Kategorien
Guide Product Feed Manager For WooCommerce WooCommerce

8 Best Google Shopping Feed Optimization Tips To Drive More Sales [2025]

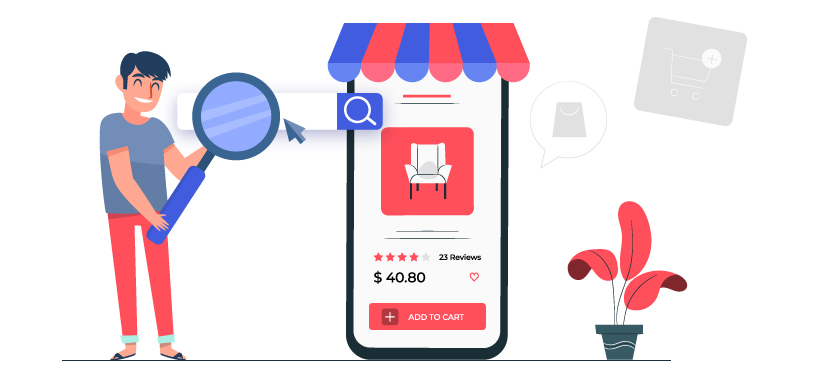
Since Google is the number one search engine today, its shopping campaigns always bring the best results.

According to The Media Campaign, 46% of all product searches are made via Google.

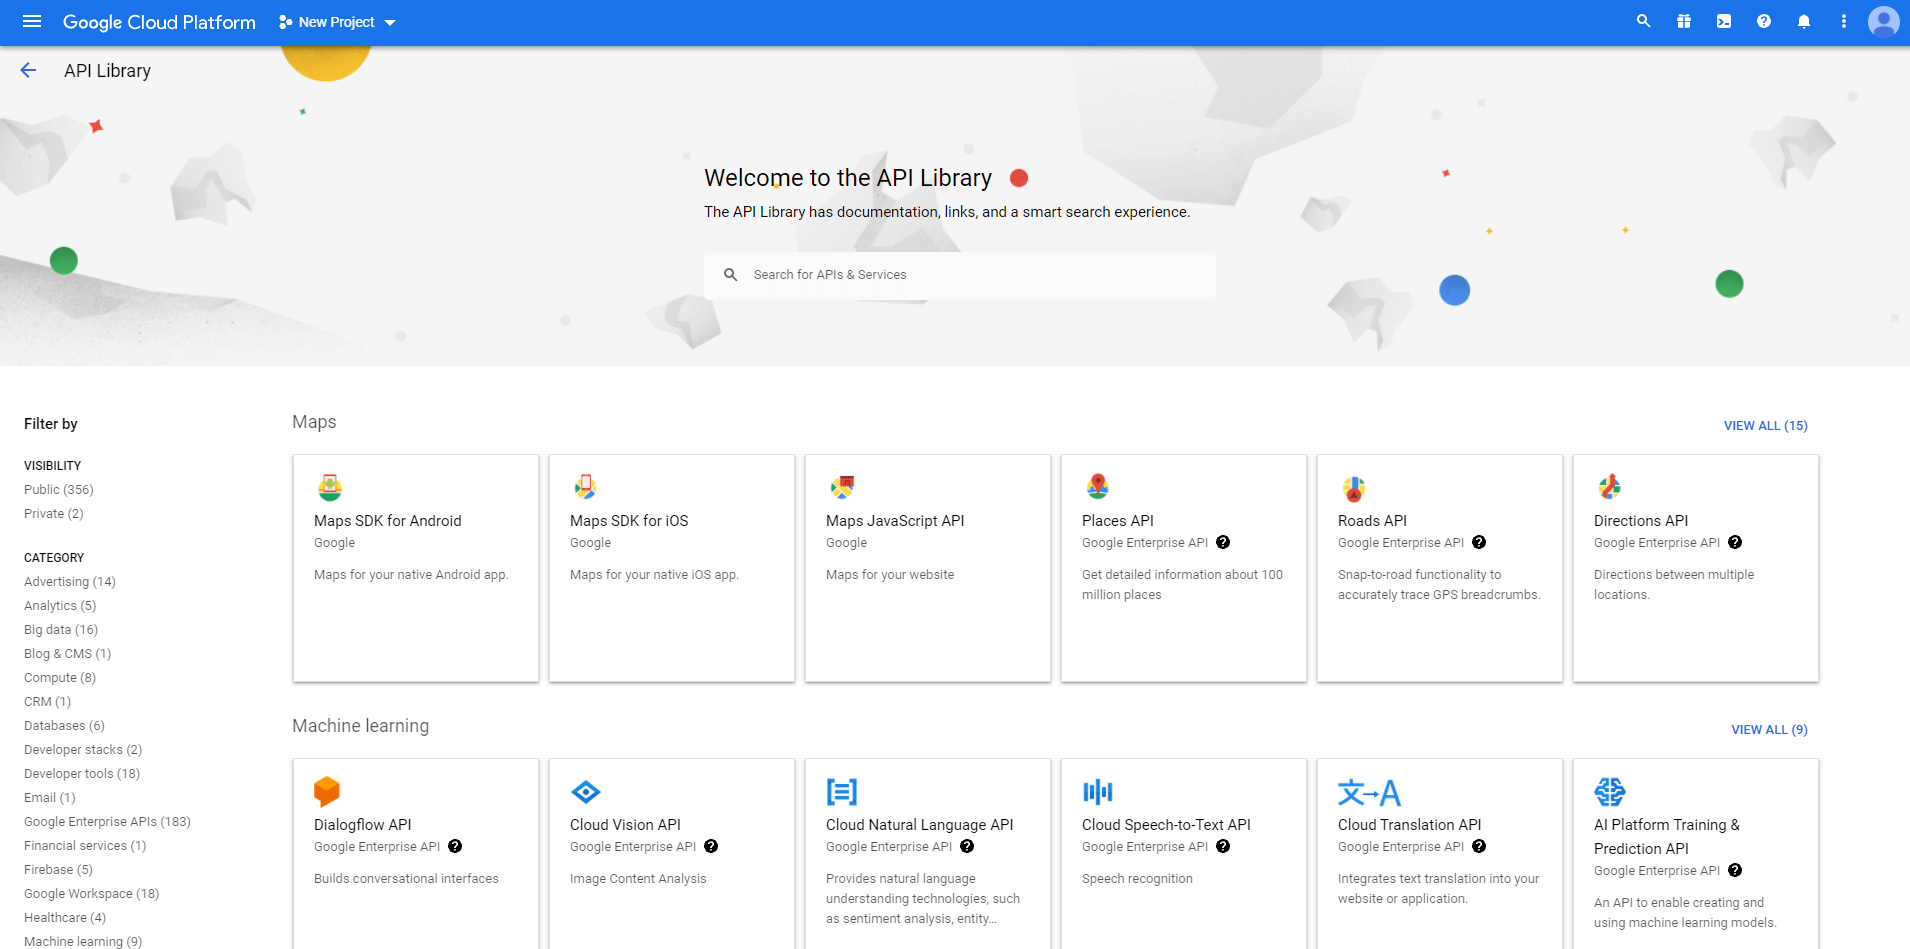
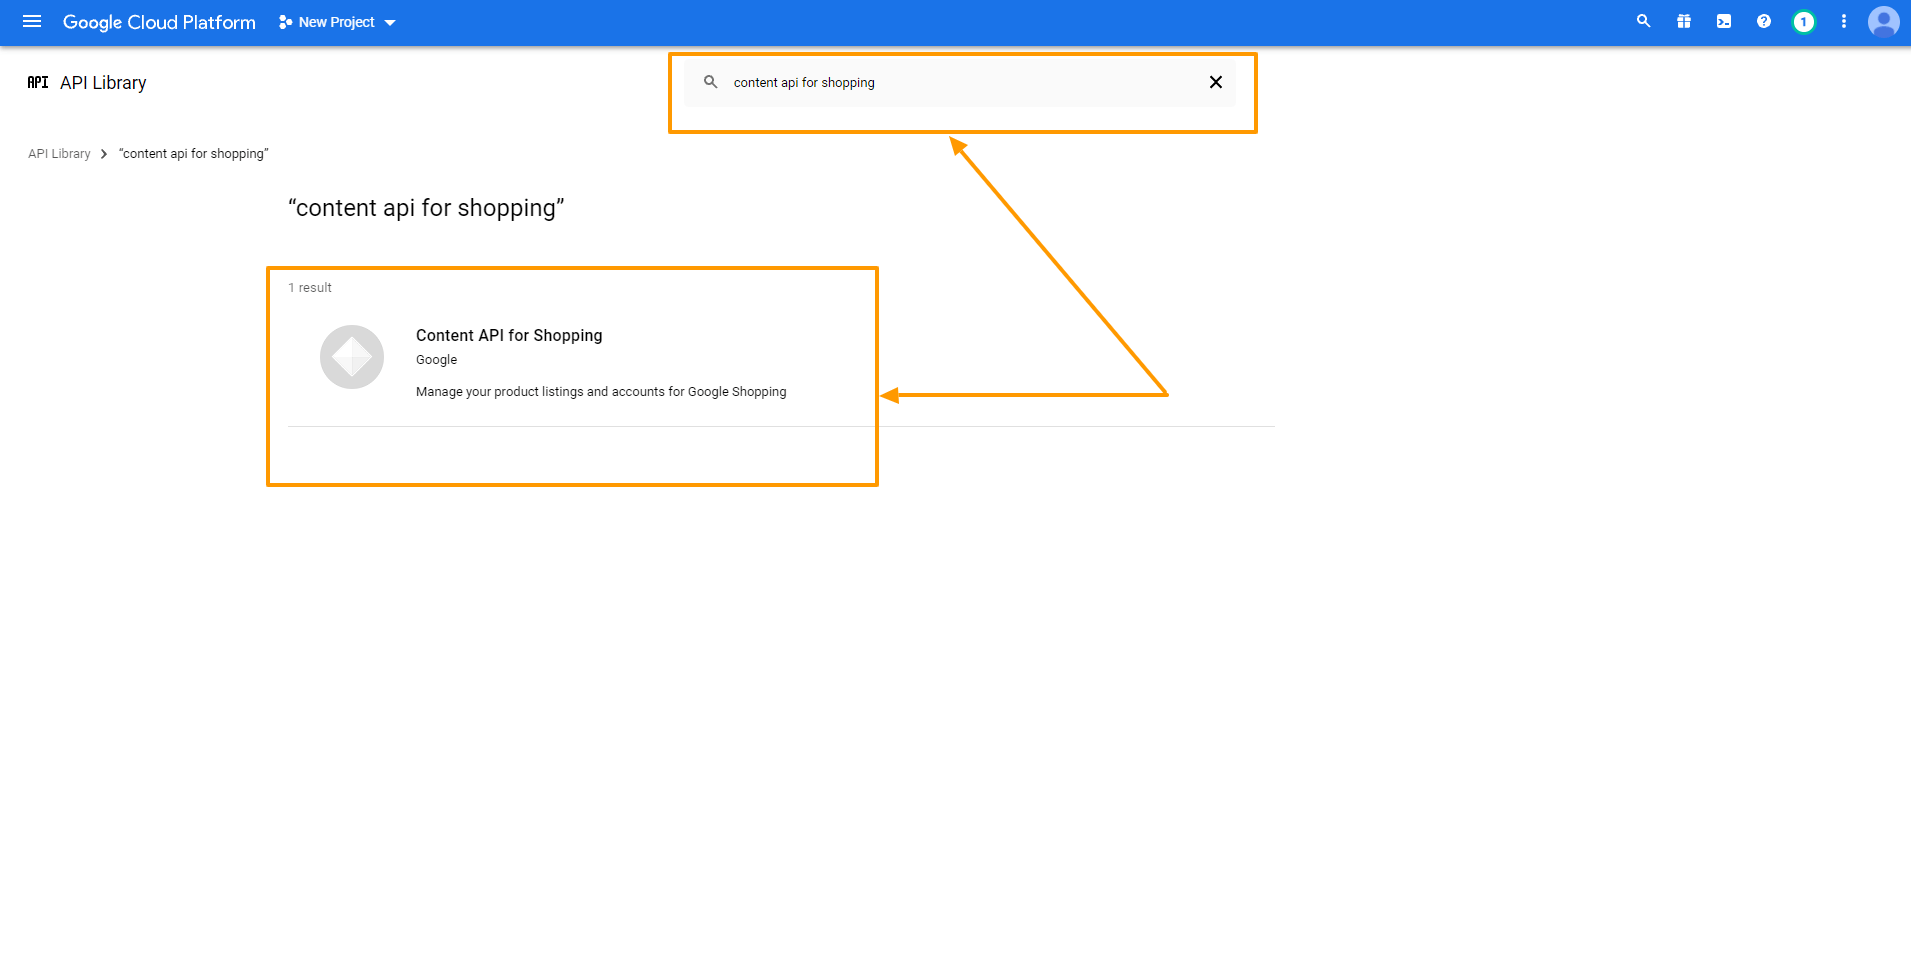
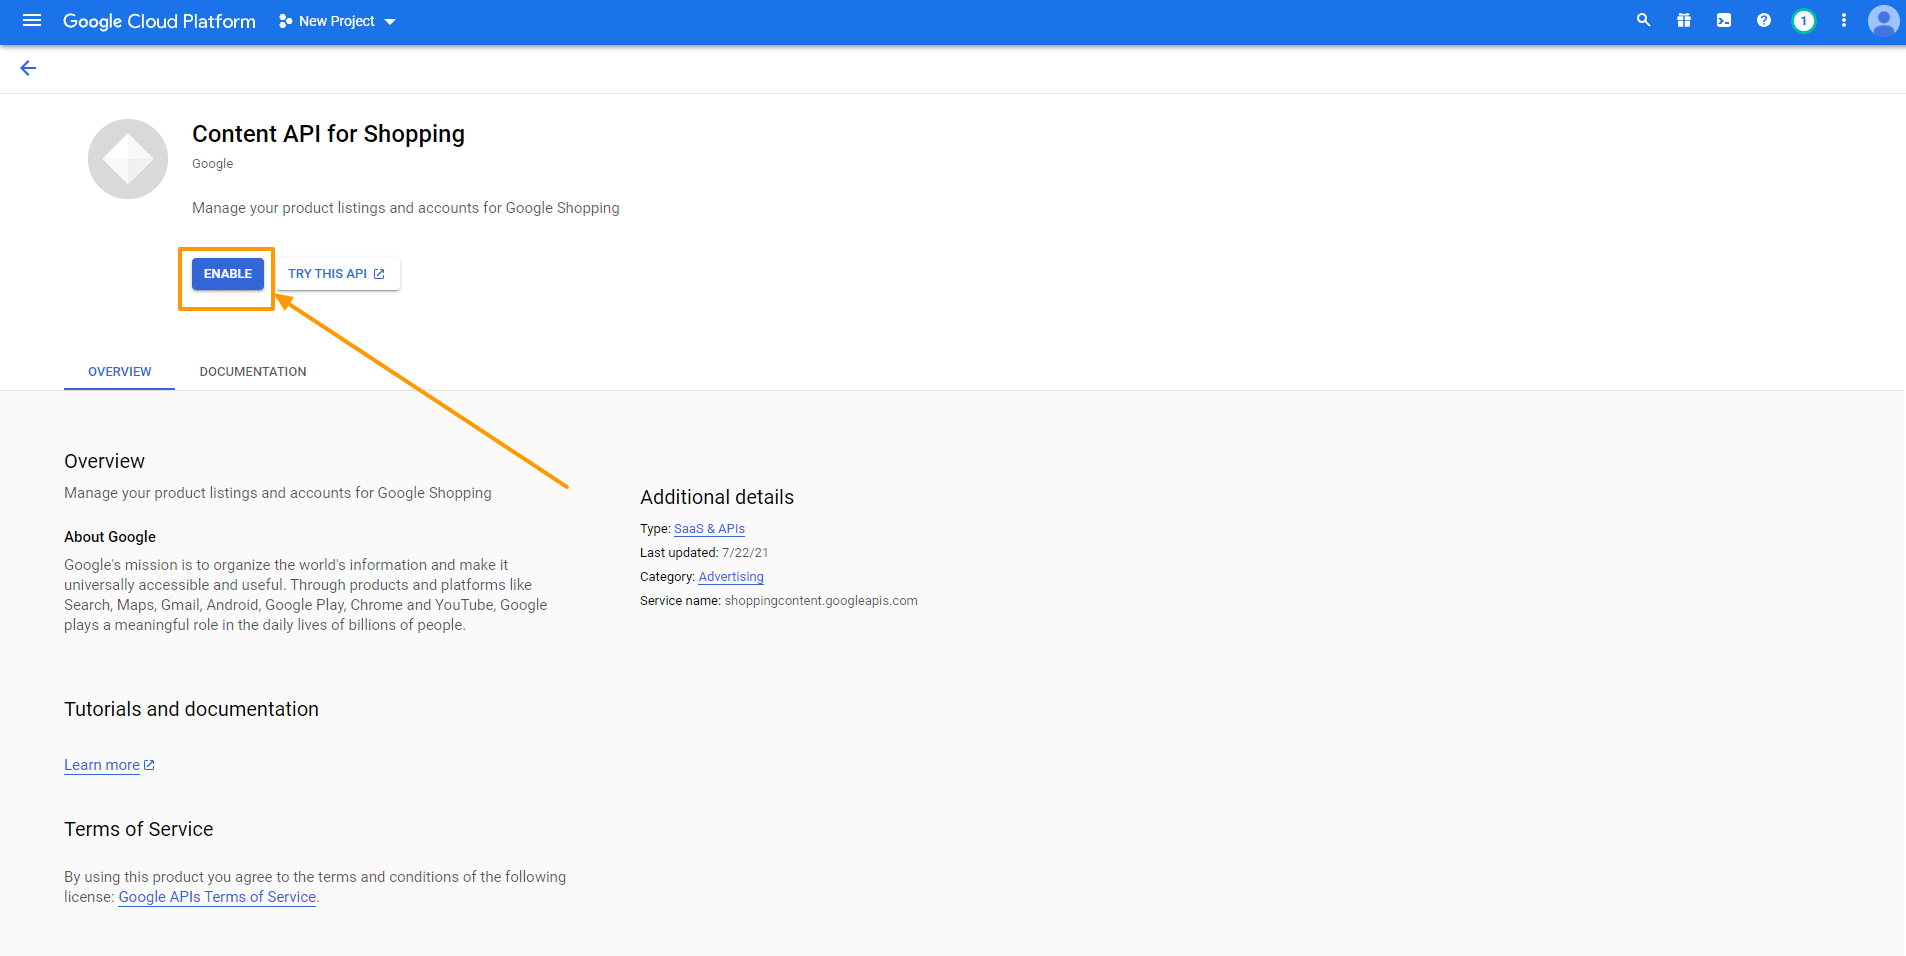
If you own a WooCommerce store, then promoting your products on the Google Merchant Center will be a game-changer to drive more sales.

And for that, you need to create a product feed for Google Shopping and optimize it properly.

In this article, you will learn a few important Google Shopping Feed optimization tactics that you should embrace if you want successful results.

After reading this article you will learn

  • Why it is important to optimize Google product feed
  • Which product data should be optimized for the best results
  • How you can optimize these data to convert more buyers

And in the long run, you will be able to get more sales from Google Shopping campaigns and grow your business.

Fangen wir also an.

What is a Google Shopping Feed?

A Google Shopping feed is a file that contains all the details about the products you want to list on Google Shopping. This includes information like product titles, descriptions, prices, images, and other essential attributes.

google shopping feed

Think of it as a structured file that acts as the bridge between your WooCommerce store and Google Merchant Center. Once you upload this feed, Google uses it to display your products in relevant search results or shopping ads.

For example, if you’re selling sneakers, the shopping feed ensures your products show up with accurate information when someone searches for “running shoes” or “comfortable sneakers.”

Why should you optimize your Google Shopping Feed?

To get the best results from Google Shopping, you need more than just uploading a product feed. Optimizing it ensures your products appear in front of the right audience and perform better.

Here’s why it’s important:

  • Increases product visibility: An optimized feed helps Google understand your product better, improving its chances of appearing in search results.
  • Attracts relevant customers: When your product data matches the customer’s search intent, it makes them more likely to click on your listing.
  • Improves ad performance: A detailed and accurate feed leads to higher-quality ads, which typically results in better click-through rates and conversions.
  • Reduces rejection issues: Google has strict guidelines for product feeds. Optimizing ensures you meet their standards, avoiding unnecessary rejections.
  • Simplifies management: A clean, optimized feed is easier to update and maintain over time, saving you effort in the long run.

Optimizing your Google Shopping feed is not an extra step but a crucial part of your product marketing strategy. It ensures your products are presented accurately and attractively to potential buyers.

Challenges Of Promoting Products via Google Shopping

As much as Google Shopping drives sales, there are a few challenges that you need to overcome to get the best outcome.

  1. Your product feed data must meet Google’s feed structure
    Google Shopping has its own defined feed structure which you need to follow if you want to list products there. What most store finds difficult to do is to make sure they have met all the criteria explained in their product data specification. So you should create a product feed that meets all requirements.
  1. Rejection of product feed by Google
    The biggest issue people face is that the data people submit are rejected by Google for one or more reasons. The most common reasons Google rejects are
    • mismatched data between the website’s schema, feed, and frontend view
    • missing required product data
    • dynamic pricing issue
    • wrong currency, and
    • variation product data mismatch.

Try to solve the above problems but if you still struggle then Google Consultants are experts who can come in handy for navigating Google’s requirements and optimizing your data for approval.

  1. Products listed on Google Shopping but not getting results
    This is a blind spot for many online shops that sell via Google Shopping. Many believe that just listing products there should bring results. But the fact here is, that you need to optimize some of your product data to get better results. This may include the product title, images, category, offer prices, and even your website’s design.

    **Submitting basic product data will not trigger potential buyers to purchase, you have to make sure to optimize the data so that the product Ads and listings will convince the prospect to make a buying decision.

Throughout this article, you will learn all the possible ways to optimize your Google shopping feed that will make your Google Shopping campaign successful.

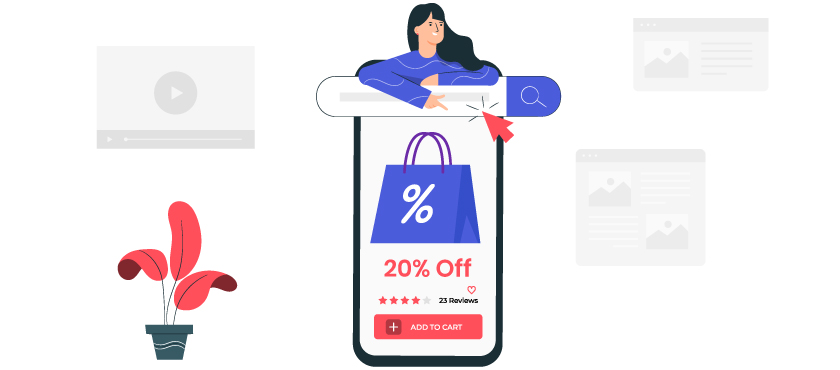
6 Proven Google Shopping Feed Optimization Tips That Can Trigger More Sales

To learn how to optimize Google shopping feed, you can apply these 6 proven Google merchant center optimization techniques :

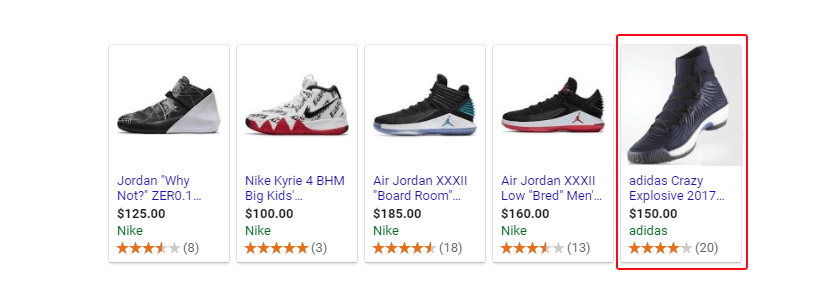
1. Optimized Product Title To Match Search Queries

The product title is a vital element that you can use to drive the right traffic.

It is a crucial element that is not only necessary to optimize your Google Shopping feed but also plays a key role in conversion rate optimization, helping you maximize sales and performance.

When your customer is looking for a product, the title is one of the first things the prospects will judge your product by.

You have to make the title meaningful in a way so that just by reading it, your targeted buyer feels like this is what he/she was looking for.

This will help to trigger more potential buyers to click on the Google Shopping Ads for your products that appear above the search results. In this simple way, you can do your Google shipping optimization.

The best way to optimize a product title is to add some extra elements to the title that will highlight its specialty or features.

product title Optimization

For example, let’s say you are selling a cream in France called ‘Avène Tolérance Extrême Cream.’

Now, if you leave the name as is, only the buyers who are familiar with Avène or have researched the brand will recognize this product. Others may not click on the Shopping Ad with that title.

But, let’s consider naming it ‘Avène Tolérance Extrême – Moisturizer for Sensitive Skin, 50ml.’

This title specifies that

  • this cream is by Avène (i.e. the product brand)
  • it’s a Moisturizer (not a beauty cream)
  • it’s for Sensitive Skin (i.e. skin type), and
  • it is the ’50ml’ pack.

As you can see, this title will tell a buyer, who has zero knowledge about this product, if it is for her, i.e., a higher chance of a conversion.

Just like that, you can optimize the product title for any product by adding elements such as the product brand, color, size, capacity, quantity, special feature, model, who it’s for, or even its use case.

Here are a few more examples for different product types:

  • Books or Novels – Book Name + Genre + Author Name
    Example: The Da Vinci Code – Mystery Thriller by Dan Brown
  • Electronics – Product Brand + Product Name + Model + Special feature
    Example: OnePlus Nord N20 5G – 13 + 3 + 3 MP Camera, 64GB RAM
  • Clothing Products – Brand + Product Name + Color + Size + Material
    Example: Gant The Original T-Shirt – Red, XL, 100% Cotton

This approach is a proven tactic and easy to embrace.

Things to avoid when optimizing product titles:

  • Avoid Promotional terms on the title.
  • Don’t stuff keywords if it doesn’t fit
  • Don’t use all capital letters in a title.
  • Avoid special symbols.

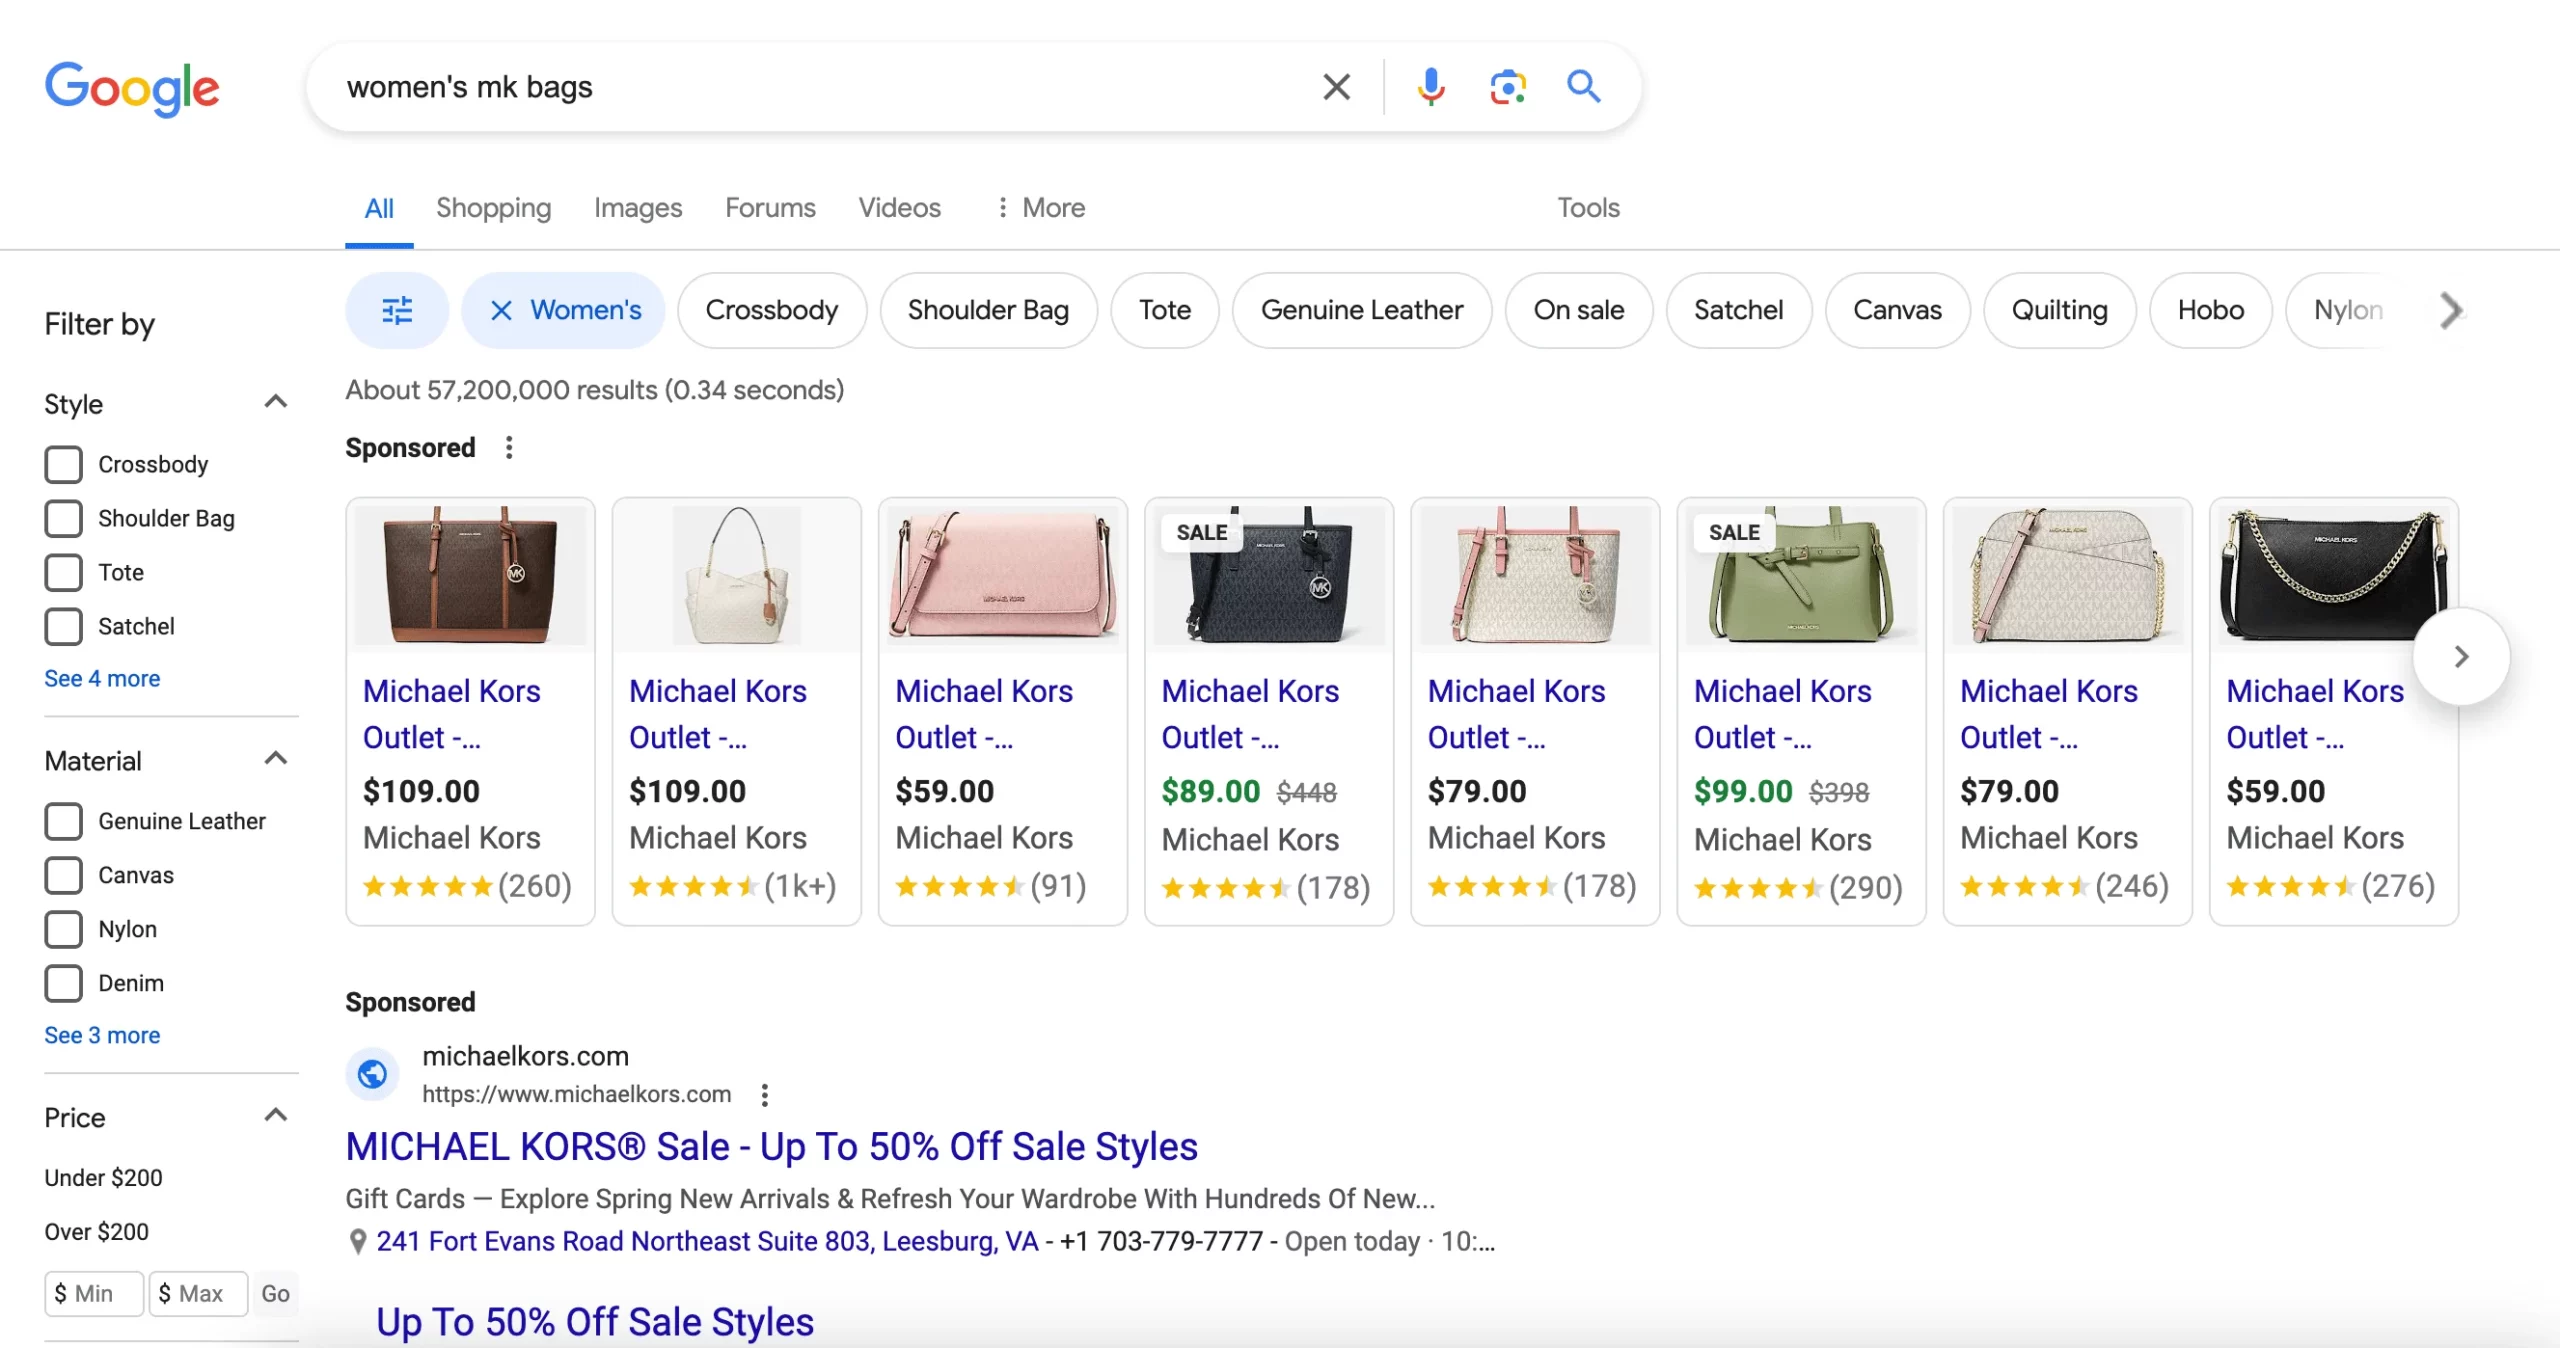
2. Unique Image Optimization Tricks To Connect With Buyers

Once you list on Google Shopping, the product image plays a huge part in convincing buyers to choose your product among others.

Thus this plays a vital role in Google shopping ads optimization.

So you must make sure you use images that clearly show what the product is. This is especially important for products such as clothing and accessories, decoratives, tech products, toys, etc.

The most common advice photographers will give you is to take product images with a white background (or a contrasting background if your product is White).

This is the best approach if you want to clearly keep your buyers focused on your product.

When people search for products on Google, a lot of products are suggested in a single row.

So the idea of a distraction-free view of the product doesn’t really apply there unless the product has a catchy color combination.

Image Optimization

Here are a couple of unique tactics you can follow that may help you stand out in Google merchant center optimization.

  • Use a shaded-white background
    The concept here is to use a gradient background with a mix of white and light grey to give a shaded feel at the back. This creates an unexpected classy impression of the product in the center.
  • Find the most uncommon color for your niche
    If you have competition in the market, you can do a quick search on Google with your product title and look at the suggested product Ads. See which background colors are commonly used. Then you can decide on an uncommon background color that may make your Ad stand out among most other product Ads.
    *It’s best to consult with a professional UX designer for this as they will be more expert in suggesting backgrounds that stand out. A user experience enhancements audit can also help identify the best visual choices for better ad performance and visibility.
  • Use contrast backgrounds
    Large brands such as Zara have embraced the concept of solid contrast background colors and it delivered great results. So it’s a proven approach you can choose to embrace as well.
  • Choose an angle that highlights the best feature(s)
    Often you have to be creative about how you take the picture. You will see that in modern-day eCommerce, most shoe brands take the approach of placing two shoes in two ways – one is laid on the ground and the other is kept upright. This is to try and show all views of the shoes.
  • If Possible, Use Square Images
    Since all Google Shopping Ads are displayed with square images, it’s best if you too could provide images in that size. In most shops, people tend to keep a longer height for the product images. What this will do is that Google will fit the image via the longest dimension, in this case, the height, making the image smaller in the process. A square image will maintain the right dimension ratio and view your product in the best possible size.

    **If you use square images, you can also try using an image border to make your product stand out.

It’s best you make these changes in your WooCommerce store and then use those image links in the product feed data for Google for the best results.

For Product variations, make sure to have specific images for each variation rather than just a single image for all variants.

Things to avoid when optimizing product images:

  • Do not use unclear or blurry images
  • Avoid including product price in the images
  • Avoid using promotional words in the images (e.g. Special offer, 10% discount, etc)
  • Do not cluster the product background with unnecessary elements

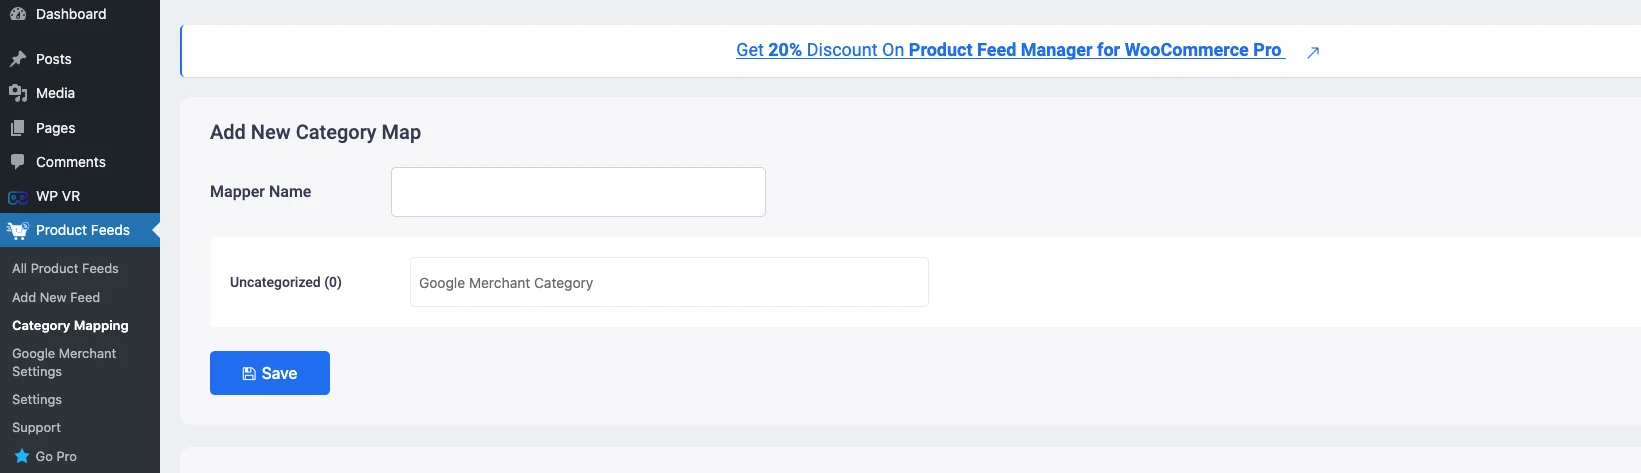
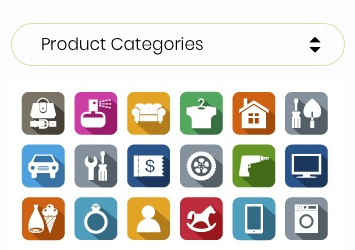
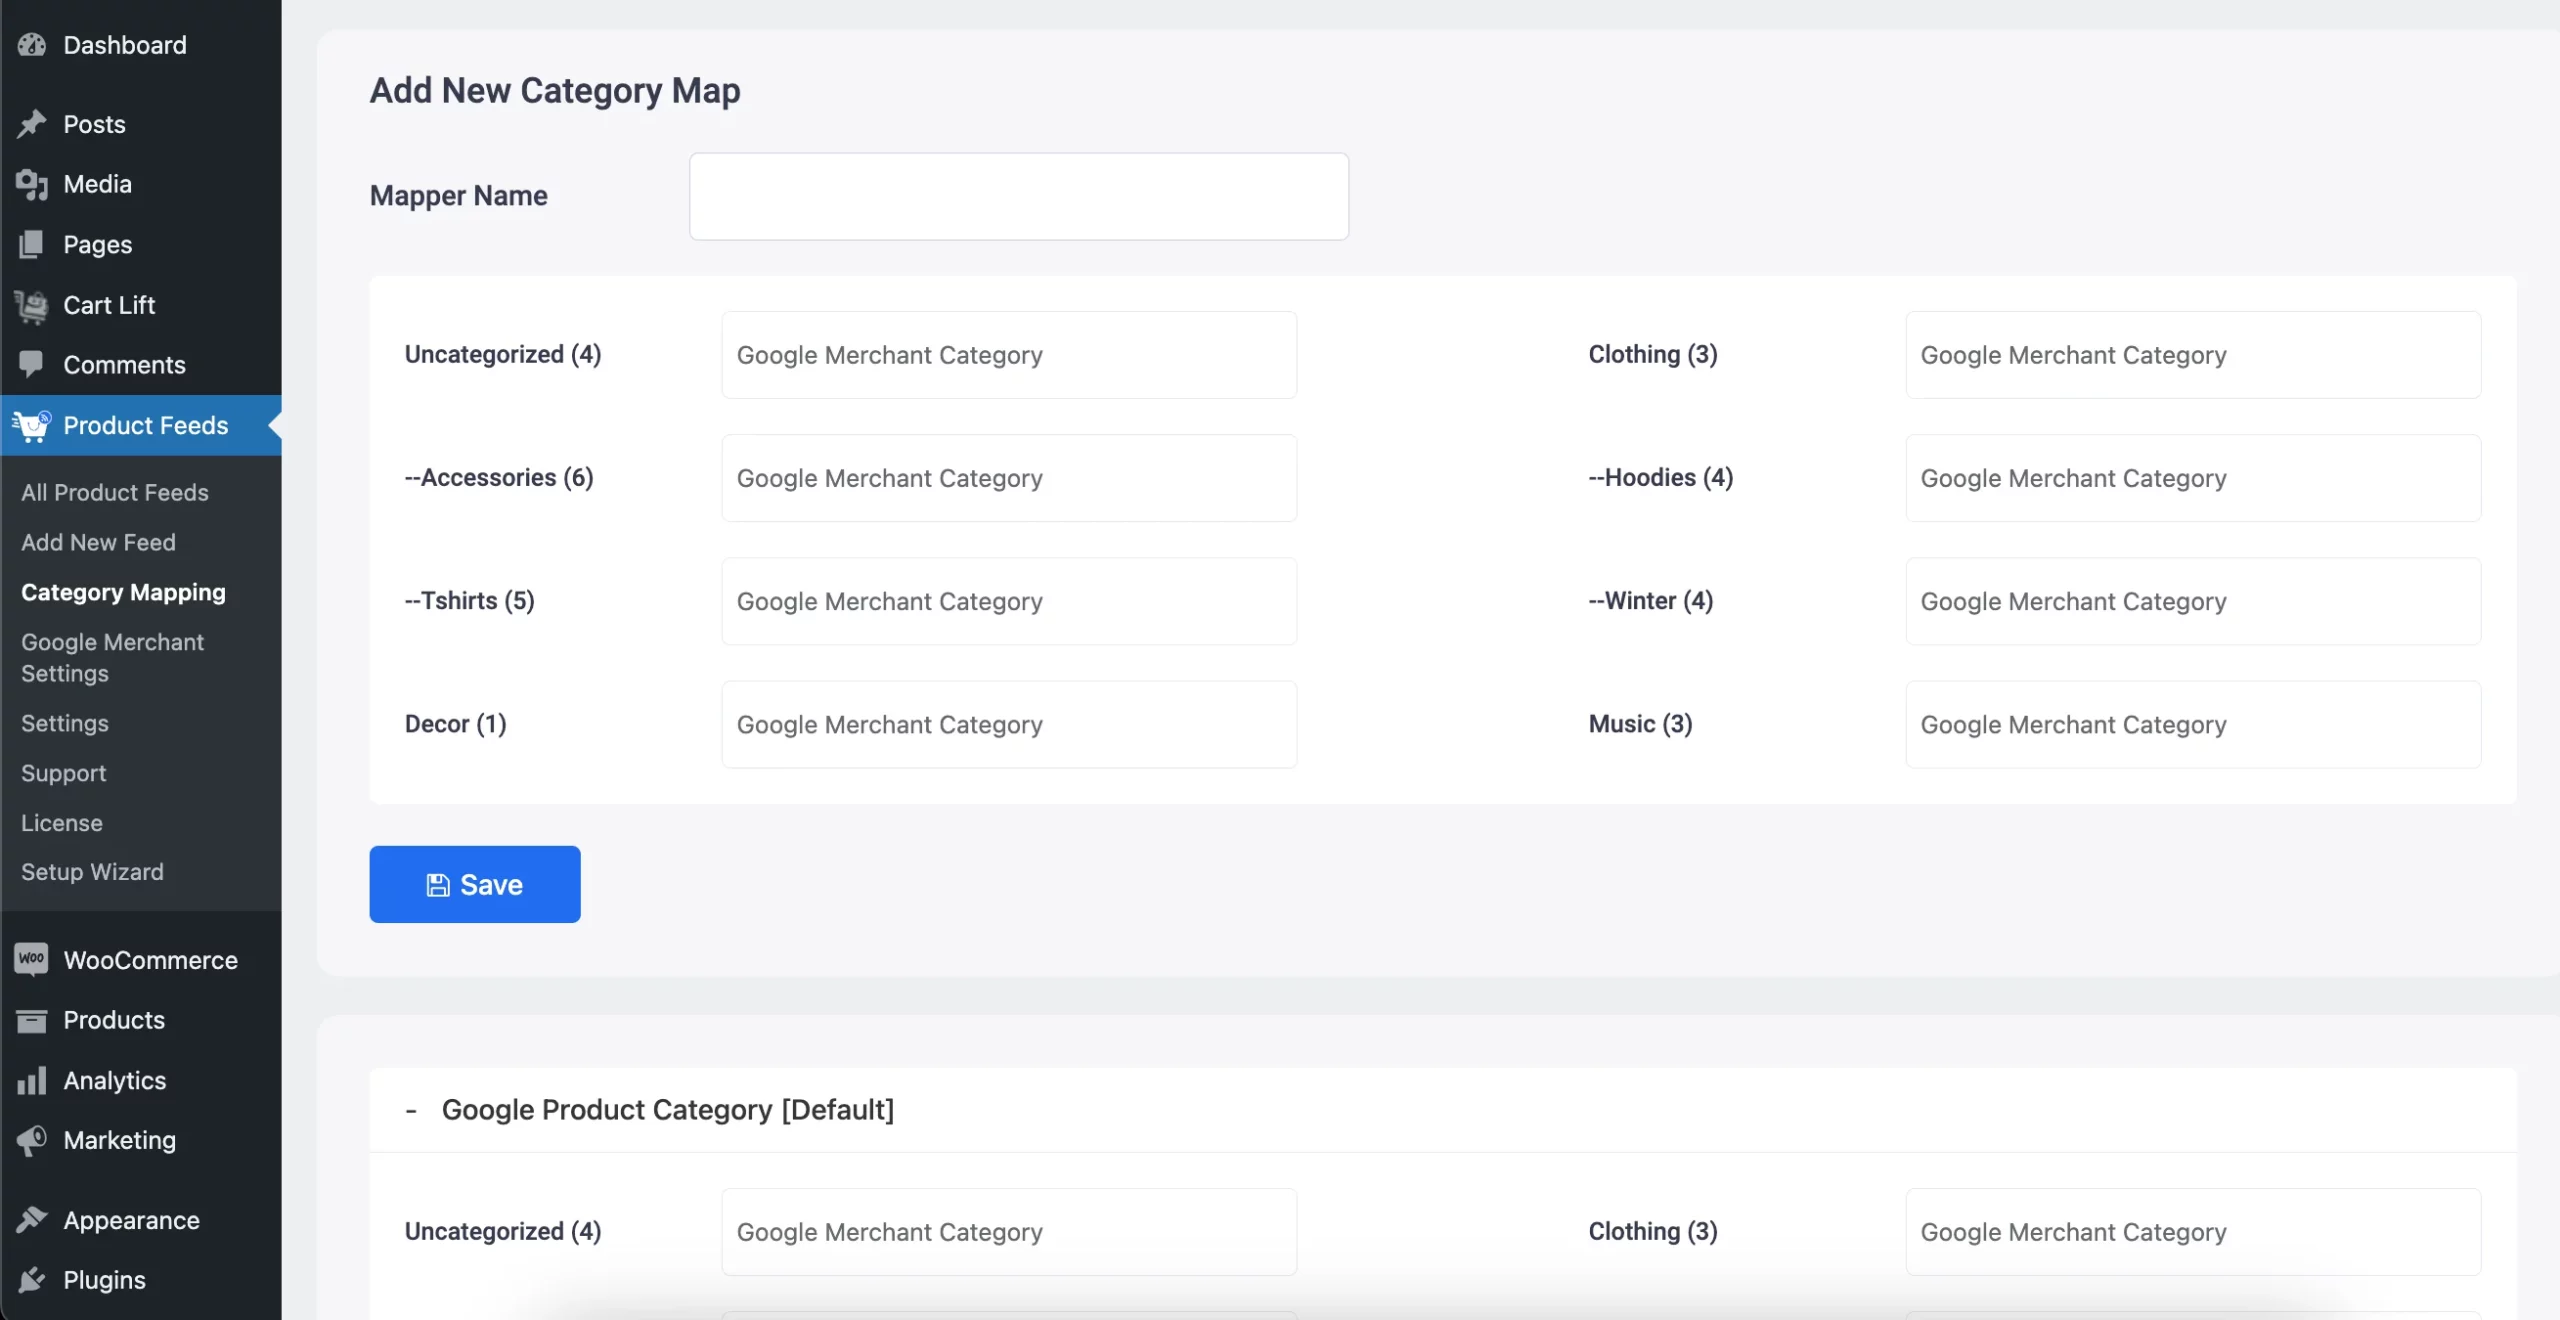
3. Follow Google’s Category Hierarchy In Your Store To Optimize Google Shopping Feed

The product category is important to help buyers find a certain type of product they are looking for.

At the same time, Google also maintains a categorization of products to display your shopping ads to the right audience. This is one kind of Google shopping optimization you get for free.

Google doesn’t make it mandatory for you to submit a product category field, but it does look for the category in your store in order to place a product under its right search intent category.

So you must maintain proper categorization in your store.

It’s best to maintain your product category structure as per Google as most other marketplaces also follow the same category hierarchy.

Google-Kategorienzuordnung

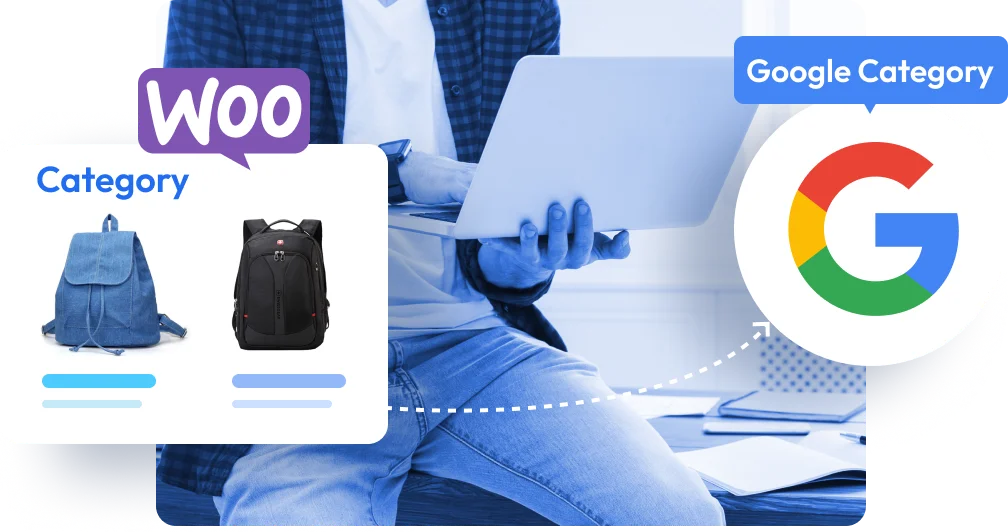
You can get help from Google’s taxonomy list to optimize the categories on your website.

However, just maintaining the categories is not the only product feed optimization. You have to ensure you are assigning your product to the most relevant possible product category.

For example, if are selling a Baby Bathtub, then do not just assign it under the category ‘Baby & Toddler’ or the ‘Baby & Toddler > Baby Bathing’. It should rather go under the further child category ‘Baby & Toddler > Baby Bathing > Baby Bathtubs & Bath Seats.’

This will help you keep track of your products more efficiently and help Google display your products to the right audience.

Tips To Optimize Product Category

  • In WooCommerce, when choosing a child category, make sure to mark the parent category as well.
  • Even if you do not follow Google’s taxonomy, make sure to keep the categories meaningful. Google can relate to the meanings of your set categories.
  • Avoid using special characters in category names.

4. Try To Maintain Consistent Product Data Everywhere To Optimize Google Shopping Feed

It is important to make sure your buyers do not get confused with your products.

For example, if you have one title in your WooCommerce store and another title in your Google Shopping listings, it may cause some confusion – the buyer may initially get baffled and start looking for the description, or often, if they are in a hurry, they will simply close the tab and look for other options.

The same can be the same if you have a different meta title and schema which will alter your traditional search result Title and the title Google bot will find in the schema.

So the best practice is to try to keep all your product data same whereever it is listed to optimize google shopping feed better.

google shopping ads optimization

What to do if you have already added a lot of products without optimized data?

Yes, it can be hectic to change the titles, descriptions, images, or other product data for optimization for all the products that you have already added to your WooCommerce store.

If you have fewer products in-store, then it’s best to take the time and make the changes.

In case you have a lot of products, you can leave them as-is and start optimizing the data for all the new products that you will add in the future.

This will ensure that you will get the best sales results for your new products.

Over time, the old products will eventually be sold out and there will be a time when your store will have all products with optimized data.

Should you not optimize the product feed data for the old products?

One of the questions that may arise is if you keep the old product data unchanged, should you simply submit those data without optimizing them?

The answer is NO.

Even if you can’t take the time to optimize the product data in your store, you should at least optimize some elements of the product when adding them to the Google product feed – the product title and category.

This may not solve the confusion issue due to different content, but it will still trigger more buyers to at least visit your store.

  • Google normally does not reject your feed due to the title as long as the main Title keywords are included in your product title in the feed.
  • The category is important as it helps Google to properly display your products to the right audience.

Apart from this, you should also consider making sure all the required product data by Google is consistent in both your product schema and your product page.

This is important because Google will crawl your website before approving your product feed and may reject products if a mismatch exists for required attributes. And this point is highly important for Google merchant center optimization.

5. Include All Required Product Data In WooCommerce

The required product attributes that Google recommends are more than just for product feed.

If you make sure to include those data for your products properly, then it will also help you rank in terms of SEO. Also, it is highly important for Google shopping optimization.

Without including the required product data, google merchant center optimization is incomplete.

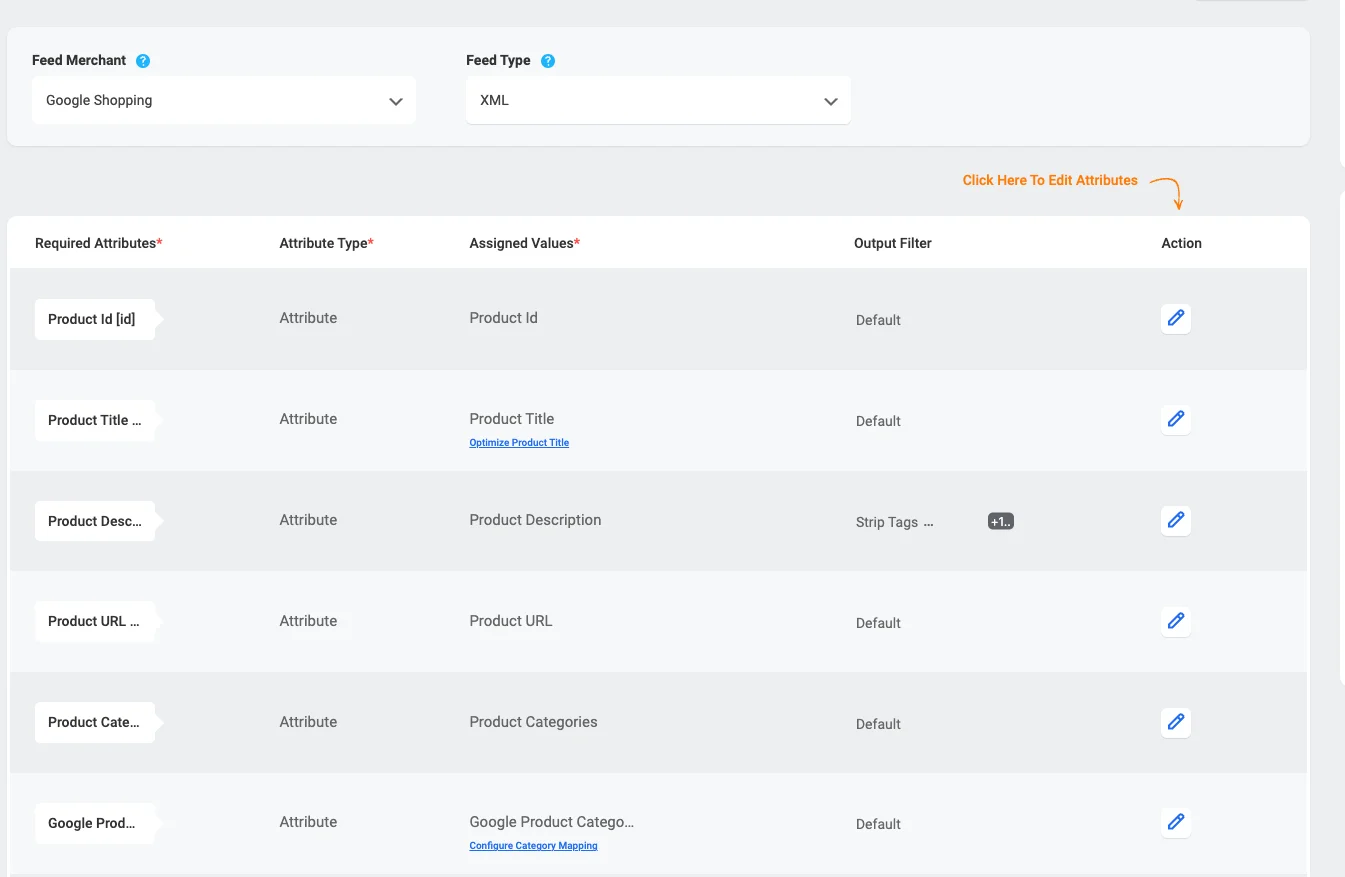
Following are the recommended attributes by Google that you should include for products in your WooCommerce store as well:

  • Produkt-ID
  • Produkt-Titel
  • Produktbeschreibung
  • Produkt-Link/URL
  • Produkt-Kategorie
  • Produkt-Bild-URL
  • Verfügbarkeit der Bestände
  • Regulärer Preis
  • Produkt-Zustand
  • Hersteller/Markenname
  • GTIN (Global Trade Item Number)
  • MPN (Hersteller-Teilenummer)
  • Specific product attributes
    • Material
    • Altersgruppe
    • Farbe
    • Geschlecht
    • Größe

Let’s dive deeper into some key attributes and how to optimize them.

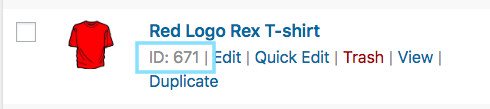
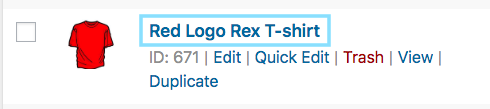
i. Product ID Optimization

Your Product ID is a unique identifier that distinguishes each item in your store. It’s crucial for tracking and managing your product listings, especially when you have a large inventory.

  • Use simple, consistent formats (e.g., numeric IDs or SKU codes).
  • Avoid duplicating IDs, as this can cause errors in your Google Merchant Center feed.

ii. Product Description

A well-written product description not only helps with Google SEO but also convinces customers to click.

  • Keep it detailed but concise—highlight the key benefits and features.
  • Use bullet points for technical details and maintain a natural flow for readability.
  • Include keywords naturally without keyword stuffing.

iii. Product Price

Your product price should always reflect the actual cost customers will pay.

  • Ensure your prices are competitive for your industry.
  • Match the price displayed in your feed with the price on your product page—discrepancies can cause rejections in Google Merchant Center.

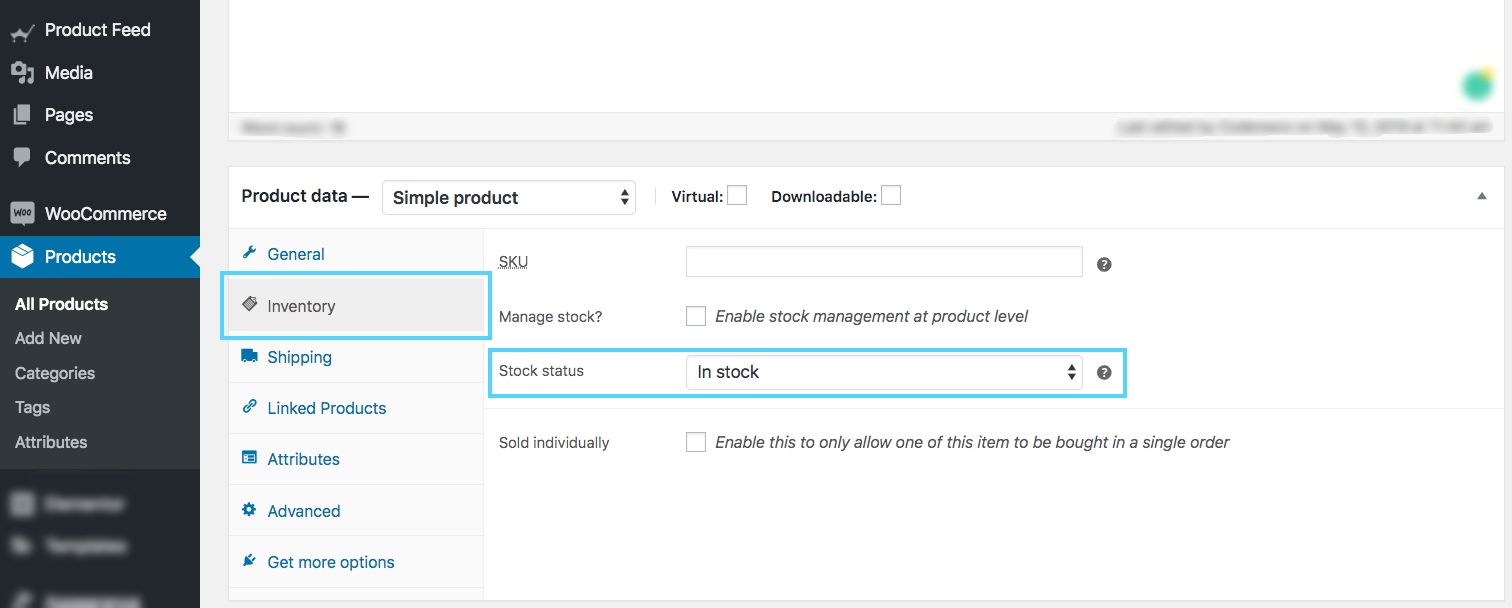
iv. Product Stock Availability

Accurate stock information is crucial for maintaining customer trust and ensuring your products qualify for ad campaigns.

  • Update your inventory regularly to prevent showing out-of-stock items.
  • Use labels like “In Stock” or “Out of Stock” in your product feed.

v. Managing Product Links

Each product should have a dedicated URL that leads directly to the product page.

  • Avoid redirecting links or using generic URLs.
  • Make your product links user-friendly by including descriptive terms (e.g., /products/blue-running-shoes).
manage product link

vi. Product Category & Subcategory

Assigning the right category to your products ensures they appear in the relevant search results.

  • Use Google’s recommended category structure to map your products accurately.
  • Include subcategories when possible, as they provide better targeting for niche audiences.

vii. Using Correct GTIN & MPN

Google requires specific identifiers like GTIN (Global Trade Item Number) and MPN (Manufacturer Part Number) for products to improve search accuracy.

  • Add GTIN and MPN for each product, especially if they’re brand-specific or globally sold items.

viii. Add as Many Additional Product Images

Customers are more likely to convert when they can view a product from multiple angles.

  • Upload high-quality images that showcase your product’s features.
  • Include close-ups, variations (like colors or styles), and lifestyle shots for better engagement.
  • Optimize image file sizes to maintain page loading speeds.

Some of these are important for proper product Ads distribution, for example, the GTIN can help identify your product’s legitimacy and help Google to choose a more appropriate category.

Some of these data can also be used to trigger conversion on the product page. For example, the specific product attributes are things buyers look at when considering buying something for personal use, such as a Jacket. Plus, these attributes can also be used to create variations of the same product.

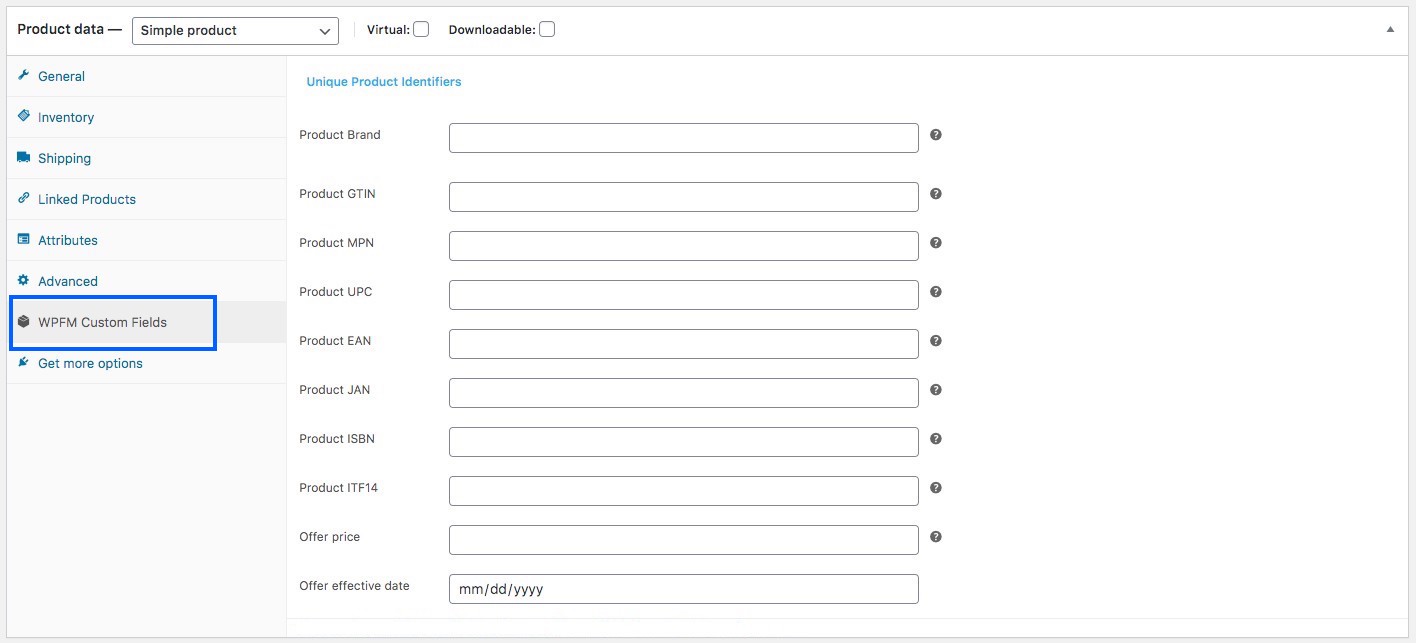
Now, some of the data here cannot be included in the default WooCommerce.

For example, there is no default product field for GTIN, MPN, or Brand. In this case, you may use different plugins to get the custom fields.

Note that, just using a custom field is not enough. The data saved there should be part of the product structured data or Schema Markup. Plus, in the case of variable products, these attributes have to be specific for each variant.

Following are a couple of tools you can consider looking at:

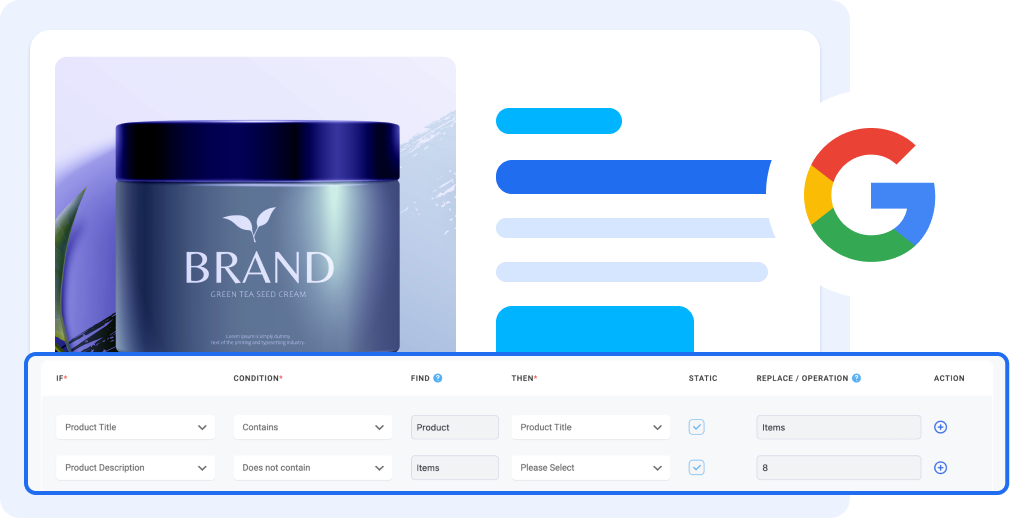
6. Dynamic Display of Products

Dynamic product views let you tailor how your products appear based on what shoppers are searching for. This means the product images, titles, and descriptions can adjust dynamically to match search terms, making your listings more relevant and appealing.

Here’s why this matters:

  • It helps improve your click-through rate since shoppers see exactly what they’re searching for.
  • It increases conversion rates by displaying product details that match buyer intent.

To get the best results, use relevant and descriptive keywords in your dynamic views. These keywords help Google understand your product better and show it in the right search results.

7. Include Shipping Information

The shipping details in your product feed play a big role in customer decisions and Google Shopping rankings. Shoppers want clarity on courier service costs and delivery times, so optimizing this information is essential.

Shipping info

Here’s how to make the most of your shipping details:

  • Offer free shipping: This can make your product more attractive and encourage more buyers to click and purchase.
  • Provide expedited shipping options: Fast delivery sets your product apart from competitors, especially for time-sensitive buyers.
  • Track your shipping performance: Monitor delivery times and product condition on arrival. Keeping shipping reliable and consistent helps build trust and customer satisfaction.

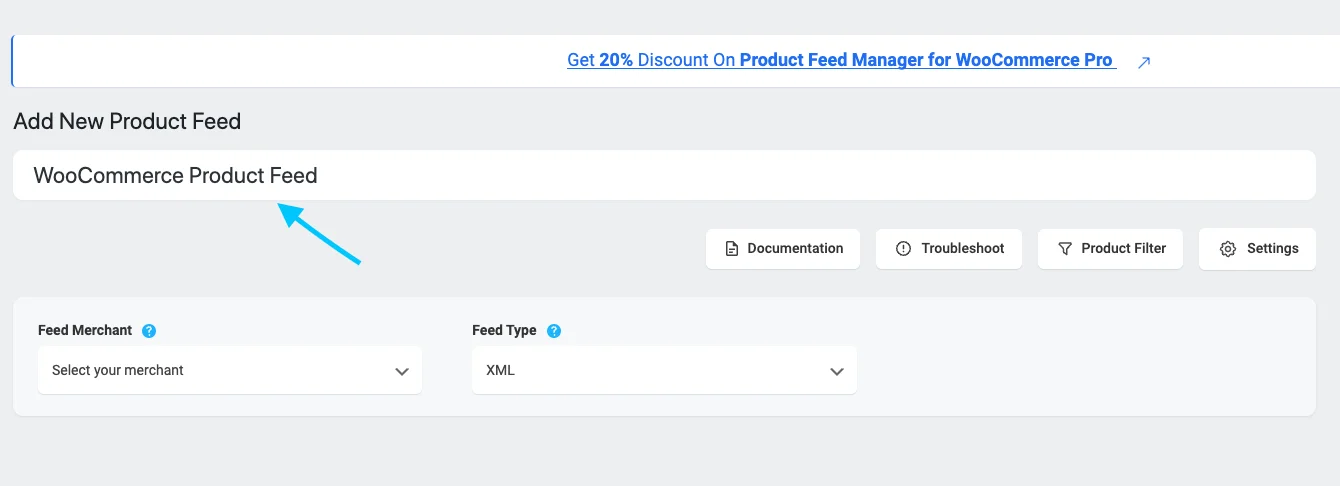
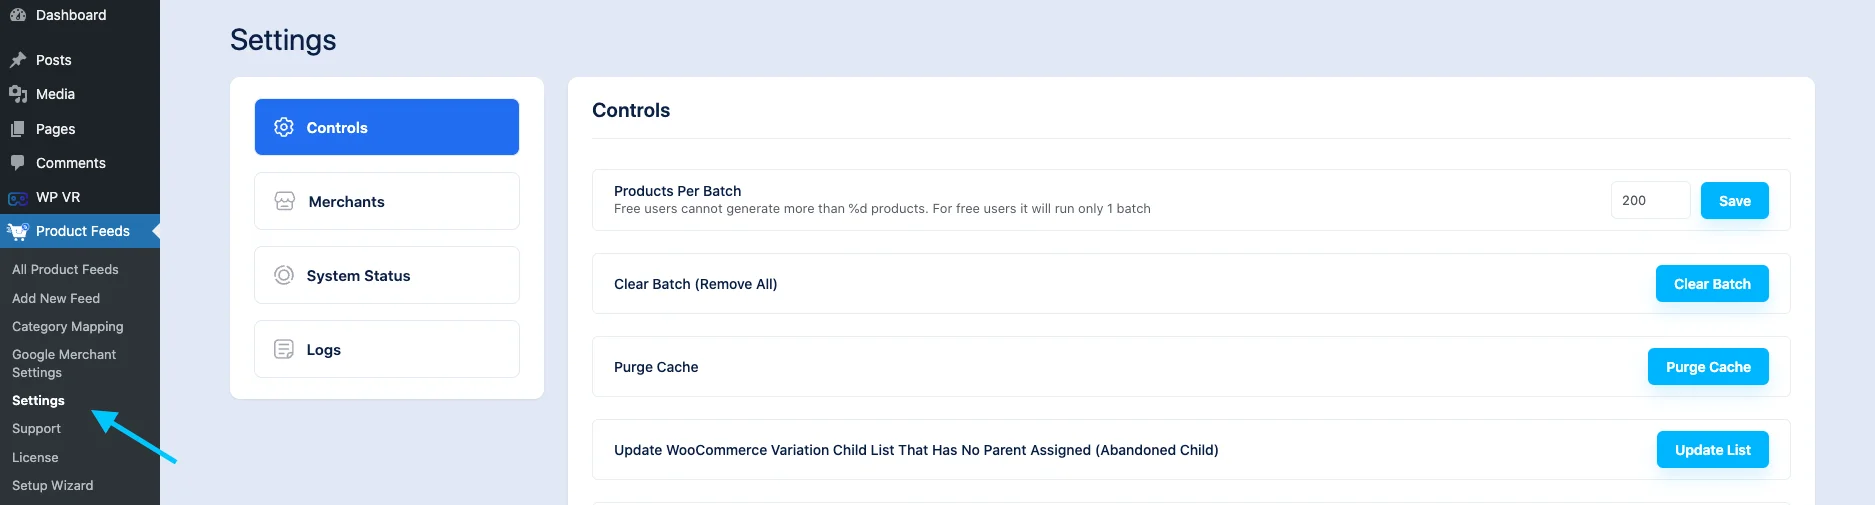
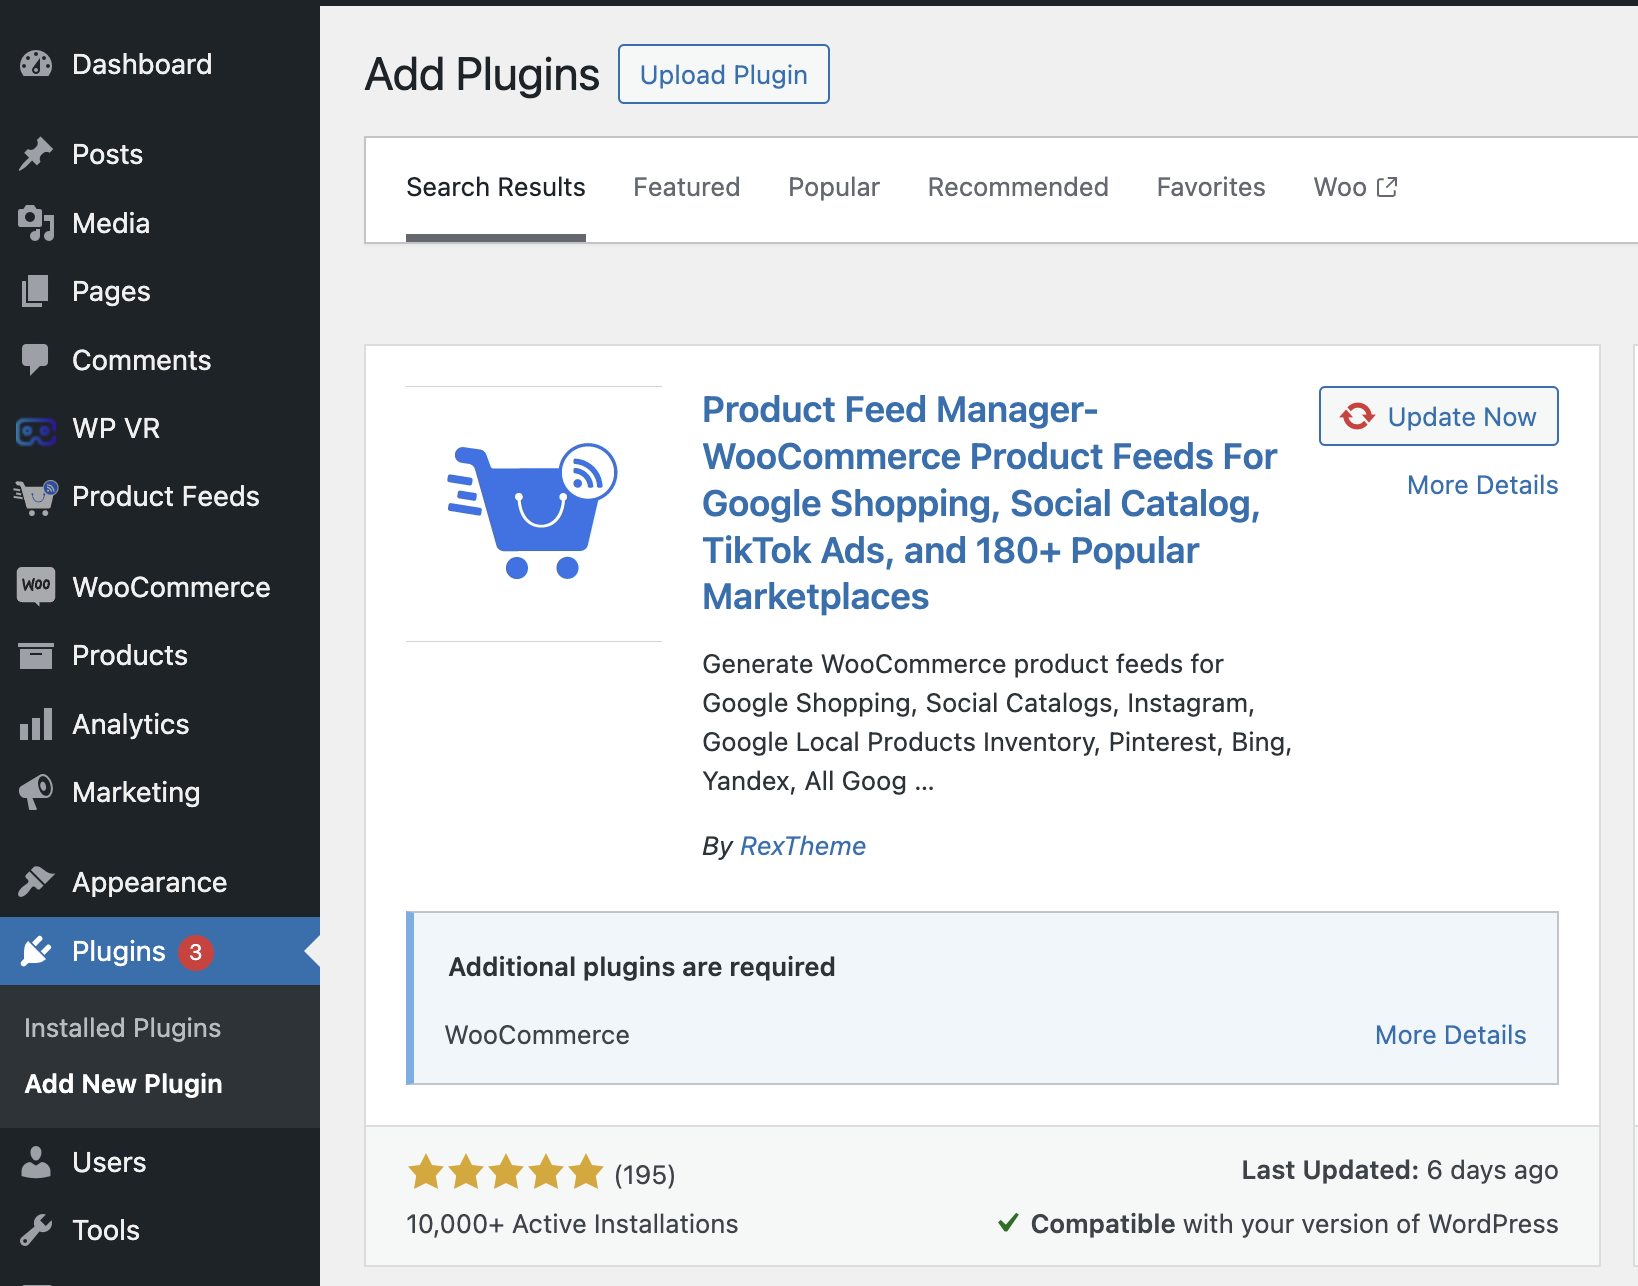
8. Use A Feed Generation Plugin For Accuracy

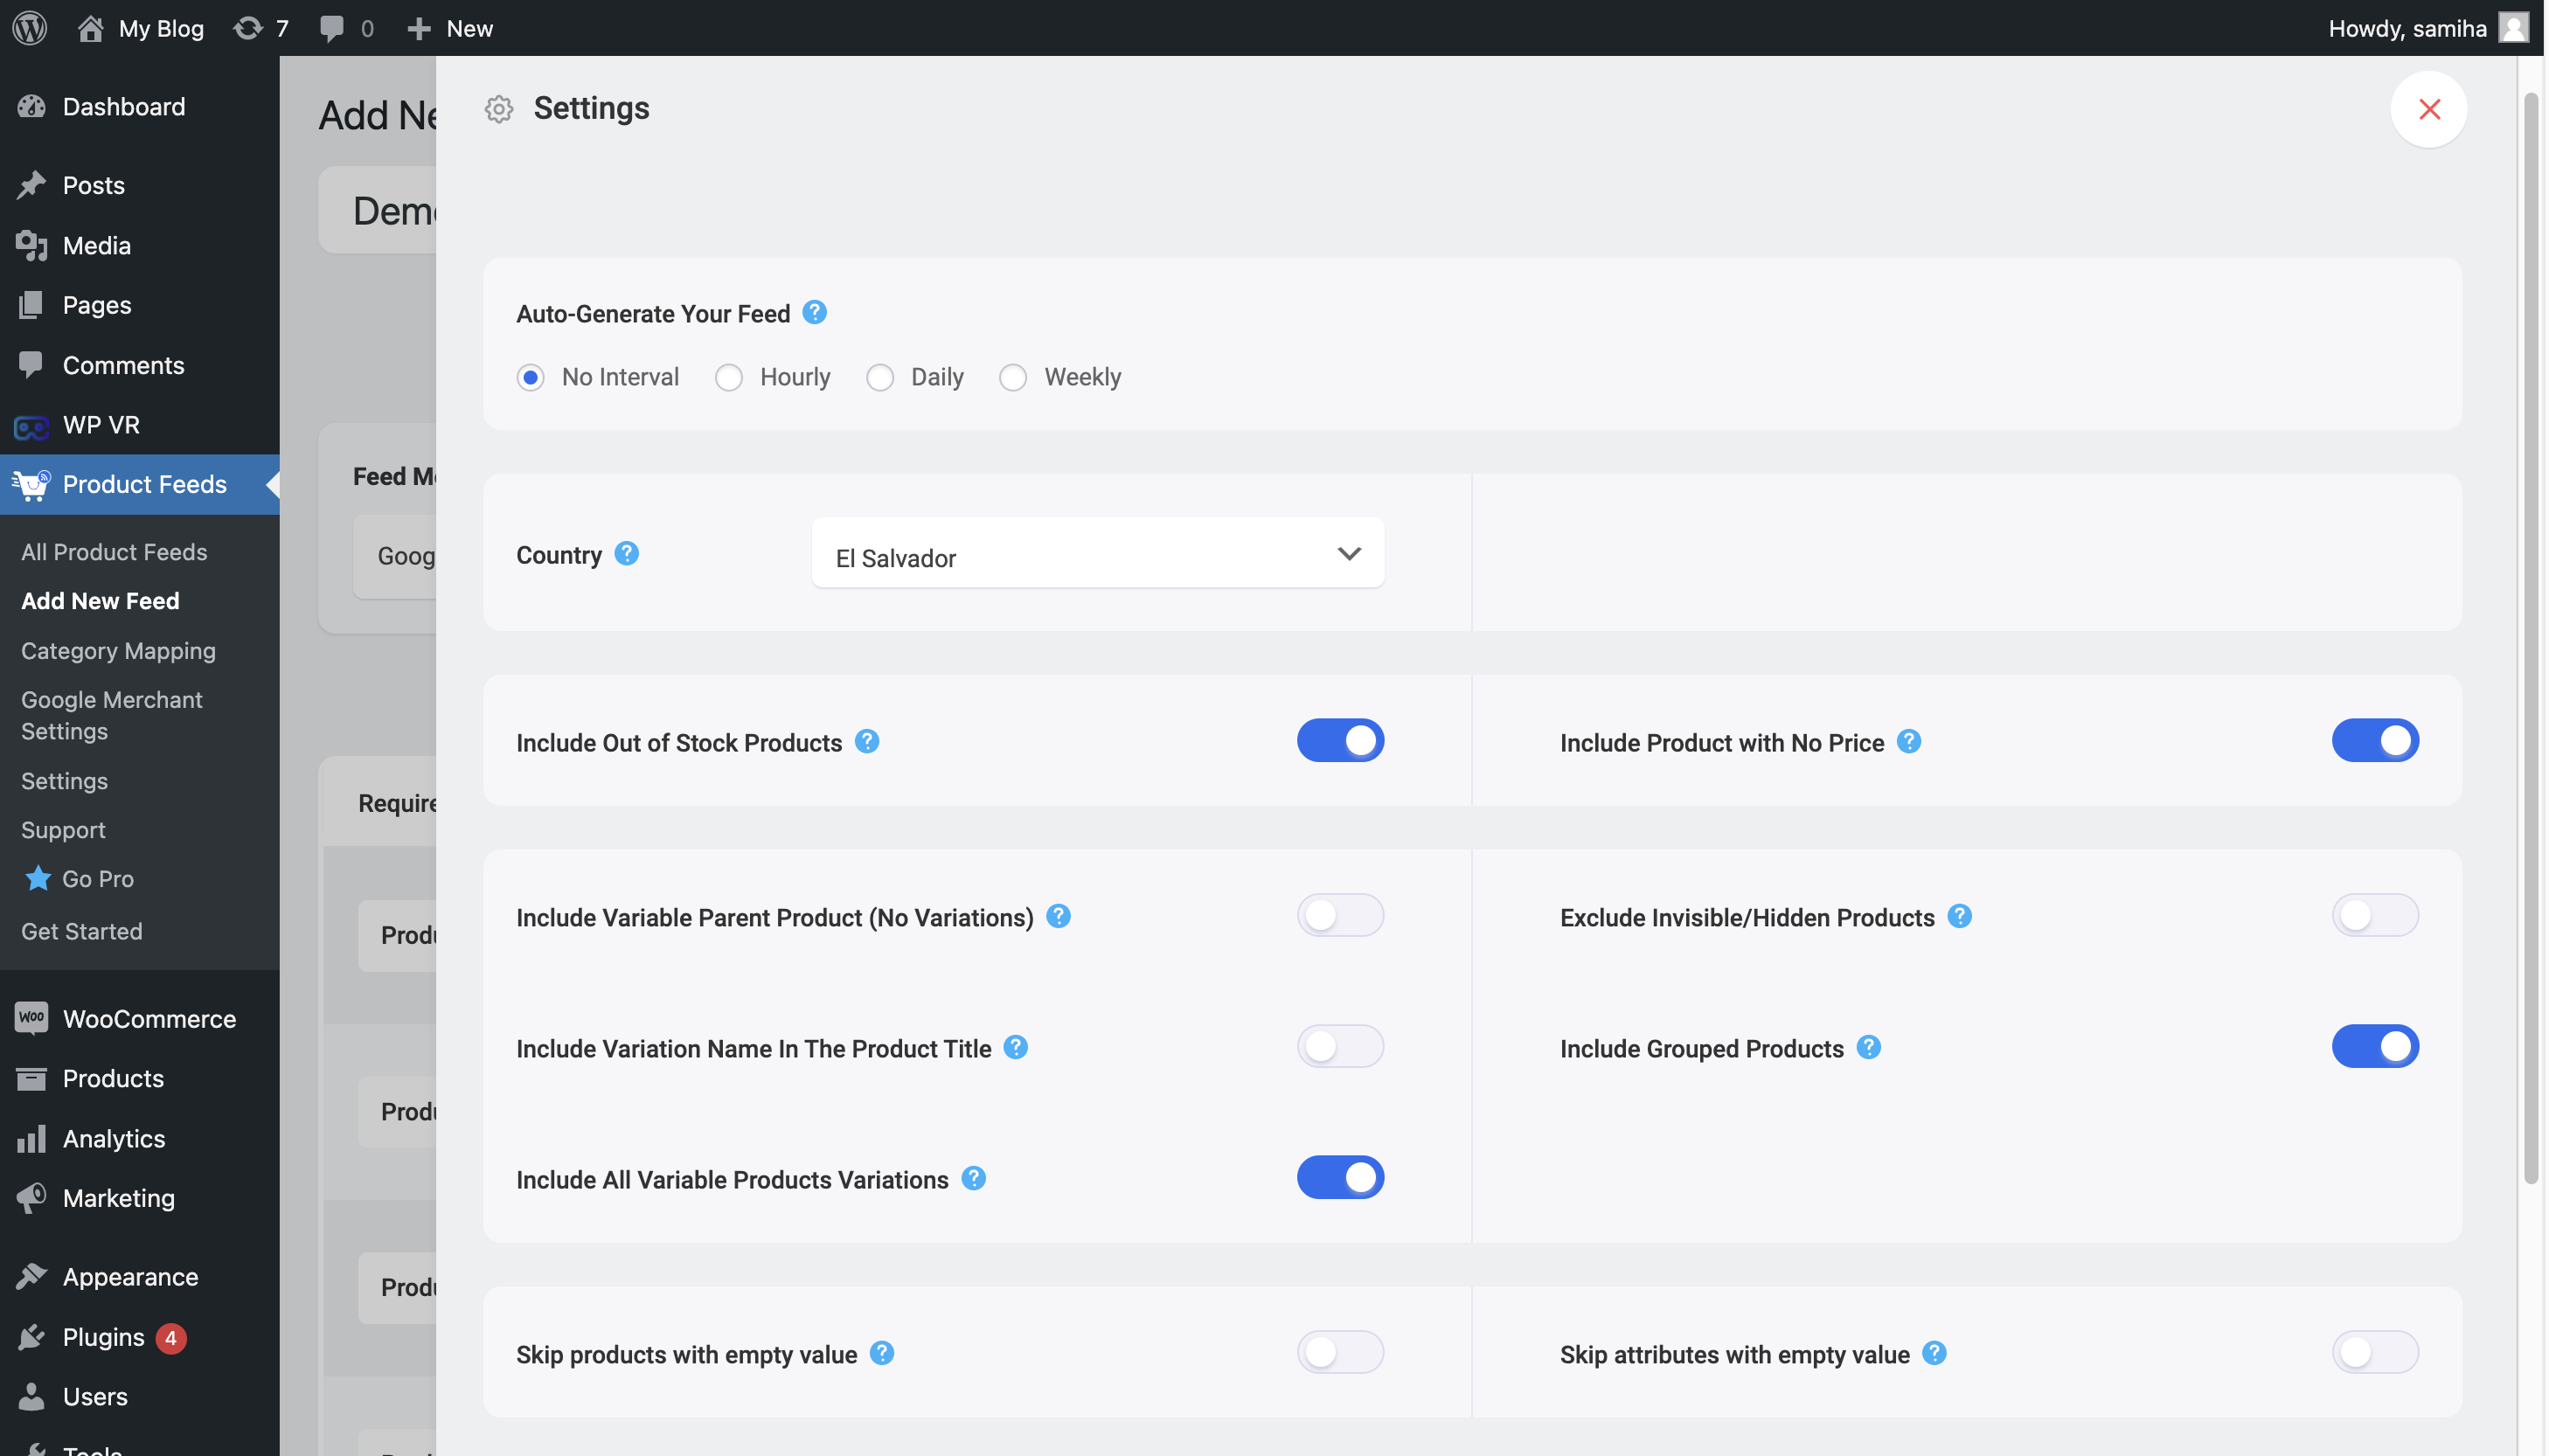
Now, despite putting enough effort into making your product data optimized for conversion, it is also important to generate the product feed in the right format and with the right product data.

As per Google’s product data specification, you have to maintain a set XML format with all the required attributes as tags.

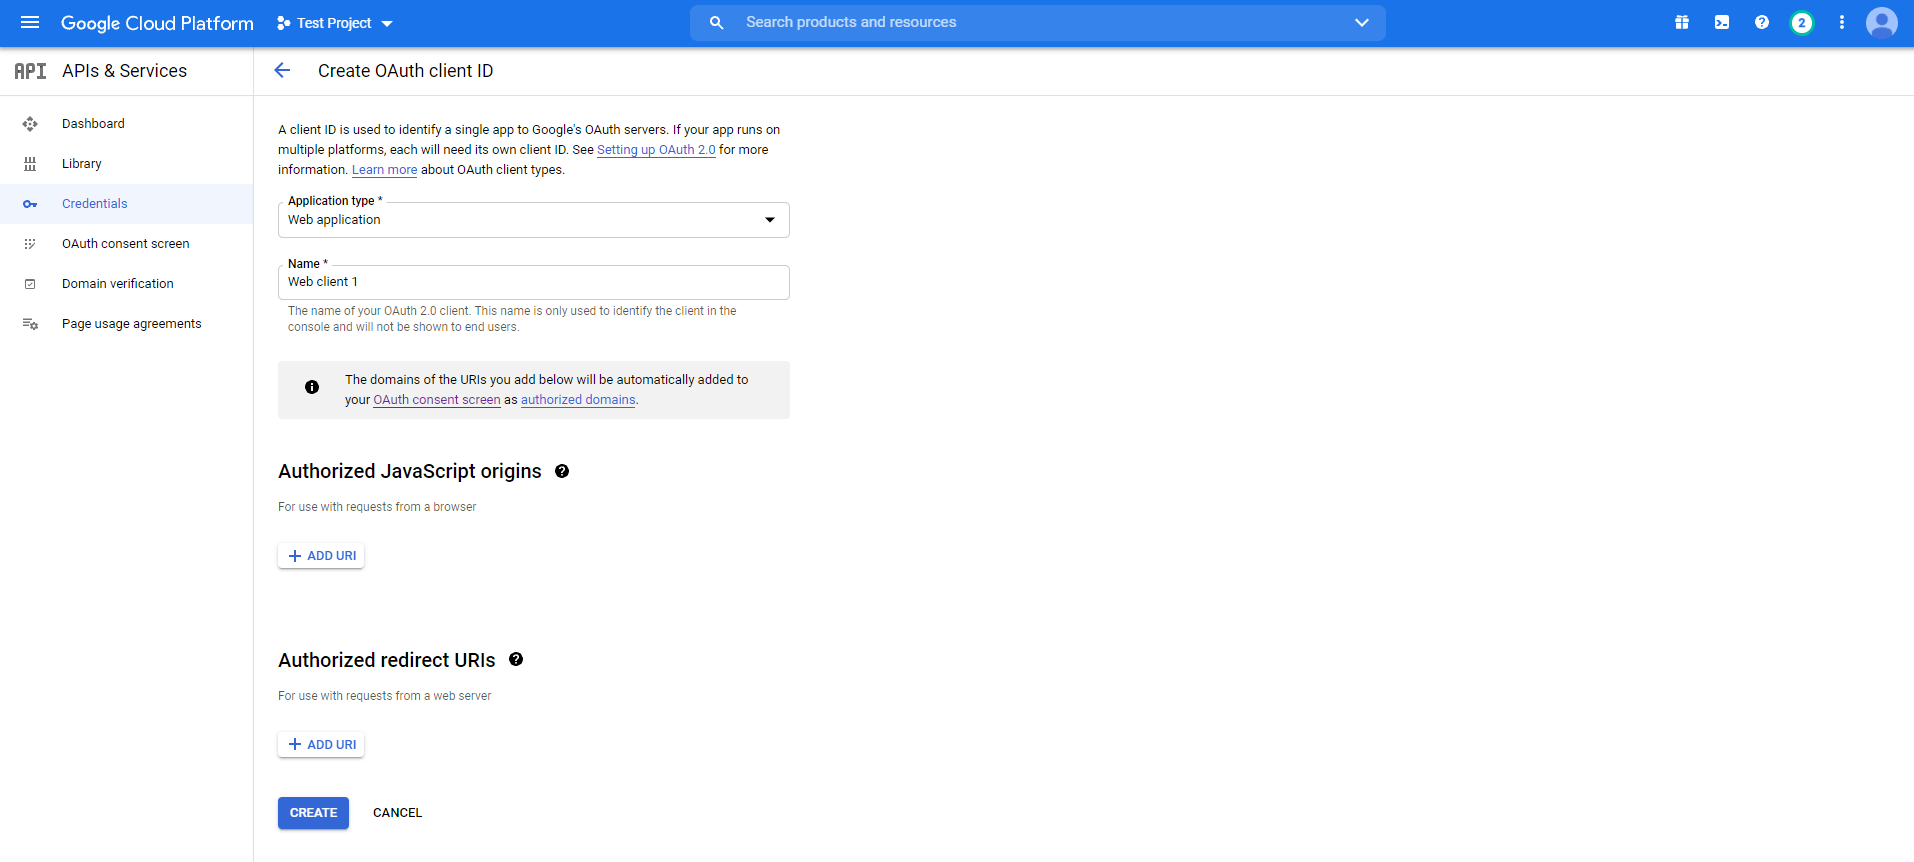
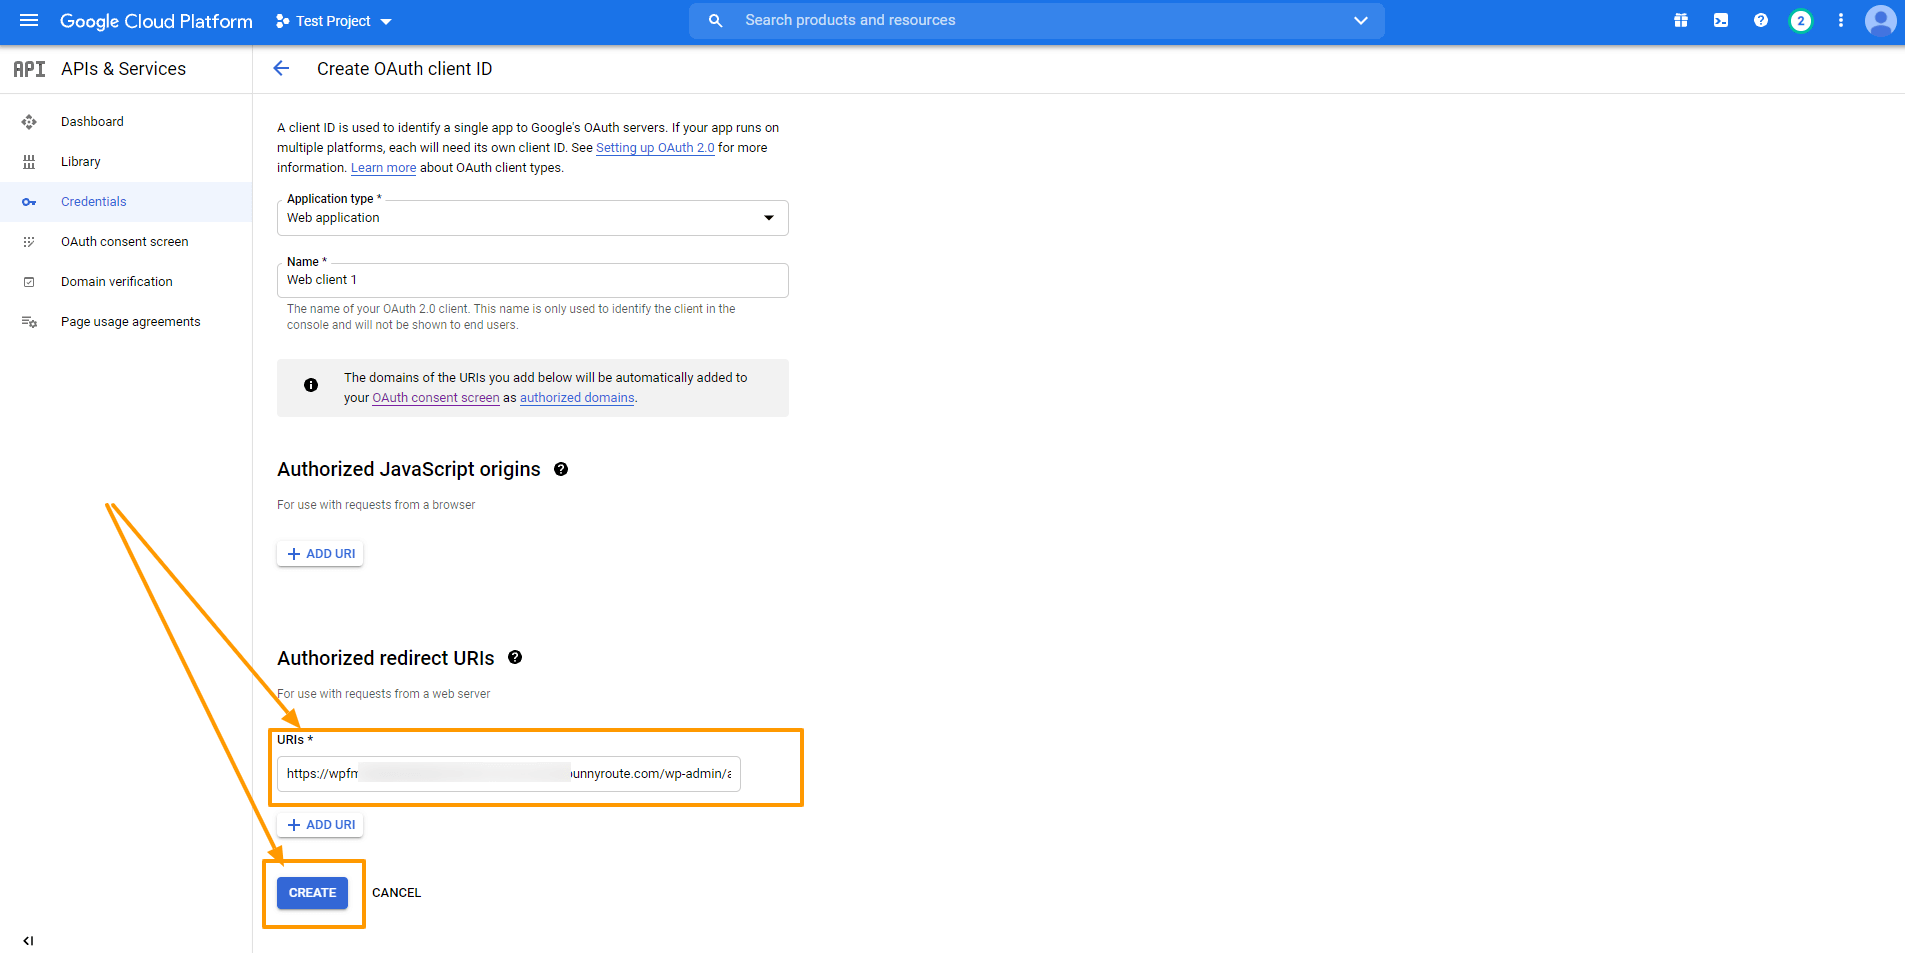
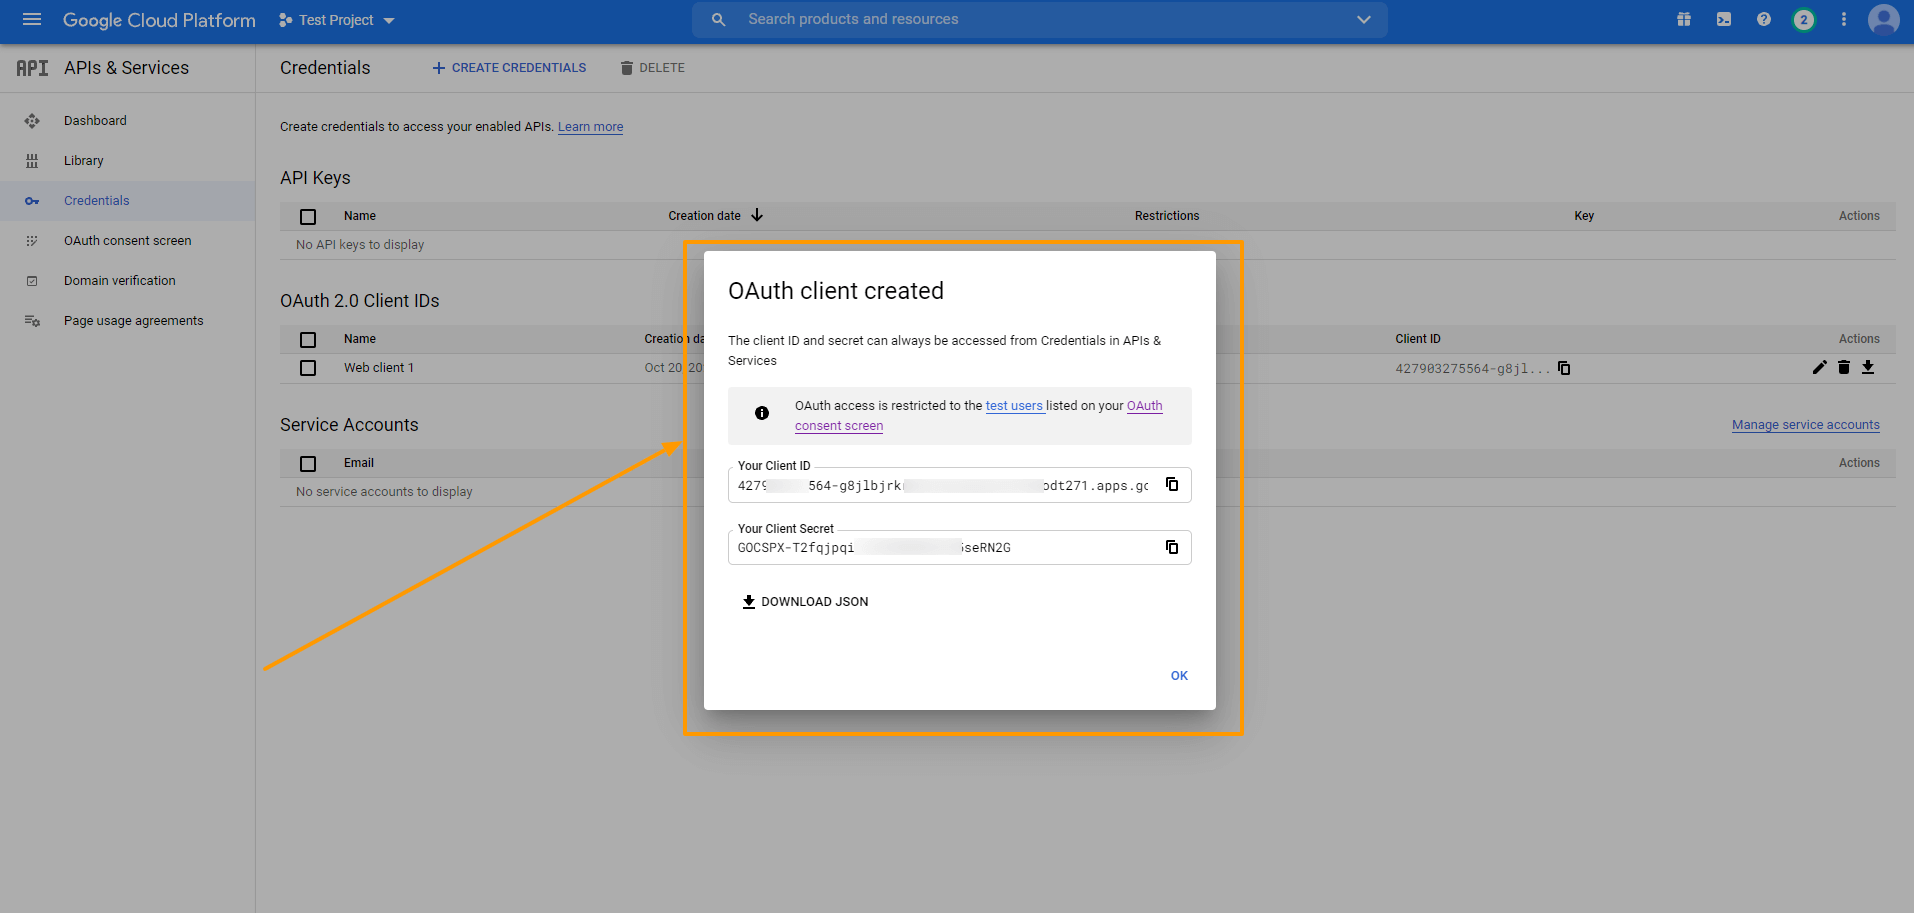
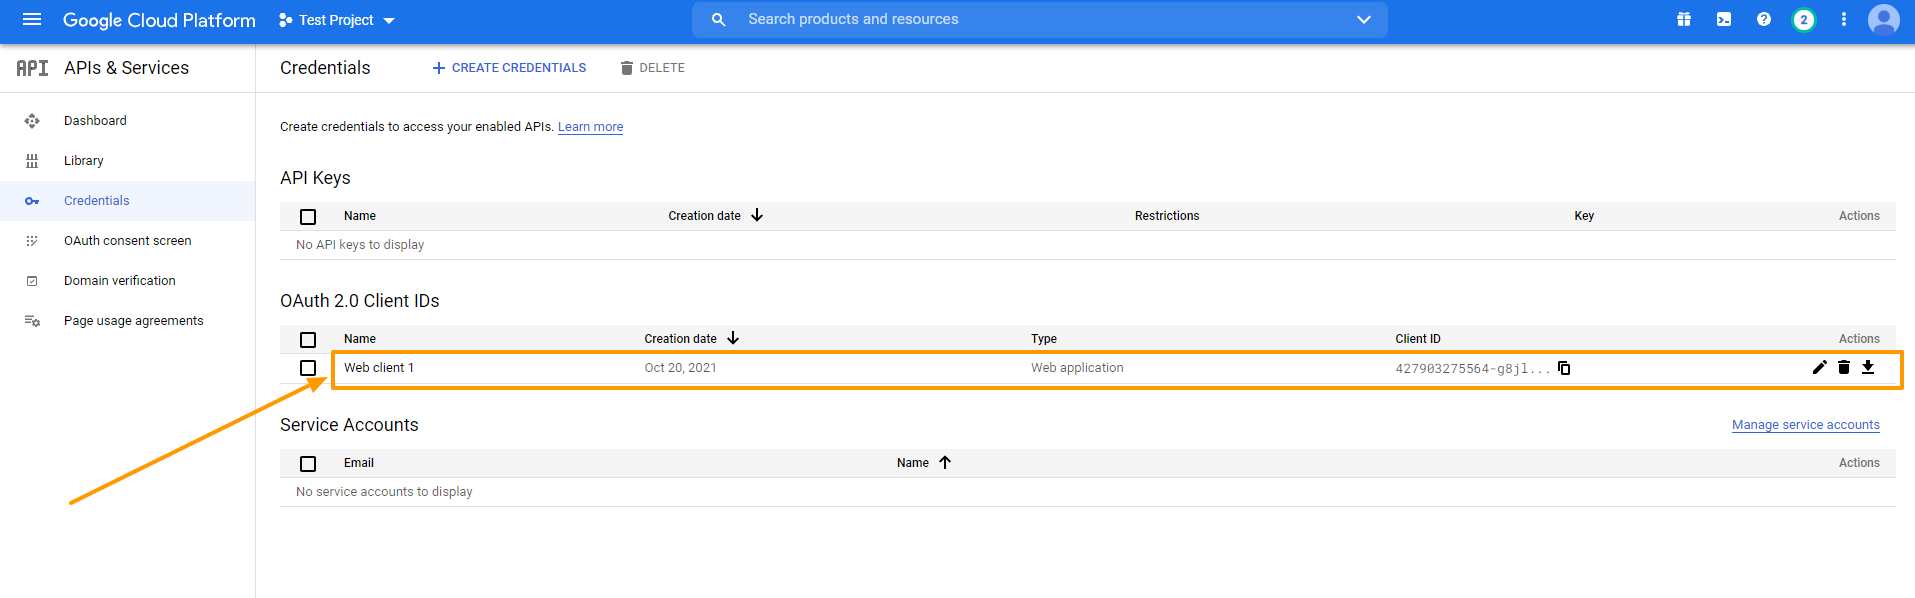
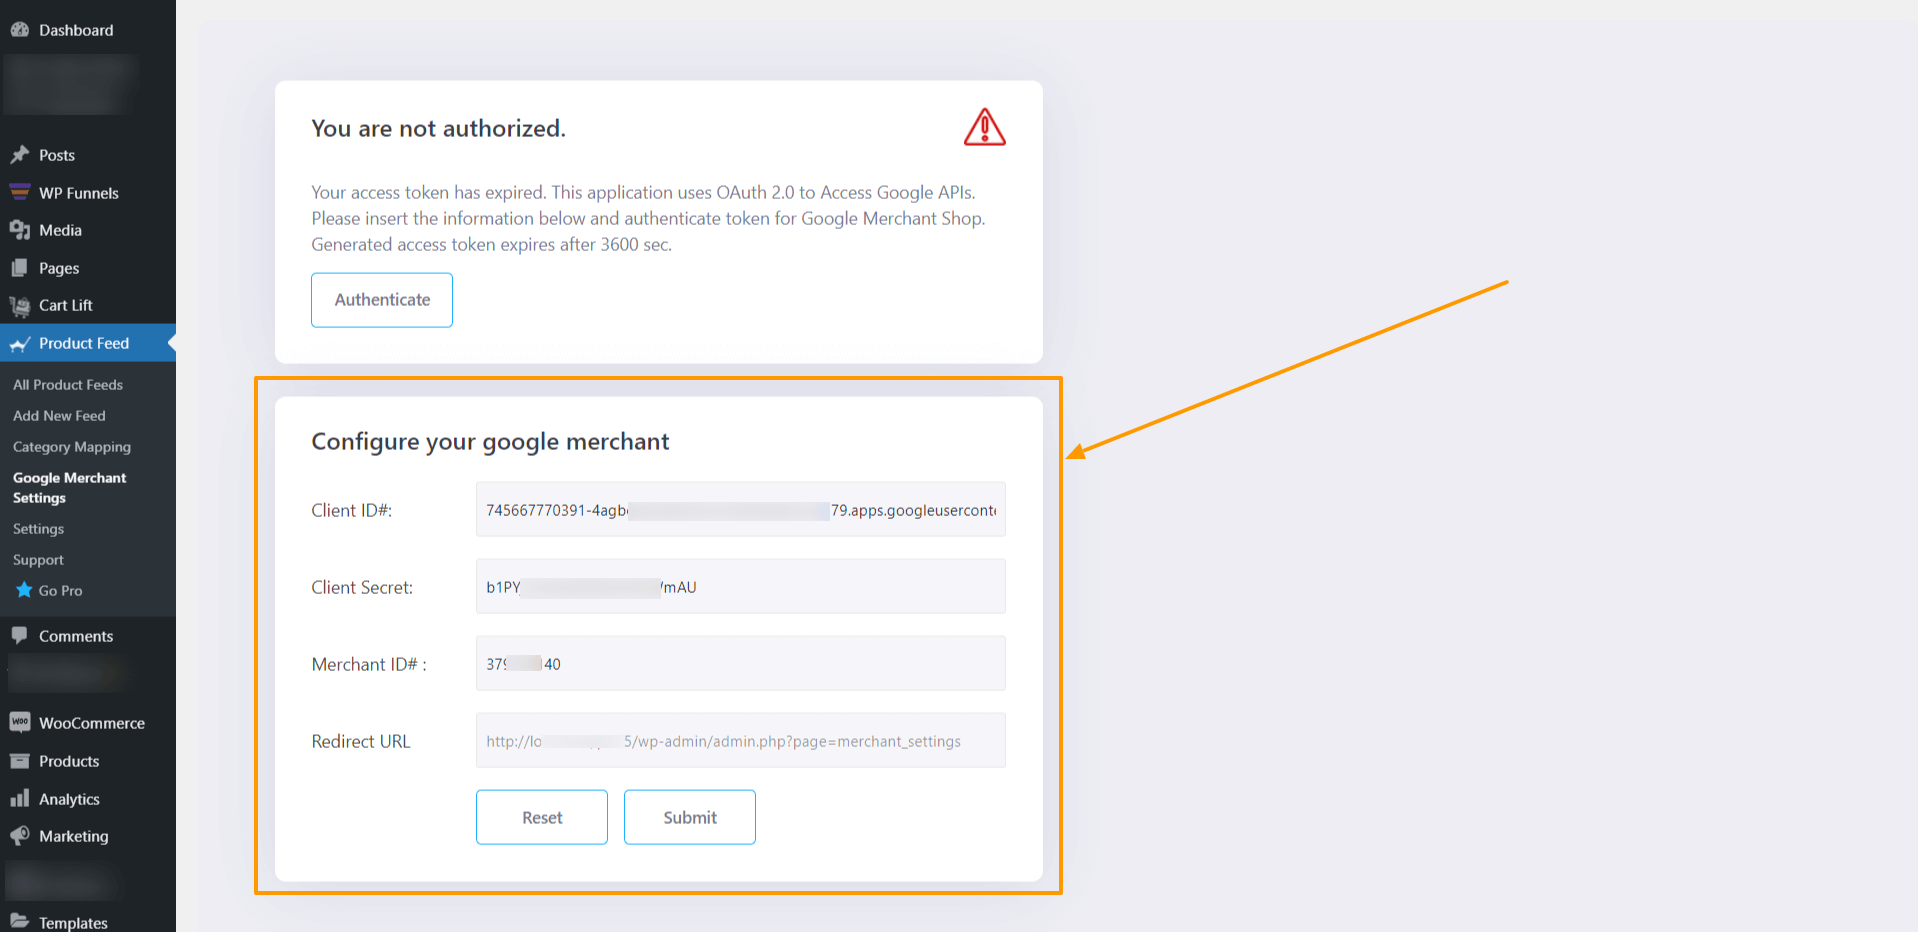
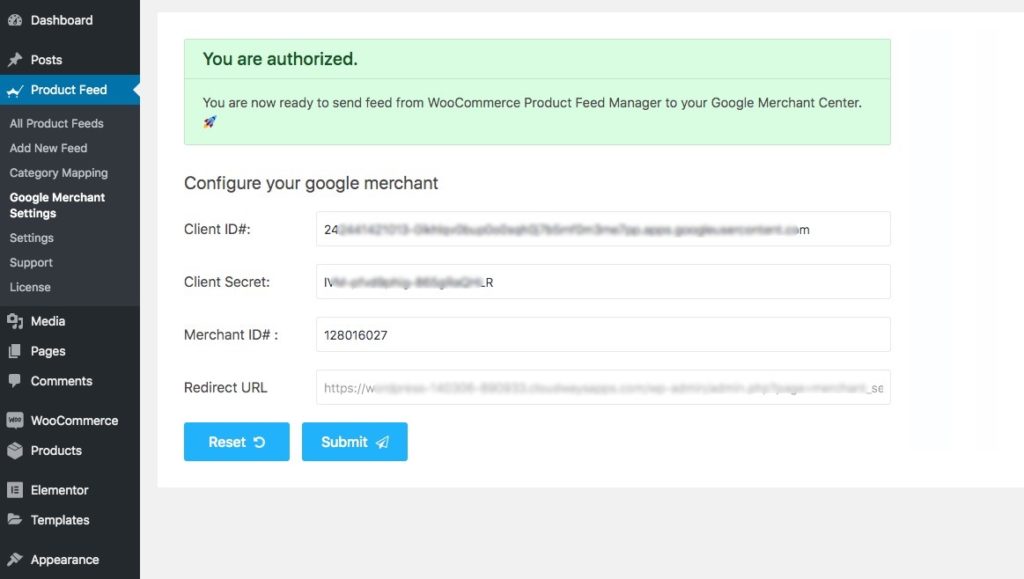
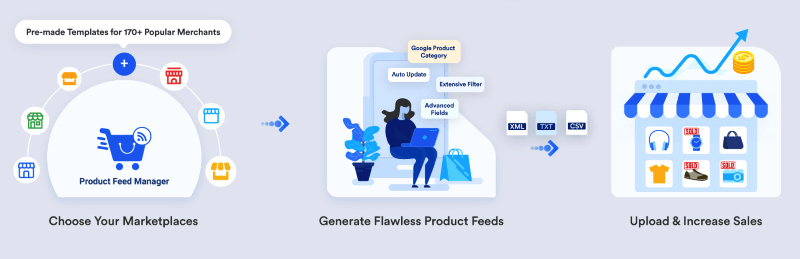
In this regard, you can either partner up with a feed management SAAS tool such as Feed Army, or, you can rather consider going with a much more affordable WordPress plugin, Product Feed Manager for WooCommerce.

Produkt-Feed-Manager für WooCommerce (PFM)

Product Feed Manager is a simple and easy-to-use plugin that helps to generate product feed for several marketplaces (including Google Shopping) in the right format in just a few clicks.

The specialty of this plugin is its pre-built feed template, which you can set up in just a few minutes, even without any prior knowledge of Google product feed.

If you want to avoid getting your feed rejected due to a human error, you should consider using this plugin to list your products on Google Shopping easily.

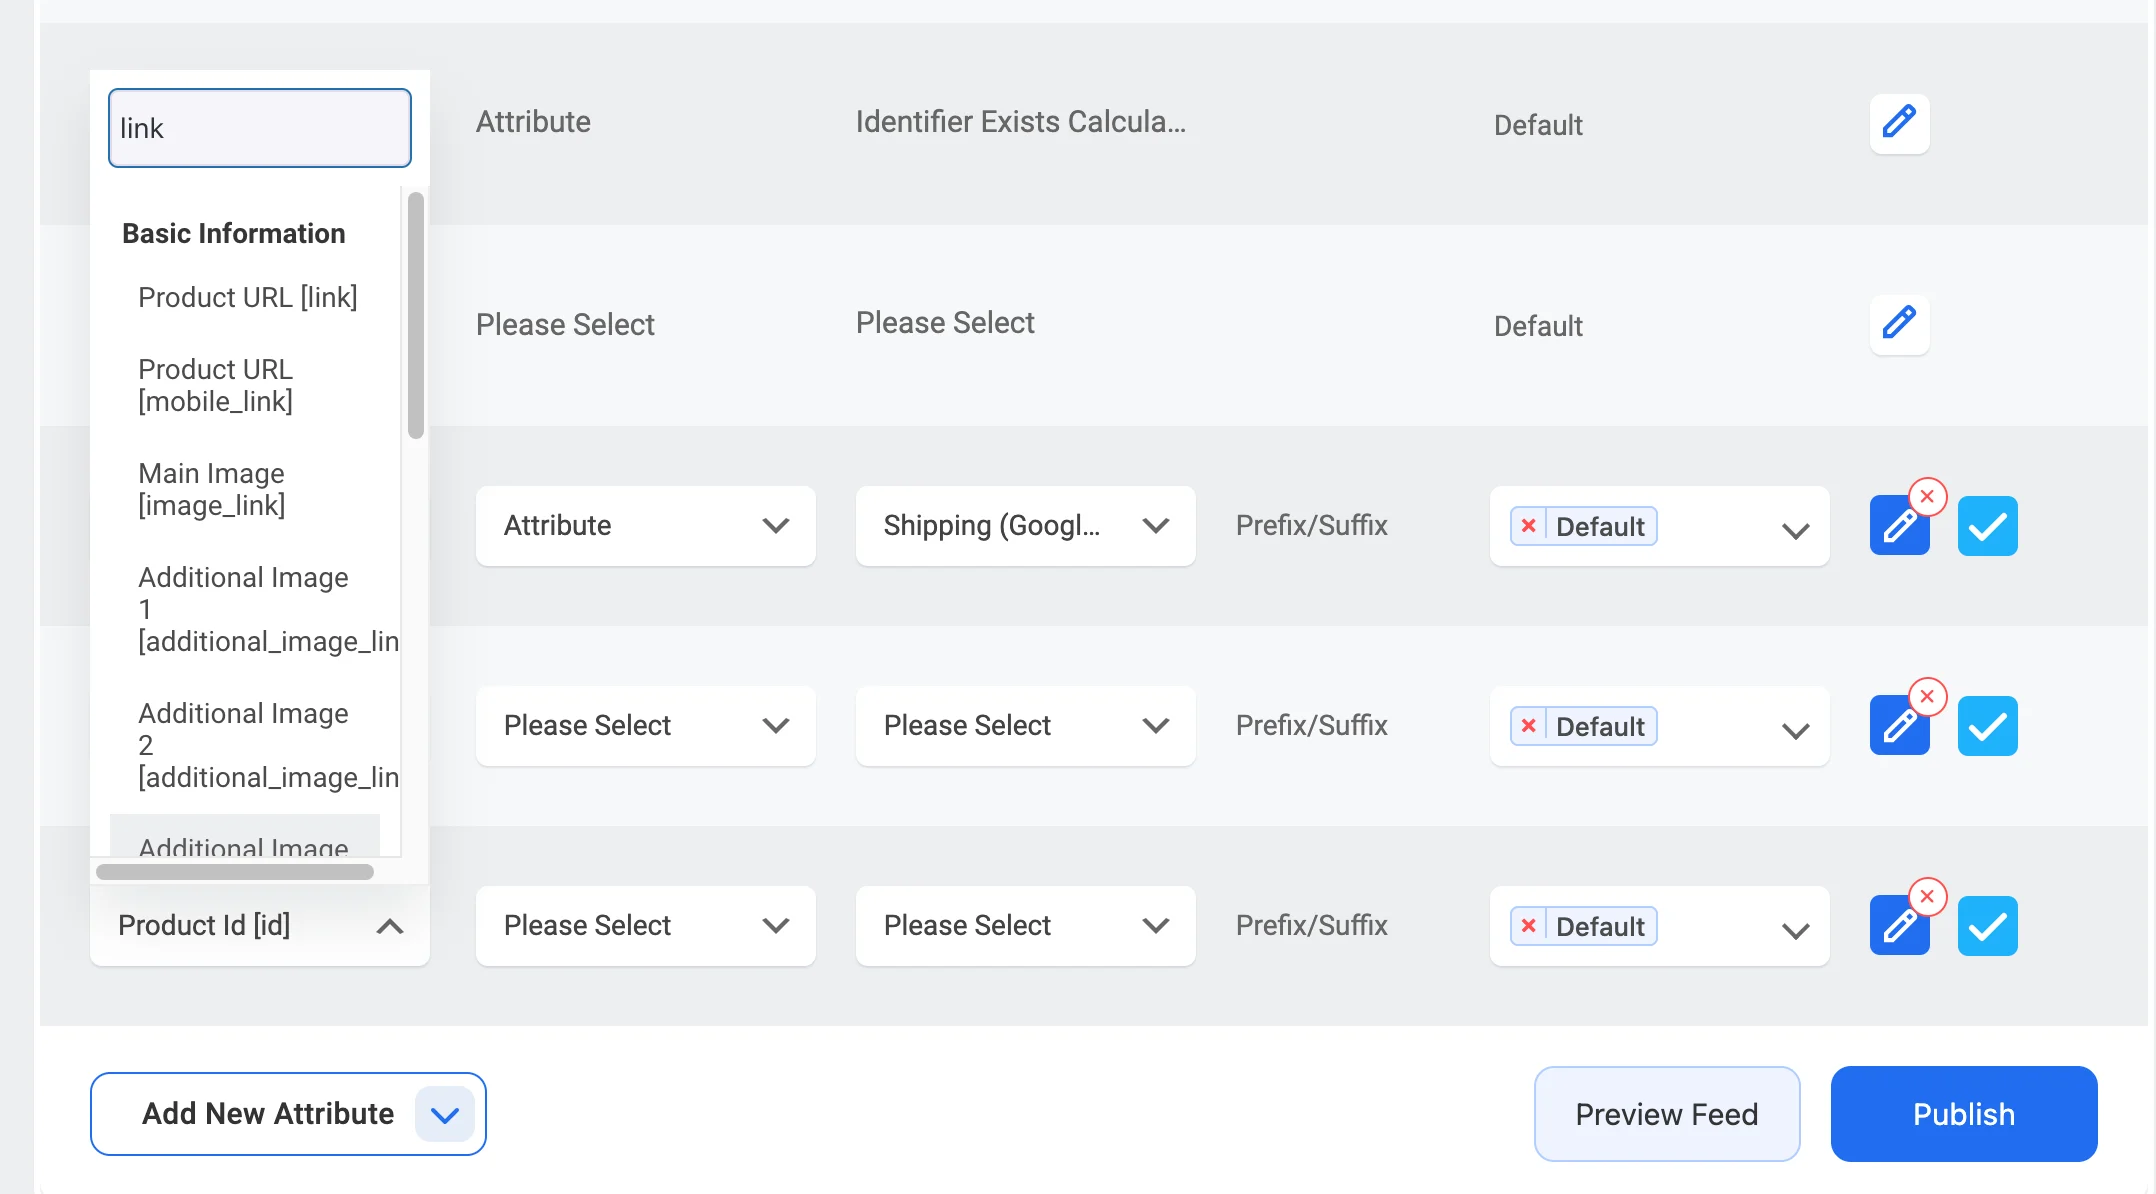
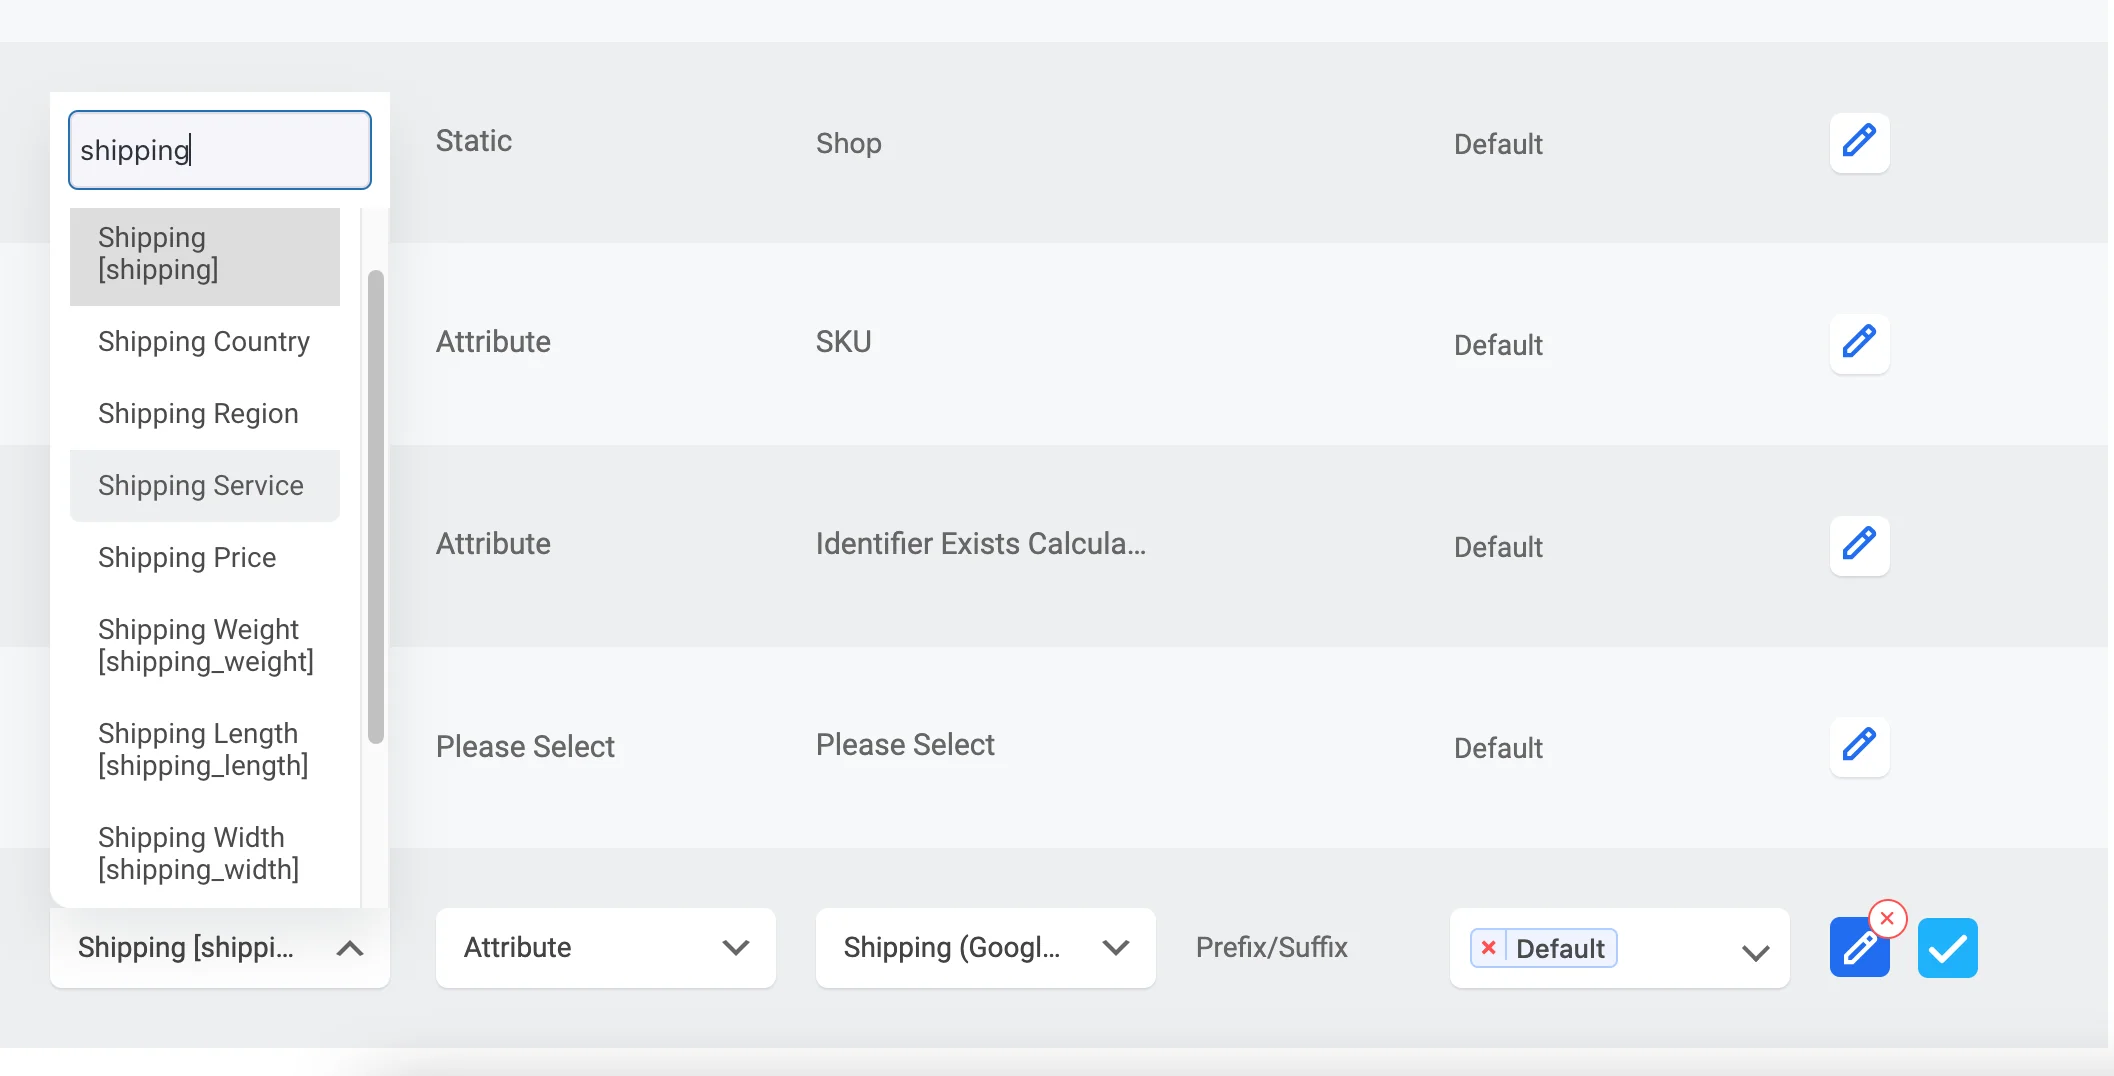
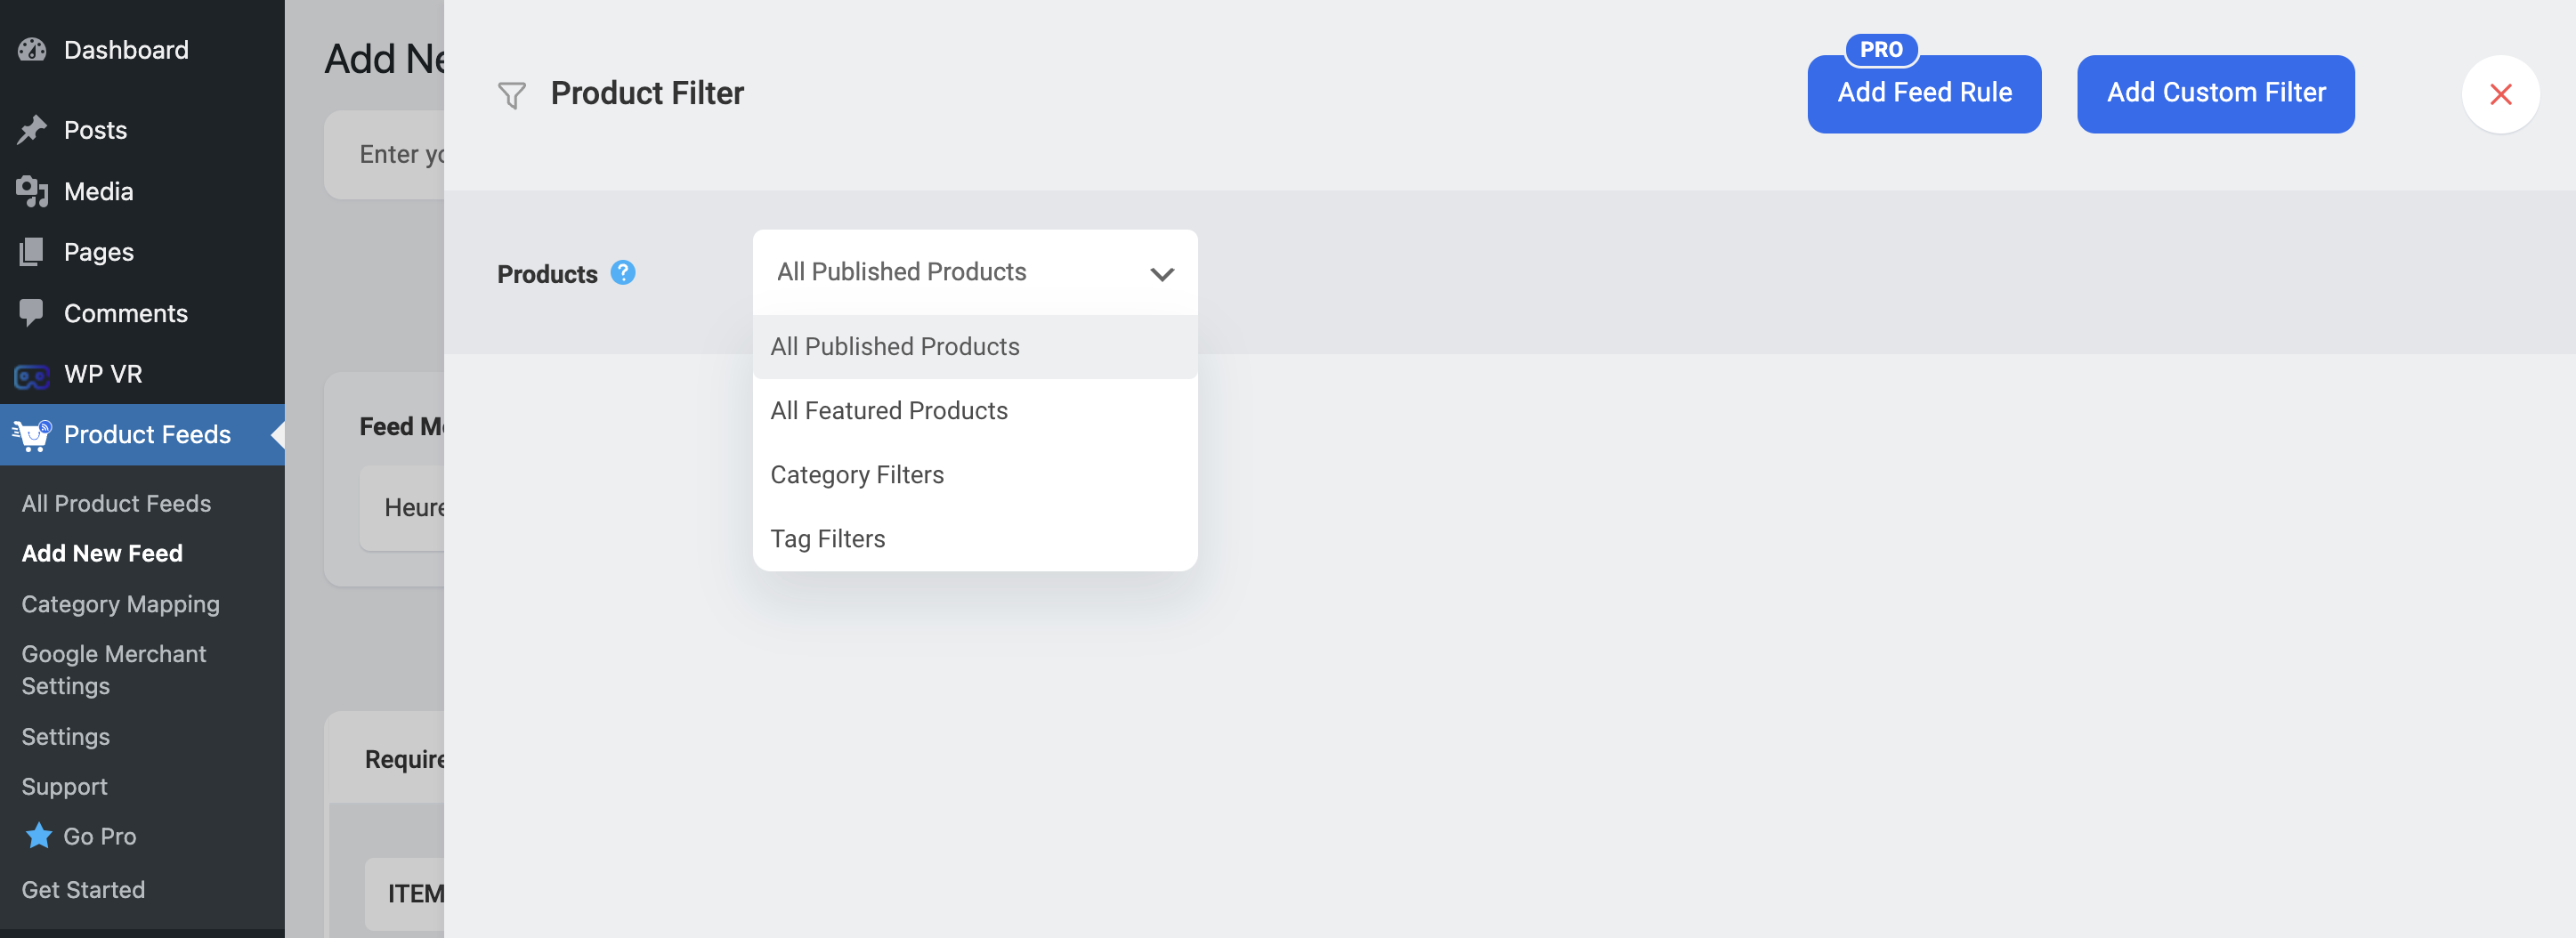
PFM has all the tools required to optimize Google shopping feed :

  • The plugin comes with the combined field feature which can help with optimizing product titles for the Google shopping feed optimization.
  • Its category mapping feature will help to optimize the category in the feed data without changing your store’s original categories.
  • This plugin also comes with custom fields for GTIN, MPN, and Product Brand to help you set up your products in an optimized way before generating the feed.
  • Plus, its one-click JSON-LD structured data ensures data mismatch in the schema.

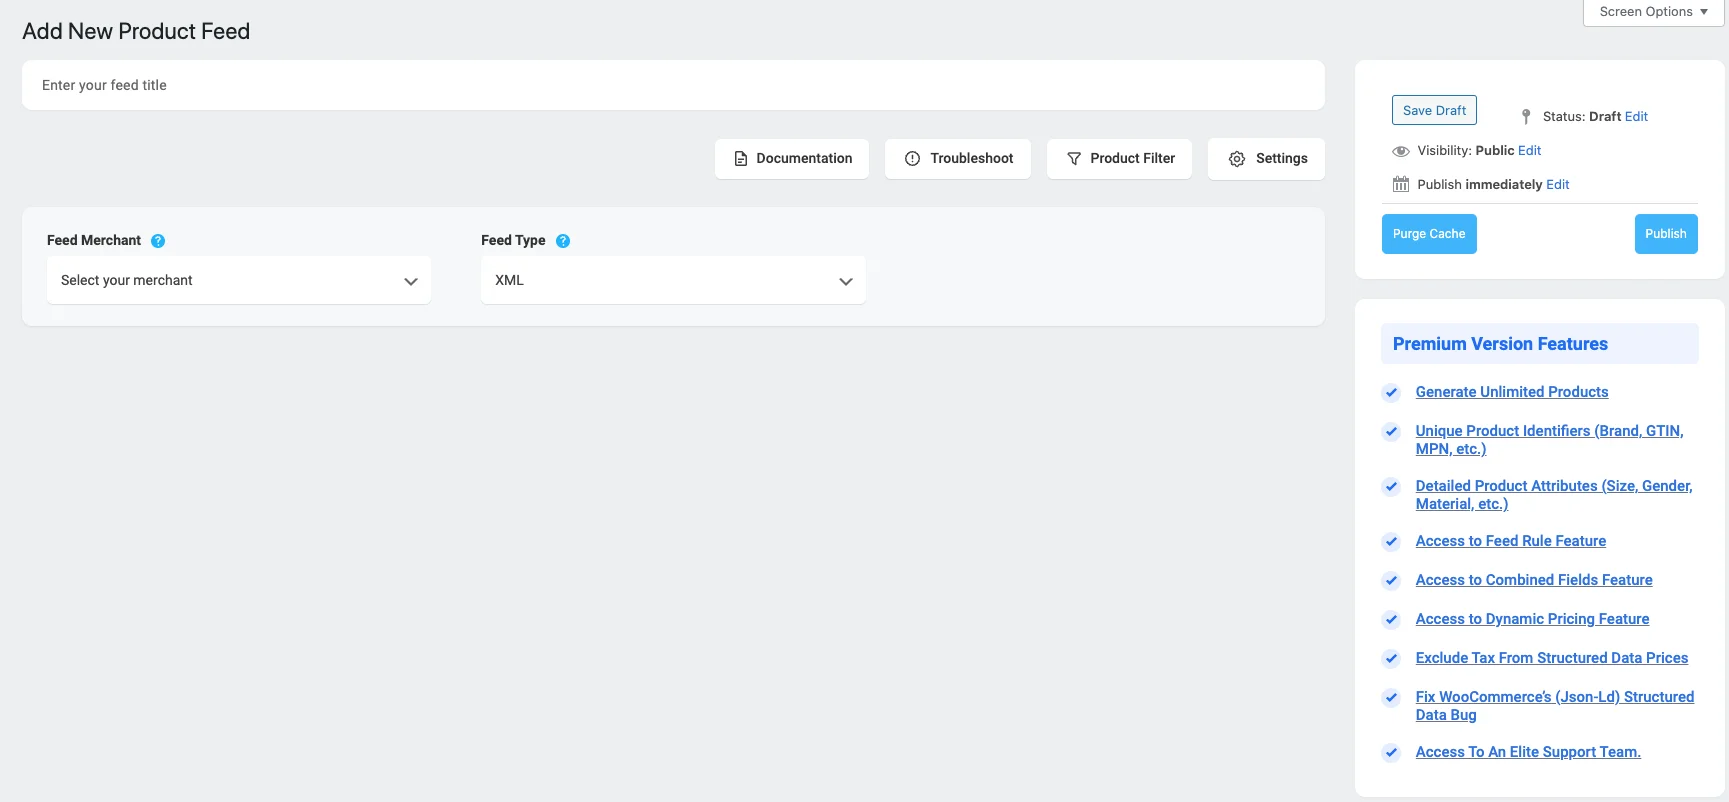
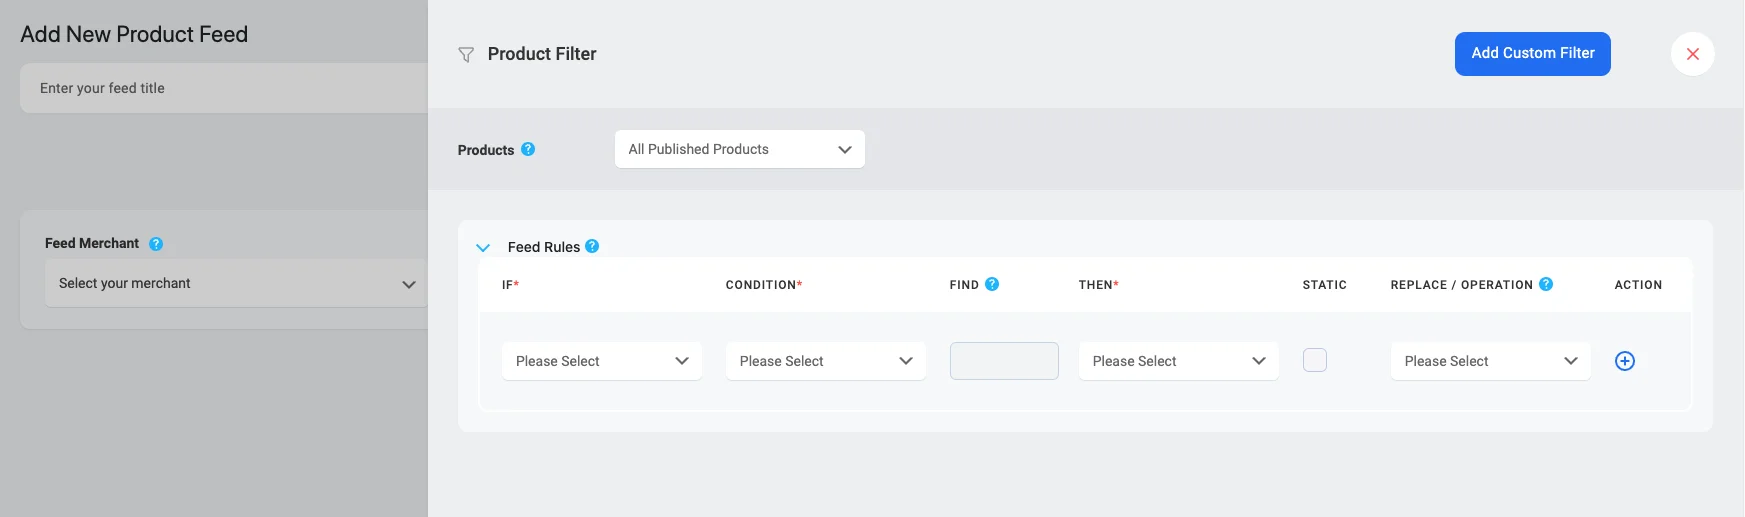
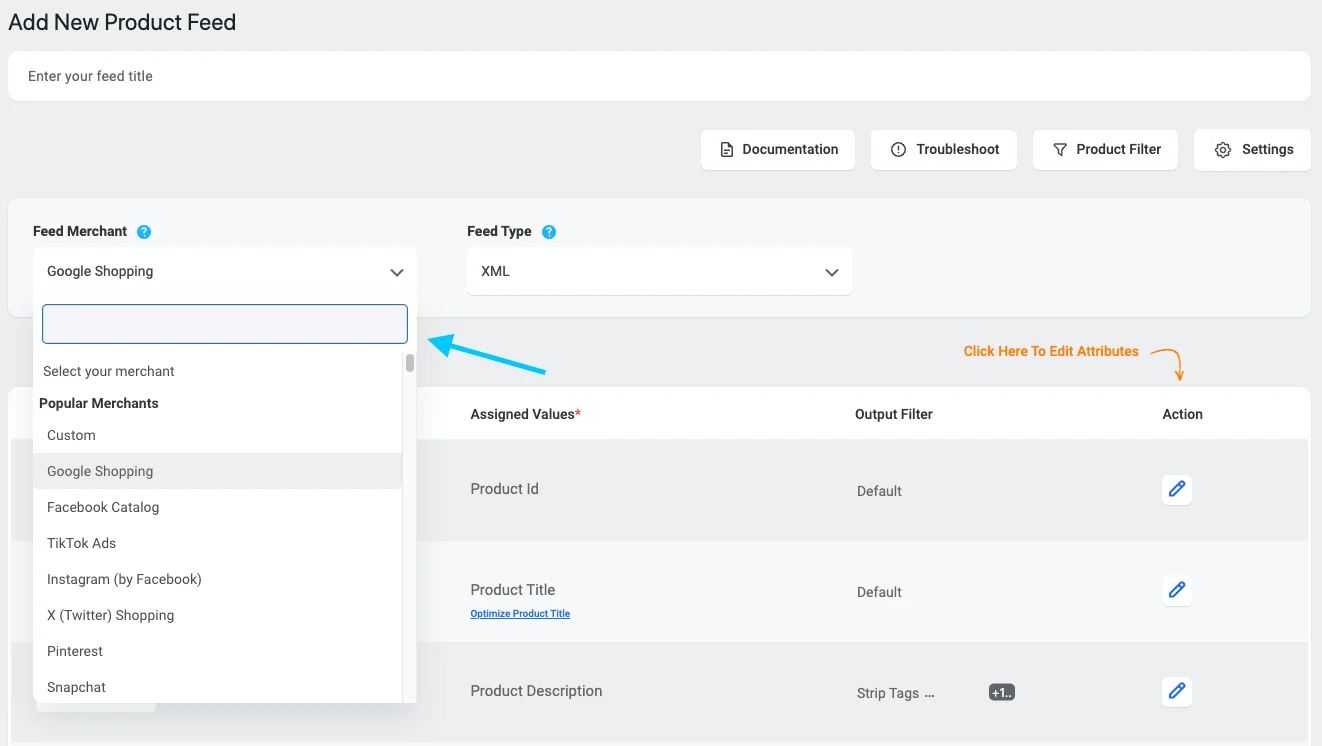
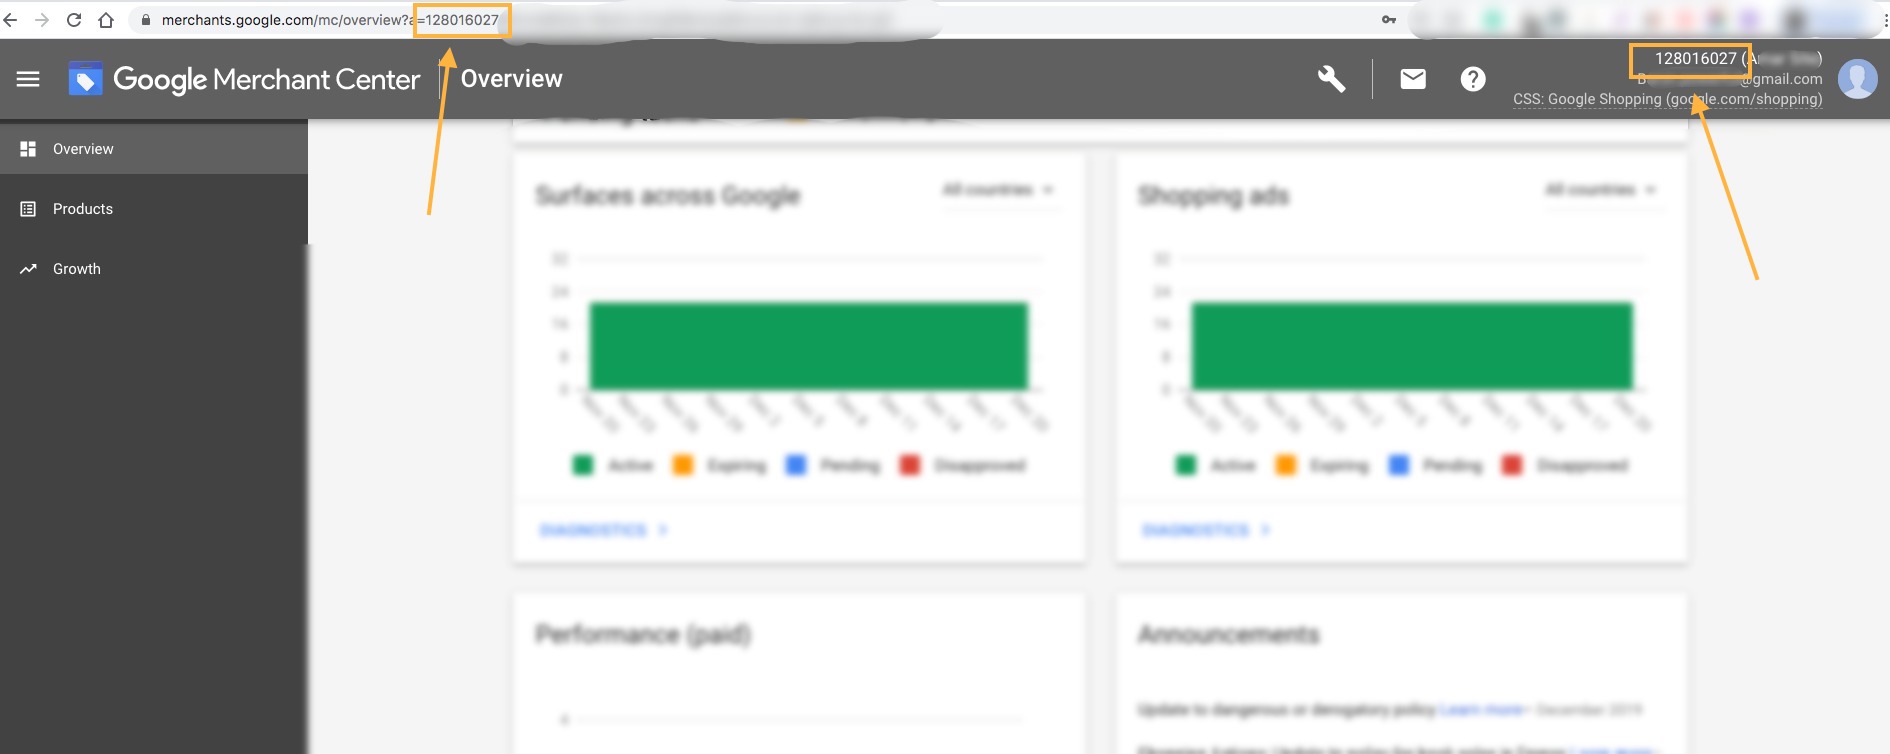
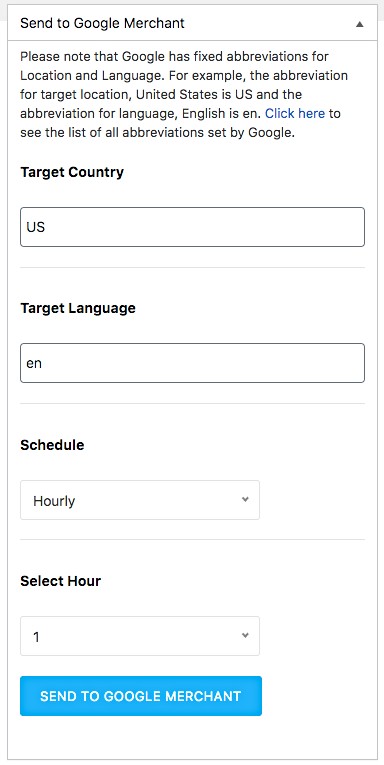
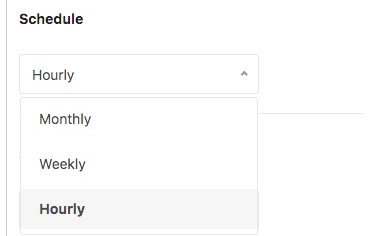
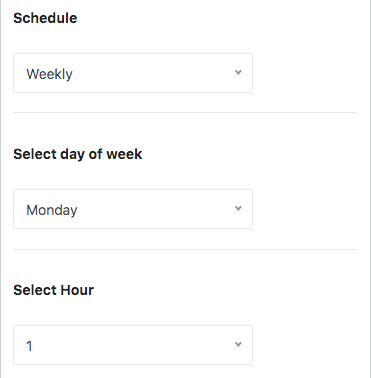
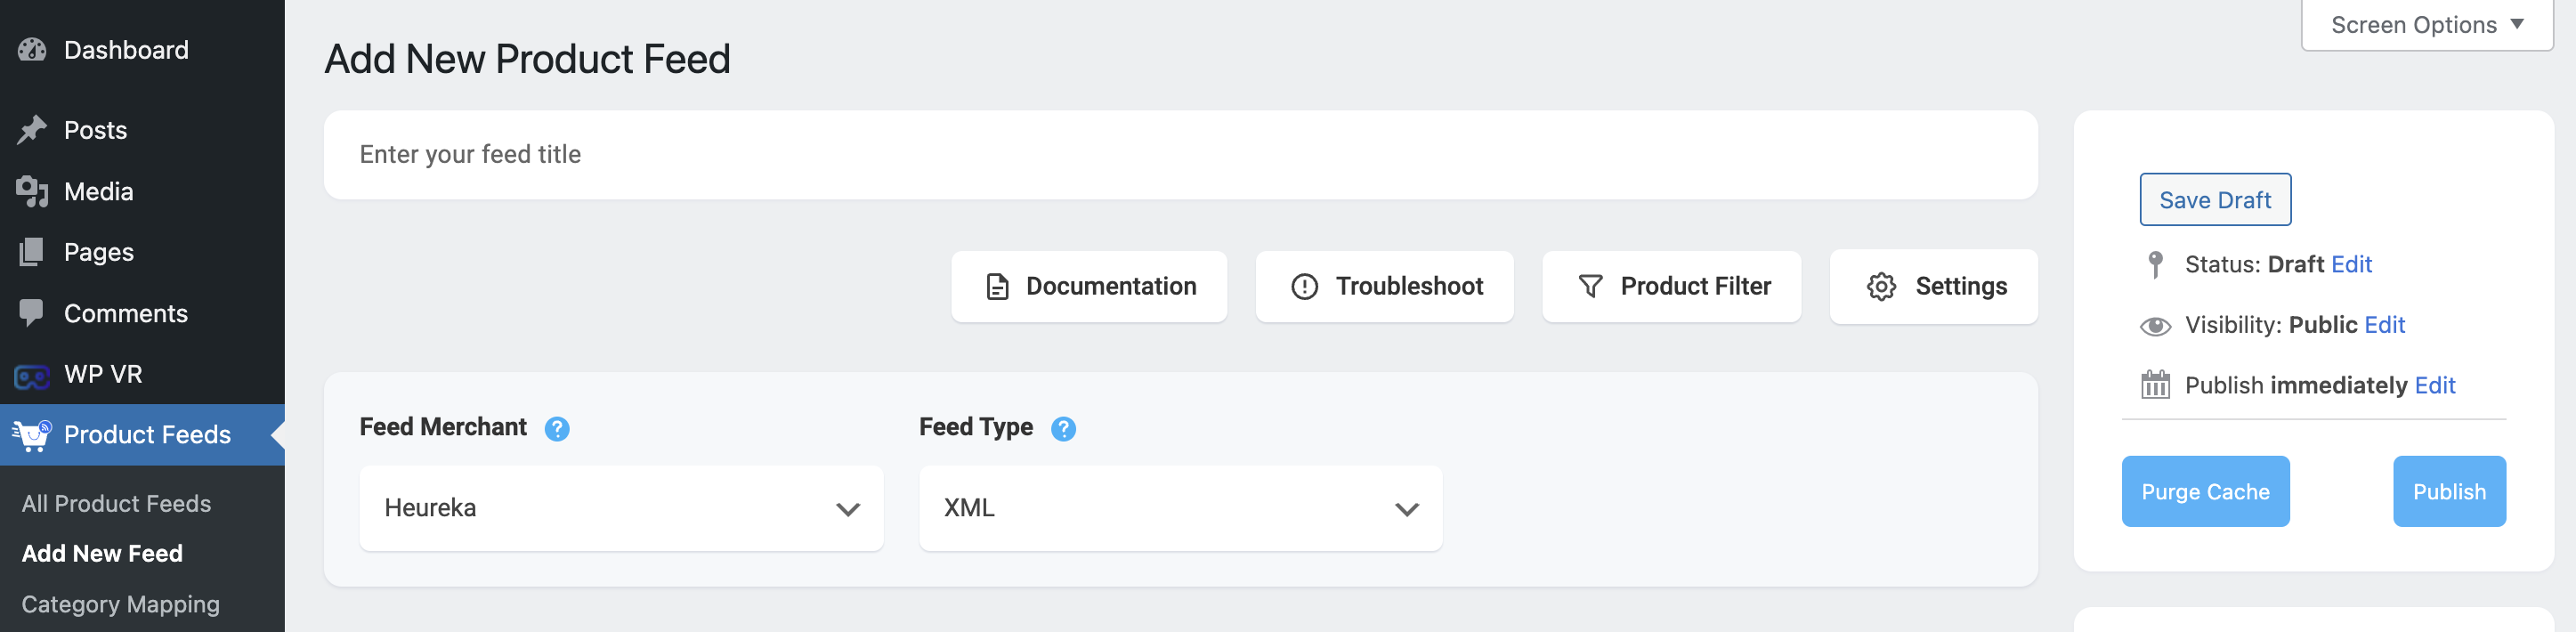
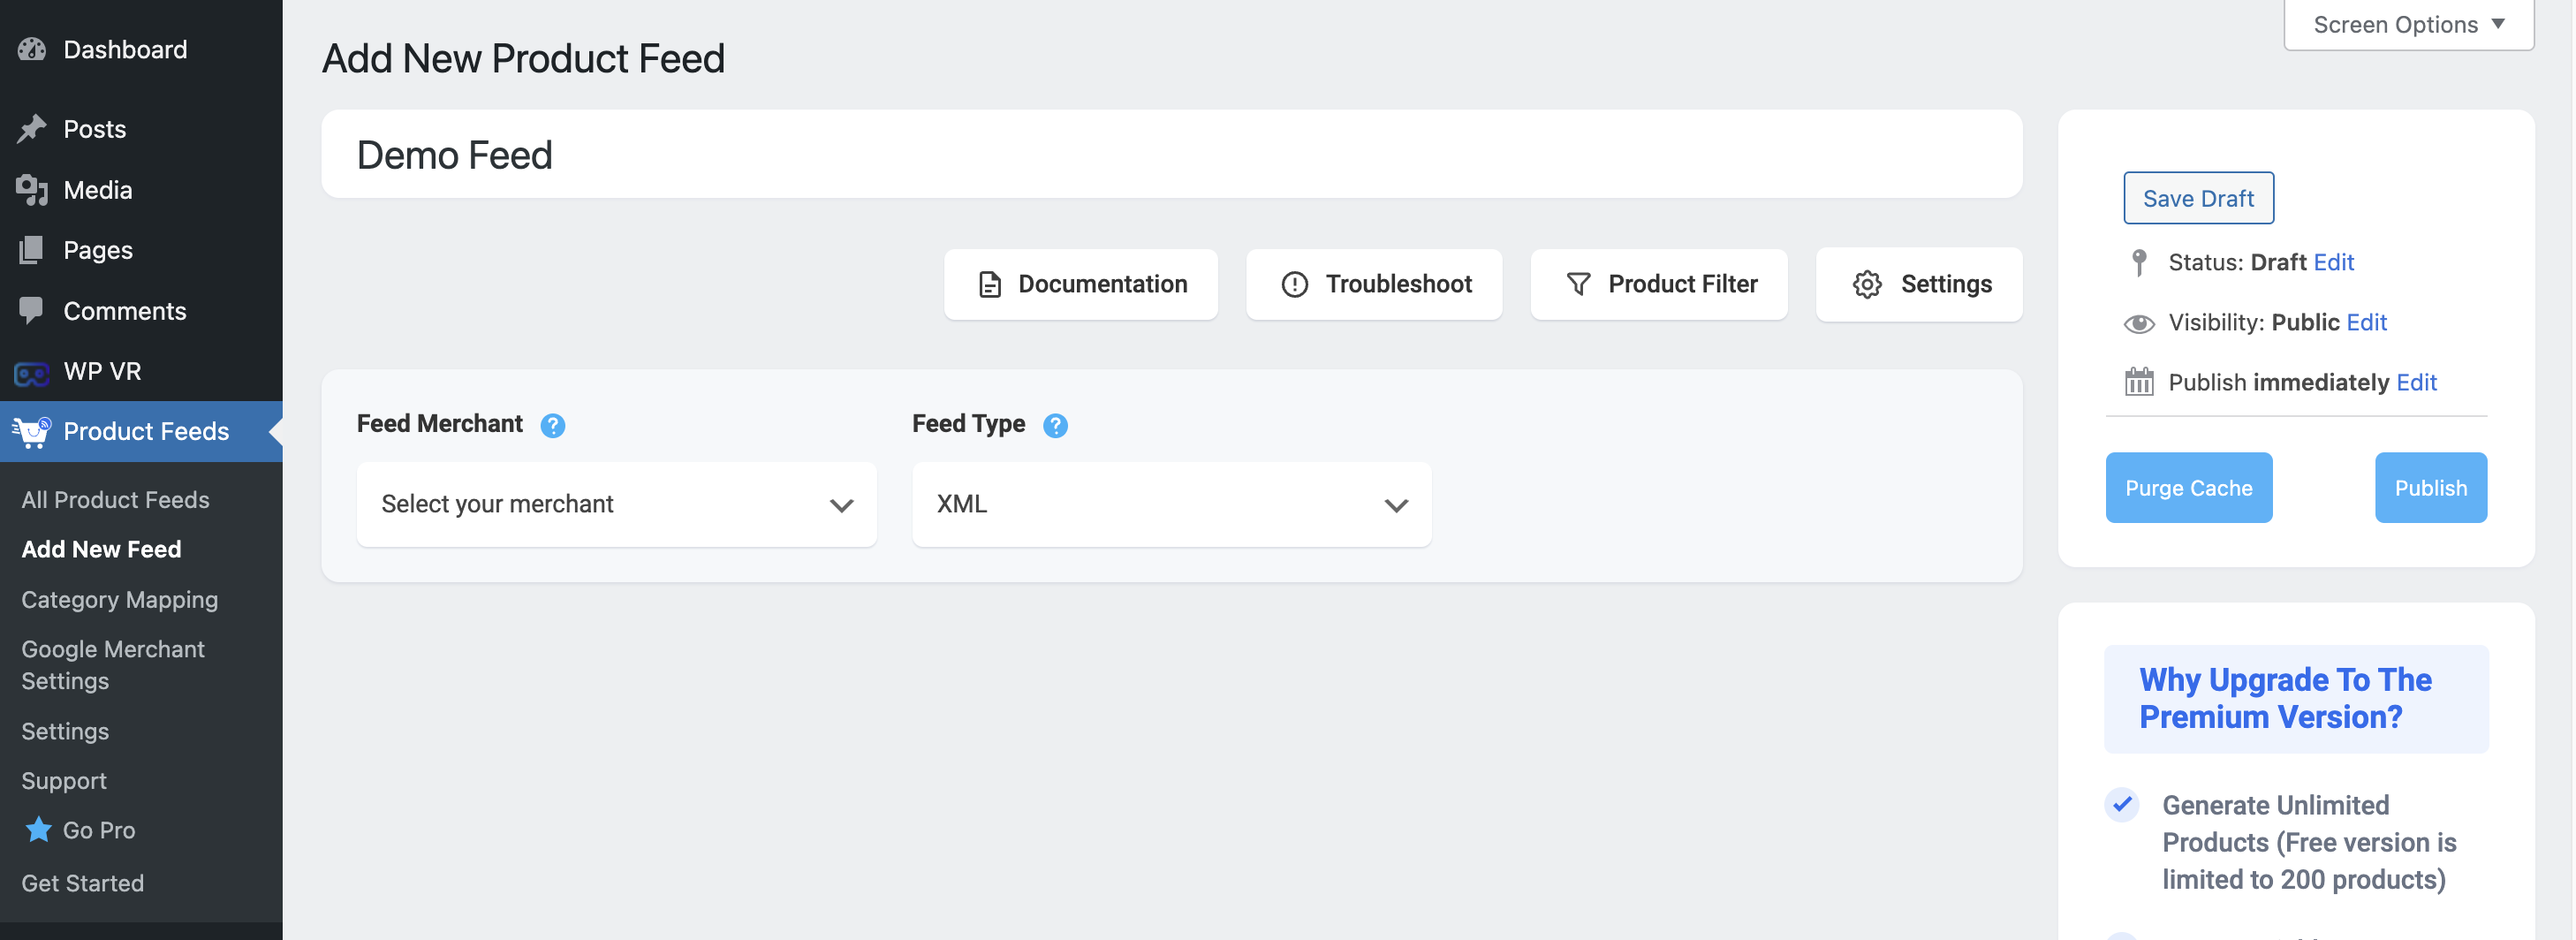
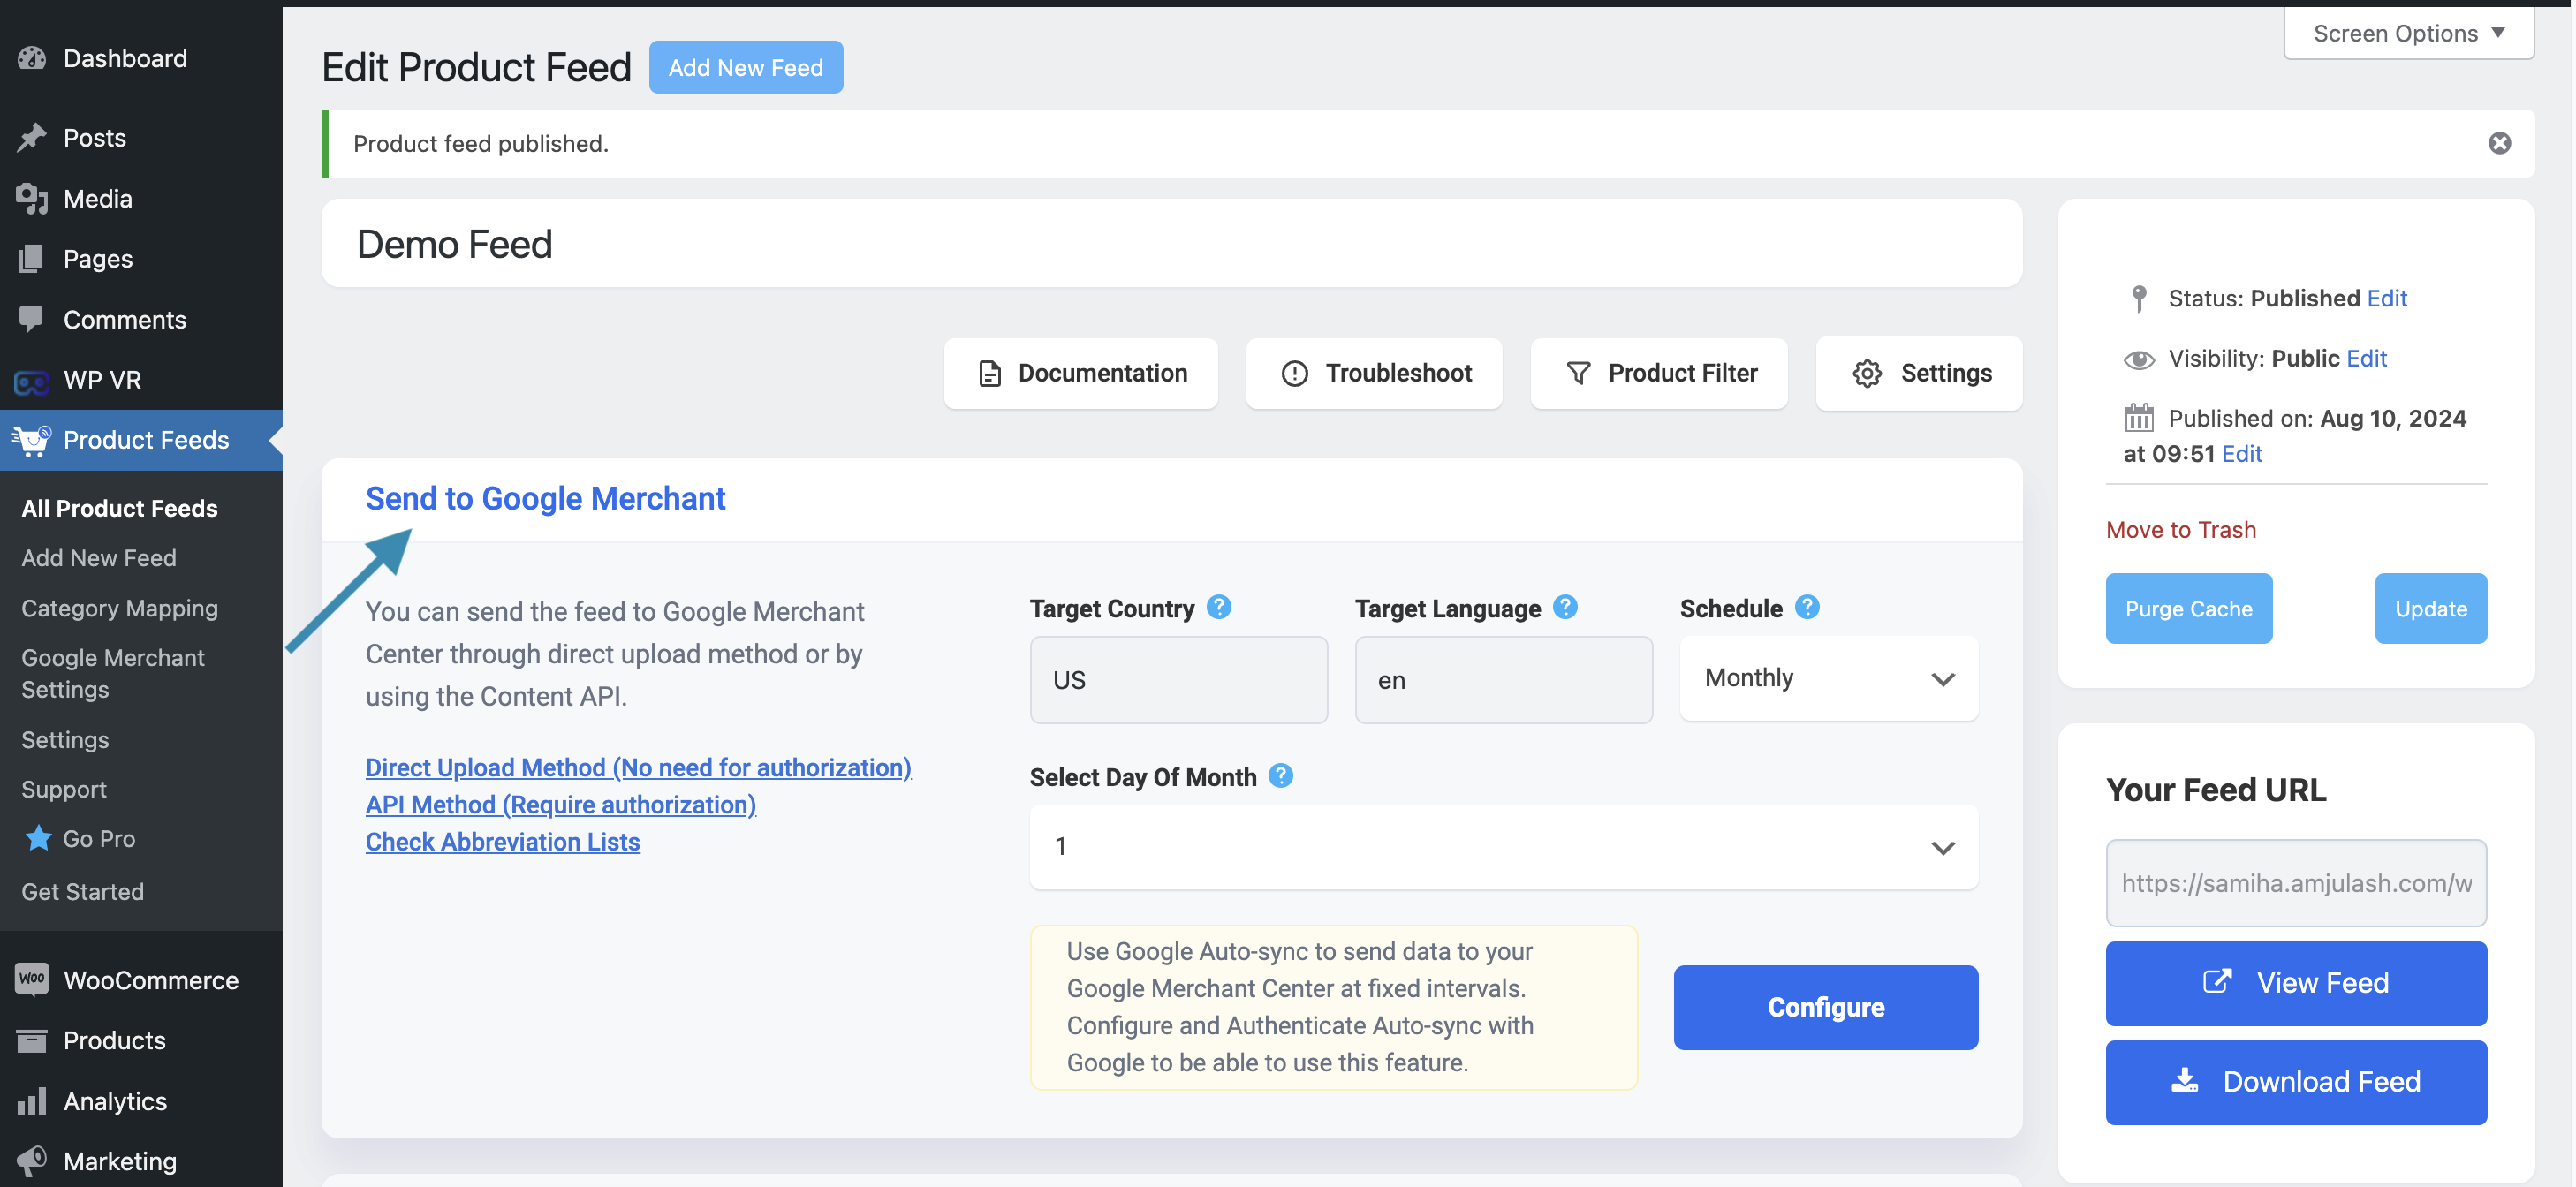
Following is a glimpse of how you can generate a Google product feed using PFM:

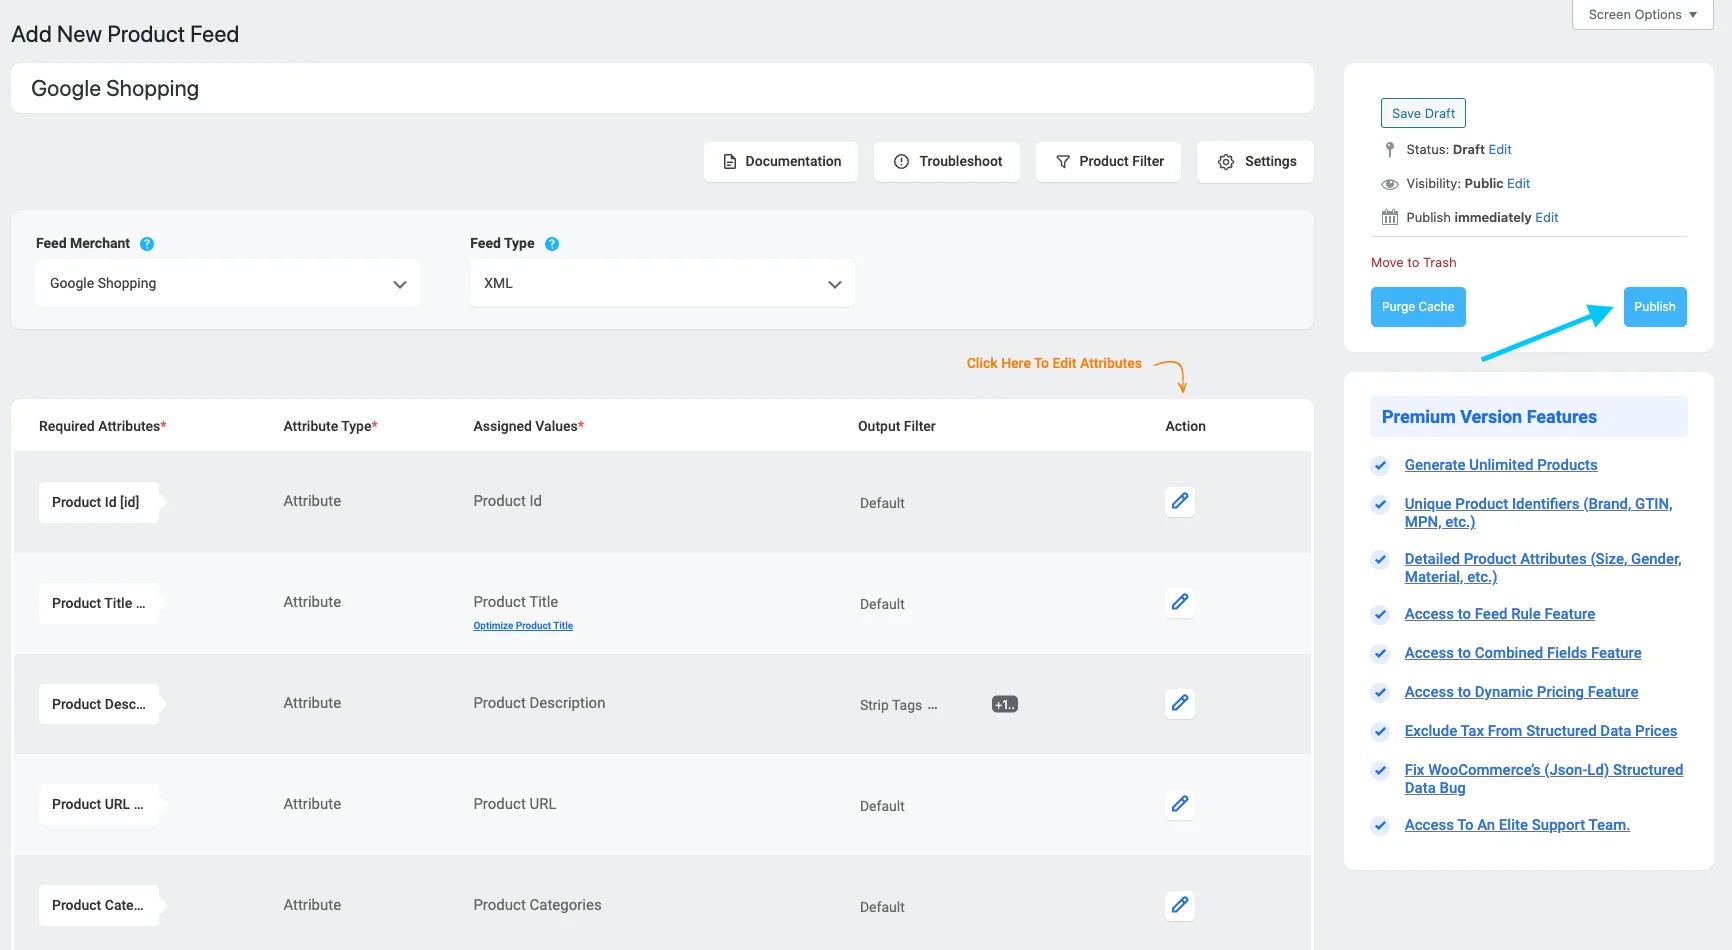
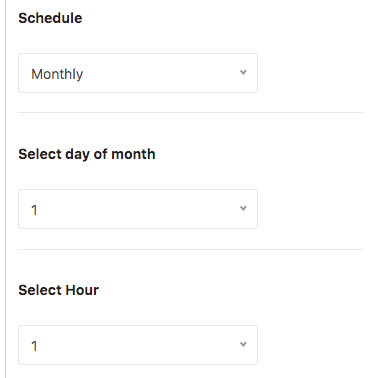
On your PFM dashboard –

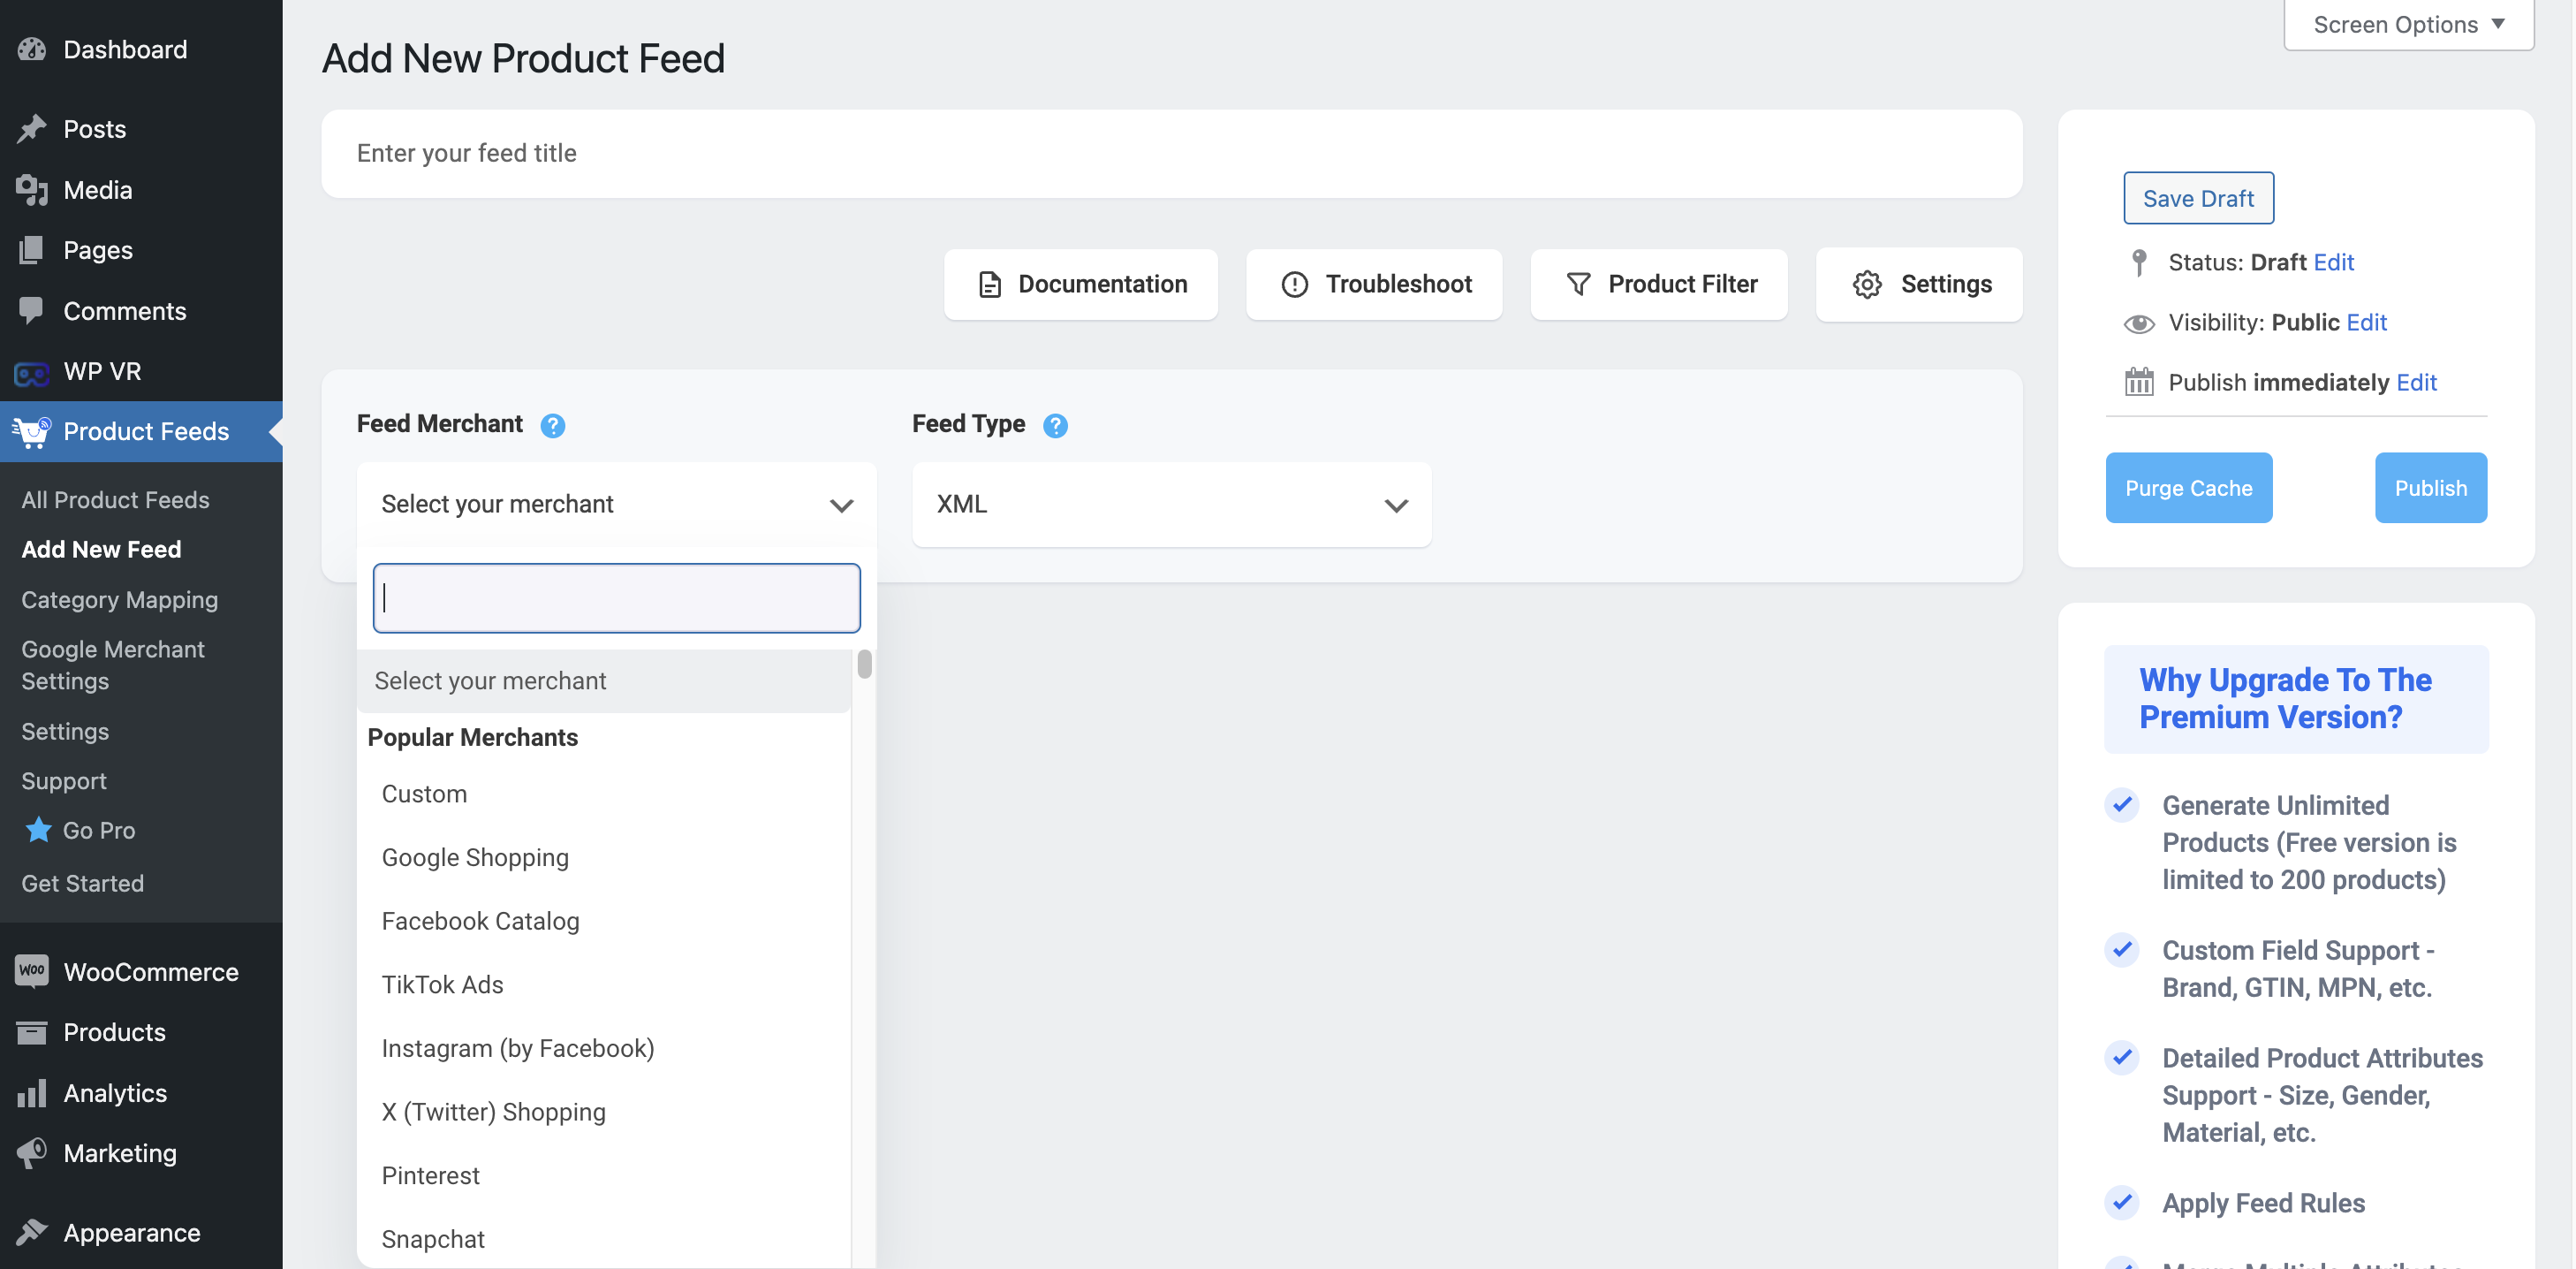
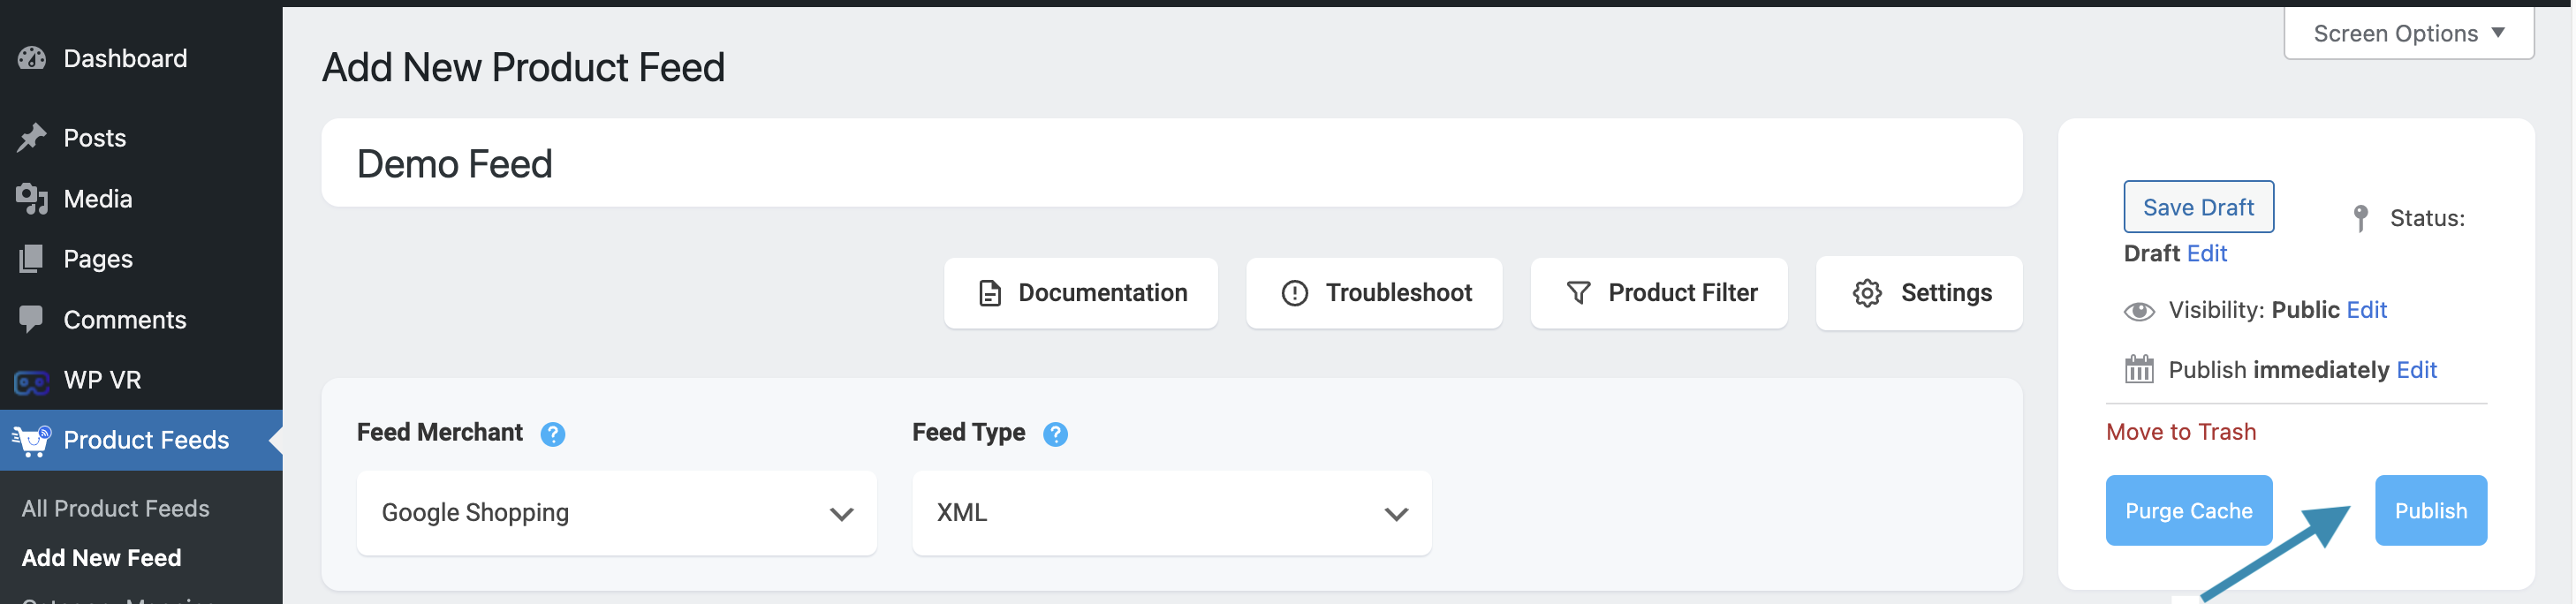
  1. Click on Add New Feed.
  2. Enter A feed title.
  3. Select Google from the merchant list.

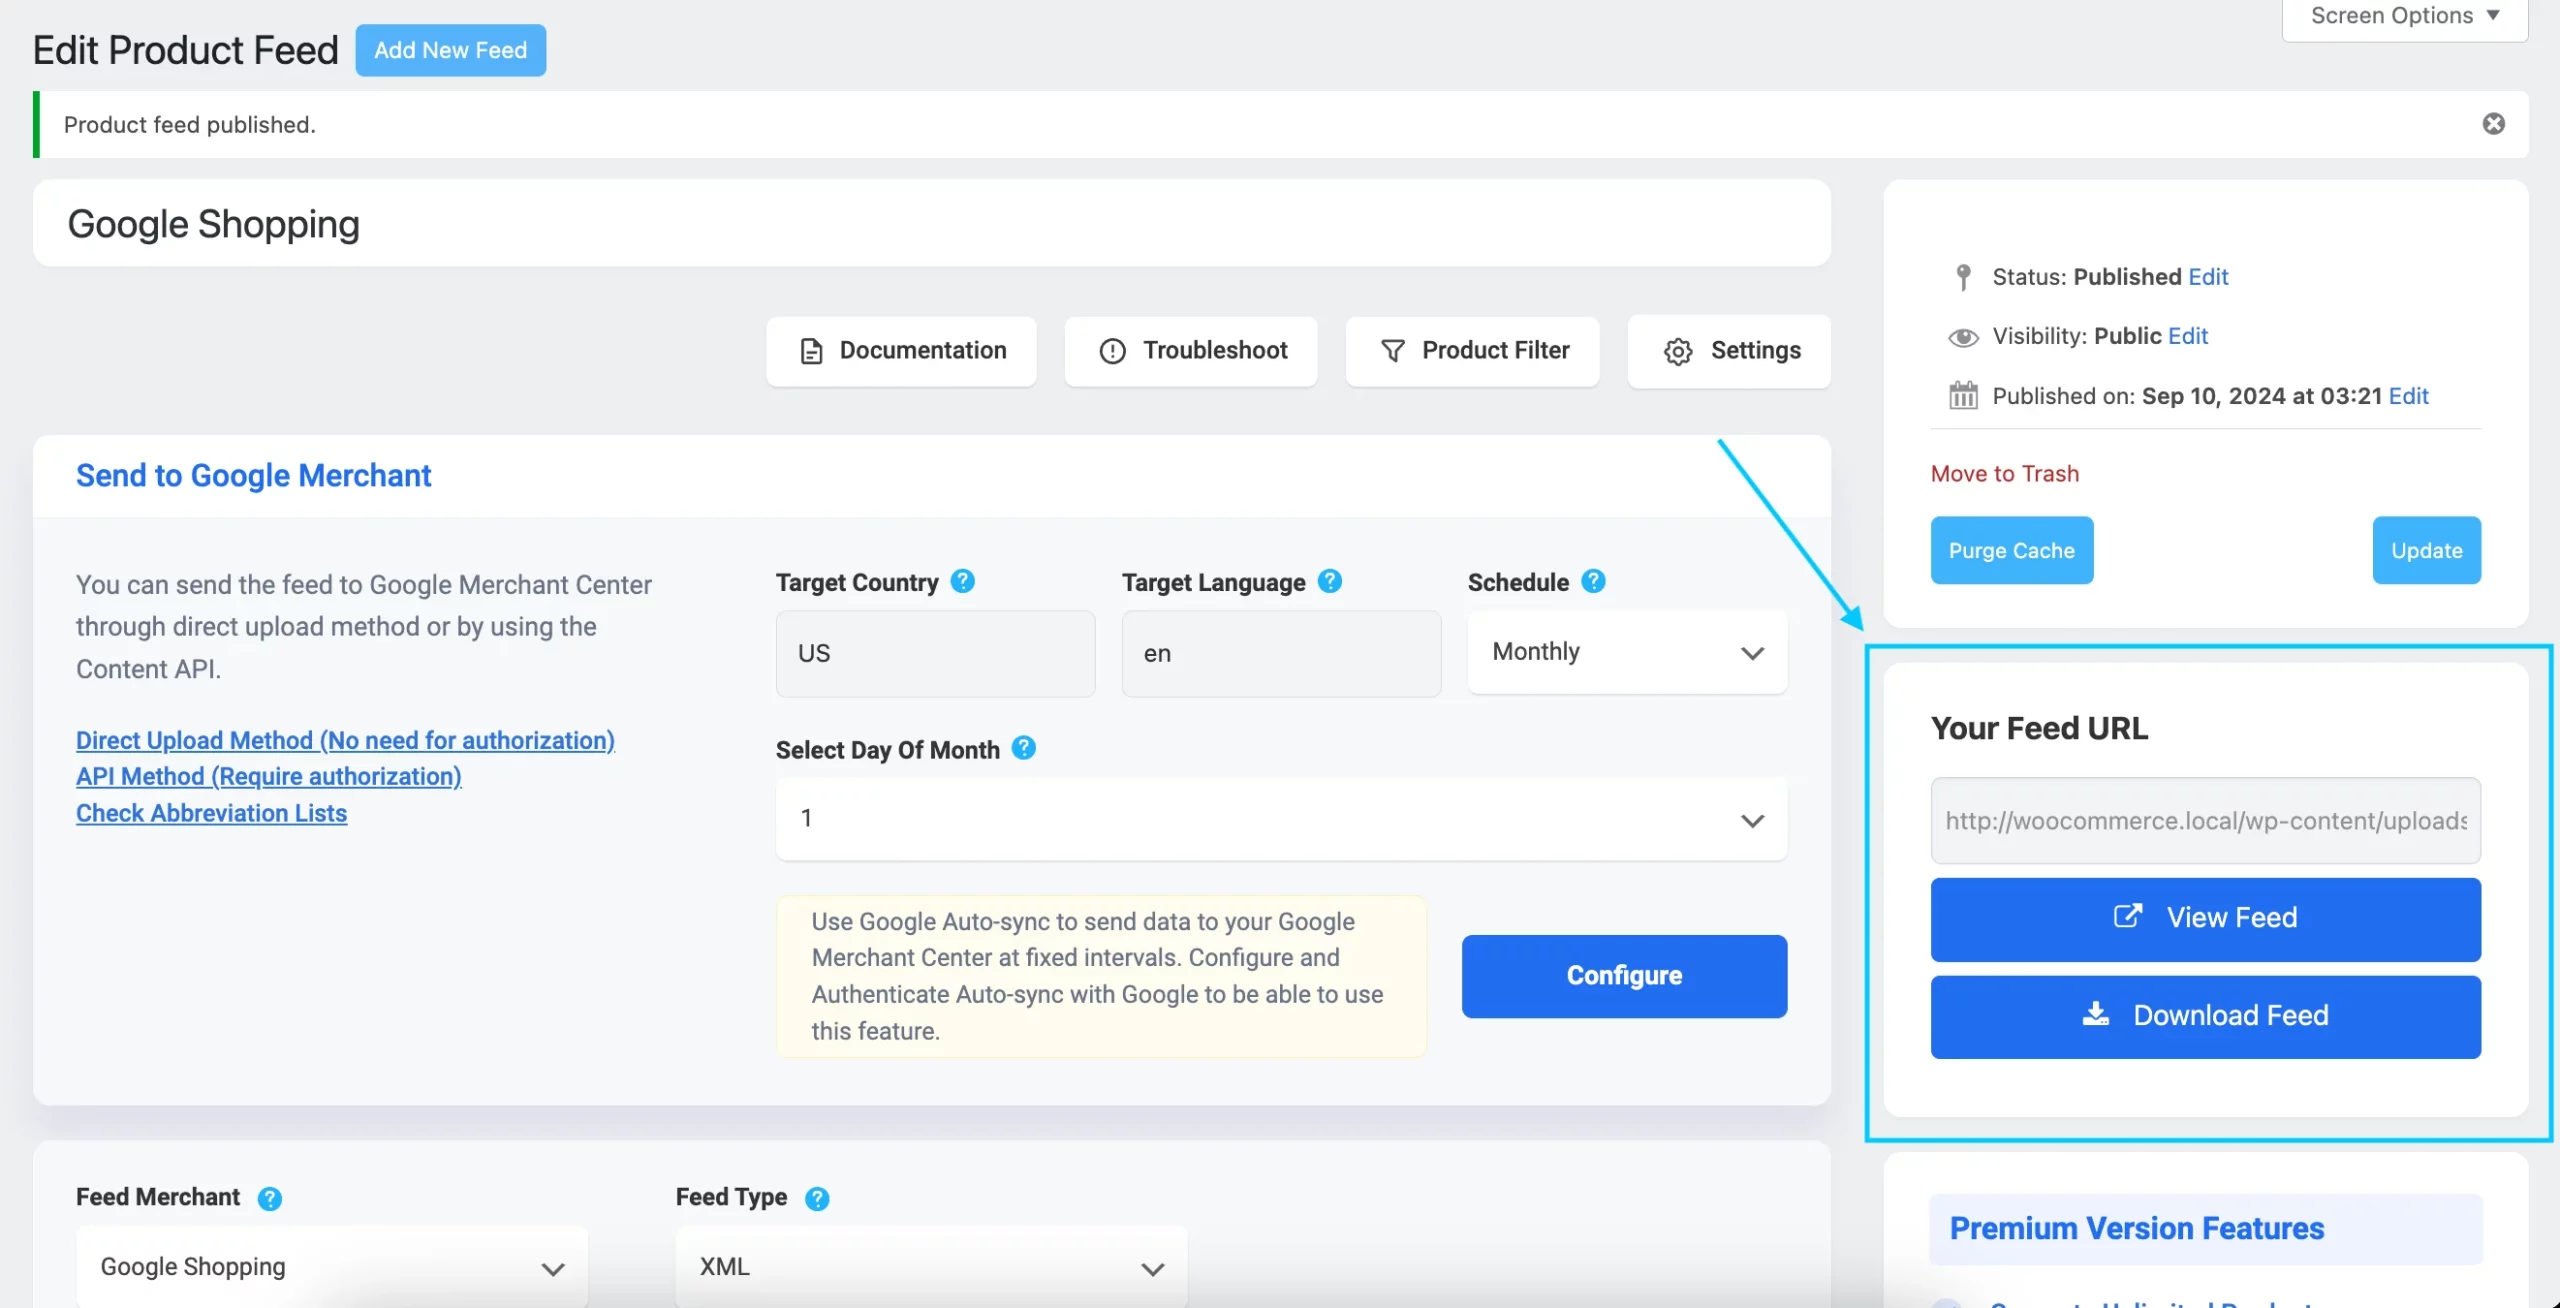
Once you map all the attributes with the correct product data, click on the publish button.

And, your feed will be ready to upload in the Google Merchant Centre. This way you can pull up Google merchant center optimization very easily.

Create product feeds in 3 simple steps

Common Errors While Optimizing Google Shopping Feed

Even with the best intentions, it’s easy to make mistakes when optimizing your Google Shopping feed. These errors can hurt your product visibility and lead to missed opportunities. Here are some of the most common ones you should watch out for:

  • Leaving out critical product attributes: Forgetting to include fields like GTIN or product category can cause Google to disapprove your product listings. For instance, if you’re selling branded shoes and don’t add the correct GTIN, your listing might never reach the right audience.
  • Using vague or generic titles: Titles like “Stylish Shirt” don’t help shoppers or Google understand what you’re selling. Be specific: “Men’s Cotton Polo Shirt – Navy Blue, Size L” works much better.
  • Uploading low-quality product images: A blurry or poorly cropped image can deter shoppers. Always use high-resolution images that clearly display your product.
  • Incorrect pricing or availability: If your feed shows a different price or indicates “in stock” when your product is actually sold out, shoppers will lose trust, and Google might flag your listing.
  • Missing keywords in descriptions: A plain description without relevant search terms can prevent your product from showing up in searches. Use keywords naturally in a way that highlights your product’s benefits.
  • Skipping regular feed updates: Product details, like prices and stock levels, change frequently. Not keeping your feed updated can lead to outdated information being displayed, which frustrates shoppers.

Read our guide if you want to know more about the google feed errors.

Anmerkung des Autors

Since WooCommerce is your source of earning money, you need to invest some time to optimize your Google shopping feed and then go for promotions.

And when it comes to product promoting your products, listing products on Google Shopping is a must.

The tactics mentioned above are just 6 among many other ways you can do google merchant center optimization or even Google Shopping ads optimization.

If you haven’t already, start optimizing your product data and make your marketing efforts fruitful.

FAQs

1. How often should you update your Google Shopping feed?

You should update your feed whenever product details like price, stock, or availability change. Regular updates keep your listings accurate and improve performance.

2. What happens if your product images are low quality?

Low-quality images can reduce clicks and conversions. Google might even disapprove your listings if images don’t meet their guidelines.

3. Why is GTIN important for your products?

GTIN helps Google identify and categorize your products accurately. Without it, your listings might not show up in relevant searches.

4. Can incorrect shipping details impact your feed?

Yes, inaccurate shipping info can confuse shoppers and lead to lower sales or negative reviews. Always double-check your shipping parameters.

5. Do product titles affect search visibility?

Absolutely. Clear, specific titles with relevant details improve your product’s chances of appearing in the right searches.


Kategorien
Guide Product Feed Manager For WooCommerce WooCommerce

How To Generate WooCommerce Google Product Feed – With 6 Simple Steps

Wenn Sie einen WooCommerce-Shop besitzen, müssen Sie sich bei der Werbung für Ihre Produkte etwas mehr Mühe geben.

Eine Möglichkeit, wie die meisten WooCommerce-Geschäfte Erfolg haben, ist die Werbung für ihre Produkte über Google Shopping.

As a WooCommerce store owner, you can get numerous opportunities to showcase your products with Google Shopping ads.

But, there is a big issue that most store owners face.

To upload product feed files properly in the format that Google suggests.

This article will guide you through the steps of building a Woocommerce Google shopping product feed with WooCommerce with 6 simple steps(VERY EASY)

Now, I am here using a plugin Product Feed Manager For WooCommerce, and going to show you how you can generate a Woocommerce Google shopping product feed with JUST A FEW CLICKS.

Tool zum Generieren von WooCommerce Google-Produkt-Feed 

First, you need to make sure that the Product Feed Manager For WooCommerce is installed and activated.

PFM plugin

Jetzt können Sie damit fortfahren, den WooCommerce Google-Produkt-Feed effizient zu generieren.

6 Easy Steps To Generate WooCommerce Google Product Feed

Um einen genauen WooCommerce Google Product Feed zu erstellen, müssen Sie die folgenden 10 einfachen Schritte befolgen:

Lassen Sie uns nun die Schritte im Detail nachvollziehen:

Schritt 1 - Neuen Feed hinzufügen

Gehen Sie zu Dashboard > Produkt-Feed > Neuen Feed hinzufügen

PFM feed title

Sie führt Sie zur folgenden Seite:

Adding title in PFM

Vergeben Sie jetzt einen Titel für dieses Produkt-Feed.

Schritt 2 - Wählen Sie Ihren Händler

Wählen Sie in der Dropdown-Liste den Händler aus, bei dem Sie Ihre Produkte auflisten möchten. Hier wählen Sie Google Shopping.

select you merchant options-PFM

Once you select Google Shopping, you’ll see all the required Google Shopping feed attributes listed on the page.

google shopping attributes in PFM

Schritt 3 - Konfigurieren Sie die nicht zugeordneten Attribute

Auf der Seite zur Erstellung des Feeds sehen Sie, dass die Werte für fast alle Attribute entsprechend eingestellt sind.

As you can see here for the Manufacturer (brand)the values are set as static.

google shopping product attribute PFM

but for Google Product Categories, the values are not set.

Sie müssen die richtigen Werte für diese Attribute zuordnen.

Schritt 4 - Option "Filter & Einstellungen" konfigurieren

Sie können verschiedene Filter verwenden, um die Produkte auszuwählen, die Sie in Ihren Feed aufnehmen möchten.

Product filter options for PFM

Sie können auch verschiedene Einstellungsoptionen je nach Ihren Vorlieben konfigurieren.

Setting options of PFM

Schritt 5 - Erzeugen der Produktzufuhr 

Sobald die gesamte Konfiguration eingerichtet ist, scrollen Sie zur oberen rechten Seite und veröffentlichen Sie den Feed.

Publish button in PFM

Daraufhin wird der Ladebalken für die Futtermittelerzeugung angezeigt.

Sobald der Ladevorgang abgeschlossen ist, ist Ihr Futter fertig.

Now, you will be able to view the feed, copy the feed link, and download the feed.

Schritt 6 - Hochladen WooCommerce Google Product Feed für die Förderung 

Sie können nun den generierten Produkt-Feed herunterladen und in Ihr Google Merchant Center hochladen.

Wenn Sie Ihren WooCommerce-Shop mithilfe unseres Plugins automatisch mit Google Shopping synchronisiert haben, können Sie die Daten direkt über die Option "An Google senden" senden.

sent to google merchant

Under this option, you can set your schedule according to your own will, either WeeklyMonthly, or Hourly basis. Once you select the schedule, click on the Green button Send To Google.

Und das war's. Der Feed wird an Google gesendet und regelmäßig gemäß Ihrem festgelegten Zeitplan aktualisiert.

Falls Sie nicht wissen, wie Sie Ihren WooCommerce-Shop mit Google automatisch synchronisieren können, indem Sie Product Feed Manager For WooCommerce verwenden, lesen Sie diesen Artikel.

Generate WooCommerce Google Product Feed with Product Feed Manager

The simplest yet most efficient product feed management plugin for creating a Google Shopping feed for WooCommerce is Product Feed Manager for WooCommerce.

PFM google feature page

Everything that the Google Merchant Feed (also known as the Google Shopping Feed) requires will be provided to you.

This plugin is a very easy-to-use Google shopping feed generator.

If you still having confusion, go through this video tutorial :

Schlussfolgerung

Hopefully, after this complete guide, you will have no issues in generating WooCommerce Google Product Feed.

Fangen Sie also an, Ihre Produkte über Google Shopping zu bewerben, und die Konversionsrate steigt.

Kategorien
Guide Product Feed Manager For WooCommerce WooCommerce

Complete Guide To WooCommerce Product Feed – Google Shopping & Facebook [2024]

Das Online-Shopping hat in den letzten zehn Jahren stark zugenommen. Über 85% der Menschen weltweit bevorzugen den Online-Einkauf gegenüber dem Besuch physischer Geschäfte (laut alphr.com).

Many WooCommerce stores are doing exceptionally well and have achieved three times more sales than they used to about a few years ago.

Wussten Sie, dass Sie auch Ihren Ladenumsatz in kürzester Zeit verdreifachen können?

Aber was ist das Geheimnis?

Nun, der Schlüssel ist ...
Wenn Sie Ihren Produkt-Feedauf die richtige Art und Weise erstellen und über Google Shopping Ads und Facebook Dynamic Ads bewerben, können Sie Ihre Verkäufe sofort ansteigen sehen.

Lassen Sie mich das erklären.

Google und Facebook haben das größte Publikum. Die Werbung auf ihren Händlerplattformen kann Ihre Verkäufe im Handumdrehen ankurbeln, WENN SIE GERECHT sind.

Today, you will get a complete step-by-step guide on how to generate your WooCommerce Product Feed in the most optimized way and skyrocket your store performance.

Am Ende dieses Leitfadens werden Sie in der Lage sein 

  • Set up proper WooCommerce product feed in the most optimized way for Google Shopping and Facebook Dynamic Ads
  • Generieren Sie in Minutenschnelle genaue und leistungsgerechte Produktzuführung
  • Laden Sie den Feed auf Ihre gewünschte Plattform hoch und sehen Sie, wie Ihre Verkäufe steigen

Inhaltsverzeichnis


1. WooCommerce Produkt-Feed für Google Shopping-Anzeigen
1.1 Wie man den WooCommerce Google Product Feed optimal einrichtet
1.2 Google-Produkt-Feed-Beispiele

2. WooCommerce-Produkt-Feed für dynamische Facebook-Anzeigen
2.1 So richten Sie den WooCommerce-Facebook-Produkt-Feed auf optimale Weise ein
2.2 Facebook-Produkt-Feed-Beispiele

3. Wie man mit dem richtigen Tool einfach einen Produkt-Feed generiert

Jetzt tauchen wir in die Sache ein.

What is a WooCommerce Product Feed?

To sell your products on Google Shopping, Facebook Marketplace, or Instagram Shop, you need to create the PROPER WooCommerce product data feeds.

So, What it is?

Basically, when you create a product feed for your online store, it includes all the important information about your products.

Then, when you upload this feed to a marketplace, like Google Shopping, the platform uses that data to list your products for sale.

Those data are basically called product attributes or product feed attributes that match with the marketplace.

This is how a WooCommerce Product Feed Works!

Let’s make you understand this with Facebook!

So, when you send your store’s products to Facebook, it takes important info from your list to show your stuff on your Facebook catalog feed.

When someone looks for something, Facebook uses your product details to show ads that match.

If they like what they see, they can click on the ad and go straight to your Facebook store to check it out.

Product feed manager to Facebook marketplace
Source: Freepik

This can bring more people to your site and increase your sales on WooCommerce on a large scale!

How Does Product Feed Attribute Work

Product feed attributes tell you all the important stuff like what the product looks like, how much it costs, and even what size it is.

These attributes help your customers find what they are looking for when shopping online.

For example, if you’re looking for a shirt, attributes like color and size make it easy to find the right one.

Search engines and online shopping platforms use these attributes to match up what your customers are looking for with the right products.

The more accurate and detailed the attributes are, the better chance a product has of showing up in search results.

This means more people will see it and maybe even buy it.

1. WooCommerce-Produkt-Feed für Google-Shopping-Anzeigen

WooCommerce Produkt-Feed für Google Shopping

The most popular and effective merchant shop for promoting your WooCommerce products is Google.

Sie müssen von Google Shopping Ads gehört haben. Immer wenn Sie nach einem bestimmten Produkt suchen, erhalten Sie so etwas:

Google Shopping Ads - WooCommerce Google Produkt-Feed
Google Shopping Ads

Diese sind sehr ansprechend und die meisten Käufer finden ihre gewünschten Produkte über diese Anzeigen.

Ihre Produkte aus Ihrem WooCommerce-Produkt-Feed können ebenfalls in diesen Ergebnissen erscheinen, wenn Sie es richtig machen.

And this guide will help you execute it successfully with ease.

First, set up an account on Google Merchant Center.

Sobald Sie ein Konto haben, müssen Sie Ihren WooCommerce-Produkt-Feed hochladen, um über Google zu werben. Google hat jedoch einige Feed-Spezifikationen, die Sie befolgen müssen. Lassen Sie uns das also genauer untersuchen.

Wie man den WooCommerce Google-Produkt-Feed am besten einrichtet

Wenn Sie Ihre Produkte hochladen, sucht Google nach einigen spezifischen Daten.

Lassen Sie uns untersuchen, welche Daten Sie in Ihren Feed aufnehmen müssen, und ich werde Ihnen Beispiele für die einzelnen Daten geben, damit Sie wissen, wie der WooCommerce Google-Produkt-Feed am besten generiert werden kann.

Ein richtiger Google-Produkt-Feed (im XML-Format) eines einzelnen Produkts sieht normalerweise wie folgt aus:

<rss xmlns:g="http://base.google.com/ns/1.0" version="2.0" >
    <channel>
    <title> The name of the feed file </title>
    <link> Your website link </link>
    <description> Description of the content </description>
    <item>
        Product data attributes
    </item>
    </channel>
</rss>

**Here the item tag ( <item> </item> ) encapsulates the data of a product. For multiple products, you simply add more item tags and the product data within, and the rest remains the same.

Nun enthalten die Produktdaten eine Menge Informationen, die Sie den jeweiligen Attribut-Tags innerhalb des Artikel-Tags zuordnen müssen.

Für Google Shopping Ads werden die folgenden Daten für jedes Ihrer Produkte benötigt:

  • Produkt-ID
  • Produkt-Titel
  • Produktbeschreibung
  • Produkt-Link/URL
  • Produkt-Kategorie
  • Google-Produktkategorie
  • Produkt-Bild-URL
  • Verfügbarkeit der Bestände
  • Regulärer Preis
  • Produkt-Zustand
  • Hersteller/Markenname
  • GTIN (Global Trade Item Number)
  • MPN (Hersteller-Teilenummer)
  • Kennung
  • Inhalt für Erwachsene
  • Multipack
  • Bündel
  • Material
  • Altersgruppe
  • Farbe
  • Geschlecht
  • Größe
  • Muster
  • Objektgruppen-ID

Einige dieser Attribute hängen vom Produkttyp und seinen Varianten ab. Nachstehend finden Sie eine ausführlichere Erklärung mit Beispielen, wie jede dieser Daten in Ihrem Speicher für eine maximale Ausgabe aussehen sollte.

Jedes Attribut ist im folgenden Format auf dem Feed enthalten:


<g: Attribute name > Attribute Data </g: Attribute name >

Sie erhalten einen Link zu einer Beispielprodukt-Feed-Datei später in diesem Artikel, nachdem ich die detaillierten Anweisungen zu den Attributen und einige Tipps durchgegangen bin.

== Click here to skip the details and tips, and go to view the sample product feed. ==

Schauen wir uns die Details an, um zu verstehen, wie Sie diese Daten einschließen sollten, welches Format die Feed-Datei hat und welche Daten aufgrund der Produkte in Ihrem WooCommerce-Shop ein- bzw. ausgeschlossen werden sollten.

Produkt-Feed-Manager für WooCommerce

Produkt-ID

Attributid
Beispielwert671
Struktur der Futtermittel<g:id>671</g:id>

It is a unique identifier for your product in your store.
On WooCommerce, you should see the ID when you browse the product list.

Produkt-ID

Sie können jedoch auch die Produkt-SKU als Produkt-ID verwenden.

Produkt-Titel

AttributTitel
BeispielwertT-Shirt mit rotem Logo Rex
Struktur der Futtermittel<g:title>
    <![CDATA[ Red Logo Rex T-shirt ]]>
</g:title>

Es ist der Name des anzuzeigenden Produkts.
Auf WooCommerce sollten Sie den Titel des Produkts sehen, wenn Sie die Produktliste durchsuchen.

Produkttitel bei WooCommerce - PFM

When you set the product title, do specify any special feature, such as its color and the brand name, along with the product. This will create more attraction for buyers.

However, you are not allowed to use any other promotional touch to the tile (for example, adding “free shipping” or “discounted price” or using all caps).

In the case of variable products, include the brand name in the title. Rather than including just ‘any’ feature to the main title, mention the feature that makes it a variant of the product.

For example, if a product is a Logo Rex T-shirt and has variations of Red and Blue, then on your Google Product Feed, one variation should be named “Logo Rex T-shirt – Red” and the other one “Logo Rex T-shirt – Blue”.

So, the feed data view will look like this individually:

<g:title>
    <![CDATA[ Logo Rex T-shirt - Red ]]>
</g:title>
<g:title>
    <![CDATA[ Logo Rex T-shirt - Blue ]]>
</g:title>

Produktbeschreibung

AttributBeschreibung
BeispielwertDies ist ein rotes T-Shirt. Es wurde nur zu Testzwecken erstellt.
Struktur der Futtermittel<g:description>
    <![CDATA[ This is a Red T-shirt. It was created for testing purposes only. ]]>
</g:description>

Fügen Sie eine korrekte Beschreibung des von Ihnen verkauften Produkts hinzu. Stellen Sie sicher, dass Sie alle wichtigen Merkmale hervorheben, die es haben kann, um Käufer anzuziehen.

Wenn Sie ein Produkt bearbeiten, können Sie seine Kachel, den Link und die Beschreibung wie in der Abbildung unten gezeigt einstellen:

Produkt-Bearbeitungsseite

Even though you should mention the exclusive features and benefits of the description, you are not allowed to use any extensive promotional touch in the description (for example, adding “free shipping” or “discounted price” or using all caps to highlight a certain point).

Außerdem sollten Sie keine Links zu einer anderen Webseite einfügen oder die Produkte mit denen der Konkurrenz vergleichen.

Produkt-Link/URL

AttributLink
Beispielwerthttps://www.yourwebsite.com/red-logo-rex-t-shirt/
Struktur der Futtermittel<g:link>
    <![CDATA[ https://www.yourwebsite.com/red-logo-rex-t-shirt/ ]]>
</g:link>

Dies ist der Link zu Ihrer Produktseite.
Wenn Sie ein Produkt bearbeiten, sehen Sie den Permalink direkt unter dem Titel-Feld. Das ist die URL zu Ihrem Produkt.

Produkt-Permalink

When people find your product on Google, clicking on that Ad will take the potential buyer to the link you provide here.

Am besten ist es, den Produkttitel auf dem Link anzugeben, doch viele ziehen es vor, stattdessen die Produktkennung zu verwenden, und einige verwenden beide.

Außerdem müssen Sie sicherstellen, dass Ihre Website-Domäne verifiziert ist und mit "http" oder "https" beginnt.

Produkt-Kategorie

Attributprodukt_typ
BeispielwertBekleidung
Struktur der Futtermittel<g:product_type>
    <![CDATA[ Clothing ]]>
</g:product_type>

This is the product type or category that you set on your store.
When editing a product on WooCommerce, on the right side, you will have the option to set a Category.

Complete Guide To WooCommerce Product Feed - Google Shopping &amp; Facebook [2024] 1

This attribute is optional, but we recommend you use it to create a better visualization for viewers.

Google-Produktkategorie

Attributgoogle_produkt_kategorie
BeispielwertKleidung und Accessoires > Bekleidung
Struktur der Futtermittel<g:google_product_category>
    <![CDATA[ Apparel & Accessories > Clothing ]]>
</g:google_product_category>

Google has a category list of its own, which you need to use to categorize your products on Google Shopping. You must set this attribute according to their required taxonomy in order to get your Google Product Feed approved.

Klicken Sie hier, um die Google-Kategorieliste und -Taxonomie anzuzeigen.

Daher können Sie entweder Ihre WooCommerce-Shop-Kategorien entsprechend einstellen oder Ihre eigenen Kategorien mit Hilfe eines Plugins bei der Erstellung des Produkt-Feeds den Google-Kategorien zuordnen lassen.

Ich verwende den Product Feed Manager für WooCommerce, um das Category Mapping anzuwenden.

Kategorie-Zuordnung mit WooCommerce Product Feed Manager
Beispiel für Kategorie-Mapping

As you can see, on the left is a list of all the categories available in my store. On the right, get the option to map them with Google Categories.

Produkt-Bild-URL

Attributimage_link
Beispielwerthttps://www.yourwebsite.com/redtee394.png
Struktur der Futtermittel<g:image_link>
    <![CDATA[
        https://www.yourwebsite.com/redtee394.png
    ]]>
</g:image_link>

Dies wird der Link zum Hauptbild Ihres Produktes sein.
Wenn Sie ein Produkt bearbeiten, scrollen Sie auf der rechten Seite nach unten, und Sie sollten die Möglichkeit finden, ein Produktbild hinzuzufügen.

Complete Guide To WooCommerce Product Feed - Google Shopping &amp; Facebook [2024] 2

Welches Bild Sie auch immer hier verwenden, Sie müssen die URL zu diesem Bild für das Attribut "image_link" angeben.

Sie sollten ein überzeugendes Bild des Produkts ohne Werbetext oder Wasserzeichen bereitstellen. Vermeiden Sie auch die Verwendung von Platzhalterbildern.

Denken Sie daran, dass dieses Image der wichtigste Faktor ist, um mehr Kunden zu gewinnen. Die meisten Menschen werden Ihr Produkt nur dann bemerken, wenn ihnen gefällt, was sie sehen. Stellen Sie also sicher, dass Sie ein klares Bild mit hoher Qualität liefern.

Lagerstatus/Verfügbarkeit

AttributVerfügbarkeit
Beispielwertvorrätig
Struktur der Futtermittel<g:availability>in_stock</g:availability>

Dies bedeutet, dass das Produkt noch vorrätig oder ausverkauft ist.
Blättern Sie auf der Produktbearbeitungsseite nach unten zum Abschnitt mit den Produktdaten. Wählen Sie Inventar und Sie sollten die Möglichkeit erhalten, den Lagerstatus zu setzen.

Vorrätig

This value will be added under the attribute “availability” when generating a Google product feed. Google accepts the values “in_stock”, “out_of_stock”, or “preorder.”

WooCommerce gibt Ihnen standardmäßig die Optionen "auf Lager" und "nicht auf Lager". Für die Option "Vorbestellung" müssen Sie zusätzliches Coding oder ein anderes Plugin verwenden.

Tipp:
Sie denken vielleicht darüber nach, warum Sie Produkte hinzufügen sollten, die "vergriffen" sind. Nun, manchmal kann man die "out of stock"-Option als psychologische Taktik einsetzen.

Hier ist ein Beispiel:
Nehmen wir an, Sie haben ein T-Shirt mit 2 Varianten, Rot und Schwarz, und sagen wir, die schwarzen sind ausverkauft.

Wenn sich die Interessenten die Produkte ansehen, werden sie sehen, dass es zwei ähnliche Produkte gibt und eine Variante ausverkauft ist.

Das könnte bedeuten, dass dieses T-Shirt ziemlich beliebt ist. Daher wird es bestimmte Interessenten dazu verleiten, über den Kauf des Roten nachzudenken.

Regulärer Preis

AttributPreis
Beispielwert26.53 USD
Struktur der Futtermittel<g:price>26.53 USD</g:price>

Dies ist der Preis des Produkts (in der Regel vor Steuern).
Blättern Sie auf der Produktbearbeitungsseite nach unten zum Abschnitt mit den Produktdaten. Auf der Registerkarte Allgemein erhalten Sie die Möglichkeit, den regulären Preis festzulegen.

Preis

This value will be added under the attribute “price” when generating a WooCommerce Google product feed.

Make sure you are inputting the accurate price, with the ISO currency code as the suffix.

Bitte beachten Sie, dass der Preis nicht "0" sein kann. (Der Preis "0" ist nur für mobile Geräte akzeptabel, die auf vertraglicher Basis verkauft werden).

Wenn Ihre Produkte für die USA oder Kanada bestimmt sind, dann erheben Sie keine Steuern auf den Preis. Für jedes andere Land müssen Sie die Mehrwertsteuer oder die GST oder eine andere regionale Steuer hinzufügen.

Produkt-Zustand

AttributBedingung
BeispielwertNeu
Struktur der Futtermittel<g:condition>
    <![CDATA[ New ]]>
</g:condition>

Verwenden Sie dieses Attribut, um zu kennzeichnen, ob Ihr Produkt brandneu oder überholt ist. Sie können die Werte "neu", "überholt" oder "gebraucht" zur Definition des Zustandes verwenden.

WooCommerce hat kein Feld, um den Zustand des Produkts zu definieren, daher müssen Sie es selbst zum Produkt-Feed hinzufügen.

Der Product Feed Manager For WooCommerce bietet Ihnen jedoch die Möglichkeit, das Feld für die Produktbedingungen für alle Produkte hinzuzufügen.

Hersteller/Markenname

AttributMarke
BeispielwertRexTest
Struktur der Futtermittel<g:brand>
    <![CDATA[ RexTest ]]>
</g:brand>

It is mandatory to provide the manufacturer/brand name in order to add a product to Google Shopping. Ideally, you should also mention the brand name on the product tile.

Aber WooCommerce enthält kein "Marken"-Feld für Ihre Produkte. Daher können Sie für jedes Produkt ein benutzerdefiniertes Feld erstellen oder ein Plugin verwenden, um das Markenfeld zu jedem Produkt in Ihrem WooCommerce-Shop hinzuzufügen.

However, movies, books, or musical records don’t require you to include a brand name. In that case, you can keep the brand section empty.

GTIN (Global Trade Item Number)

Attributgtin
Beispielwert123465465464
Struktur der Futtermittel<g:gtin>
    <![CDATA[ 123465465464 ]]>
</g:gtin>

Um Produkte über Google Shopping Ads zu bewerben, müssen Hersteller aus den USA oder Kanada, die eine GTIN-Zertifizierung haben, die GTIN-Nummer für jedes Produkt auf Ihrem Google Product Feed angeben.

Für andere Hersteller

  • in Nordamerika, stellen Sie UPC
  • in Europa, EAN zur Verfügung stellen
  • in Japan, stellen Sie JAN

Für ein Buch müssen Sie jedoch stattdessen die ISBN angeben, und für Multipacks müssen Sie die ITF-14 angeben.

MPN (Hersteller-Teilenummer)

AttributMPN
BeispielwertRex0011Test
Struktur der Futtermittel<g: MPN>
    <![CDATA[ Rex0011Test ]]>
</g: MPN>

Falls ein Produkt keine GTIN (oder UPC, EAN, JAN) hat, müssen Sie stattdessen die MPN angeben.

You may also use the product SKU as the value of its MPN when you do not have both GTIN or MPN (provided that you didn’t use the SKU as its product id).

Now, WooCommerce doesn’t provide fields for Brand, GTIN, or MPN by default. Hence, you need to input custom fields for every product manually.

However, I use the Product Feed Manager For the WooCommerce plugin which includes those fields on every product, as shown below:

Benutzerdefinierte Felder

Ich muss nur die richtigen Daten eingeben und sie als Werte der erforderlichen Attribute verwenden, wenn ich meinen WooCommerce-Produkt-Feed generiere.

Kennung vorhanden

AttributBezeichner_existiert
Beispielwertnein
Struktur der Futtermittel<g:identifier_exists>no</g:identifier_exists>

Sie haben bereits gelernt, dass die Angabe von GTIN oder MPN obligatorisch ist. Einige Produkte haben jedoch weder eine GTIN noch eine MPN.

Einige Produkte werden zum Beispiel nur lokal hergestellt und enthalten keine GTIN oder MPN.

In diesem Fall müssen Sie das Attribut "identifier_exists" verwenden und den Wert "no" zuweisen. 

Inhalt für Erwachsene

AttributErwachsene
Beispielwertja
Struktur der Futtermittel<g:adult>yes</g:adult>

Sie haben vielleicht einige erotische oder erwachsene Produkte. Es ist völlig in Ordnung, sie bei Google Shopping zu bewerben, solange Sie sie als Erwachseneninhalt kennzeichnen. Wenn Sie ein Produkt aus der Erwachsenenbranche einreichen, müssen Sie das Attribut "adult" verwenden und den Wert "yes" zuweisen.

Wenn Sie ein Geschäft betreiben, das vollständig in der Erotikbranche angesiedelt ist, z.B. ein lizenziertes Erotikgeschäft, dann benötigen Sie keine Attribute. Sie sollten lieber zu den Einstellungen Ihres Google Merchant Centers gehen und die Option wählen, die besagt, dass Ihr Unternehmen Produkte für Erwachsene liefert.

Multipack

AttributMultipack
Beispielwert8
Struktur der Futtermittel<g:multipack>8</g:multipack>

Ein Multipack ist, wenn Sie eine Gruppe von mehreren identischen Produkten als eine Einheit verkaufen, z.B. 8 Stifte zusammen.

This attribute is required for promotion in certain locations such as Australia, Brazil, Czechia, France, Germany, Italy, Japan, Netherlands, Spain, Switzerland, the UK, and the US.

You must include this attribute and assign its value to the number of products you assembled into a multipack.

Wenn das Multipack von seinem eigentlichen Hersteller und nicht von Ihnen zusammengestellt wird, brauchen Sie dieses Attribut nicht anzugeben.

Tipp:
Versuchen Sie, Multipacks in Ihrem Geschäft mit einem kleinen Rabatt anzubieten.

Wenn z.B. 1 Stift 10 Dollar kostet und Sie ein Multipack für 8 Stifte festlegen, dann versuchen Sie, statt 80 Dollar einen Rabatt zu geben und vielleicht 70 oder 75 Dollar zu verlangen. Dieser kleine Rabatt wird mehr Attraktivität schaffen.

Bündel

Attributis_bundle
Beispielja
Feed-Daten<g:is_bundle>yes</g:is_bundle>

Ein Bundle ist, wenn Sie mehrere Produkte nehmen und sie als ein einziges Paket verkaufen. In der Regel sind alle Produkte in einem Bündel in gewisser Weise miteinander verbunden und können auch ohne das Bündel einzeln verkauft werden.

Hier fungiert ein Produkt als Hauptprodukt, die übrigen sind Unterprodukte, die in einem Paket angeboten werden.

Sie können z.B. ein Produktpaket erstellen, das eine Kamera, eine Speicherkarte und eine Tragetasche enthält. Hier ist die Kamera das Hauptprodukt, während die Speicherkarte und die Tragetasche verwandte Unterprodukte in einem Bündel sind.

Für die Förderung von Bundles in Australien, Brasilien, Tschechien, Frankreich, Deutschland, Italien, Japan, den Niederlanden, Spanien, der Schweiz, dem Vereinigten Königreich und den USA müssen Sie dieses Attribut verwenden und ihm den Wert "ja" oder "wahr" zuweisen.

Material

AttributMaterial
BeispielLeder
Feed-Daten<g:material>Leather</g:material>

Falls Sie ein Produkt hochladen möchten, dessen Material ein bemerkenswertes Merkmal ist, können Sie dieses Attribut verwenden. Sie müssen gültige Materialnamen verwenden.

Falls das Produkt aus mehreren Materialien hergestellt wurde, nennen Sie alle Materialien, wobei Sie diese mit "/" voneinander trennen. Zum Beispiel Baumwolle/Leder/Polyester.

**For promoting Apparel & Accessories in Brazil, France, Germany, Japan, the UK, and the US, you need to provide more attributes, including age group, color, gender, and size. For variable products, you must include an extra attribute called item_group_id. So let’s learn more about them.

Altersgruppe

AttributAlter_Gruppe
BeispielwertKinder
Struktur der Futtermittel<g:age_group>kids</g:age_group>

(Dieses Feld ist nur erforderlich, wenn Ihr Produkt unter die Kategorie Kleidung und Accessoires oder deren Unterkategorie fällt)

Sie müssen zuordnen, für welche Altersgruppe dieses Produkt bestimmt ist.

Google wird die folgenden Werte akzeptieren:

  • Neugeborenes
  • Kleinkind
  • Kleinkind
  • Kinder
  • Erwachsene

In the case of variable products, assign a separate age group for each variant.

Farbe

AttributFarbe
BeispielwertTango-Rot
Struktur der Futtermittel<g:color>Tango Red</g:color>

(Dieses Feld ist nur erforderlich, wenn Ihr Produkt unter die Kategorie Kleidung und Accessoires oder deren Unterkategorie fällt).

Sie müssen die Farbe des Produkts beschreiben (aber keine Farbcodes oder Einzelbuchstaben).

Wenn es mehrere Farben gibt, erwähnen Sie alle Farben und trennen Sie diese mit einem "/". Zum Beispiel Rot/Blau/Grün.

For variable products, assign a separate color for each variant and add it to the product title.

Tipp:
Es ist nicht notwendig, dass Sie eine allgemeine Farbe angeben müssen. Sie können eher einprägsame Farbnamen wie "Tango Red" statt nur "Red" verwenden, was für Käufer attraktiver ist.

Geschlecht

AttributGeschlecht
Beispielwertmännlich
Struktur der Futtermittel<g:gender>male</g:gender>

(Dieses Feld ist nur erforderlich, wenn Ihr Produkt unter die Kategorie Kleidung und Accessoires oder deren Unterkategorie fällt).

Beim Verkauf von Bekleidung sollten Sie angeben, für welches Geschlecht das Produkt bestimmt ist.

Google akzeptiert die folgenden Geschlechter:

  • männlich
  • weiblich
  • Unisex

Größe

AttributGröße
BeispielwertXL
Struktur der Futtermittel<g:size>XL</g:size>

(Dieses Feld ist nur erforderlich, wenn Ihr Produkt unter die Kategorie Kleidung und Accessoires oder deren Unterkategorie fällt).

Sie müssen dem Produkt einen entsprechenden Größenwert zuordnen.

For example, “XL” to define extra-large, or “15/32 slim” to define a 15-inch neck size, 32 inches sleeves, and a slim fit.

Für ein Produkt in Freegröße sollten Sie den Wert "Einheitsgröße", "OS", "Einheitsgröße für alle", "OSFA", "Einheitsgröße für die meisten" oder "OSFM" zuweisen.

Bei variablen Produkten weisen Sie für jede Variante eine eigene Größe zu, die Sie auch dem Titel des Produkts hinzufügen können.

Tipp: Halten
Sie eine Maßtabelle auf Ihrer Website bereit, um die hier genannten Größen zu definieren.

Wenn Sie beispielsweise die Größe als XL zugewiesen haben, erläutern Sie in der Tabelle die Höhe, Breite, Brustgröße usw. in Zoll oder cm, um Ihren Kunden eine Möglichkeit zu geben, zu überprüfen, ob diese Größe die richtige Passform ist.

Verschiedene Länder haben unterschiedliche Maße für die gleichen Größencodes, daher wird dies hilfreich sein.

Muster

AttributMuster
Beispielwertgestreift
Struktur der Futtermittel<g:pattern>Striped</g:pattern>

This field is only applicable to variable products. If you have different pattern designs for the same product, then you need to mention separate patterns for each variant using this attribute.

Objektgruppen-ID

Attributitem_gruppen_id
BeispielwertAB12345
Struktur der Futtermittel<g:item_group_id>AB12345</g:item_group_id>

Bei variablen Produkten, wenn die Abweichungen aufgrund einer der folgenden Ursachen auftreten:

Bei variablen Produkten, wenn die Abweichungen aufgrund einer der folgenden Ursachen auftreten:

  • Farbe
  • Größe
  • Muster
  • Material
  • Altersgruppe
  • Geschlecht

dann müssen Sie das Attribut "item_group_id" verwenden.

Alle Varianten desselben variablen Produkts haben die gleiche Artikelgruppen-ID. Dies zeigt an, dass es sich um Varianten eines einzigen Produkts handelt. Sie müssen also eine eindeutige Gruppen-ID für jedes variable Produkt wählen.

Google Produkt-Feeds Beispiele

Da Sie nun wissen, welche Details Sie benötigen, um Ihren WooCommerce-Produkt-Feed für Google zu generieren, lassen Sie uns nun einige Beispiele betrachten, um die Struktur zu verstehen.

Google akzeptiert verschiedene Dateiformate von Produkt-Feeds, die hochgeladen werden können. Das empfohlene Format ist jedoch XML.

Here’s a sample of a simple product feed:

Beispiel für einen Google-Produkt-Feed eines einfachen Produkts

Here’s a sample of a variable product feed:

Beispiel für den Google-Produkt-Feed eines variablen Produkts

These feeds can easily be generated using the plugin, Product Feed Manager For WooCommerce.

Once you have the product feed file, you can now manually upload it to your Google Shopping Center.

However, the plugin also allows you to auto-sync with Google Shopping directly.

This means the feed can automatically be generated and sent to Google, according to your scheduled time.

I’ll give you a proper tutorial on the plugin at the end of this article.
Or you can,

2. WooCommerce Produkt-Feed für dynamische Facebook-Werbung

WooCommerce Produkt-Feed für dynamische Facebook-Werbung

Facebook ist das größte soziale Medium und derzeit eine wichtige Plattform zum Hochladen und Bewerben von Produkten für Ihr Unternehmen.

Wenn Sie auf Facebook blättern, finden Sie oft gesponserte Beiträge, wie unten dargestellt:

Facebook Dynamische WerbeanzeigenBagdoom.com

Wie Sie sehen, gibt es die Schaltfläche "Jetzt einkaufen", und es gibt Pfeile, mit denen Sie innerhalb einer Galerie von Produkten für dasselbe Unternehmen streichen können.

Dies ist eine intelligente Art und Weise, für Ihre Produkte zu werben.

Als Besitzer eines Woocommerce-Geschäfts ist es ideal, Ihre Produkte über Facebook zu verkaufen, da Sie ein größeres Publikum erreichen.

Wenn Sie bestimmte Richtlinien befolgen, können auch Sie von der Verwendung dynamischer Facebook-Werbung profitieren und den ROI Ihres Geschäfts steigern.

Wie man den WooCommerce Facebook-Produkt-Feed am besten einrichtet

Facebook hat einige Richtlinien für die Produkt-Feed-Spezifikationen, die Sie befolgen müssen, damit Ihre Produkte für Facebook Dynamic Ads zugelassen werden.

Let’s take a look at the necessary data that you must submit for your product to be promoted on Facebook. 

I will give you examples for each data so that you know the most optimized way to generate the feed.

Ein Produkt-Feed (im CSV-Format) eines einzelnen Produkts für Facebook sieht normalerweise so aus:

Complete Guide To WooCommerce Product Feed - Google Shopping &amp; Facebook [2024] 3

**Here, the 1st row will be the list of attributes per column.

And then from the 2nd row onwards, each row is a product, with values assigned for attributes (or product data).

Nun erfordern dynamische Facebook-Werbung die folgenden Attributwerte für jedes Ihrer Produkte:

● Produkt-ID
● Produkttitel
● Lagerverfügbarkeit
● Produktzustand
● Produktbeschreibung
● Produktbild-URL
● Produkt URL ● Produkt URL
● Regulärer Preis
● Hersteller/Marke

● Google-Produktkategorie
● GTIN (Global Trade Item Number)
● MPN (Hersteller-Teilenummer)
● Größe
● Farbe
● Geschlecht
● Muster
● Begrenztes Sonderangebot
● Begrenzte Sonderangebotsdauer

Some of these attributes depend on the product type and its variants. Below is a more detailed explanation with examples of how each of these attributes should be assigned on your Facebook product feed for maximum output.

You will get samples of Facebook product feeds later on in this article after I go over detailed instructions on the attributes and some tips.

Schauen wir uns die Details an, um zu verstehen, welche Werte Sie jedem Attribut zuweisen sollten und welche auf der Grundlage der Produkte in Ihrem WooCommerce-Shop ein- bzw. ausschließen sollten.

Upload products to Facebook Catalog with Flawless Product Feed in Just a Few Minutes

Produkt-ID

Attributid
Beispielwert671

Es ist ein eindeutiger Identifikator für Ihr Produkt in Ihrem Geschäft.
Auf WooCommerce sollten Sie die ID sehen, wenn Sie die Produktliste durchsuchen.

Produkt-ID

Es wird empfohlen, die vorhandene SKU des Produkts als ID zu verwenden, da diese immer eindeutig ist.

Wenn mehrere Produkte die gleichen IDs haben, wird nur das erste Produkt auf der Liste berücksichtigt. Der Rest wird ignoriert. Stellen Sie also sicher, dass jedes Produkt eine eindeutige ID hat.

Produkt-Titel

AttributTitel
BeispielwertT-Shirt mit rotem Logo Rex

Es ist der Name des anzuzeigenden Produkts.
Auf WooCommerce sollten Sie den Produkttitel sehen, wenn Sie die Produktliste durchsuchen.

Produkttitel über WooCommerce

Wenn Sie den Produkttitel festlegen, geben Sie neben dem Produkt auch besondere Merkmale wie die Farbe und den Markennamen an. Dies wird die Aufmerksamkeit der Käufer auf sich ziehen.

However, you are not allowed to use any other promotional touch to the tile (for example adding “free shipping” or “discounted price” or using all caps).

In case of variable products include the brand name to the title. Rather than including just any feature in the main title, mention the feature that makes it a variant of the product.

For example, if a product is a Logo Rex T-shirt and has variations of Red and Blue, then one variation should be named “Logo Rex T-shirt – Red” and the other one “Logo Rex T-shirt – Blue”.

In der CSV-Datei werden sie also unterschiedliche Werte für den Titel haben:

idTitel
872Logo Rex T-Shirt - Rot
873Logo Rex T-Shirt - Blau

Verfügbarkeit der Bestände

AttributVerfügbarkeit
Beispielwertvorrätig

Dies bedeutet, dass das Produkt noch vorrätig oder ausverkauft ist.
Blättern Sie auf der Produktbearbeitungsseite nach unten zum Abschnitt mit den Produktdaten. Wählen Sie Inventar und Sie sollten die Möglichkeit erhalten, den Lagerstatus zu setzen.

Vorrätig

This value will be added under the attribute “availability” when generating WooCommerce Facebook product feed for Facebook Dynamic Ads.

Facebook accepts the following values:

  • in stock – when the product is ready for immediate shipping
  • out of stock – when the product is not available in stock
  • Vorbestellung - kann im Voraus für die künftige Wiederauffüllung der Bestände bestellen
  • available for order – if the product is available, but will require a couple of weeks for shipping
  • eingestellt - wenn das Produkt nicht mehr hergestellt wird

WooCommerce will give you the options “in stock” and “out of stock” by default.

For the rest of the values, you will need to use extra coding or another plugin.

Tipp:
Wussten Sie, dass das Hinzufügen von Produkten, die "nicht vorrätig" sind, eine großartige psychologische Taktik sein kann?

Hier ist ein Beispiel:
Nehmen wir an, Sie haben ein T-Shirt mit 2 Varianten, Rot und Schwarz, und sagen wir, die schwarzen sind ausverkauft.

Wenn sich die Interessenten die Produkte ansehen, werden sie sehen, dass es zwei ähnliche Produkte gibt und eine Variante ausverkauft ist.

Das könnte bedeuten, dass dieses T-Shirt ziemlich beliebt ist. Daher wird es bestimmte Interessenten dazu verleiten, über den Kauf des Roten nachzudenken.

Produkt-Zustand

AttributBedingung
Beispielwertneu

Verwenden Sie dieses Attribut, um zu kennzeichnen, ob Ihr Produkt brandneu oder überholt ist. Sie können die Werte "neu", "überholt" oder "gebraucht" zur Definition des Zustandes verwenden.

WooCommerce hat kein Feld, um den Zustand des Produkts zu definieren, daher müssen Sie es selbst zum Produkt-Feed hinzufügen.

However, the Product Feed Manager For WooCommerce will have the option for you to add the product condition field for all products.

Produktbeschreibung

AttributBeschreibung
BeispielwertDies ist ein rotes T-Shirt. Es wurde nur zu Testzwecken erstellt.

Fügen Sie eine korrekte Beschreibung des von Ihnen verkauften Produkts hinzu. Stellen Sie sicher, dass Sie alle wichtigen Merkmale hervorheben, die es haben kann, um Käufer anzuziehen.

When you edit a product, you get to set its title, link, and description as shown in the picture below:

Produkt-Bearbeitungsseite

You should mention the exclusive features and benefits of the description.

However, you are not allowed to use any extensive promotional touch in the description (for example adding “free shipping” or “discounted price” or using all caps to highlight a certain point).

Außerdem sollten Sie keine Links zu einer anderen Webseite einfügen oder die Produkte mit denen der Konkurrenz vergleichen.

Produkt-Bild-URL

Attributimage_link
Beispielwerthttps://www.yourwebsite.com/redtee394.png/

Dies wird der Link zum Hauptbild Ihres Produktes sein.
Wenn Sie ein Produkt bearbeiten, scrollen Sie auf der rechten Seite nach unten, und Sie sollten die Möglichkeit finden, ein Produktbild hinzuzufügen.

Produkt-Image auf WooCommerce

Welches Bild Sie auch immer hier verwenden, Sie müssen die URL zu diesem Bild für das Attribut "image_link" angeben.

Denken Sie daran, dass dieses Image der wichtigste Faktor ist, um mehr Kunden zu gewinnen. Die meisten Menschen werden Ihr Produkt nur dann bemerken, wenn ihnen gefällt, was sie sehen. Stellen Sie also sicher, dass Sie ein klares Bild mit hoher Qualität liefern.

It’s best if the image is a clear picture of the product without any promotional text watermark, or any placeholder image (although I am using one just for test purposes).

Sie müssen jedoch die richtige Bildauflösung beibehalten.

If you use a square image for carousel ads, then the dimensions should be 600×600 px.

For Dynamic Ads with a single image, you need a minimum resolution of 1200×630 px with a minimum aspect ratio of 4 : 5 and a maximum aspect ratio of 1: 91: 1.

Alles, was außerhalb der genannten maximalen Seitenverhältnisse liegt, wird ausgeschnitten.

Produkt-URL

AttributLink
Beispielwerthttps://www.yourwebsite.com/red-logo-rex-t-shirt/

Dies ist der Link zu Ihrer Produktseite.
Wenn Sie ein Produkt bearbeiten, sehen Sie den Permalink direkt unter dem Titel-Feld. Das ist die URL zu Ihrem Produkt.

Produkt-Permalink

Am besten ist es, den Produkttitel auf dem Link anzugeben, doch viele ziehen es vor, stattdessen die Produktkennung zu verwenden, und einige verwenden beide.

Außerdem müssen Sie sicherstellen, dass Ihre Website-Domäne verifiziert ist und mit http oder https beginnt.

Regulärer Preis

AttributPreis
Beispielwert26.53 USD

Dies ist der Preis des anzuzeigenden Produkts.
Blättern Sie auf der Produktbearbeitungsseite nach unten zum Abschnitt mit den Produktdaten. Auf der Registerkarte Allgemein erhalten Sie die Möglichkeit, den regulären Preis festzulegen.

Preis

This value will be added under the attribute “price” when generating a product feed for Facebook.

Bitte beachten Sie, dass der Preis nicht "0" sein kann und jedes Produkt mit "0" oder keinem Preiswert zur Ablehnung von dynamischen Facebook-Werbung führt.

Make sure you are inputting the accurate price with the ISO currency code as the suffix.

Hersteller/Marke

AttributMarke
BeispielwertRexTest

Falls ein Produkt keine GTIN hat, ist es zwingend erforderlich, den Hersteller/Markennamen anzugeben, um das Produkt auf Facebook hinzuzufügen.

If the product falls under the Daily Deals Inventory, then you must also include MPN alongside brand. 

Aber WooCommerce enthält kein "Marken"-Feld für Ihre Produkte. Daher können Sie für jedes Produkt ein benutzerdefiniertes Feld erstellen oder ein Plugin verwenden, um das Markenfeld zu jedem Produkt in Ihrem WooCommerce-Shop hinzuzufügen.

Google-Produktkategorie

Attributgoogle_produkt_kategorie
BeispielwertKleidung und Accessoires > Bekleidung

Facebook verwendet die gleiche Taxonomie und Kategorieangaben wie Google. Um Ihre Produkte zu kategorisieren, müssen Sie daher dieses Attribut gemäß der Google-Taxonomie festlegen, damit Ihr WooCommerce-Facebook-Produkt-Feed genehmigt werden kann.

Klicken Sie hier, um die Google-Kategorieliste und -Taxonomie anzuzeigen.

You can either set your WooCommerce store categories accordingly or have your own categories mapped to Google’s using a plugin when generating a feed.

Ich verwende den Product Feed Manager für WooCommerce, um das Category Mapping anzuwenden:

category maqpping

GTIN (Global Trade Item Number)

Attributgtin
Beispielwert3234567890126

Für einen Hersteller in den USA oder Kanada, der GTIN-zertifiziert ist, ist es notwendig, die GTIN-Nummer für jedes Produkt auf Ihrem Facebook-Produkt-Feed anzugeben.

Alternatively, you can also use UPC, EAN, JAN, or ISBN in place of GTIN if you are from a different location.

MPN (Hersteller-Teilenummer)

Attributmpn
BeispielwertRex0011Test

Falls ein Produkt keine GTIN (oder UPC, EAN, JAN, ISBN) hat, müssen Sie stattdessen die MPN angeben. Es ist eine eindeutige Hersteller-ID für ein Produkt, das keine GTIN hat.

Wenn Sie bei Produkten, die sich im Bestand des Tagesgeschäfts befinden, einen Markennamen angeben, dann ist es auch zwingend erforderlich, die MPN anzugeben.

Now, WooCommerce doesn’t provide fields for Brand, GTIN, or MPN by default. Hence, you need to input custom fields for every product manually.

However, I use the Product Feed Manager For the WooCommerce plugin includes those fields on every product, as shown below:

Benutzerdefinierte Felder

Ich muss nur die richtigen Daten eingeben und sie als Werte der erforderlichen Attribute verwenden, wenn ich den Facebook-Produkt-Feed generiere.

Größe

AttributGröße
BeispielwertGroß

Dieses Feld ist nur für variable Produkte mit Größenvarianten erforderlich.

You may use words such as Small, Medium, or Large, or you may use numbers such as 20, 25, etc, whichever is appropriate to define the size of a product.

Tipps:
Sie sollten auf Ihrer Website eine Maßtabelle führen, um die von Ihnen genannten Größen für Ihre Produkte zu definieren.

Wenn Sie beispielsweise die Größe als Large zugewiesen haben, erläutern Sie in der Tabelle die Höhe, Breite, Brustgröße usw. in Zoll oder cm, um Ihren Kunden eine Möglichkeit zu geben, zu überprüfen, ob diese Größe die richtige Passform ist.

Verschiedene Länder haben unterschiedliche Maße für die gleichen Größencodes, daher wird dies hilfreich sein.

Farbe

AttributFarbe
BeispielwertTango-Rot

Dieses Feld ist nur für variable Produkte mit Farbvarianten erforderlich.

Sie müssen die Farbe des Produkts beschreiben (aber keine Farbcodes oder Einzelbuchstaben).

Wenn es mehrere Farben gibt, erwähnen Sie alle Farben und trennen Sie diese mit einem "/". Zum Beispiel Rot/Blau/Grün.

In the case of variable products, assign a separate color for each variant and add it to the product title.

Tipp:
Sie können die Farbe auf kreative Weise beschreiben, anstatt einfach allgemeine Farben zu verwenden. So können Sie beispielsweise eher eingängige Farbnamen wie "Tango Red" statt nur "Red" verwenden, was für Käufer attraktiver ist.

Geschlecht

AttributGeschlecht
BeispielwertUnisex

Sie müssen angeben, für welches Geschlecht das Produkt bestimmt ist.

Facebook akzeptiert die folgenden Geschlechter:

  • männlich
  • weiblich
  • Unisex

Muster

AttributMuster
BeispielwertFlanell

Dieses Feld ist nur für variable Produkte mit Mustervarianten erforderlich. Verwenden Sie Eigennamen für Muster wie "Gestreift", "Flanell" usw.

Begrenztes Sonderangebot

AttributAngebot_Preis
Beispielwert9.99 USD

Dies ist eine einzigartige Option, die Sie nur bei Facebook Dynamic Ads erhalten.

You can set a product to be on a special discounted price for certain hours every day (during the offer period), or in other words, the product will be under the Daily Deals Inventory.

Tipp:
Manchmal kann ein einziger Tagesrabatt auf bestimmte beliebte Produkte in Ihrem Geschäft Ihren Umsatz steigern.

Wenn Sie zum Beispiel eine Uhr in Ihrem Geschäft haben, bei der die Leute mehr als andere Produkte kaufen, können Sie ein überraschendes Ein-Tages-Sonderangebot machen. Dies könnte Ihre Verkäufe an diesem Tag verdoppeln und mehr Aufmerksamkeit von zukünftigen Interessenten erregen.

Fügen Sie einfach das Attribut "offer_price" in Ihren WooCommerce Facebook-Produkt-Feed ein und legen Sie einen ermäßigten Preis als Wert fest, um den angebotenen Sonderpreis zu definieren (einschließlich eines geeigneten ISO-Währungscodes als Suffix). Der Angebotspreis muss mindestens 15 % unter dem regulären Preis liegen, sonst wird er von Facebook abgelehnt.

Begrenztes Sonderangebot Dauer

AttributAngebot_Preis_Erfolgsdatum
Beispielwert2018-06-01T12:00-0300/2018-12-01T00:00-0300

If you want to give a special offer for a product under the Daily Deals Inventory on Facebook, then along with “offer_price”, you must also add this attribute to specify the start and end date, with time, for the special offer.

Mention the start date and hours of the offer, then use a slash, and then mention the end date and hours of the offer.

Tipp:
Vor großen Festivals, internationalen Anlässen oder Feiertagen kann es manchmal sinnvoll sein, Sonderangebote für bestimmte Produkte zu machen, um den Verkauf zu fördern.

Zum Beispiel können Sie eine Woche vor Weihnachten ein spezielles Rabattangebot für Weihnachtshüte einführen. Dies wird Ihre Verkäufe definitiv ankurbeln.

Facebook Produkt-Feed-Beispiele

Da Sie nun wissen, welche Details Sie benötigen, um Ihren WooCommerce-Produkt-Feed für Facebook Dynamics zu generieren, lassen Sie uns nun einige Beispiele betrachten, um die Struktur zu verstehen.

Facebook accepts several file formats of product feeds to be uploaded. However, the recommended format is CSV.

Here’s a sample of a simple product feed:

Beispiel für Facebook-Produkt-Feed eines einfachen Produkts

Here’s a sample of a variable product feed:

Beispiel für Facebook-Produkt-Feed eines variablen Produkts

These feeds can easily be generated using the plugin, Product Feed Manager For WooCommerce. Once you have the product feed file, you can now manually upload it to your Facebook Business Account.

Jetzt haben Sie alles über den WooCommerce Google Product Feed und den WooCommerce Facebook Product Feed erfahren.

Lassen Sie mich Ihnen also eine richtige Anleitung zu dem Tool geben, mit dem ich WooCommerce-Produkt-Feeds einfach und in wenigen Sekunden erstellen kann.

Wie man WooCommerce-Produkt-Feeds einfach mit dem richtigen Werkzeug erzeugt

Product Feed Manager For WooCommerce ist ein Plugin, mit dem Sie ganz einfach Produkt-Feed ohne Programmierkenntnisse oder fortgeschrittene technologische Kenntnisse generieren können.

Warum dieses Plugin verwenden?

Es gibt mehrere Gründe, warum Product Feed Manager For WooCommerce eine ideale Wahl ist, um Ihnen bei der Erstellung von Feeds zu helfen:

  • Das manuelle Hochladen von Produkten dauert Stunden. Dieses Plugin erzeugt innerhalb von Sekunden einen Feed.
  • Das Plugin verfügt über eine saubere und einfache Schnittstelle mit entsprechender Dokumentation. Daher ist die Anwendung und das Erlernen der Software einfach.
  • Erzeugen Sie fehlerfreie Feeds, egal wie viele Produkte Sie haben.
  • Mit den Filteroptionen können Sie Feeds nur für die von Ihnen benötigten Produkte erzeugen.
  • It provides a Google Category Mapping option that saves us from changing the categories on our WooCommerce store.
  • Es ermöglicht Ihnen die automatische Synchronisierung mit dem Google Shopping Center, d.h. Ihr WooCommerce-Produkt-Feed wird automatisch an Google gesendet, ohne dass Sie ihn manuell hochladen müssen.
  • Es wird mit einer vorgefertigten Liste aller erforderlichen Attribute von Google und Facebook geliefert, so dass Sie keine Attribute manuell hinzufügen müssen.
  • Add certain custom fields such as GTIN, MPN, Brand, and UPC to your products, which are not available by default on WooCommerce.
  • Ein sehr aktives und nützliches Unterstützungsteam hilft Ihnen bei eventuellen Verwirrungen.

Lassen Sie uns jetzt durchgehen, wie Sie leicht Produkt-Feed mit Product Feed Manager für WooCommerce generieren können.

How to get a Product Feed Manager For WooCommerce?

Product Feed Manager For WooCommerce hat eine kostenlose Version, die Sie verwenden können, um seine grundlegenden Funktionen zu testen und seine Schnittstelle zu verstehen.

Aber es wird empfohlen, die Pro-Version zu kaufen, da sie mit verfeinerten Funktionen ausgestattet ist.

Installieren und aktivieren Sie das Plugin auf Ihrem WordPress-Dashboard, und Sie sollten so etwas sehen:

Product Feed Manager Settings

Jetzt sind Sie bereit, Produkt-Feeds zu erzeugen.

Wie WooCommerce Produkt-Feed mit Produkt-Feed-Manager zu generieren?

Product Feed Manager für WooCommerce ist so einfach zu bedienen.

1. Klicken Sie einfach auf "Neuen Feed hinzufügen" und Sie werden die Seite "Neuen Produkt-Feed hinzufügen" sehen:

add new feed

2. Oben haben Sie die Möglichkeit, dem Feed einen Titel zu geben.

Geben Sie zunächst einen Titel für die Feed-Datei ein. Dann können Sie festlegen, welche Produkte in Ihren Feed aufgenommen werden sollen.

add feed name

3. Direkt unter dem Titel sehen Sie eine Option zur Auswahl Ihres bevorzugten Händlers. Klicken Sie einfach auf die Dropdown-Schaltfläche Händler füttern und wählen Sie Ihren bevorzugten Händler aus der Dropdown-Liste aus oder suchen Sie in der Dropdown-Box.

Wählen Sie Ihren bevorzugten Händler aus und alle erforderlichen Attribute werden unten geladen.

add merchant

Produkt-Filter

With the Product Feed Manager for the WooCommerce plugin, you will have the option to choose which products to include in your feed.

Um die Optionen zu sehen, klicken Sie einfach auf die Schaltfläche Produktfilter.

add product filter

Wenn Sie auf die Schaltfläche Produktfilter klicken, wird die Produktfilter-Schublade auf der rechten Seite des Fensters eingeblendet.

product filter dashboard

Hier sehen Sie, dass die Option "Alle veröffentlichten Produkte" standardmäßig ausgewählt ist - diese Option umfasst jedes einzelne Produkt in Ihrem WooCommerce-Shop.

Wenn Sie möchten, können Sie auch andere Filteroptionen verwenden. Klicken Sie auf das Dropdown-Menü, und Sie werden einige Filteroptionen in der Dropdown-Liste sehen:

all products filter option in PFM

Sie können wählen

  • Alle vorgestellten Produkte - veröffentlicht nur die vorgestellten Produkte
  • Kategoriefilter - Produkte über Kategorien auswählen
  • Product Filter – use this custom filter to set a conditional filter
  • Tag Filter – choose a product using tags

Sehen Sie sich dieses Video an, um zu sehen, wie erstaunlich die Filteroptionen sind. Sie können ganz einfach die Produkte auswählen, die Sie in Ihren Produkt-Feed aufnehmen oder aus diesem ausschließen möchten.

Automatische Aktualisierung planen

Um einen Zeitplan für den Abruf festzulegen, klicken Sie zunächst auf die Schaltfläche Produkteinstellungen.

Setting

Wenn Sie auf die Schaltfläche " Produkteinstellungen" klicken, wird die Schublade "Produkteinstellungen" auf der rechten Seite des Fensters eingeblendet

Hier finden Sie oben in den Einstellungsoptionen die Option Auto-Generate Your Feed.

Sie können die geplante Aktualisierung auf täglich, stündlich oder wöchentlich einstellen.

Danach haben Sie die Möglichkeit, Variationen von Produkten einzuschließen oder auszuschließen und bei gruppierten Produkten die übergeordneten Produkte einzuschließen.

WPML-Unterstützung

Wenn Sie WPML verwenden, um verschiedene Sprachversionen Ihrer Produkte einzustellen, finden Sie hier einen WPML-Abschnitt.

You can have a look at this doc for a better understanding of how you can generate a feed with WPML:

Feed-Konfiguration

Um einen Feed zu erstellen, müssen Sie zunächst Ihren bevorzugten Händler auswählen.

Wählen Sie für Google Product Feed den Händlertyp "Google Shopping".
Wählen Sie für Facebook Product Feed den Händlertyp "Facebook".

add merchants

Nach der Auswahl wird die Seite aktualisiert, und die erforderlichen Attribute werden automatisch angezeigt.

all product attributes

Hier befinden sich die Attribute auf der linken Seite, und die Werte der Attribute werden in der Spalte Zugewiesene Werte festgelegt.

Wählen Sie den Typ als Attribut und wählen Sie dann den Wert, den dieses Attribut in Ihrem WooCommerce-Shop haben wird.

Wenn Sie der Meinung sind, dass ein Attribut fehlt, können Sie es durch Drücken der Schaltfläche "NEUES ATTRIBUTE HINZUFÜGEN" hinzufügen.

Auf dieser Seite finden Sie einige sprachbezogene Optionen, wenn Sie WPML verwenden.

You can have a look at this doc for a better understanding of how you can generate a feed with WPML translation.

WooCommerce-Produkt-Feed generieren

Sobald der Feed konfiguriert ist, können Sie nun auf "Veröffentlichen" auf der rechten Seite klicken und Sie sehen einen Ladebalken.

publish button

Once this is complete, the “Publish” button will change to an “Update” button and you will get the feed link or feed download button right below the “Update button.”

Get URL or Download Product Data Feed

Then you can set your product data feed to be updated automatically using the “Auto-Generate Your Feed” feature. So you won’t need to manually update your feed everytime you add new products or update any product individually.

auto feed generate

Now you can download this feed and upload it to your desired merchant shop and watch your store sales get a boom.

Kategorie-Zuordnung

Wie ich bereits erwähnt habe, bietet dieses Plugin Optionen für die Zuordnung von Kategorien. Schauen Sie sich dieses Video an, um zu sehen, wie Sie die Kategoriezuordnungsfunktion einfach nutzen können:

Automatische Synchronisierung mit dem Google-Einkaufszentrum

Eine der besten Funktionen, die Product Feed Manager For WooCommerce bietet, ist, dass Sie Ihren WooCommerce-Produkt-Feed direkt mit dem Google Shopping Center automatisch synchronisieren können.

You can schedule the auto-sync to take place either hourly, weekly, or monthly. This means that every change you make to your products of the product feed. They will automatically be updated on your Google Shopping Center. You do not have to download and upload the feed every time.

Klicken Sie hier, um zu erfahren , wie Sie mit dem Product Feed Manager für WooCommerce WooCommerce-Produkte automatisch mit dem Google Shopping Center synchronisieren.

Anmerkung des Autors

Es ist immer wichtig, die besten verfügbaren Wege zu lernen und umzusetzen, um Ihren ROI zu erhöhen.

Product Feed Manager For WooCommerce is a powerful tool that you can use to achieve the goal of tripling your store performance, along with other marketing campaigns.

Machen Sie also weiter und beginnen Sie Ihre Reise zum Erfolg!

Fühlen Sie sich frei, Kommentare zu hinterlassen, wenn Sie Verwirrung oder Vorschläge haben.


Frequently Asked Question

What is a Product Feed?

A product feed is basically a file (could be CSV, XML, RSS, etc.) containing comprehensive data about products, including titles, images, descriptions, prices, categories, availability, quantities, and other relevant attributes or data.


By providing your customers with accurate and engaging product information in various marketplaces, a well-structured product feed will help with informed purchasing decisions and targeted advertising campaigns.

What are the Benefits of Using Product Feeds For WooCommerce?

Here are some of the significant benefits of using product feeds for your business,

  • Get more visibility for your products by listing them on popular marketplaces and comparison shopping engines. This opens up your business to a much larger customer base who may have never discovered your store otherwise.
  • Product feed management tools help ensure the product information you provide stays consistent and accurate across all platforms. No more worrying about errors that could leave customers feeling misled or dissatisfied.
  • Updating product details like pricing and availability with product feeds. Make any changes once, and they’ll automatically sync across every channel where your feed is distributed.
What criteria should I consider before selecting a Product Feed Management tool that suits my business?

Before you invest in a Product Feed Management tool you should check whether the tool has these or not,

  • WooCommerce compatibility
  • Easy-to-use interface
  • Customizable feed attributes
  • Automated Feed Updates
  • Performance analytics and reporting

Product Feed Manager For WooCommerce has all these – Check it out

How do Product Data Feeds work?

Once you create product feeds for your preferred marketplace, you can upload and promote them on those marketplaces to increase your sales without any effort. If you change anything in your WooCommerce store, and they’ll automatically sync across every channel where your feed is distributed.

Kategorien
Guide Product Feed Manager For WooCommerce

Google kündigt kostenfreie Google Shopping-Aktionen an [2022]

The Corona outbreak is a big threat to humanity. We all know how dangerous the virus is. However, it also comes with another big threat – an economic crisis.

Due to the lockdown, most offices are incapable of running operations, and consumers have no option but to stay at home. And every business saw a drastic fall in its revenue.

However, a few local online shops are able to continue running their business, despite earning a lot less than usual.

Since people are not able to go out, they may order products online and get them delivered to their homes, thus creating a little opportunity for the eCommerce business to somehow survive.

However, things might just get better for your shop.

Selling On Google Shopping Is Free Of Cost During Corona Crisis

Earlier on 21st April 2020, Google made a huge announcement.

Within 1 week, Google will start allowing merchants to sell their products through Google Shopping completely free of cost!

According to Google, “as consumers increasingly shop online, they’re searching not just for essentials but also things like toys, apparel, and home goods.”

So Google wants to extend out a helping hand to both the consumers and the merchants. Free online listing means more merchant shops will be able to sell products through Google Shopping, and consumers will get more products to buy from.

This is great news for all online shops, especially the sites that deliver locally and the stores that sell digital products.

If you are running a WooCommerce store and deliver locally, then this is your biggest opportunity to get the maximum exposure and increase sales during this global crisis.

How To Make The Most Out Of This Opportunity

This could be your best chance to sustain during the economic crisis threat. And there is still one week time before Google starts this initiative.

So, let us look at how you can make the most out of this golden opportunity that Google is offering.

With one week at hand, we suggest you do the following:

  1. Prepare your shop by optimizing product details for SEO
  2. Identify your best selling products and plan a discount campaign
  3. Identify products that might be necessities and plan a discount campaign
  4. Make arrangement for selling a few digital products if possible
  5. Get your products listed on Google Shopping ASAP

Let us look at how you can pull this off.

1. Prepare your shop by optimizing product details for SEO

Product Details For SEO

SEO is always important if you want your products to be found on Google. Even if you list your products on Google shopping, SEO optimization will determine how relevant your product is based on your customer’s search term.

**Make sure to use an SEO plugin, such as Yoast or RankMath, on your WooCommerce store.

For example, if you are selling a T-shirt with Avengers’ design on it, then obviously you want your ideal customers to be the ones who are looking for Avengers themed t-shirts.

In that case, you can set the t-shirt title, Special Marvel Avengers Tshirt – Red, and set the keyword to Marvel Avengers Tshirt. Within the description, use this keyword a couple of times in the product description, and include it in the product link as well. These will indicate that the product is relevant to the keyword.

Your SEO tool will give you a score to understand if it was well optimized.

If you have a few products in your shop, then apply SEO optimization on every product. If you have too many products, then conduct SEO optimization at least for your best selling products.

2. Plan A Discount Campaign For Your Best-Selling Products

Browse through your website’s analytics or reports, and find out which products performed the best in the last two months.

Collect their titles, links, and the price.

Now, the 1st thing to do is to optimize them for SEO.

Next, plan out a discount campaign for your best selling products, such as a 20% discount for the 1st twenty sales from Google Shopping, or a 10% discount throughout the lockdown.

Plan A Discount Campaign

You might assume that since these are bestsellers, they will sell automatically through Google’s immense reach.

However, keep in mind, just like you, there are tons of other online shops that also plan to take advantage of this opportunity. Hence, along with more exposure, you will face more competition as well.

Consumers will look to purchase products either based on higher rating, or lower price. Nowadays, a lower price will get a high priority since everyone is trying to save money in response to the crisis.

Hence, it is only logical to run discounts and increase your sales.

3. Plan A Discount Campaign For Products That Might Be Necessities

Certain products are a necessity nowadays besides food and beverages, for example, bathing products, cleaning products, tissues, tampons, etc.

Also, certain electronics such as water purifiers, ovens, hair trimmers, etc might also be considered necessities at this time.

You may identify such products, optimize them for SEO, and decide on a discount campaign for them as well.

**Since we are focusing on local sales, it would be even better if you could deliver free of cost. But that’s totally your decision to make.

4. Make Arrangement For Selling A Few Digital Products If Possible

You might have a fixed category of products that you sell.

However, if you are an online retail shop that sells various types of products, then you might consider adding a few digital products (if you don’t have any already) such as movies, music collections, games, or books.

Most people are sitting idle at home, and looking for ways to make their days more entertaining. Hence, these digital products are pretty demanded in the current situation.

Even though there is no guarantee that if you arrange such products they will have maximum sales, it is still a high possibility.

5. Get Your Products Listed On Google Shopping ASAP

With this free of cost opportunity at hand, you should list your products on Google Shopping ASAP. You need to be prepared to upload your products right from the start.

Get Products Listed On Google Shopping ASAP

To do so, you first need to understand that Google Shopping has a fixed set of instructions that you must follow for your products to get approved.

It will look for specific data in the right format that is accepted by Google Shopping. Plus, Google has its own set of categories that you must indicate through your feed.

Here’s a guide to set up your WooCommerce Product data in an optimized way for Google Shopping:

In the guide, you will get actionable instructions on what data to submit and how to optimize them for approval on Google Shopping.

For example, if you have a t-shirt with 3 color variations, red, blue, and green, then you have to submit each variation separately and include the color name in the Product title. So if the product is called “New Cotton T-shirt”, for its the red variant, then the title should be “New Cotton T-shirt – Red”.

Similar to this, there are several other tips that you will find in that guide to optimize your feed data.

Now, to create the product feed, it’s really not convenient to do so manually. Rather use a product feed generation tool to generate a feed for all of your products in a few minutes.

If you own a WooCommerce store, then you can use Product Feed Manager For WooCommerce. It is a plugin that already has a set template for Google Shopping.

All you need to do is create a new feed, choose Google Shopping as the merchant, and assign a few attributes with the right values.

Let us look at a few reasons for you to use Product Feed Manager For WooCommerce.

Produkt-Feed-Manager für WooCommerce

WPFM banner for Google Shopping promotions

The plugin as a few features that are dedicated to helping you generate an accurate product feed for Google Shopping.

1. Pre-Built Google Shopping Feed Template

Google specifically requires you to submit 12 mandatory data for your products:

  • Produkt-ID
  • Produkt-Titel
  • Produktbeschreibung
  • Produkt-Link/URL
  • Produkt-Kategorie
  • Google-Produktkategorie
  • Produkt-Bild-URL
  • Verfügbarkeit der Bestände
  • Regulärer Preis
  • Produkt-Zustand
  • Hersteller/Markenname
  • GTIN or MPN

And there are a few more conditional attributes that you need to submit depending on your niche.

The plugin by default has these attributes set. When you choose Google Shopping, the plugin will display the template which includes all the mandatory fields and values assign (except for 3 which I will explain in a bit).

So, you don’t need hours to set it up, and nor do you need exclusive knowledge to set up the feed. 80% of your work is already done.

2. Auto-sync WooCommerce Products To Google Shopping

One of the notable features this plugin has is the option to auto-sync your generated product feed to Google Shopping.

Once you generate the product feed, you can send the feed to your Google Merchant Center in just a click. Once you send the feed to Google, any changes you make later to the products and the feed, they will automatically be updated on Google Shopping.

You won’t have to manually upload new feed files to Google every time you make changes.

Here’s a written guide on how it works:

Here’s a video to show you how it works:

3. Category Mapping For Accepted Google Categories

On the mandatory attributes mentioned above, there is one called Google Product Category. You need to assign each of your products to a category that Google accepts.

Don’t worry, you do not need to change any data or category names on your shop for this.

The plugin has a Category Mapping feature where you can map your shop categories to that of Googles. Durig feed generation simply assigns the mapping values as the values for Google Product Category.

It’s really easy to use. Here’s a written guide on it:

Here’s a video to show you how it works:

4. Special Custom Attribute Fields

On the mandatory attribute list mentioned above, you can see that there certain attributes, Manufacturer/Brand, GTIN, and MPN.

However, WooCommerce by default has no field(s) for these attributes.

Product Feed Manager For WooCommerce comes with the feature of including these fields to your products where you can assign the values.

You also get extra custom fields for conditional attributes such as Gender, Color, Size, or Pattern which you need to submit if you sell products in the Apparels category.

Here’s a guide about it:

5. Avoid Price Mismatch Error When Uploading Feed

Many people face a common error, “Price mismatch” when uploading the feed and many of their products get rejected.

The reason behind this is, for a variable product, if you have different pricing for different variations, WooCoomerce displays both the highest price and the lowest price when Google crawls that product page for a particular variation. This causes a mismatch in the price you submitted.

Product Feed Manager For WooCommerce holds the option to fix JSON LD structured data so that only the accurate price is displayed when Google crawls a variant of a variable product.

It’s just a single click in the plugin’s settings to activate it. Here’s how:

Hence, you will be able to avoid facing the “Price mismatch” error on Google Shopping.

6. Exclusive Filter For Efficient Feed Generation

The plugin allows you to generate a product feed for all the products, or you may use it’s filter options to generate a feed for specific products only.

For example, if you have products that are no longer in stock and you do not want to submit them on Google, then you can use the custom filter to exclude all products that are out of stock.

It also has a category filter and tag filter where you can simply choose certain categories or tags to generate a product feed for the products under those categories or tags only.

Here’s a video to show you how it works:

This really saves time and you can upload only the products that you want to sell through Google Shopping.

7. Easily Add Variant Values To The Product Title

Now, as I have mentioned above, Google advises to include the variant value to the Product title (though not mandatory).

However, it is not necessary to change the title in your store to achieve this. The plugin allows you to choose to add the variant names to Product titles in the product feed that you generate.

As you can see, this plugin is a great help in generating an accurate product feed quickly, and optimize the feed for getting the best results through Google Shopping.

Schlussfolgerung

Google is taking a very honorable initiative to help both the consumers and sellers. There is no way you should lose this opportunity.

So, go ahead and prepare your store right away if you want the best results out of free promotion through Google Shopping and increase your sales to sustain during this world crisis.

Kategorien
Guide Product Feed Manager For WooCommerce

Accepted Google Country Codes List For All Google Ads [2024]

Google is currently the largest marketplace to promote WooCommerce products through various Ad campaigns such as Shopping Ads, Adwords, Dynamic Remarketing, and many more.

Hier finden Sie eine Liste der Google-Ländercodes, die Sie in Google Ads verwenden können, wenn Sie auf Länder verweisen, für die Sie werben oder in die Sie versenden.

Google-Ländercodes-Liste

In der Regel bestehen die Google-Ländercodes aus zwei Buchstaben (Groß- und Kleinschreibung wird nicht berücksichtigt).

A | B | C | D | E | F | G | H | I | J | K | L | M | N | O | P | Q | R | S | T | U | V | W | Y | Z

A

LandLändercodes
🇦🇫 Afghanistanaf
🇦🇱 Albanienal
🇩🇿 Algeriendz
🇦🇸 Amerikanisch-Samoawie
🇦🇩 AndorraAnzeige
🇦🇴 Angolaao
🇦🇮 Anguillaai
🇦🇶 Antarktisaq
🇦🇬 Antigua & Barbudaag
🇦🇷 Argentinienar
🇦🇲 Armenienam
🇦🇼 Arubaaw
🇦🇺 Australienau
🇦🇹 Österreichunter
🇦🇿 Aserbaidschanaz

B

LandLändercodes
🇧🇸 Bahamasbs
🇧🇭 Bahrainbh
🇧🇩 Bangladeschbd
🇧🇧 Barbadosbb
🇧🇾 Belarusvon
🇧🇪 Belgiensein.
🇧🇿 Belizebz
🇧🇯 Beninbj
🇧🇲 Bermudabm
🇧🇹 Bhutanbt
🇧🇴 Bolivienbo
🇧🇦 Bosnien und Herzegowinaba
🇧🇼 Botswanabw
🇧🇻 Bouvet-Inselbv
🇧🇷 Brasilienbr
🇮🇴 Britisches Territorium im Indischen Ozeanio
🇧🇳 Brunei Darussalambn
🇧🇬 Bulgarienbg
🇧🇫 Burkina Fasobf
🇧🇮 Burundibi

C

LandLändercodes
🇰🇭 Kambodschakh
🇨🇲 Kameruncm
🇨🇦 Kanadaca
🇨🇻 Kap VerdeLebenslauf
🇰🇾 Kaimaninselnky
🇨🇫 Zentralafrikanische Republikvgl.
🇹🇩 Tschadtd
🇨🇱 Chilecl
🇨🇳 Chinacn
🇨🇽 Weihnachtsinselcx
🇨🇨 Cocos (Keeling)-Inselncc
🇨🇴 Kolumbienmit
🇰🇲 Komorenkm
🇨🇬 Kongocg
🇨🇩 Kongo, Die Demokratische Republik Kongocd
🇨🇰 Cook-Inselnck
🇨🇷 Costa Ricacr
🇨🇮 Elfenbeinküsteci
🇭🇷 Kroatienhr
🇨🇺 Kubacu
🇨🇾 Zyperncy
🇨🇿 Tschechische Republikcz

D

LandLändercodes
🇩🇰 Dänemarkdk
🇩🇯 Dschibutidj
🇩🇲 Dominicadm
🇩🇴 Dominikanische Republiktun

E

LandLändercodes
🇪🇨 Ecuadorec
🇪🇬 Ägyptenz.B.
🇸🇻 El Salvadorsv
🇬🇶 Äquatorialguineagq
🇪🇷 Eritreaer
🇪🇪 Estlandee
🇪🇹 Äthiopienund

F

LandLändercodes
🇦🇨 Falkland-Inseln (Malwinen)fk
🇫🇴 Färöer-Inselnfür
🇫🇯 Fidschifj
🇫🇮 Finnlandfi
🇫🇷 Frankreichfr
🇬🇫 Französisch-Guayanagf
🇵🇫 Französisch-Polynesienpf
🇹🇫 Französische Südterritorientf
Produkt-Feed-Manager für WooCommerce

G

LandLändercodes
🇬🇦 Gabunga
🇬🇲 Gambiagm
🇬🇪 Georgienge
🇩🇪 Deutschlandde
🇬🇭 Ghanagh
🇬🇮 Gibraltargi
🇬🇷 Griechenlandgr
🇬🇱 Grönlandgl
🇬🇩 Grenadagd
🇬🇵 Guadeloupegp
🇬🇺 Guamgu
🇬🇹 Guatemalagt
🇬🇳 Guineagn
🇬🇼 Guinea-Bissaugw
🇬🇾 Guyanagy

H

LandLändercodes
🇭🇹Haitiht
🇭🇲 Heard Island und Mcdonald Islandshm
🇻🇦 Heiliger Stuhl (Staat Vatikanstadt)va
🇭🇳 Hondurashn
🇭🇰 Hongkonghk
🇭🇺 Ungarnhu

I

LandLändercodes
🇮🇸 Islandist
🇮🇳 Indienin
🇮🇩 Indonesienid
🇮🇷 Iran, Islamische Republikir
🇮🇶 Irakiq
🇮🇪 Irlandd.h.
🇮🇱 Israelil
🇮🇹 Italienes

J

LandLändercodes
🇯🇲 Jamaikajm
🇯🇵 Japanjp
🇯🇴 Jordanienjo

K

LandLändercodes
🇰🇿 Kasachstankz
🇰🇪 Keniake
🇰🇮 Kiribatiki
🇰🇵 Korea, Demokratische Volksrepublikkp
🇰🇷 Korea, Republikkr
🇰🇼 Kuwaitkw
🇰🇬 Kirgisistankg

L

LandLändercodes
🇱🇦 Demokratische Volksrepublik Laosla
🇱🇻 Lettlandlv
🇱🇧 Libanonlb
🇱🇸 Lesothols
🇱🇷 Liberialr
🇱🇾 Libysch-Arabische Dschamahirijaly
🇱🇮 Liechtensteinli
🇱🇹 Litauenlt
🇱🇺 Luxemburglu

M

LandLändercodes
🇲🇴 Macaomo
🇲🇰 Mazedonien, Ehemalige Jugoslawische Republik Mazedonienmk
🇲🇬 Madagaskarmg
🇲🇼 Malawimw
🇲🇾 Malaysiameine
🇲🇻 Maledivenmv
🇲🇱 Maliml
🇲🇹 Maltamt
🇲🇭 Marshall-Inselnmh
🇲🇶 Martiniquemq
🇲🇷 MauretanienHerr
🇲🇺 Mauritiusmu
🇾🇹 Mayotteyt
🇲🇽 Mexikomx
🇫🇲 Mikronesien, Föderierte Staaten vonfm
🇲🇩 Moldawien, Republikmd
🇲🇨 Monacomc
🇲🇳 Mongoleimn
🇲🇸 MontserratFrau
🇲🇦 Marokkoma
🇲🇿 Mosambikmz
🇲🇲 Myanmarmm
Produkt-Feed-Manager für WooCommerce

N

LandLändercodes
🇳🇦 Namibiana
🇳🇷 Naurunr
🇳🇵 Nepalnp
🇳🇱 Niederlandenl
| | Niederländische Antillenan
🇳🇨 Neukaledoniennc
🇳🇿 Neuseelandnz
🇳🇮 Nicaraguani
🇳🇪 Nigerne
🇳🇬 Nigeriang
🇳🇺 Niuenu
🇳🇫 Norfolkinselnf
🇲🇵 Nördliche Marianen-Inselnmp
🇧🇻 Norwegennein

O

LandLändercodes
🇴🇲 Omanom

P

LandLändercodes
🇵🇰 Pakistanpk
🇵🇼 Palaupw
🇵🇸 Palästinensische Gebiete, besetzteps
🇵🇦 Panamapa
🇵🇬 Papua-NeuguineaSeite
🇵🇾 Paraguaypy
🇵🇪 Perupe
🇵🇭 Philippinenph
🇵🇳 Pitcairnpn
🇵🇱 Polenpl
🇵🇹 Portugalpt
🇵🇷 Puerto Ricopr

Q

LandLändercodes
🇶🇦 Katarqa

R

LandLändercodes
🇷🇪 Réunionüber
🇷🇴 Rumänienro
🇷🇺 Russische Föderationru
🇷🇼 Ruandarw

S

LandLändercodes
🇸🇭 Heilige Helenash
🇰🇳 St. Kitts und Neviskn
🇱🇨 St. Lucialc
🇵🇲 Saint Pierre & Miquelonpm
🇻🇨 St. Vincent und die Grenadinenvc
🇼🇸 Samoaws
🇸🇲 San Marinosm
🇸🇹 São Tomé und Príncipest
🇸🇦 Saudi-Arabiensa
🇸🇳 Senegalsn
🇷🇸 Serbien & 🇲🇪 Montenegrocs
🇸🇨 Seychellensc
🇸🇱 Sierra Leonesl
🇸🇬 Singapursg
🇸🇰 Slowakeisk
🇸🇮 Sloweniensi
🇸🇧 Salomon-Inselnjdn
🇸🇴 Somaliaso
🇿🇦 Südafrikaza
🇬🇸 Südgeorgien und die Südlichen Sandwichinselngs
🇪🇸 Spanienes
🇱🇰 Sri Lankalk
🇸🇩 Sudansd
🇸🇷 Surinamsr
🇸🇯 Svalbard & Jan Mayensj
🇸🇿 Swasilandsz
🇸🇪 Schwedense
🇨🇭 Schweizch
🇸🇾 Arabische Republik Syriensy

T

LandLändercodes
🇹🇼 Taiwan, Provinz Chinatw
🇹🇯 Tadschikistantj
🇹🇿 Tansania, Vereinigte Republiktz
🇹🇭 Thailandth
🇹🇱 Timor-Lestetl
🇹🇬 Togotg
🇹🇰 Tokelautk
🇹🇴 Tongaan
🇹🇹 Trinidad und Tobagott
🇹🇳 Tunesientn
🇹🇷 Türkeitr
🇹🇲 Turkmenistantm
🇹🇨 Turks- und Caicosinselntc
🇹🇻 Tuvalutv

U

LandLändercodes
🇺🇬 Ugandaug
🇺🇦 Ukraineua
🇦🇪 Vereinigte Arabische Emirateae
🇬🇧 Vereinigtes KönigreichGroßbritannien
🇺🇸 Vereinigte Staatenuns
🇺🇲 Kleinere abgelegene Inseln der Vereinigten Staatenum
🇺🇾 Uruguayuy
🇺🇿 Usbekistanuz

V

LandLändercodes
🇻🇺 Vanuatuvu
🇻🇪 Venezuelave
🇻🇳 Vietnamvn
🇦🇨 Jungferninseln, Britischvg
🇻🇮 Jungferninseln, U.S.vi

W

LandLändercodes
🇼🇫 Wallis und Futunawf
🇪🇭 Westsaharaeh

Y

LandLändercodes
🇾🇪 Jemenja

Z

LandLändercodes
🇿🇲 Sambiazm
🇿🇼 Simbabwezw

Verbotene Länder

Due to the sanctions imposed by the OFAC, Google Ads isn’t available to advertisers in certain countries mentioned below:

  • Krim
  • Kuba
  • Iran
  • Nordkorea
  • Sudan
  • Syrien
Keine Google-Anzeigen - Google-Ländervorwahlen

Schlussfolgerung

Verwenden Sie gegebenenfalls die Ländercodes für Google.

Wenn Sie über Google Shopping Ads werben möchten, finden Sie hier eine vollständige Anleitung zur Erstellung eines WooCommerce-Produkt-Feeds für Google Shopping.

Kategorien
WooCommerce Guide Product Feed Manager For WooCommerce

How To Auto-Sync WooCommerce Products To Google Merchant Shop in 2024

Es ist für die meisten WooCommerce-Shop-Besitzer selbstverständlich, dass sie versuchen, ihre Verkäufe durch die Förderung mehrerer verschiedener Händlergeschäfte zu steigern. Fast alle WooCommerce-Shop-Besitzer bewerben ihre WooCommerce-Produkte bei Google Merchant Shop, da es der größte Marktplatz ist, um mehr potenzielle Kunden zu gewinnen.

Product Feed Manager For WooCommerce makes it extra easy for you to promote your valuable products in different merchant shops. As a reliable WordPress agency, we care about your success. With the regular iteration of our plugin, we are spreading the way for your continuous improvements and benefits.

Today, we are happy to inform you about the new update of our plugin Product Feed Manager For WooCommerce. We recently added a new feature that will give you an extra hand in promoting your products on Google Merchant Shop.

With this latest version, you can simply work in harmony with the best merchant shop out there and potentially increase your revenue with product feed management strategies.

Hauen wir rein!

Hier ist das vollständige Video-Tutorial. Oder Sie lesen die schriftliche Anleitung unten, damit Sie Ihre WooCommerce-Produkte einfach automatisch mit Google synchronisieren können.

Automatische Synchronisierung von WooCommerce-Produkten an Google

You can auto-sync your WooCommerce Products to Google Merchant Shop using our plugin.

This means that with the latest Product Feed Manager For WooCommerce, you can now directly send your WooCommerce products to Google Merchant Shop; you no longer need to download and upload feed on your Google Merchant Center manually.

This feature carries out the task by allowing your Google Merchant Center to fetch the data of your updated Google product feed according to the schedule you decide.

You need to simply set up your Product Feed Manager For WooCommerce to integrate with your Google Merchant Shop.

Once you have set the required credentials to auto-sync the plugin with your Google merchant account, you can then choose your desired schedule, when you want your updated product feed to be collected by your Google Merchant Shop. It’s as simple as that.

Dadurch sparen Sie so viel Zeit. Sie können sich auf die Verbesserung Ihres WooCommerce-Shops konzentrieren, während Ihr aktualisierter Produkt-Feed automatisch an Ihren Google Merchant Shop gesendet wird.

WooCommerce Produkte zu Google Merchant Shop

So funktioniert es

Synchronizing your WooCommerce Products to Google Merchant Shop is an easy procedure. Just follow these steps and you are good to know how to generate A WooCommerce Google feed with auto sync featurs.

Sie benötigen 3 spezifische Informationen, um die Synchronisation einzurichten:

  • Kunden-ID
  • Kundengeheimnis
  • Google-Händler-ID

Sie können Ihre Client-ID und das Client-Secret in Ihrer Google Developers Console und Ihre Google Merchant ID in Ihrem Google Merchant Shop erfassen.

Falls Sie nicht wissen, wie Sie sie finden können, lesen Sie weiter, wir haben eine Anleitung zum Sammeln der Daten bereitgestellt.

Beginnen wir jetzt mit den Schritten.

Schritte zur automatischen Synchronisierung von WooCommerce-Produkten mit Google Merchant Shop

Sie müssen ein paar spezifische Schritte befolgen, um es einzurichten.

Gehen wir also jeden Schritt nacheinander durch.

Schritt 1 - Sammeln Sie die Kunden-ID und das Kundengeheimnis

i. Ein Projekt anlegen

Gehen Sie zunächst zur Google Developers Console und melden Sie sich mit Ihrem Google-Konto an. Sie sehen dann ein Dashboard wie dieses:

Google Console API Dashboard.png

Wenn Sie bereits ein Projekt für Ihre Produkte erstellt haben, können Sie dasselbe verwenden, oder Sie können ein neues Projekt erstellen, wenn Sie noch kein Projekt haben.

To do this, you need to click on New Project. Here you will be given a list of projects that you have created so far.

Neues Projekt auswählen

Click on New Project to set up a new project.

Create New Project

Now provide the required information.

New Project Required Information

Here, you can change the Project Name/ Project ID if you want.

Once the project is ready, you will get a notification on the top right corner. You can select your new project from the New Project option or from the Notification dropdown.

New Project Added Notification

ii. Content-API für den Einkauf aktivieren

Content API for Shopping is an interface that allows you to interact with the merchant center platform directly. This helps you to increase the efficiency of your shop with proper data management in a more organized way.

To activate it for your current project, Go to the Dashboard. Select ENABLE APIS AND SERVICES.

Enable Content API Option

It will take you to the API Library Dashboard.

API Library Dashboard

Search for Content API for Google Shopping and select the Content API for Shopping option

Search Content API for Shopping

Click on the Enable button to enable the Content API for the Shopping option

Enable Content API for Shopping

However, you don’t need to enable this Content API for Shopping if you see that it is enabled in the first place.

iii. Berechtigungsnachweise erstellen

Dies ist der wichtigste Teil, in dem Sie die Anmeldeinformationen einrichten müssen, damit die API richtig funktioniert. Lassen Sie uns anfangen.

a. Bildschirm OAuth-Zustimmung

Click on the OAuth Consent Screen option on the left, and It will take you to the OAuth Consent Screen.

Select External as the User Type and click on the Create button.

OAuth Consent Screen - User Type

Now fill up the forms and click on the SAVE AND CONTINUE button.

OAuth Consent Screen - App Registration
The terms you will face here are

Bildschirm "OAuth-Zustimmung

- Name der Anwendung

Der Name der App, für die Sie um Zustimmung bitten. Diesen müssen Sie angeben, sonst können Sie sich nicht mit Ihrem Schritt nähern.

- Anwendungs-Logo

Das identische Bild Ihrer App, um genau zu sein, ein Logo Ihrer App. Kunden werden Ihre App anhand dieses Bildes erkennen.

- E-Mail-Unterstützung

Diese E-Mail-ID hilft Ihren Kunden, Sie zu erreichen, wenn Sie Benutzerunterstützung benötigen. Die Google-ID, die Sie zum Einloggen in Ihre Google-Konsole verwendet haben, wird standardmäßig hier platziert.

- Autorisierter Bereich

Sie müssen hier die URL der Anwendung eingeben. Andernfalls wird Google Ihre Domain nicht als autorisiert markieren. Wie Sie auf dem Bild unten sehen können, habe ich meine Domain cloudwaysapps.com bereitgestellt.

Ihre Domäne ist wahrscheinlich bereits standardmäßig vorhanden, aber falls Sie sehen, dass es keine Domäne gibt, sollten Sie hier die autorisierte Domäne Ihres Geschäfts angeben.

- Anwendungs-Homepage/Datenschutzpolitik/ TOS-Link

Dies sind die jeweiligen Links zur Homepage und zu den Datenschutzbestimmungen und -bedingungen Ihres Antrags, und sie werden auf Ihrem Einverständnis-Bildschirm angezeigt. Sie müssen jedoch auf Ihrer autorisierten Domain gehostet werden - sonst brauchen Sie das Feld nicht auszufüllen.

Provide the Application Name and Authorized Domain(s) to start the process. You can add the rest of the options later.


Click on SAVE AND CONTINUE.

Scopes

OAuth Consent Screen - Scopes
- Bereiche für Google-APIs

You are provided with a list of scopes here. You can also add your own. The level of scopes you choose here (such as email/profile/OpenID/custom), your application can access only that part of your user’s data.

Click on SAVE AND CONTINUE.

Test Users

OAuth Consent Screen - Test Users
Assign Test Users

While the publishing status is set to “Testing”, only test users are able to access the app. Allowed user cap prior to app verification is 100, and is counted over the entire lifetime of the app. 

You can provide access to the test users from here.

Click on SAVE AND CONTINUE.

It will show you a summary and your registration is now complete.

OAuth Consent App Registration Summary
b. OAuth Kunden-ID

Gehen Sie zurück zu Referenzen. Klicken Sie auf die blaue Schaltfläche Create credentials und wählen Sie OAuth Client ID aus dem Dropdown-Menü.

OAuth Client ID - Create Credentials

At first, select Web Application as the Application Type.

OAuth Cliet ID Type

You will see the following info:

Create New OAuth Client ID
The terms you will face here are
- Name

Sie müssen hier einen Namen angeben, um sich zu nähern. Es ist der Name Ihrer OAuth(Open Authorization)-Client-ID. Wie Sie sehen können, habe ich den Namen als Test Guide Web App1 festgelegt.

- Autorisierte JavaScript-Ursprünge

Sie ist die Ursprungs-URI der Client-Anwendung. Ihre Verwendung ist nicht immer obligatorisch. Wenn Sie jedoch einen Nicht-Standard-Port verwenden, sollten Sie ihn hier angeben.

- Autorisierte Umleitung von URIs

Nach der Authentifizierung bei Google ist dies der Pfad, den Sie benötigen, um Ihre Nutzer auf Ihre Anwendung umzuleiten. Es darf keine öffentliche IP-Adresse sein und es muss die passende Redirect-URL aus Ihrem Plugin-Dashboard sein.

You will get the Redirect URL from your Product Feed Manager For WooCommerce dashboard. Go to Product Feed> Google Merchant Settings and you can see the redirect URL marked in the picture below.

Umleitungs-URL sammeln

Kopieren Sie die Adresse und fügen Sie sie unter Autorisierte Umleitungs-URIs ein und klicken Sie auf Erstellen.

OAuth Content ID - Set Redirect URL

You will see that under Credentials, you have an OAuth 2.0 Client ID created, and you will get the OAuth Client ID credentials.

New OAuth Client ID Credentials

Copy the Client ID and Secret and you can also download the credentials in JSON format for later use by clicking on the DOWNLOAD JSON button.

Close the box and you will see that a new OAuth 2.0 Client ID is added.

OAuth 2.0 Client ID List

You can click on the ID to view and edit information.

Schritt 2 - Holen Sie sich Ihre Google-Händler-ID

To get started with Google Merchants, follow this link. You will be taken to your merchant dashboard. From here you can monitor your feeds, product list, and some more options.

So when you send your WooCommerce Products to Google, they will be listed here.

Von hier aus ist es einfach, Ihre Händler-ID zu finden. Sie ist direkt neben unserem Profilbild angegeben, wie auf dem Bild unten gezeigt:

Google-Händler-ID

Kopieren Sie die Händler-ID und speichern Sie sie.

Step 3 – Sync Product Feed Manager For WooCommerce With Google Merchant Shop

Finally, when you have your Client ID, Client Secret, and Merchant ID, Go to Your Dashboard> Product Feed> Google Merchant Settings.

Geben Sie alle Informationen entsprechend ein, wie unten gezeigt:

Enter Google Merchant Credentials to PFM

Sobald Sie alles eingerichtet haben, klicken Sie auf "Submit". Klicken Sie nach dem Absenden auf Authentifizieren.

It will redirect you to the permission page of Google. Allow your Google account to approve access to your authorized domain. Then you will get a message that ‘You are authorized’.

Autorisiert für Auto-Synchronisation

Und Sie sind bereit! Jetzt ist es an der Zeit, die Auto-Synchronisationsfunktion zu nutzen, um Ihre WooCommerce-Produkte an Google Merchant Shop zu senden.

Schritt 4 - Planen Sie die automatische Synchronisierung

Now that the setup is complete, you can go to your product feed, and on the right side of the page, you will see that there is the new feature, Send to Google Merchant.

Automatische Synchronisierung des Produkt-Feeds mit Google

Unter diesem Abschnitt haben Sie die Optionen:

  • Zielland
  • Zielsprache
  • Zeitplan
  • Stunde auswählen
An Google Merchant Box senden

Wählen Sie zunächst das Zielland und die Sprache.

FYI:
You have to input a short form, and it has to match Google’s format. At first, you can see a small paragraph with a ‘Click here’ link. Go there and check the short forms of your desired target country and language to be accurate.

Als nächstes können Sie Ihren Zeitplan nach Ihrem eigenen Willen festlegen.

Choose between WeeklyMonthly, or Hourly basis.

Arten von Zeitplänen

Wenn Sie "Stündlich" wählen:

Stündlicher Zeitplan

Then select the number of hours after which the schedule will be triggered.

Wenn Sie Wöchentlich wählen:

Wöchentlicher Zeitplan

Then choose a day of the week and the hour of that day when this schedule will be triggered.

Wenn Sie Monatlich wählen:

Monatlicher Zeitplan

Wählen Sie dann das Datum eines Monats und die Stunde des Tages, an dem dieser Zeitplan ausgelöst wird.

Sie können zu Ihrem Google Merchant Center > Feed gehen und den gesendeten Feed überprüfen.

Since the schedule is set, this feed will be updated automatically according to the schedule, regularly.

Jetzt sind Ihre Feeds ordnungsgemäß mit dem Google Merchant Center synchronisiert, und Sie müssen nicht mehr bei jeder Aktualisierung Ihrer Produkt-Feeds auf Ihre Konten zugreifen. Daher müssen Sie keine WooCommerce-Produkte mehr manuell auf Google hochladen.

Nehmen Sie einfach Änderungen an Ihrem Feed vor, und Ihr Google Merchant Shop erhält die Aktualisierung automatisch.

Schlussfolgerung

Product Feed Manager For WooCommerce has been under constant improvement to help you promote your products easily.

If you find any Google feed errors, our support team is always there to give you instant support when you need it.

Update your Product Feed Manager For WooCommerce on a regular basis and benefit from all the new features we add on a regular basis.

Wir hoffen, dass dieser Artikel für Sie nützlich war, und wünschen Ihnen eine angenehme Reise mit Ihrem WooCommerce-Shop, indem Sie Ihre WooCommerce-Produkte automatisch mit Google synchronisieren.

Kategorien
WooCommerce Guide Product Feed Manager For WooCommerce

6+ Powerful Google Product Feed Optimization Tips For E-commerce Success

Google is the #1 search engine in the world and seemingly the best place for marketing. Google offers Google Merchant Center to allow eCommerce stores to promote their products through Google.

If an eCommerce store can create proper Google product feeds, its sales can skyrocket in no time.

But, you will need to know how to optimize Google Shopping feed so that your Google product feed is approved by Google in the first place. 

Your WooCommerce store may include many variations and attributes for your products, but Google Merchant Center has its own set of requirements that you must meet in order to upload your products and get approved with your Google product feed.

That’s why I came up with 6+ high-impact Google product feed optimization tips and going to explain them in this blog.

So, let’s get started!

**P.S. These are just basic tips. If you want a detailed guide then read:

1. Select Product Category According To Google

Google Product Feed Category

Your website may have custom categories, different from Google. But Google has its own taxonomy list, and you must submit a feed accordingly.

You must make sure that Google product feed has all the products categorized according to the Google taxonomy list.

Your website may have custom categories, different from Google. But Google has its own taxonomy list, and you must submit a feed accordingly. You must make sure that Google product feed has all the products categorized according to the Google taxonomy list.

When you optimize product feeds, you must map your categories with Google category list, or else Google won’t accept it.

For Example:
If you have a product under the category ‘Apparels > Bodywear’ on your site, it is not in the Google taxonomy list. So you need to map it with the most relevant one. In this case, in Google, the product should be under ‘Apparel & Accessories > Clothing.’

Also when mapping, be as specific as possible and categorize the product under the most relevant sub-heading. 

For example, if your product is a Tuxedo, then the best category under Google will be ’Apparel & Accessories > Clothing > Suits > Tuxedos.’ 

This will narrow down search results for targeted customers, hence more chance of a conversion.

2. Deciding A Good Title

Your product title is what Google relies on when deciding how to optimize Google Shopping feed for a customer’s search phrase.

Plus the title acts as a hook, to grab customers’ attention and create more interest.

Google allows you to write a title of up to 150 characters. It is wise to optimize product feeds by giving a title that says what your product is from your eCommerce store, and some of its best features that people search for.

For Example:
If you are selling a Tuxedo for a particular brand — let’s assume ‘Rexth Clothing’ is a brand. You can choose the title “Rexth Ultralight Black Modern Fit Tuxedo With Golden Buttons.” This title highlights the brand, the color, the type, the product itself and one of its exclusive features.

Now, basic Google previews will only show 35 characters only. So try to make the first 35 characters relevant to what people might search for when looking for this particular product.

Inside the Google Merchant Portal, it will only display 75 characters and the rest will show when the customer clicks on your product. Which means you should include your best keywords within the first 75 characters.

It’s ideal for shop owners to write titles within 75 characters and include target keywords there for optimized results.

Google Product Preview

**P.S.: Don’t add promotional phrases to your title such as “Limited offer,” “Special Discount,” etc. Google algorithms take these negatively.

3. Beginning Of Description

After searching for a product on Google, a person will be able to see a preview of the details of your product. These details include the title, description, review rating, price, etc.

For description, even though you can write up to 5000 characters, the first couple of lines are crucial. How to optimize Google shopping feed involves making the description as compelling and informative as possible within the first 175 characters.

The description on Google Shopping Preview will only display the first 175 characters of the actual description. 

Thus you should try to include the best benefits and features of your products in the first couple of lines. This will act as a trigger to create ‘desire’ in customers.

Try to make it precise and not a marketing promotion of your site.

Beschreibung

4. Detailed Description

As we mentioned earlier, the beginning of the product description is crucial and should be catchy while including targeted keywords. But this doesn’t change the fact that you have to write a proper description nonetheless. 

Make the description as detailed as possible and include all the features and benefits of your product. This is crucial for google feed optimization as it helps in better ranking and visibility.

Also, keep in mind the SEO attributes when writing the description. Make sure to include keywords and avoid including any irrelevant data.

Do not give any misinformation. Reminding you that just one bad review can lower your rankings on Google search.

5. Advantage Of A Unique Image For Google Product Feed Optimization

Even though you may have multiple images for your product, Google will specifically ask for an image link to a picture of your product, which will be used as the preview photo in the search results.

Google Shopping Preview

It is best to create a high-quality Image for this purpose. Now, most shop owners directly take images from the manufacturers’ sites; thus almost all of their previews are about the same.

The smart thing to do here is to try and give a picture that is different and will stand out.

You can take a photo on your own or search for a uniquely clicked photo of the same product and use them (as long it is not a copyright infringement) as the image for your product.

Having a unique photo on display, among others who all look similar to each other, will create more curiosity among customers.

Unique Picure

A different picture stands out and grabs customers’ attention.

But do make sure not to add extra promotional text on the images. Also, it is advised to give an image with a white background.

6. Include The Mandatory Data In Your Google Product Feed

Include The Mandatory Data for Google Product Feed Optimization

Apart from the product category, title, description and image, there are a few more data which you must include in your product feed.

(i) Condition

This basically lets you choose from the options ‘new’, ‘refurbished’ or ‘used.’

(ii) Availability

You can choose from the options, ‘in stock’, ‘out of stock’ or ‘pre-order’. This information has to be included on your feed and later updated according to current availability on a regular basis.

**P.S.: Failure to deliver, while saying the product is available, has a negative impact. One bad review from a customer can affect Google’s priority on your products. Hence, be honest about the availability.

(iii) Price

You need to specify the product price and currency.

Make sure to include VAT within the price (except in the USA, Canada or India). Most customers expect to pay exactly what is mentioned. (The only extra fee people may agree to pay is the shipping charge).

**Note: Don’t tweak your Google product feed and make it different from your actual site, at least in the case of the data that are to be displayed on the preview. Once you provide the data, Google will cross-check with your website. Any mismatch and Google will penalize your ranking.

(iv) GTIN (Global Trade Item Number)

This is a unique product identifier for any product (often in the form of barcodes).

You may know GTIN as UPC (if in North America), EAN/UCC (if in most places outside North America), JAN (if in Japan), ISBN (if you deal with books), etc. There are more countries which call it by different names, but all serve the same purpose.

Often products may have multiple GTINs. In that case, you may choose either one. If you are offering a package with numerous products, then providing the GTIN of any one of the products will be fine.

GTIN is not a marketing term or a feature of the product. But Google algorithm gives more priority to products that have GTIN. So it’s best to include it in your Google Product Feed.

(v) MPN (Manufacturer Part Number)

MPN is a unique identifier of each product, deduced by the manufacturer. You will be required to include this in case you don’t have a GTIN for any product.

**In case you have a product with no GTIN or MPN, you need to mark the ‘identifier_exists’ attribute of that particular product as false. Not marking it false will automatically be considered as true, and Google will look for a GTIN in your product feed. In this case, your product feed will be rejected.

(vi) Product Link

You will need to provide a direct link to the product, not the root domain.

(vii) Brand Name

Google will ask for the name of the manufacturer, not your company or any distributors. So don’t include your name in this field unless it is your own manufactured product.

(viii) Product ID

The product ID is the code you assign to your products on your website. This will allow you to keep track of your products from Google to your site.

Google Merchant Shop is a must for any WooCommerce shop owners, who want more potential customers.

Make sure you have created a proper Google Product Feed. In case you are not confident in creating on your own, you can use plugins or feed management tools.

You May Try Out A WordPress Plugin

The process of setting up and keeping up a Google Shopping feed takes time and work.

You can rely on the plugin Product Feed Manager For WooCommerce (developed by us, RexTheme) which is simple to use and will help you generate Google Product Feed with no hassle. It has a built-in feed format set up for Google and many other merchants’ shops.

Produkt-Feed-Manager

This plugin will let you map categories very easily, and all you will need to do is select the products you want to generate a feed for. 

It will create a feed that you can auto-sync with your Google Merchant Shop, and with little or no changes, your products will be up on Google Shipping. 

You may try using its free version and see if it suits you.