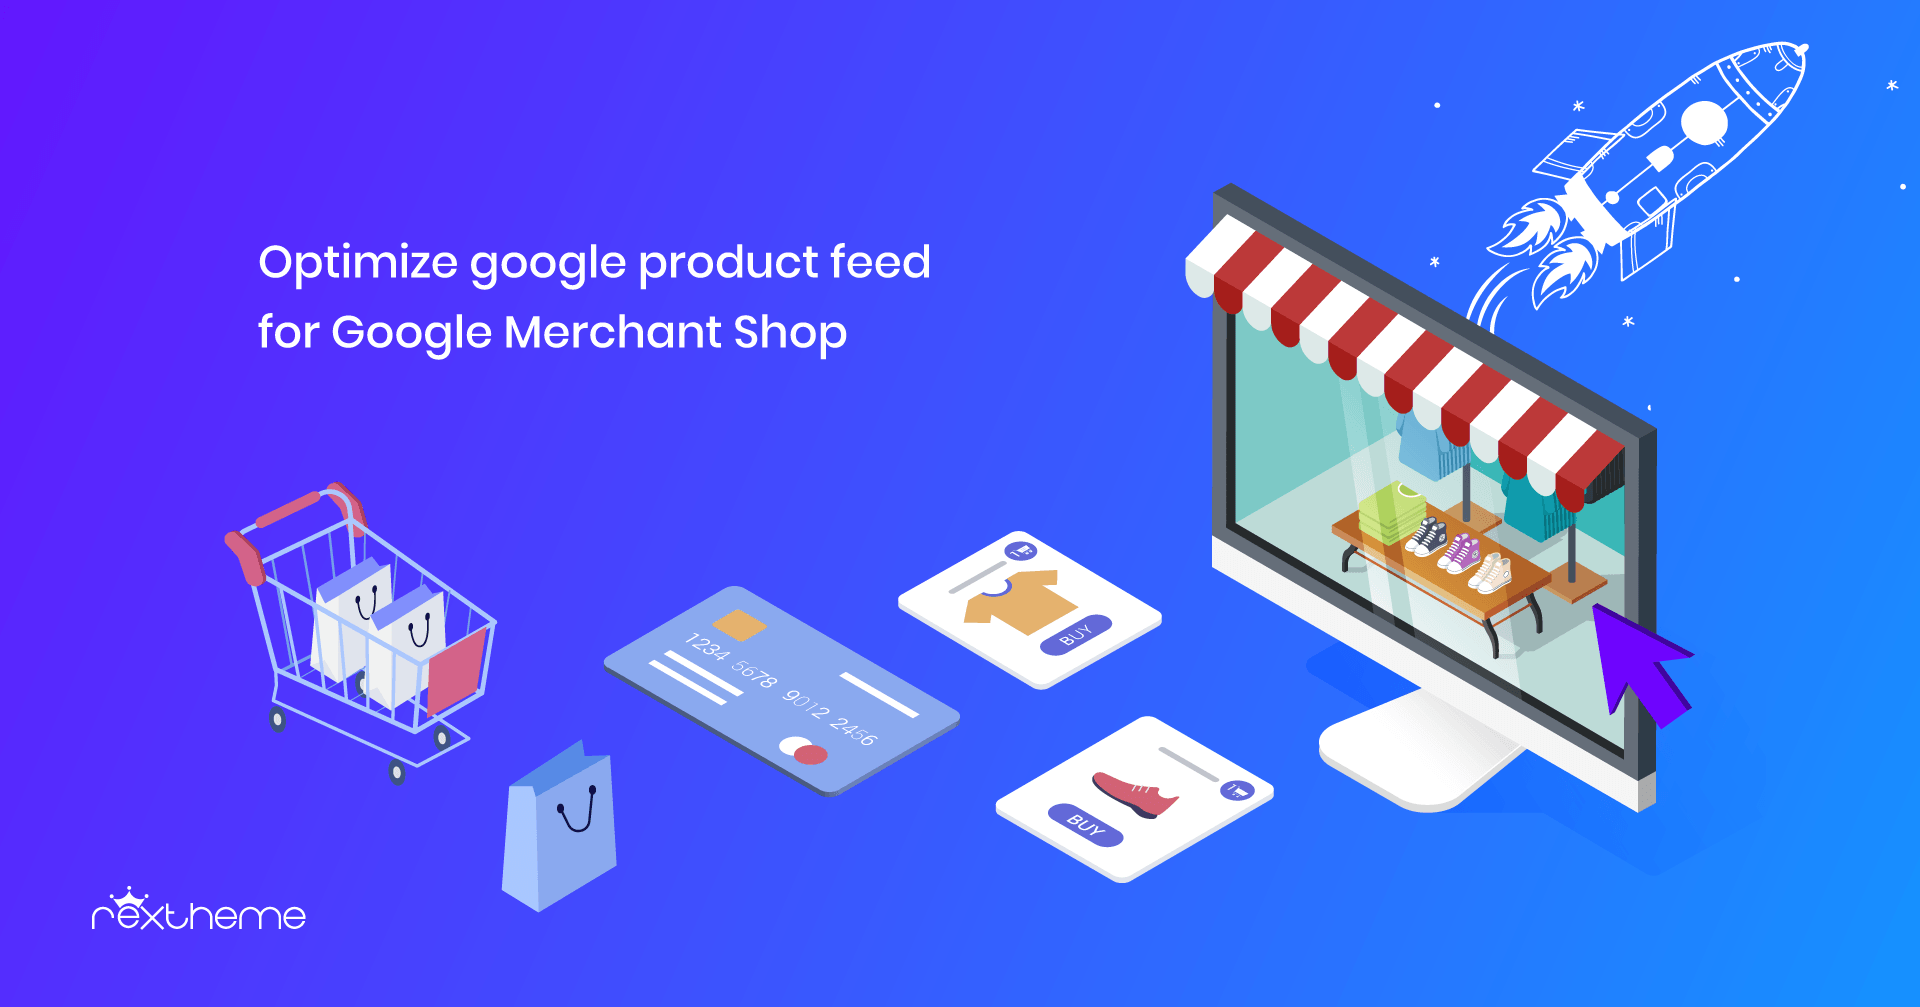
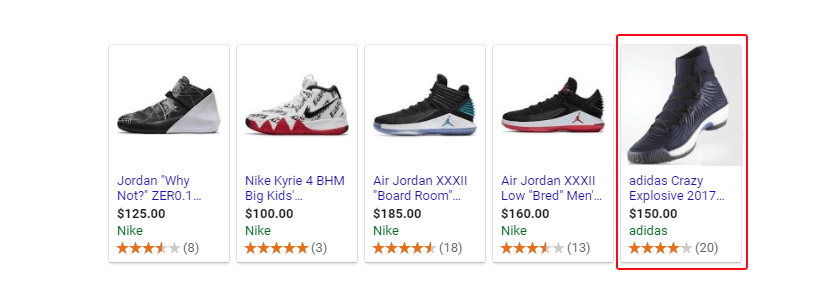
It is natural for most WooCommerce Shop Owners to try and increase their sales by promoting several different merchant shops. Almost all WooCommerce store owners promote their WooCommerce Products to Google Merchant Shop since it is the largest marketplace to get more potential customers.
Product Feed Manager For WooCommerce makes it extra easy for you to promote your valuable products in different merchant shops. As a reliable WordPress agency, we care about your success. With the regular iteration of our plugin, we are spreading the way for your continuous improvements and benefits.
Today, we are happy to inform you about the new update of our plugin Product Feed Manager For WooCommerce. We recently added a new feature that will give you an extra hand in promoting your products on Google Merchant Shop.
With this latest version, you can simply work in harmony with the best merchant shop out there and potentially increase your revenue with product feed management strategies.
Let’s dig in!
Here’s the complete video tutorial. Or you may read the written guide below so that you can auto-sync your WooCommerce Products to Google easily.
Auto-sync WooCommerce Products To Google
You can auto-sync your WooCommerce Products to Google Merchant Shop using our plugin.
This means that with the latest Product Feed Manager For WooCommerce, you can now directly send your WooCommerce products to Google Merchant Shop; you no longer need to download and upload feed on your Google Merchant Center manually.
This feature carries out the task by allowing your Google Merchant Center to fetch the data of your updated Google product feed according to the schedule you decide.
You need to simply set up your Product Feed Manager For WooCommerce to integrate with your Google Merchant Shop.
Once you have set the required credentials to auto-sync the plugin with your Google merchant account, you can then choose your desired schedule, when you want your updated product feed to be collected by your Google Merchant Shop. It’s as simple as that.
This will save you so much time. You can focus on improving your WooCommerce Shop while your updated product feed will automatically be sent to your Google Merchant Shop.
Here’s How It Works
Synchronizing your WooCommerce Products to Google Merchant Shop is an easy procedure. Just follow these steps and you are good to know how to generate A WooCommerce Google feed with auto sync featurs.
You will need 3 specific information to set up the synchronization:
- Client ID
- Client Secret
- Google Merchant ID
You can collect your Client ID and Client Secret from your Google Developers Console and you can collect your Google Merchant ID from your Google Merchant Shop.
In case you are unaware of how to find them, continue reading, we have provided instructions on how to collect them.
Let’s begin with the steps now.
Steps to Auto-Sync WooCommerce Products to Google Merchant Shop
You need to follow a few specific steps to set it up.
- Step 1 – Collect Client ID And Client Secret
- Step 2 – Get Your Google Merchant ID
- Step 3 – Sync Product Feed Manager For WooCommerce With Google Merchant Shop
- Step 4 – Schedule the Auto-Sync
So let’s go through each step one by one.
Step 1 – Collect Client ID And Client Secret
i. Create A Project
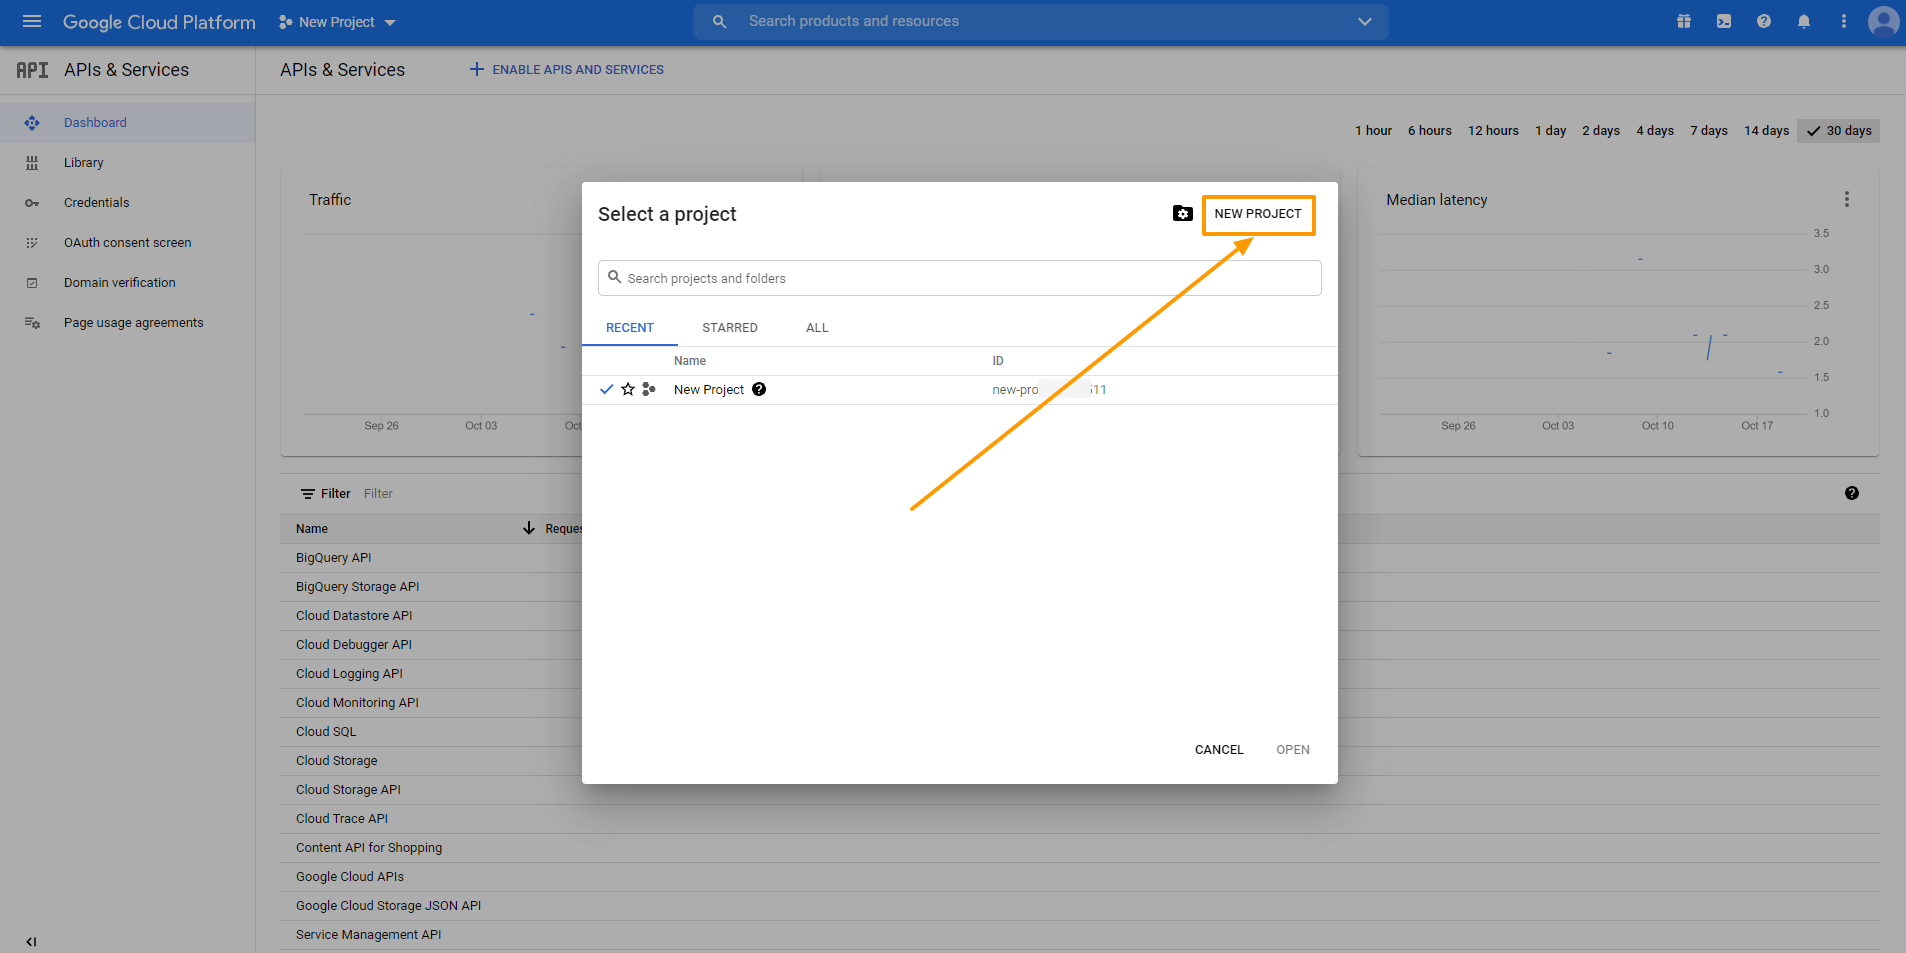
First, go to Google Developers Console and log in with your Google account. You will see a dashboard like this:

If you already have a project created for your products, you can use the same, or you can create a new project if you don’t have one yet.
To do this, you need to click on New Project. Here you will be given a list of projects that you have created so far.

Click on New Project to set up a new project.
Now provide the required information.
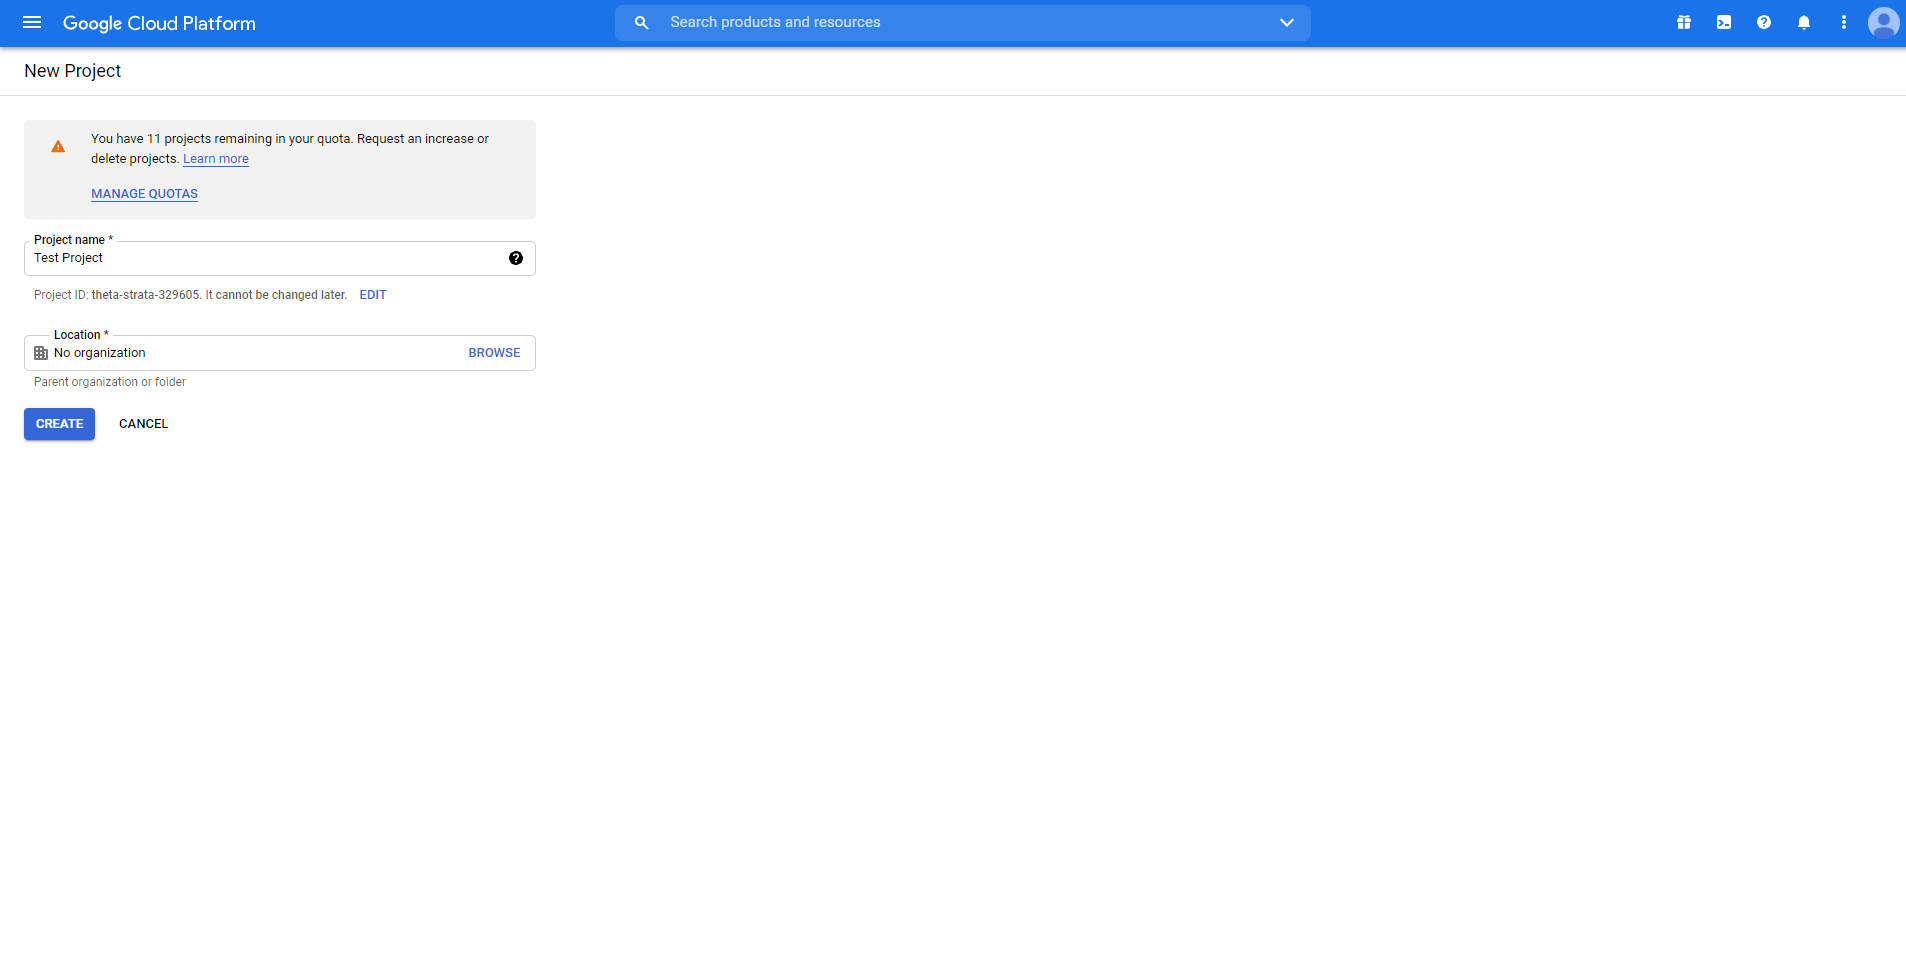
Here, you can change the Project Name/ Project ID if you want.
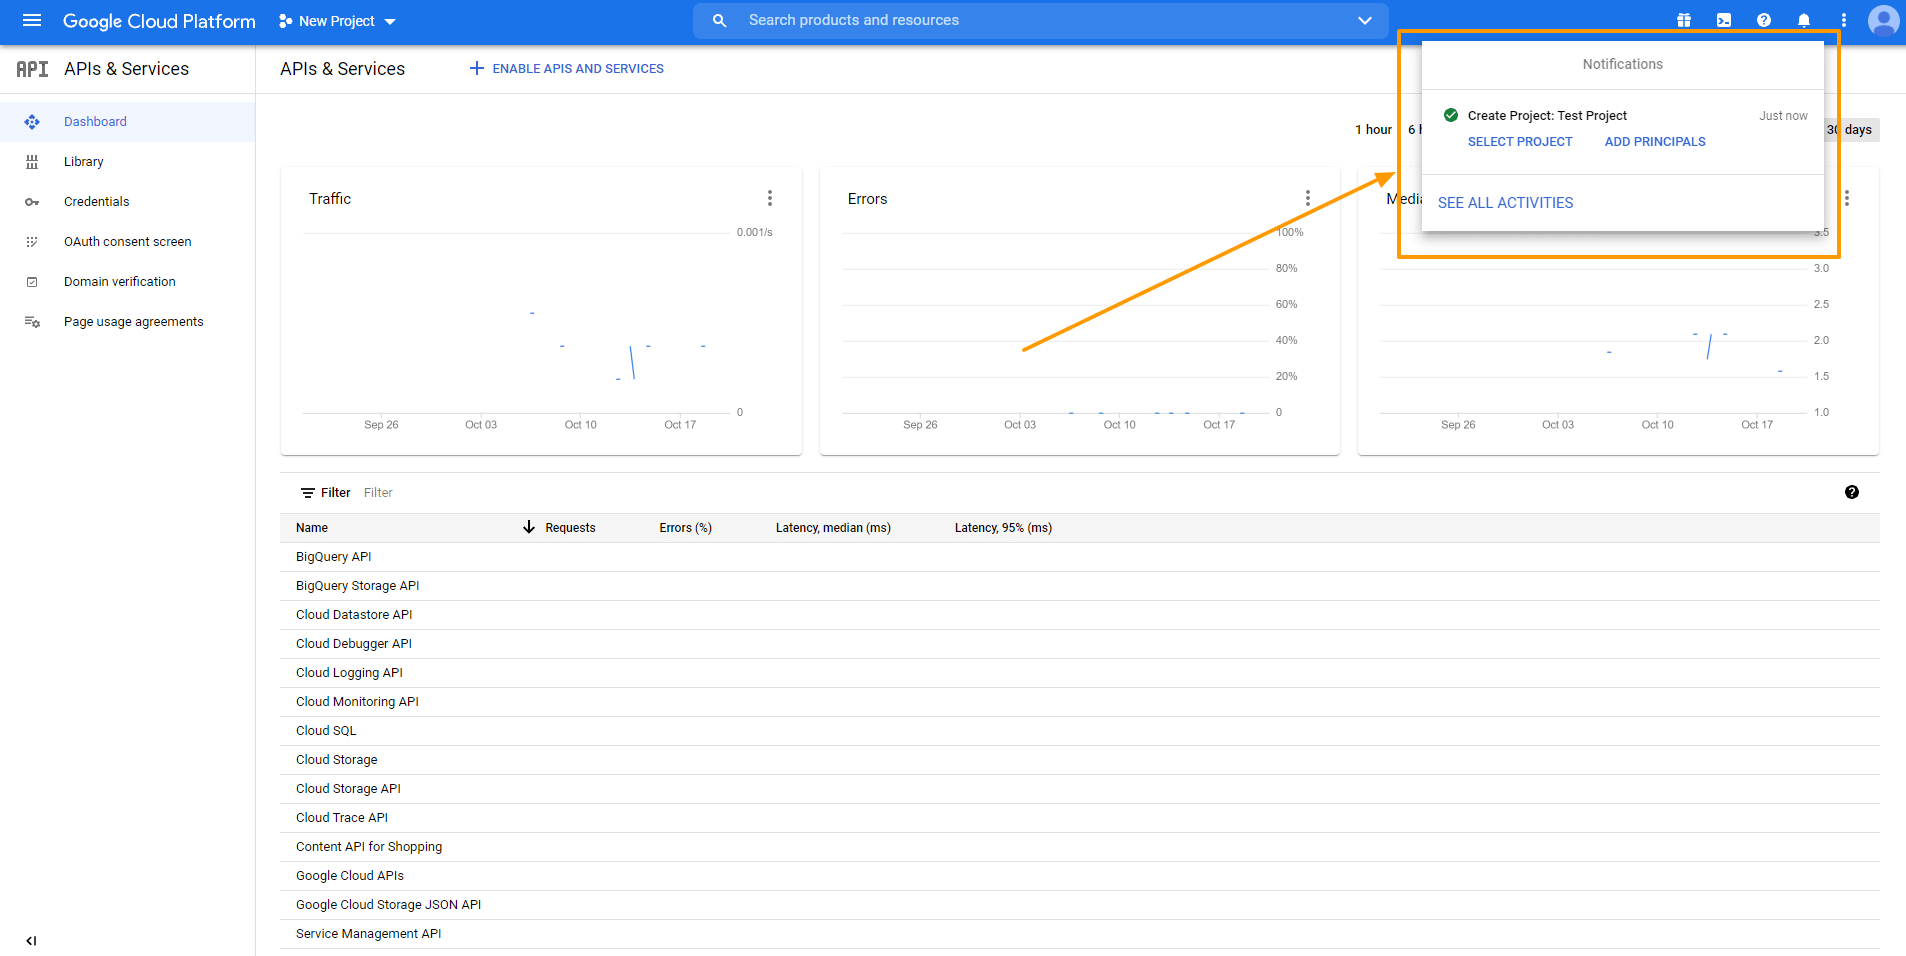
Once the project is ready, you will get a notification on the top right corner. You can select your new project from the New Project option or from the Notification dropdown.
ii. Enable Content API for Shopping
Content API for Shopping is an interface that allows you to interact with the merchant center platform directly. This helps you to increase the efficiency of your shop with proper data management in a more organized way.
To activate it for your current project, Go to the Dashboard. Select ENABLE APIS AND SERVICES.
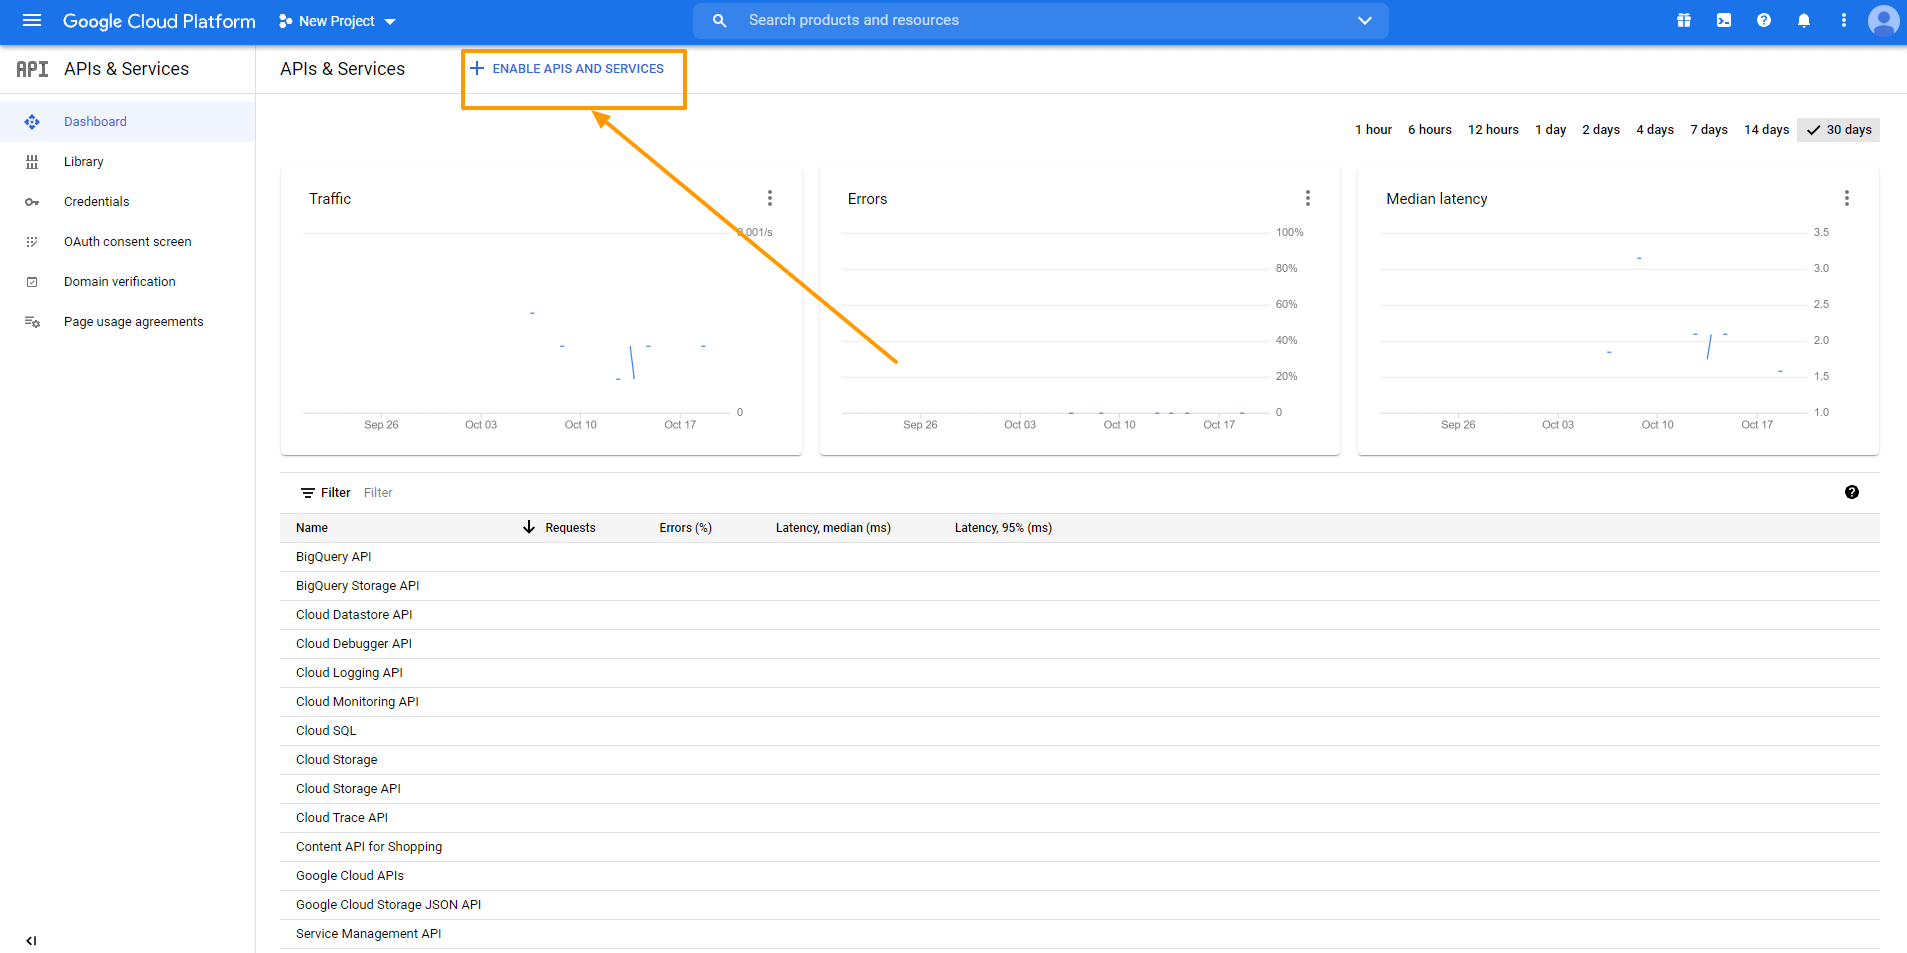
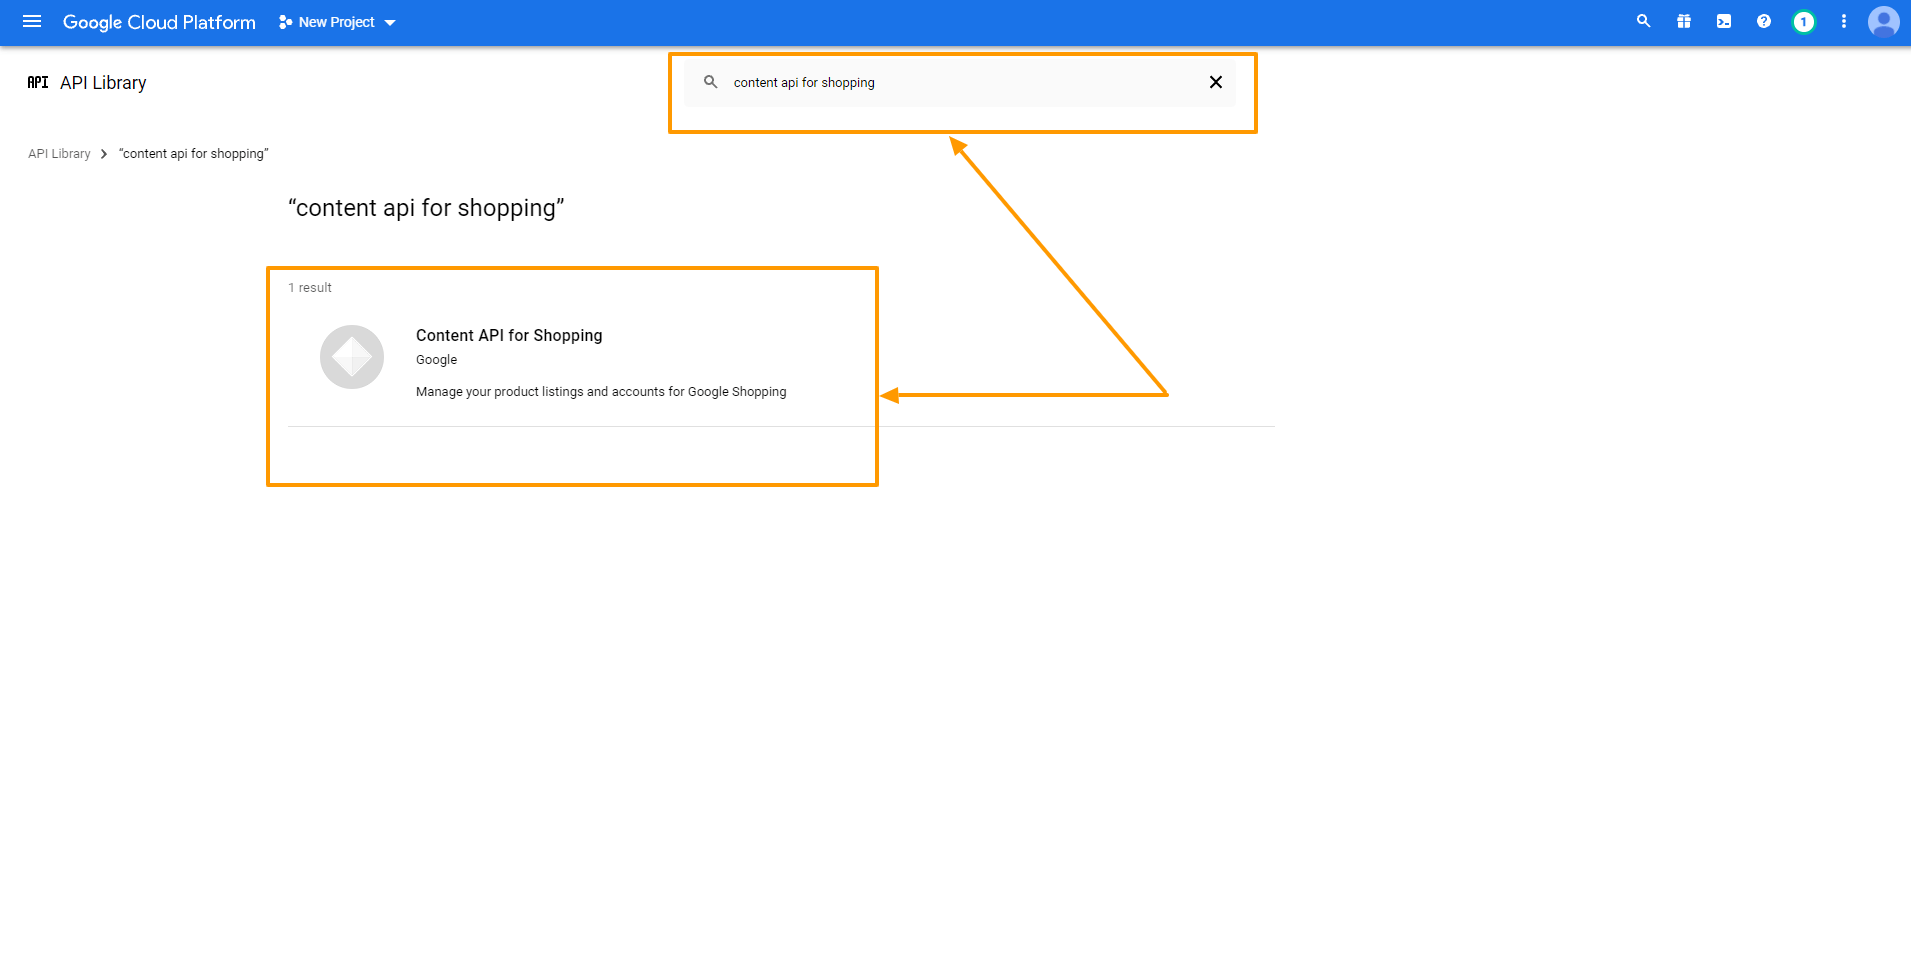
It will take you to the API Library Dashboard.
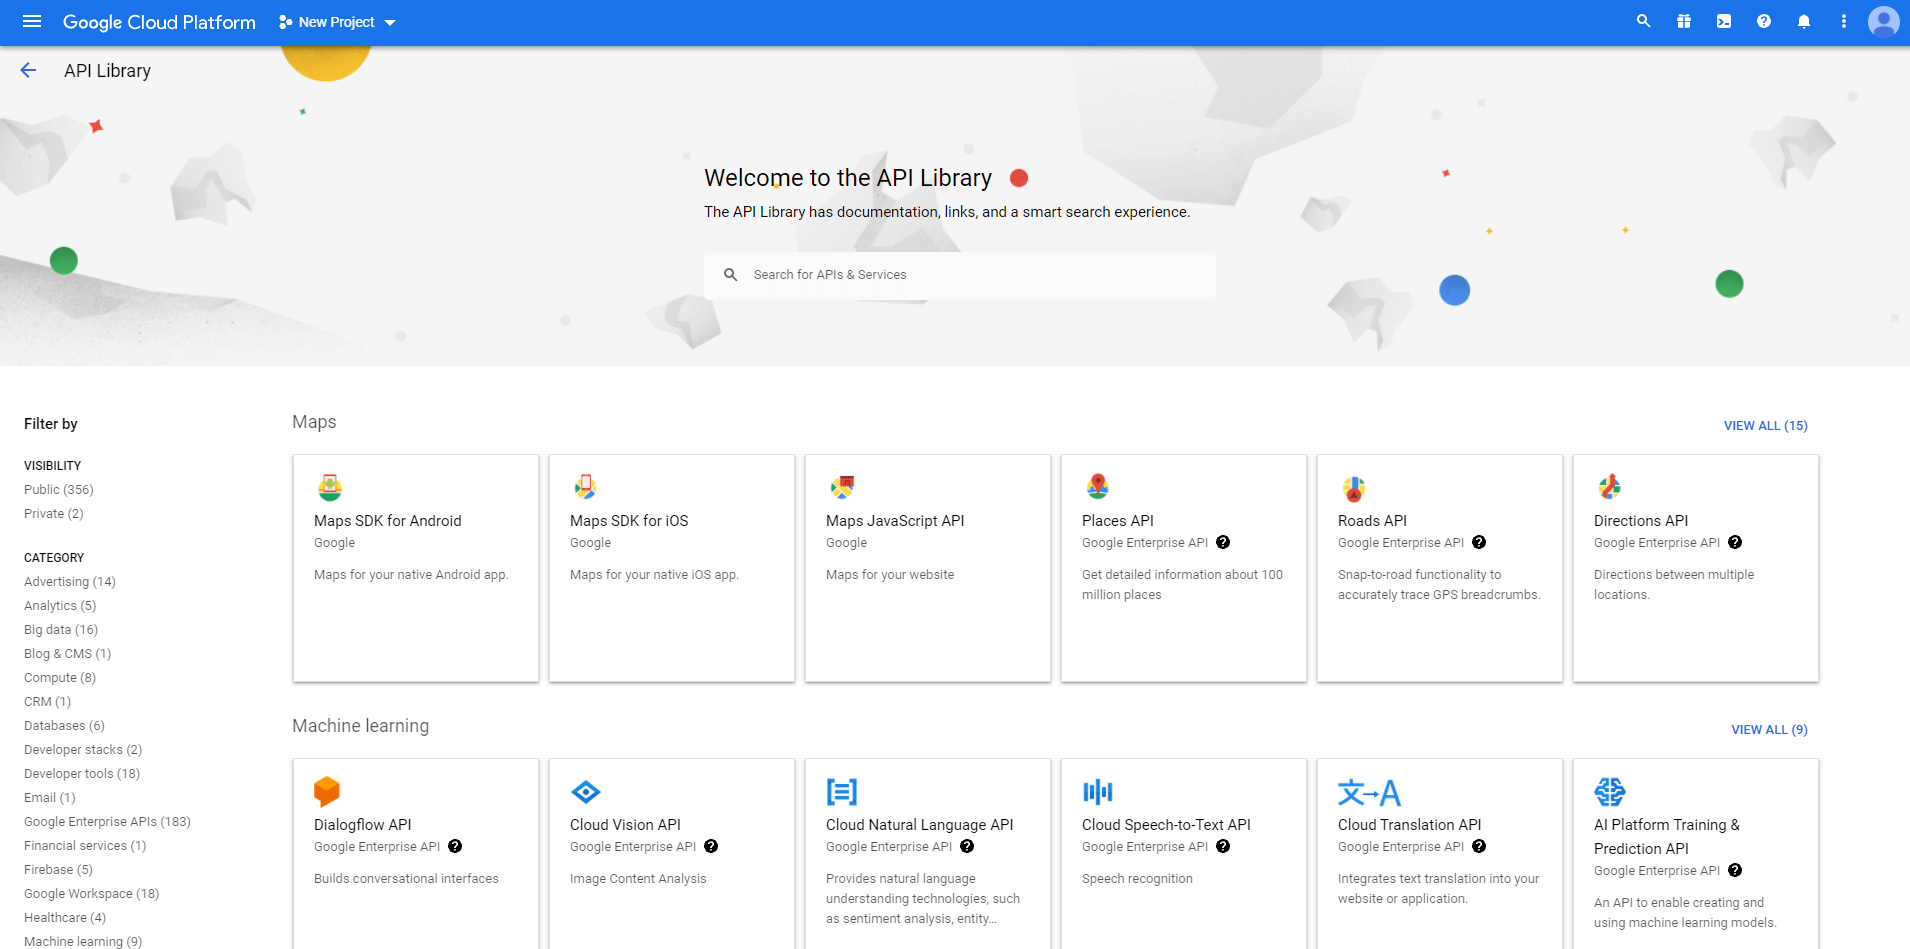
Search for Content API for Google Shopping and select the Content API for Shopping option
Click on the Enable button to enable the Content API for the Shopping option
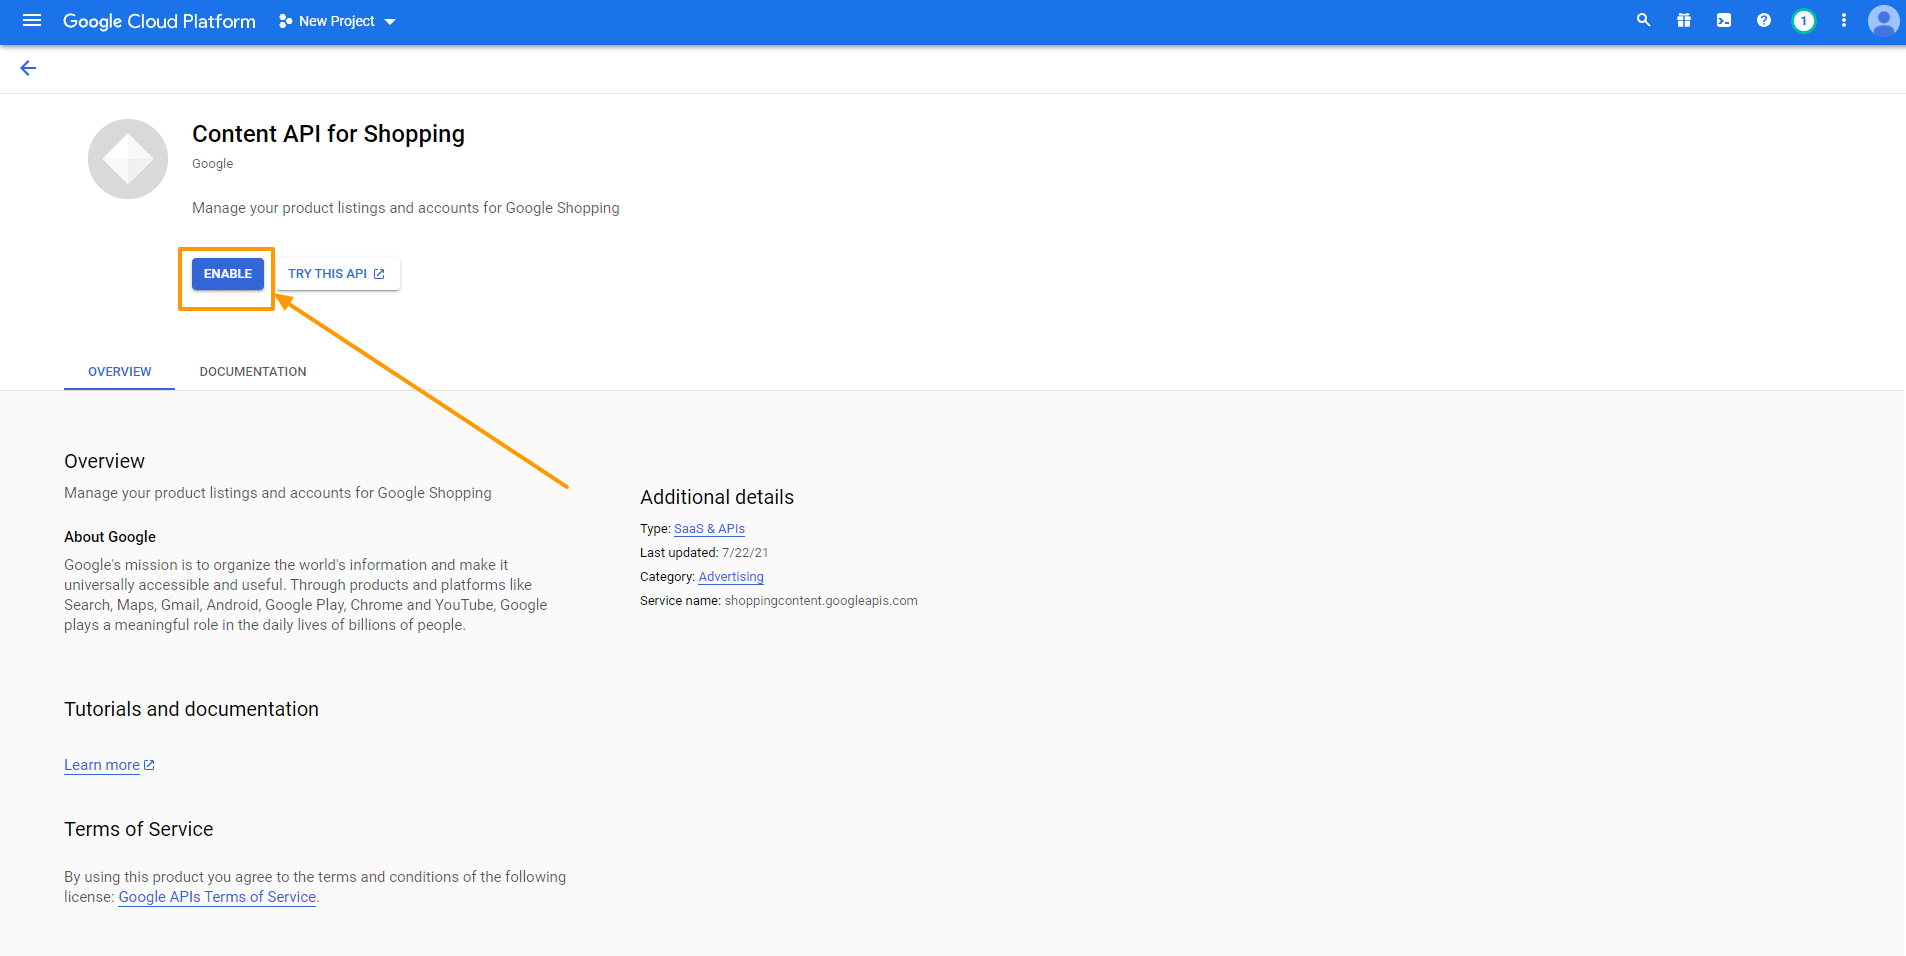
However, you don’t need to enable this Content API for Shopping if you see that it is enabled in the first place.
iii. Create Credentials
This is the most important part where you will need to set up credentials to make the API work properly. Let’s get started.
a. OAuth Consent Screen
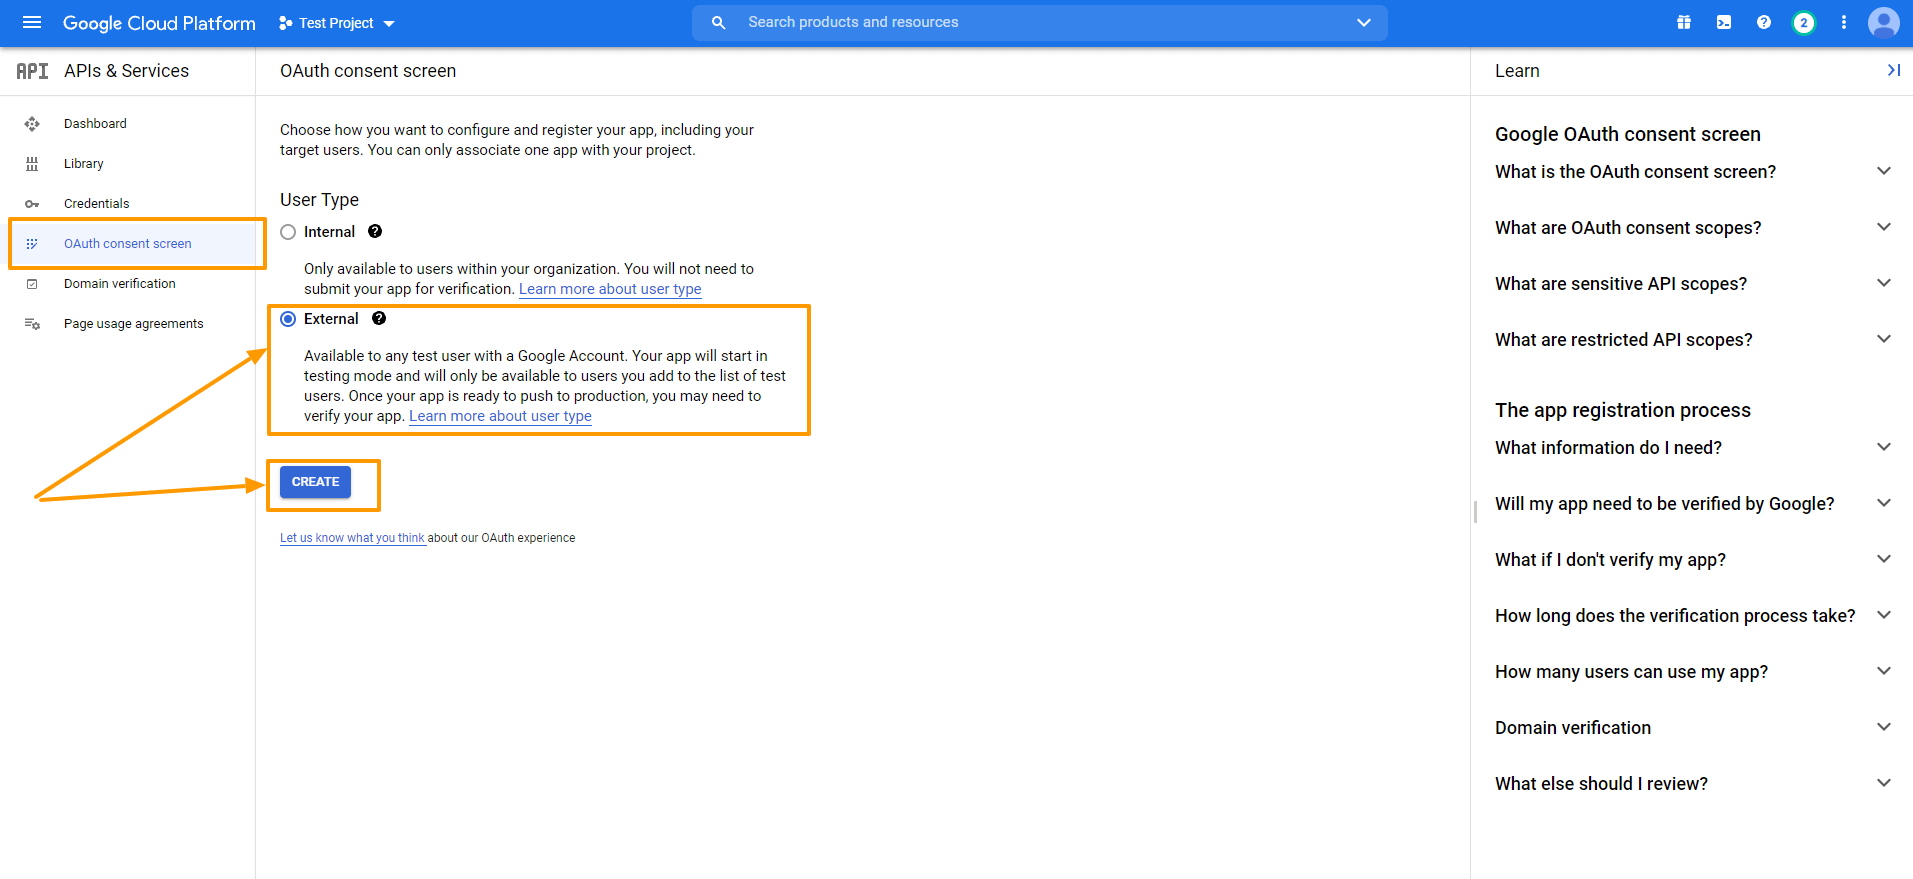
Click on the OAuth Consent Screen option on the left, and It will take you to the OAuth Consent Screen.
Select External as the User Type and click on the Create button.
Now fill up the forms and click on the SAVE AND CONTINUE button.

The terms you will face here are
OAuth Consent Screen
• Application Name
The name of the App you are asking for consent. You need to provide this otherwise you can not approach with your step.
• Application Logo
The identical image of your app to be specific, a logo of your app. Customers will recognize your app based on this image.
• Support Email
This email ID will help your customers to reach you in need of user support. The google id you used to log in to your google console will be placed here by default.
• Authorized Domain
You must enter the application URL here. Otherwise, Google won’t mark your domain as authorized. As you can see in the picture below, I provided my domain, cloudwaysapps.com.
Your domain will probably already be there by default but in case you see that there is no domain, you should provide the authorized domain of your shop here.
• Application Homepage/Privacy Policy/ TOS Link
These are the respective homepage and privacy policy/ terms and service links of your application and they will be previewed on your consent screen. But it has to be hosted on your authorized domain — otherwise no need to fill the box.
Provide the Application Name and Authorized Domain(s) to start the process. You can add the rest of the options later.
Click on SAVE AND CONTINUE.
Scopes
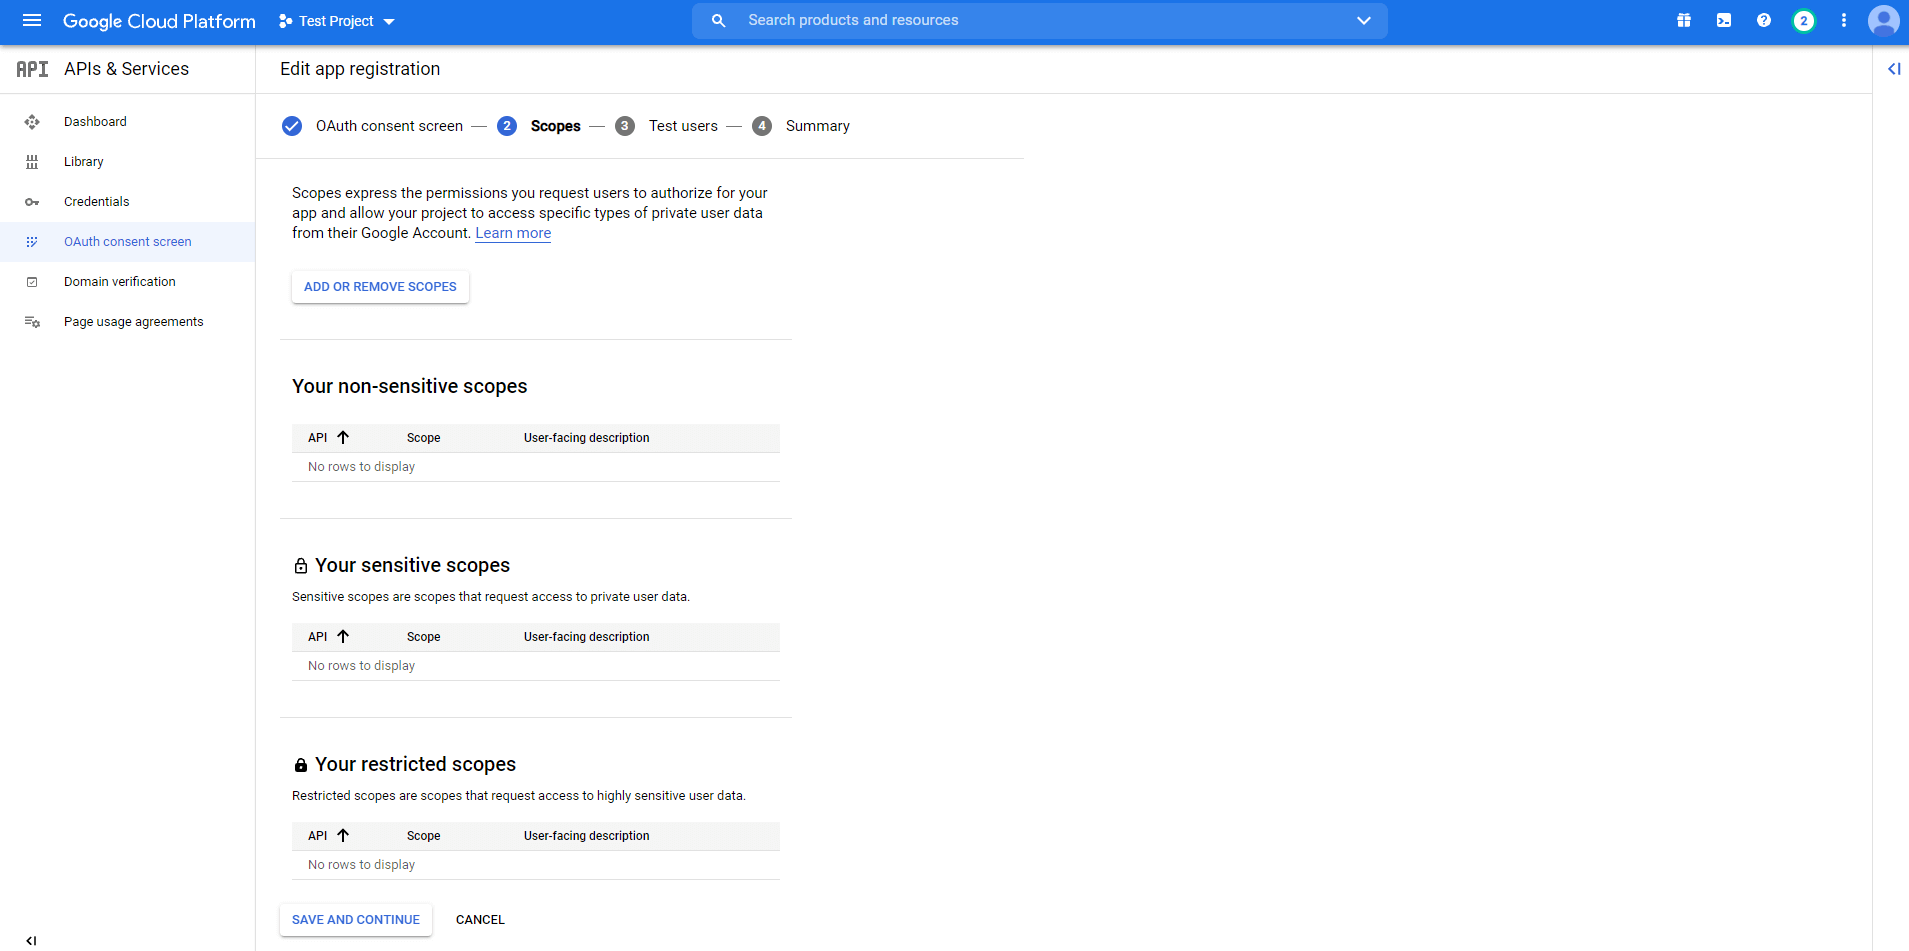
• Scopes for Google APIs
You are provided with a list of scopes here. You can also add your own. The level of scopes you choose here (such as email/profile/OpenID/custom), your application can access only that part of your user’s data.
Click on SAVE AND CONTINUE.
Test Users
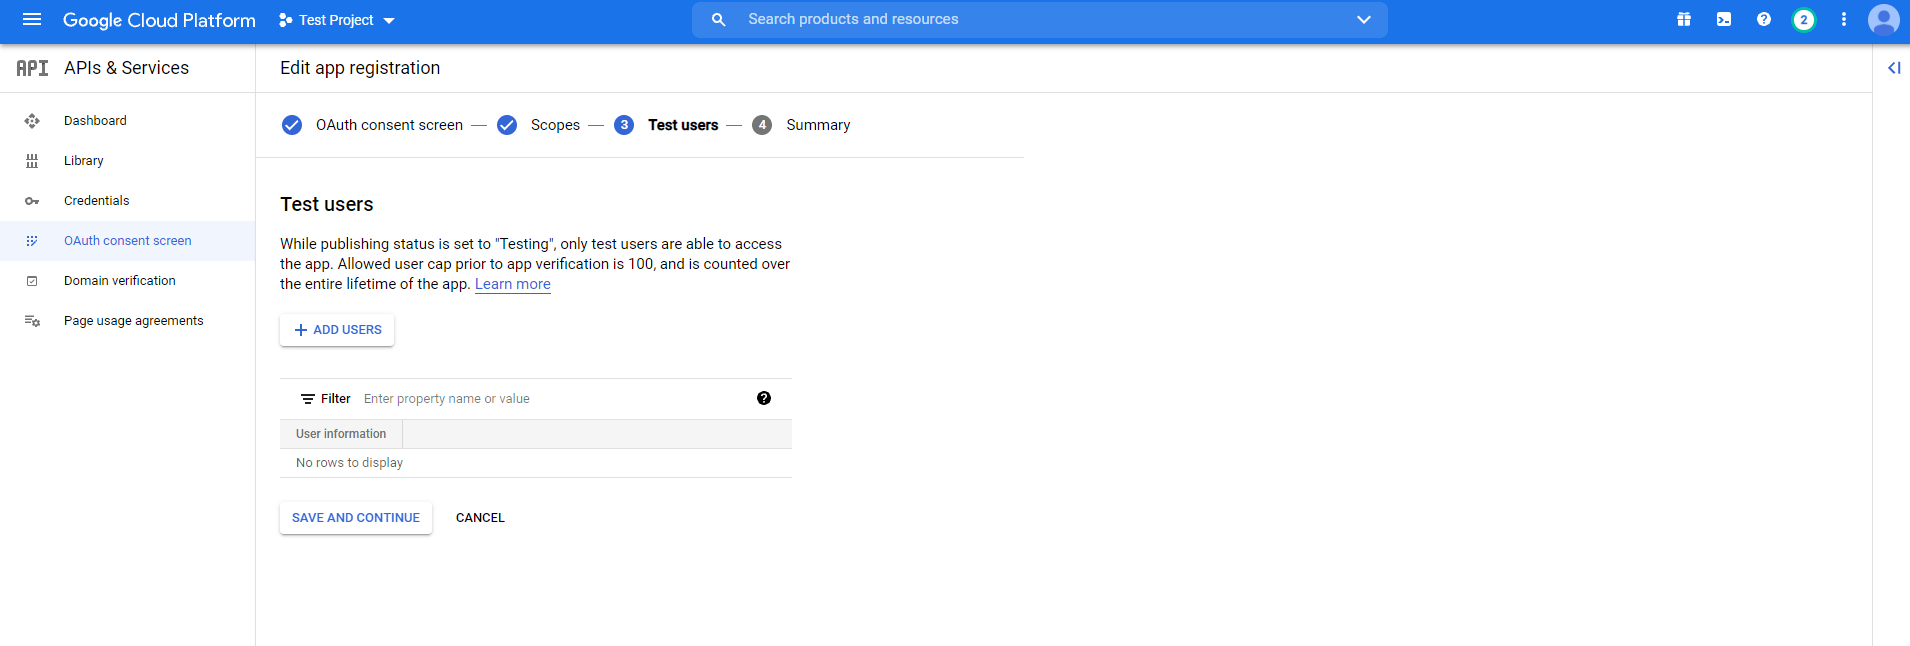
Assign Test Users
While the publishing status is set to “Testing”, only test users are able to access the app. Allowed user cap prior to app verification is 100, and is counted over the entire lifetime of the app.
You can provide access to the test users from here.
Click on SAVE AND CONTINUE.
It will show you a summary and your registration is now complete.

b. OAuth Client ID
Go back to Credentials. Click on the blue button Create credentials and choose OAuth Client ID from the drop-down menu.
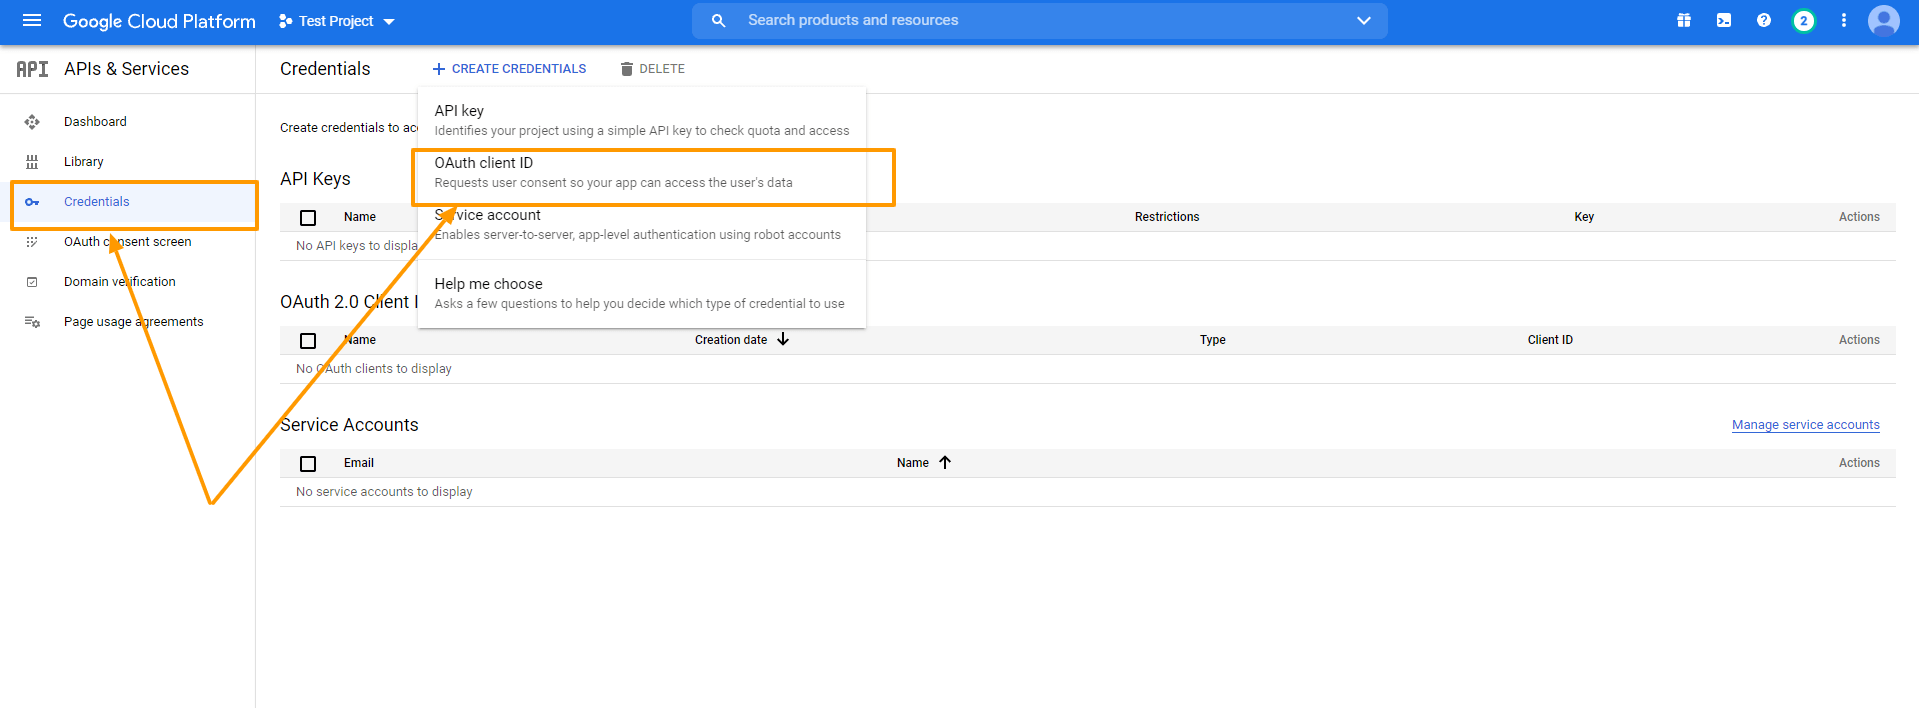
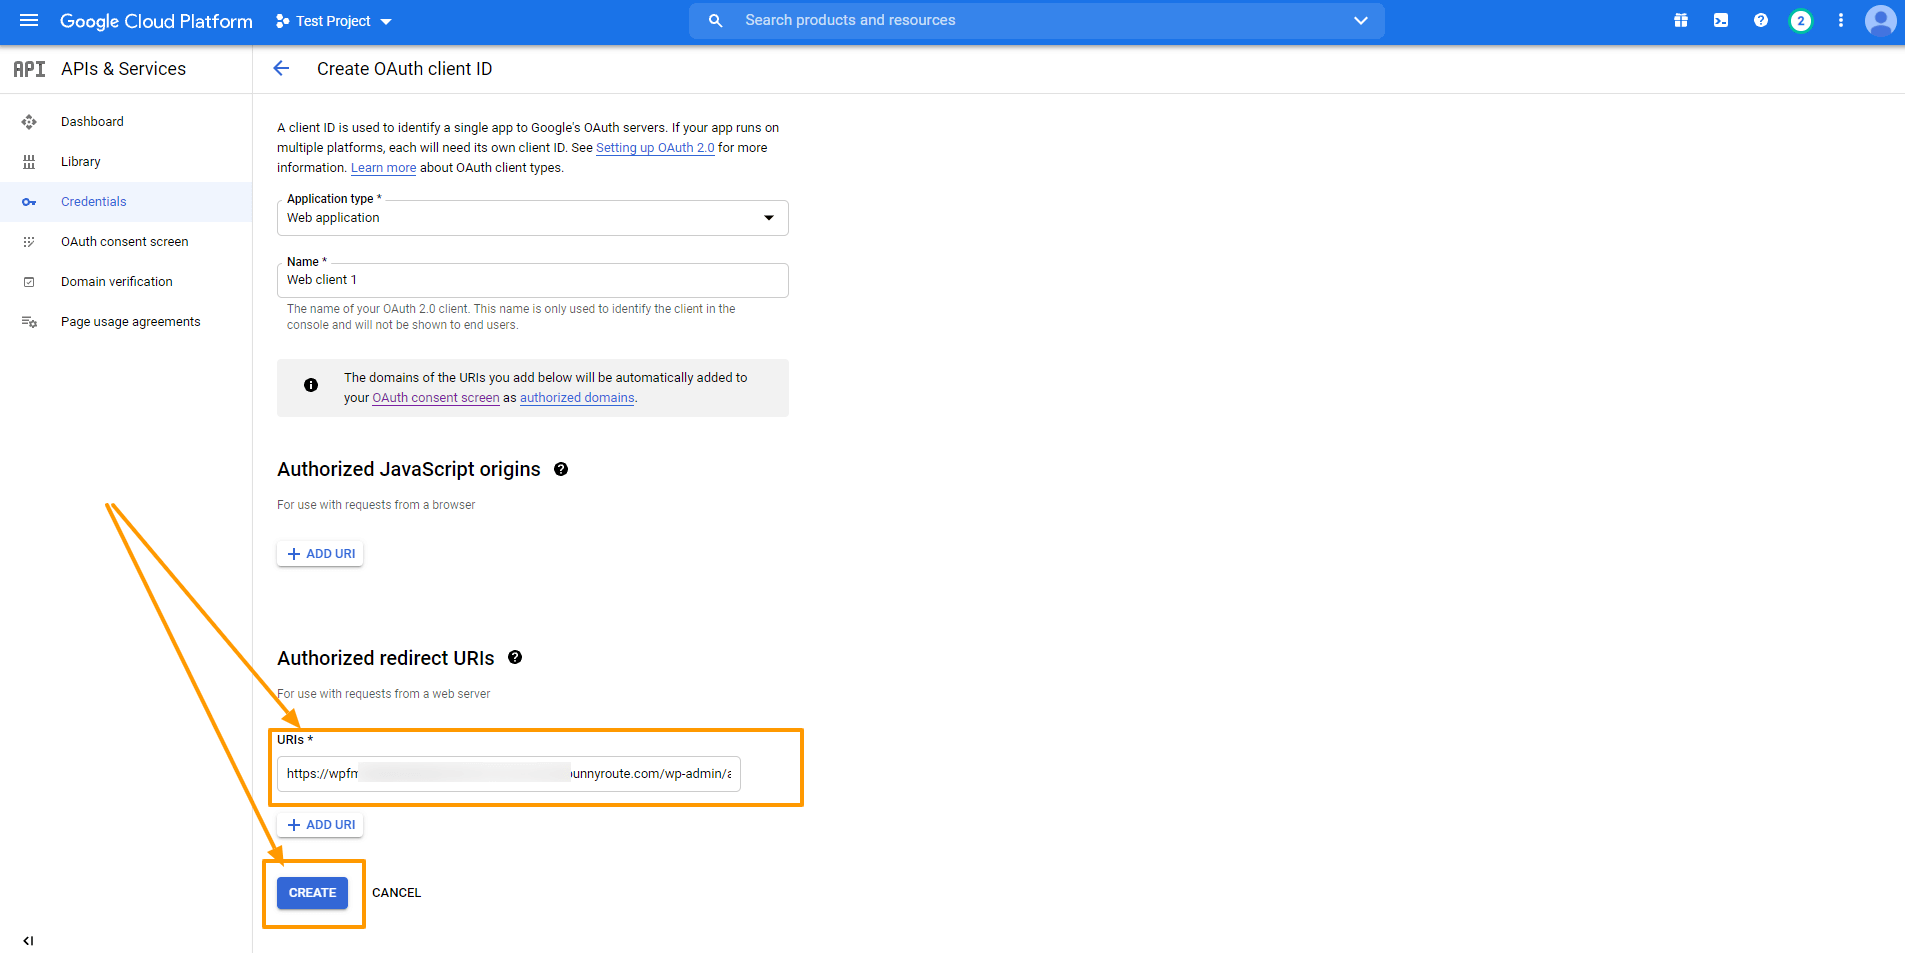
At first, select Web Application as the Application Type.
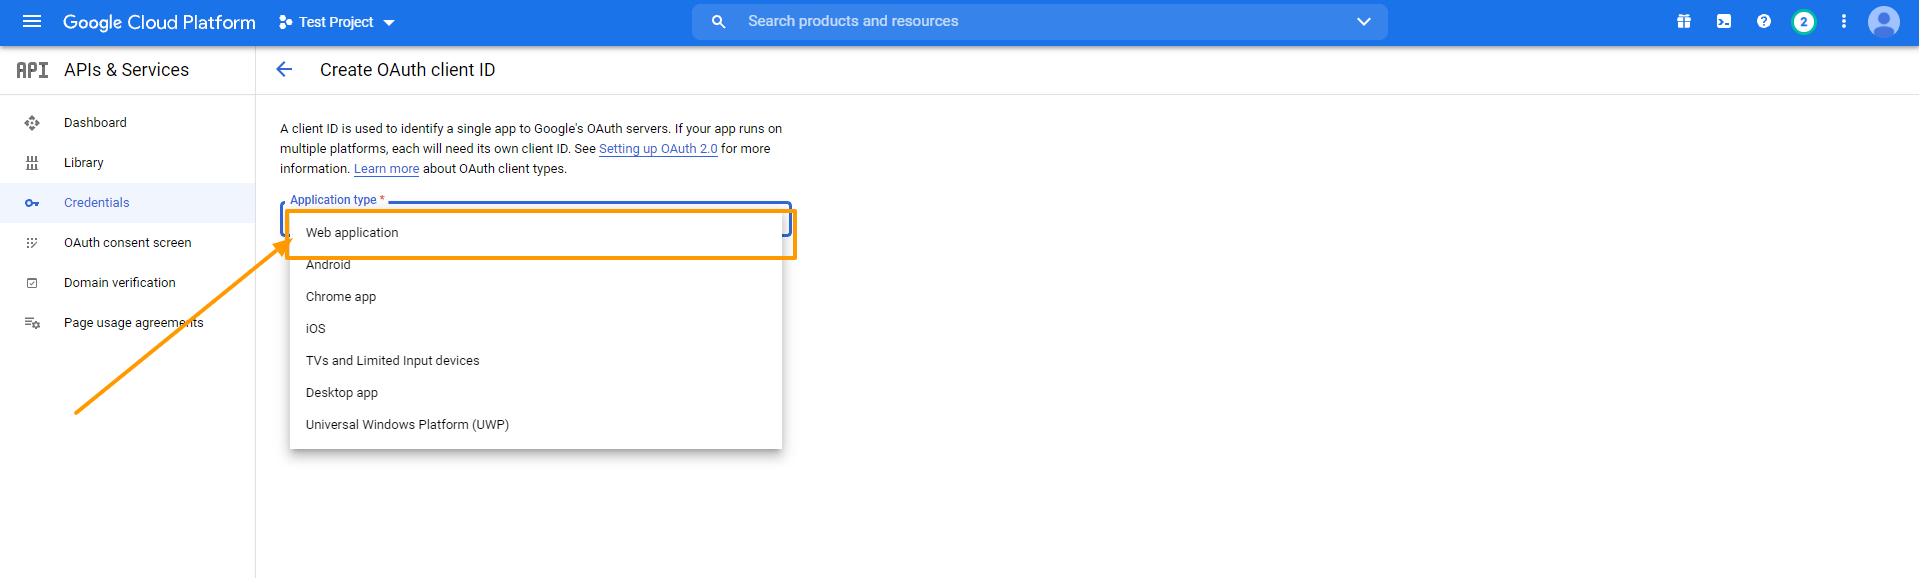
You will see the following info:
The terms you will face here are
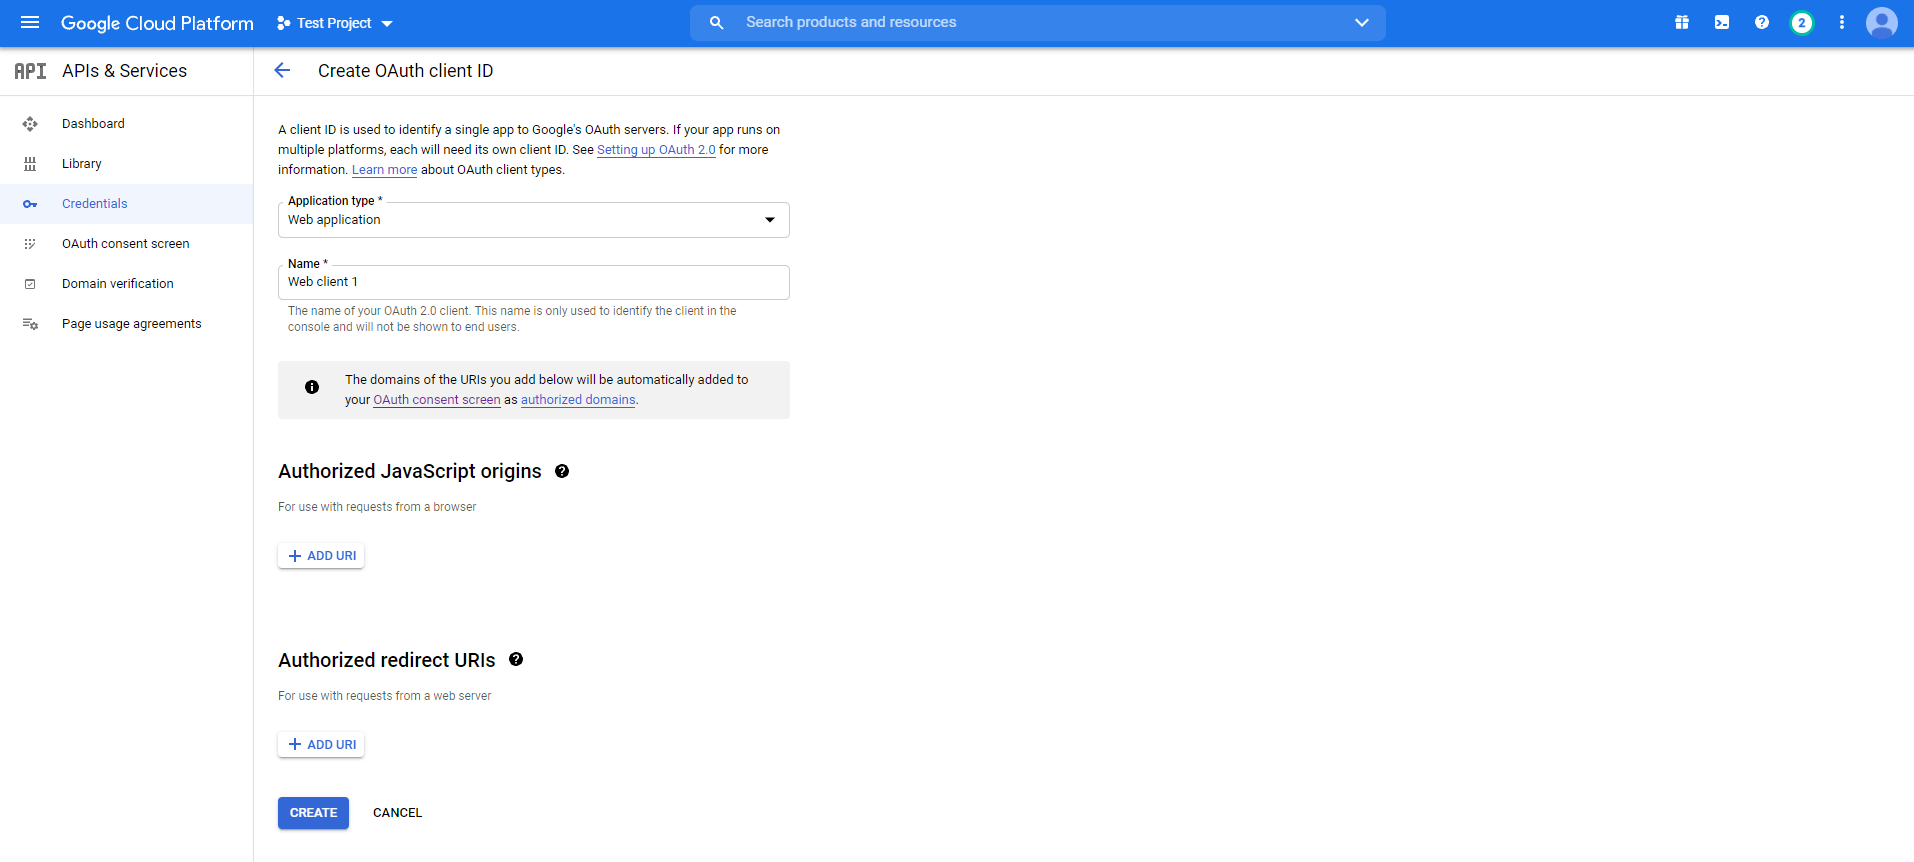
• Name
You need to provide a name here to approach. It is the name of your OAuth(Open Authorization) Client ID. As you can see, I have set the name as Test Guide Web App1.
• Authorized JavaScript Origins
It is the origin URI of the client application. It is not always mandatory to use. However, if you are using a non-standard port, you should include it here.
• Authorized Redirect URIs
After the authentication with Google, this is the path you will need to redirect your users to your application. It can not be a public IP address and it has to be the matching Redirect URL from your plugin dashboard.
You will get the Redirect URL from your Product Feed Manager For WooCommerce dashboard. Go to Product Feed> Google Merchant Settings and you can see the redirect URL marked in the picture below.
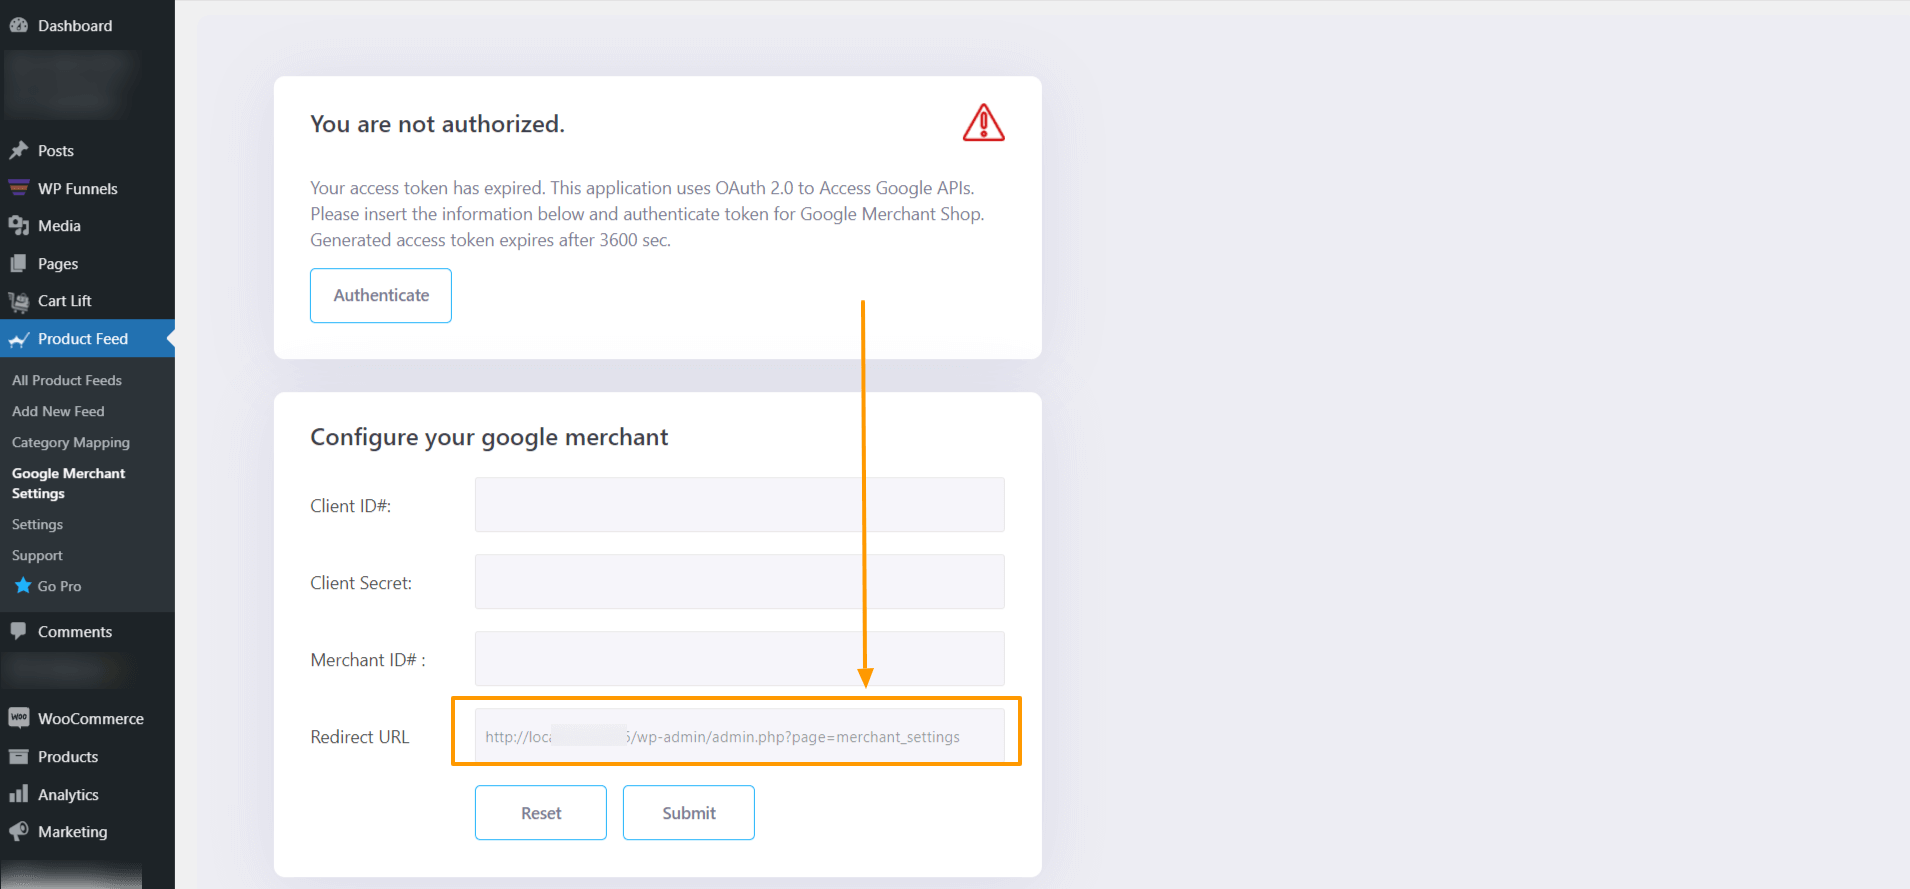
Copy the address and paste it under Authorized redirect URIs and click Create.
You will see that under Credentials, you have an OAuth 2.0 Client ID created, and you will get the OAuth Client ID credentials.
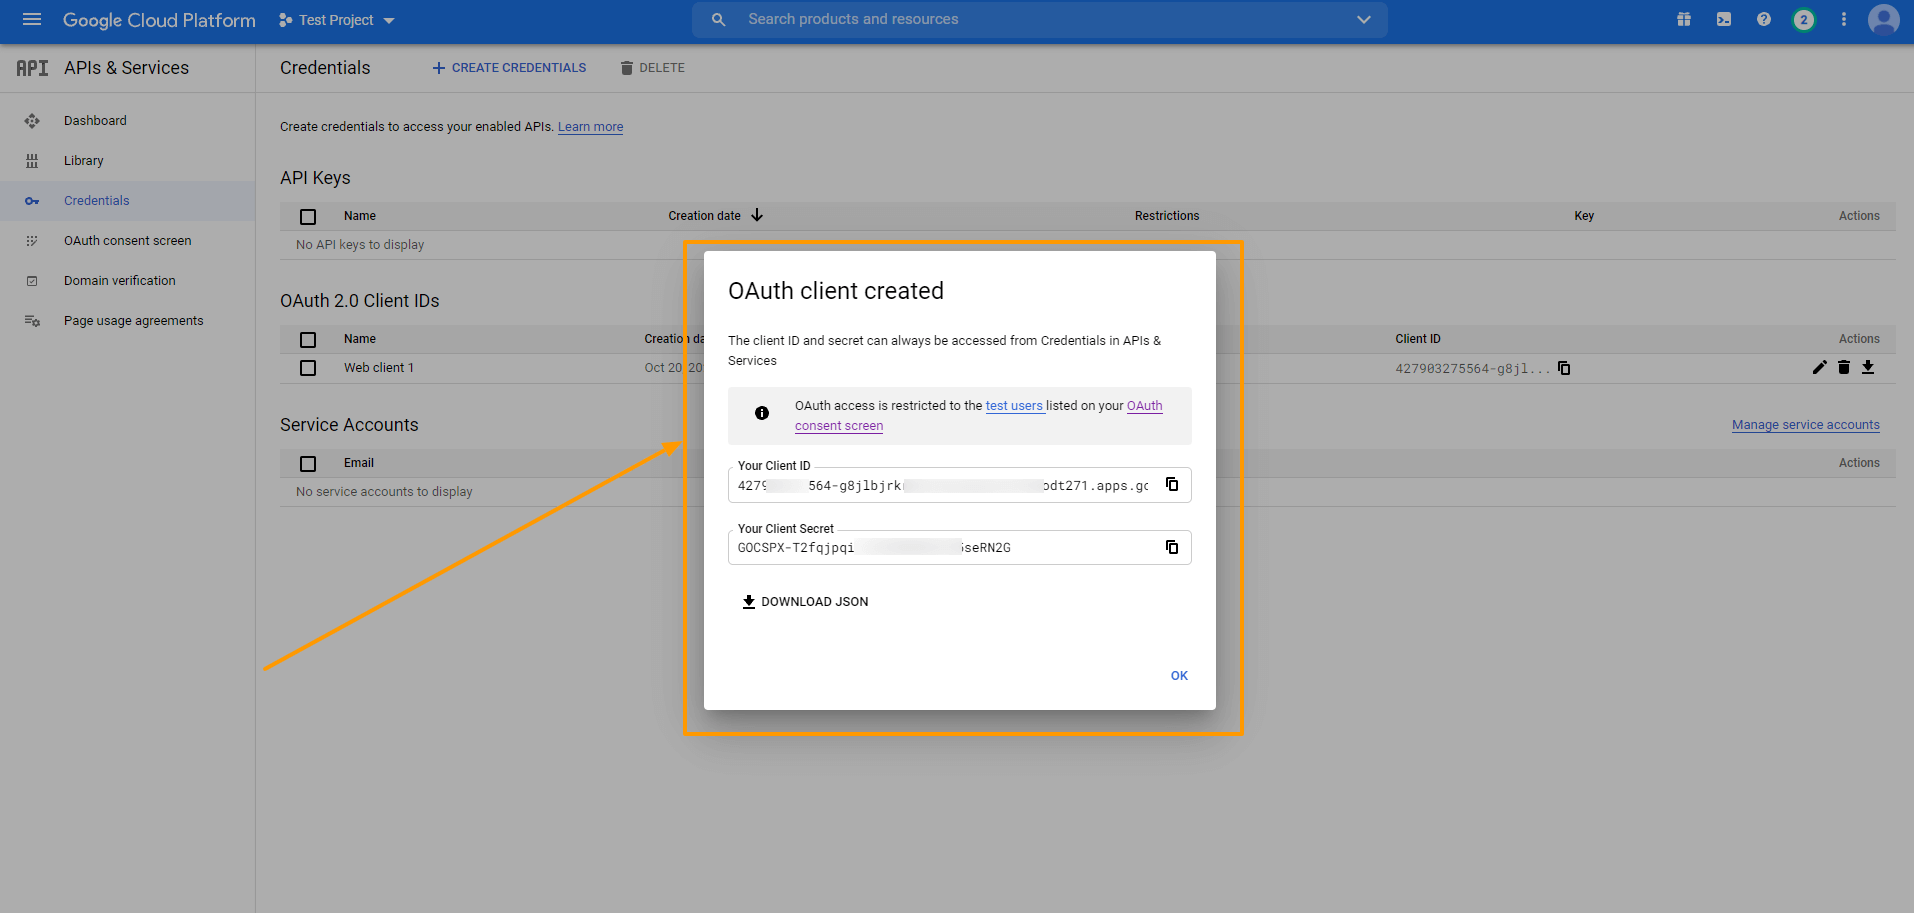
Copy the Client ID and Secret and you can also download the credentials in JSON format for later use by clicking on the DOWNLOAD JSON button.
Close the box and you will see that a new OAuth 2.0 Client ID is added.
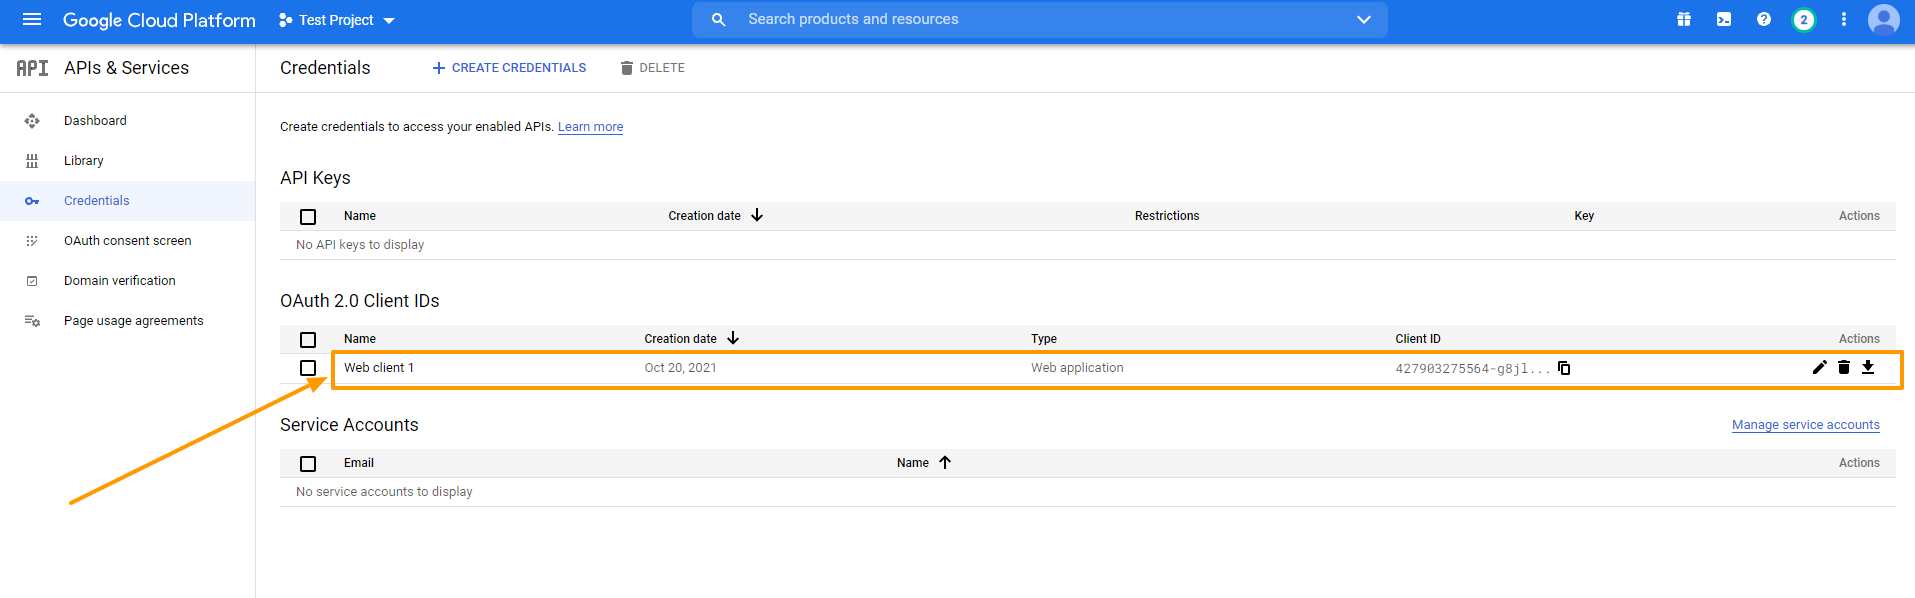
You can click on the ID to view and edit information.
Step 2 – Get Your Google Merchant ID
To get started with Google Merchants, follow this link. You will be taken to your merchant dashboard. From here you can monitor your feeds, product list, and some more options.
So when you send your WooCommerce Products to Google, they will be listed here.
Finding your merchant ID from here is easy. It is given just beside our Profile image as shown in the image below:
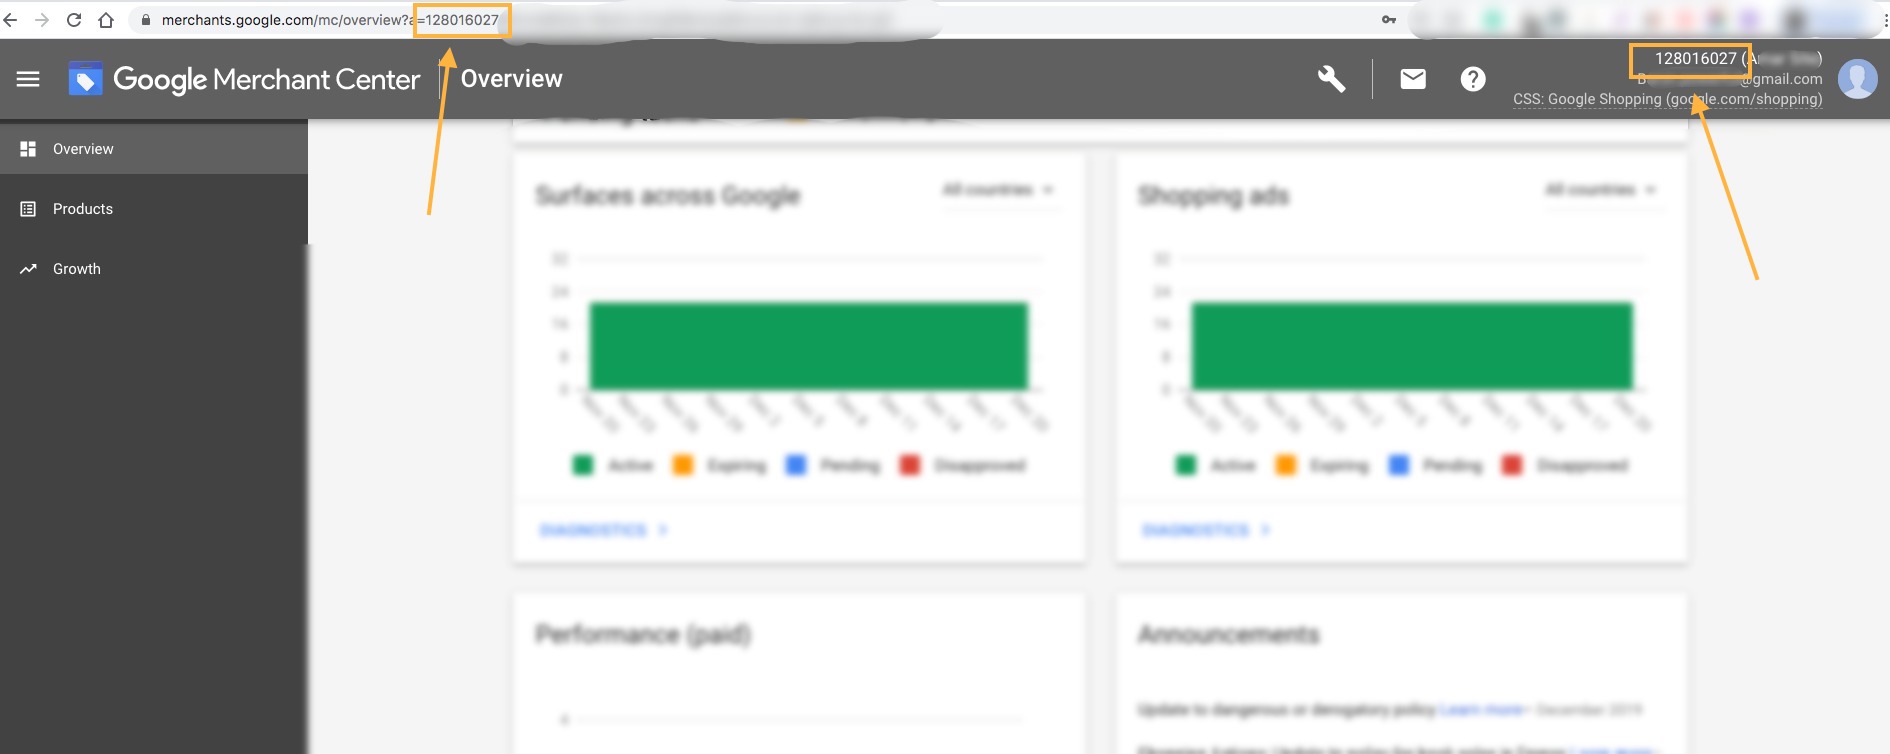
Copy the Merchant ID and save it.
Step 3 – Sync Product Feed Manager For WooCommerce With Google Merchant Shop
Finally, when you have your Client ID, Client Secret, and Merchant ID, Go to Your Dashboard> Product Feed> Google Merchant Settings.
Put all the information accordingly as shown below:
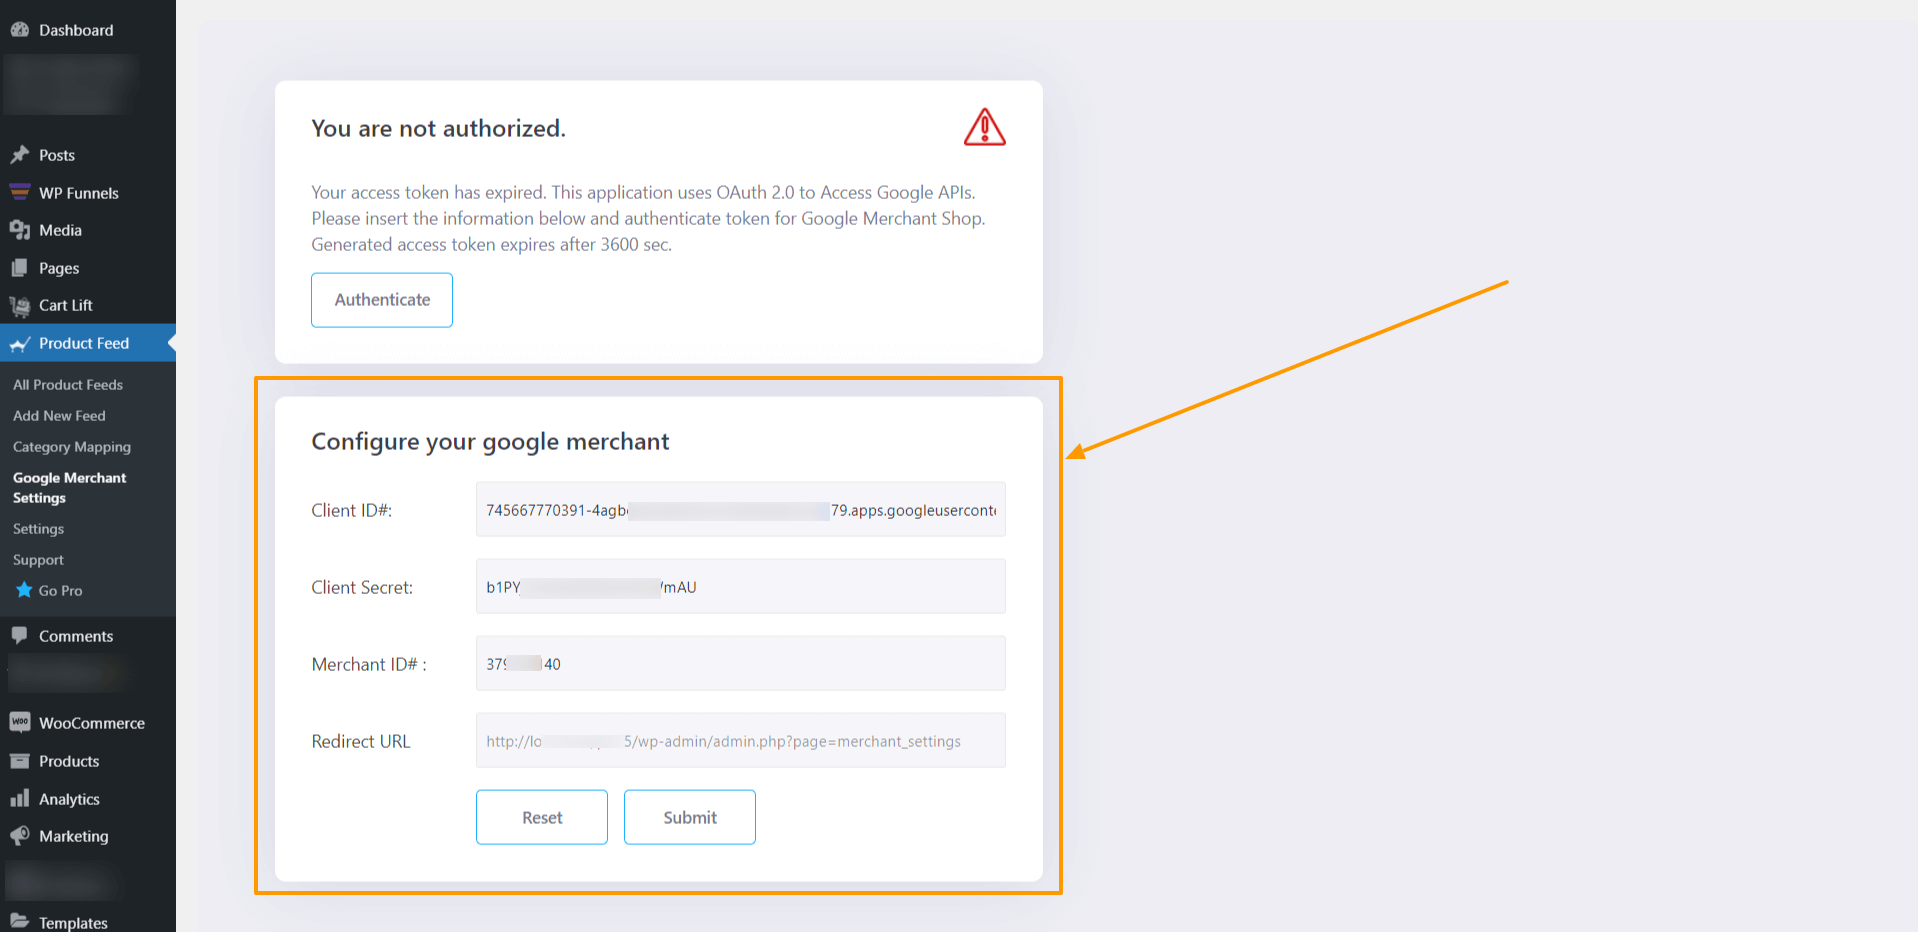
Once you have everything in place, click on Submit. After submitting, click on Authenticate.
It will redirect you to the permission page of Google. Allow your Google account to approve access to your authorized domain. Then you will get a message that ‘You are authorized’.
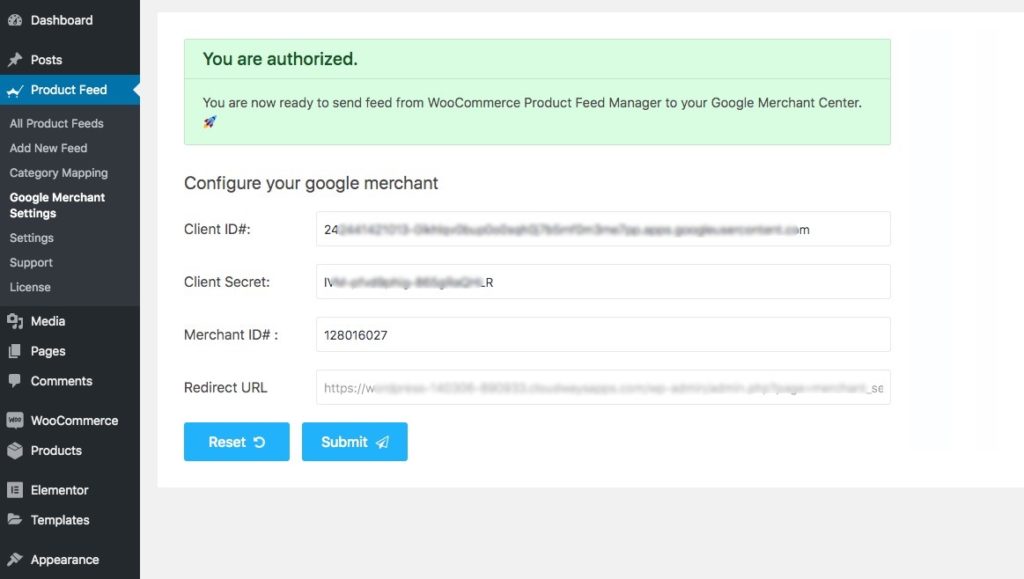
And you are all set! Now it’s time to use the auto-sync feature to send your WooCommerce Products to Google Merchant Shop.
Step 4 – Schedule the Auto-Sync
Now that the setup is complete, you can go to your product feed, and on the right side of the page, you will see that there is the new feature, Send to Google Merchant.

Under this section, you will have the options:
- Target Country
- Target Language
- Schedule
- Select Hour
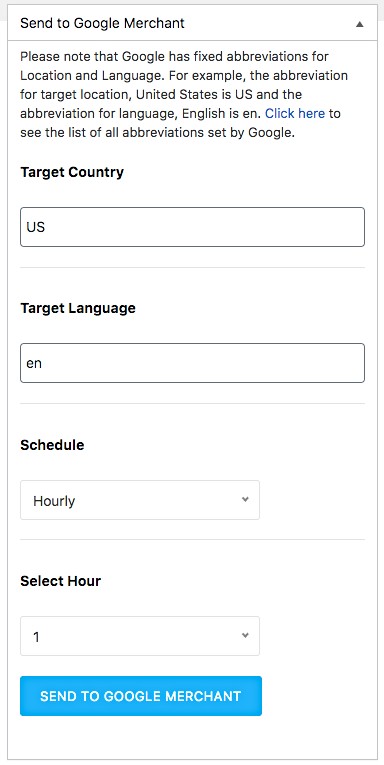
First, choose the Target Country and the Language.
FYI:
You have to input a short form, and it has to match Google’s format. At first, you can see a small paragraph with a ‘Click here’ link. Go there and check the short forms of your desired target country and language to be accurate.
Next, you can set your schedule according to your own will.
Choose between Weekly, Monthly, or Hourly basis.
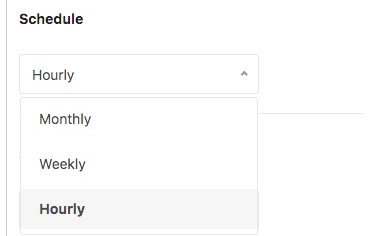
If you choose Hourly:
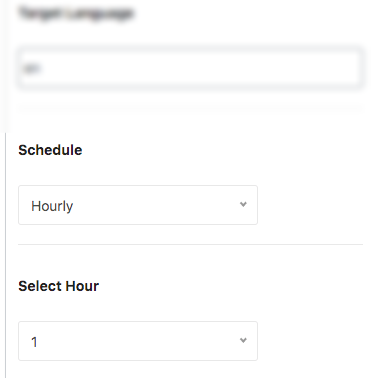
Then select the number of hours after which the schedule will be triggered.
If you choose Weekly:
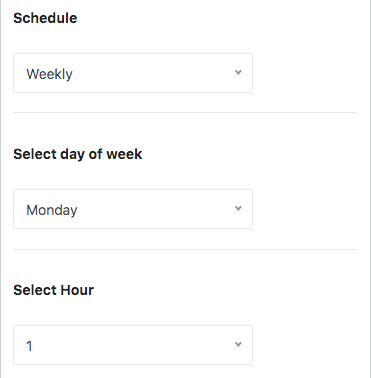
Then choose a day of the week and the hour of that day when this schedule will be triggered.
If you choose Monthly:
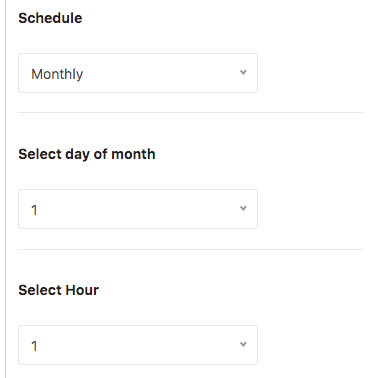
Then choose the date of a month and the hour of that day when this schedule will be triggered.
You can go to your Google Merchant Center > Feed and check the feed that was sent.
Since the schedule is set, this feed will be updated automatically according to the schedule, regularly.
Now your feeds are properly synchronized with Google Merchant Center and you won’t need to access your accounts every time you update your product feeds. Hence, no more manually uploading WooCommerce Products to Google.
Just simply make changes to your feed, and your Google Merchant Shop will get the update automatically.
Conclusion
Product Feed Manager For WooCommerce has been under constant improvement to help you promote your products easily.
If you find any Google feed errors, our support team is always there to give you instant support when you need it.
Update your Product Feed Manager For WooCommerce on a regular basis and benefit from all the new features we add on a regular basis.
We hope this article was useful to you and we wish you a delightful journey with your WooCommerce Store by auto-syncing your WooCommerce Products to Google.