![8 Proven Product Title Optimization Tricks You Should Apply [2025] 1](https://staging-rextheme.kinsta.cloud/wp-content/uploads/2025/01/Product-Title-Optimization.webp)
Imagine this: You’re searching for a product online. You skim through the results, and suddenly, one listing grabs your attention. Why? Because the title speaks directly to what you’re looking for.
Now, flip the script. Your potential customers are doing the same thing—scrolling, scanning, and deciding in seconds. Will your product title stop them in their tracks? Or will they scroll past?
Here’s the reality: Your product title is your first sales pitch. Get it right, and you drive more clicks, higher conversions, and better rankings. Get it wrong, and well… you’re just another listing lost in the noise.
In fact, according to WakeUpData, optimizing product titles can result in a 47% increase in click-through rate (CTR).
That’s nearly half more potential buyers landing on your page—just by tweaking a few words.
But don’t worry—you don’t have to guess your way through this. In this guide, I’ll share 8 proven ways to craft product titles that attract, persuade, and sell.
Let’s dive in and start turning those scrolls into sales.
What Basically is Product Title Optimization?
Product title optimization is simply making your product title as clear, accurate, and compelling as possible. It’s about choosing the right words, placing them in the right order, and including relevant keywords to ensure your product gets noticed.
For example, let’s say you’re selling a leather jacket. Instead of just calling it “Leather Jacket,” you optimize the title to something like: “Men’s Brown Leather Jacket – Stylish, Warm, Perfect for Winter”. This title is more detailed, includes keywords like “men’s,” “brown,” and “winter,” and it gives shoppers a clear idea of what to expect.
Now that you have a clear understanding, let’s look at why optimizing your product title is essential to your e-commerce success.
Why is Product Title Optimization Necessary?
You’re probably wondering, “Why put so much effort into tweaking my product titles?” Here’s why it matters:
i. Higher Click-Through Rate (CTR):
When your product title is clear and specific, it grabs the attention of shoppers.
Let’s say you’re selling a camera. A title like “Digital Camera with 4K Video & 30x Zoom” is more likely to get clicked than just “Digital Camera.”
It gives customers the details they care about, increasing the chances they’ll click on your product. The result? More traffic to your store.
ii. Better Search Results:
When your title includes the right keywords, it helps search engines understand exactly what your product is.
For example, if someone is searching for a “waterproof smartwatch,” a title like “Men’s Waterproof Smartwatch – Fitness Tracking & Heart Rate Monitor” will be picked up by search engines and shown in the search results.
This means your product has a better chance of being seen by people who are specifically looking for what you’re selling.
iii. Clearer Customer Expectations:
Think about it—if you were looking for a leather sofa, would you prefer a title like “Sofa” or one like “Comfortable Leather Sofa – 3-Seater, Durable & Easy to Clean”?
The second one gives you a clear picture of what the product is, what it’s made of, and its key features. This helps customers quickly understand what they’re getting, so they feel more confident about their purchase.
iv. Builds Trust:
When your product title is specific and descriptive, customers trust it more. If a title clearly explains what a product does and why it’s useful, shoppers are more likely to believe it’s a quality item.
For example, a title like “Wireless Headphones with Noise Cancelling” tells customers exactly what to expect, making them feel more confident in clicking through to learn more.
This kind of clarity builds trust and encourages sales.
Let’s now dive into the prime section- the ultimate tactics that will drive you more sales.
8 Effective Product Title Optimization Tactics To Drive More Sales
When a person is looking to purchase online, he/she may search for the product in various ways. He may search via the product brand, model number, or even one of its best features.
The challenge here is to identify which search terms are most commonly used for a certain type of product.
You need to avoid giving too many details, which ensures you have the most notable keywords included in a product title.
For example, the soap, Imperial Leather is quite popular to many, however, not everyone is familiar if it will match their skin type. When using soaps, people are normally very concerned about their skin types. So, instead of listing the product as “Imperial Leather Soap Bar,” it’s better to use “Imperial Leather Soap for Sensitive Skin.”
Another concern here would be the volume of the soup. Is it a 200g soap or a 100g soup? If a user needs to enter the product page to find it out, it’s more time-consuming. You can rather improve the title to “Imperial Leather Soap for Sensitive Skin – 100g.”
1. Search Optimize Title to Improve CTR
Words have immense power to convince. Use them to encourage your targeted audience.
Imagine how your ideal customers would define your products. You have to find out what they’re gonna search for while looking for the products.
As an eCommerce seller, you must know your consumer behavior. Identify the most important elements that will influence the customers’ decision to buy.
Consider the following questions when you think of crafting a title-
- Who are your products for?
- What can be their age range?
- What are their demographics?
- Which type of words they would appreciate?
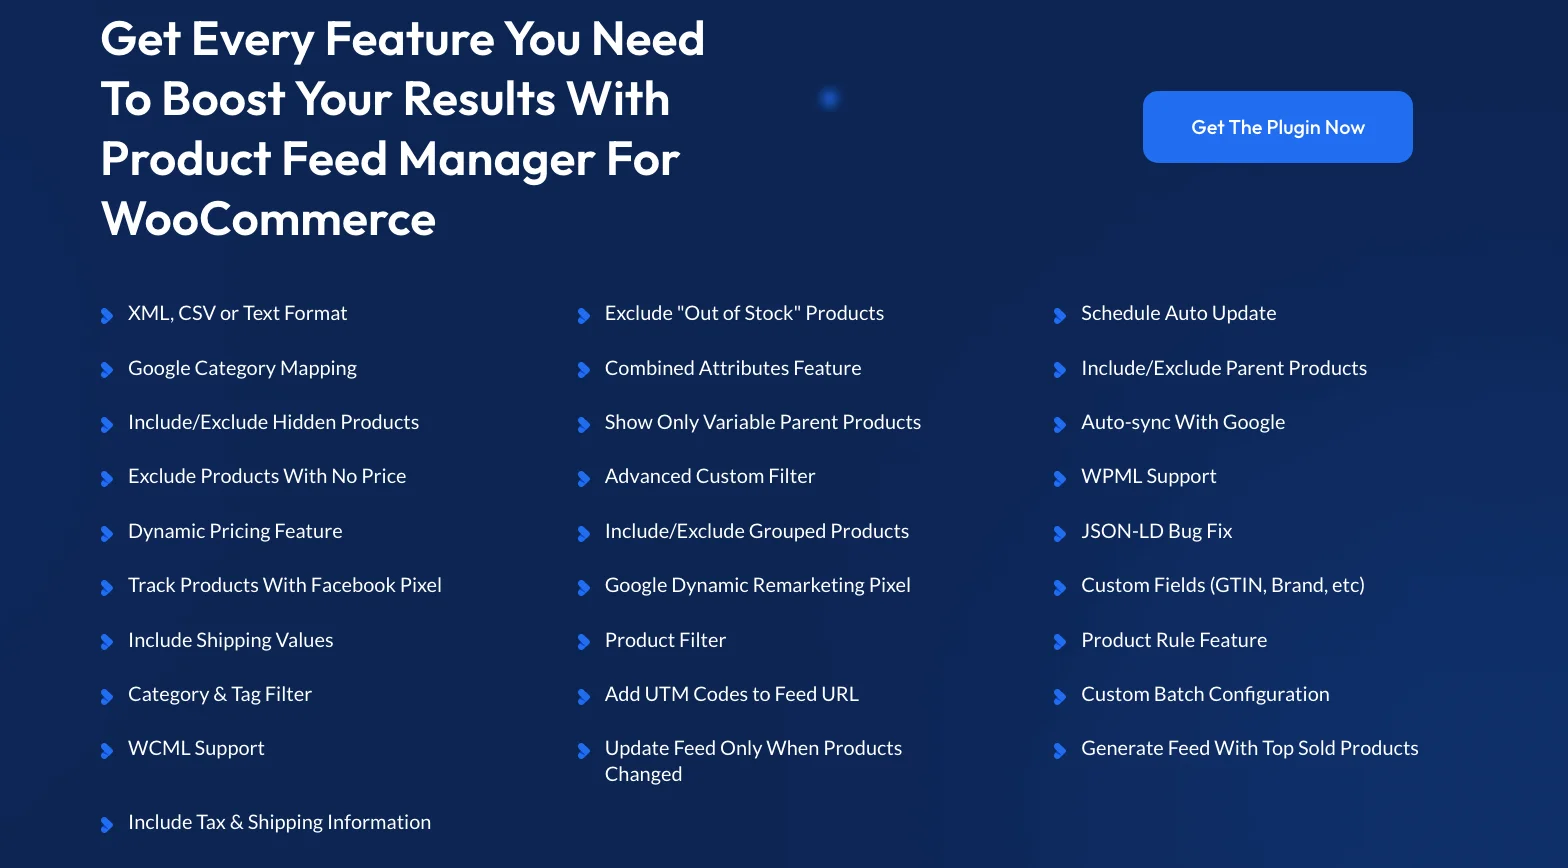
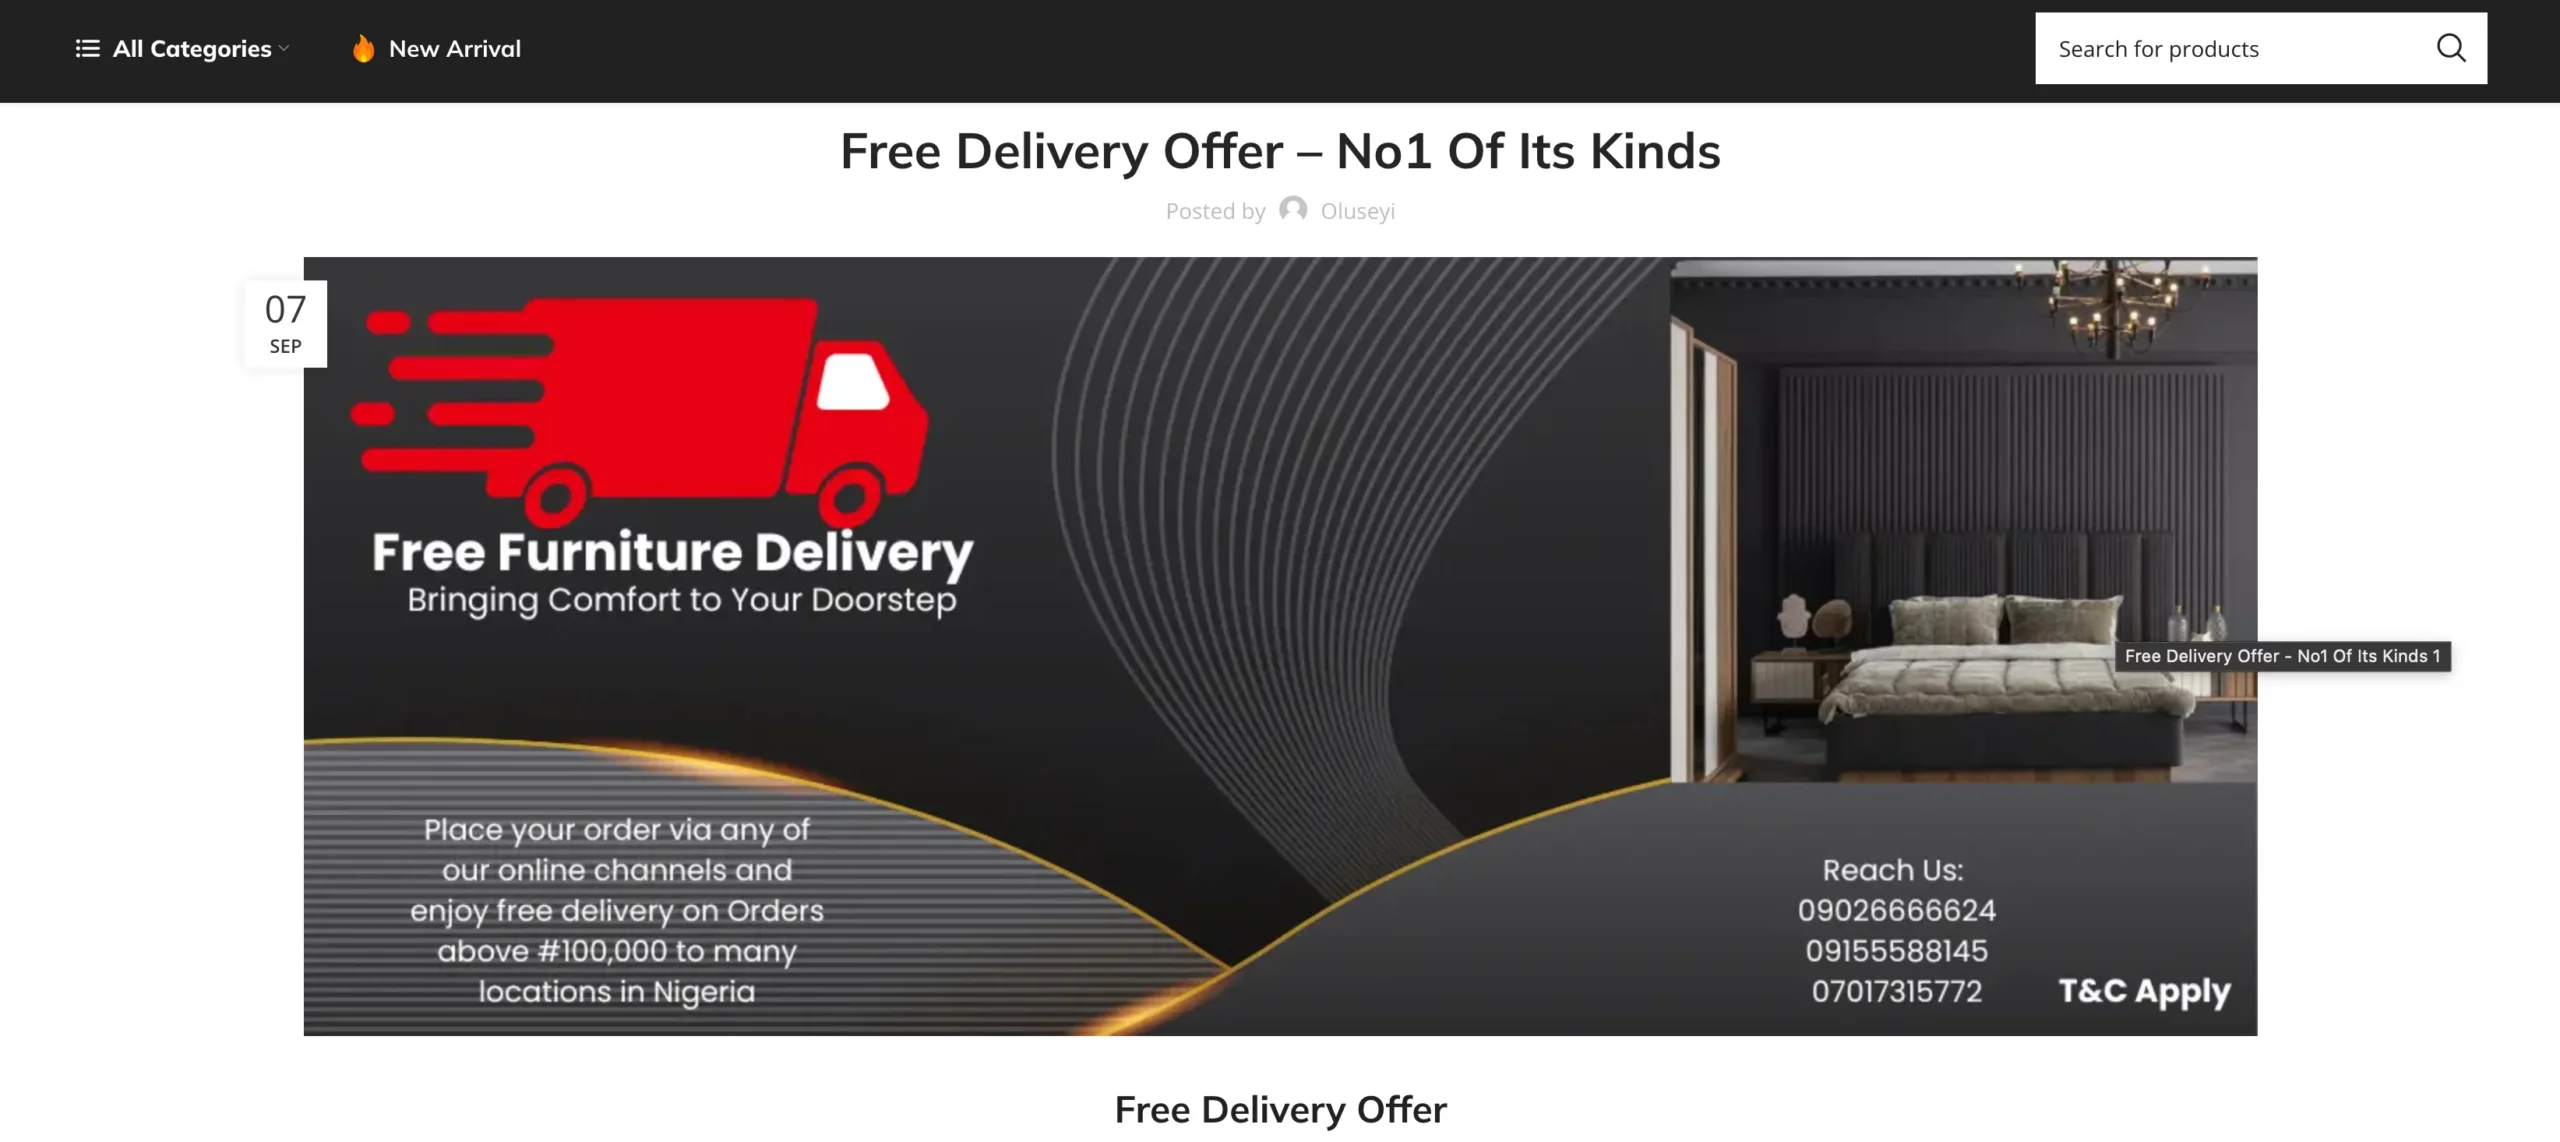
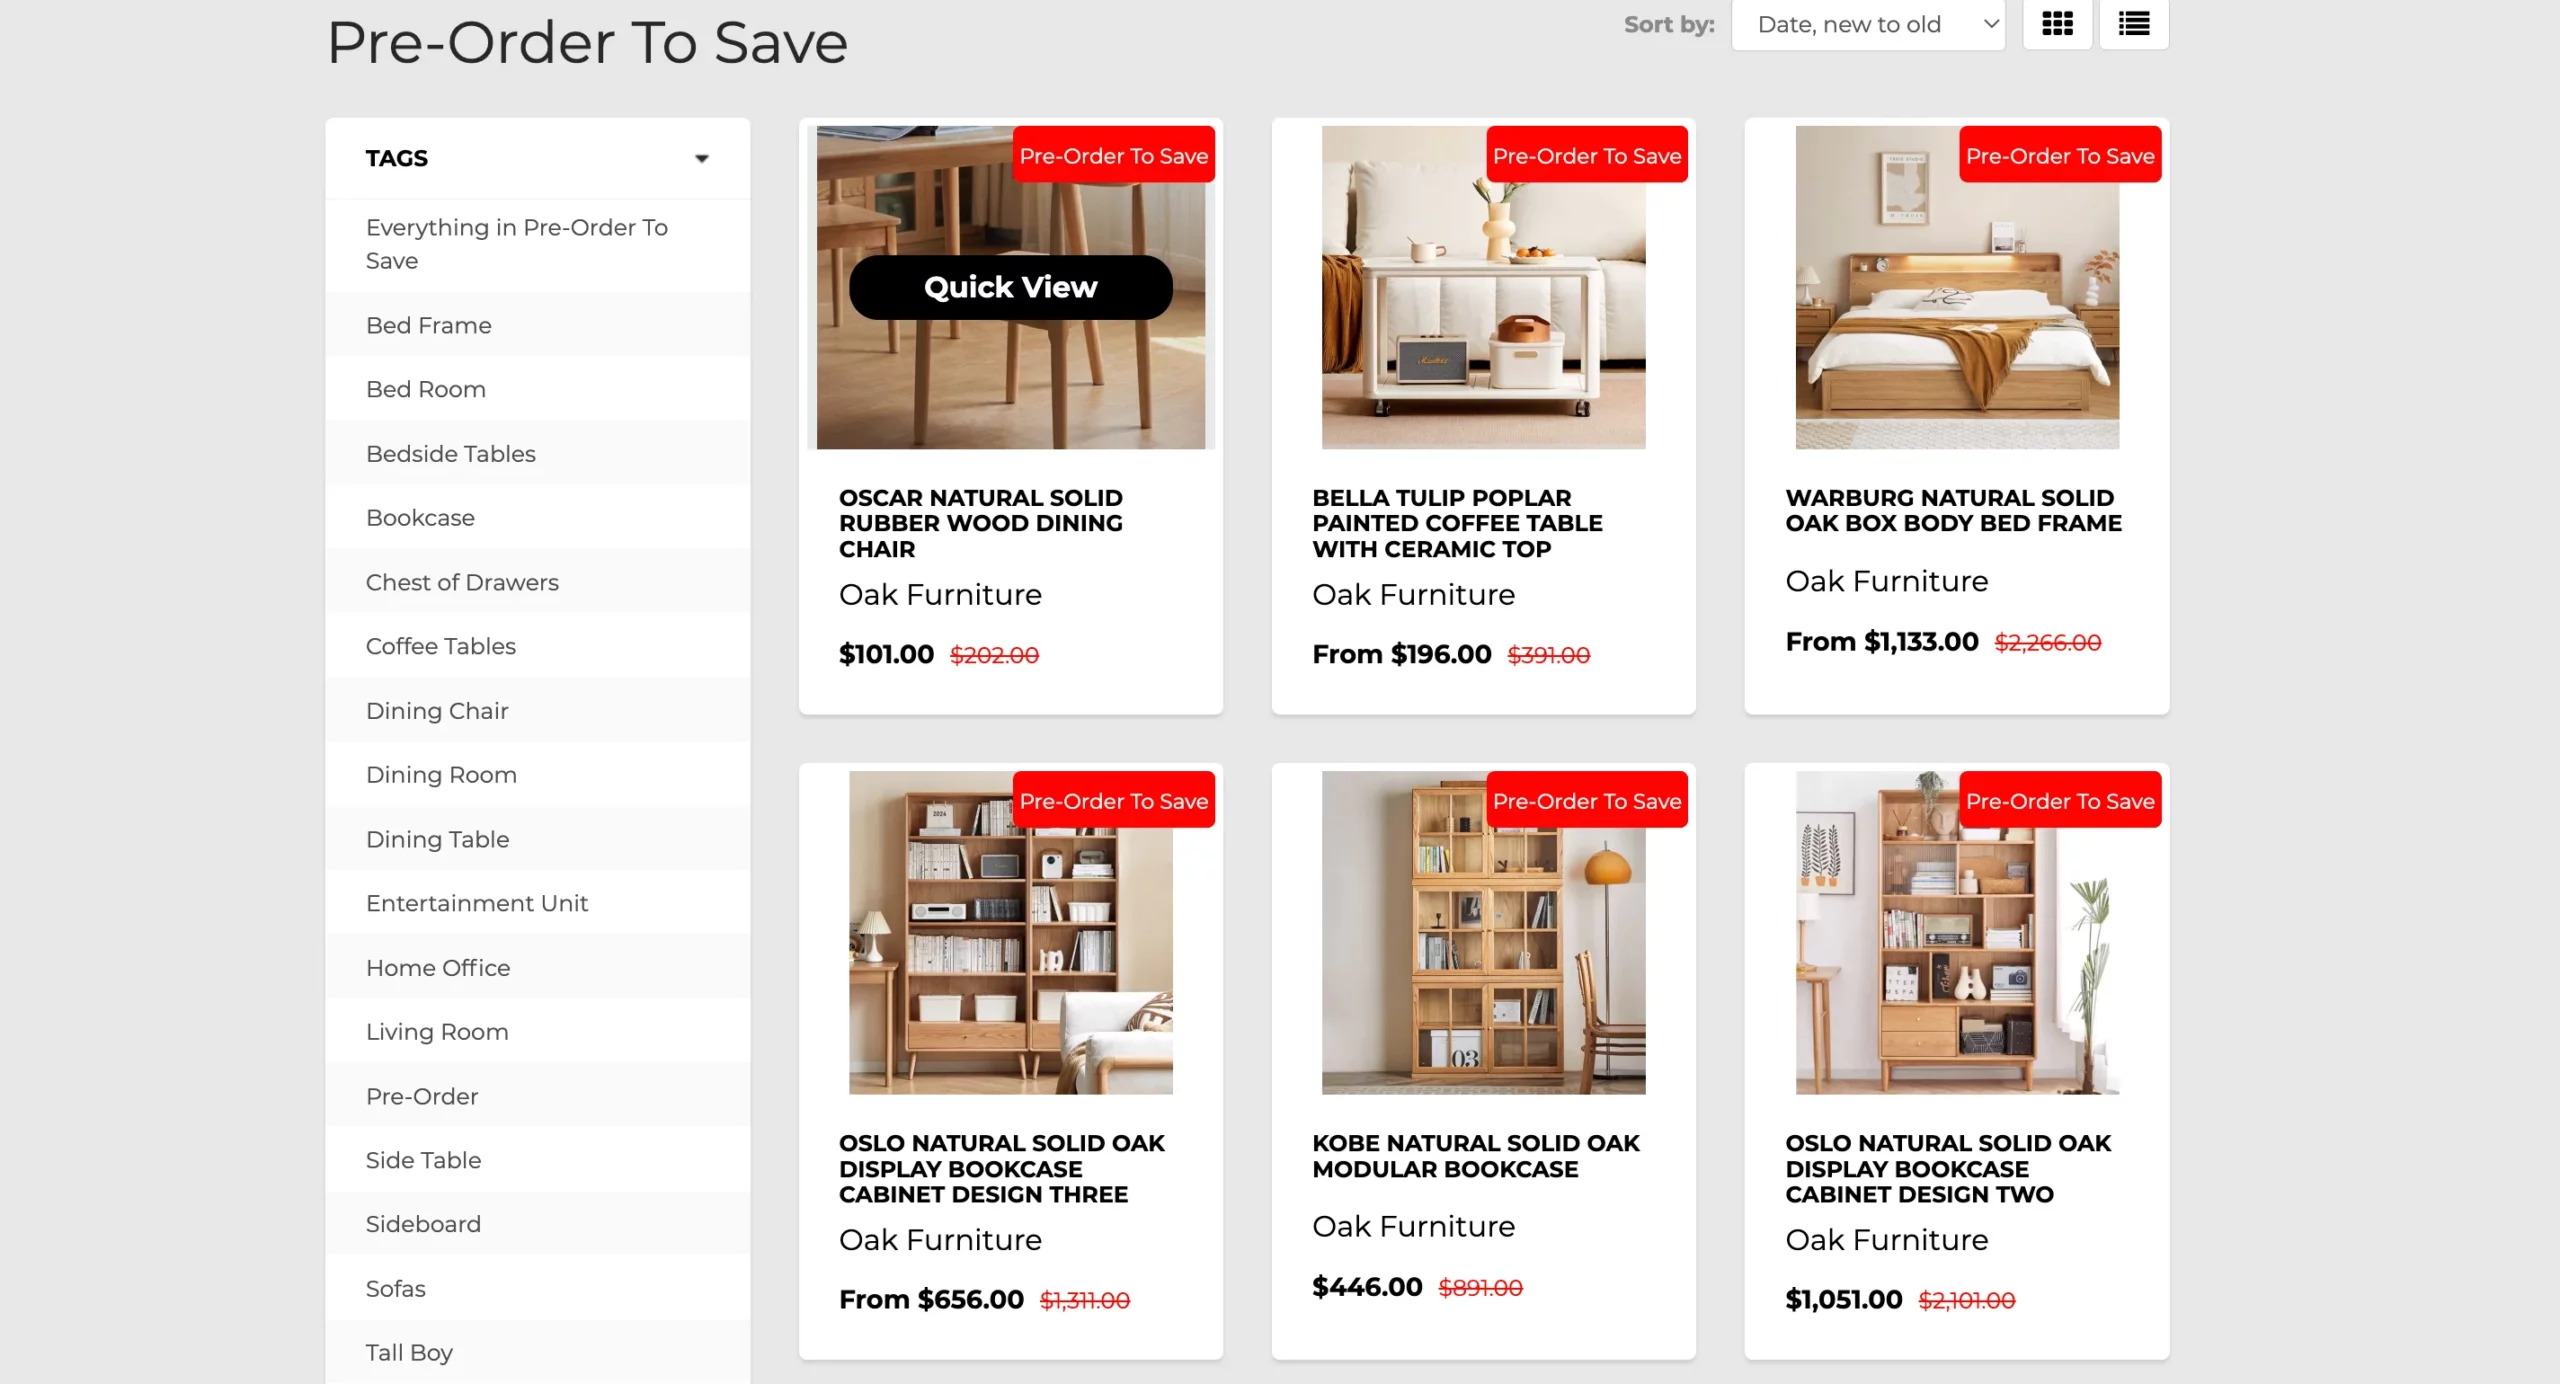
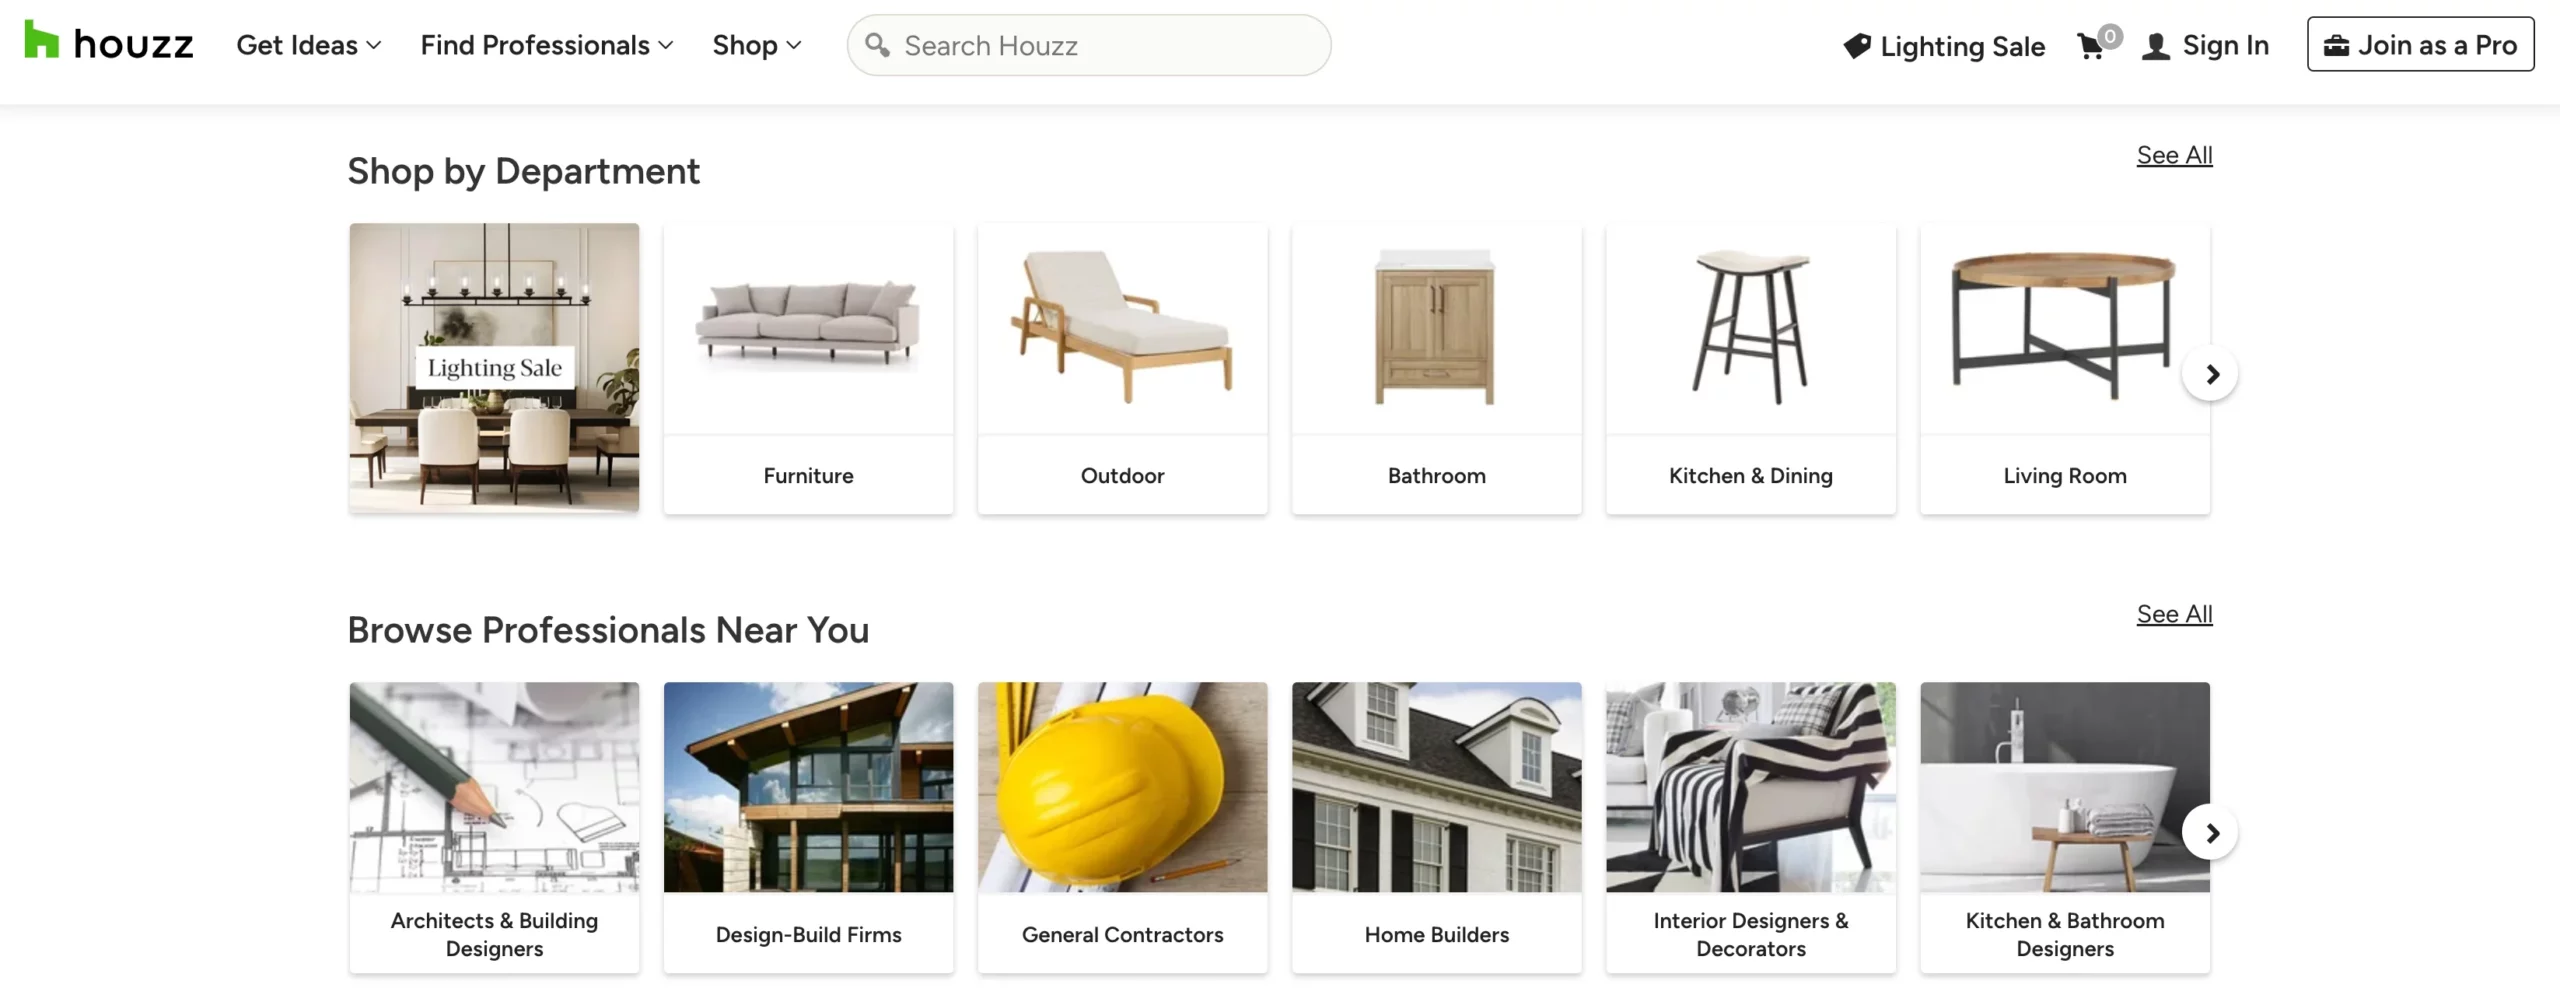
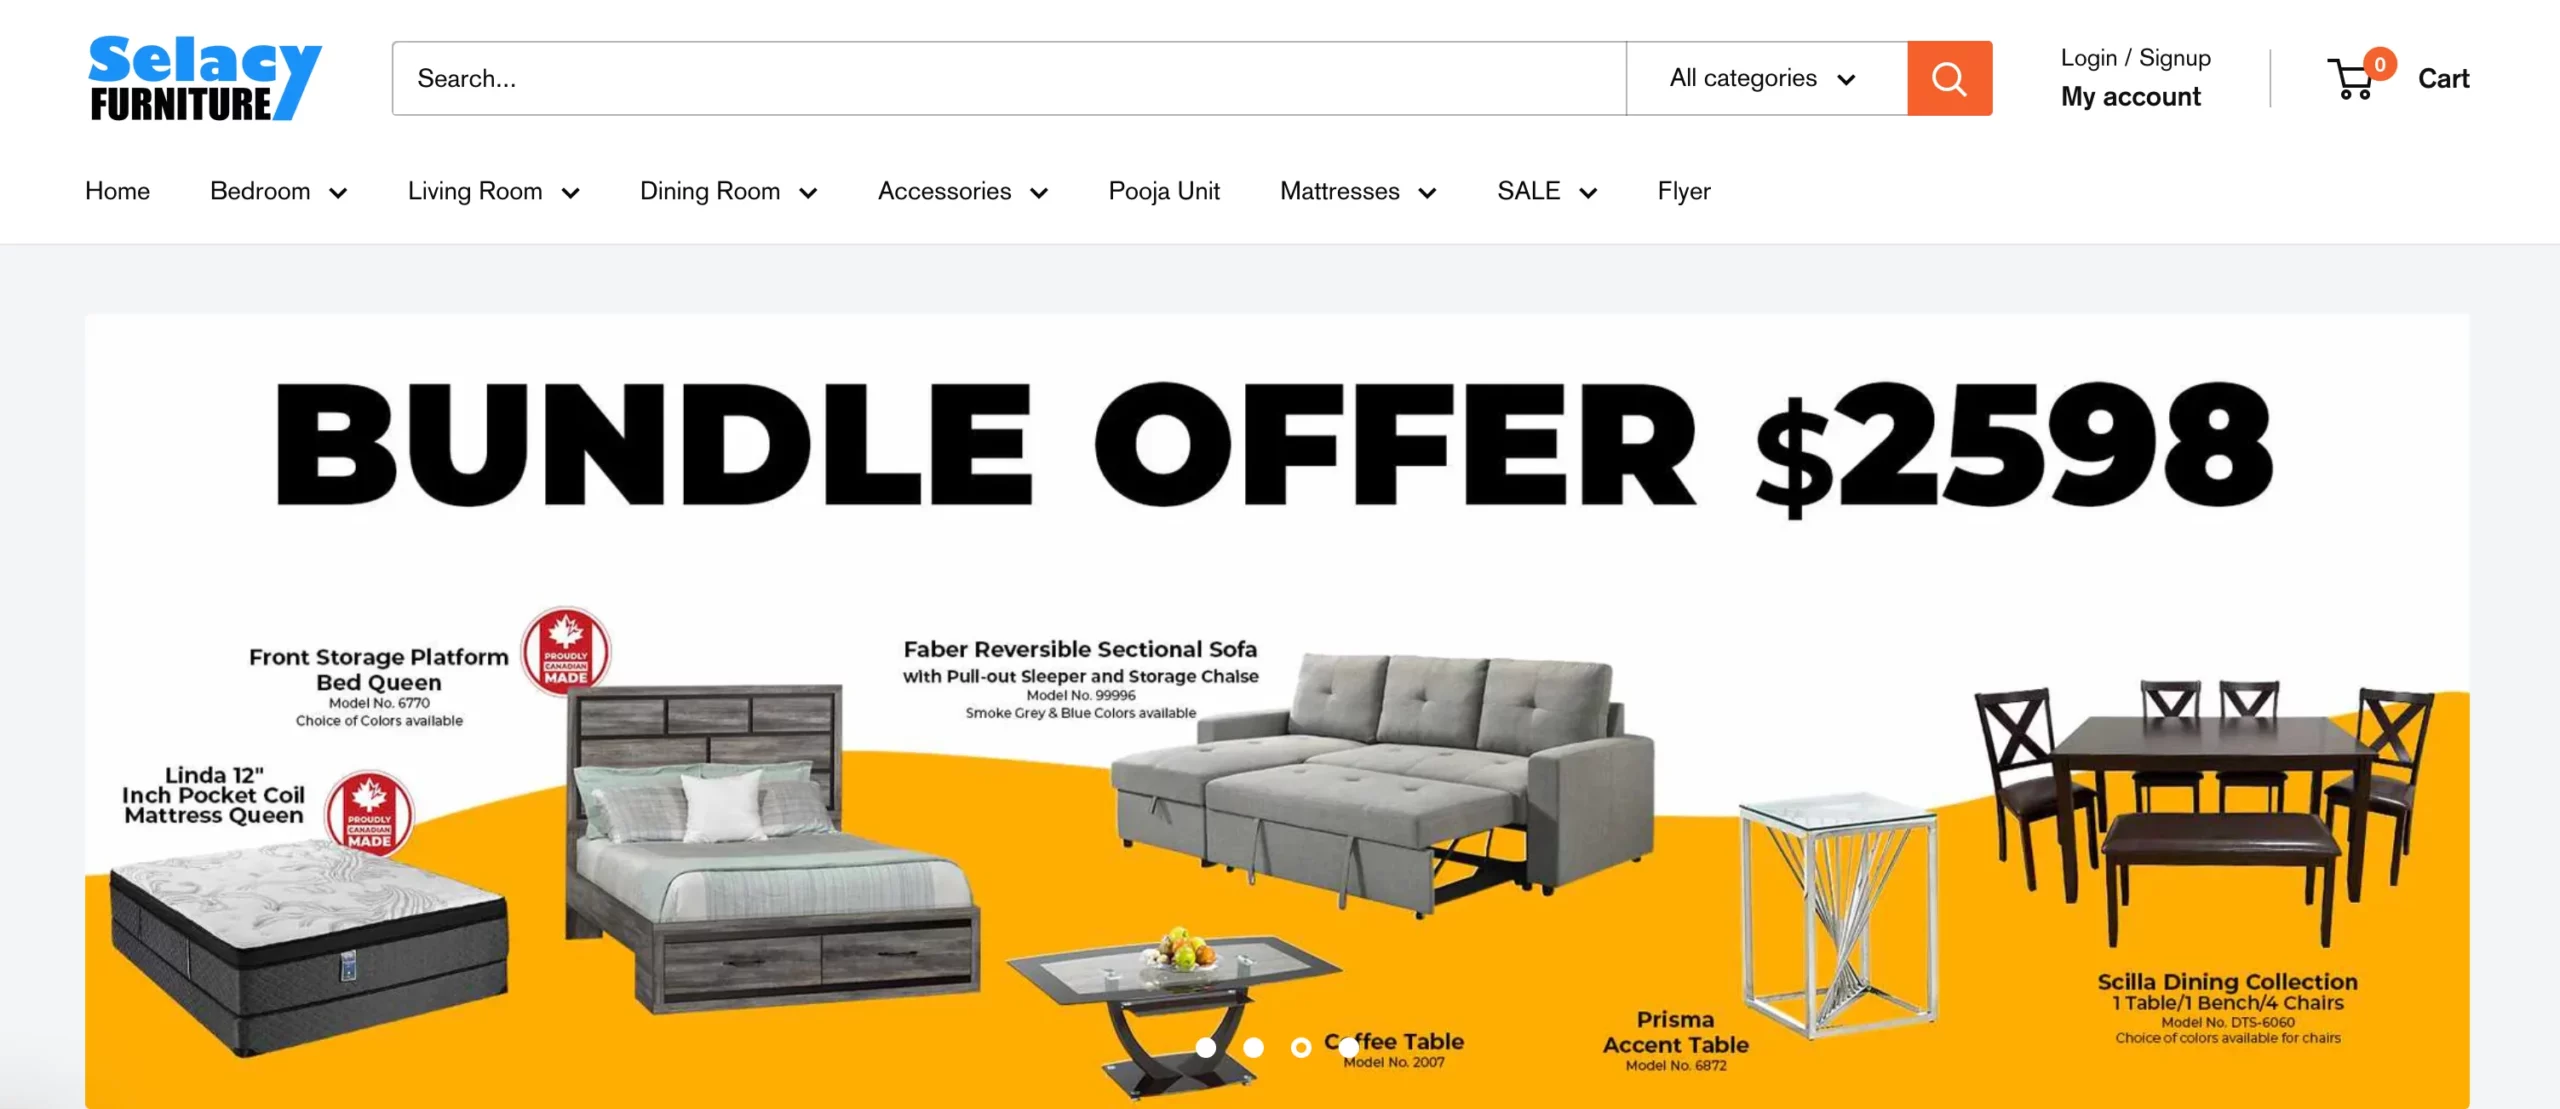
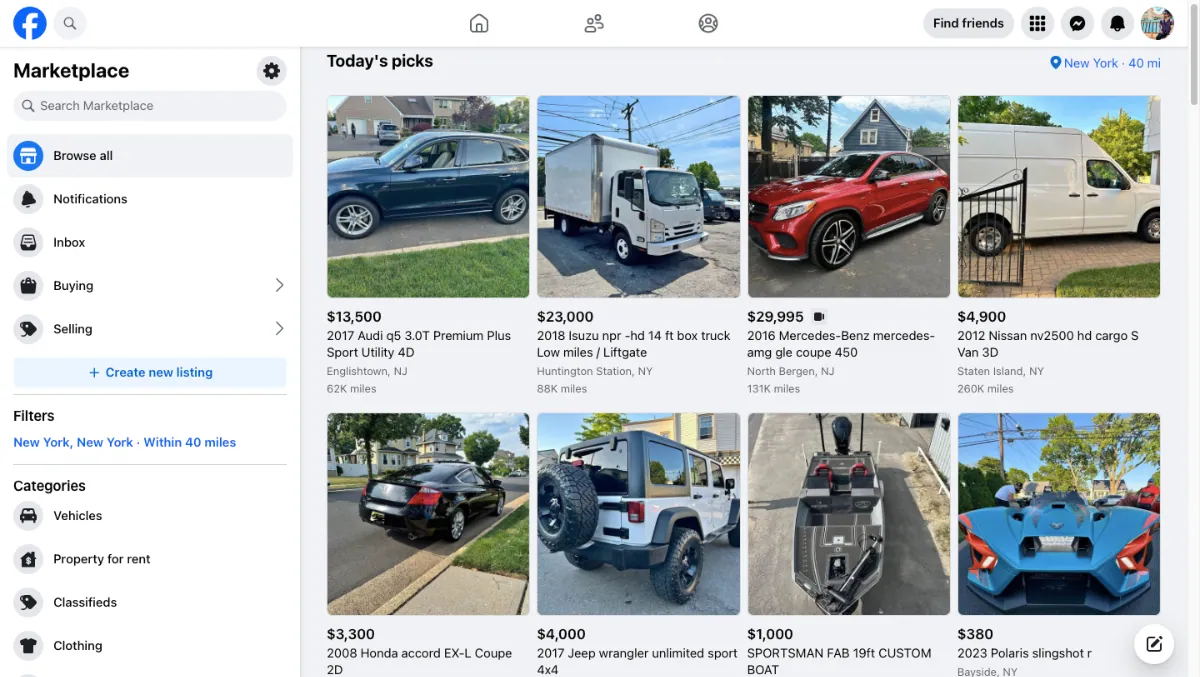
In this picture, the product titles contain all the key features of the product. Thus, it serves the customers’ search queries better.
However, in the product title optimization, nothing is fixed. Titles vary based on industries and niches.
So, to get the best results you need to analyze your targeted audience to understand their search intent.
2. Structure Product Title To Improve Traction
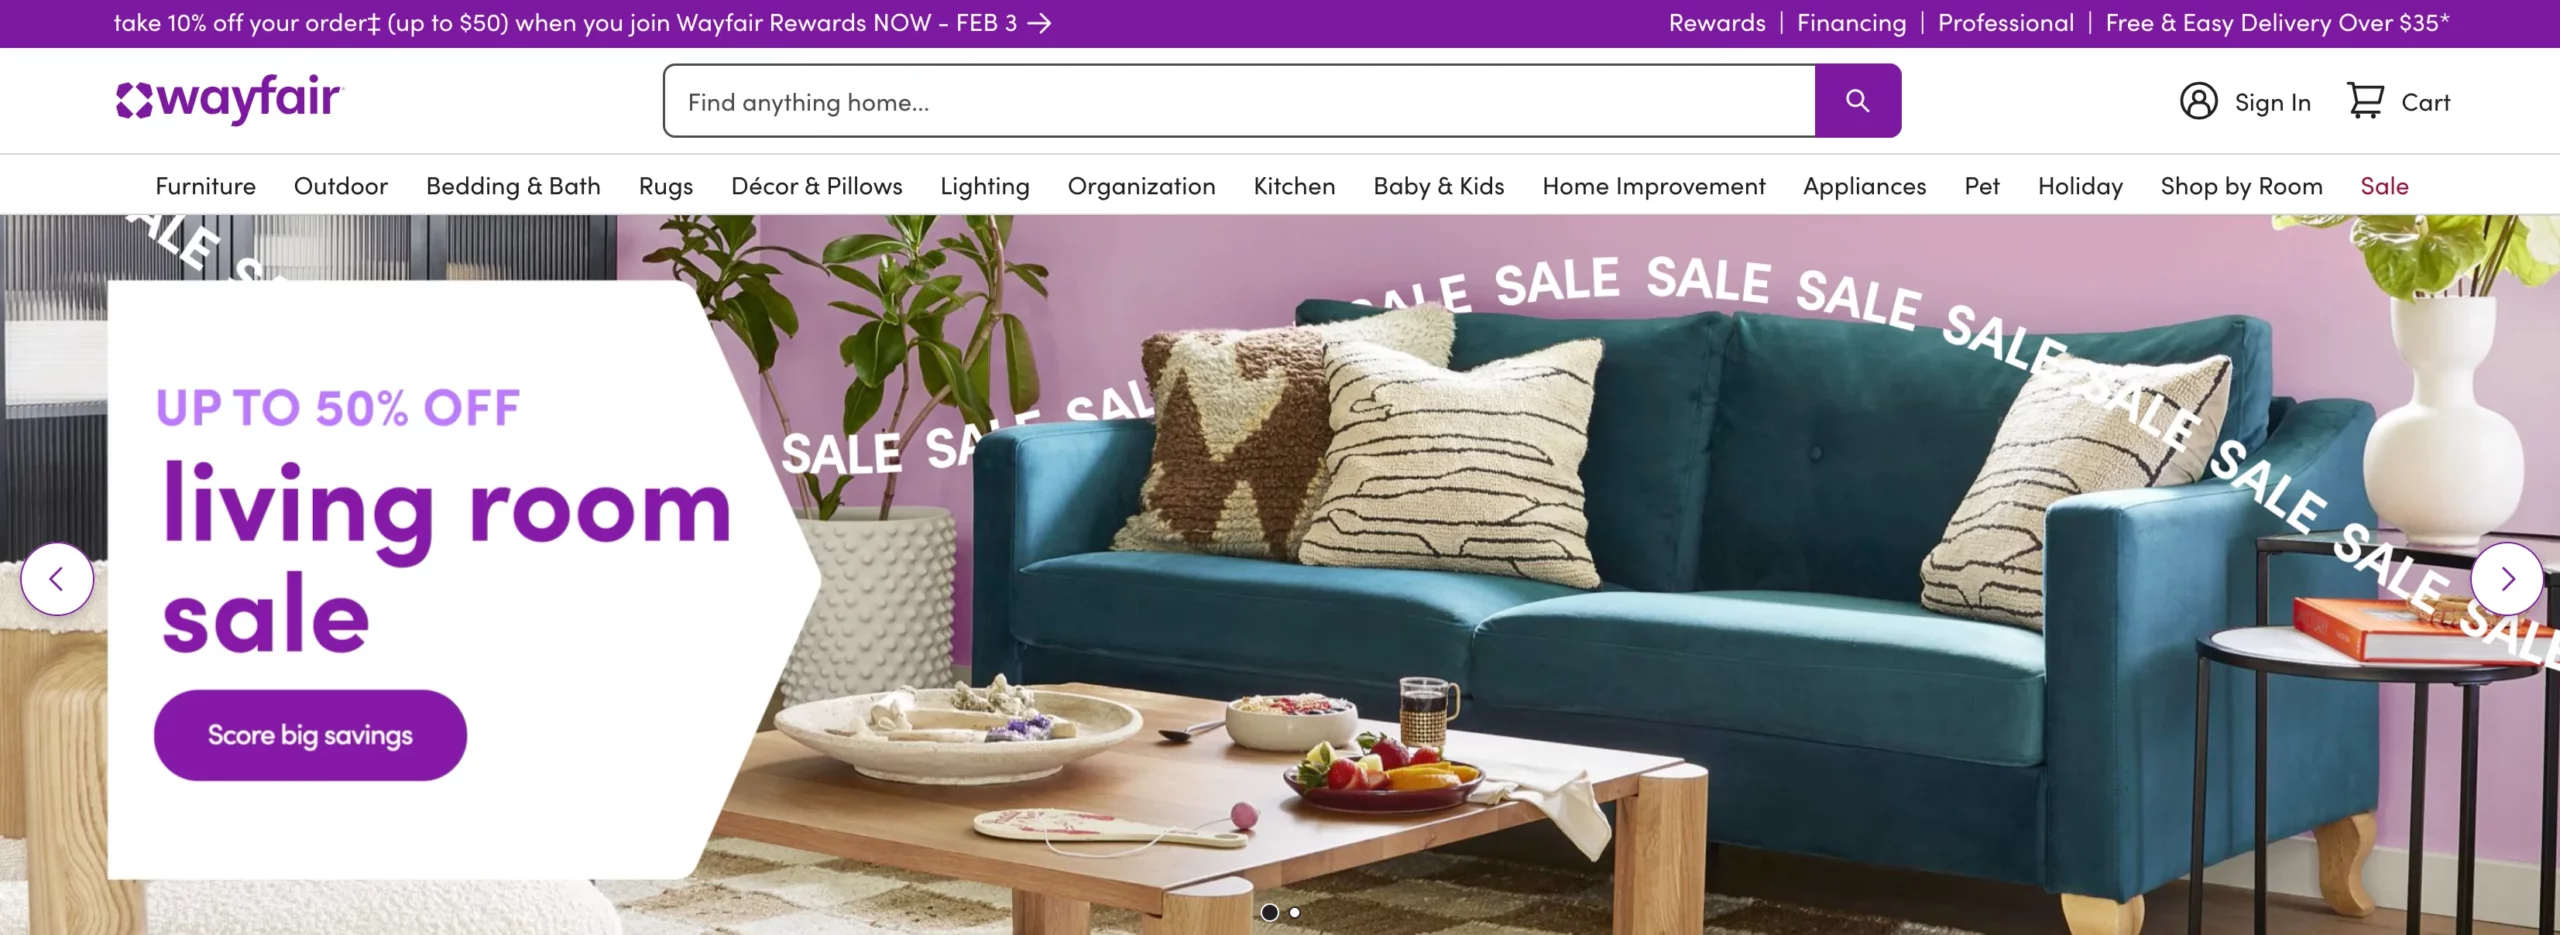
When it comes to optimizing product titles, it’s important to structure them in a way that catches the attention of potential buyers. However, with limited space for titles, it’s crucial to prioritize the most important information and use targeted keywords wisely.
One effective approach is to start with the most engaging information and relevant keywords. For example, if the product is a Samsung TV, start the title with “Samsung TV” to make it more likely to appear in search results when someone searches for that specific brand.
Another important consideration is the length of the title. Depending on the device being used to browse, the title may get cut off, so it’s essential to prioritize information and use a format that allows for the most critical details to be seen.
However, there is no significant approach for structuring product titles, but you can follow some formulas (shown in the examples).
Product Title Examples
Here I’ve listed a few formulas to help you find the right one for you.

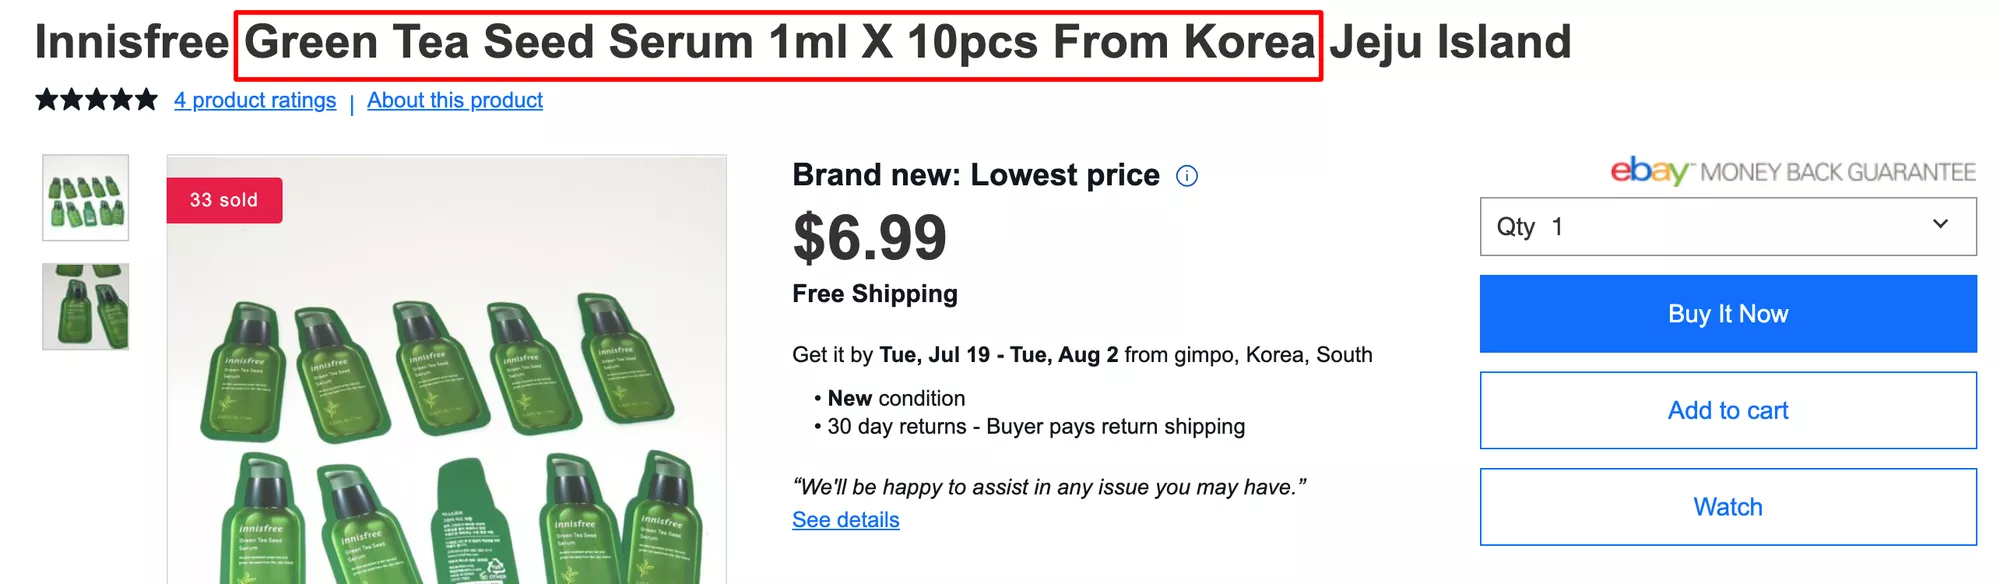
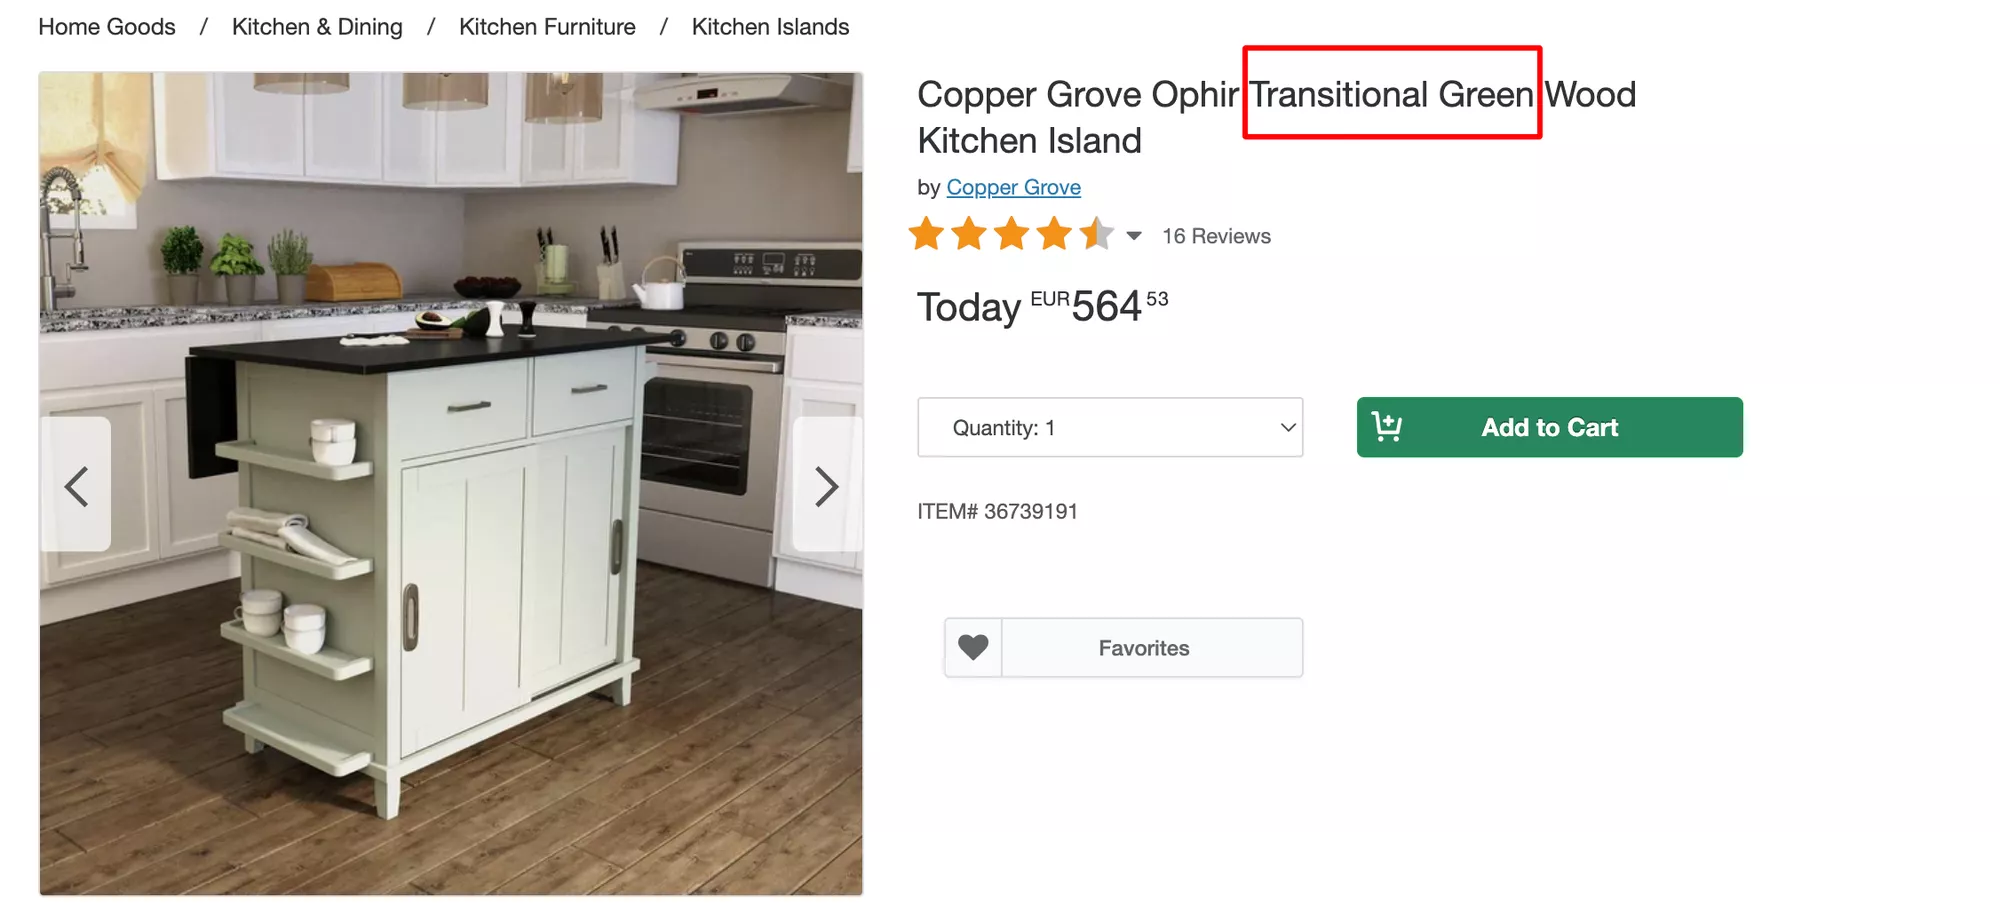
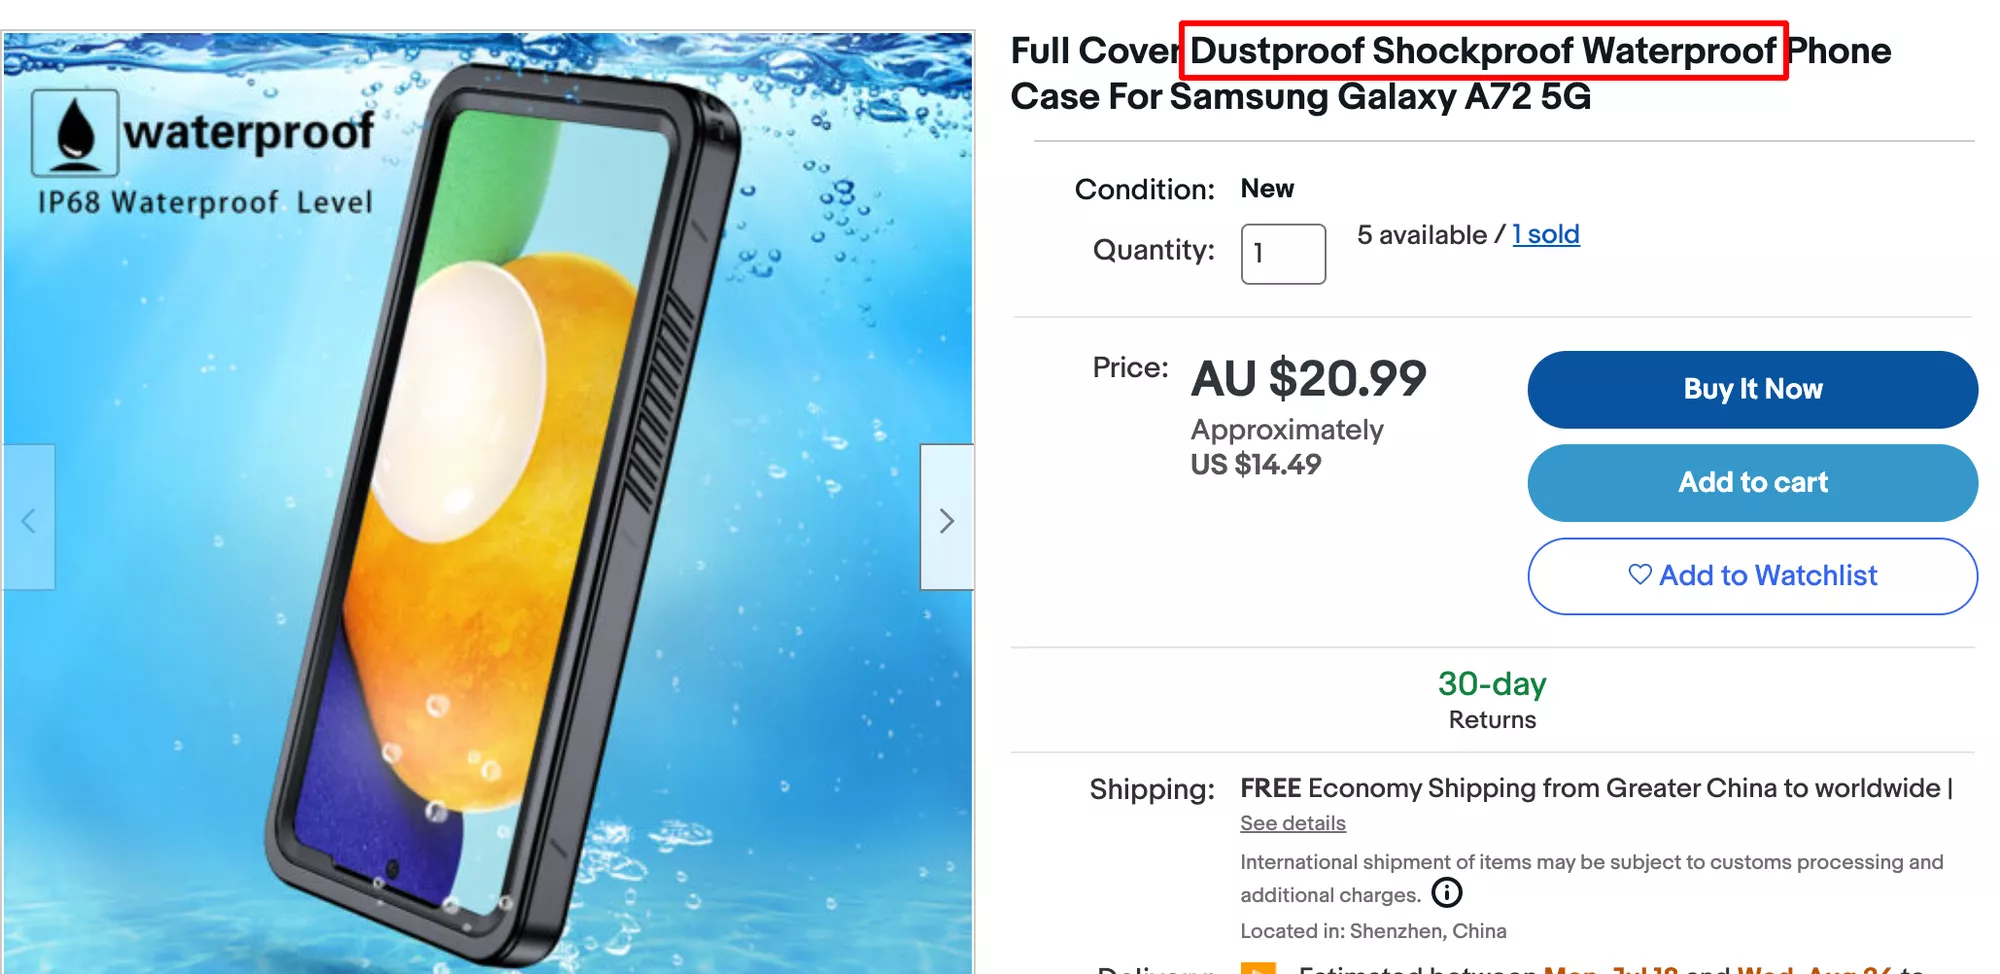
3. Highlight Relevant Adjectives To Create Desirability
When it comes to online shopping, customers rely heavily on product descriptions to get an idea of what they can expect from a product. One way to make your product stand out is by using sensory adjectives in your product titles.
For instance, if you’re selling perfume, including descriptive adjectives such as “woody,” “floral,” or “citrusy” can help shoppers imagine the scent. Similarly, if you’re selling a jacket, mentioning its “soft,” “textured,” or “lightweight” features can give buyers a better understanding of the product.
By incorporating adjectives like “black,” “long,” “medium,” or “waterproof” into your titles, you can help your customers narrow down their search results and find your product more easily.
Moreover, including adjectives that specify who your product is for, such as “men’s,” “women’s,” or “children’s,” can further increase the chances of your product being seen.
However, it’s essential to use adjectives in a natural and organic way and avoid overusing them.
By finding the right balance and incorporating relevant sensory adjectives, you can create a more compelling product title that resonates with your customers and drives more sales.
4. Keyword Optimize To Stand Out In The Search Results
Keywords play a crucial role in driving traffic and increasing the visibility of your products. By using the right keywords in your product title, you can ensure that your ideal customers can easily find your products.
However, to create a successful keyword strategy, you need to conduct thorough keyword research to identify the most relevant and high-volume keywords for your products.
Let’s say, you sell skin care products. One of your products is an ‘oil-free face mask’. But your consumer can search by ‘face mask without oil’. Here, you need to check which keyword has a high search volume.
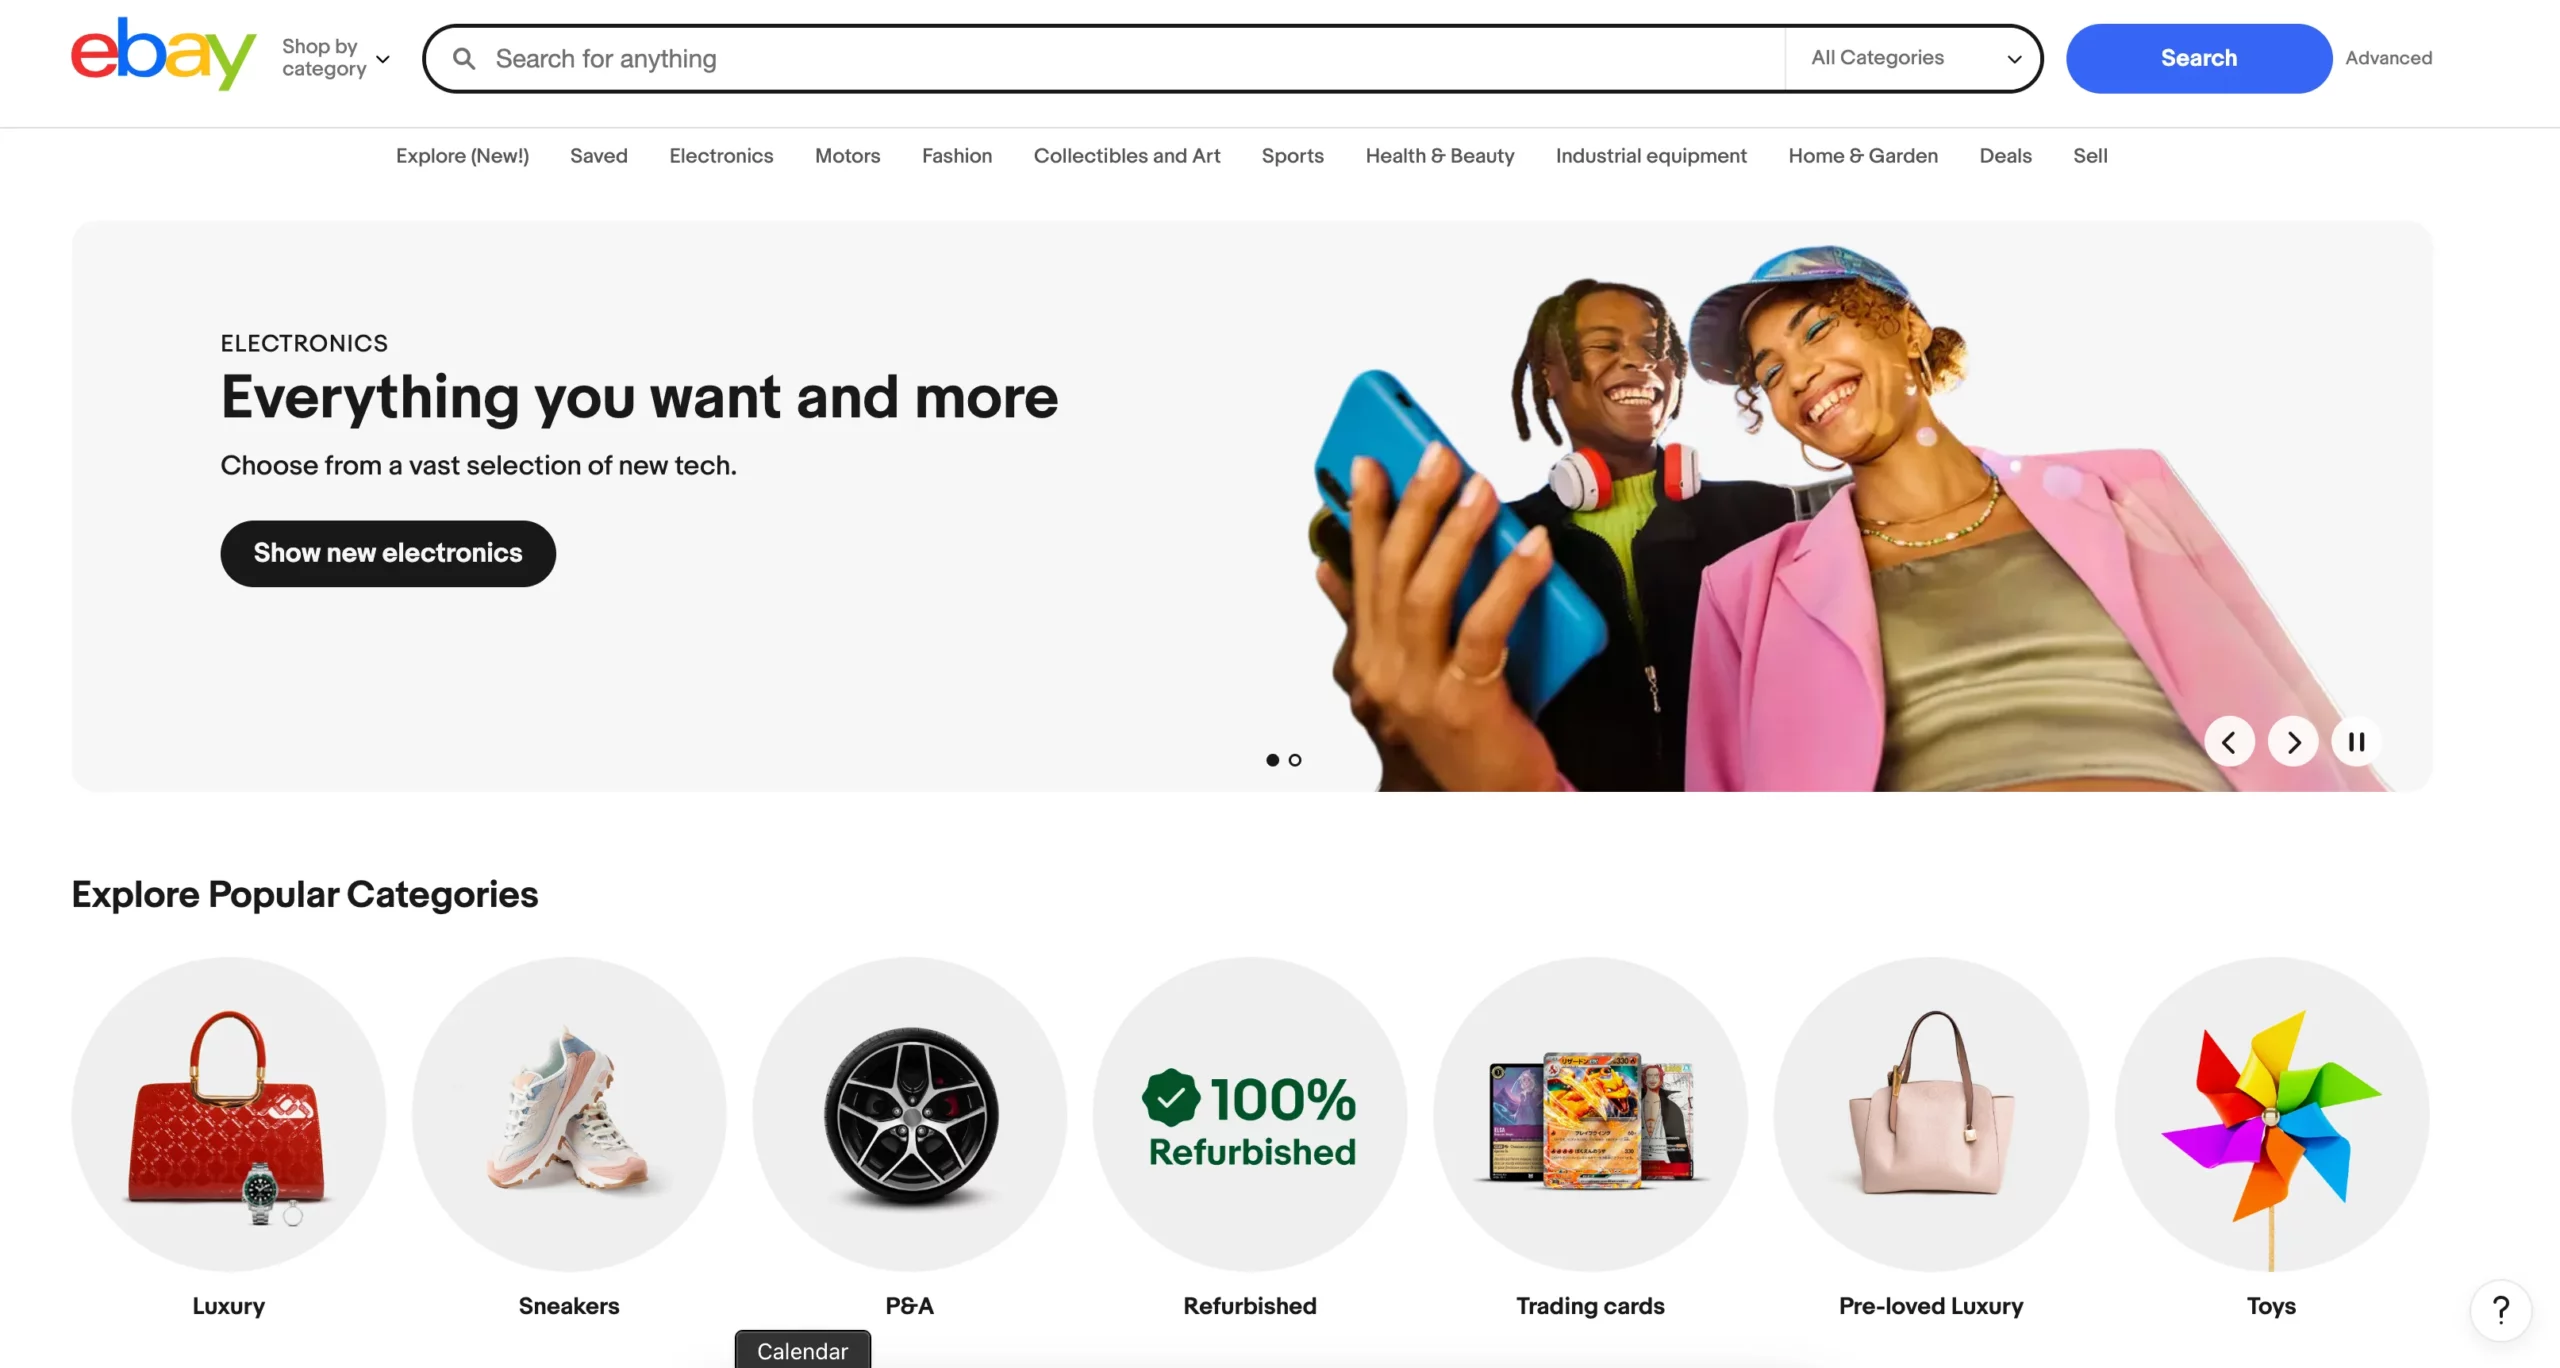
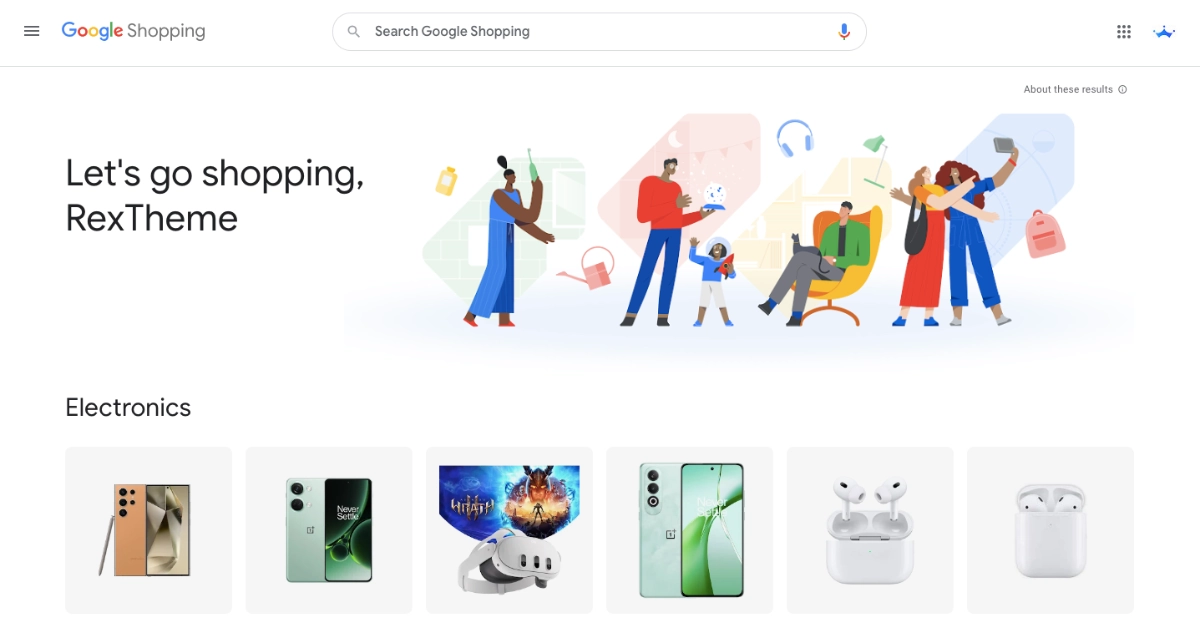
Pro Tip: If you are unsure about setting a product title, try searching on Google Shopping. You’ll get ideas about the search term perspectives.
Also, optimizing your store for Local SEO can help your products appear in more relevant searches, driving higher conversions.
**Check out our guide on optimizing local SEO to improve your search visibility further.
5. Include Your USP To Showcase Your Product Value
Including your Unique Selling Proposition (USP) in your product title can help you differentiate your product from others in the market. A USP can be anything that sets your product apart from the competition and gives your customers a reason to choose your product over others.
For instance, let’s say you’re selling a pair of running shoes. Your USP could be that the shoes are made from eco-friendly materials. Your product title could be ‘Eco-Friendly Running Shoes for Men’. This title incorporates your USP and provides customers with a clear idea of what they can expect from the product.
Another example could be a high-end smartphone that has a unique feature like a long-lasting battery life. Your product title could be ‘Premium Smartphone with Long-Lasting Battery Life’. This title highlights the unique feature of your product and makes it stand out from other smartphones in the market.
When you’re crafting your product title, think about what sets your product apart and what makes it unique. Incorporate your USP into the title in a way that is concise and attention-grabbing. This will help your product to stand out from the competition and catch the attention of potential customers.
6. Remove The Avoidable Factors For Maximum Impact
Below are some factors that you need to avoid while optimizing your product title:
Length
Do not exceed your title length of more than 150 characters. You have to make full use of the given character limit by enforcing the targeted keywords.
The optimal length of the eCommerce product title’s character is between 55-70 characters.
Separate Variants
Shoppers should be able to distinguish between your variants. Make the titles clear enough to identify the variations.
Suppose you are selling cakes of different variations, make sure to include flavor, color, and size in your product titles.
Promotional Texts
You definitely don’t want to drive your potential buyers away. Promotional texts can make that happen.
So, never include something like Buy One Get One, Flat Discount in your product title.
Grammatical Errors
Any grammatical or spelling errors will make the shoppers think you’re careless about your products. Don’t build an unprofessional image, take out the time and recheck your grammar.
7. Touch Up Your Titles To Convert More
What I meant by the touch-up phrase is, making your product title unique, eye-catching, and interesting.
Ask yourself what ‘extra’ you are offering that will convince the shoppers to buy. You have to add your special feature to stand out on the list.
Try to make your title unique. You can do this by using multiple keywords.
Consider these factors for making the title unique:
- Language quality
- Title format
- Personalized message for the targeted audience.
Suppose you’re selling skin care products, mention ‘authentic’ in the product title. Thus, your consumers won’t worry about its authenticity.
Your customers should know they are going to be benefited from the product by seeing your product title.
8. Spy Your Competitors To Stand Out In The Competition
Spying on your competitors is a crucial part of optimizing your product titles. By analyzing their product titles, you can gain valuable insights into what works and what doesn’t in your industry.
Here are some things to consider when spying on your competitors:
- Noticeable factors in their product titles: Look for commonalities and differences in their product titles. What keywords are they using? What unique selling points are they highlighting? This information can help you to refine your own product titles.
- Targeted keywords: Identify the keywords that your competitors are targeting. This will give you a sense of the language that resonates with your target audience.
- Ease of navigation: Evaluate how easy it is for users to find what they are looking for on your competitors’ sites. Are their product titles clear and descriptive? Are they using formatting (such as bullet points) to make the information more scannable?
By keeping a close eye on your competitors, you can stay ahead of the curve and continually optimize your product titles to drive more sales.
How To Optimize Your WooCommerce Product Feed Products Title
So far you’ve learned about how you can optimize your product title so that you can make your products more appealing to your audience, and so you can expect more conversion.
However, if you’re selling more than 100 products, it is quite difficult to optimize your product titles at once.
But there’s a way through which you can easily optimize your WooCommerce feed product titles while generating the product feed.
You can use the Combined Attributes feature of the Product Feed Manager for the WooCommerce plugin.
Let me show you how easily you can optimize your WooCommerce product feed product titles.
Step 1: Install Product Feed Manager for WooCommerce Plugin On Your WordPress Site
**Make sure you have WooCommerce installed on your site before installing the Product Feed Manager for WooCommerce plugin.
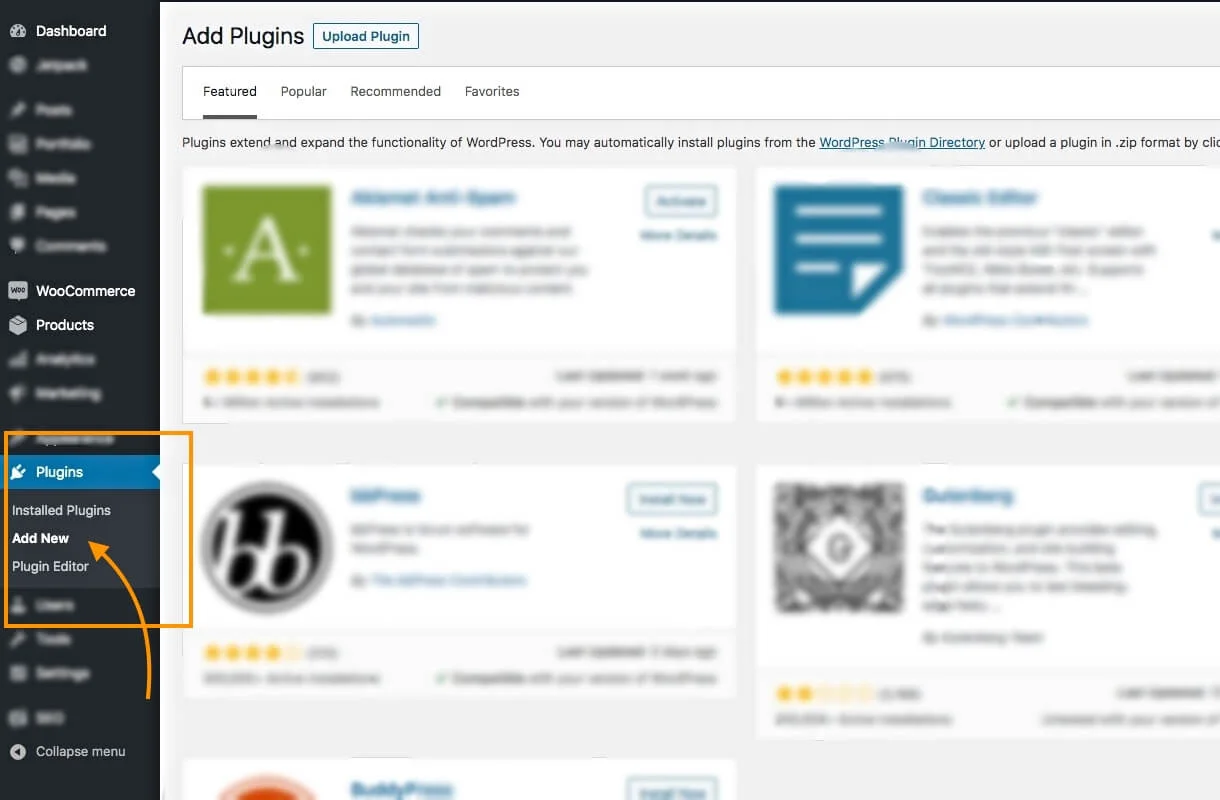
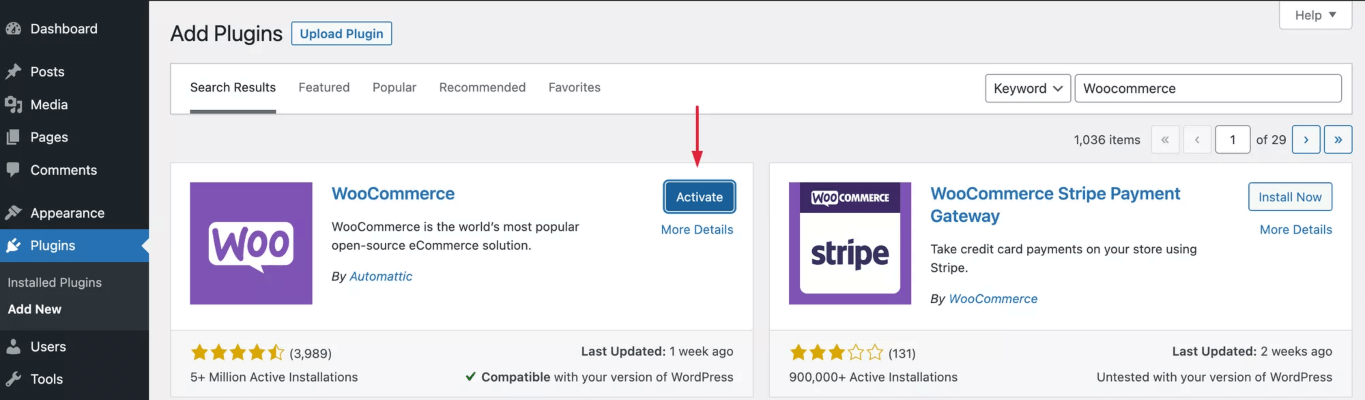
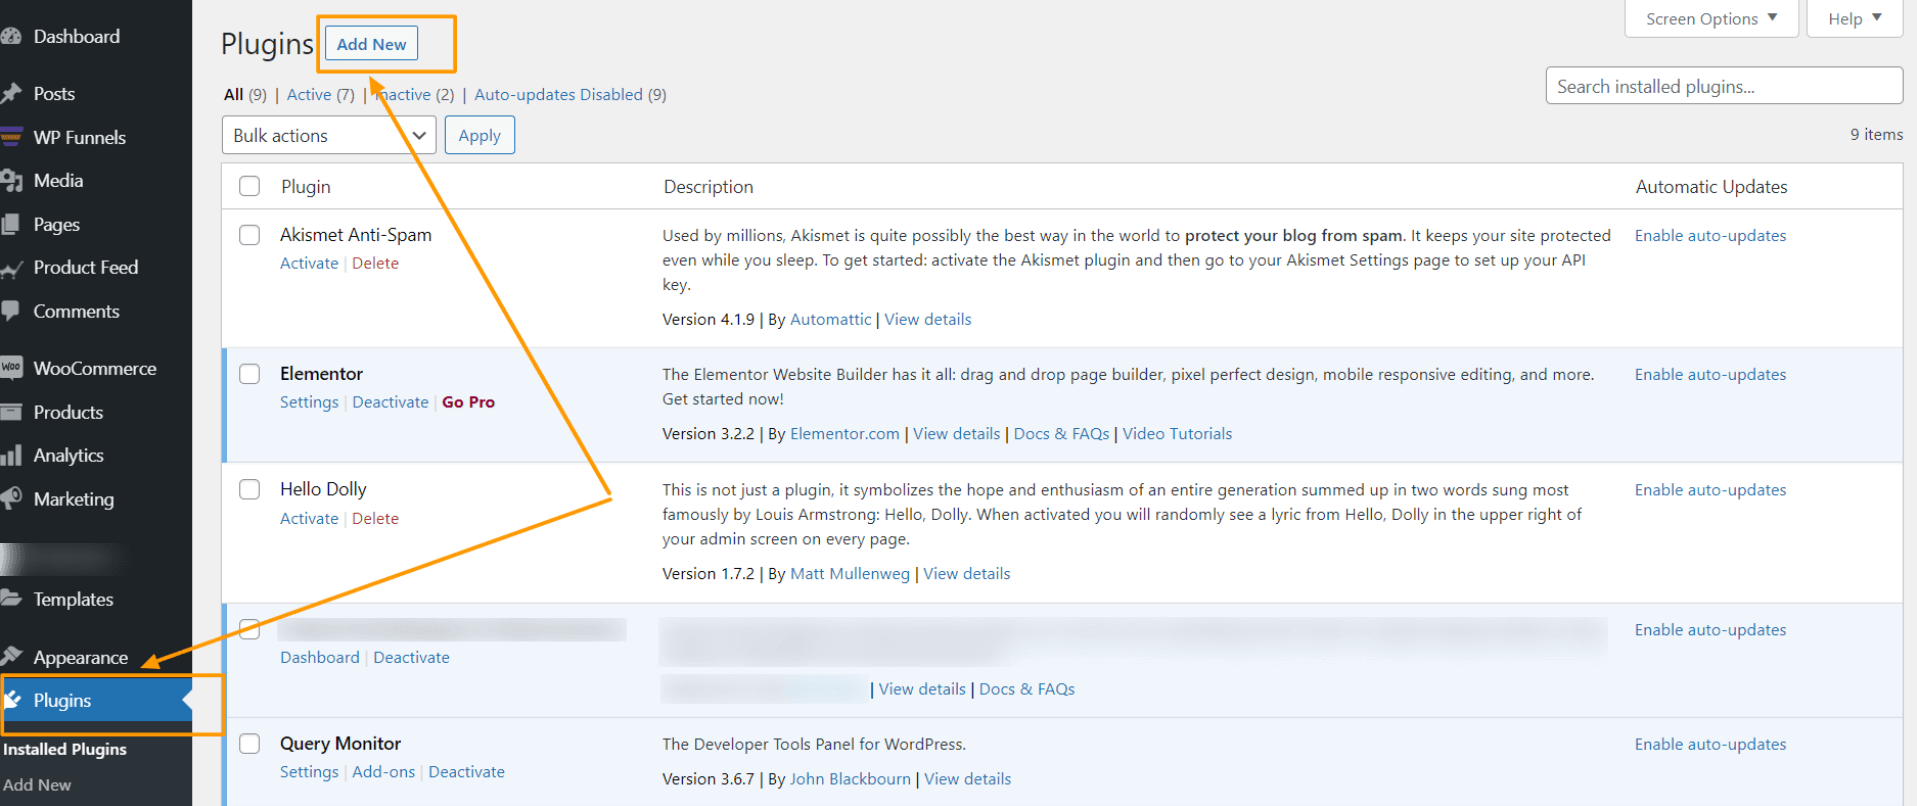
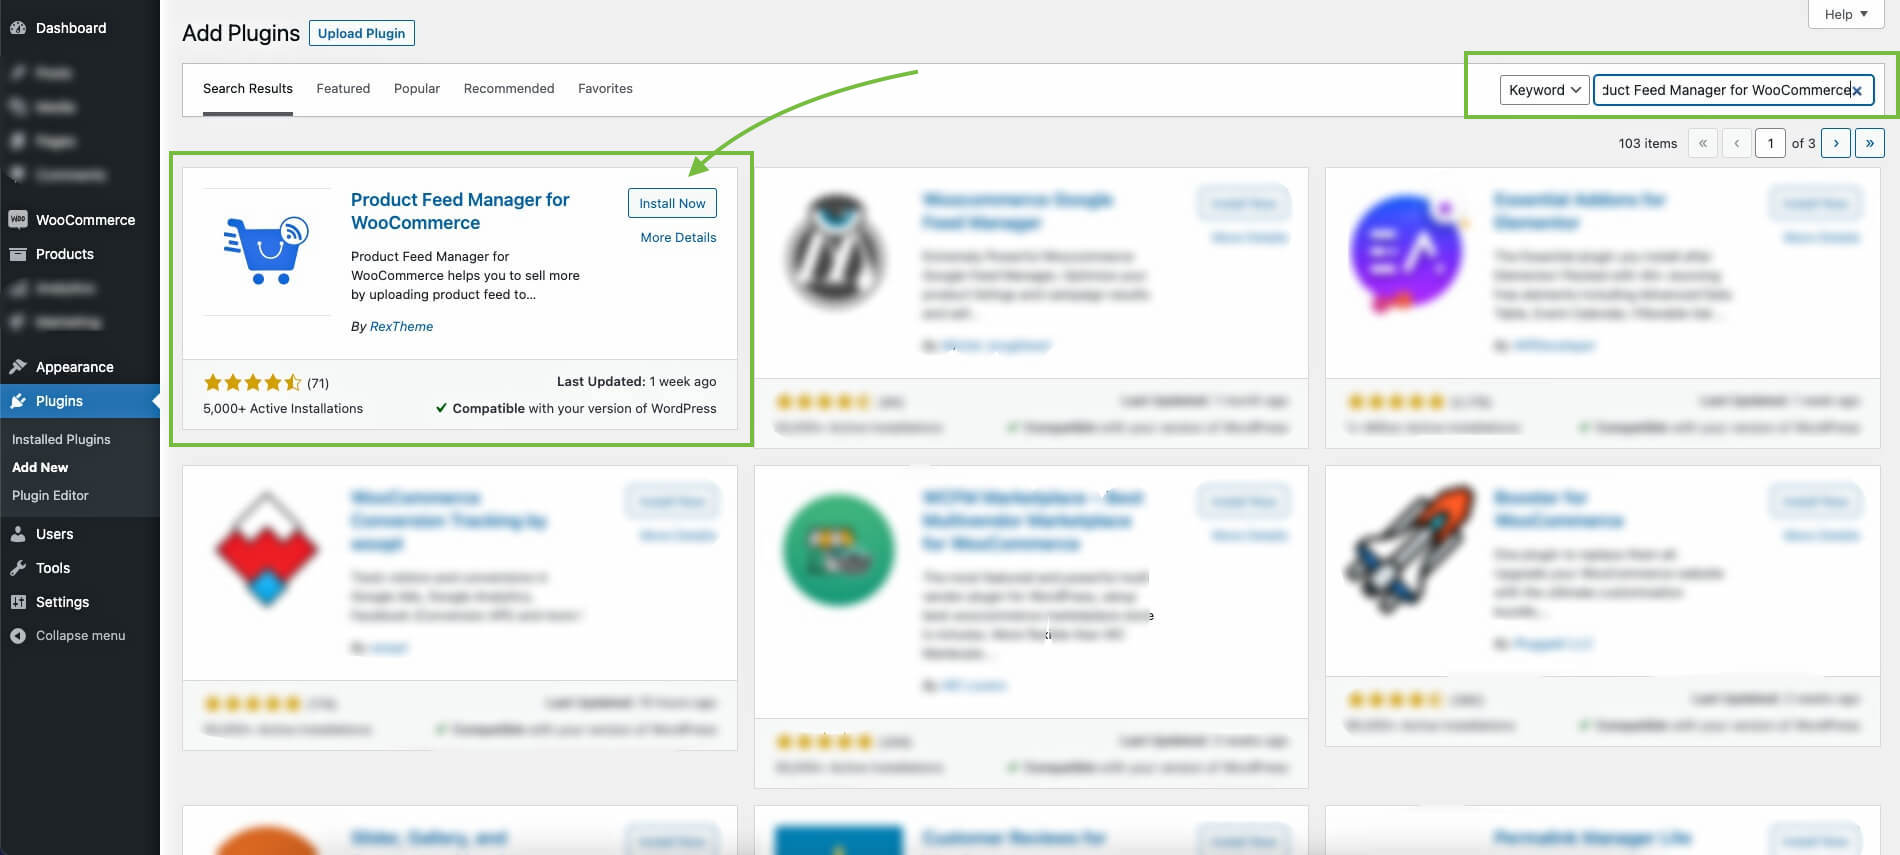
1. Go to your WordPress Dashboard and select Plugins. Click on the Add New button.
2. On the Keyword field, search for ‘Product Feed Manager For WooCommerce’, and the plugin will appear on the search results.
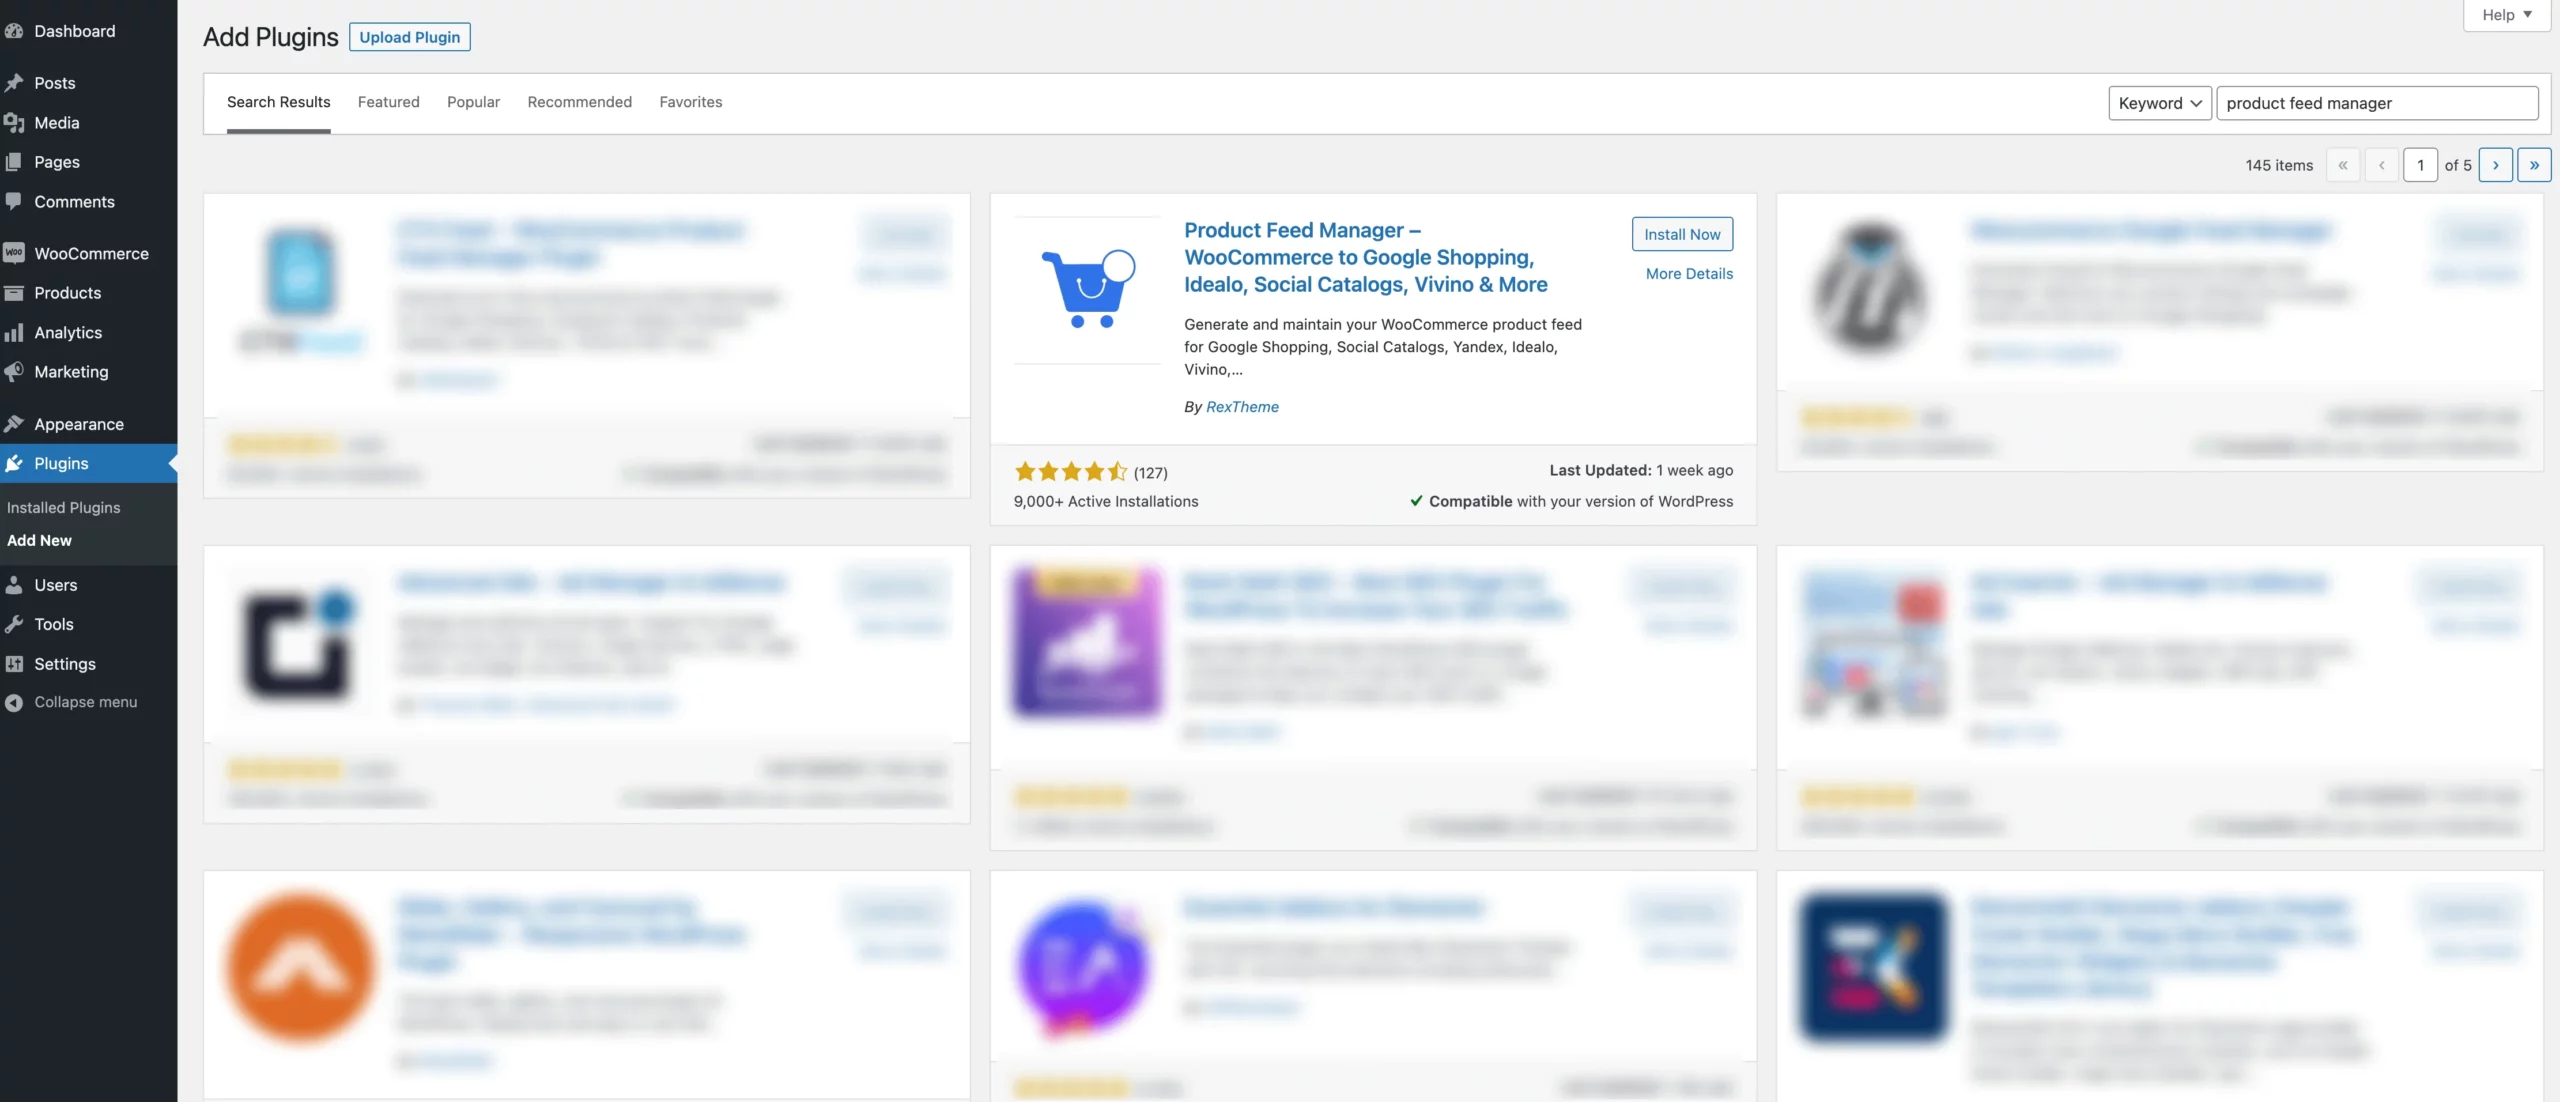
3. Click on the Install Now button.
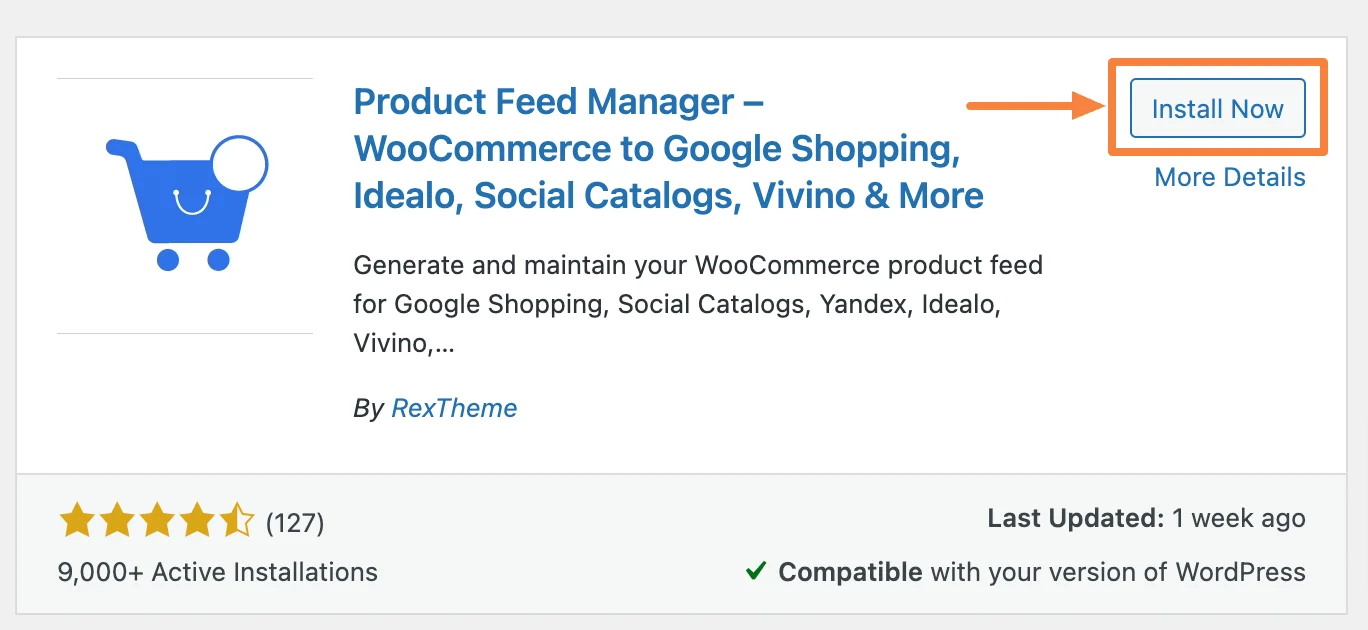
Once the plugin is installed, the Activate button will appear.
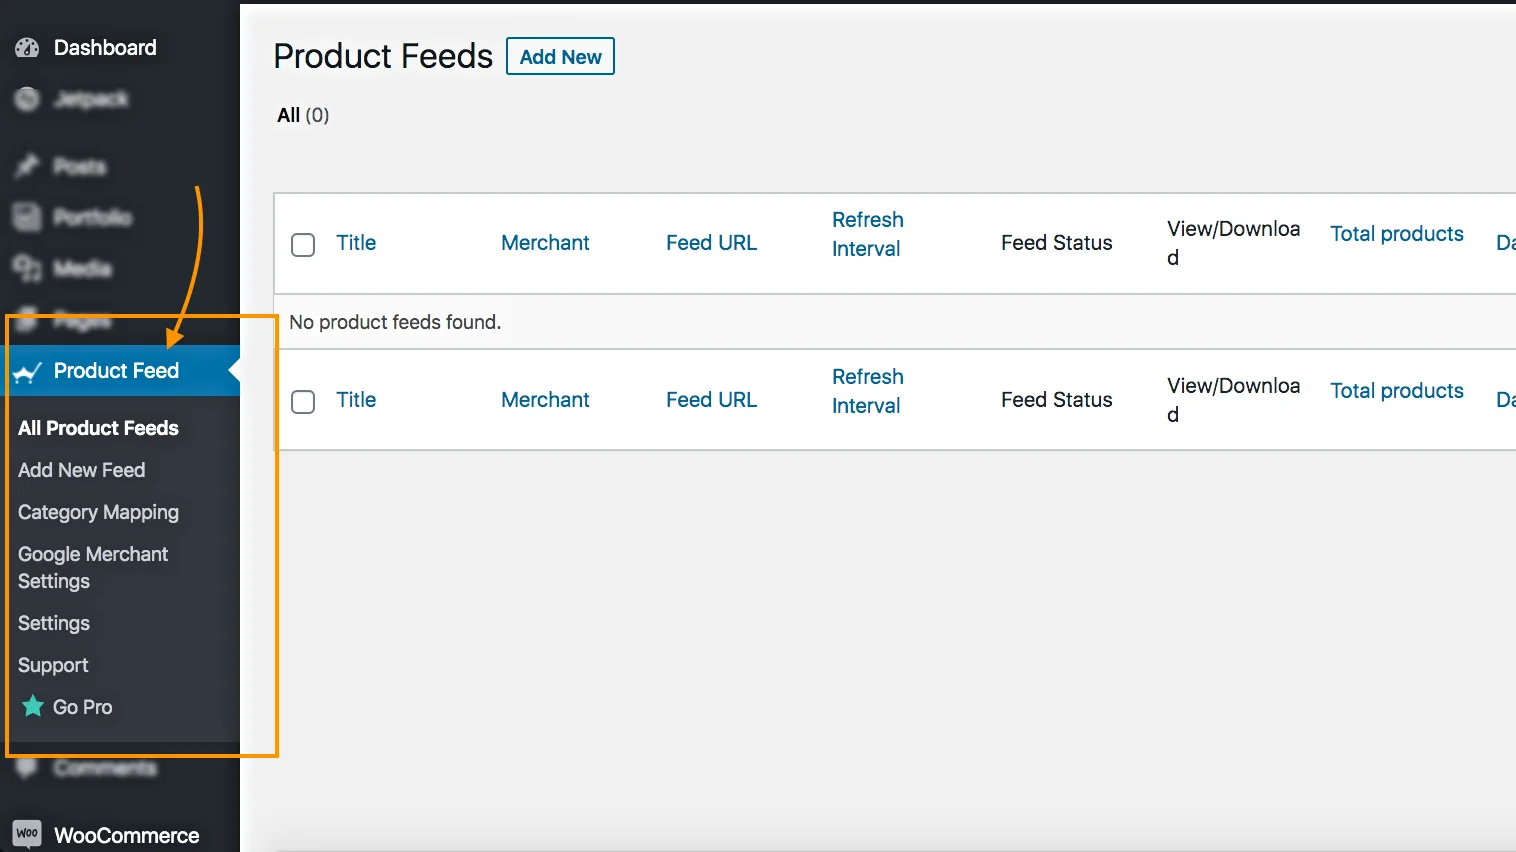
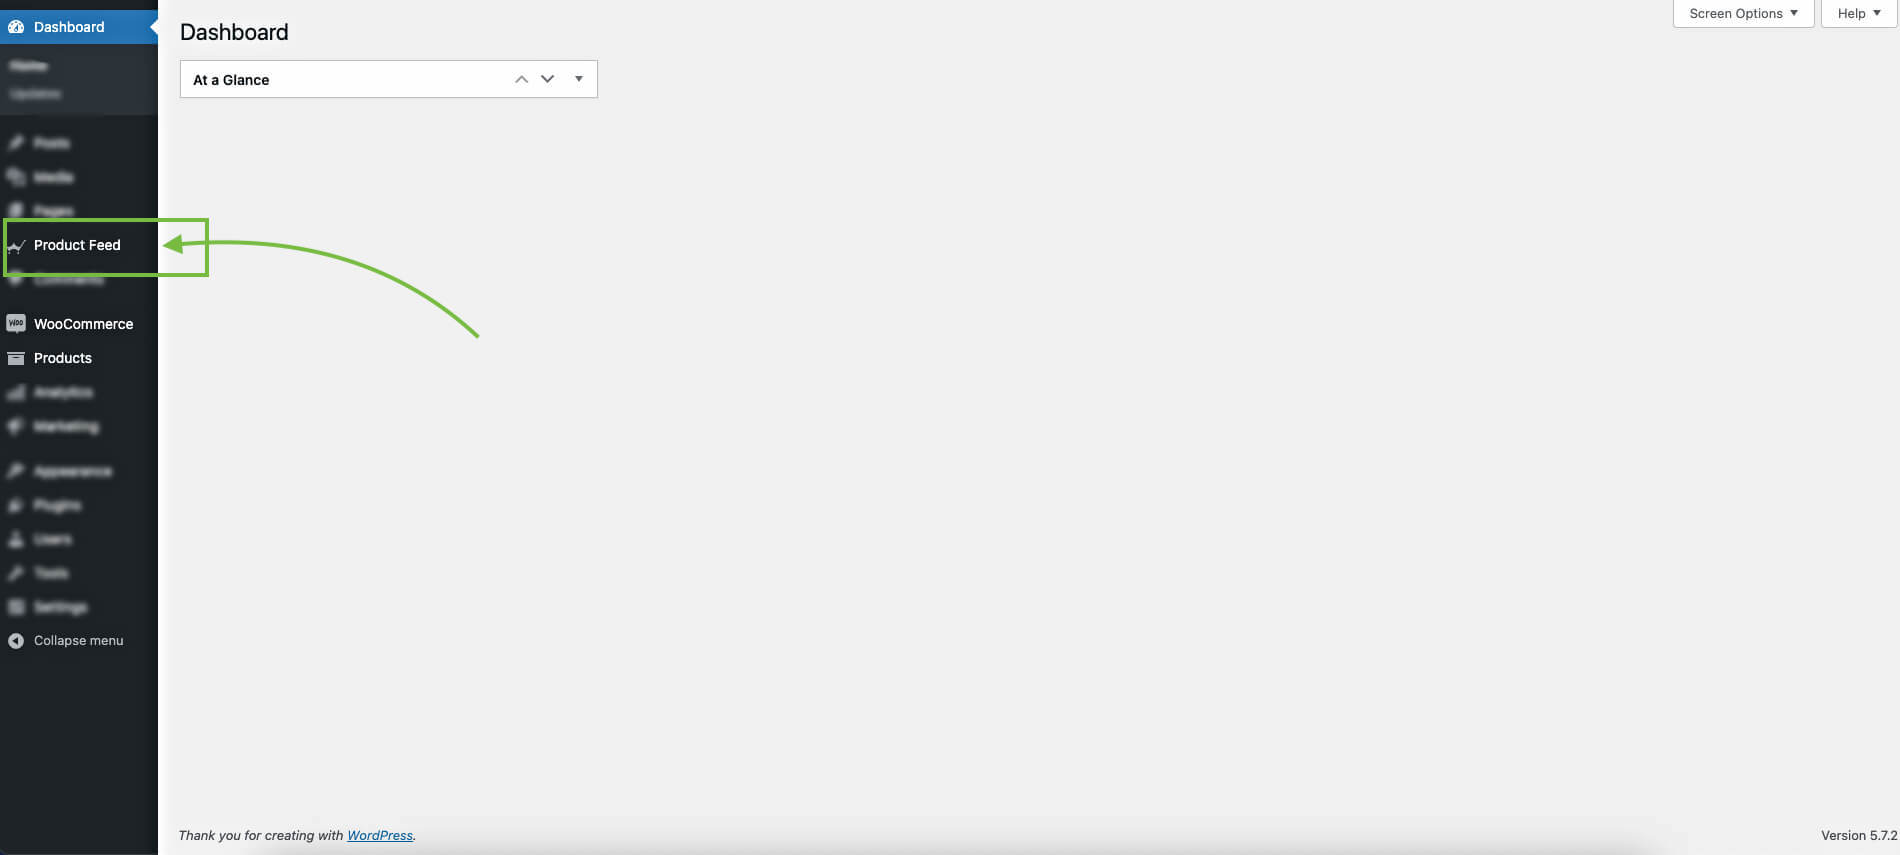
4. Click on it to activate the plugin on your site. Once the plugin is activated, a Product Feed menu will appear on the left side.
That’s it. You now have a Product Feed manager for WooCommerce installed on your site.
Now, you need to install the Pro version of the plugin to use the Combined Attribute feature to optimize your WooCommere feed product titles.
You can get the Product Feed Manager Pro version here:
https://staging-rextheme.kinsta.cloud/best-woocommerce-product-feed/
Here’s a guide that you can follow to learn how to install and activate the Product Feed Manager for the WooCommerce Pro plugin and how to activate the license: HOW TO INSTALL AND ACTIVATE PFM PRO
If you download from the WordPress repository or the RexTheme website, then go to Dashboard > Plugins > Add New and on the top left side, you will see an ‘Upload’ button. Click on it. Then upload the plugin file, Install and Activate it.
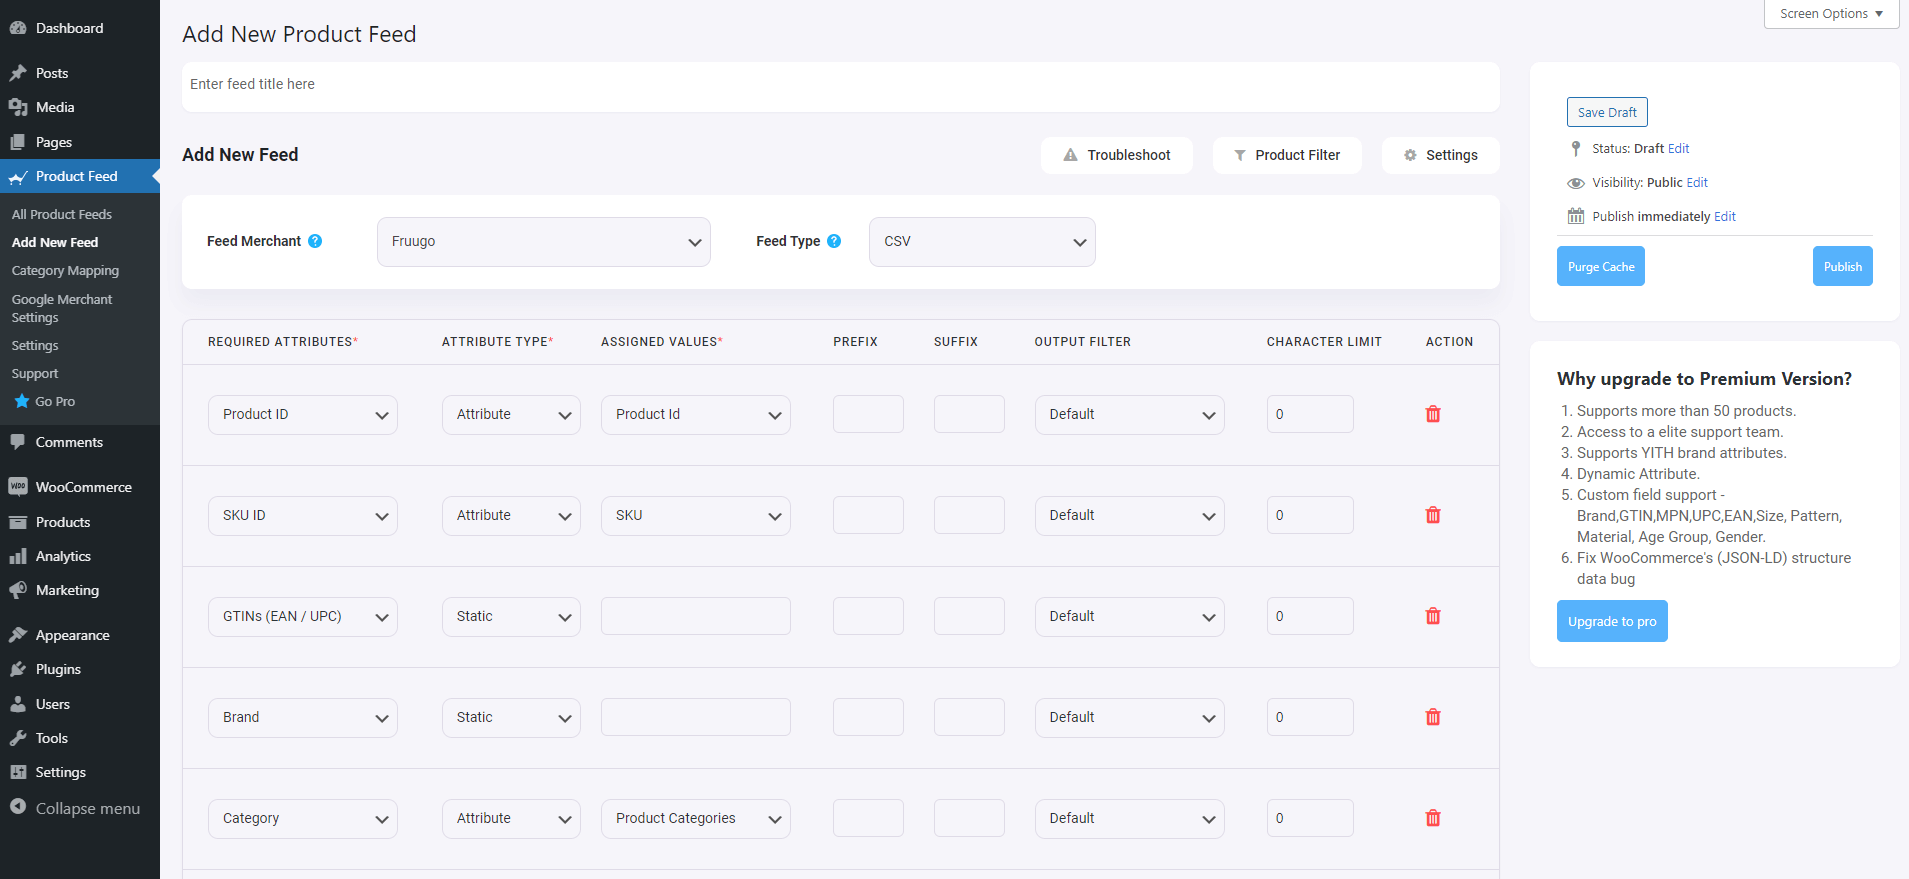
Step 2: Create A New Feed
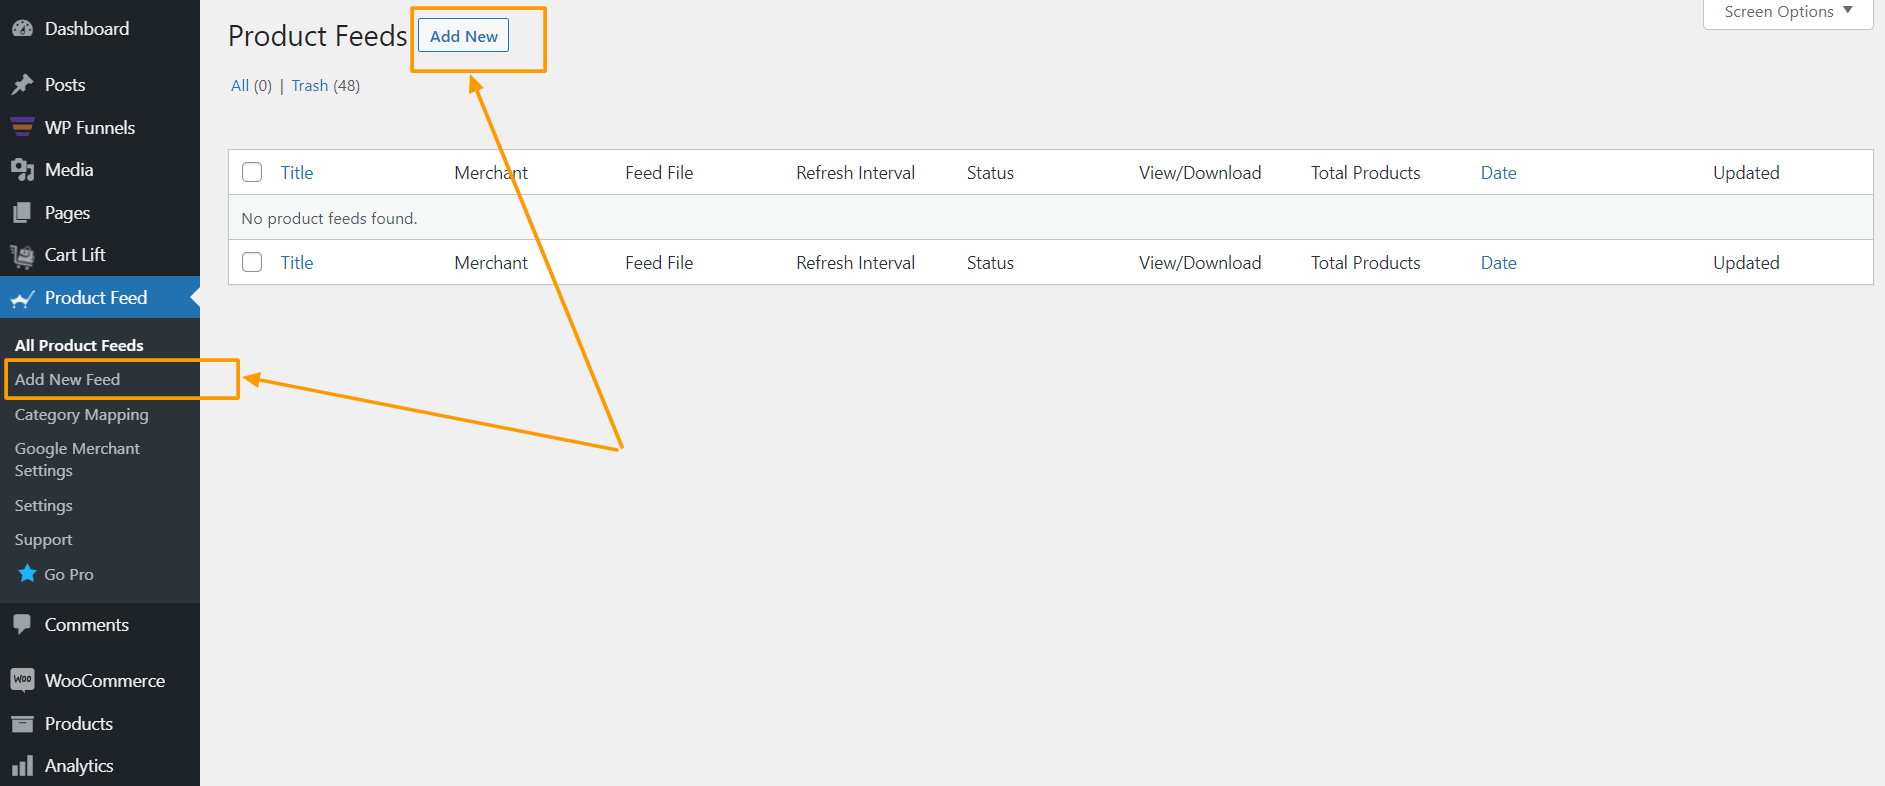
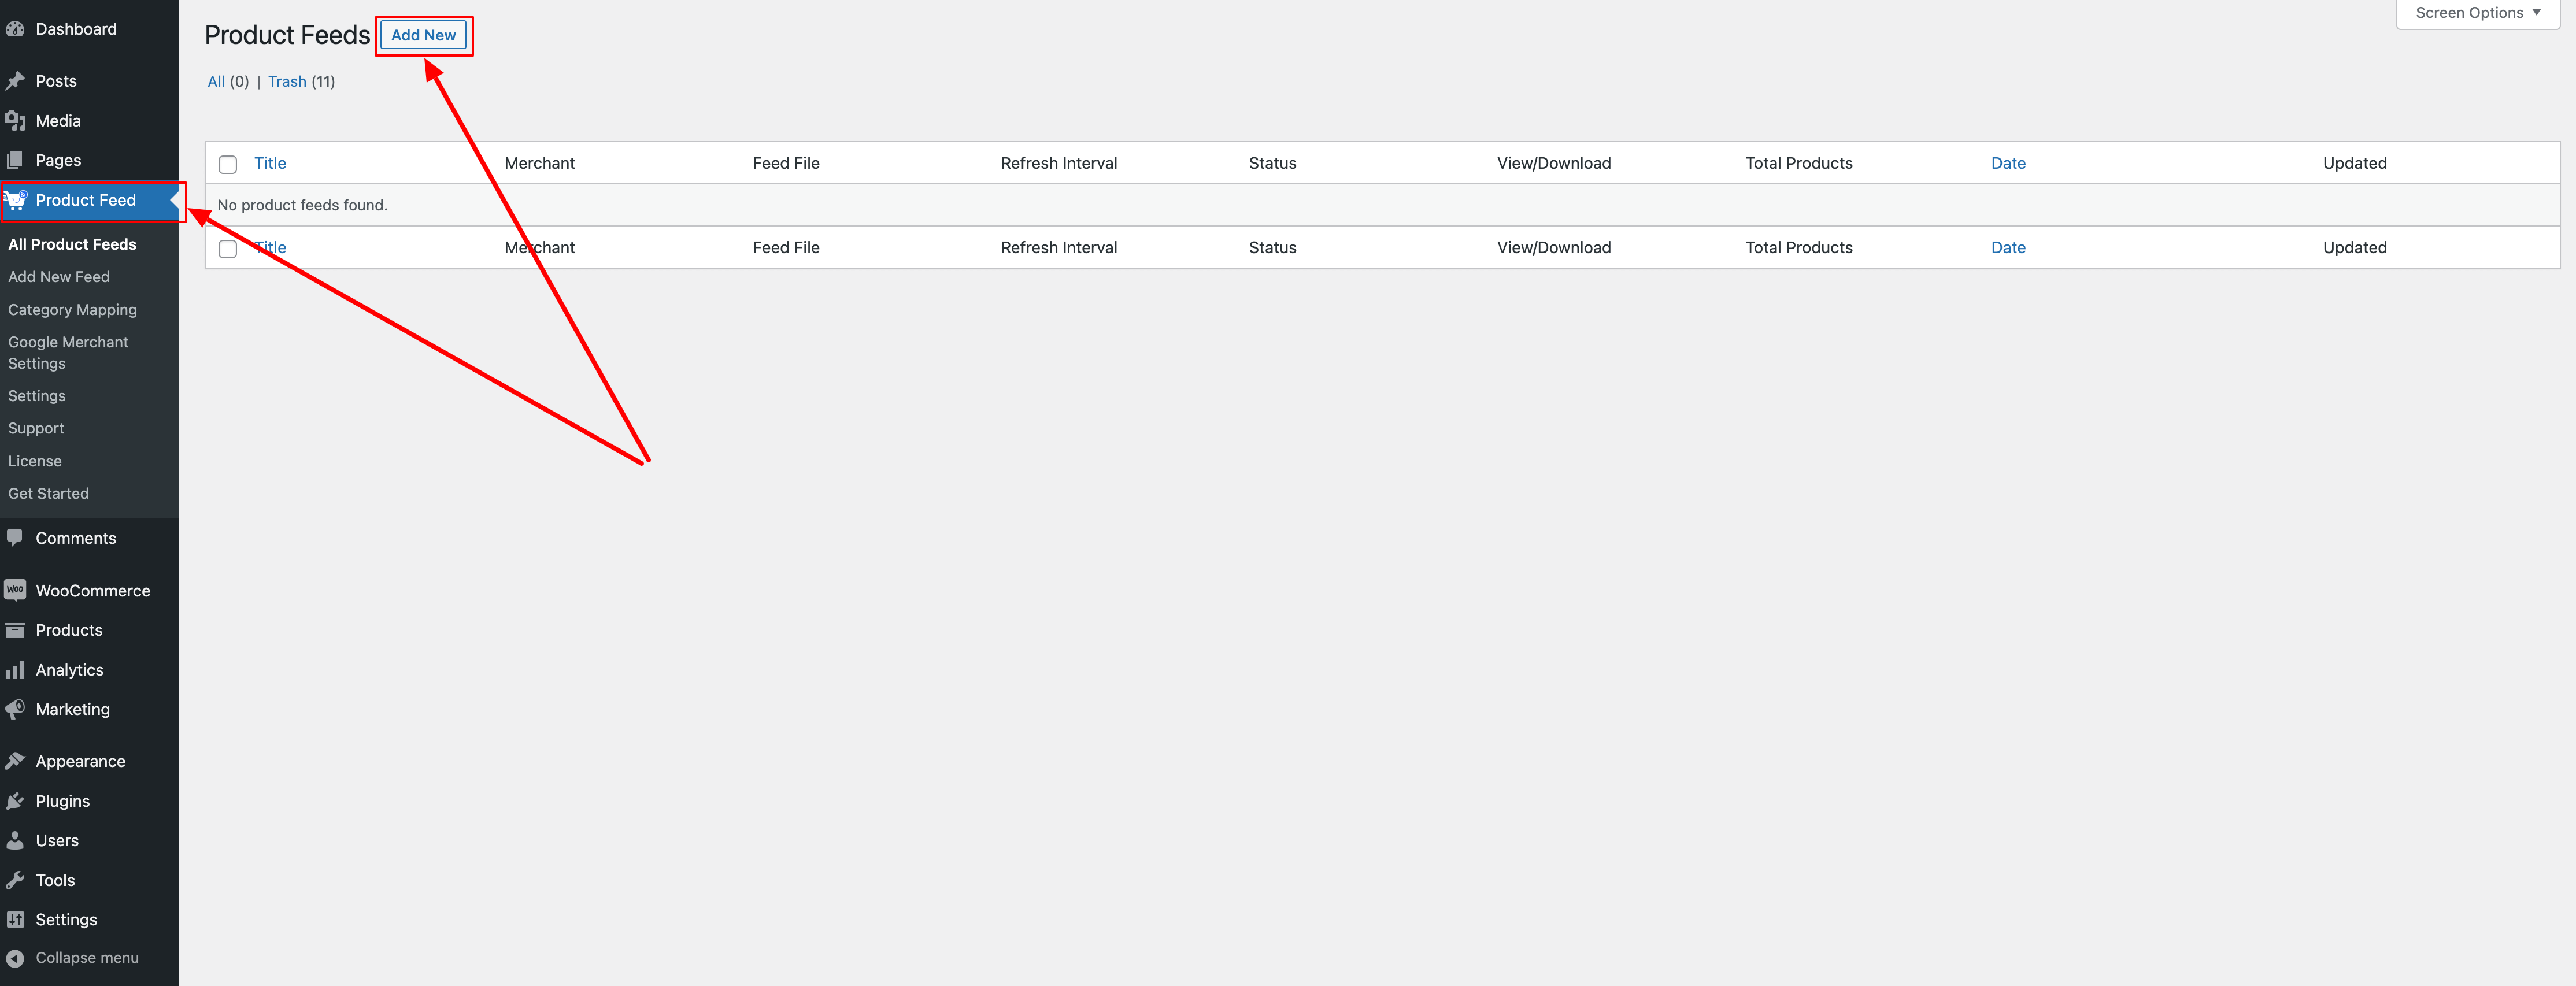
Go to your product feed dashboard.
Click on the Add New Feed button.
It will take you to the feed creation page.
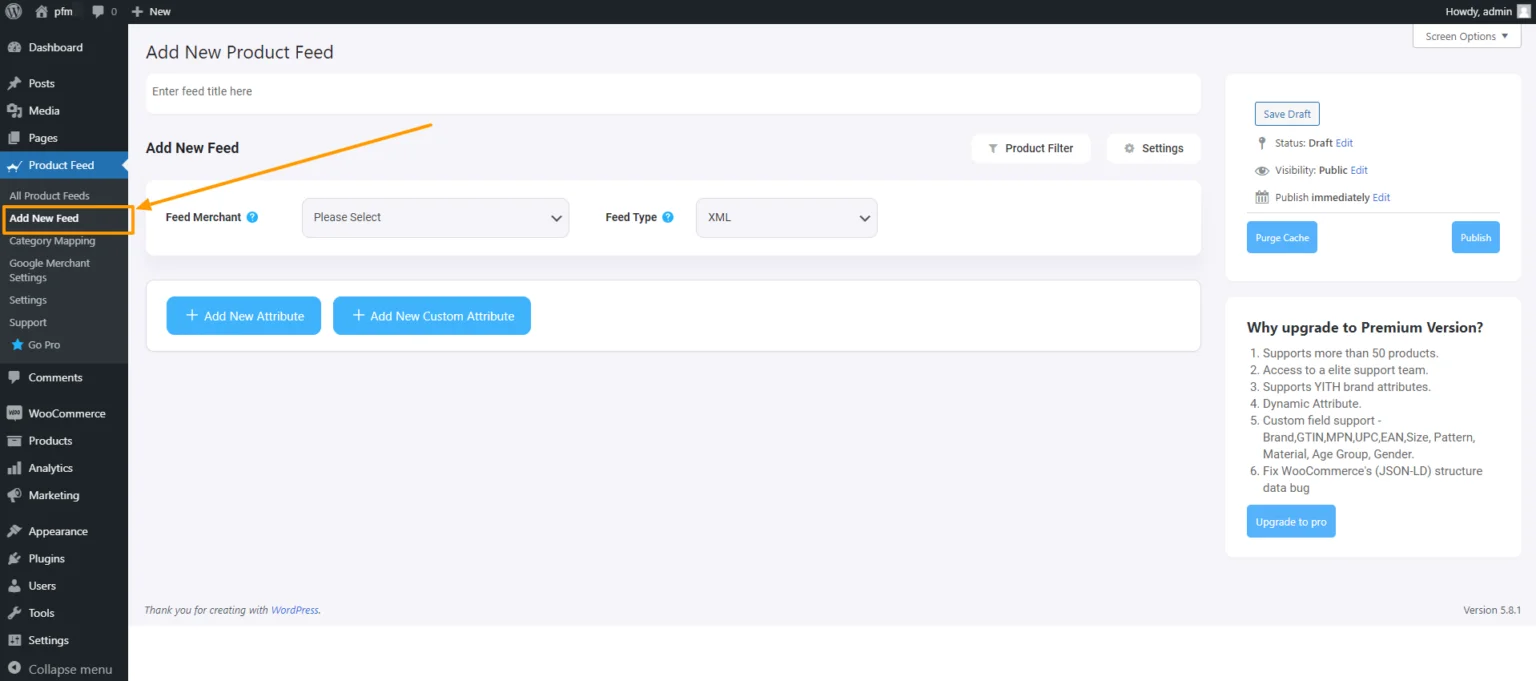
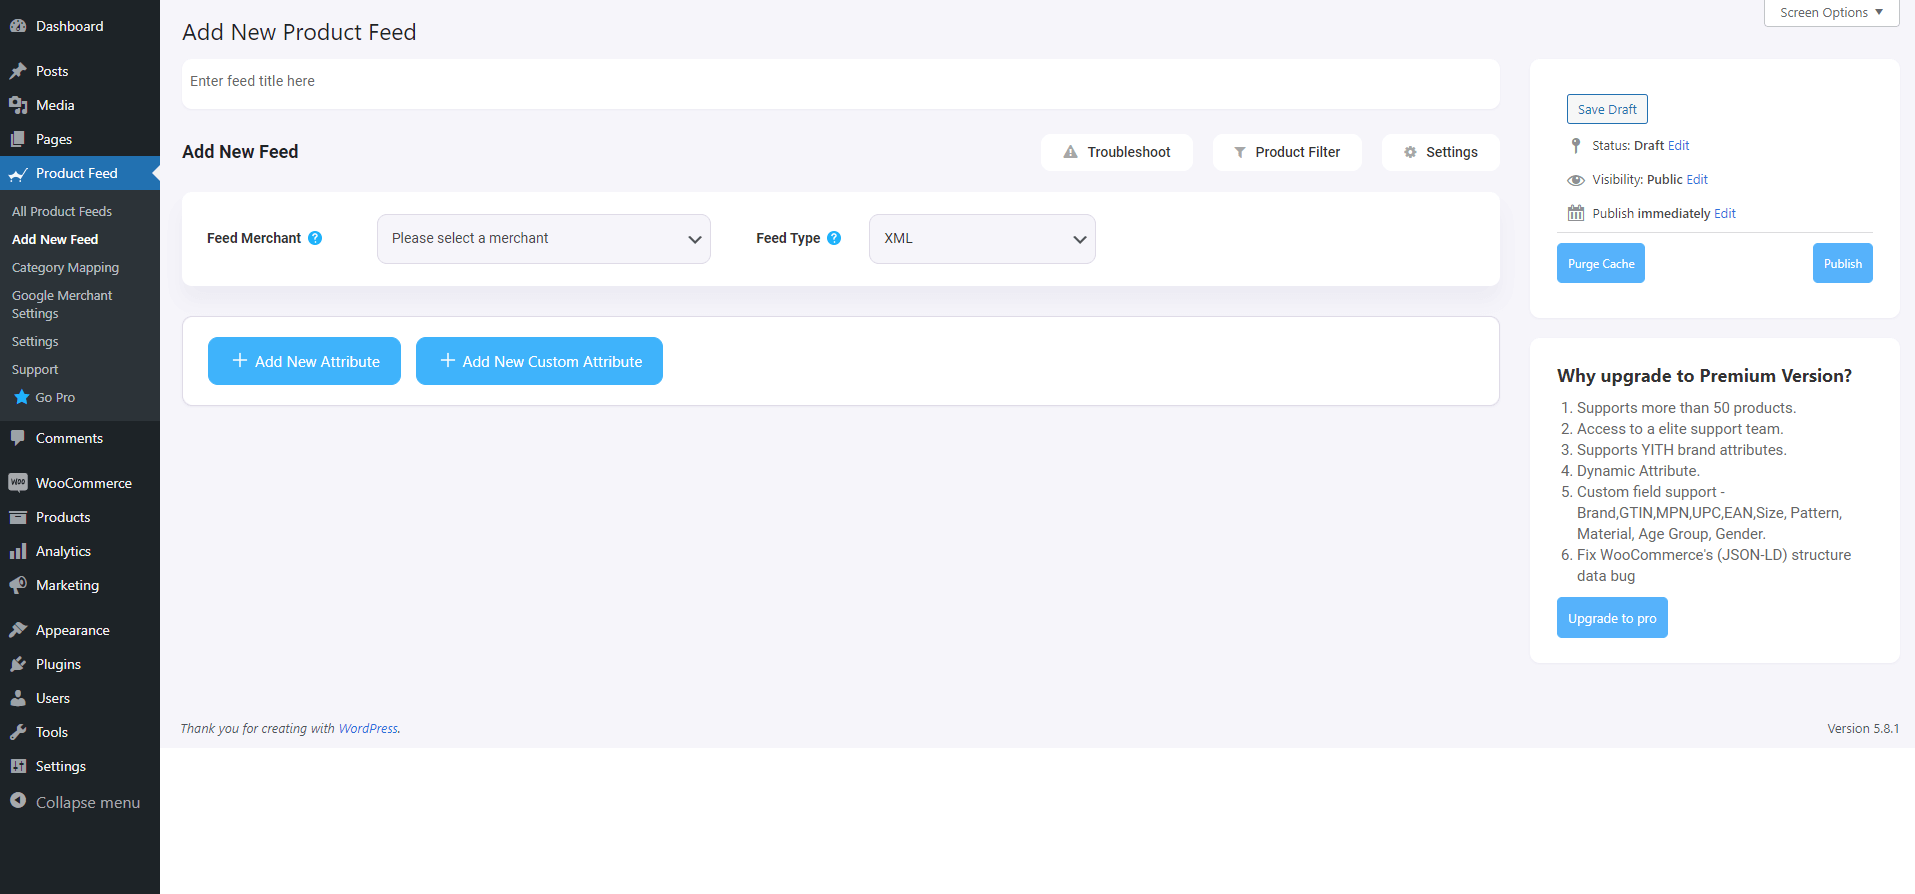
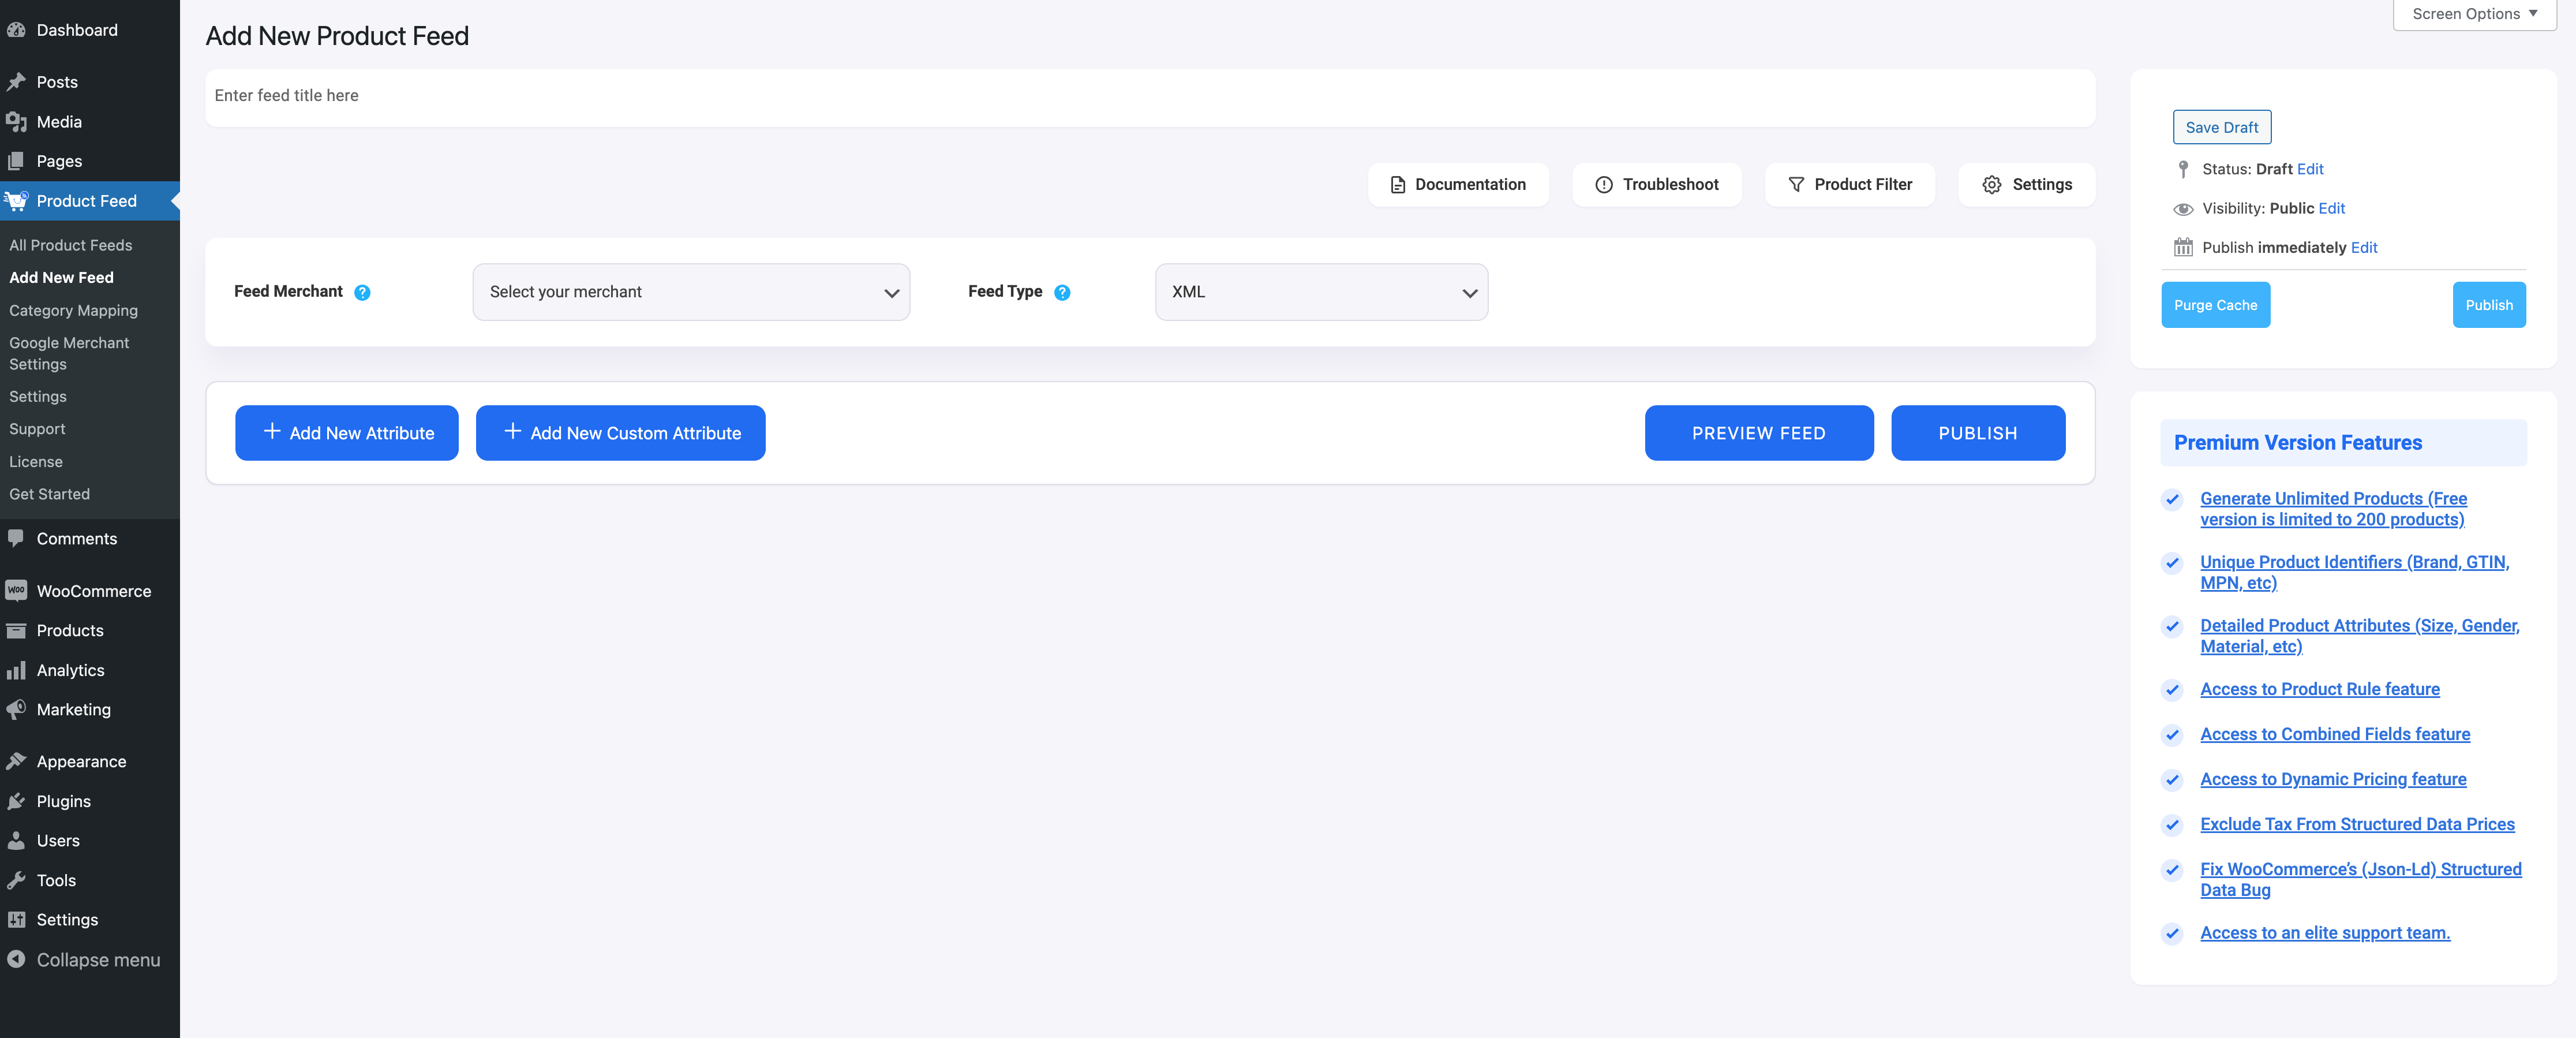
Now, here,
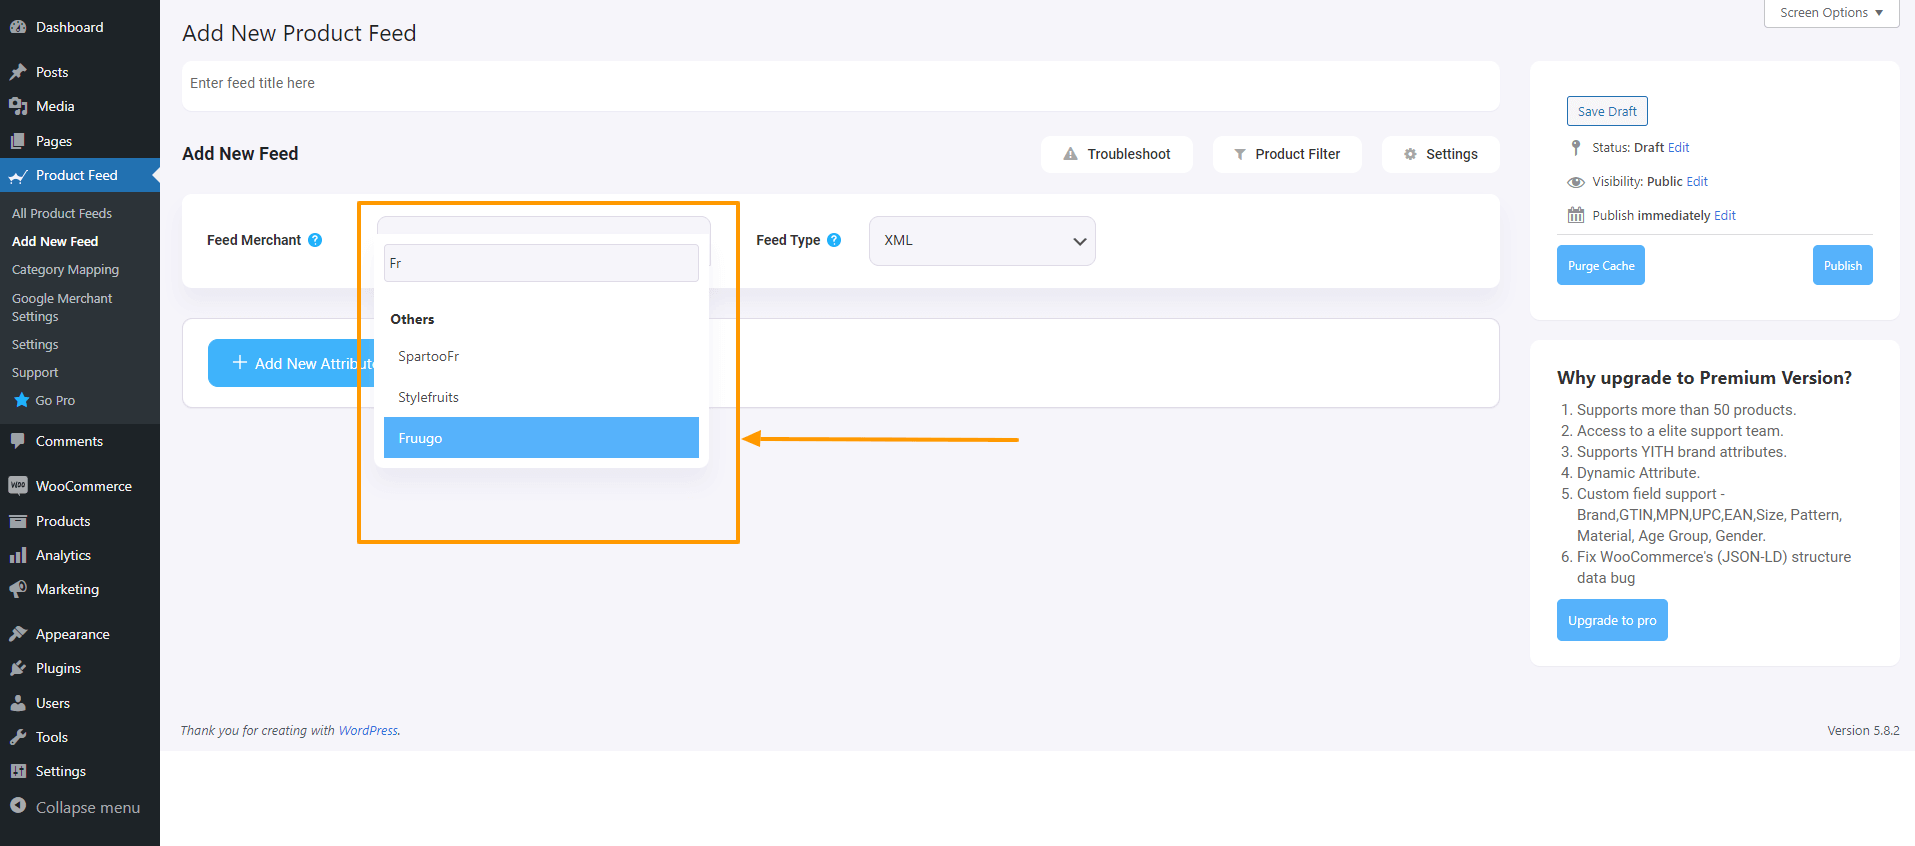
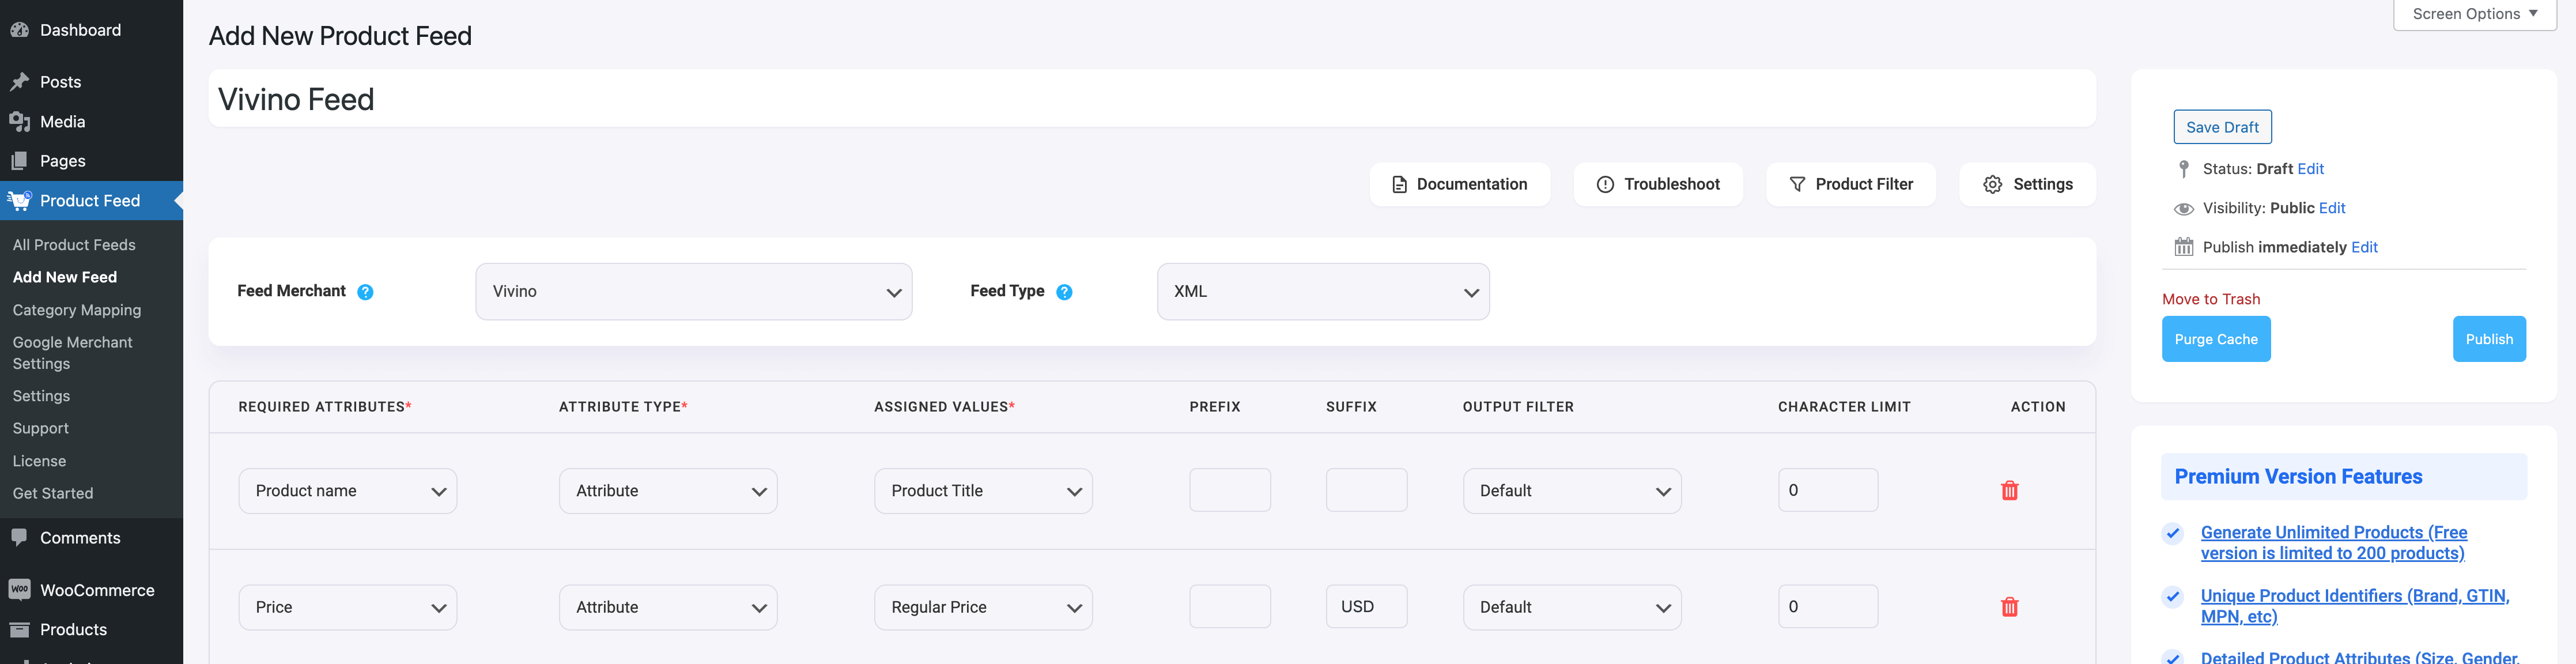
1. On top, you will get the option to add a title to the feed. Give your feed a name.

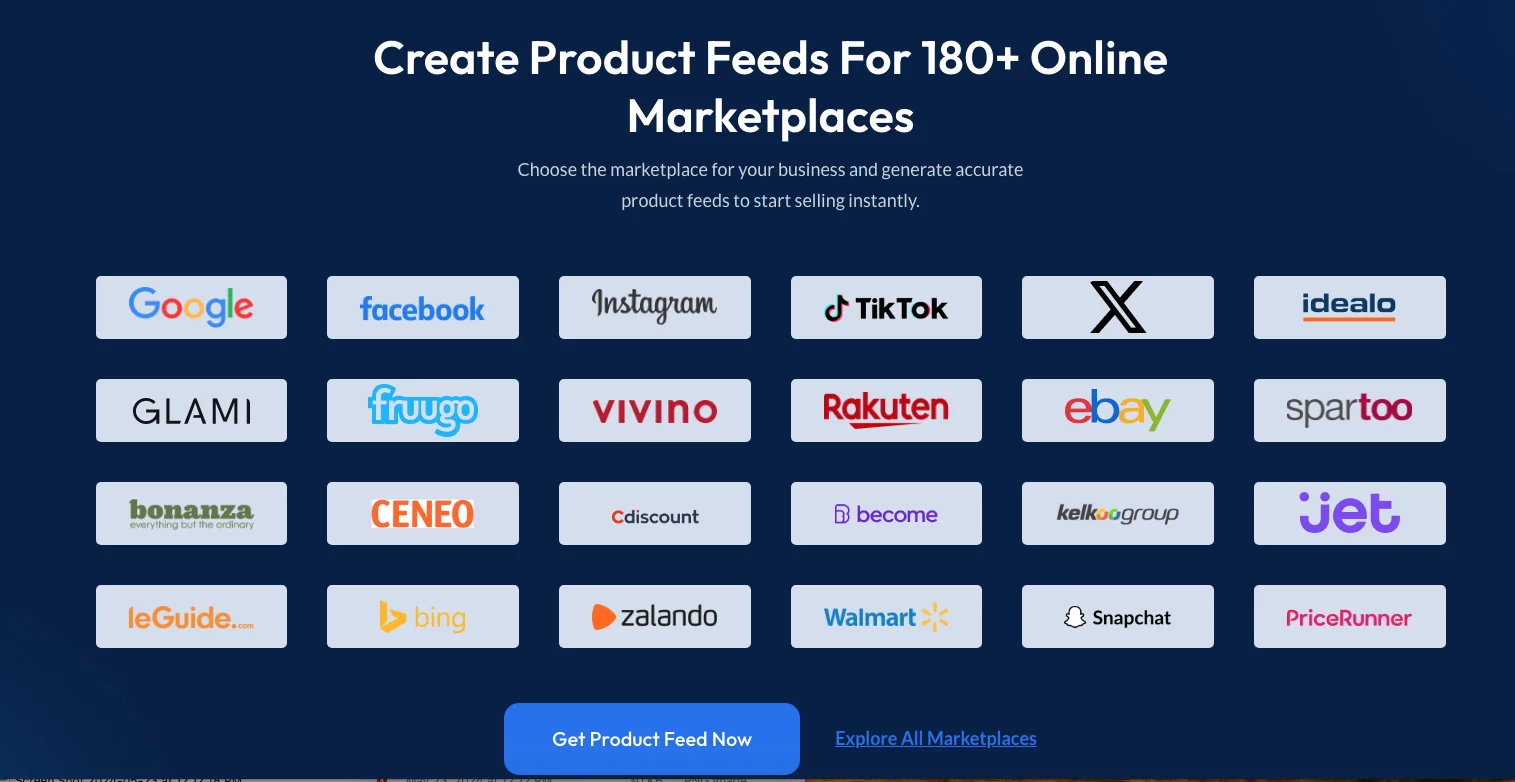
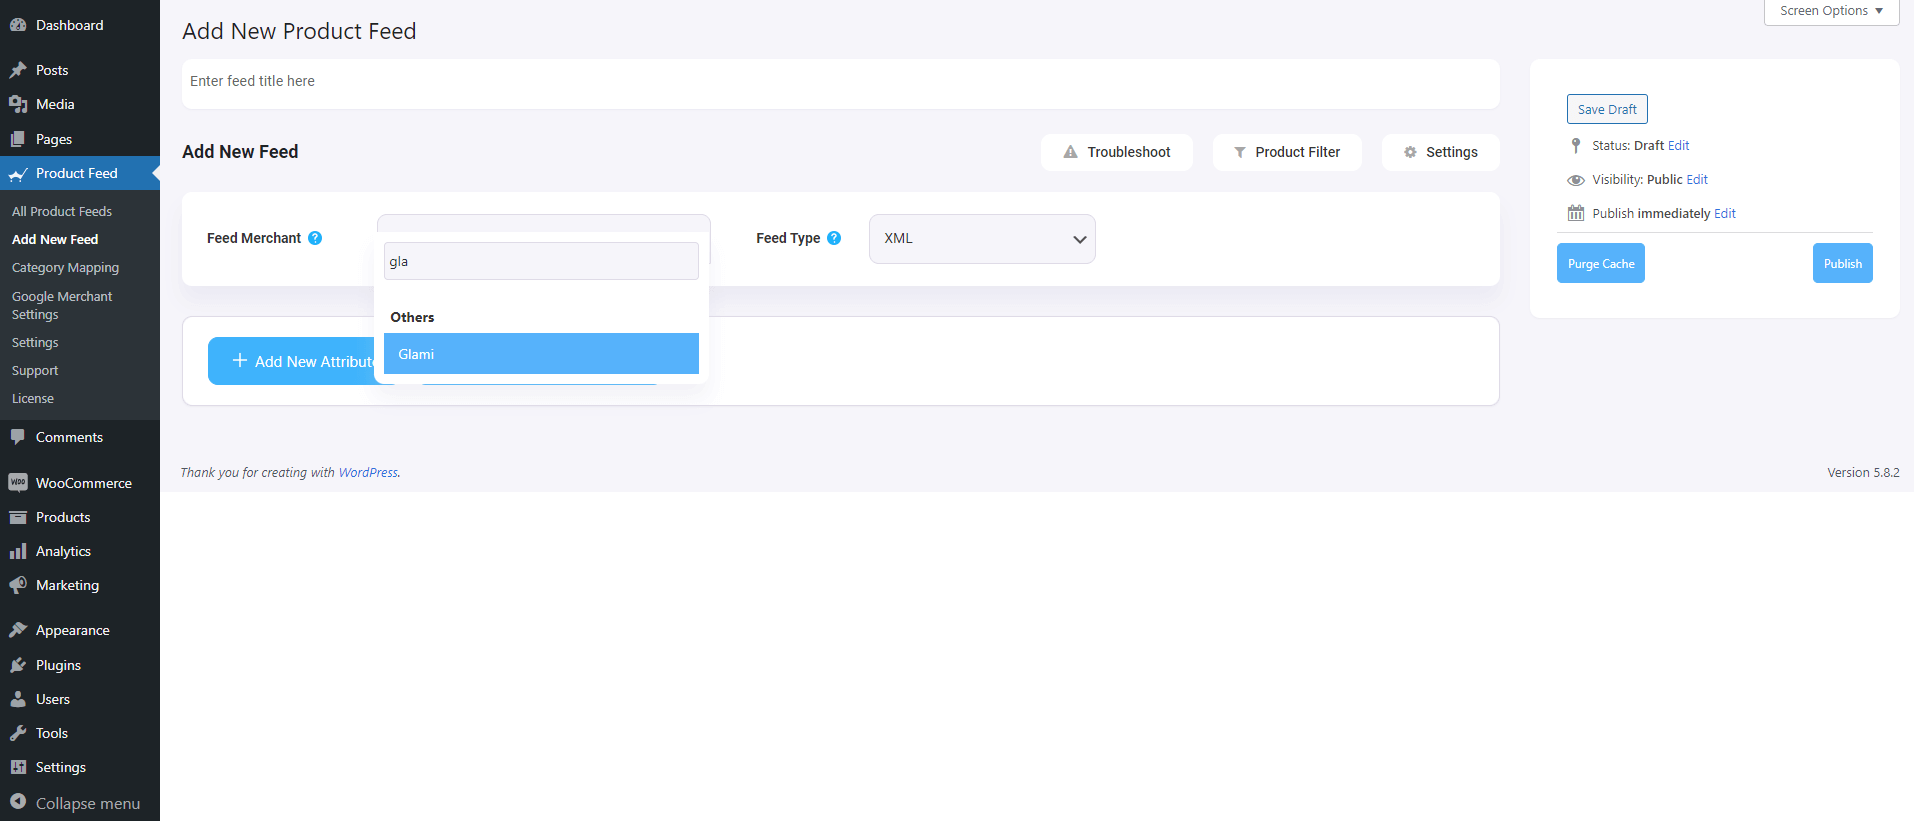
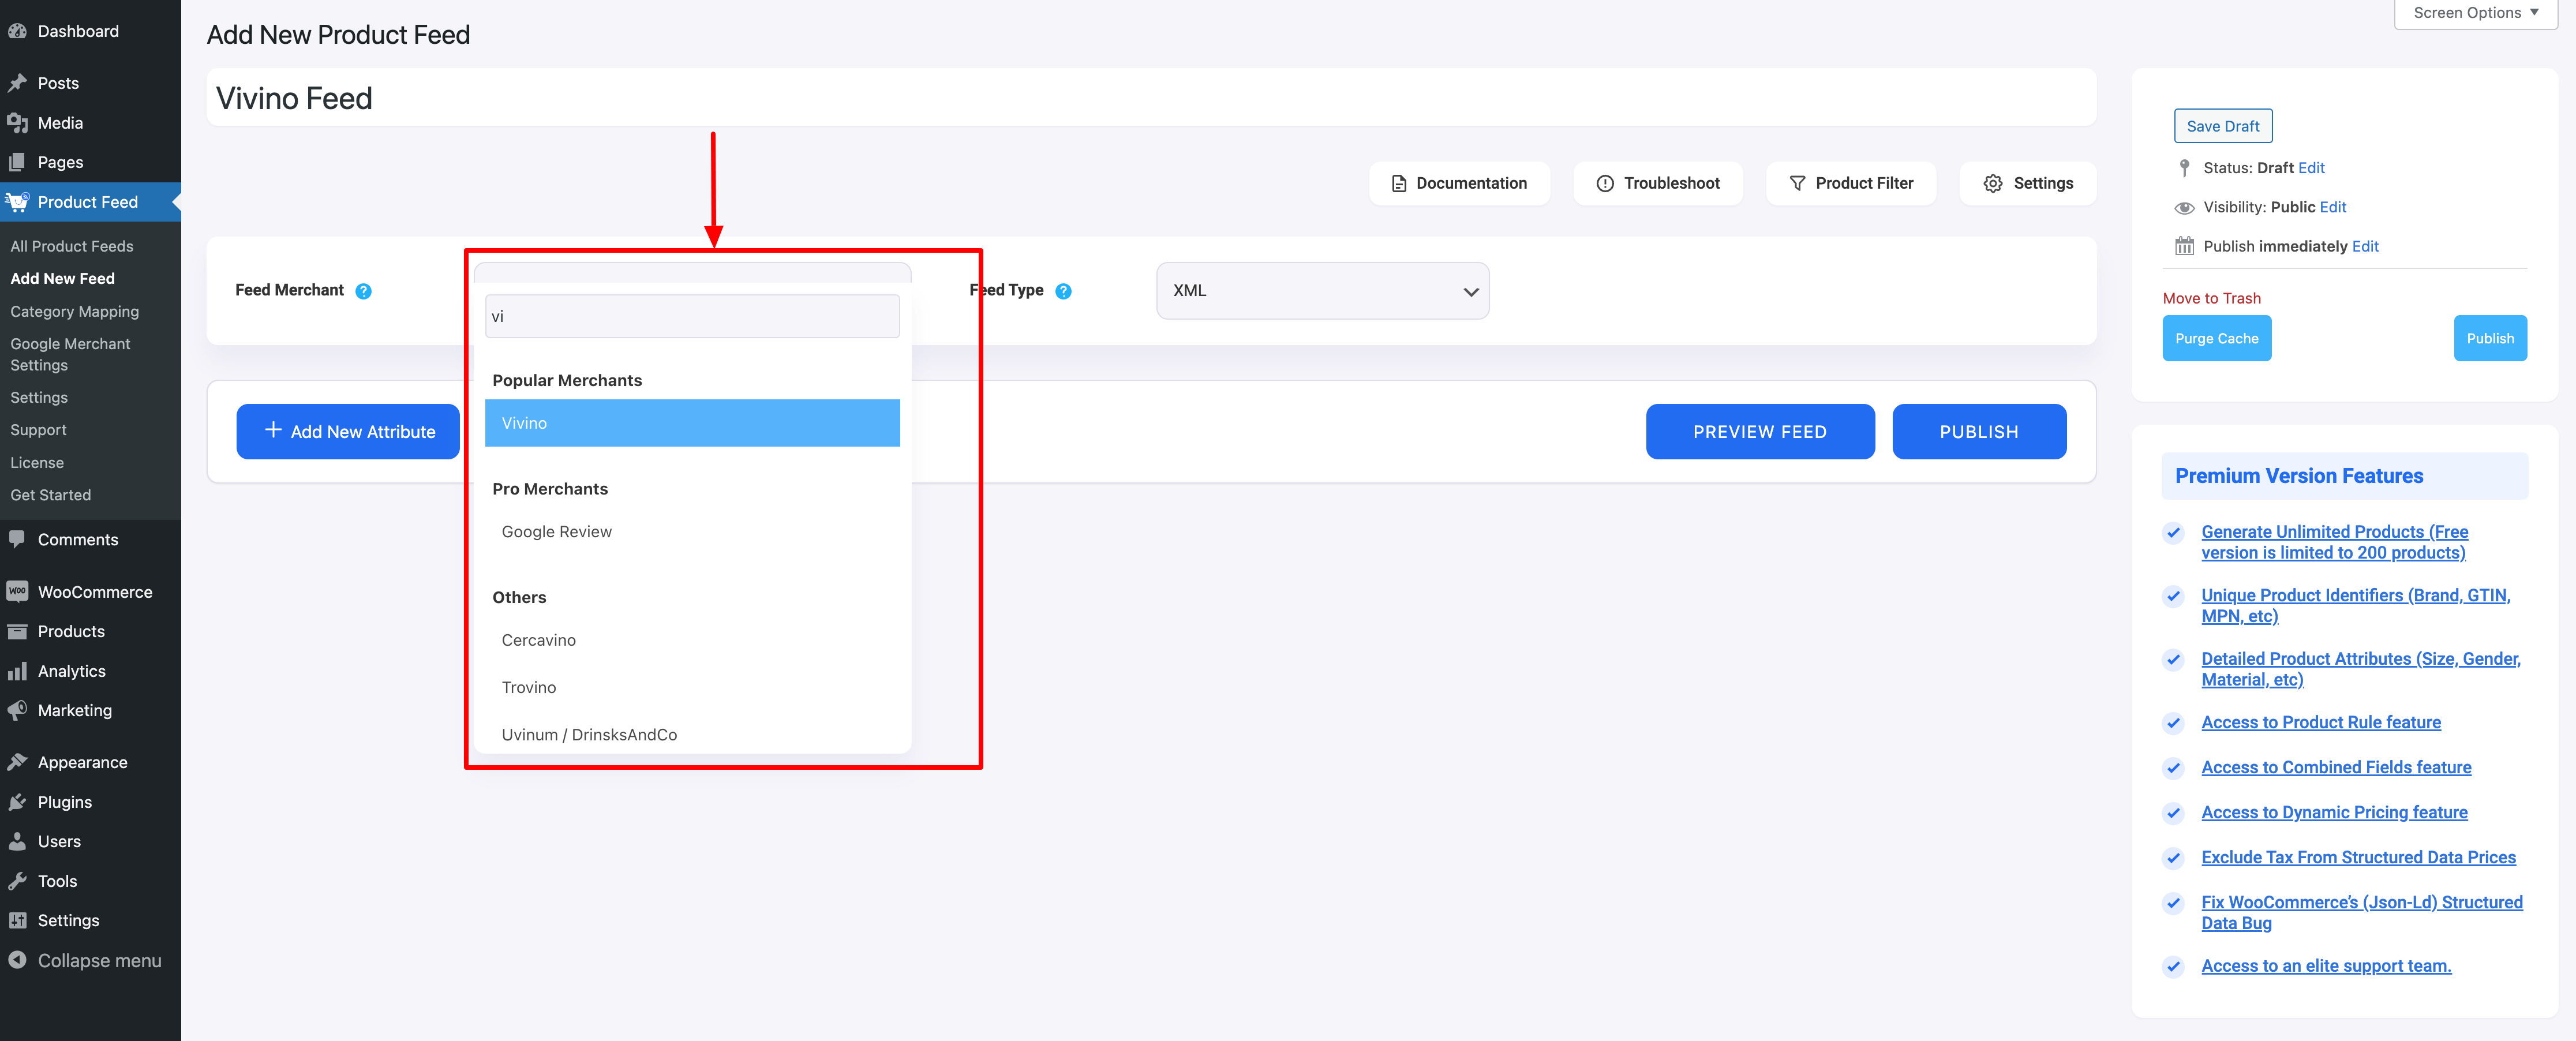
2. Just under the title, you will see an option to select your preferred merchant. Simply click on the Feed Merchant dropdown button and select your preferred merchant from the dropdown or you can search in the dropdown box.
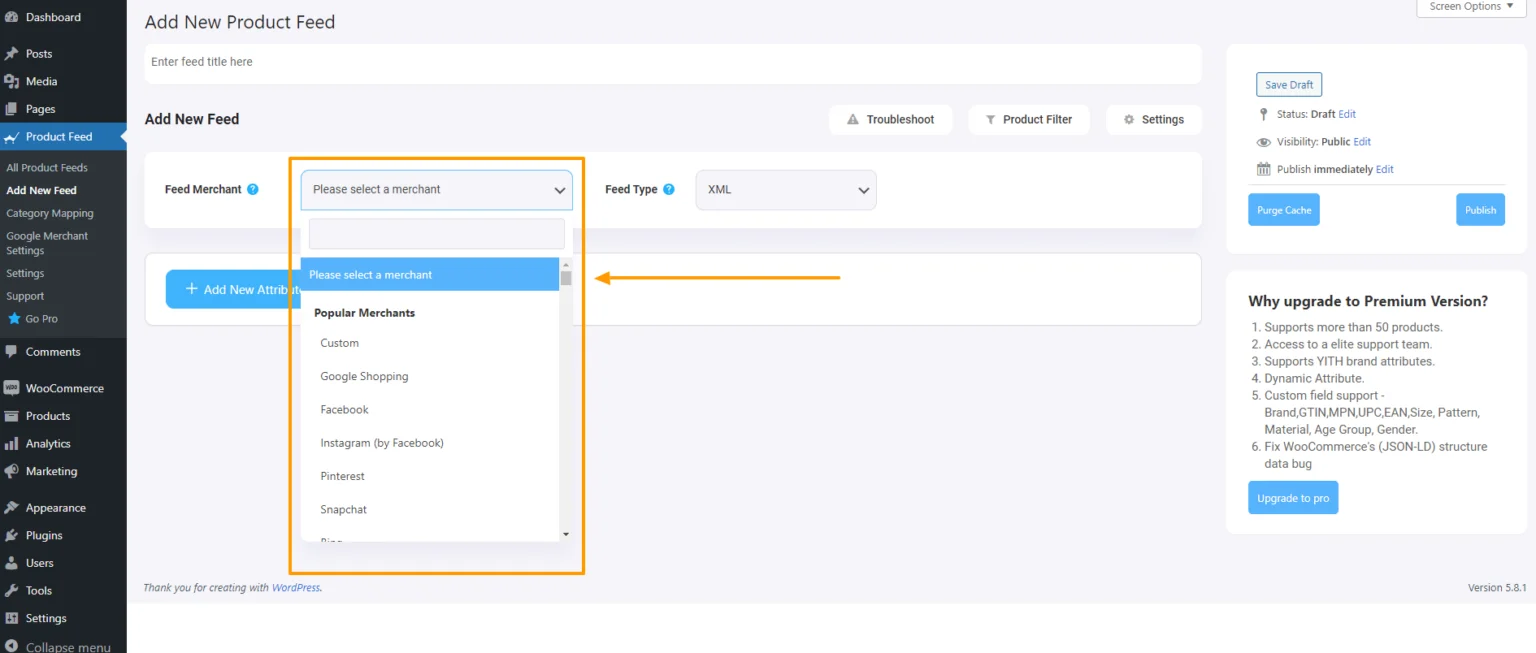
Select your preferred merchant and all the required attributes will be loaded below.
Let’s select Google Shopping for this feed.
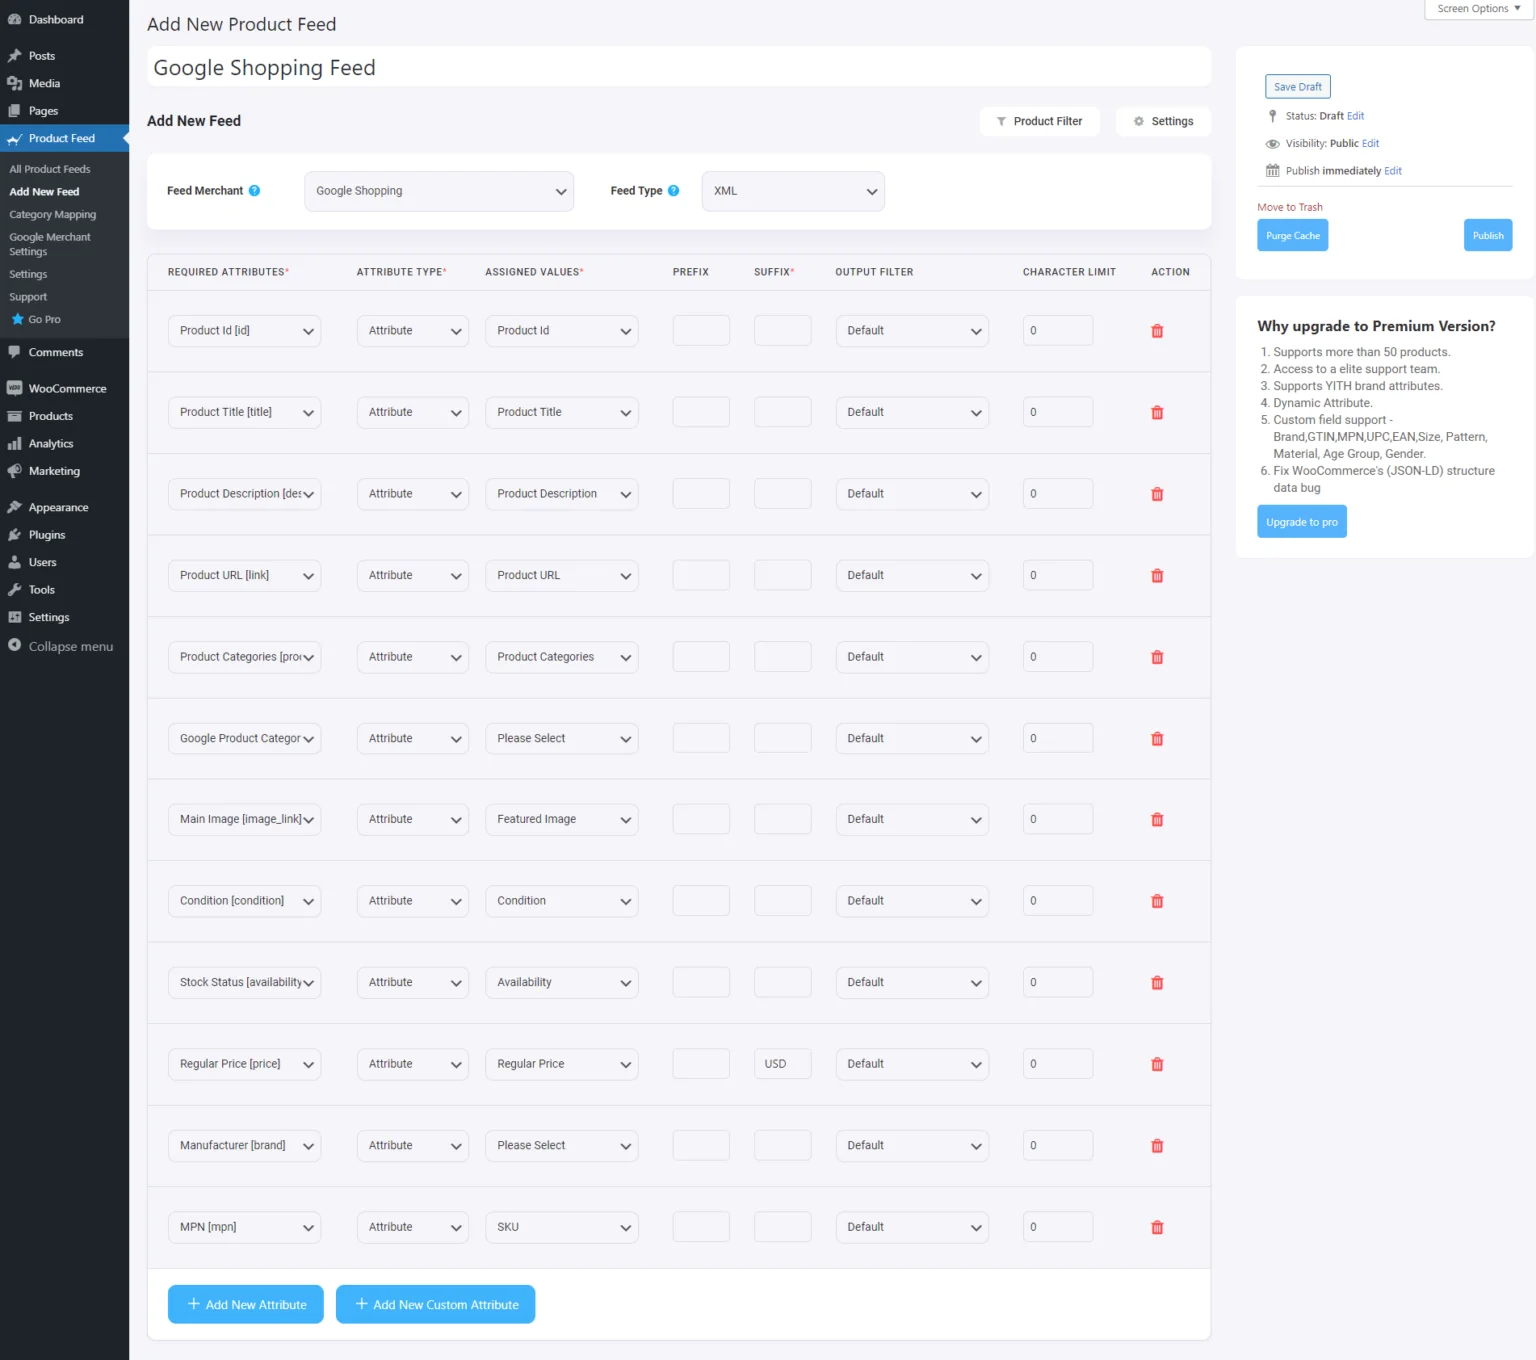
**Please note that Google Shopping only accepts XML feed submissions, so you will not get an option to choose the file format. However, for other merchants, you will get to choose a File Format next to the Feed Merchant option.
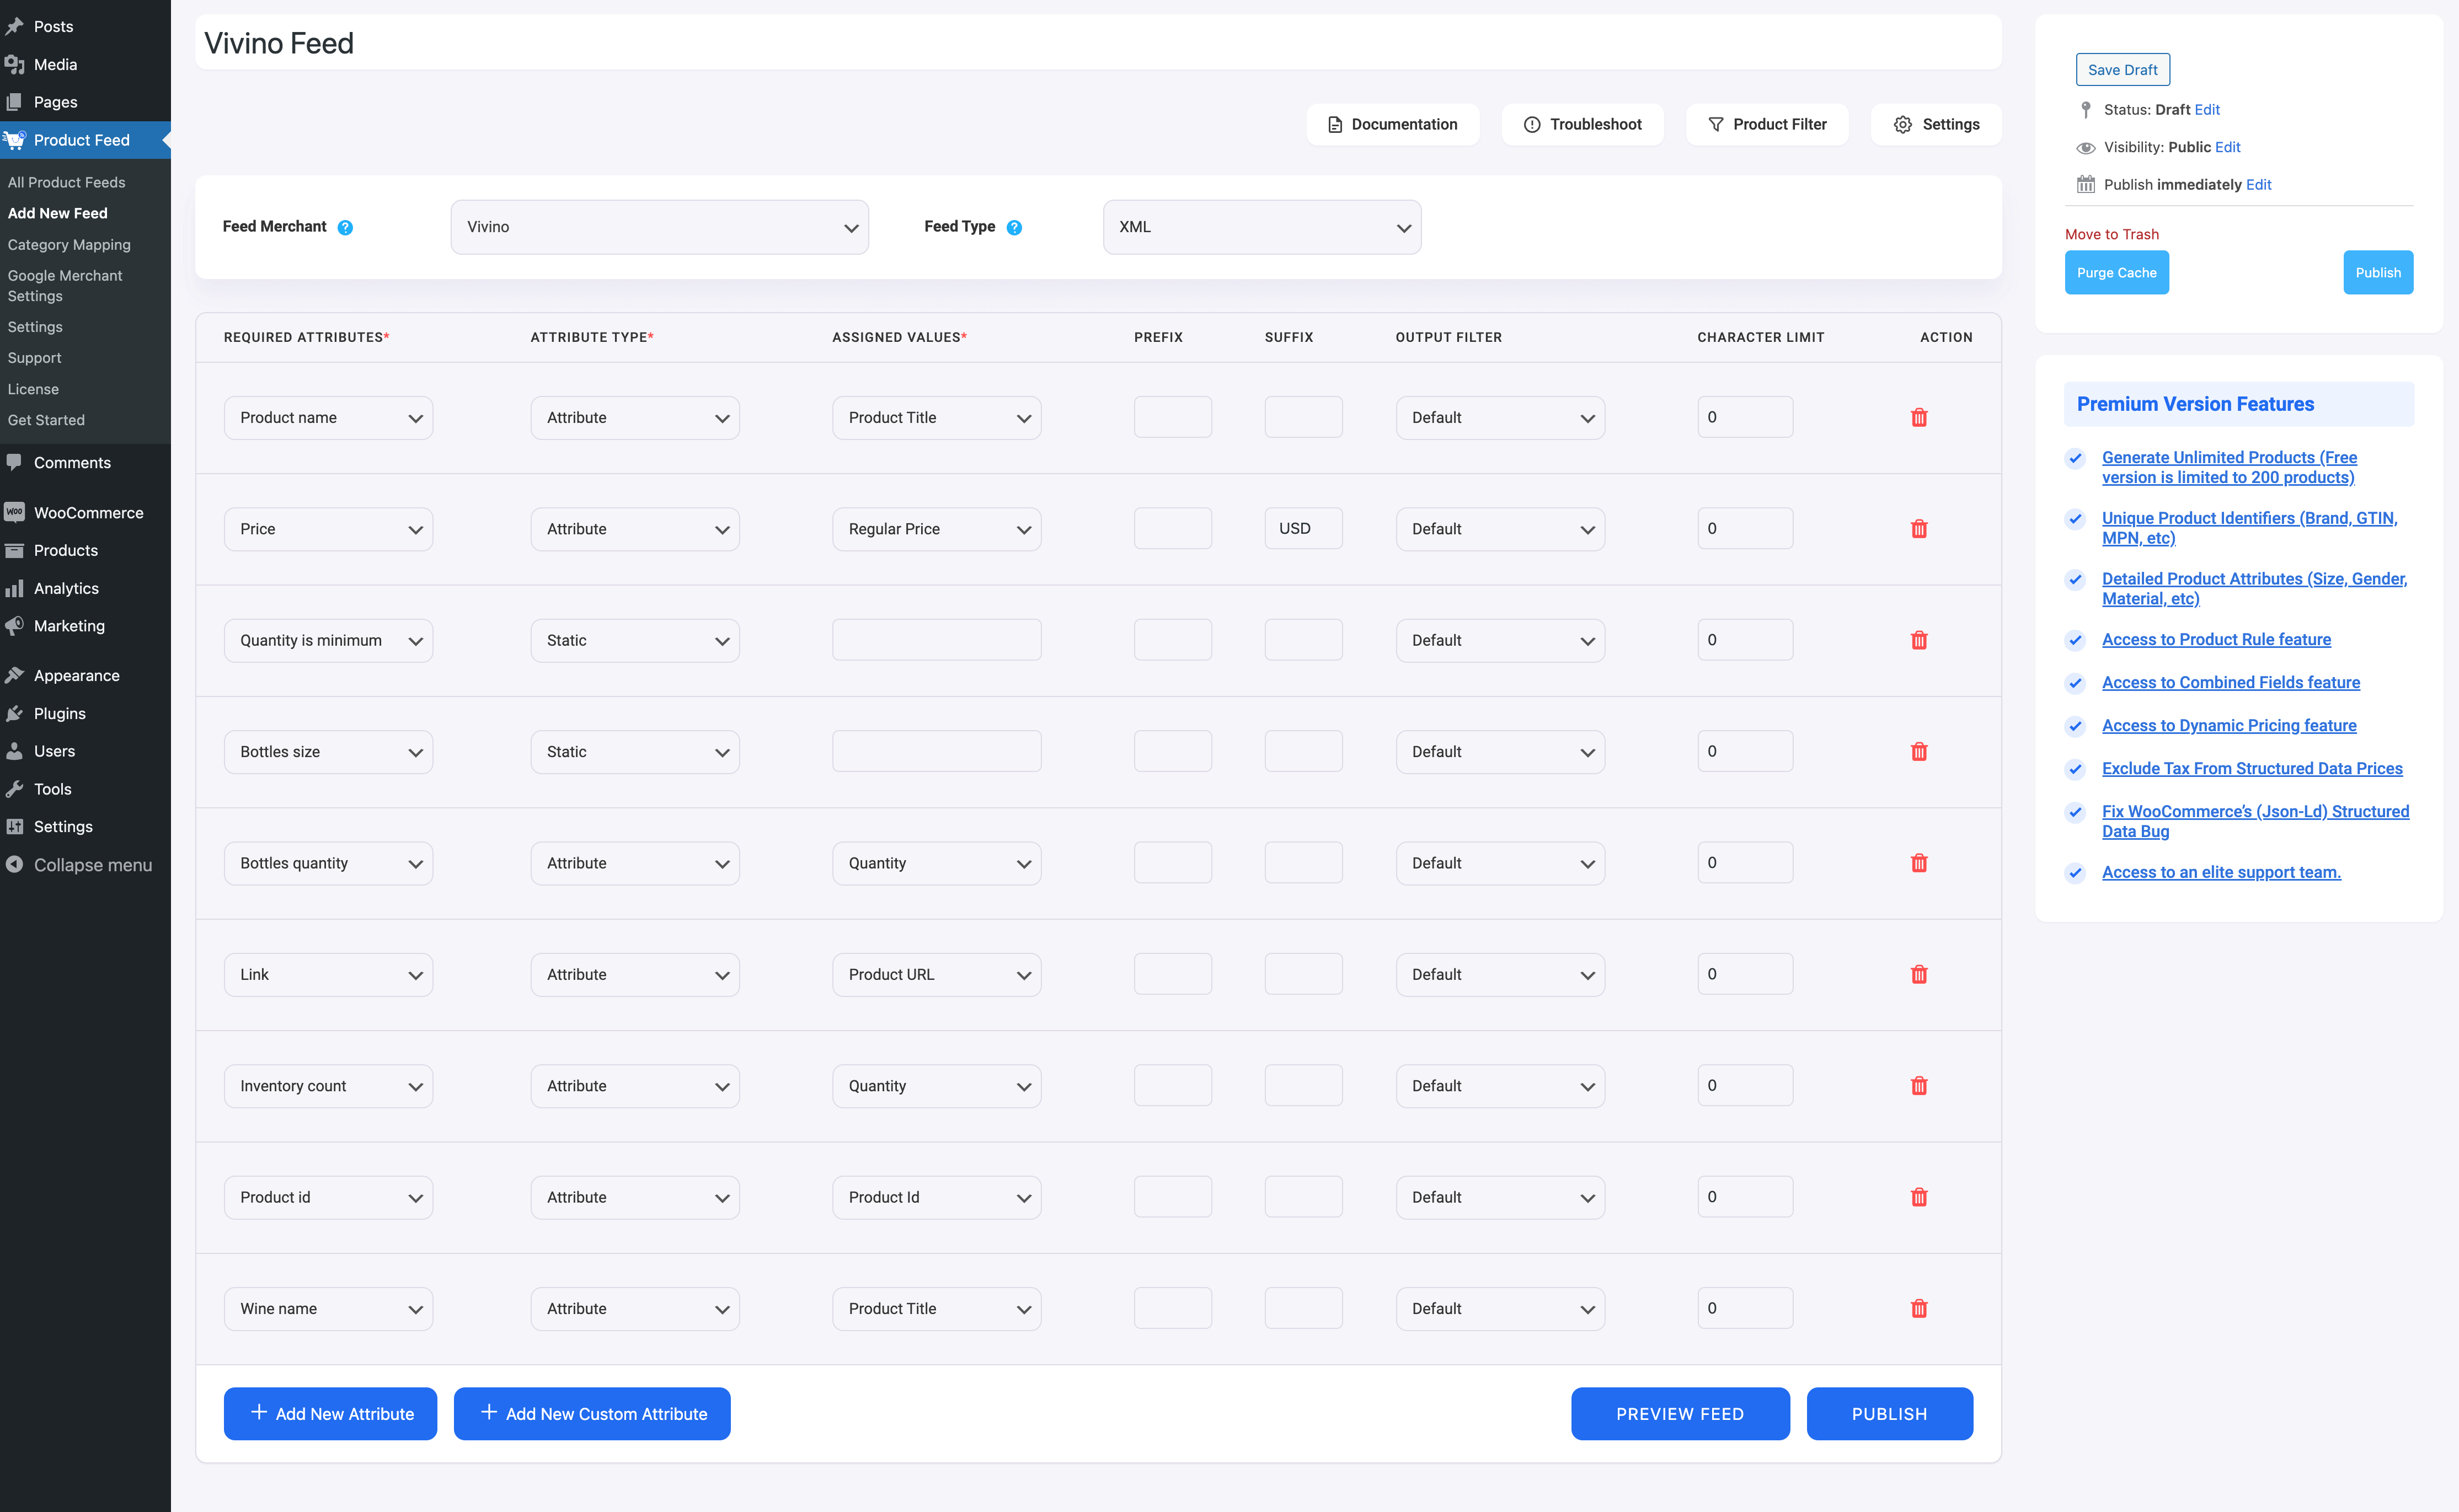
3. Here you can map your attributes. For Google, assigning a value to the Manufacturer attribute will let you create a working feed for you.
Step 3: Apply Combined Attribute Feature To Optimize Your Product Feed Products Title
Before I show you how to use this Combined Attribute feature to your title, I should let you know that you can use this feature on any of your feed attributes.
Here I will show you how you can easily optimize your product titles with the Combined Attribute feature of the plugin.
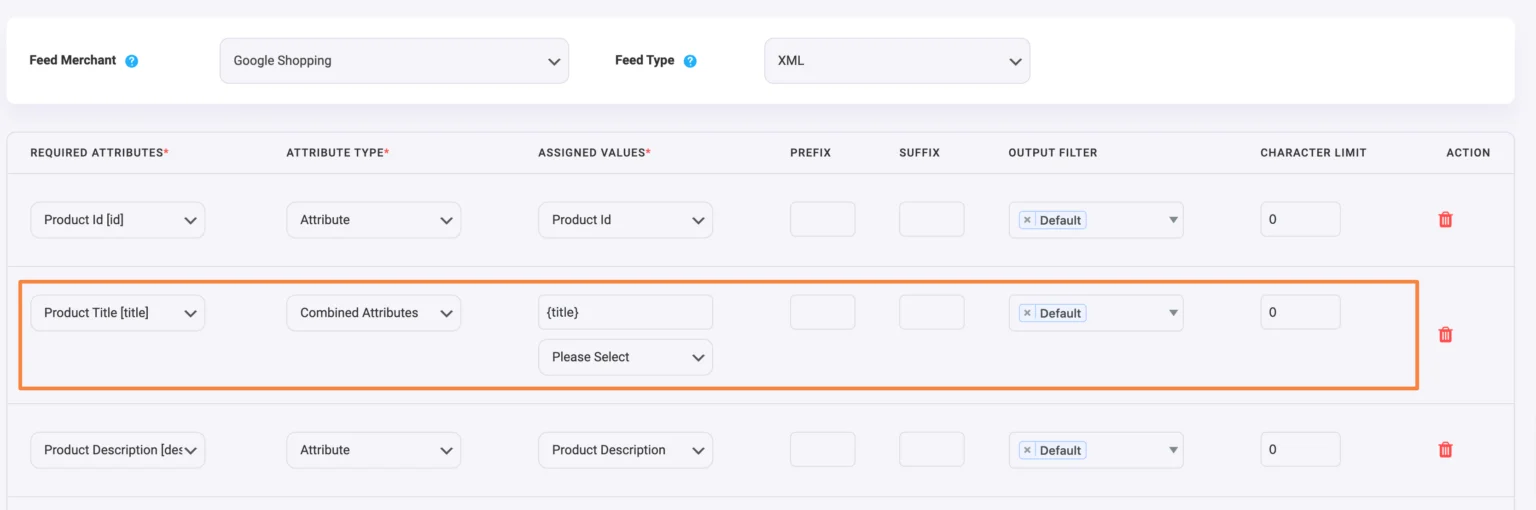
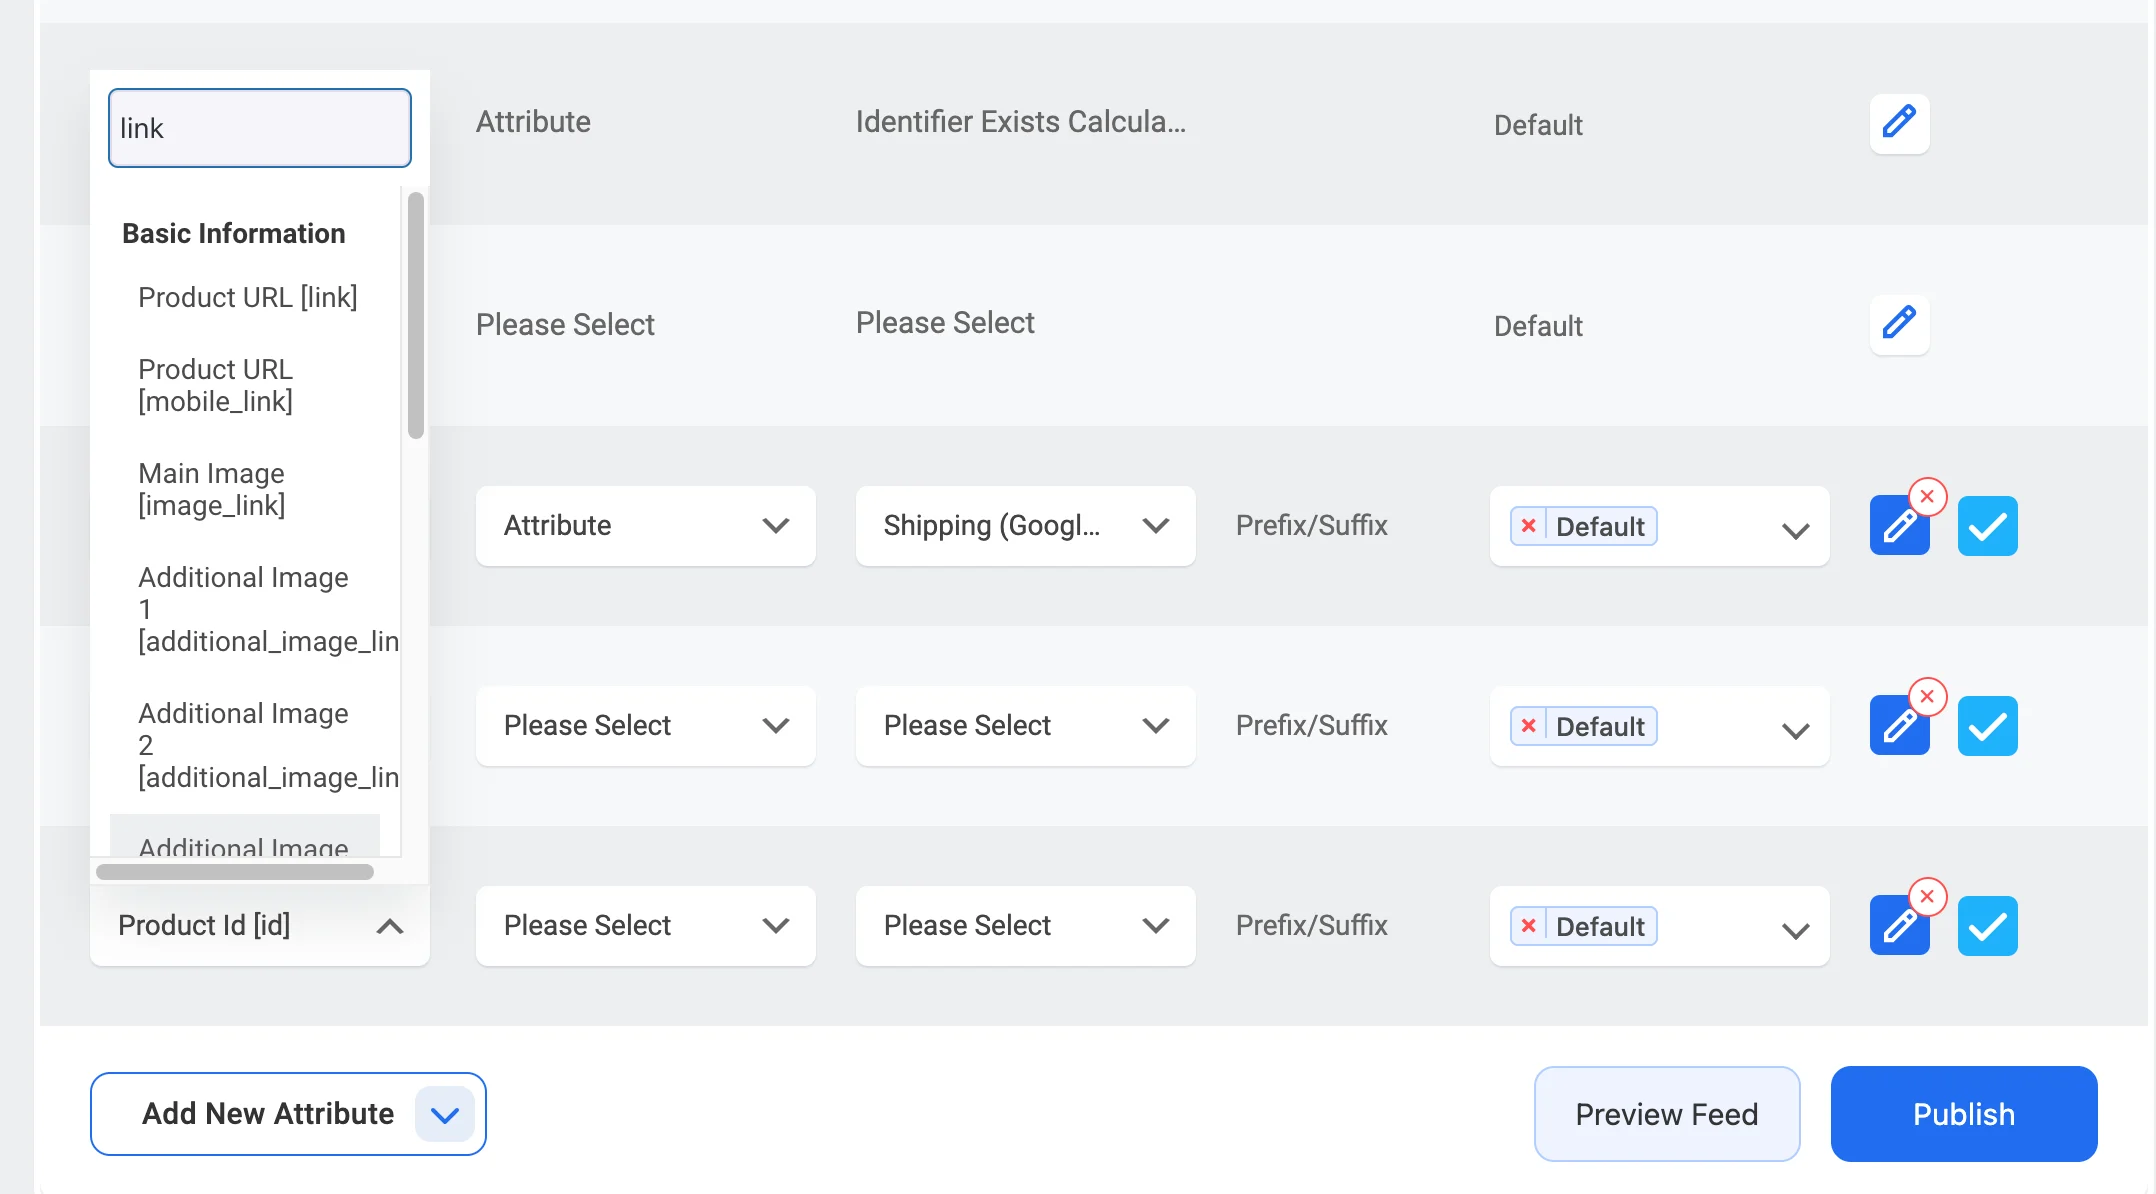
1. Click on the Attribute Type dropdown of the Product Title attribute.
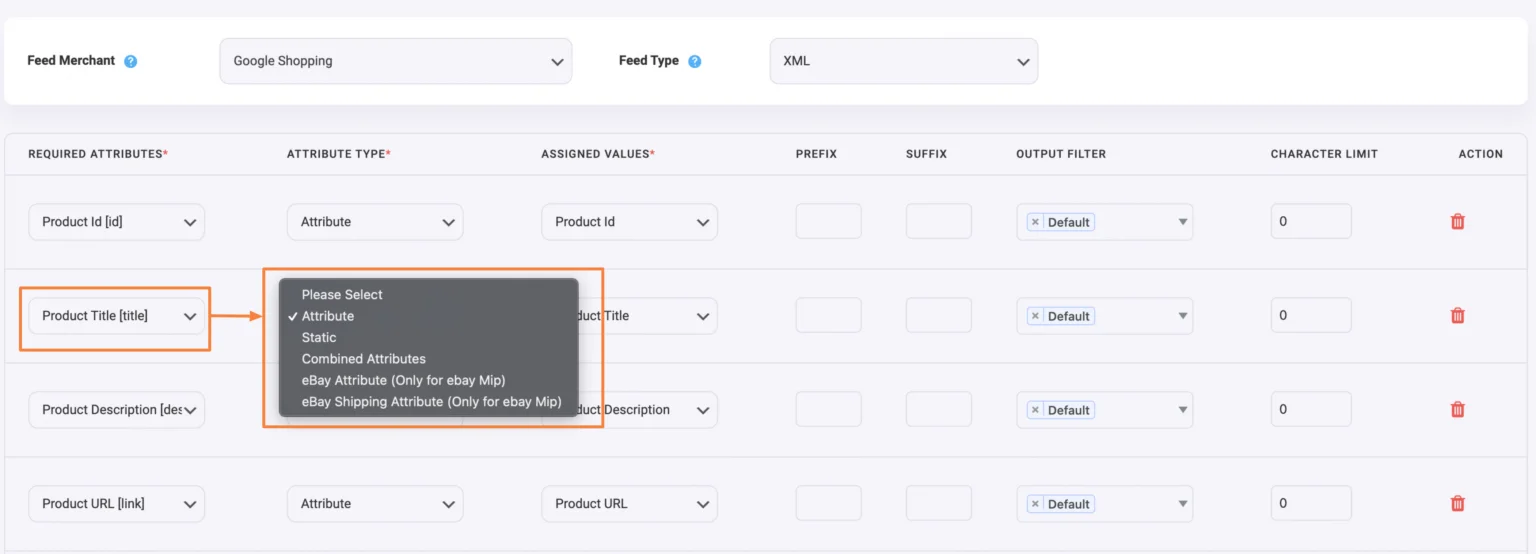
2. Select Combined Attributes from this Attribute Type dropdown, and you will see that the Product Title attribute section structure has changed and a new text field editor has appeared where the ID of the attribute is already added.
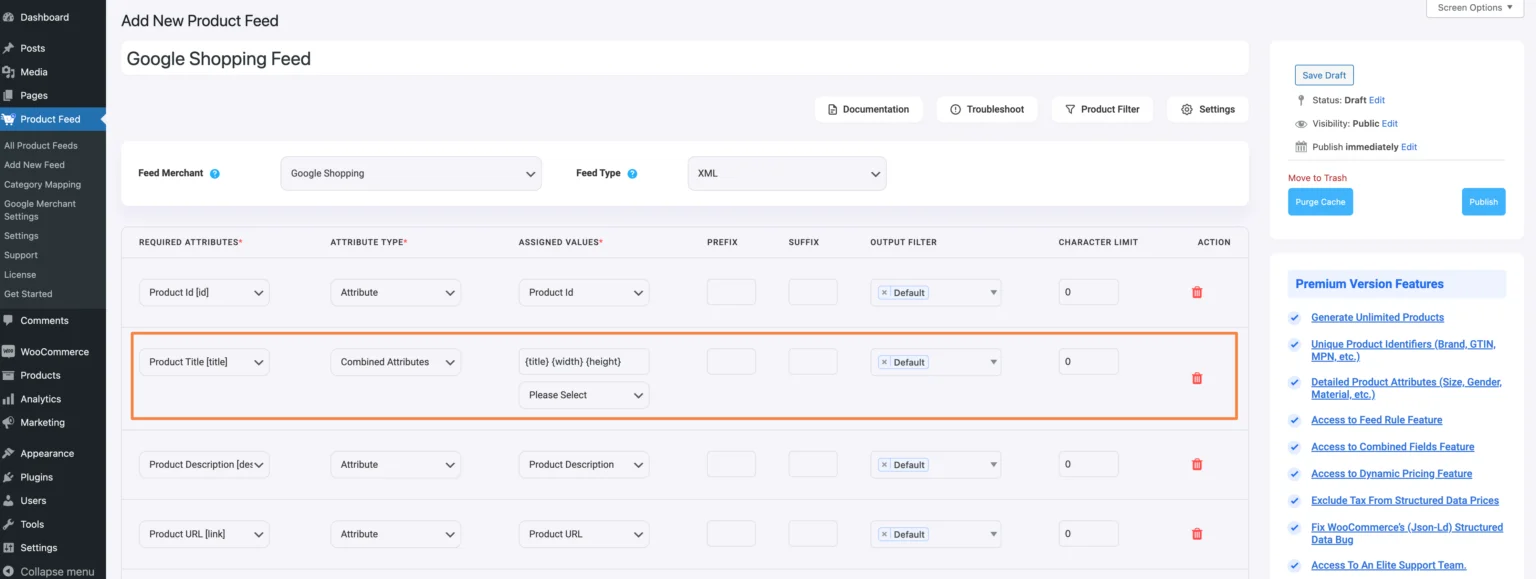
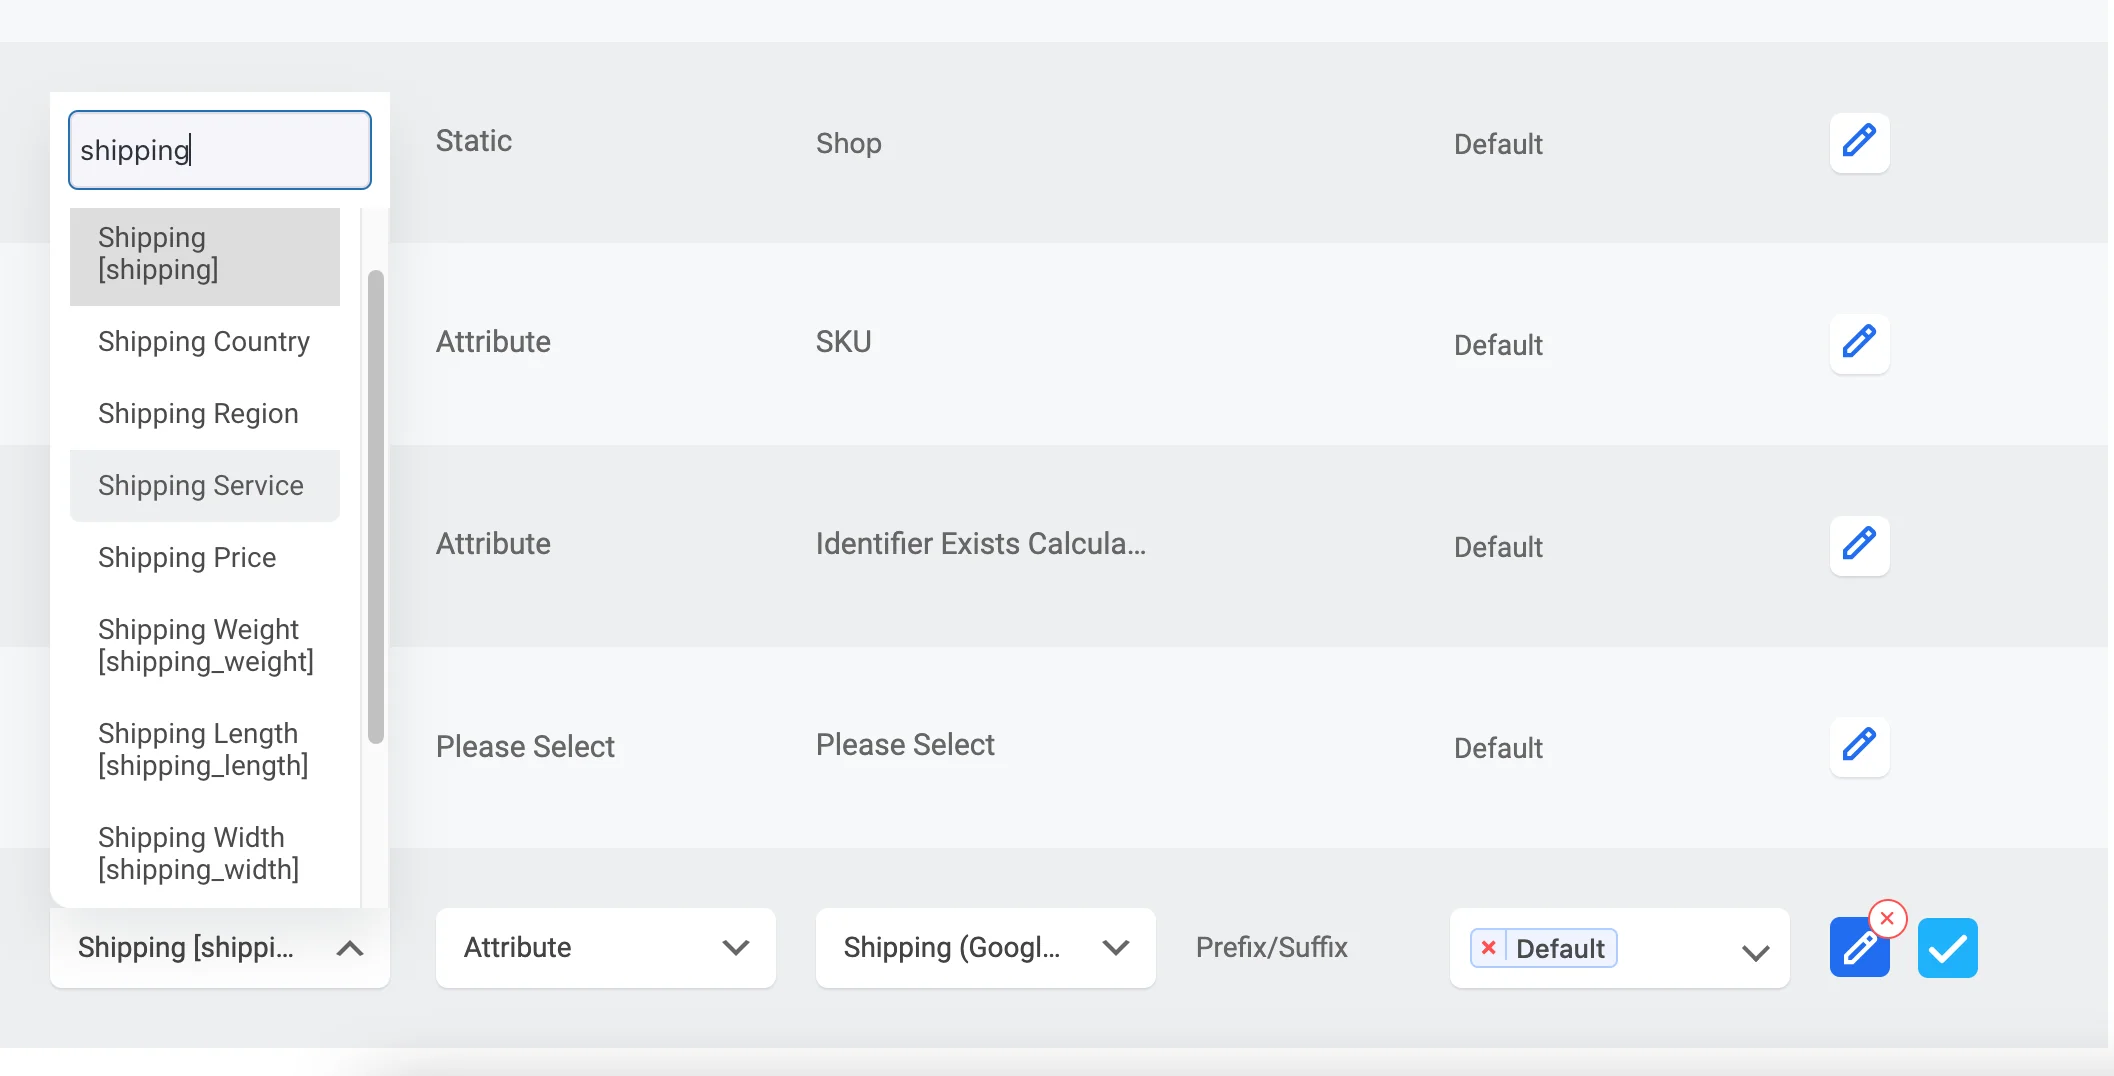
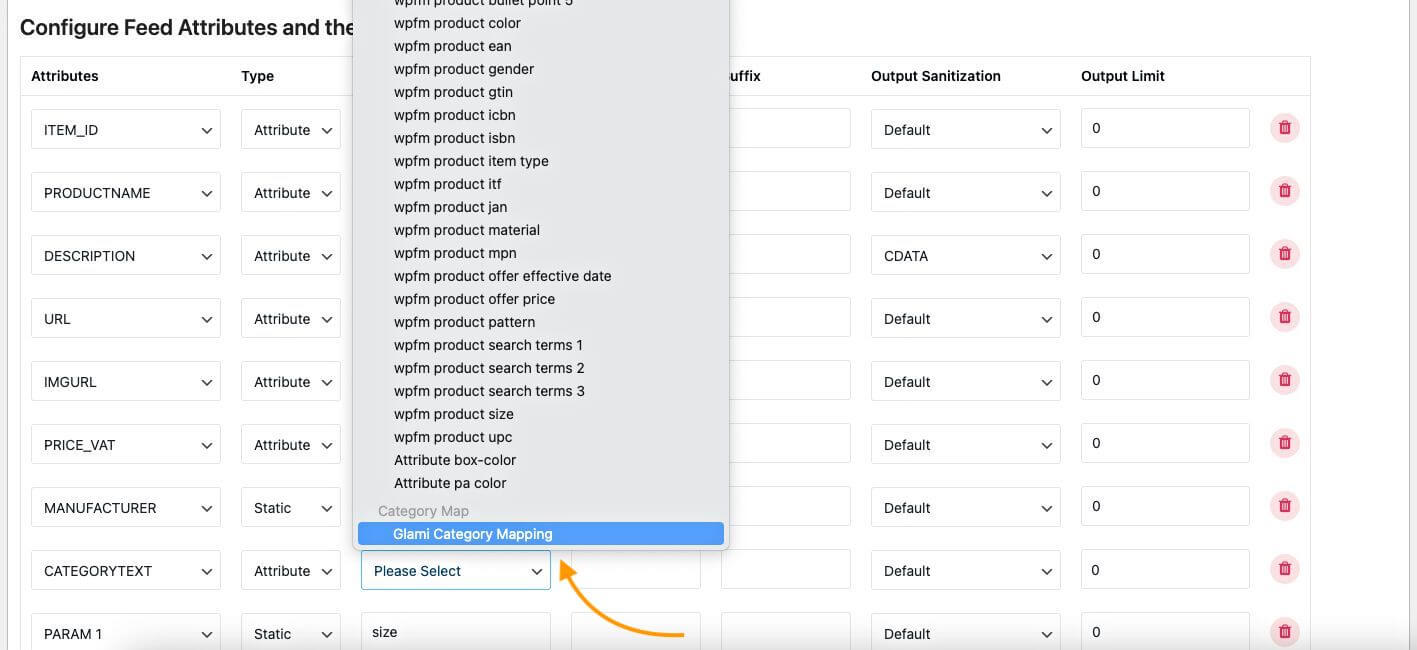
3. Click on the Attributes Values dropdown and here you will see all the values listed here.
You can select more than one value from this dropdown, one by one, and their IDs will be included in the Combined Attributes field:
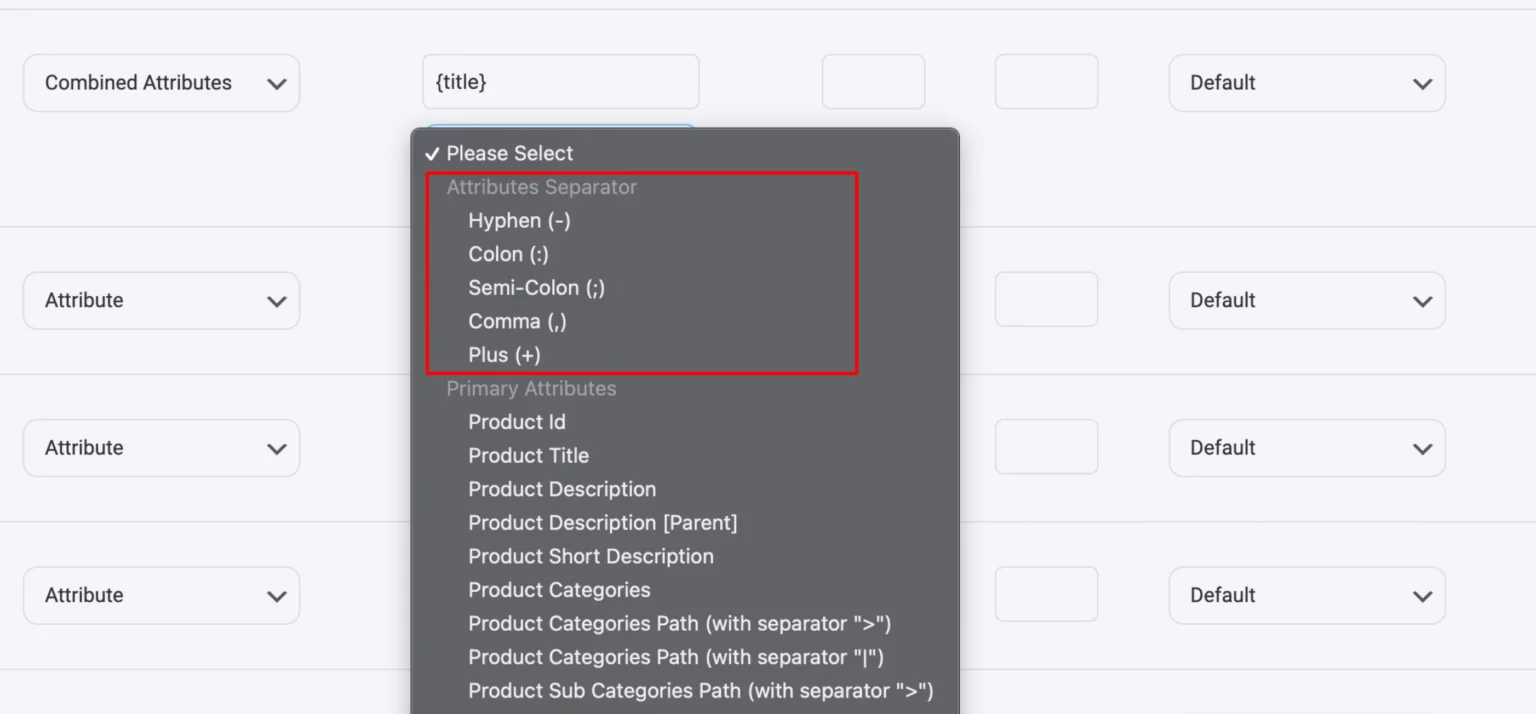
4. Here, you can use any separators between the IDs too if you want.
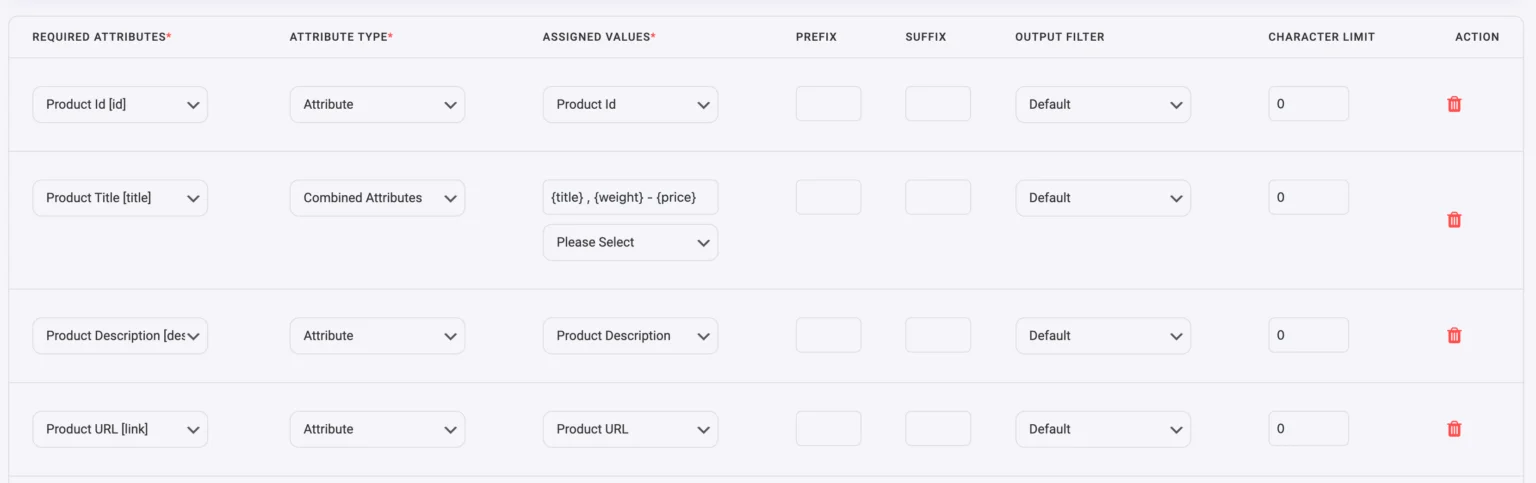
You can type any value as a separator or you can simply select any separator from the dropdown. (You can use any text or symbol as a separator too)
You can manually add or remove attribute IDs on this field.
5. Once you are done with the merging, simply click on the Publish or Update button and then open the feed to see the changes.
However, if you don’t see any changes, you should clear your browser cache and Purge Cache from the plugin, and you should see them.
Final Thoughts
Product Title optimization plays a leading role in the conversion process of eCommerce shoppers. It sets the ground for you to dominate product searches and attract new potential buyers.
So, It’s high time you give special attention to product titles and follows these product title optimization tactics.
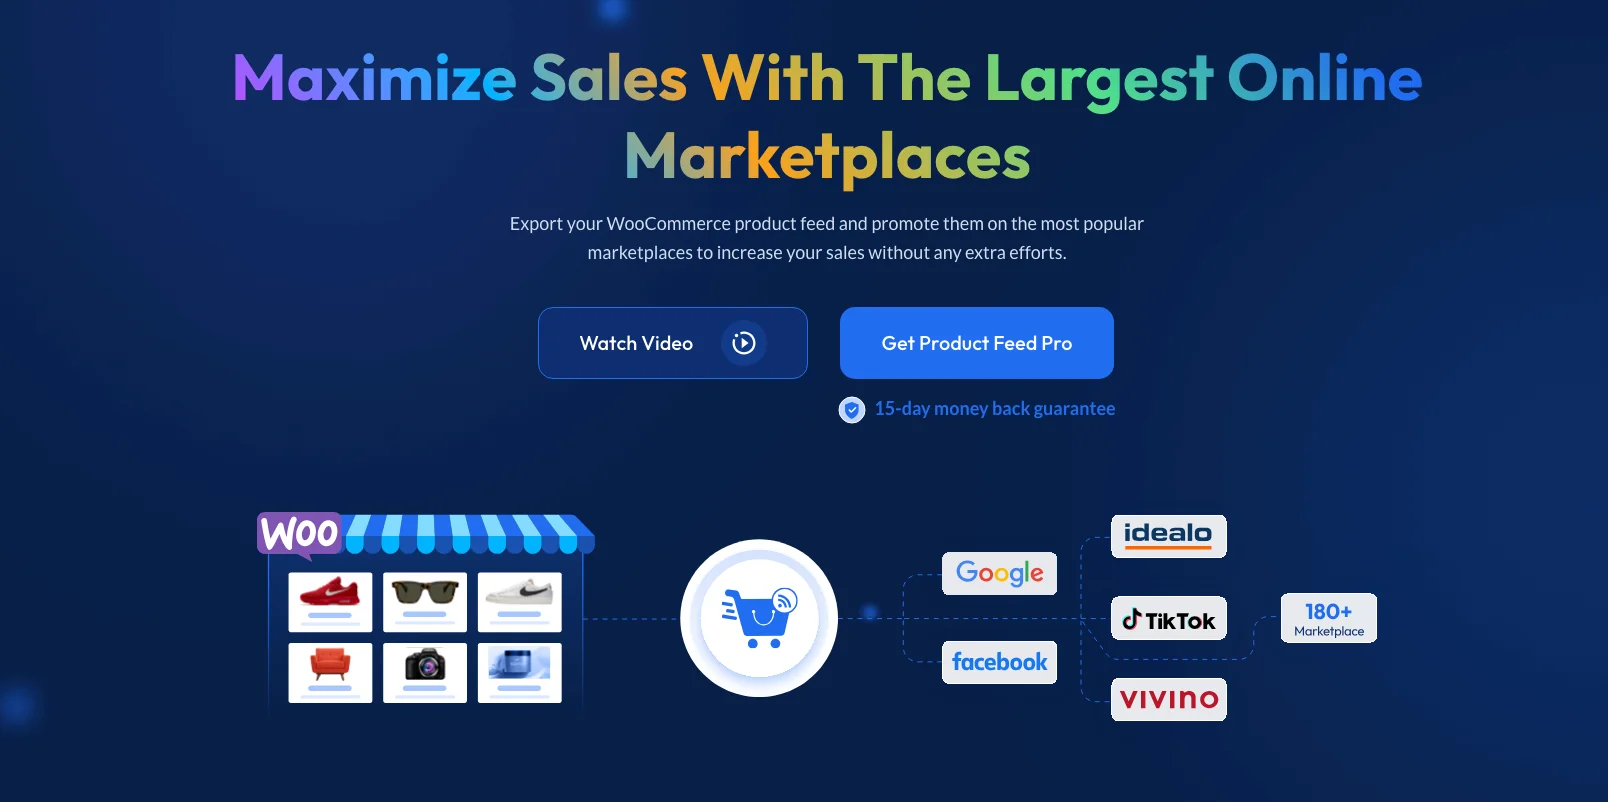
However, product title isn’t the only thing for driving more eCommerce sales. You have to optimize your product feed as well for promoting your products on different marketplaces.
Learn How to Generate WooCommerce Product Feed Optimized For Effective Promotion
FAQs
How can I optimize my WooCommerce product titles?
Focus on including relevant keywords, keeping the title clear and concise, and adhering to the platform’s title length restrictions for better visibility.
What are the common mistakes in product title optimization?
Avoid keyword stuffing, using unclear or overly generic terms, and ignoring the importance of formatting for better readability.
How does product title optimization impact SEO?
Optimizing titles helps search engines better understand your product, boosting your chances of appearing higher in search results, which can drive more traffic.
Does WooCommerce product title limit impact mobile shoppers?
Yes, long titles may truncate on mobile screens, making it harder for users to quickly understand the product details.
Should I use special characters in my product titles?
It’s best to avoid unnecessary special characters unless they directly enhance clarity or highlight key features of the product.
![The Ultimate SEO for WooCommerce Guide To Increase Traffic [2025] 2](https://staging-rextheme.kinsta.cloud/wp-content/uploads/2025/01/SEO-for-woocommerce.webp)


![How to Generate Glami XML Feed to Sell Fashion Products for WooCommerce [2024] 5](https://staging-rextheme.kinsta.cloud/wp-content/uploads/2024/06/01.-Glami-XML-Feed.webp)
![How to Generate Glami XML Feed to Sell Fashion Products for WooCommerce [2024] 6](https://staging-rextheme.kinsta.cloud/wp-content/uploads/2024/06/01.-Glami-XML-Feeds.webp)


![Quick Guide To Generate Vivino Product Feed - WooCommerce [2024] 7](https://staging-rextheme.kinsta.cloud/wp-content/uploads/2022/06/Publish-Vivino-Feed.png)