Are you setting up your online store with WooCommerce? Great choice.
In 2020, over 26% of the top 1 million eCommerce sites are using WooCommerce. And in total, there are over 5 million sites that are using WooCommerce.
It’s particularly excellent when you need to list products that come in different variations like size or color. But, getting these variable products right can be a bit tricky at first.
Today, I will give you a complete guide on how you can add WooCommerce variable products.
After reading this guide, you’ll able to:
- Add products to your store accurately and without wasting time
- Create product variations for your variable products efficiently
- Optimize your store’s product data to increase sales
- Get actionable tips to improve your variable product page to increase your conversion rate
Let’s get your products set up properly and make your store work harder for you.
Understanding WooCommerce Variable Product
You might have a few products that have multiple variations. For example, let’s say you are selling a t-shirt in 3 different colors. In this case, the t-shirt is a variable product, and each colored version of the t-shirt is a variant.
In WooCommerce, when you add products, you may choose the product type as “Variable product” and then add variants easily.
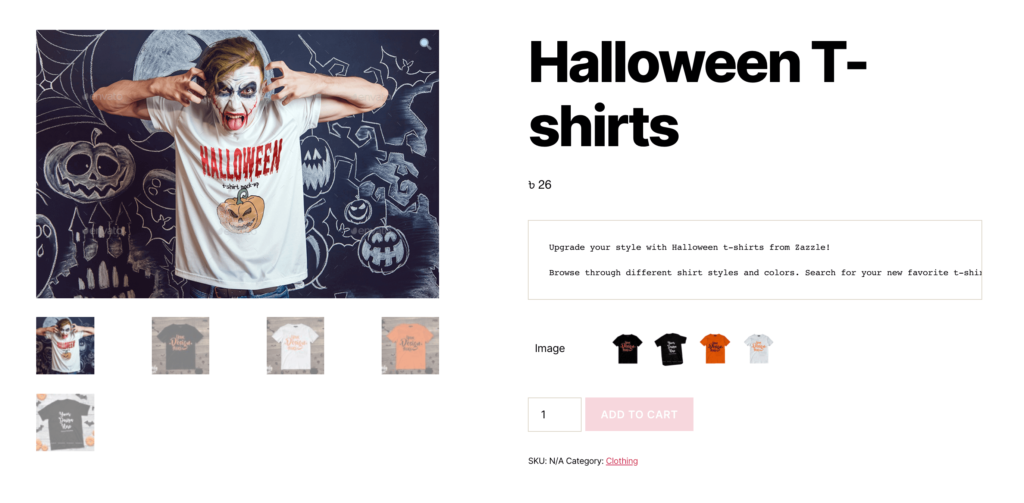
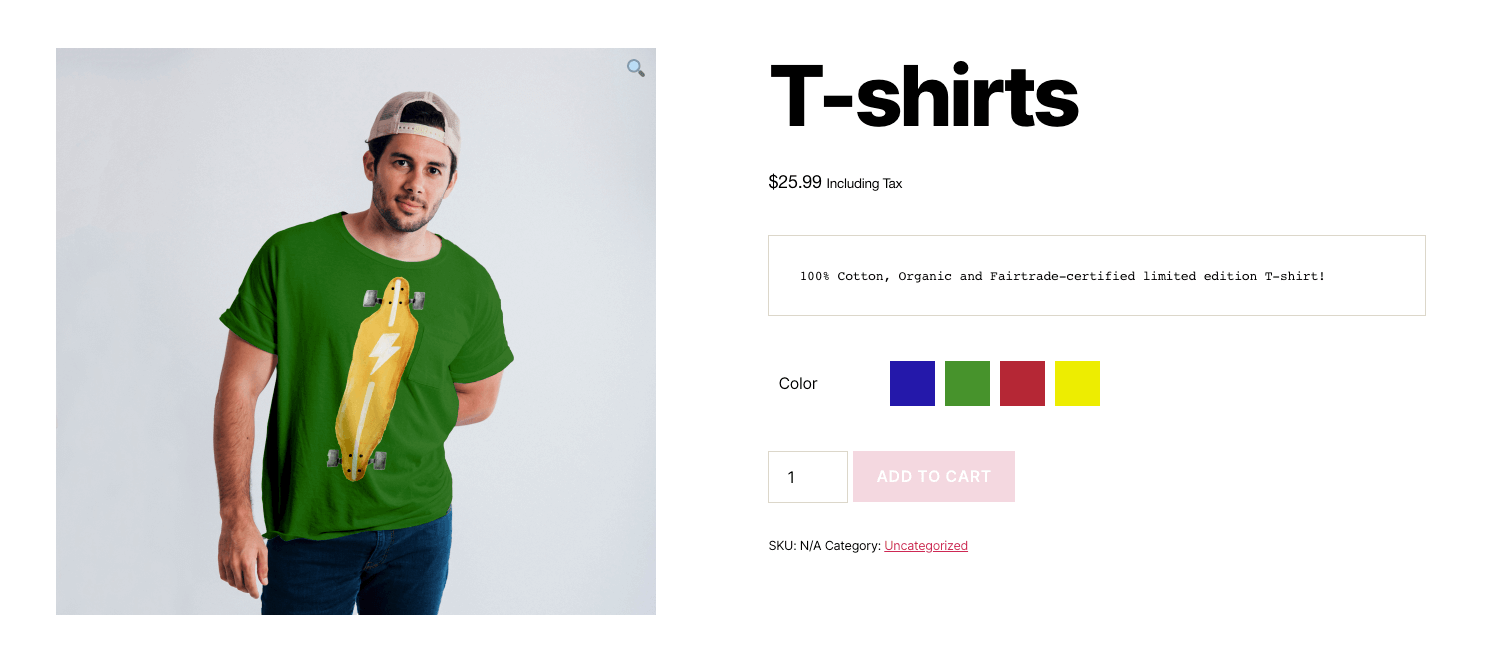
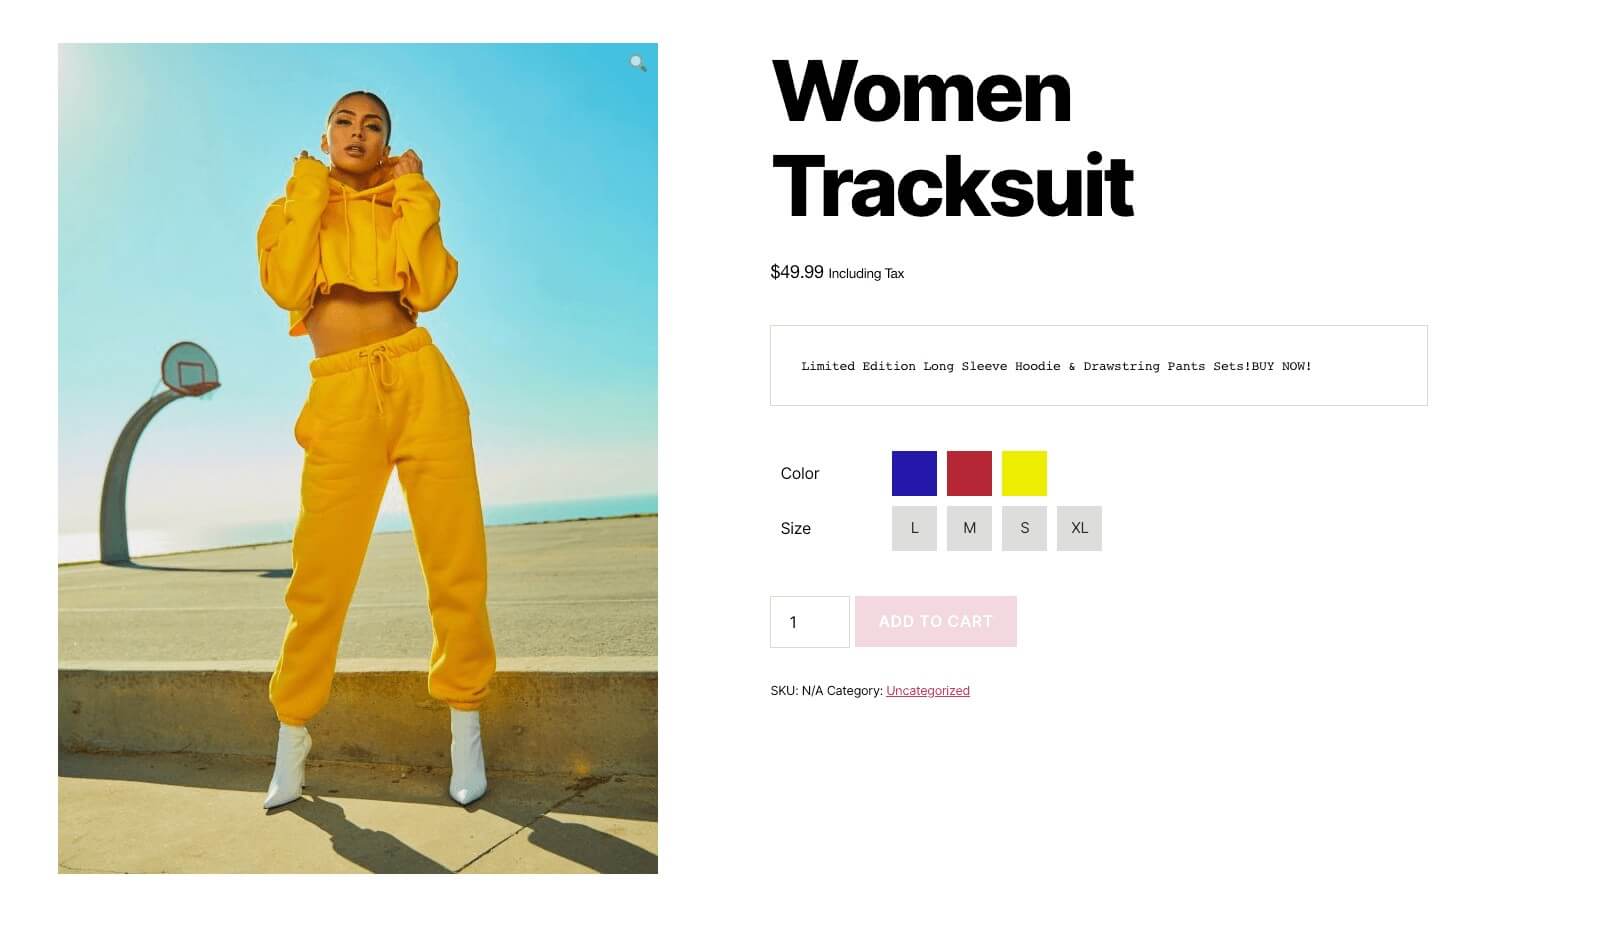
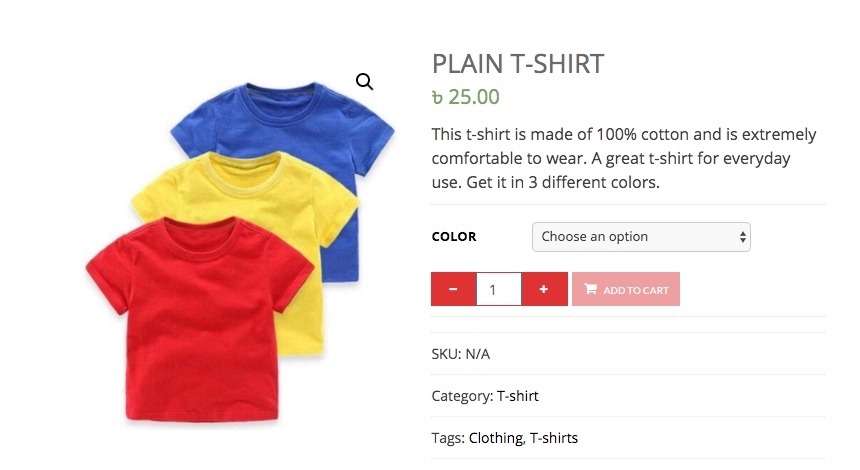
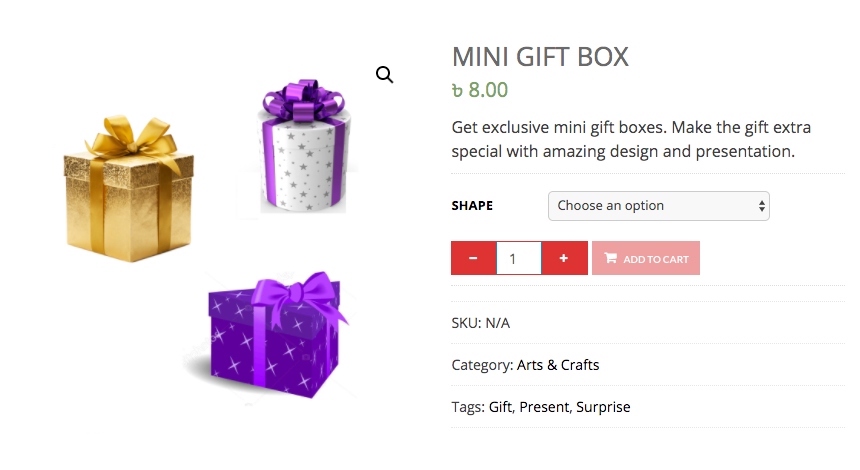
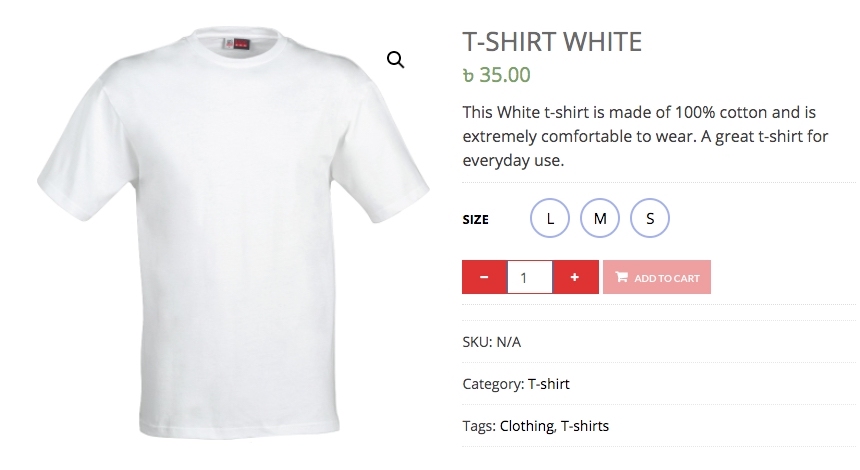
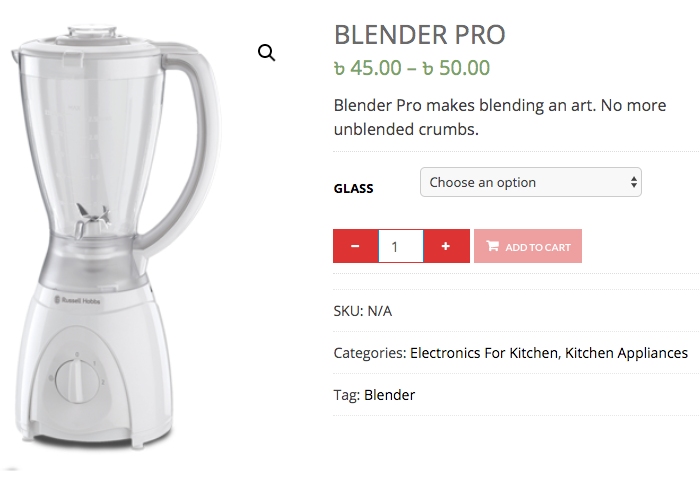
Once you add a variable product to your WooCommerce, the product page will look like this:
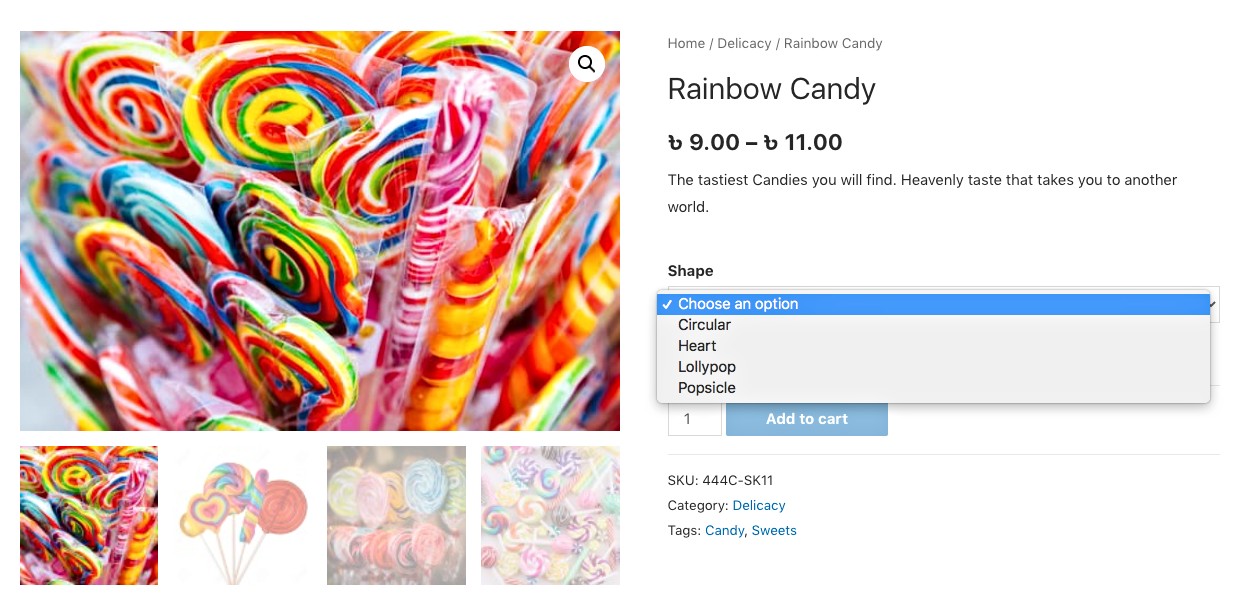
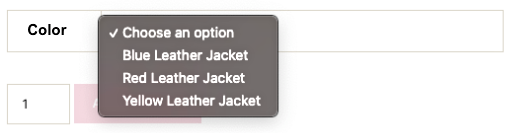
As you can see, you may click on the dropdown menu to select a variant of the product.
Next, you will be able to customize the product page in many ways, such as using suitable plugins, applying a WooCommerce theme, or by customizing the page’s design on your own.
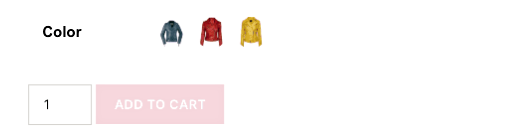
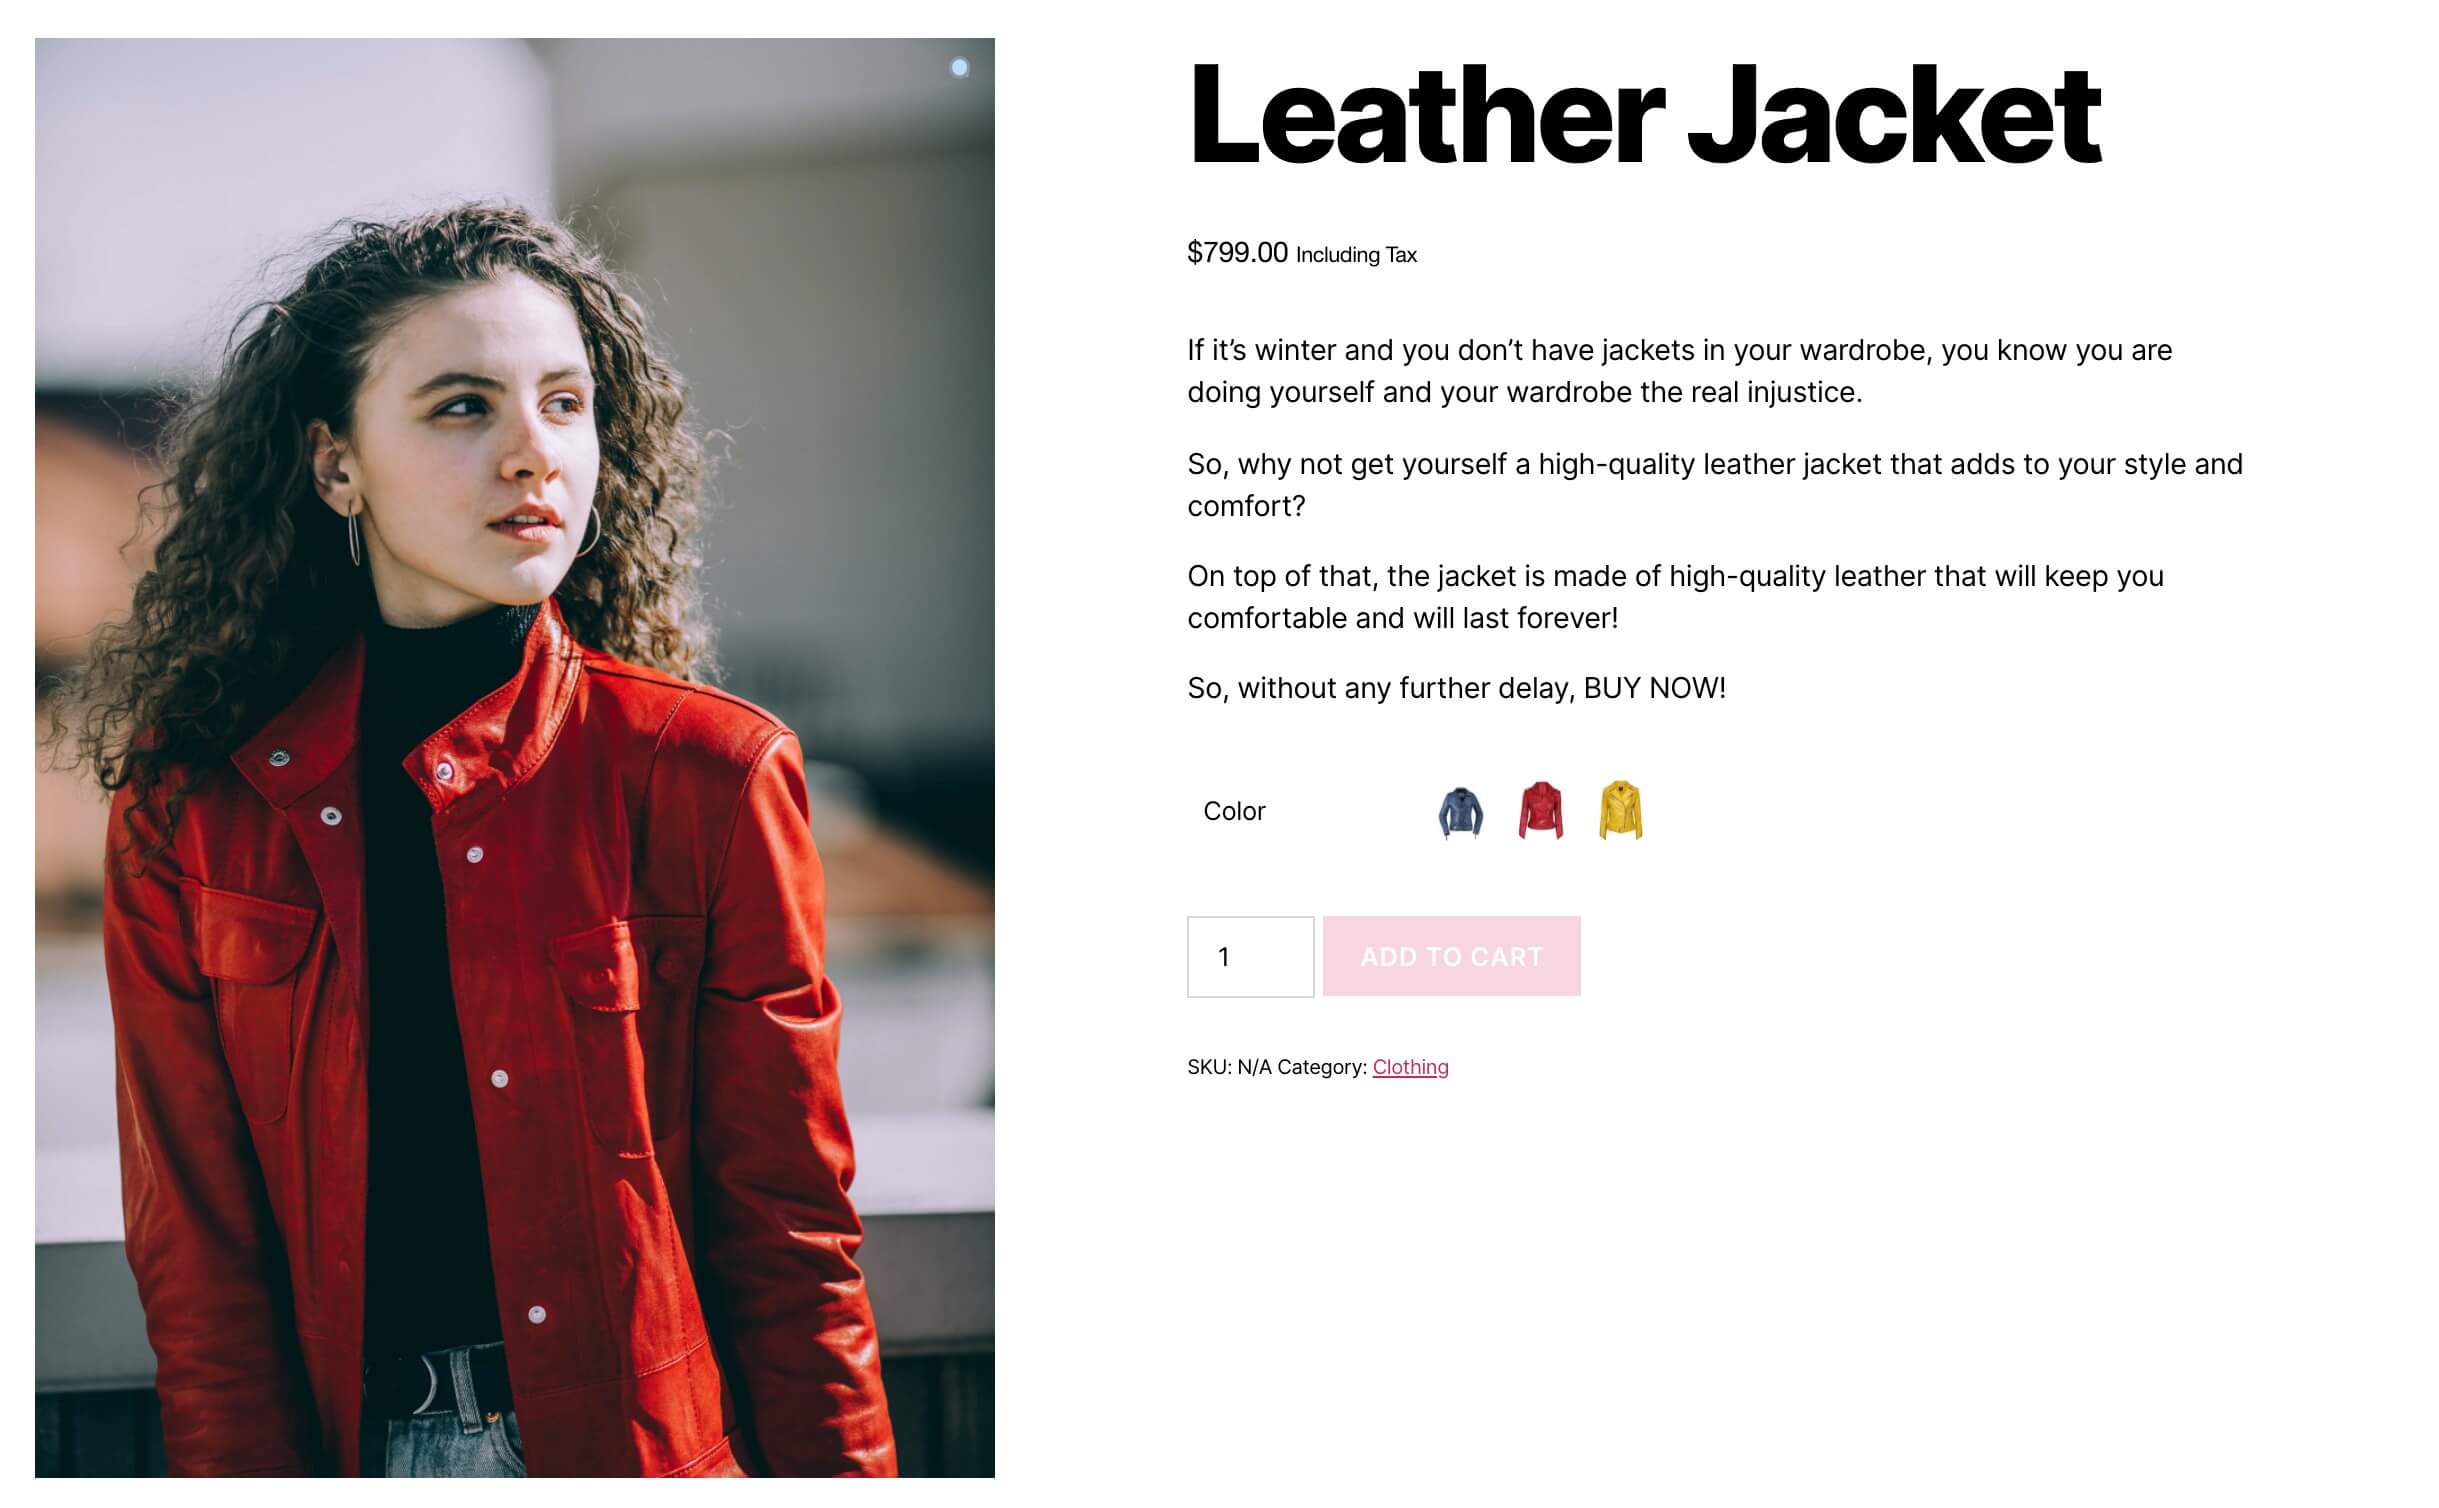
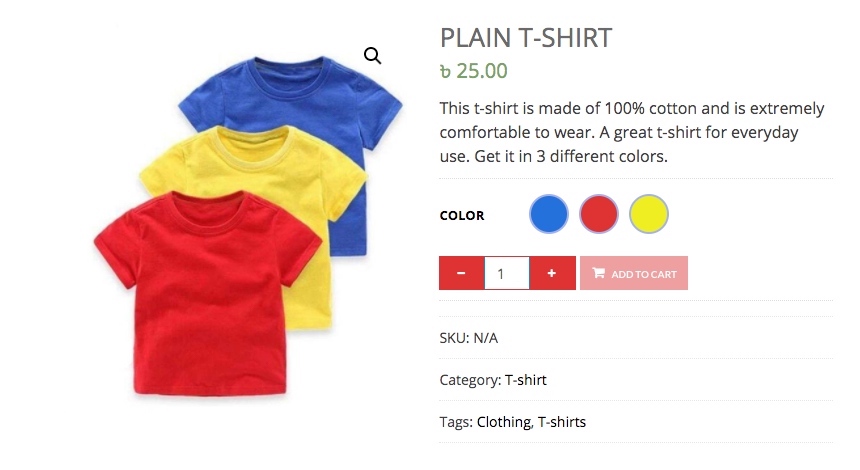
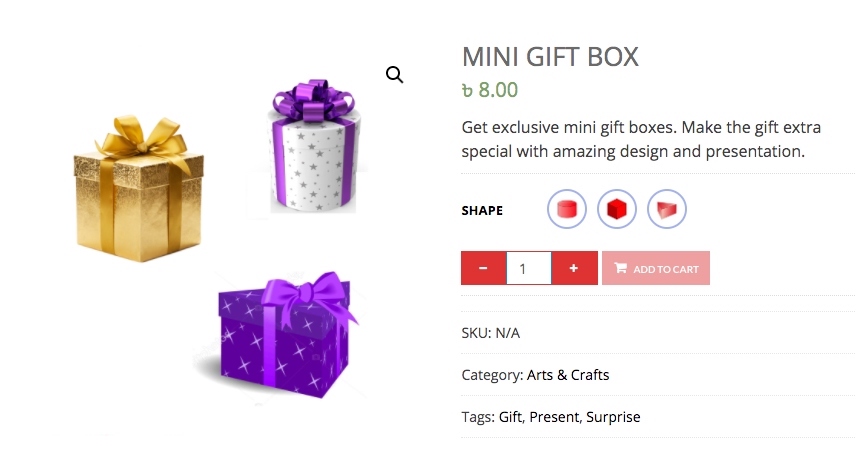
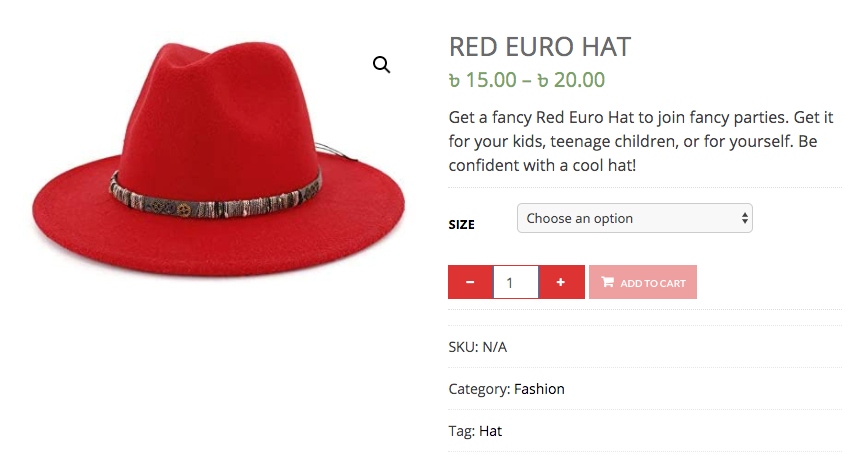
For example, you can use a plugin, Variation Swatches for WooCommerce, to display the variants in the form of swatches.
As you can see, you may click on the dropdown menu to select a variant of the product.

Now, let me give you a step-by-step guide on adding and optimizing variable products to your WooCommerce store.
So let’s get started.
Step-by-step Guide On Adding And Optimizing A WooCommerce Variable Product
Once you follow the steps below, you will be able to add variable products to your WooCommerce store easily. And later, you will get actionable tips that you can use to achieve a higher conversion rate real quickly.
Step 1 – Create Variable Product Attributes
The first step to properly adding a WooCommerce variable product is to create a variation product attribute and assign its variants.
A variation product attribute is basically the factor by which a product may vary. For example, if a product has 3 color variants, then ‘Color’ is a Variation Product Attribute, and each color is a variant.
So let us learn how to create one.
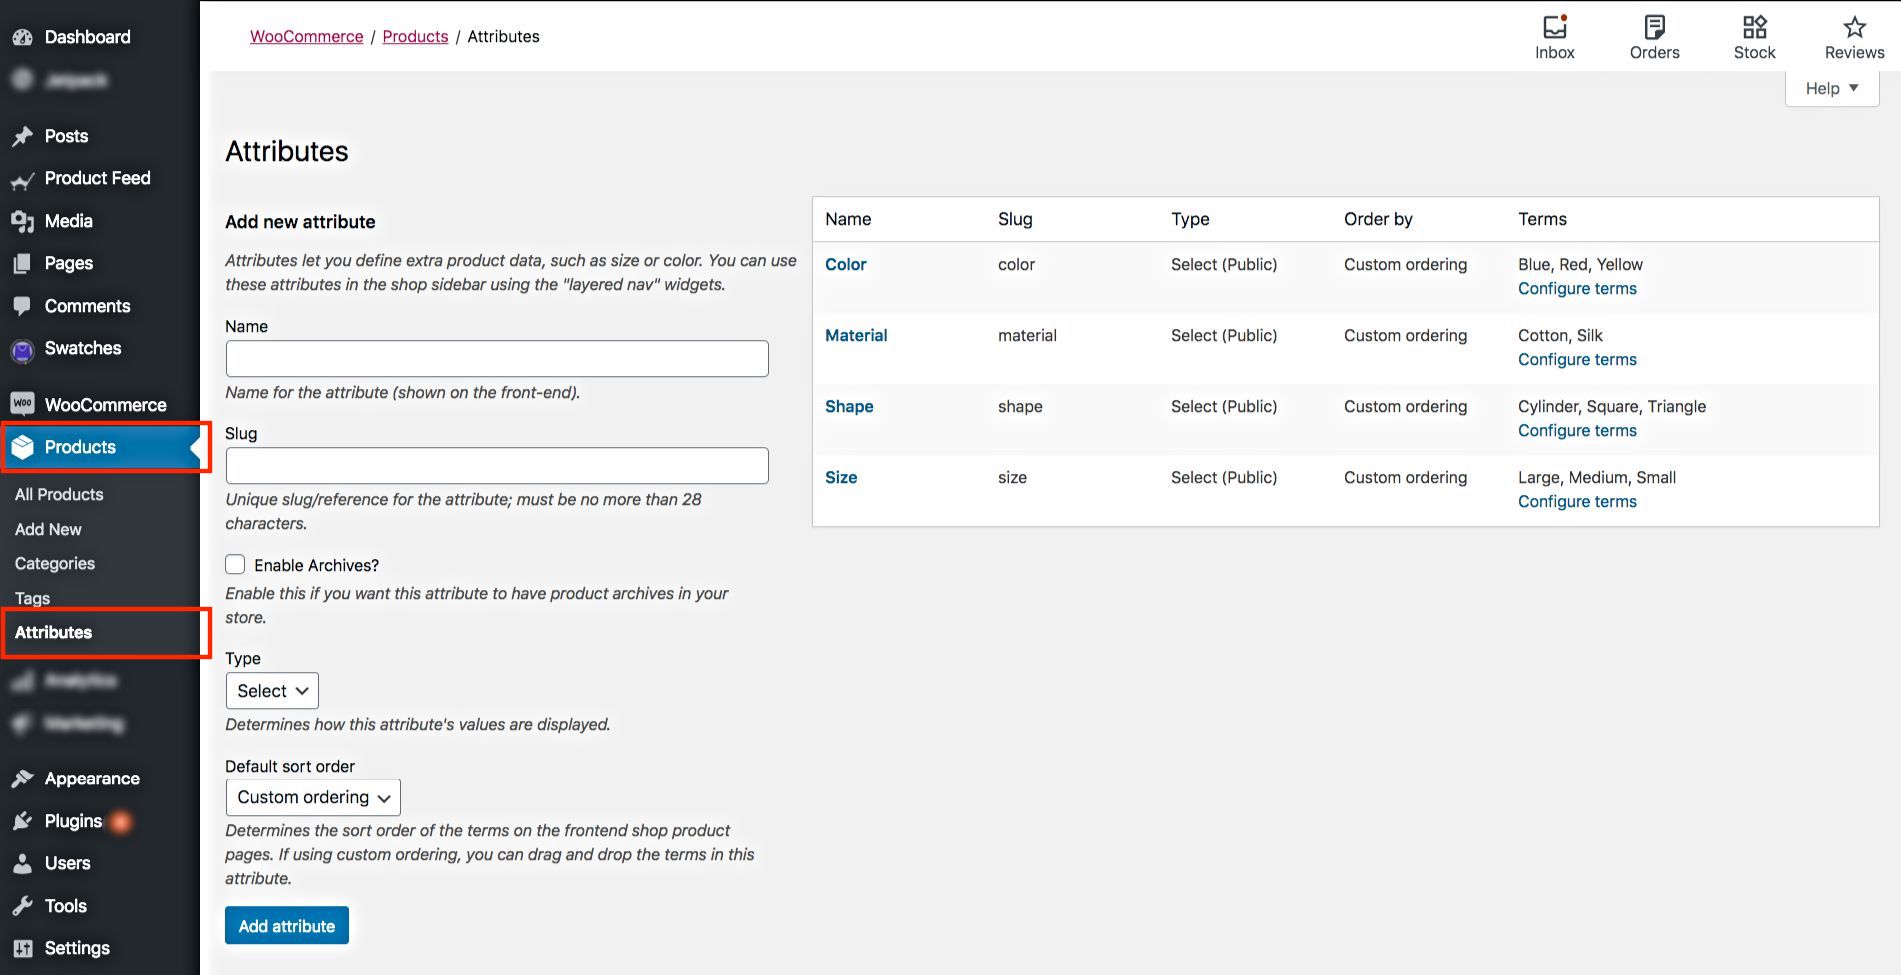
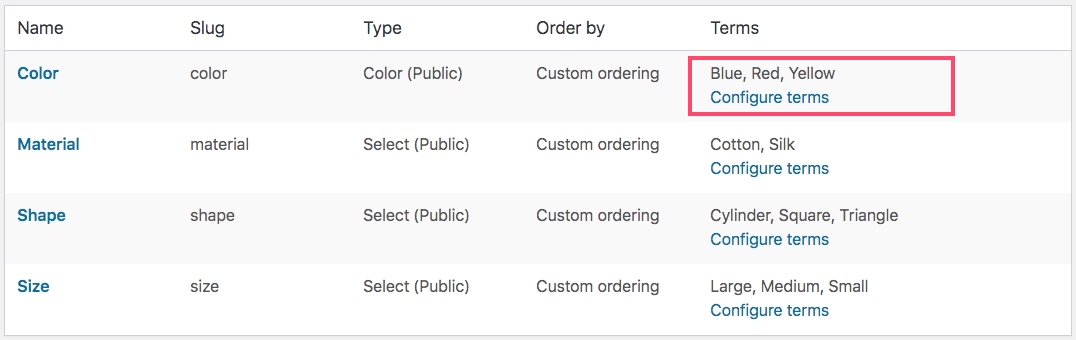
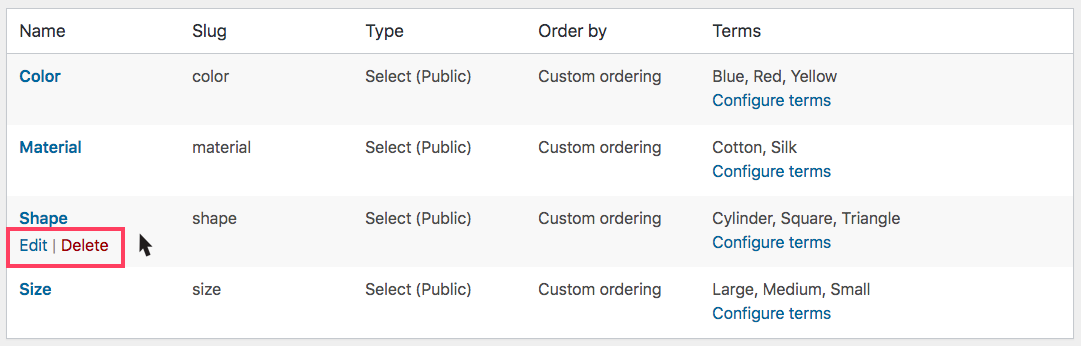
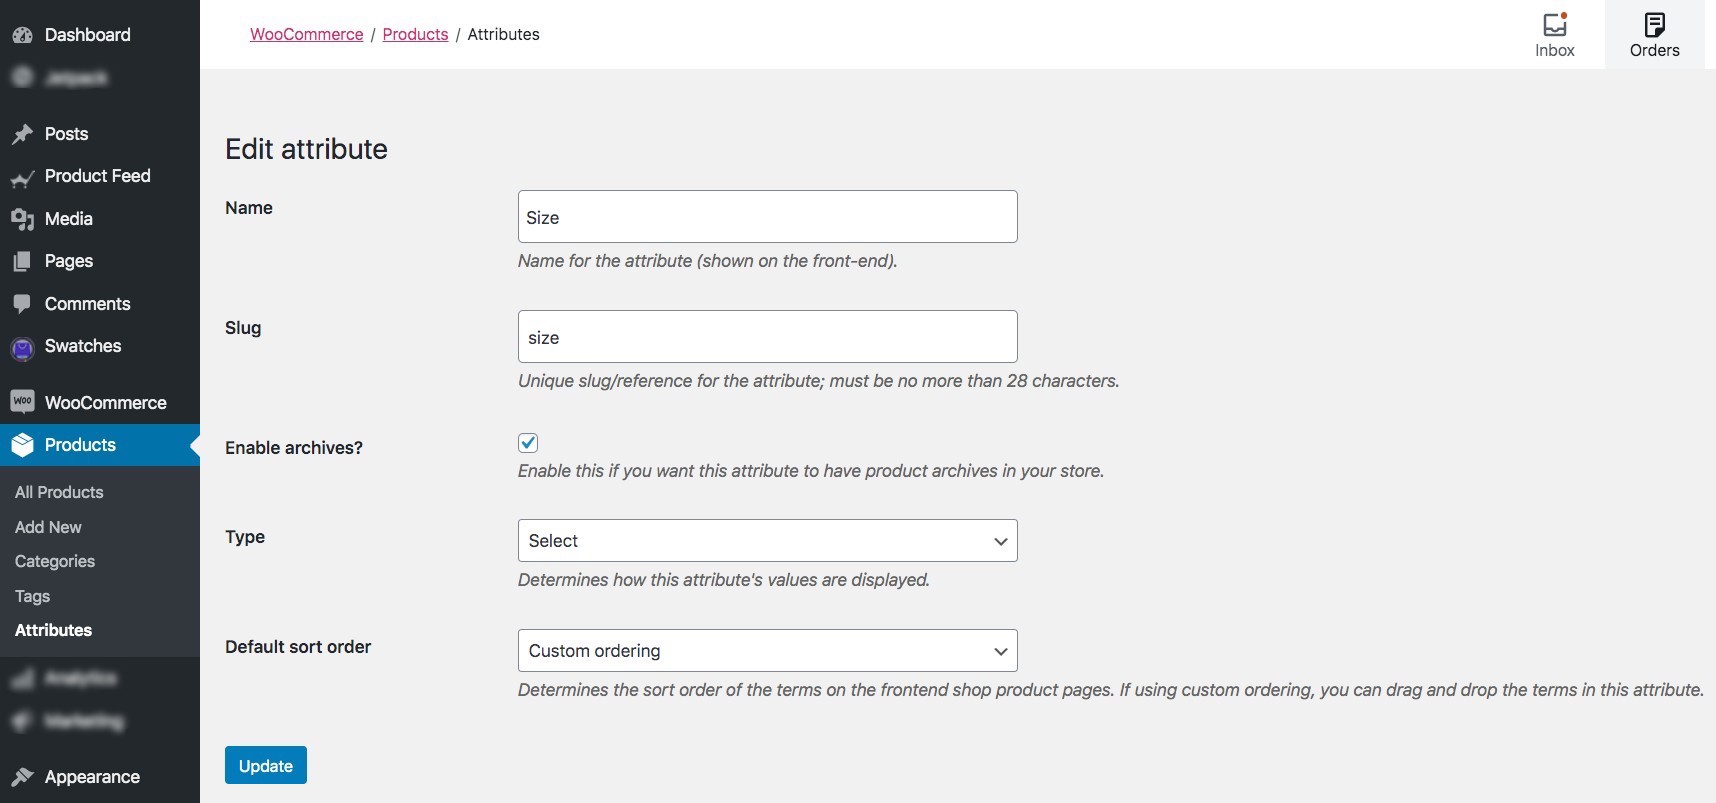
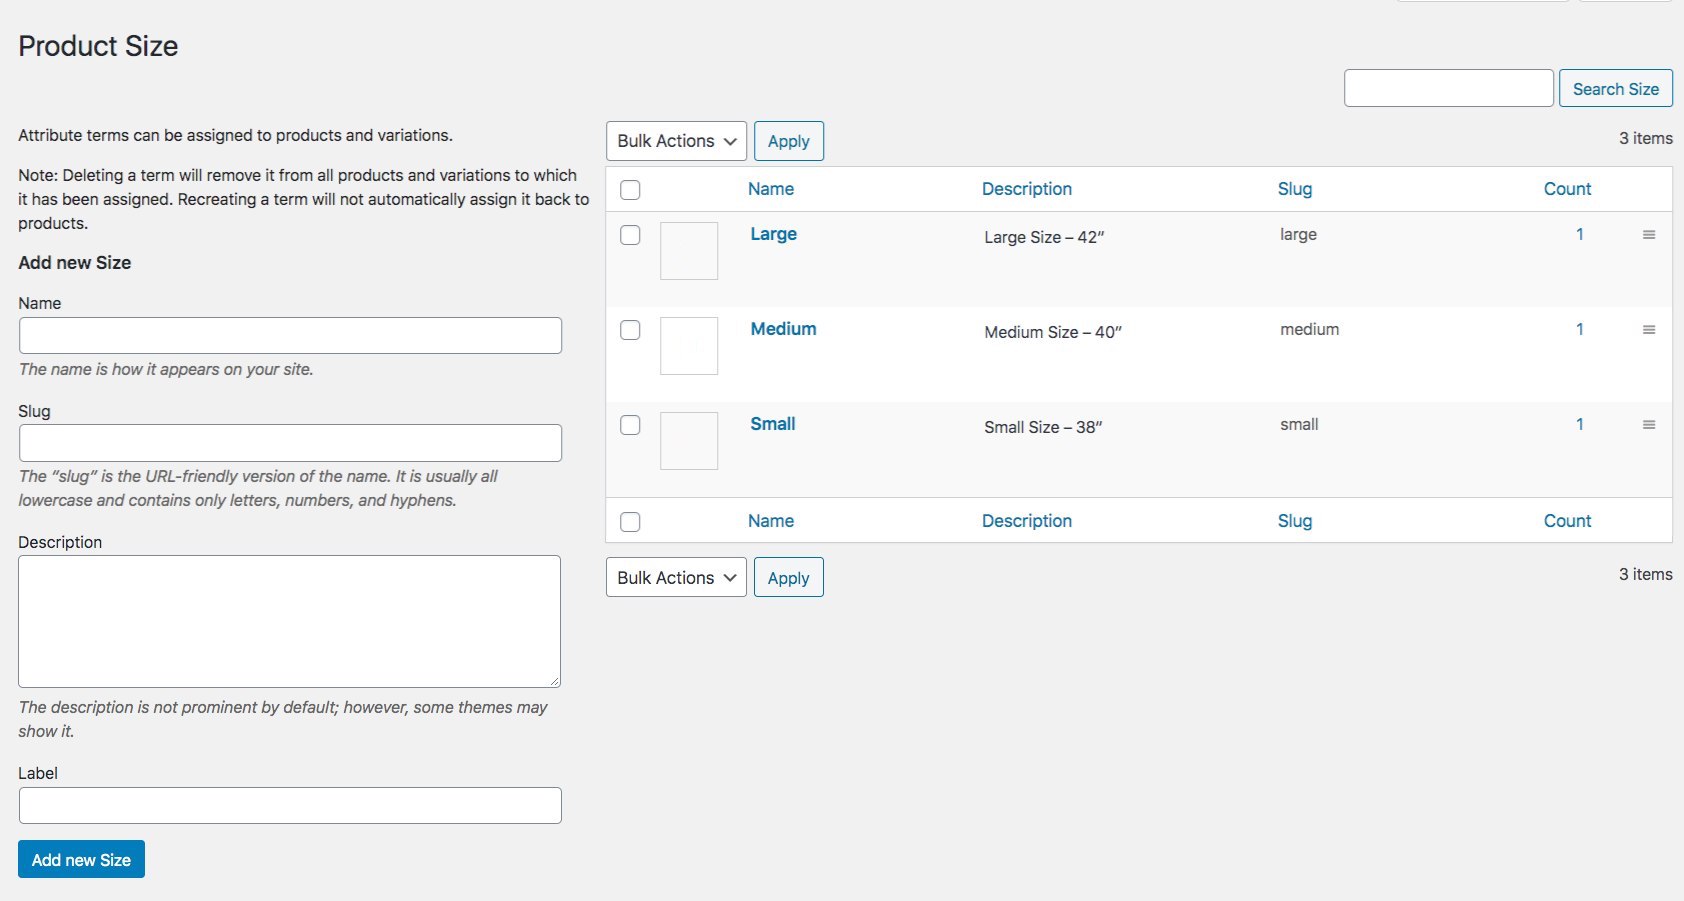
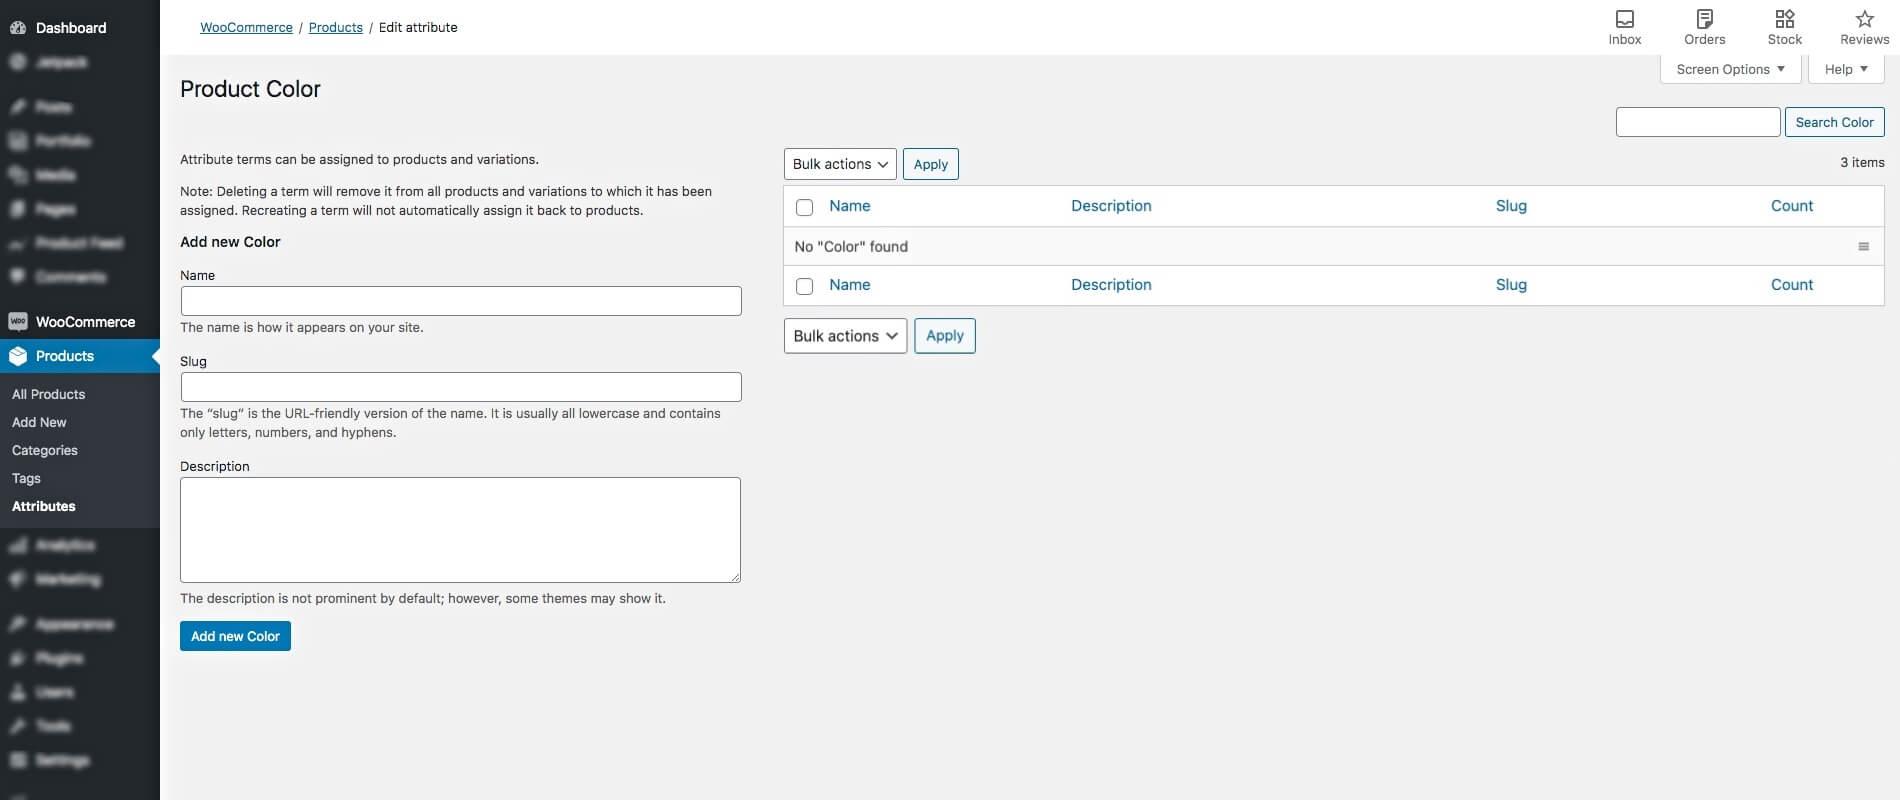
1. On your dashboard, go to Products > Attributes.
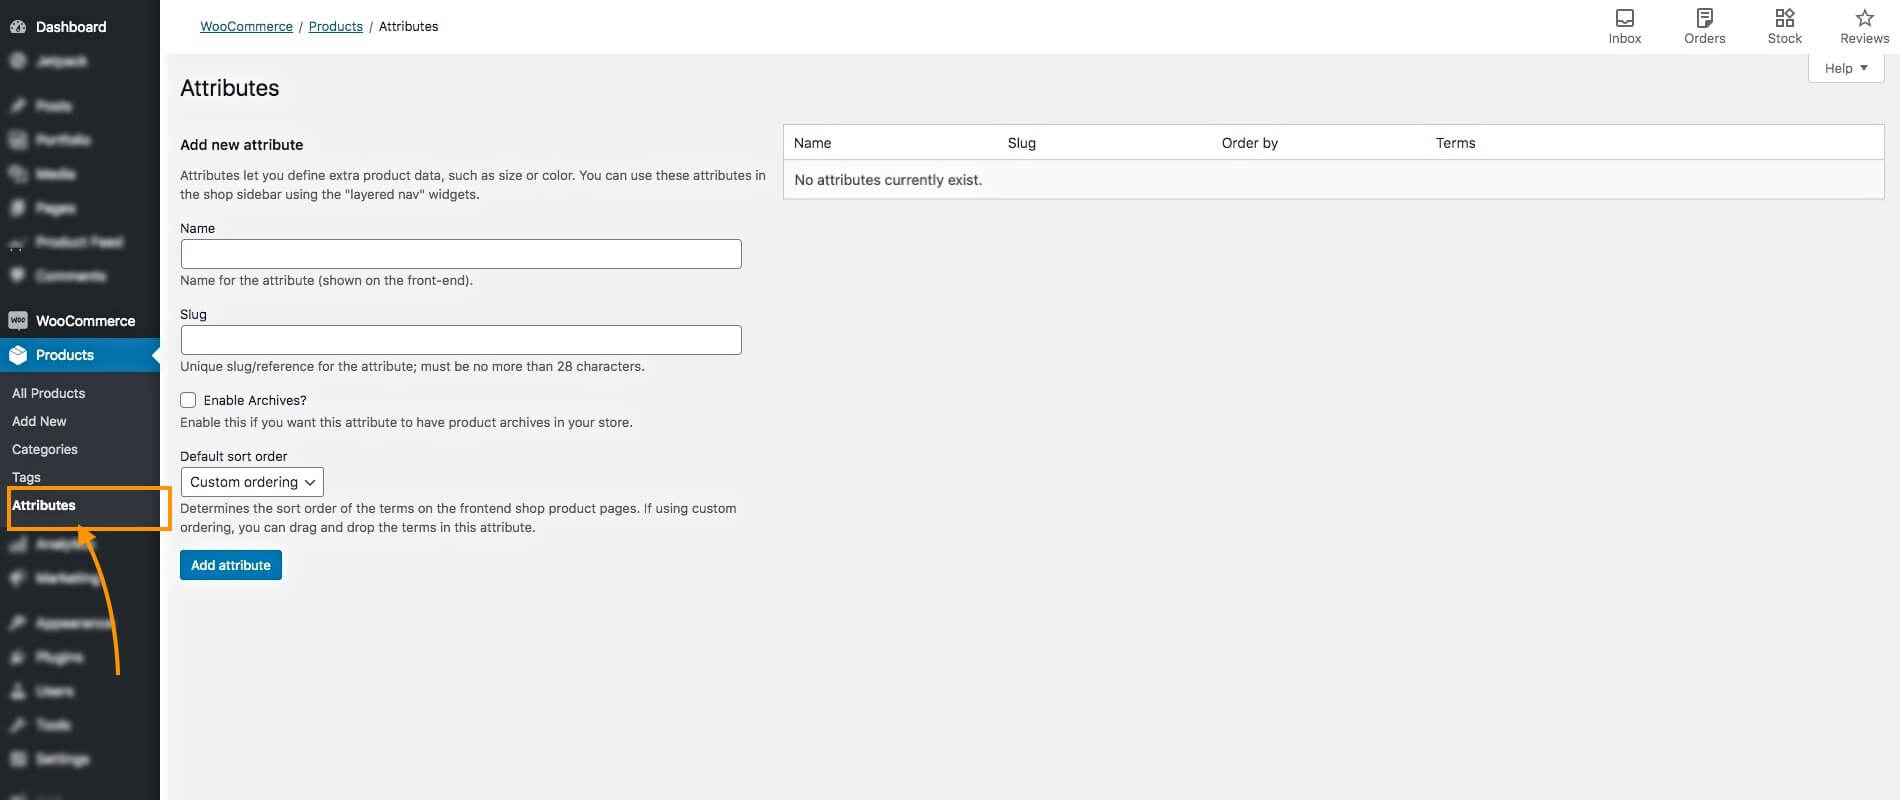
Here, you will see the option to create variation attributes.
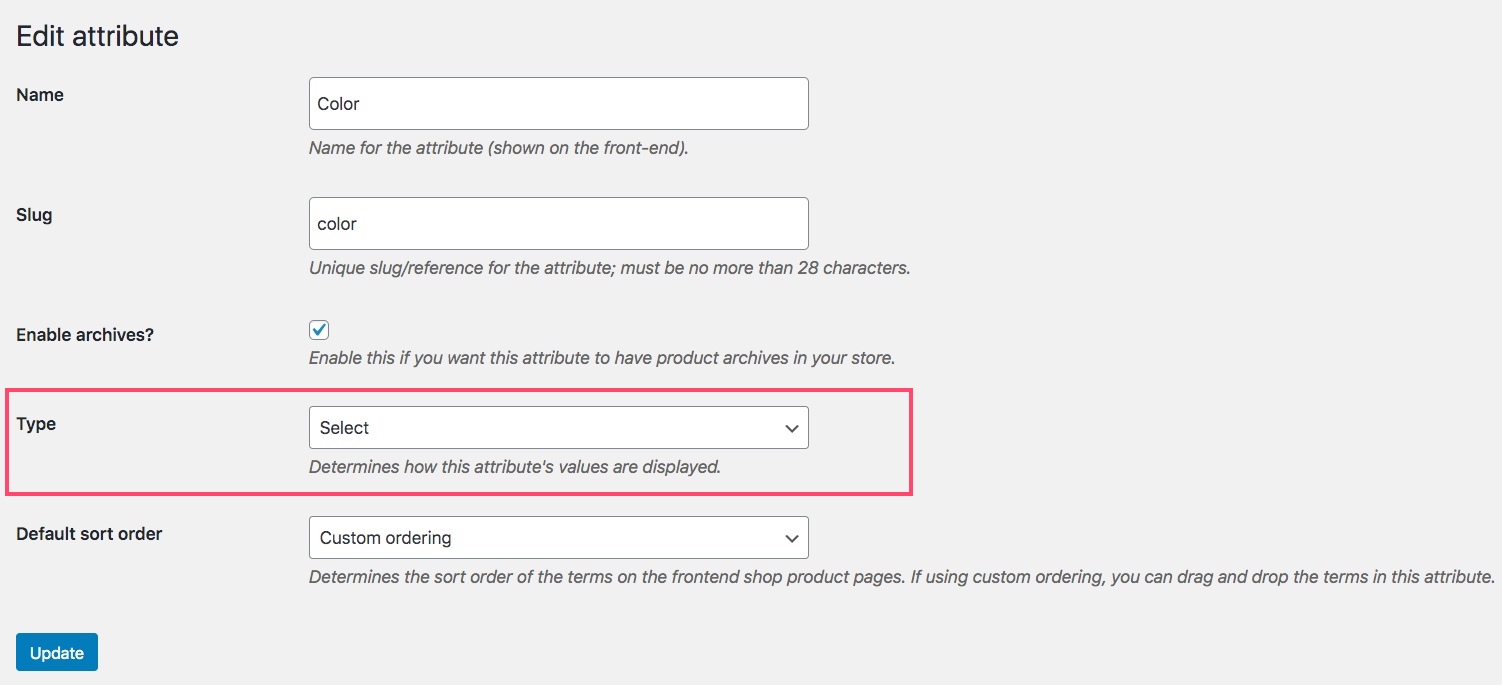
2. Input a name and slug for the attribute in their respective fields. For example, you can name it ‘Color’ and assign the slug, ‘color.’
Then click on the ‘Add attribute‘ button below.
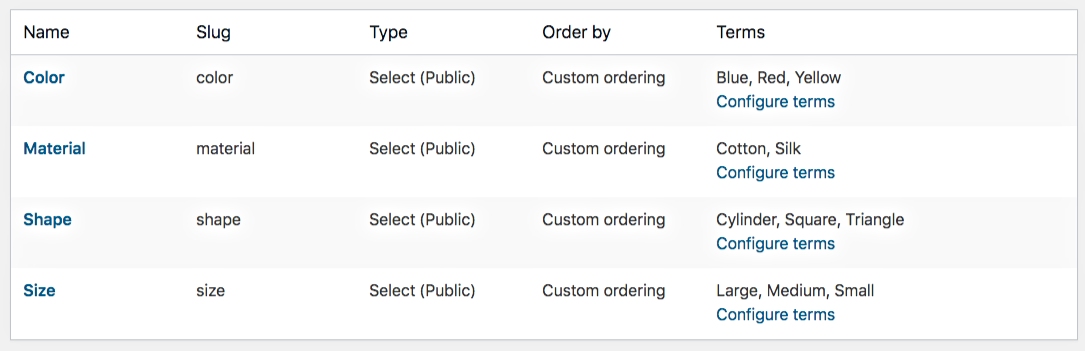
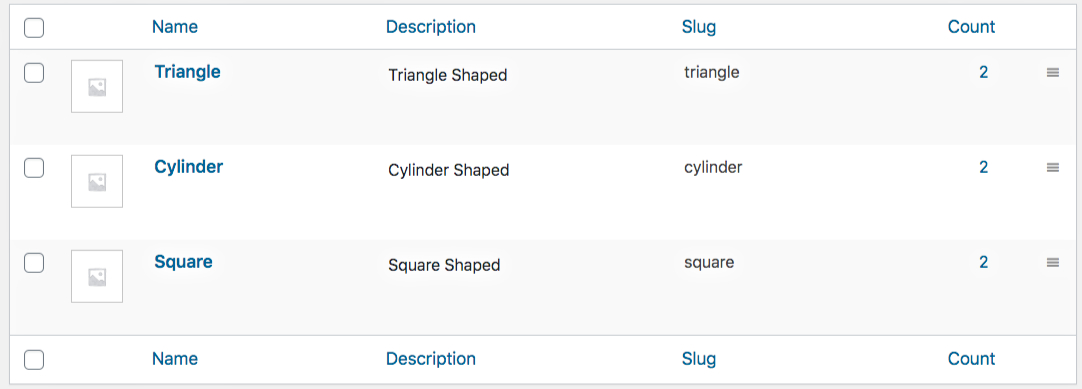
You will see that the attribute is added on the right side.
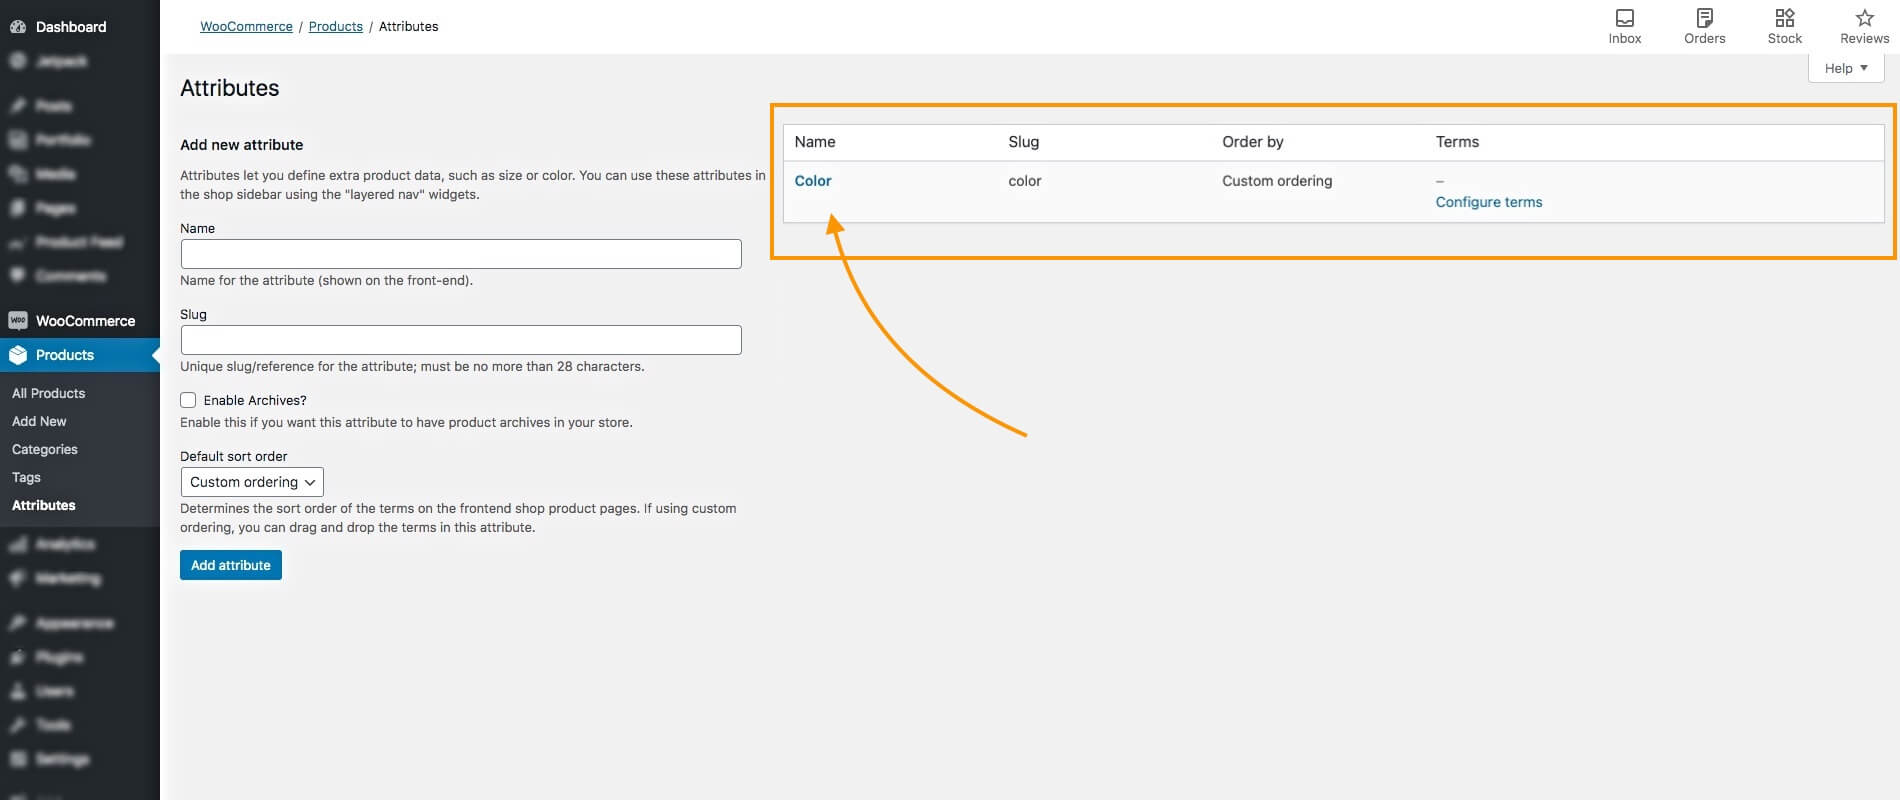
Here, I have added a variable product attributes called Color.
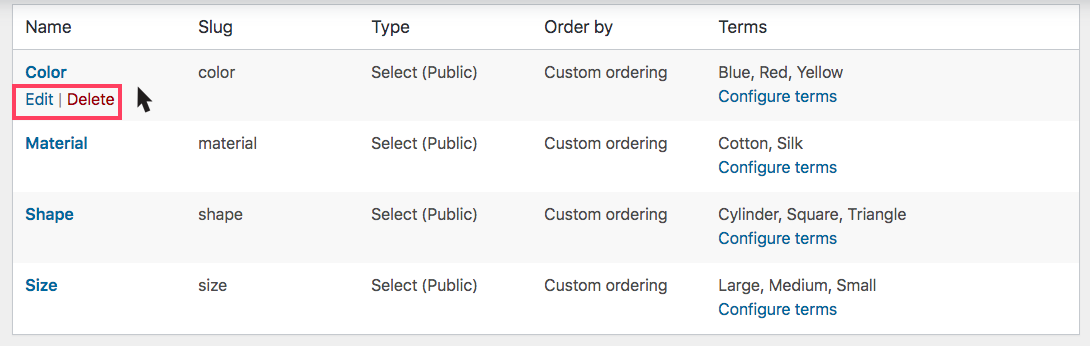
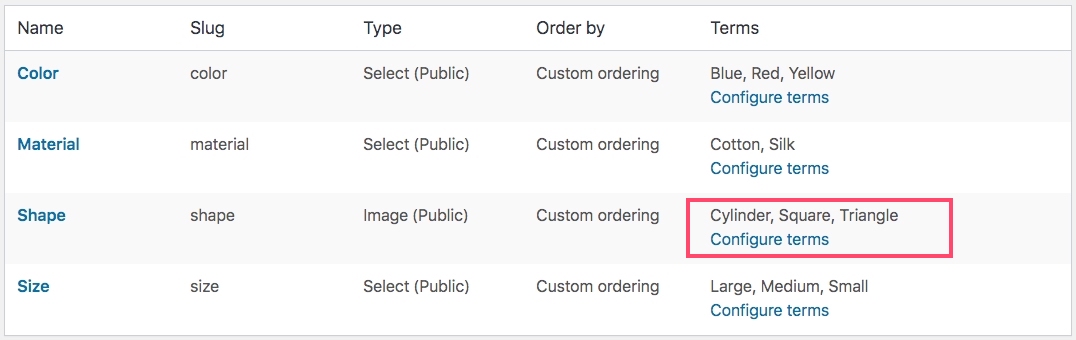
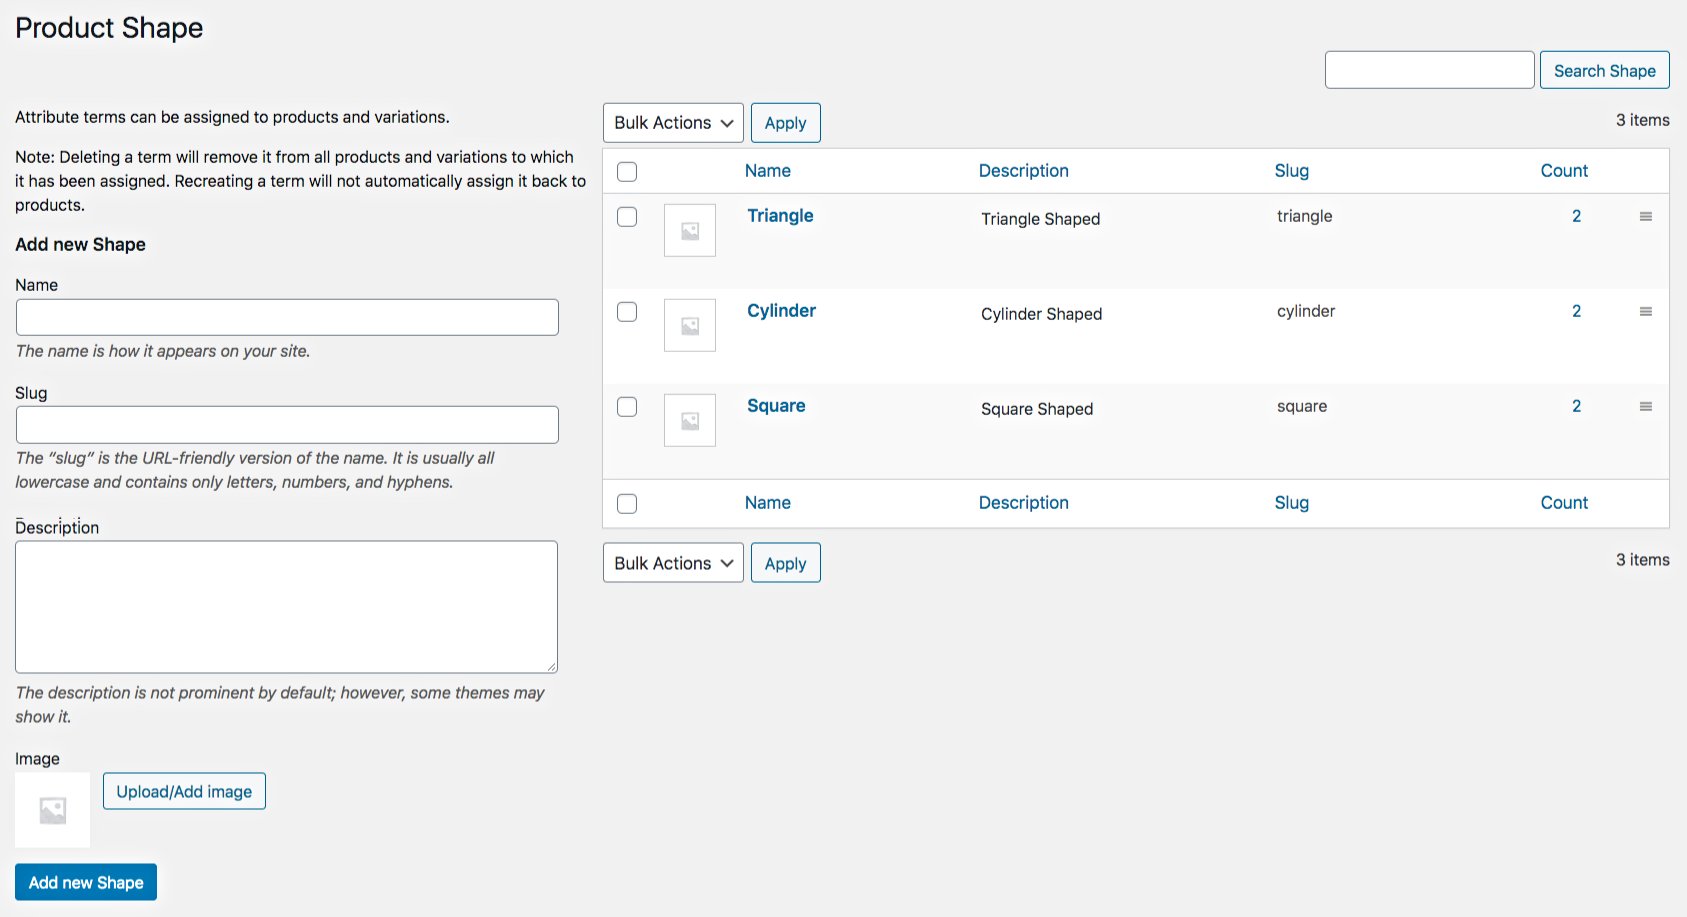
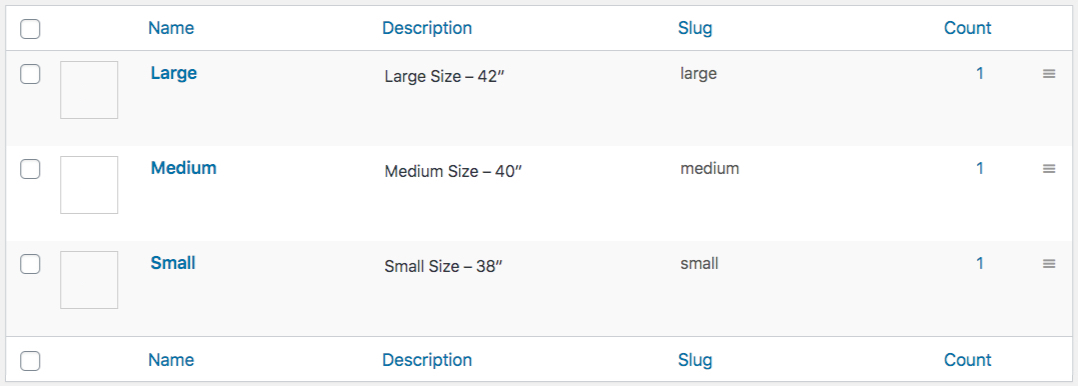
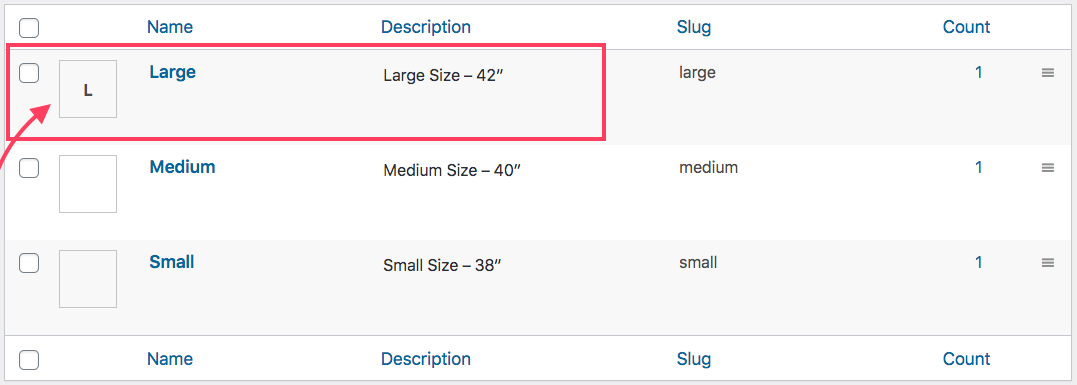
3. On the right side of the attribute, under the Terms, you will see an option called Configure Terms. Click on it.
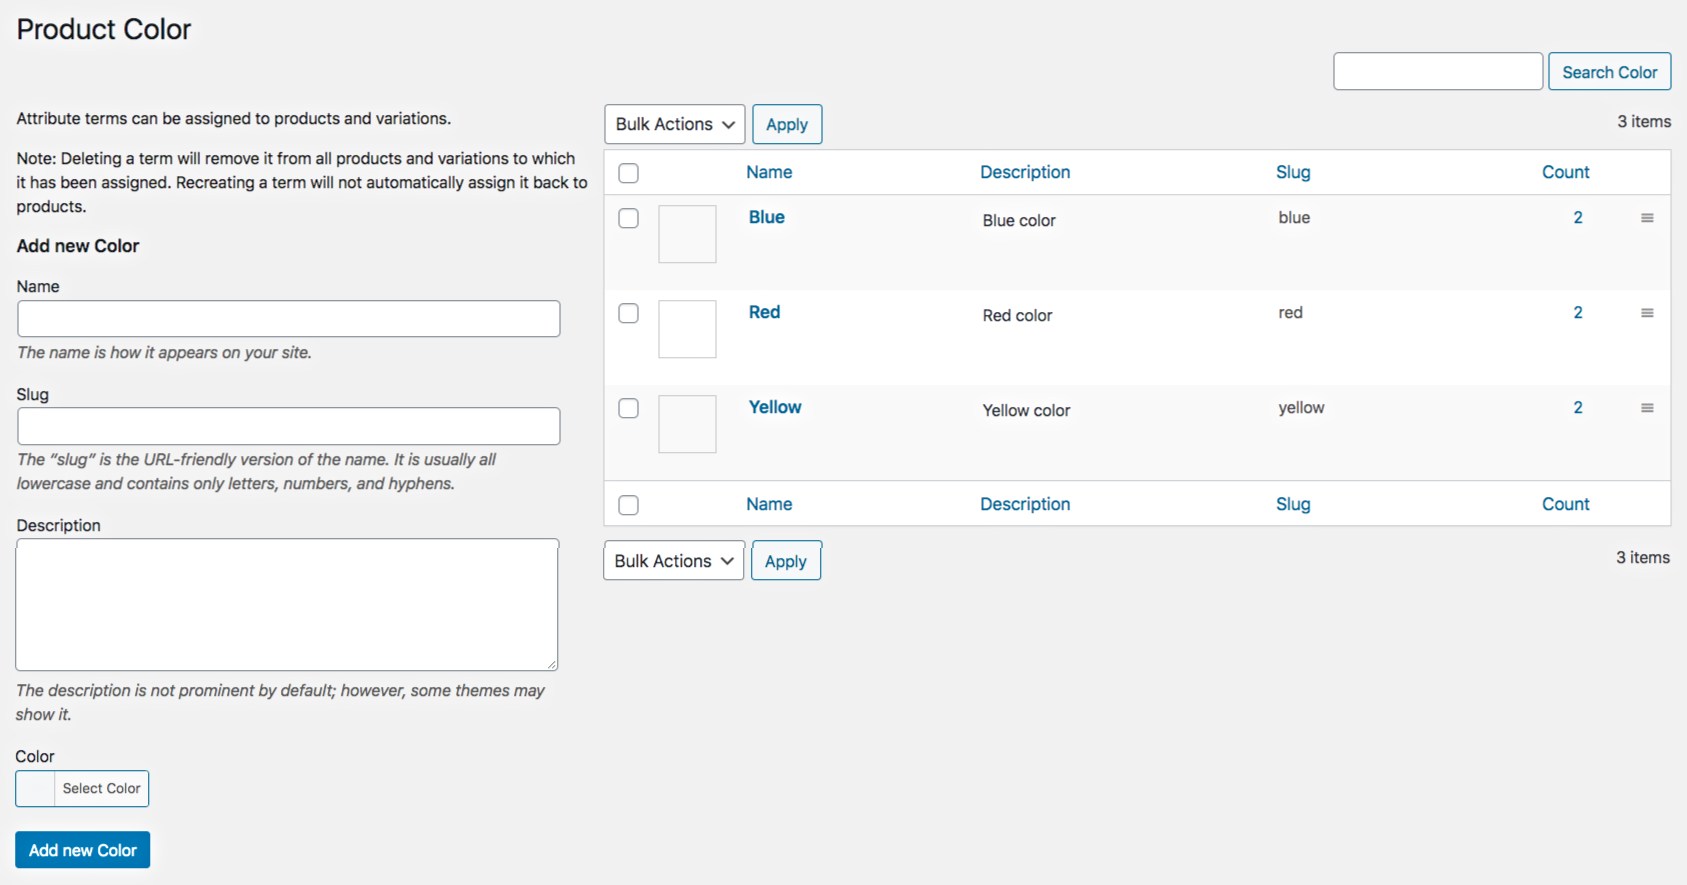
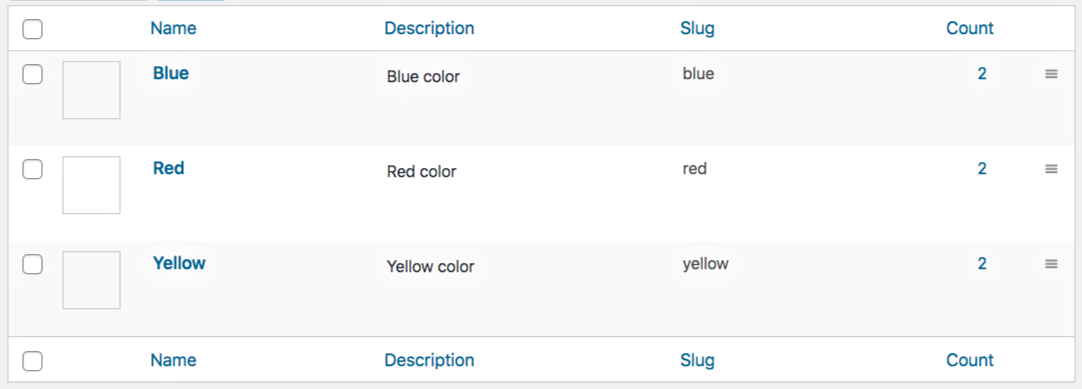
It will take you to the page where you can add variants.
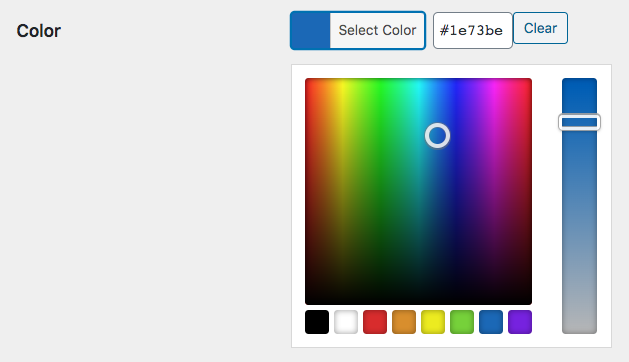
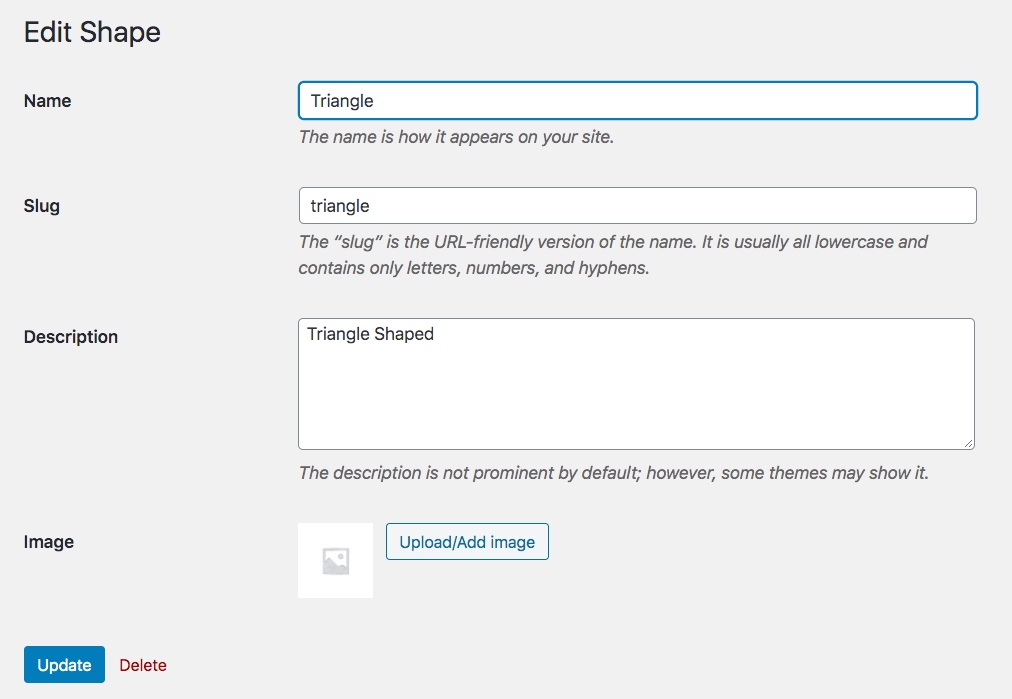
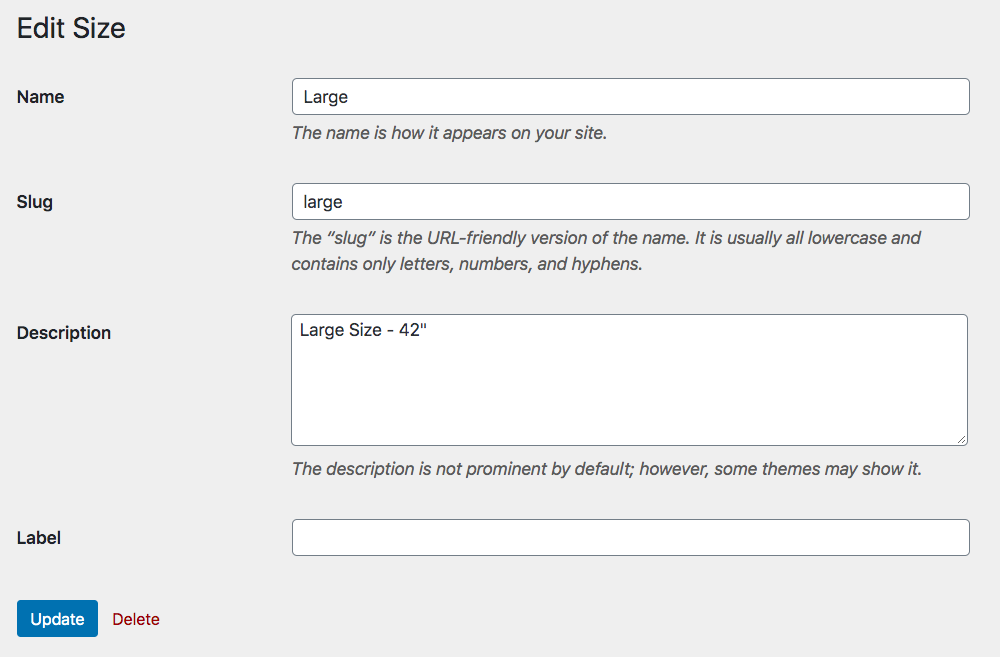
4. Input a variant name and slug in their respective fields, and add a description to it if you want to.
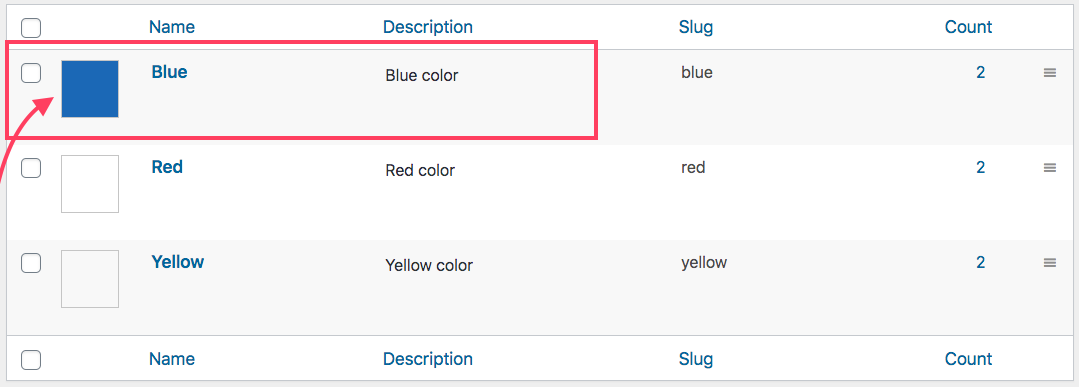
For example, you can name it ‘Blue,’ and assign the slug ‘blue.’
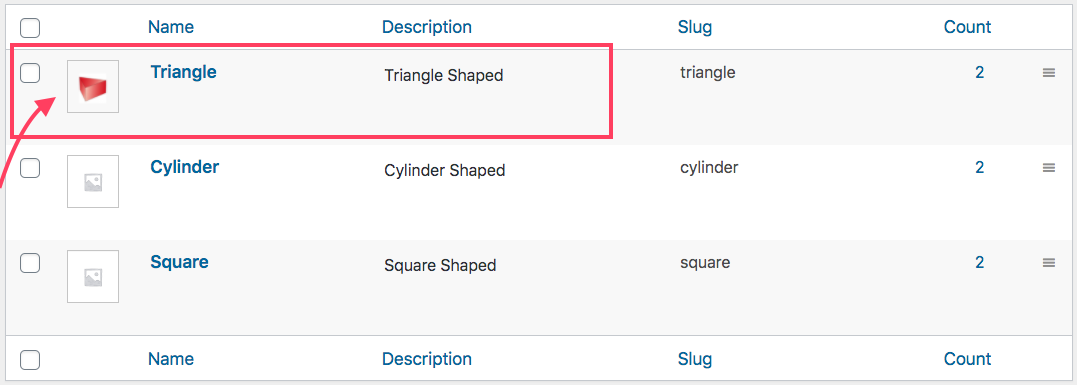
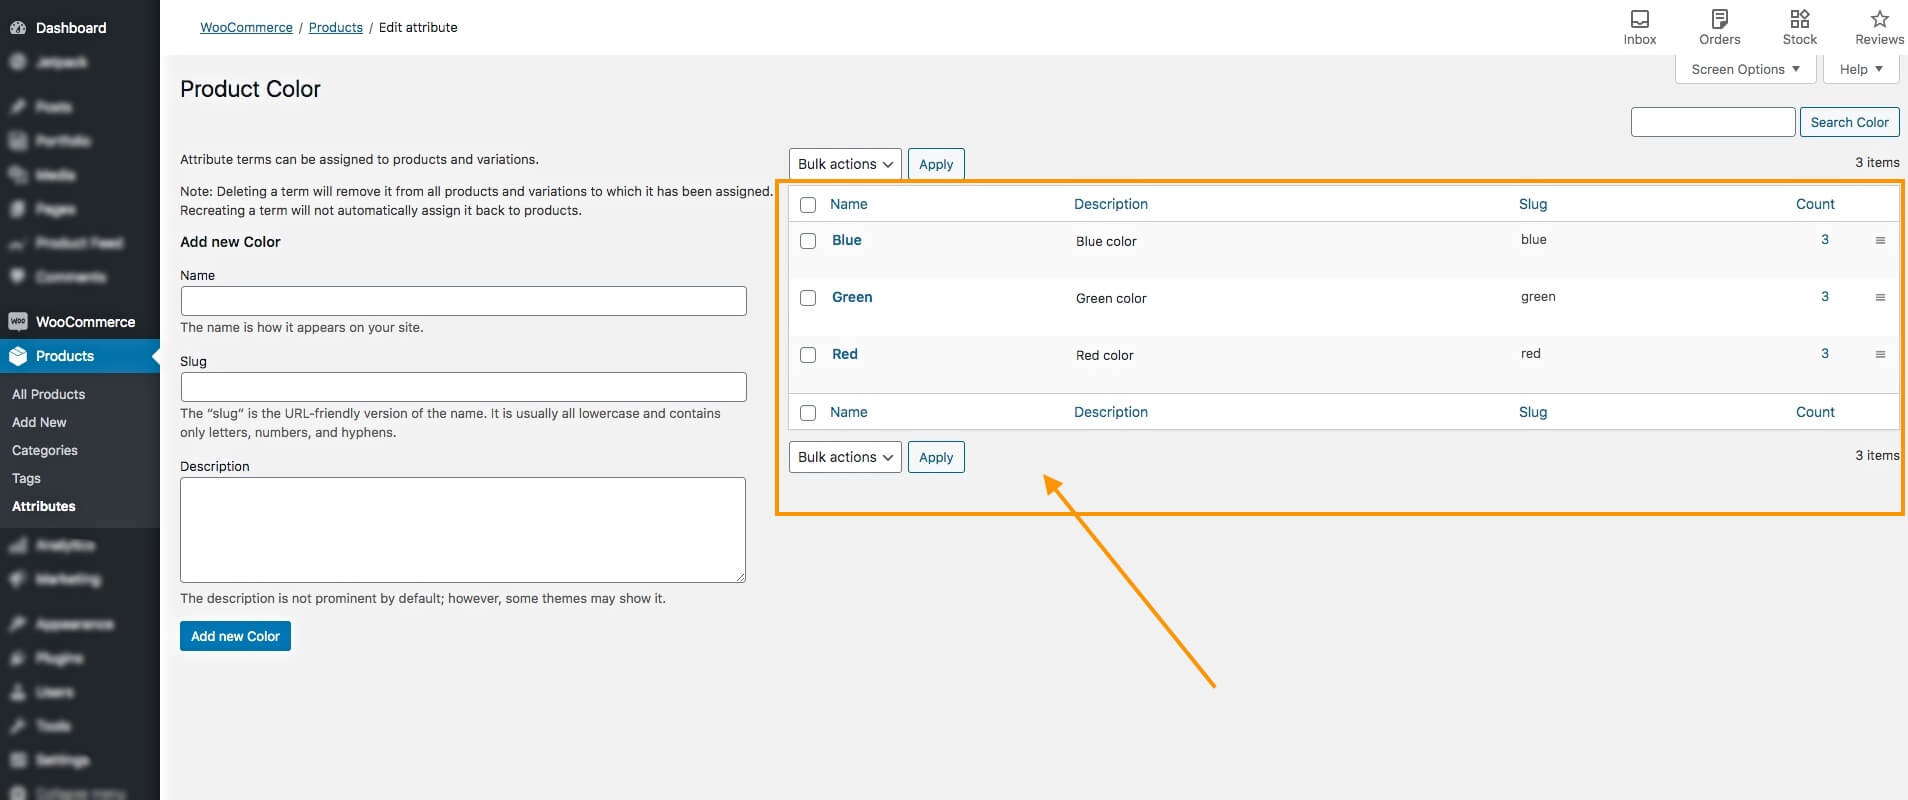
5. Then click on the Add New Color button below. You will see that the variant is added on the right side.
You can add more variants here. I have added two more, Green and Red.
It will take you to the page where you can add variants.
So far, you have a variation product attribute, and it’s corresponding variants. You can repeat the whole step to add more variations of product attributes and their variants.
These will be used to set up variations when adding variable products to your WooCommerce store.
Step 2 – Add A New Product
The next step is to add a product and set it up as a variable product.
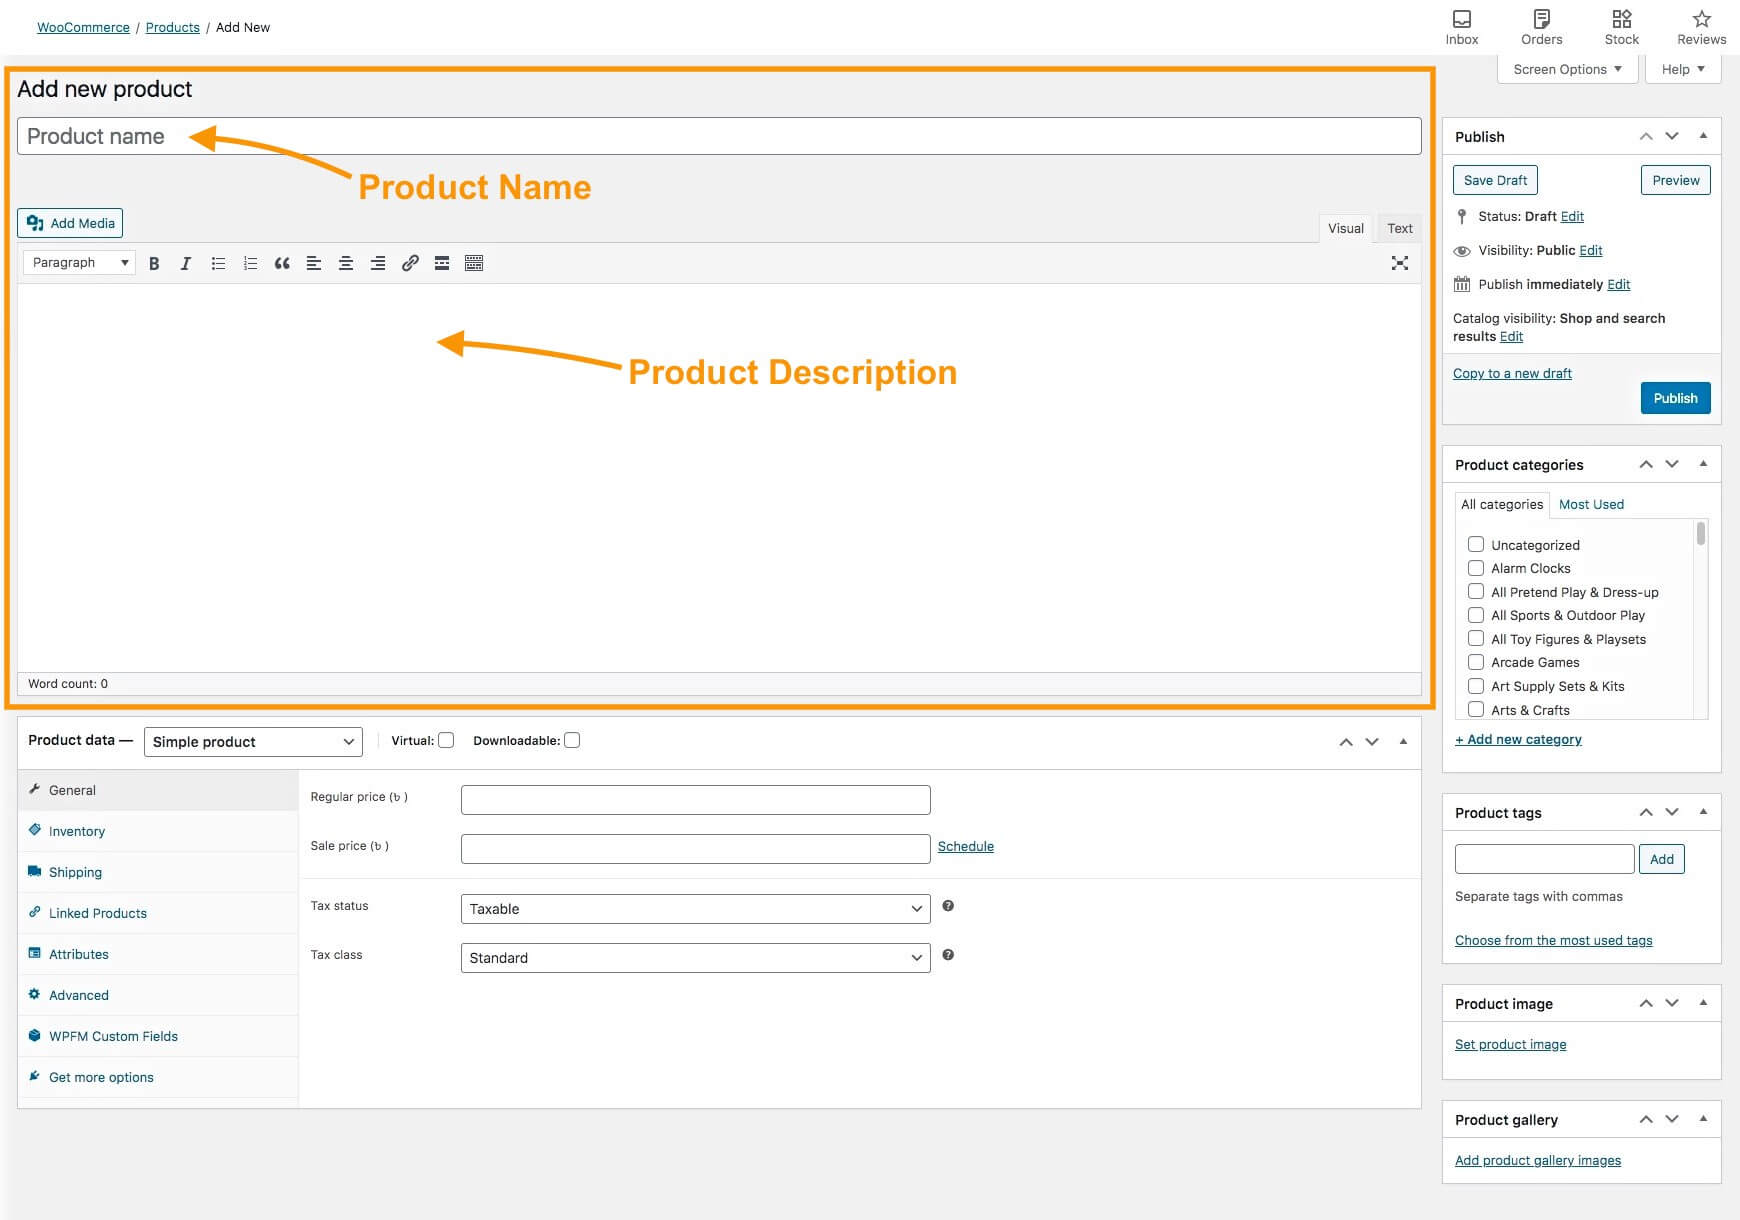
1. On your Dashboard, go to Products > Add New.

It will take you to a blank product edit page to input the necessary data for the product.
Here, you will need to add a few product data; make sure the data is optimized.
As you read on, I will give you relative examples to help you understand how you can optimize the data.
2. Add a Product Name and Description.
Try to avoid using too many marketing schemes on the Product name, but do include the unique features that may make it stand out. And, in some cases, you may include the variant term on the name as well.
For example,
You may use: Super Heroes T-shirt – Red/Blue/Green
But do not use: Red T-shirt – Buy 3 Get 1 Free
In the description, try to explain all the product features so people may learn what to expect when purchasing the product.
If you have size variants, then it is best to include a size chart in the description as well.
Make sure to highlight all the advantages and special features of the product here.
3. On the right side, you will get the option to assign Product Categories.

Here, you may choose a suitable category that already exists or create a new category for this product.
Putting the product within a relevant category is important because people will often search for products based on categories in your store.
4. Add images to your product.

On the right side, you will get the option to add a Product image. Click on Set product image to upload an image.
This is the main image of the product. A person usually notices this image first when viewing the product page.
For the main image, it’s best to use an image that is a collection of all the variations in a single picture, so that people know that they have options.
**You will be able to add images based on variants, which I will show you later.
Make sure the image is clear and matches the product you are selling. Avoid using fake images or enhanced images that look way better than the actual product.
Remember. You are here to do business on a long-term basis. Deceiving people may result in them not buying from you again. The more original you are, the more people will be your regular buyers.
Below the Product Image section, you will be able to add more images in the Gallery.
Try adding multiple images from different angles of the product to showcase it properly.
These are the basic data of the product that you need to add. However, there are more options available such as Short Description and Tags. I will give you tips on how you can optimize them later in this article.
Step 3 – Configure The Product As A Variable Product
Once you have inputted the basic details, you need to configure this product into a variable product.
1. Below, you can see the Product Data Section.
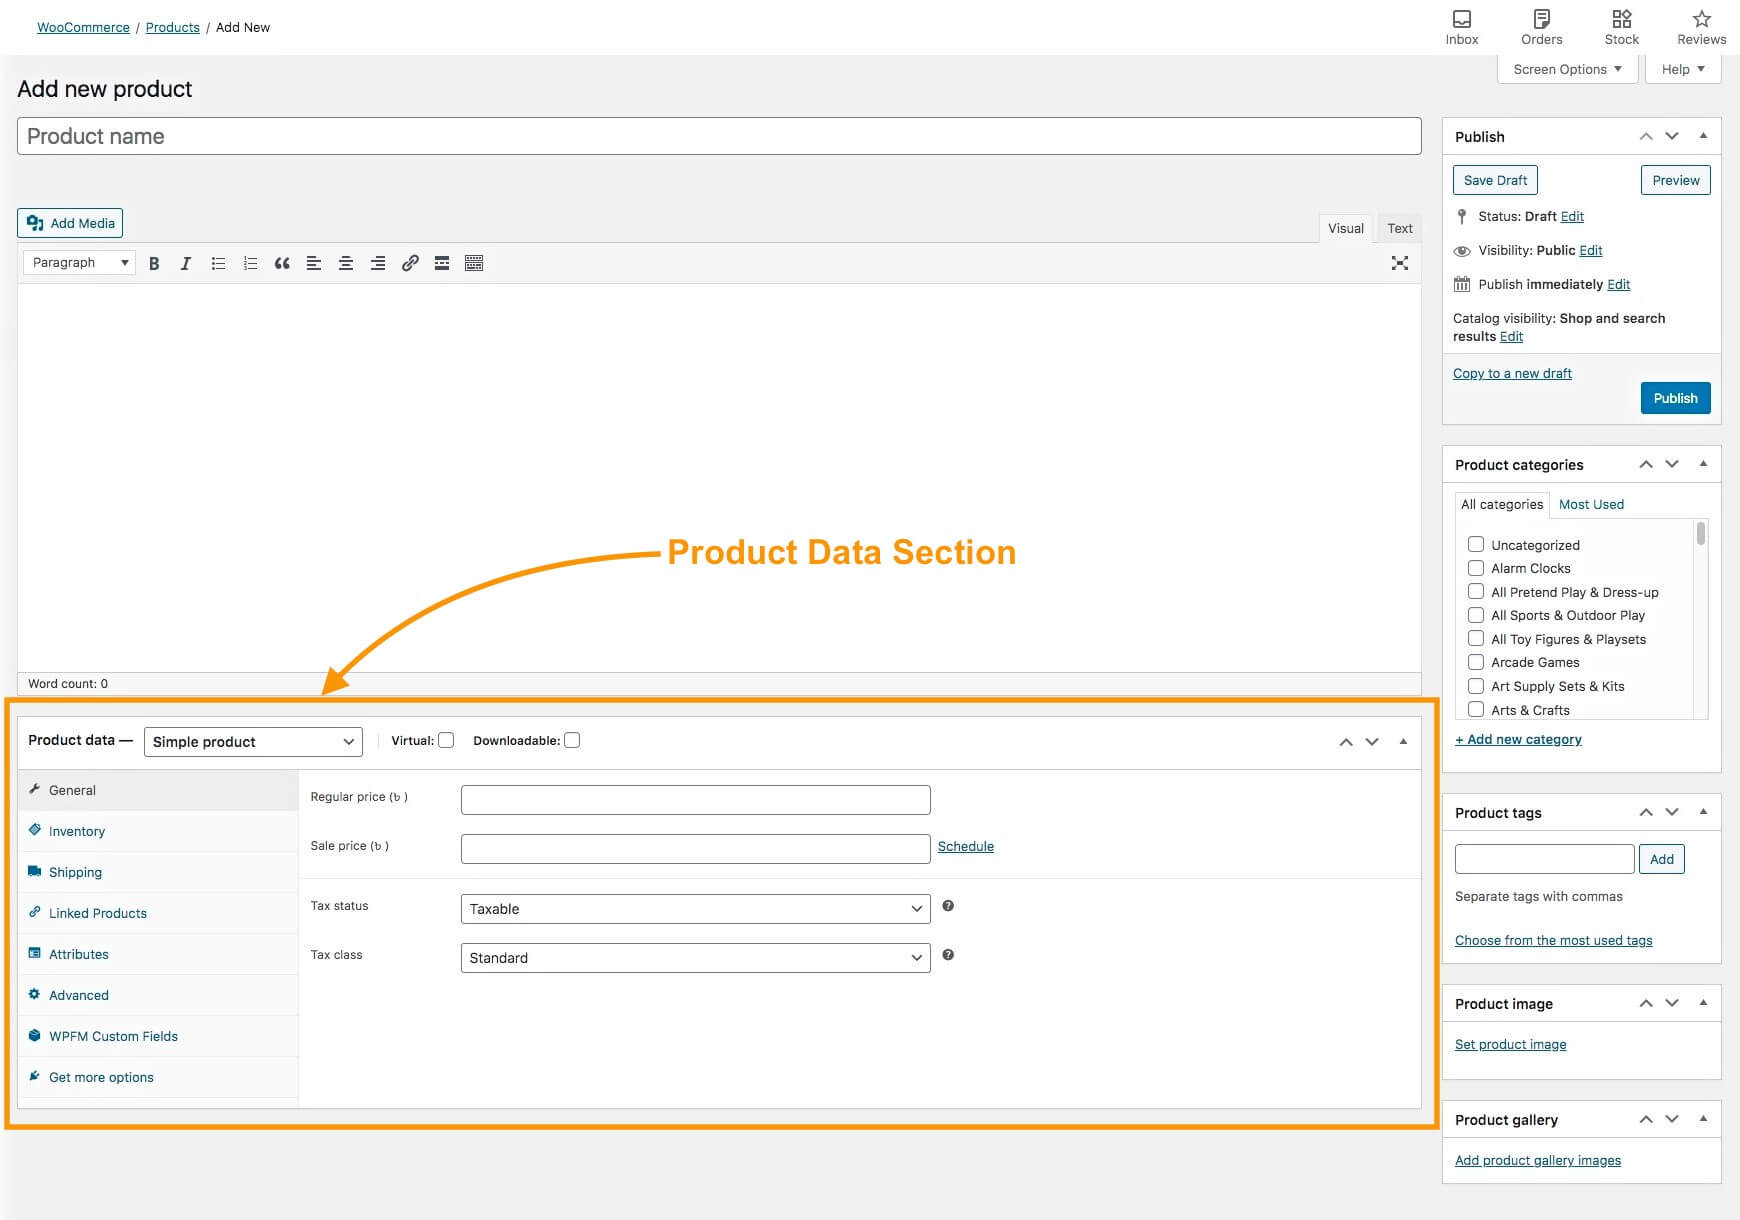
You will see that on the Product data field, it is set as a Simple product.
2. Click on Simple Product and change it to Variable Product.
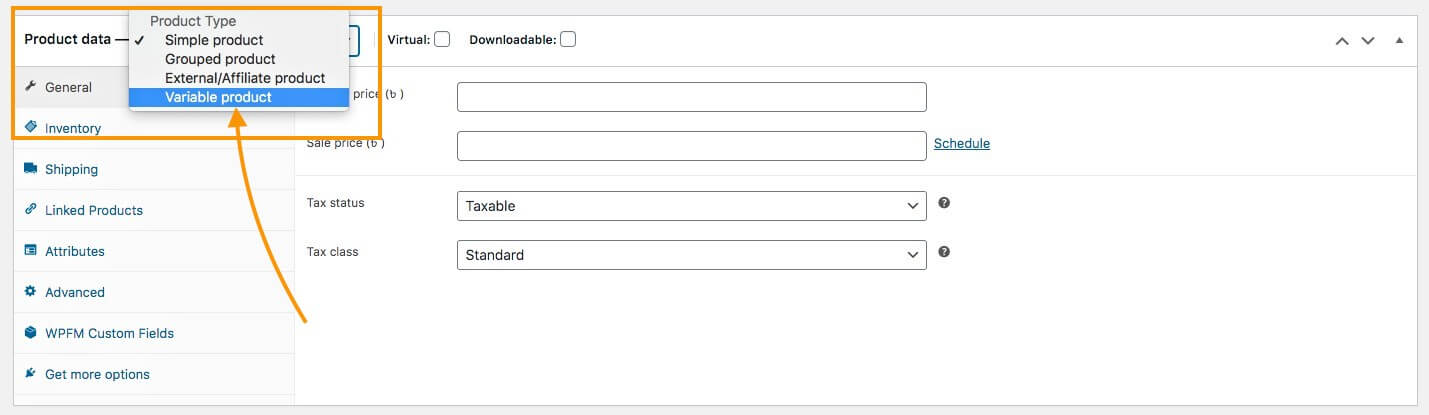
You will see that the menus below will change.

Here, by default, you will get 7 main menus on the left side (and there may be more depending on other plugins you use).
3. First, configure the General menu.
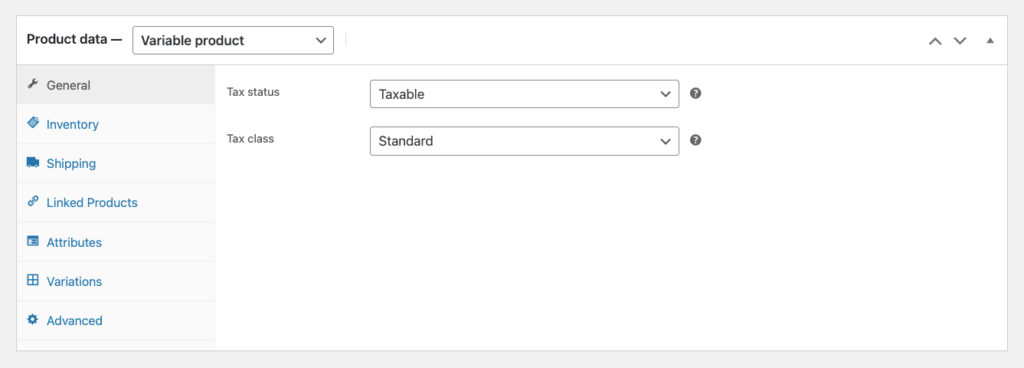
Here you will get two options:
- Tax Status – Here, you can choose if the product is taxable, or if the tax applies to the shipping cost only, or select the option ‘None’ if the product is not taxable.
- Tax Class – If you mark a product as ‘taxable,’ then you will need to choose a Tax Class, from the ones created when setting up WooCommerce.
4. Next, configure the Inventory menu.

Here you will get three options:
- SKU – This is the parent SKU of the product. Even if you assign this, you will still need to assign unique SKUs to product variants (which I will show you in a bit).
- Manage Stock – If you enable this, you will be able to
- specify the available quantity of your product,
- choose if you allow backorders or not, and
- set a threshold to be notified if the stock is low.
**For variable products, it’s best to manage stock within each variant rather than here.
- Sold Individually – You can enable this if you accept only 1 item per order for this product.
5. Now, move on to the Shipping menu.

Here, you can assign the Weight and Dimensions of the product, which may affect the shipping cost.
And if you have created a Shipping class when setting up WooCommerce, you can assign that here if it applies.
6. Then comes the Linked Products menu.

Here you can assign products for Upsell or Cross-sell for this product.
- Here’s a guide on how to use them effectively.
It’s best to assign similar products that are better and more expensive, as upsell. They will be displayed as suggested products on the product page.
For example – if it’s a Leather Jacket, then you can suggest more leather jackets that are better in quality and more expensive.
You may also assign products that are related to this product, as cross-sell. They will be suggested to the buyer in the cart.
For example – if it’s a Shirt, you can suggest suitable Jeans to go with it.
I will explain the Attributes menu, and the Variations menu in the next Step as these hold the main options to set up a WooCommerce variable product. For now, let’s take a look at the Advanced menu.
7. Go to the Advanced menu.

Here, you can leave a note for the buyer during purchase and enable reviewing by buyers.
Step 4 – Add Variation Attributes To The Product
You have set up all the basic data in the last two steps. Now, you will learn to create variants for your product.
1. Go to the Attributes menus

2. You can see there is an option that says Custom product attribute. Click on it.
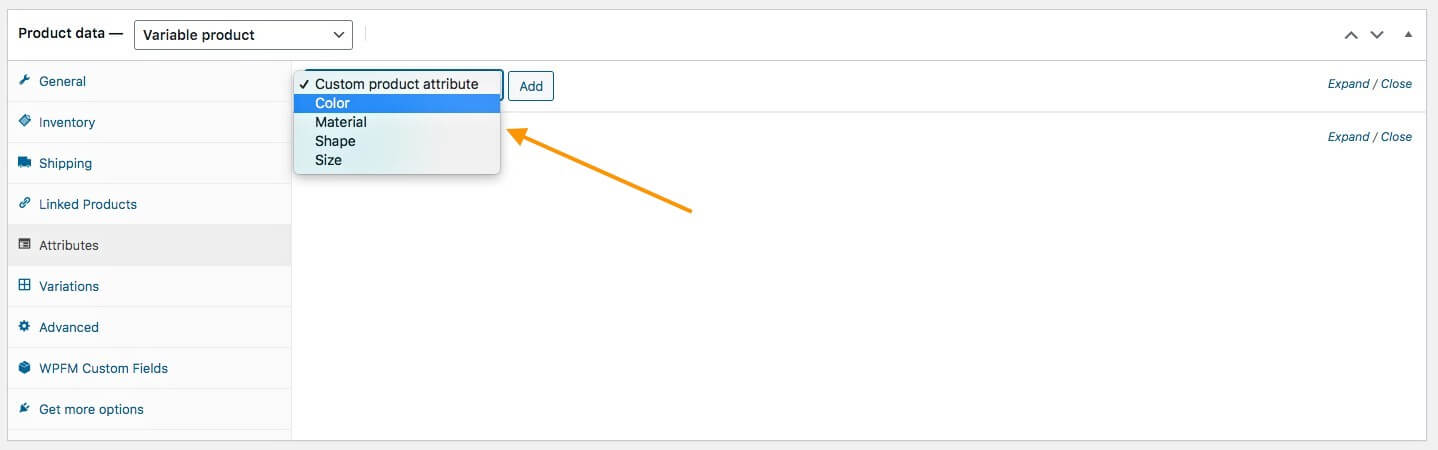
You will be able to select from the variation product attribute(s) that you created in Step 1 of this guide.
I have created three more along with ‘color,’ so you can see four options in the image above.
3. Choose the one you want to use to create product variation for this product and click on Add.
For example, let’s say you want to create color variants for this product. Then choose Color.
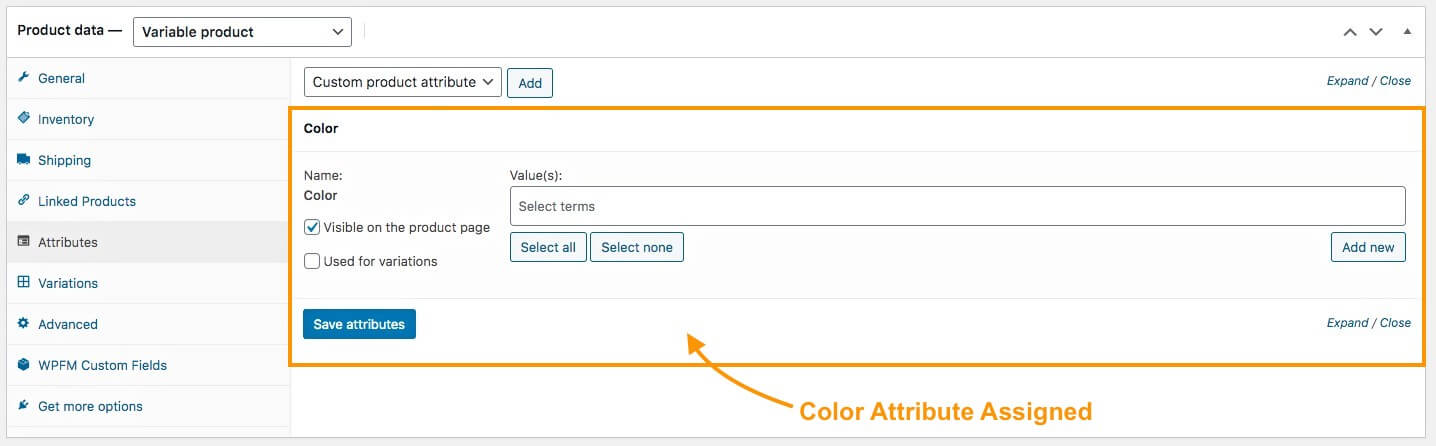
You can see, the Color attribute has been assigned.
4. Under values, if you click on the field, you will get the option to choose from the variants you created for this Attribute.
If you think all the variants apply to this product, you may click on Select All, and all the color variants will be added.
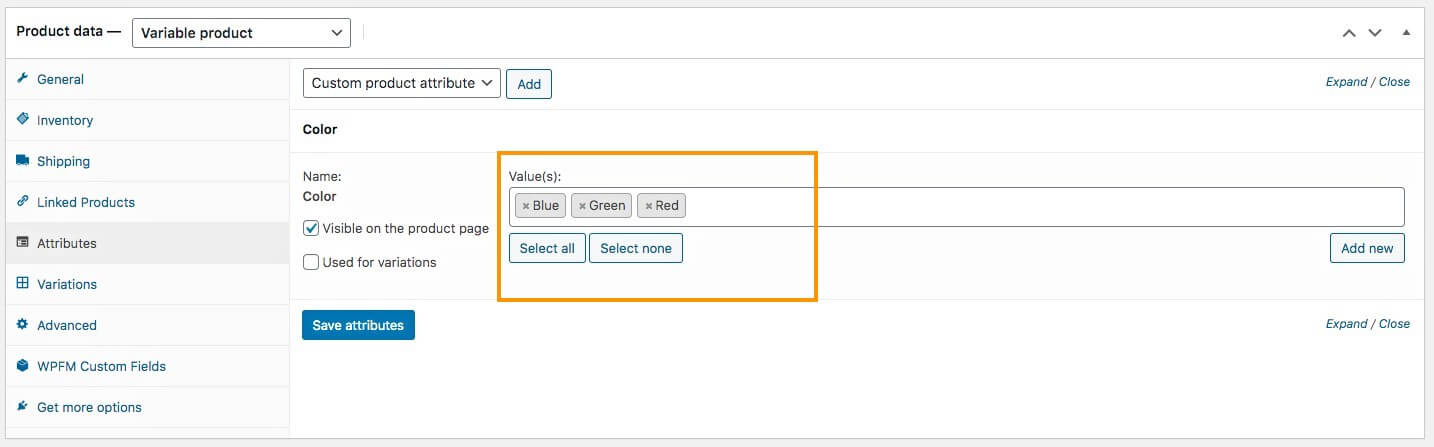
You can see that I have decided to add all the variants, Blue, Green, and Red, that I created in Step 1.
**On the right side, you can see there is an Add New button. If you need to add a color that is only applicable to this product, but you won’t need to use it for any other products, you can click on it to add it here.
5. Next, checkmark on the ‘Used for variations‘ option.
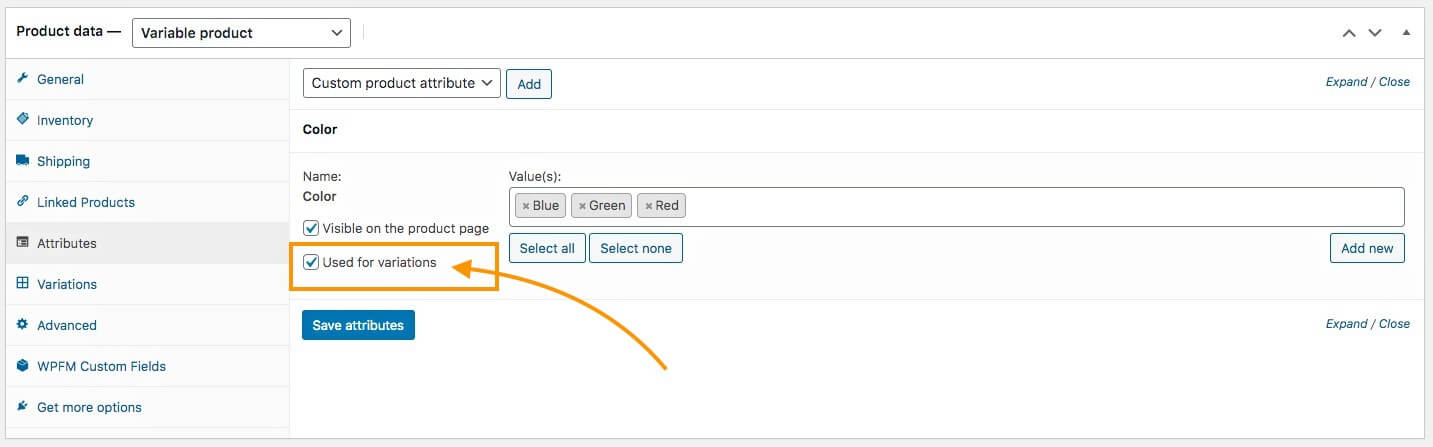
This will allow you to create variants of this product, using the variant terms you assigned. Once this is done, click on Save Attributes below.
You have successfully assigned a variation product attribute to this product.
You can repeat the process in Step 4 up until here to add more variation product attributes.
Bonus conditional steps –
The variation product attribute(s) that you learned to create in Step 1 is used globally. Any product you create, you can assign those attributes to them.
However, there may be a case where you have a product with variants that do not resemble any other products in your store.
For example, let’s say you decided to sell a unique jacket with variants based on the closure — one having a zip-closure and the other having a button closure. In this case, it is less likely that there will be more products having similar variants.
Here, what you can do is, rather than creating a global variation product attribute, you can directly create custom variation attributes just for this product.
Here’s how.
i. In the Attributes menu, instead of choosing a variation product attribute, choose Custom Product Attribute and click on Add.
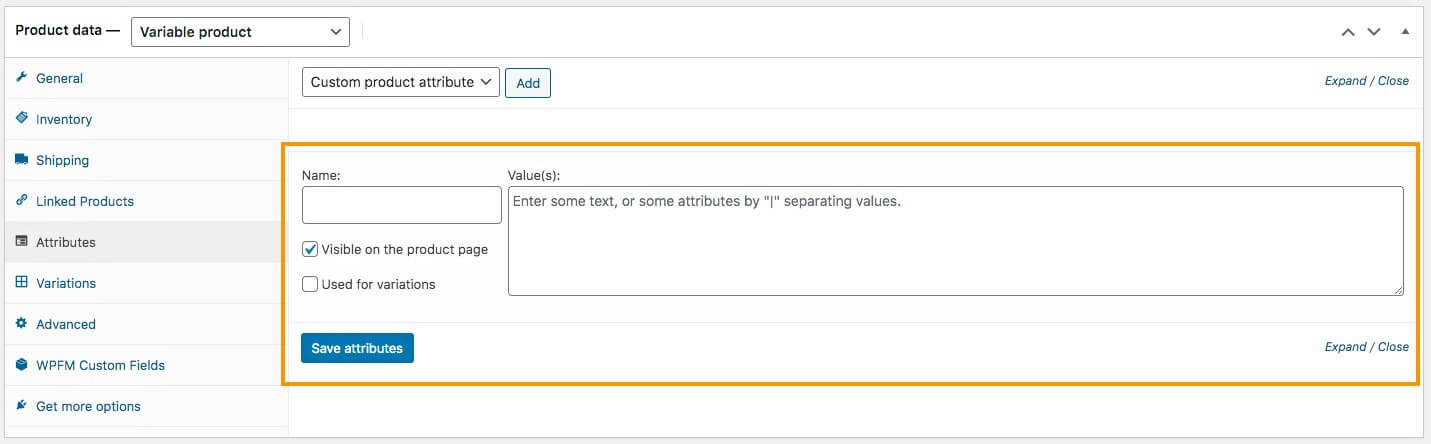
It will add a blank Attribute below.
ii. Here, name the attribute and assign values in the form ‘Variant1|Variant2’.
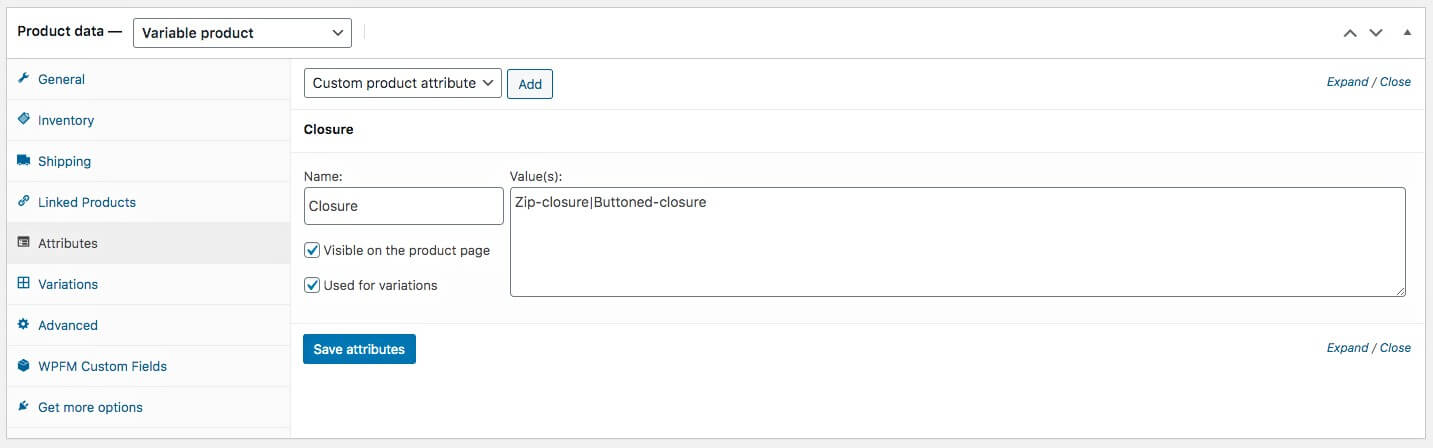
iii. And checkmark the Used for Variations option.
iv. Then click on Save Attributes.
Next, it’s time to generate product variants based on the attribute variants you added.
Step 5 – Generate Product Variations
Now that your attributes have been added to your product, it’s time to generate product variations.
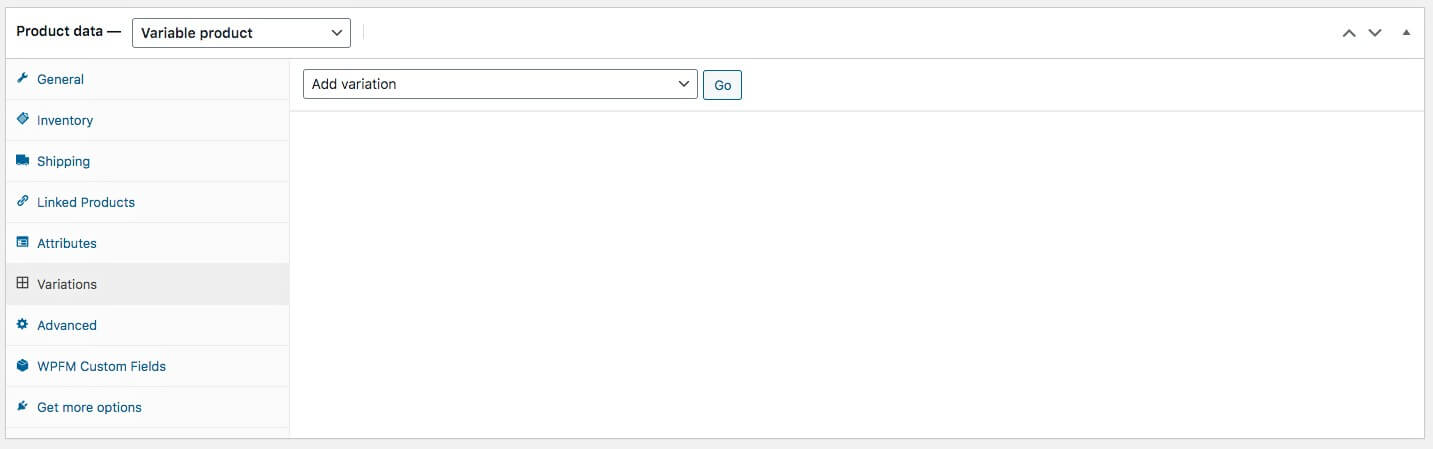
1. Go to the Variations menu.
2. Here, click on Add variation, and select, ‘Create variations from all attributes‘.
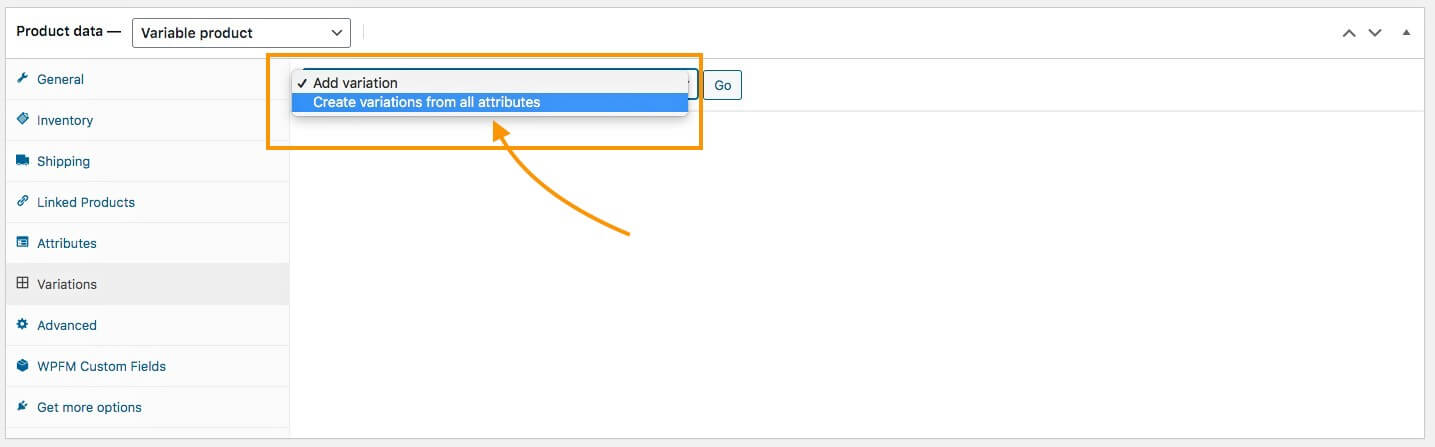
3. Then click on Go, and WooCommerce will ask for your confirmation. Once you confirm, variants of this product will be added.
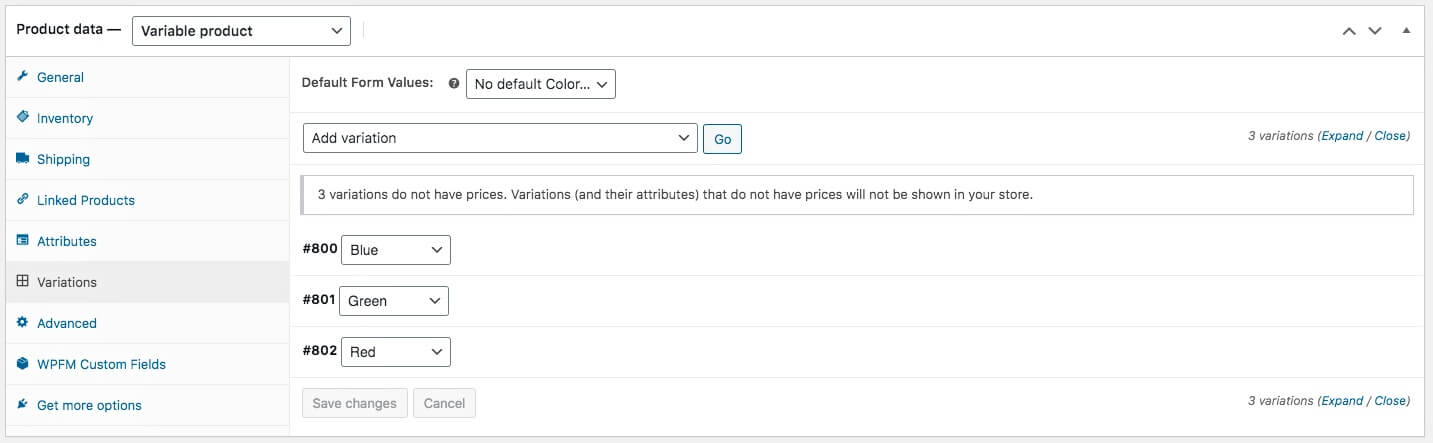
**If you marked multiple attributes for variants in Step 4, then WooCommerce will generate every possible combination between the variants here.
For example, if you used a Size attribute with 3 variant terms and a Color attribute with 3 variant terms, then a total of 9 Product variants will be generated.
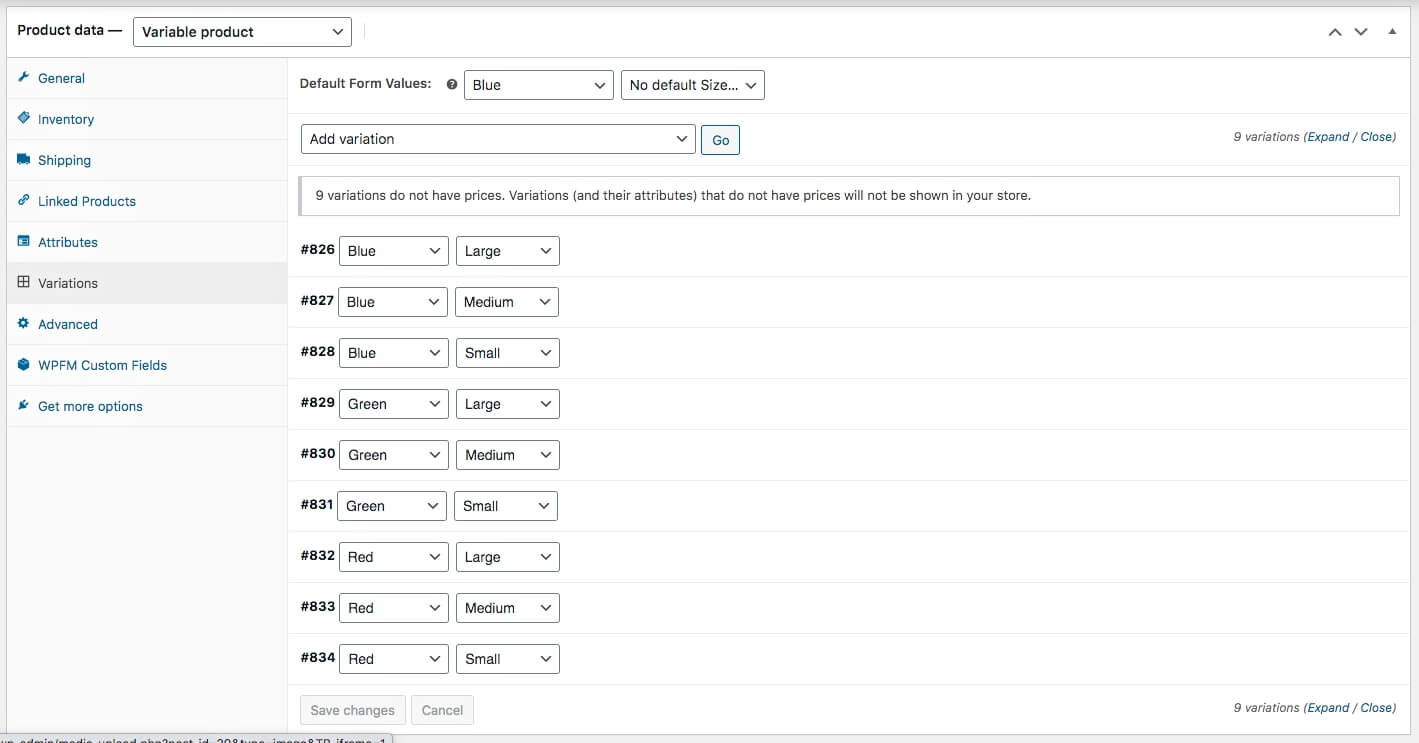
You can then remove the ones you don’t need.
Step 6 – Configure Each Variant Properly
Now, you have to configure each of the generated variants and input proper data.
1. Click on a variant, and it will expand.

2. First, assign a unique value as its SKU.
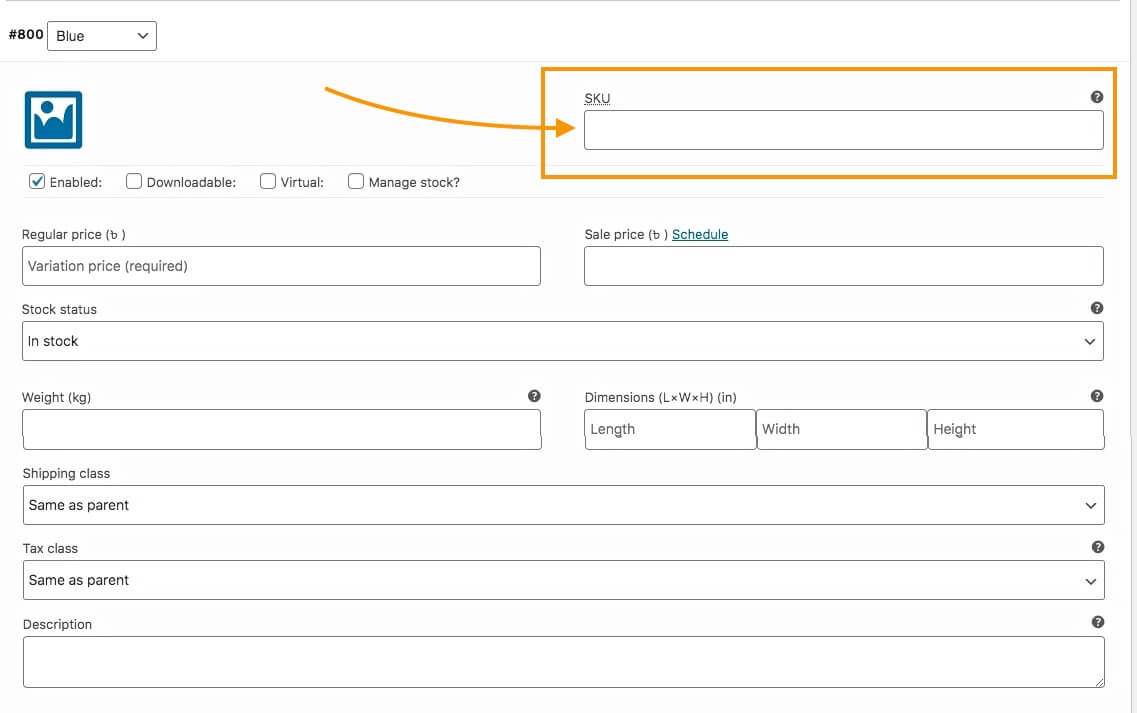
3. Next, input the Price and Stock Status for this product.
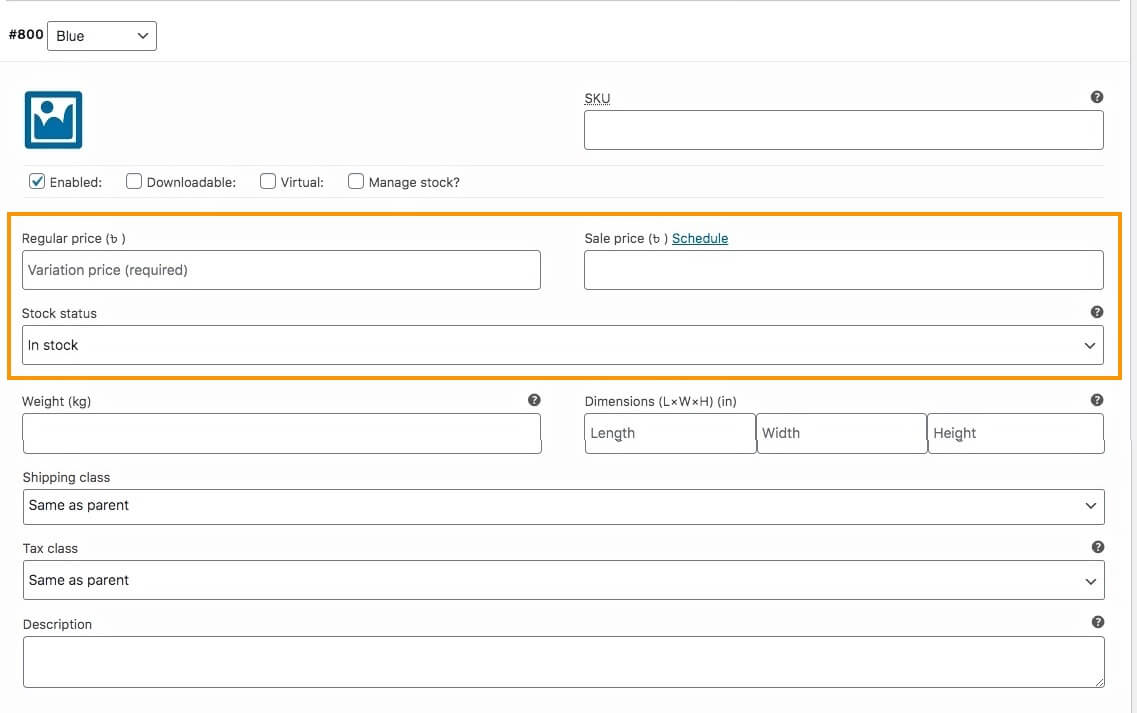
If you have a promotion running, you can include a Sale Price.
You can assign the Stock status as ‘In stock’, ‘Out of stock,’ or ‘On Backorder.’
4. Upload a suitable Image dedicated to this variant.
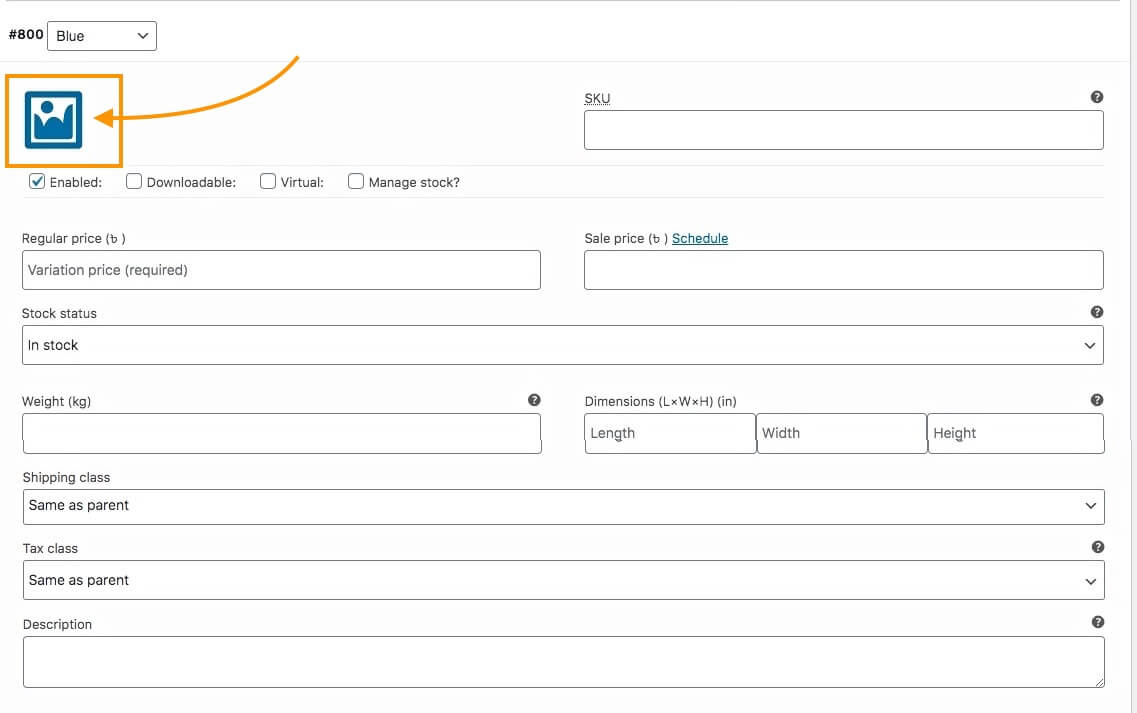
This will mean that this image will be viewed if someone selects this variant on the product page.
Make sure to include a good image here.
6. Add a Description and assign a Tax class if applicable.

Even if you have added a description earlier, it is still a great idea to add a short description within each variant.
When a person chooses this variant, he/she will get a description dedicated to this variant. So you will have a chance to highlight the uniqueness of this particular variation of the product.
And, if you want, you can enable a Tax class just for this variant; you can change the value from ‘Same as parent’ to one of the classes you created when setting up WooCommerce.
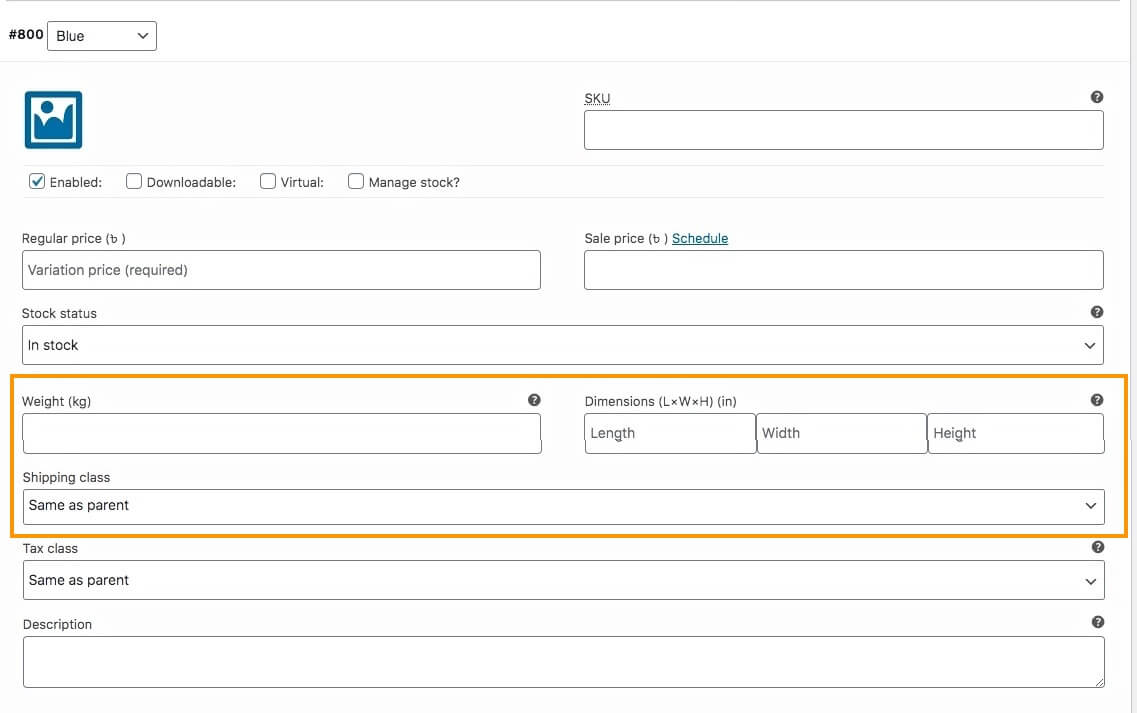
7. You can also assign Weight, Dimensions, and a Shipping class to this variant.
8. Just below the image, you will see a few options. Choose the ones that apply to your requirements.

You will get the following options:
- Enabled – If you uncheck this option, this variant will not appear as a choice on the product page.
- Downloadable – If your product is has a downloadable file required along with the product, then checkmark this option.
**When you mark a product as Downloadable, you will get additional options — attach the file, add a link to the file, assign a download limit, or assign an expiry date as download time.
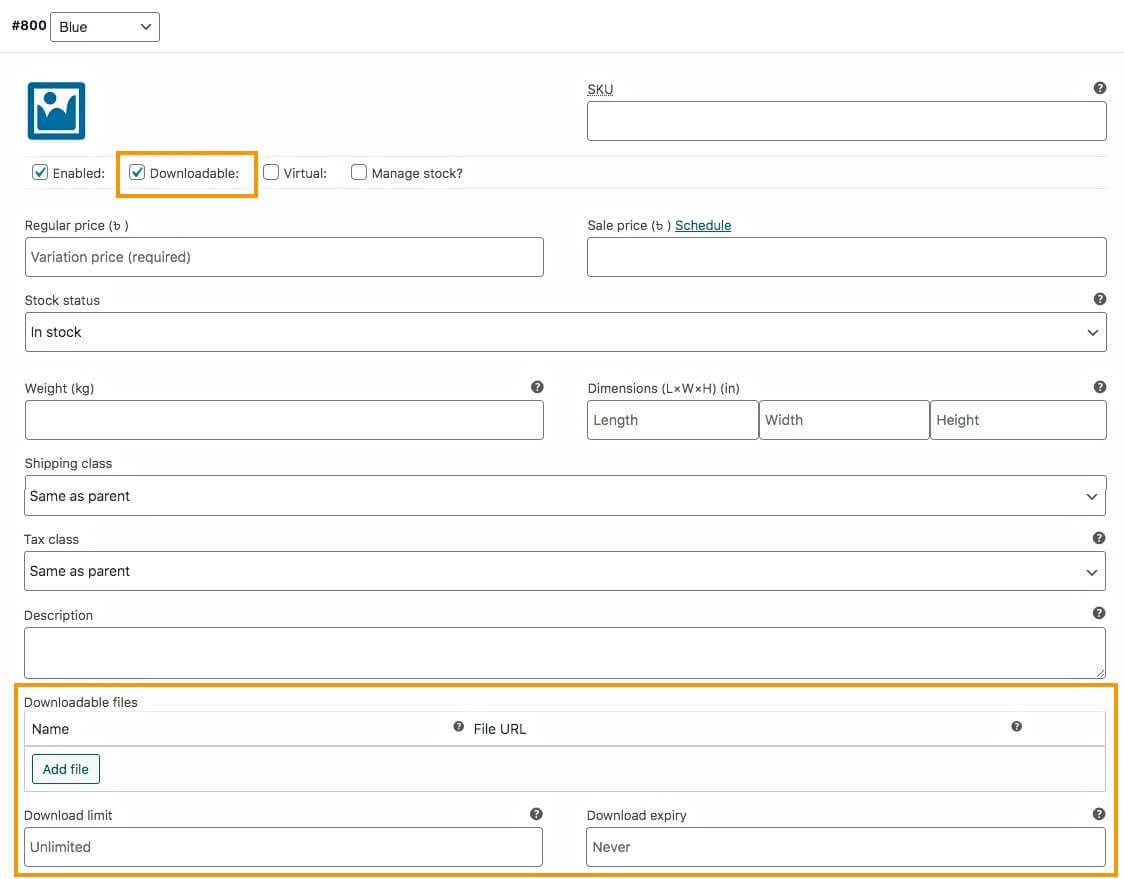
- Virtual – If you mark your product as Virtual, it means that this product cannot be shipped because it is an online product.
**When you mark a product as Virtual, you will see the fields for Weight, Dimensions, and Shipping Class will no longer be visible.
- Manage Stock – If you want to manage stock for every variant, then you can enable this option.
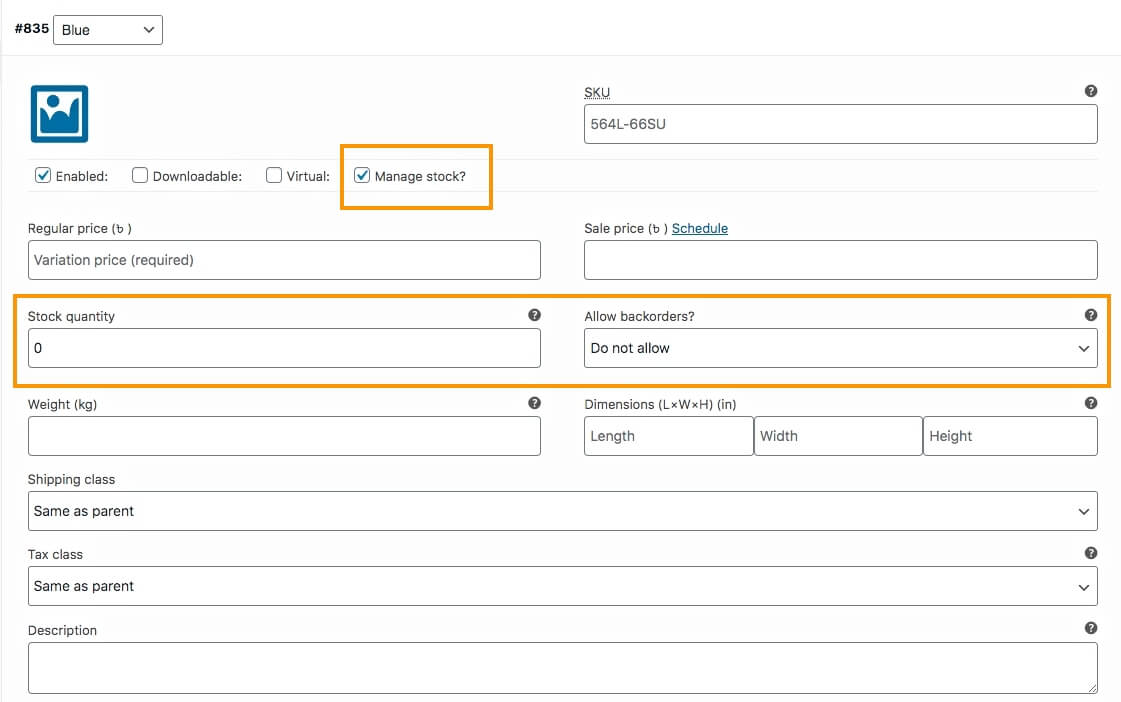
**If you enable Manage Stock, the stock status field will no longer be visible. Instead, you will get the option to input the quantity available and indicate if you allow backorder or not.
It is best to manage stock based on each variant because there are times when a certain variant may be sold out earlier. Managing it at a product level and not the variant level may result in you answering many inquiries about the variant that is not available.
9. Now click on Save Changes below. Then repeat all the tasks in Step 6 for every variant you generated for this product.
10. Scroll up and on the top right side, click on Publish, and the product will be published.
That’s it. You have successfully created a WooCommerce variable product.
How To Optimize Product Data To Increase Sales
Now, I will give you some tips on optimizing the product data, which will help you to increase your conversion rate.
Most people will give you advice such as ‘Use optimized images that highlight your product’, or ‘Optimize SEO in your product description’, and so on. Now, it’s true that all those are important.
But here, I will provide you with some unique ideas that might give you the edge in increasing your sales even further.
i. Choose A Feature Specific Product Name With ‘Smart Adjectives’
When choosing the product name, you have to keep in mind that this will be the first thing people will notice after the image.
The name should be decided in such a way so that people can instantly know what it is and its most special feature. Plus, you need to use adjectives to describe the product smartly.
For example, let’s say you are selling a t-shirt with a Super Heroes theme.
So its best feature is Super Heroes. You can set a name as ‘Super Heroes T-shirt.’
Next, you have to understand the purpose of this product.
The t-shirt is an element of style, so you would probably want to use the adjective, Stylish. However, you have to consider the fact that the word ‘Stylish’ will probably have less influence on most men. You might want to use an adjective that’s gender friendly.
In this case, you can consider the fact that ‘Super Heroes’ brings excitement or amazement among people.
So, the adjective ‘Exciting’ or ‘Amazing’ could be a great fit. And if it’s a new design, then pointing it out is also helpful.
So you may name it ‘The Amazing New Super Heroes T-shirt.’
If it’s a rare t-shirt, you can go with ‘The Rare Collection – Super
Heroes T-shirt’.
If the Super Heroes theme is popular, you might wish to go with ‘The Trending Super Heroes T-shirt’.
The three names suggested above are just examples. However, it is not mandatory to use adjectives on all product names in the same category.
For example – if it’s a single color t-shirt with not exclusive design, then you might be better off naming it ‘Comfortable Plain T-shirt.’ (The word, comfortable is almost always relative when it comes to clothing products.)
If the product has variants, you may mention the variant terms in the product name when someone selects a particular variant.
For example, let’s say you have 3 color variants for the Super Heroes T-shirt, being Blue, Green, and Red. Then, when a person chooses the Blue color for this t-shirt, you could display the name ‘The Trending Super Heroes T-shirt – Blue.’
**In WooCommerce, this cannot be done by default. So you have to use some custom coding to achieve it.
You may also choose to mention all the variation terms in the product name.
For example, you could name it ‘The Trending Super Heroes T-shirt In Blue, Green Or Red’.
Though this may not be as attractive as individual variant names, it is still effective in letting people know of the available choices.
Also, try to avoid using marketing schemes in the Product name.
For example, avoid using product names such as ‘Super Heroes T-shirt – Buy 3 Get 1 Free’.
For such matters, try mentioning such offers in the Product image, in the Description, or use a Short Description. But do not use it in the title as it will confuse people about what the product is.
ii. Make The Product Description Worth Their While
When a person reads a product description, it means that the person is interested in the product, but wants to confirm if it has the features he/she needs. And it is your task to grab this opportunity and make the prospect realize that this is the product he/she was looking for.
Most people do not value the product description as much. They simply mention the product features, and that’s it. But believe me, a product description can be a big push towards making a purchase decision.
Here’s a format I recommend that you follow. Create a description in the following order:
- What benefit will the person get with this product?
-Write a short paragraph explaining the main benefits or results people will get if they purchase this product.
For example, let’s say you are selling a pair of Earphones with good sound quality. So the paragraph could be something like this:
“Get the exclusive XYZ Earphones and get into a different world when listening to the music. This earphone is specially designed to enhance the music quality so that you feel every beat of the music, along with the soothing feeling flowing through your ears. Enjoy every bit of music on the go!!”
- The main features of the product in a benefit-specific way
-In this section, use bullet points to mention the features, while stating the benefits where possible.
For example, in the case of the XYZ Earphones, it could be something like this:
- Long wire for better portability – Cable Size: 2.5m
- Easy to fit in the ears with a suitable In-ear style.
- Enhanced base control for the maximum music experience
- 2:1 surround system for a realistic music experience
- Compatible with almost all devices – 3.5mm jack
As you can see, I have mentioned the features and stated one benefit for each, all in bullet points.
- Why a person should buy this product over other similar ones
Here, you can use a paragraph to mention the unique reason why people should buy this product. And you can mention here if it has any variants.
Also, if the product comes with something extra, you can mention it here. (However, if it’s a promotional item, you should rather mention that in the 1st paragraph.)
For example:
“What makes XYZ Earphones better than others is that it comes with an Ultra base control technology, which makes sure no noise spikes are experienced to hurt your ear. Rather, you will be able to enjoy smooth music at all times.
The XYZ Earphones come with a pouch to carry it at all times.
Plus, you can choose from three stylish colors, Blue, Green, or Red, to be your ears’ companion.”
- A call to action
-Finally, mention what people will get in the order and use a call to action.
For example:
“When you order, you will get:
- 1 x XYZ Earphones
- 1 x Earphone pouch
Buy XYZ Earphones now and start listening to awesome music.”
Now, this format is only my suggestion, but it works.
Often swapping the third paragraph with the 1st may be a good idea. In the case of some products that are too simple, it’s best if you do not use the third paragraph; rather, combine that with the 1st paragraph.
iii. Use A Short Description
I have mentioned earlier that the main Description either comes below the basic product details or with a tab to click and view.
So, you may rather use the Short Description feature in WooCommerce, which appears just below the title on the product page.
When you edit a product, go to the screen options and enable the Product Short Description option, and it will appear just below the Product Data section.
Here, explain within 3 lines, the product’s main features that people are looking for.
This will help people to realize first hand that it is the right product for them.
iv. Update the slug according to the main product name
When you use adjectives and variant terms in the Product name, publishing it also adds them to the slug or product link.
However, it’s best to use a simple URL slug, rather than a long one.
For example, in the case of the Super Heroes T-shirt, when you name it ‘The Trending Super Heroes T-shirt’, you will see that the slug will be something like this:
https://yourwebsite/product/the-trending-super-heroes-t-shirt/
You can see the product slug is ‘the-trending-super-heroes-t-shirt’
To make it simple, change it to a ‘super-heroes-t-shirt’.
You can assign a slug when creating a product. Simply go to the screen options and enable the Slug option. A Slug section will appear just below the Product Data section. There, you can input the slug you want.
Or, after publishing the product, you can go to Dashboard > Products > All Products. There look for the product and quickly edit it. Here, you will get the option to input your desired slug.
v. Try managing stock based on each variant
In WooCommerce, you have the option to manage stock, i.e., the quantity of your products, and backorder service.
When editing a variable product, you can either do it in the Inventory tab in the product data section or within each variant.
It’s best to use the manage stock option within each variant rather than the one in Inventory. This will allow you to control how many of each variant is available. In case one variant is sold out, you can mention that in your store.
Here, if you control quantities from the Inventory tab, buyers will not know if a particular variant is available.
Let us look at an example.
Suppose you are selling a pair of running shoes that vary based on the sizes, 36, 37, 38, and 39.
You have a total of 4 for each variant, which is a total of 16 shoes.
Let’s say the size 37 is sold out.
Heres’ what will happen if you manage stock in the Inventory tab:
On the product page, when a person will choose the size 37, it will still indicate that it is available.
Since you are using the Inventory tab, it counts the total number of products. So, after 4 shoes in size 37 is sold, the inventory will count that 12 more shoes are remaining. Hence, it will mark it as ‘In Stock,’ no matter what variant a prospect may choose.
Here’s how using Stock Management within a variant will help:
Since the size 37 is sold out, choosing it on the product page will indicate that it is out of stock. Choosing any other variant will display the available individual quantity of each of the variants.
Apart from these 5 tips above, do remember that it is still very important to apply SEO optimization on the Product description. And it’s best to use optimized images that highlight the best features of the product.
I’ll repeat another important tip. Please refrain from using fake images to sell your products.First, many people use images of a product and then deliver replicas that do not look identical. They do not meet the feature requirements that were claimed in the description. For example, If you are saying it’s an original Jersey, then it should be original. You can’t just send a replica.Second, do not edit your product images to such extent that it looks way better than it actually is, or looks different from the actual product. For example, do not turn a purple dress into a pink dress. Stating that ‘Color will slightly vary from real life’ doesn’t justify such high difference.
How To Customize The Product Page To Increase Engagements
Sure, optimizing product data is very important. But it is also equally important to optimize the product page.
And you can get an extra edge with variable products, and there are more scopes of customization.
Here are a few tips on customizing the product page that is currently working really well for many.
i. Customize your product page to be simple and less congested
Look for a WooCommerce product page template that is not too congested, and makes it easy for a prospect to take a decision on the product.
Many people use templates where too many details are presented right in the first view, which may confuse buyers.
Here’s an example of a clean Product Page –
In this case, you can either directly download custom product page templates such as TemplateMonster’s custom templates, or you may create one using a page builder such as Elementor.
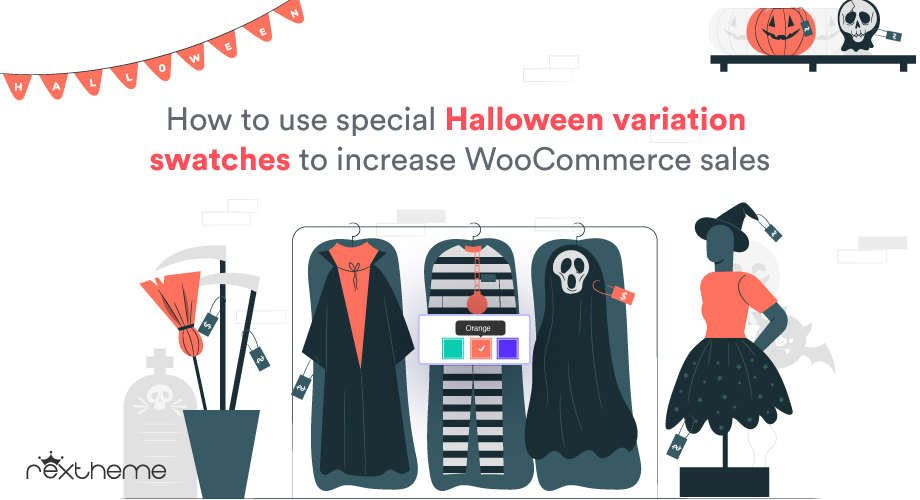
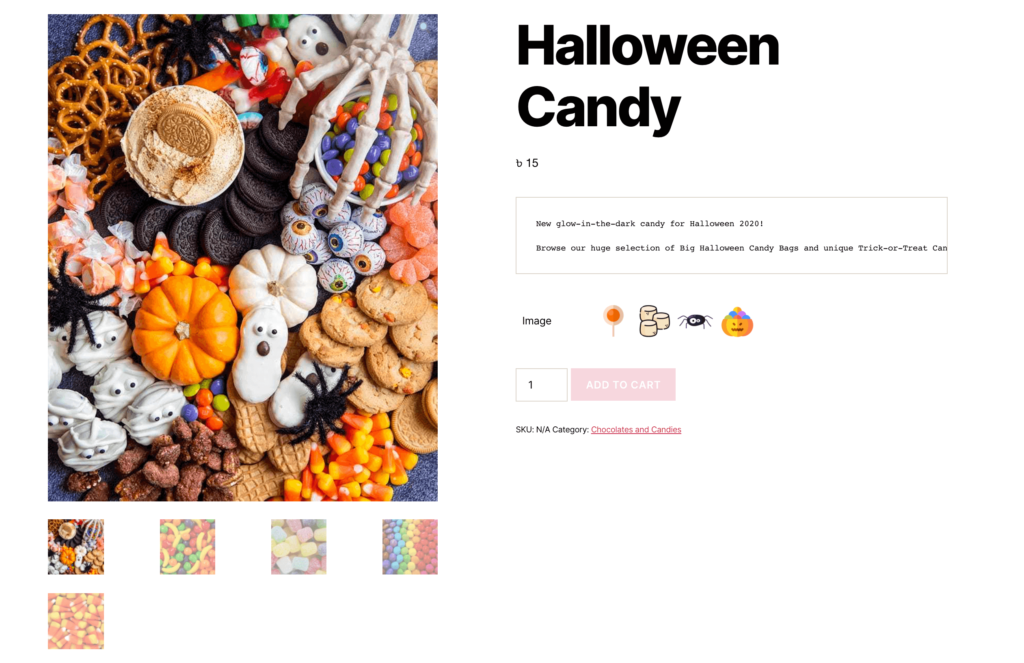
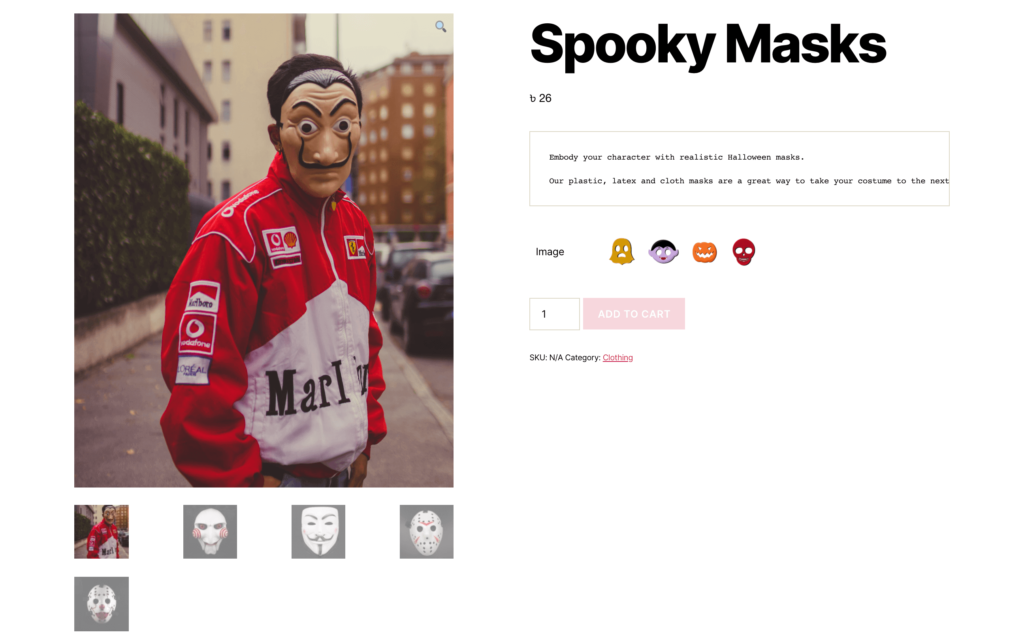
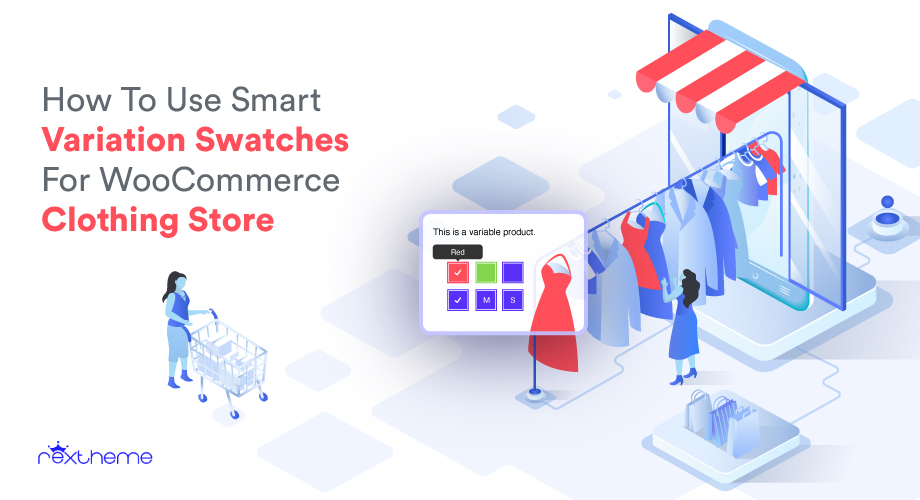
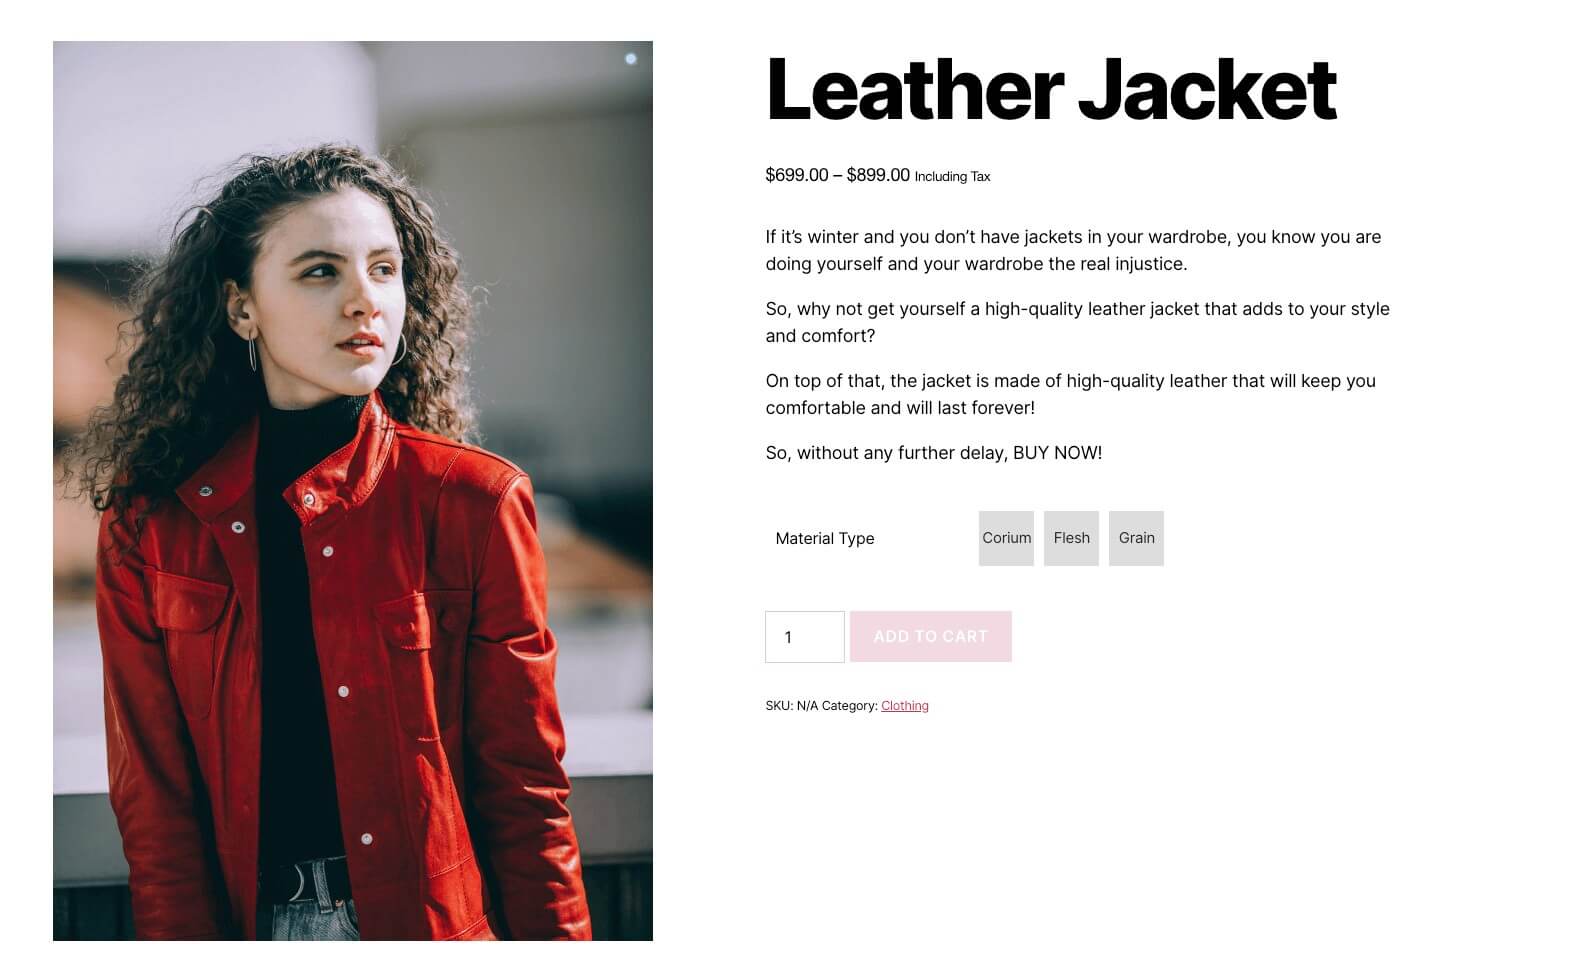
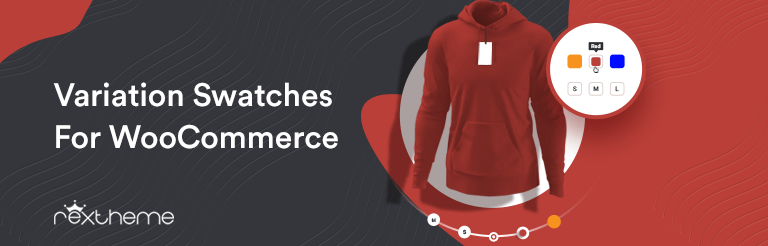
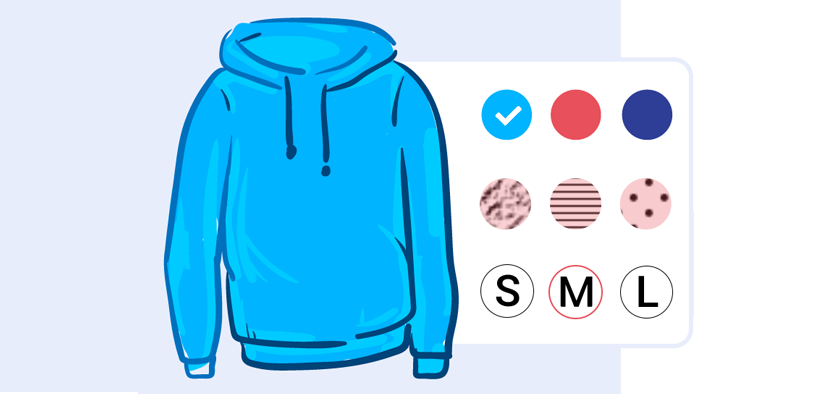
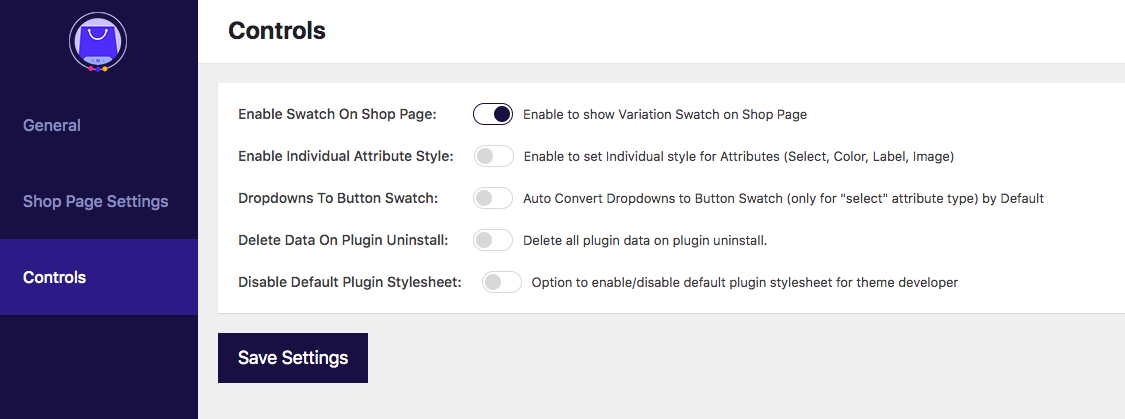
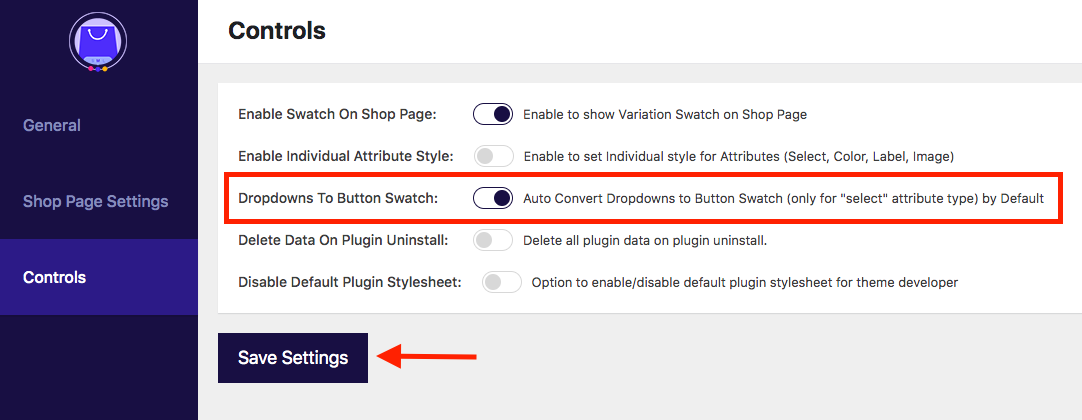
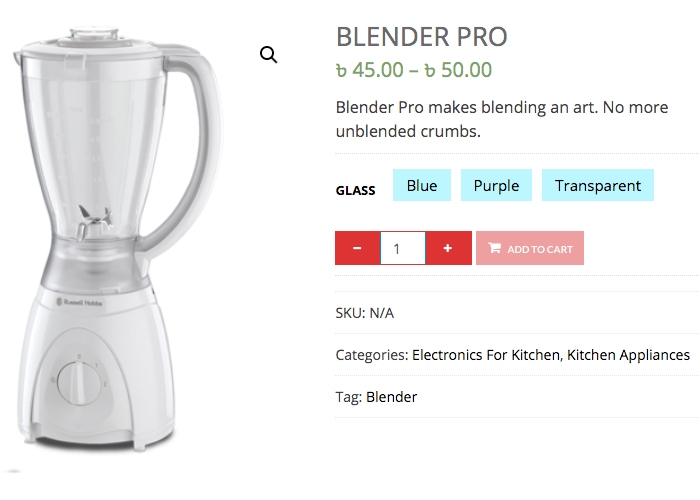
ii. Use variation swatches to offer product variants
This is one of the new trends in the WooCommerce industry.
You can display product variants in the form of button swatches. For example, you can use colored swatches to present color variants, or image swatches to let people choose variants.
It’s a great way to grab the attention of buyers and create curiosity to choose a variant.
Here’s an example of the use of color swatches to display product variants.

You may use the plugin Variation Swatches for WooCommerce to achieve this easily by following a simple guide.
iii. Use an image zoom feature to highlight products
You may let people hover over the product image to get a zoomed view. This will let people check out the product properly.
It is handy when you sell products with intricate details, such as antique products.
This may also be useful when you have product variants based on the design pattern.
You may use a plugin Product Image Zoom for WooCommerce to achieve this.
iv. Use target-based discounts on the product page
You may set target-based discount offers to people and mention them on the product page to influence people to buy more.
For example, you can offer a 10% discount to buy 3 of the same products.
Or you may offer a discount if someone purchases a product worth more than $100.
You may even offer a custom discount such as if someone buys all three variants of a product, he/she will get a 10% discount.
Here’s an example of how you can present your discount offers:

You may handle this through plugins such as ELEX WooCommerce Dynamic Pricing and Discounts.
v. Add a quick purchase option on a product page
One way to ensure the conversion is to make a buyer purchase as soon as he/she is interested in a product.
So, what you can do is you can make it so that a person can complete the purchase instantly. You may achieve this using the plugin Buy Now For WooCommerce.
It’s a simple plugin where a buyer can click on the Buy Now button, and the checkout page will appear as a pop-up so that the buyer can make the payment instantly and get done with the purchase without having to leave the page.
There are so many more customizations you can do to improve product pages. Here’s a list of plugins you can check out to customize WooCommerce variable product pages.
Conclusion
Running a WooCommerce store can be hectic if you do not organize your shop properly. Hence, it is best to learn the proper steps and actions to take when adding products, especially variable products.
Hopefully, if you follow the steps in this guide, you will be able to run a successful WooCommerce store with no difficulties whatsoever. When it comes to selling variable products, the tips will come in handy for you.
Though there are so many more to learn about WooCommerce, it’s best to learn one step at a time. Learning to add variable products in an optimized way is definitely an important step that you covered in this guide.
Also, here is a list of guides you can use to learn WooCommerce in detail. Take your time and learn to set up a proper WooCommerce store so that you can achieve a high conversion rate and increased ROI in the near future.
** FAQs **
How do I manage stock for each product variant?
To manage stock for each variant, go to the “Variations” menu under the “Product Data” section. Click on a variant to expand it, and you will see the option to input the stock quantity. This allows you to specify how many units of each variant you have available. It ensures accurate stock management for each variant separately.
Can I add unique descriptions for each product variant?
Yes, you can add unique descriptions for each variant. When you expand a variant in the “Variations” menu, you’ll find a field to add a description specific to that variant. This helps highlight the unique features and benefits of each variant. It provides more detailed information to your customers.
How do I set different prices for each variant?
To set different prices for each variant, go to the “Variations” menu. Expand a variant, and you will see fields to input the regular price and sale price (if applicable). This allows you to price each variation according to its features or market demand.
How can I add images for each product variant?
You can add specific images for each variant by expanding a variant in the “Variations” menu and uploading an image in the designated field. This ensures that when a customer selects a variant, the corresponding image is displayed. It provides a visual representation of the chosen option.
What should I do if I want to add a unique attribute just for one product?
If you need to add a unique attribute for a single product, you can create a custom attribute directly in the “Attributes” menu of the product. Select “Custom Product Attribute” and click “Add.” Then, name the attribute and input the values separated by a vertical bar (|). Check the “Used for variations” option and save it. This allows you to create product-specific attributes without affecting other products in your store.