Categories
Guide Product Feed Manager For WooCommerce WooCommerce

How To Set Up A Marketplace Strategy- 10 Actionable Tips for Growth [2025]

Ever wonder why some marketplaces explode with buyers and sellers while others feel like a ghost town?

Spoiler: it’s not luck—it’s strategy.

The truth is, that most marketplace businesses don’t fail because of a bad idea. They fail because they jump in without a plan—no clear way to attract users, generate revenue, or scale efficiently.

And before they know it, they’re stuck with an expensive, time-consuming project that just isn’t working.

That’s why having a solid marketplace strategy is non-negotiable. You need a game plan for getting sellers on board, keeping buyers engaged, and making sure your platform actually makes money.

In this guide, I’ll break down 10 actionable steps to help you build a marketplace that doesn’t just survive—but thrives.

Let’s get into it.

What is the Marketplace Strategy?

A marketplace strategy is basically your game plan for building, running, and growing an online marketplace.

It’s not just about setting up a platform and waiting for buyers and sellers to show up. It’s about knowing how to attract the right users, keep them engaged, and ensure transactions happen smoothly.

Think about it this way: if you’re launching a marketplace for handmade crafts, you need to decide how to bring in both artisans and buyers. You’ll need a system for listing products, managing payments, and handling customer service. Without a clear strategy, you might get a few initial users, but scaling will be a challenge.

A well-planned marketplace strategy covers key areas like:

  • business model selection,
  • pricing,
  • customer acquisition,
  • and seller management.
Marketplace Strategy

It ensures that your platform doesn’t just exist—it grows, stays competitive, and keeps users coming back.

Why Does Having a Marketplace Strategy Matter?

Launching a marketplace without a strategy is like throwing a party without invitations—you might get a few random visitors, but it won’t turn into a real success. Without a structured plan, you’ll struggle to attract buyers and sellers, manage operations, and scale profitably.

Here’s why a solid marketplace strategy is non-negotiable:

  • Competition is fierce – New marketplaces pop up every day, and standing out isn’t as easy as just launching a website. If you don’t have a clear approach to growth, you’ll get lost in the crowd.
  • Customers are more demanding than ever – Buyers expect fast delivery, personalized recommendations, and a seamless checkout process. If your marketplace can’t keep up, they’ll leave for one that can.
  • AI and automation are changing the rules – Businesses that use AI for pricing, product recommendations, and customer support are moving ahead fast. If you’re still relying on manual processes, you’re already behind.
  • Marketing isn’t just about ads anymore – Data-driven marketing helps you target the right audience, but without a strategy, you’ll waste money on ads that don’t convert.
  • Scaling too fast can backfire – If your operations can’t handle rapid growth, you’ll face logistical nightmares, poor user experience, and a flood of negative reviews.

Now, let’s see what are key benefits of having a proper marketplace strategy in place for your business.

Key Benefits of a Marketplace Strategy

With a solid strategy in place, you’ll see immediate and long-term benefits that help you grow and succeed in today’s competitive world.

Here’s how having a clear plan pays off:

  • Stronger customer acquisition and retention – A well-thought-out strategy helps you understand your target customers better. You’ll not only attract more of them, but you’ll also keep them coming back with offers and services they actually want.
  • Efficient resource allocation and business growth – A clear plan ensures you use your resources effectively. You’ll spend less time and money on tactics that don’t work and more on what actually drives growth.
  • Better monetization and revenue generation – With a clear strategy, you’ll spot more revenue opportunities, whether it’s through subscription models, transaction fees, or value-added services.
  • Enhanced customer trust and brand positioning – Customers trust businesses that have a clear purpose and vision. A solid strategy helps you position your marketplace as a reliable, well-organized brand, building trust from the start.
  • Competitive edge through data-driven decision-making – A good strategy relies on data, not guesswork. By using insights from customer behavior and trends, you can make smarter decisions that give you a leg up on the competition.

Now that we’ve covered the foundation of why a marketplace strategy is crucial, let’s dive into the actionable steps you can take to build and refine your own.

10 Actionable Steps to Build a Marketplace Strategy

These steps will guide you through the essentials of creating a marketplace that’s ready to scale and succeed.

1. Define Your Marketplace Vision

To start building your marketplace, you first need to define what kind of marketplace you’re creating. Are you focusing on

  • B2B (business-to-business),
  • B2C (business-to-consumer),
  • or P2P (peer-to-peer)?

This will shape how you approach everything from user acquisition to revenue generation.

2. Identify Your Target Audience & Their Needs

This step is about understanding who you’re serving. A marketplace succeeds when it solves real problems for its users. That means you need to know their pain points, demands, and behaviors before launching.

Start by researching your potential buyers and sellers. Look at competitor marketplaces, industry reports, and customer reviews to see what people are struggling with. Social media, forums, and surveys can also give you direct insights into what your audience needs.

Targeting

Focusing on a niche can make it easier to stand out. Instead of trying to serve everyone, target a specific group with clear needs. A well-defined niche helps build a loyal customer base and makes marketing more effective.

General marketplaces compete with giants like Amazon, but niche marketplaces—like ones for handmade crafts or eco-friendly products—can attract dedicated users looking for something specific.

3. Choose the Right Marketplace Revenue Model

Now that you know your marketplace type and who you’re serving, it’s time to figure out how you’ll generate revenue. Your business model needs to make sense for both you and your users—otherwise, you’ll struggle to grow.

revenue model

Let’s break down the most common revenue models, their real-world applications, and the pros and cons of each.

i. Commission Model

With the commission model, your marketplace takes a percentage of every sale made on the platform. This is one of the most popular approaches because it aligns your success with that of your sellers. If they make money, so do you.

Think about platforms like Airbnb or Upwork. When a guest books a stay or a client hires a freelancer, the marketplace takes a small cut from each transaction. This way, sellers don’t pay anything upfront—they only pay when they make a sale.

Pros:

  • No upfront cost for sellers, making it easier to attract them.
  • Scales well since revenue grows with transaction volume.
  • Encourages quality service—sellers only pay when they succeed.

Cons:

  • If transactions are low, so is your revenue.
  • Some sellers may try to avoid paying by taking transactions off-platform.
  • Setting the right commission percentage can be tricky—too high, and sellers leave; too low, and you struggle to profit.

ii. Subscription Model

A subscription model charges users a recurring fee—monthly, quarterly, or yearly—to access your marketplace or premium features. This creates a steady income stream regardless of transaction volume.

LinkedIn Premium and Amazon Prime follow this approach. LinkedIn charges job seekers and recruiters for enhanced features, while Amazon Prime members pay for benefits like free shipping and exclusive discounts.

Pros:

  • Predictable, consistent revenue stream.
  • Encourages user retention since people want to get value from their membership.
  • Works well for niche or high-value marketplaces.

Cons:

  • Harder to convince new users to sign up, especially if they don’t see immediate value.
  • You need strong marketing and engagement strategies to keep subscribers from canceling.
  • Users may expect premium features, which require ongoing investment.

iii. Listing Fee Model

With this model, sellers pay a fixed fee to list their products or services on your marketplace, regardless of whether they make a sale.

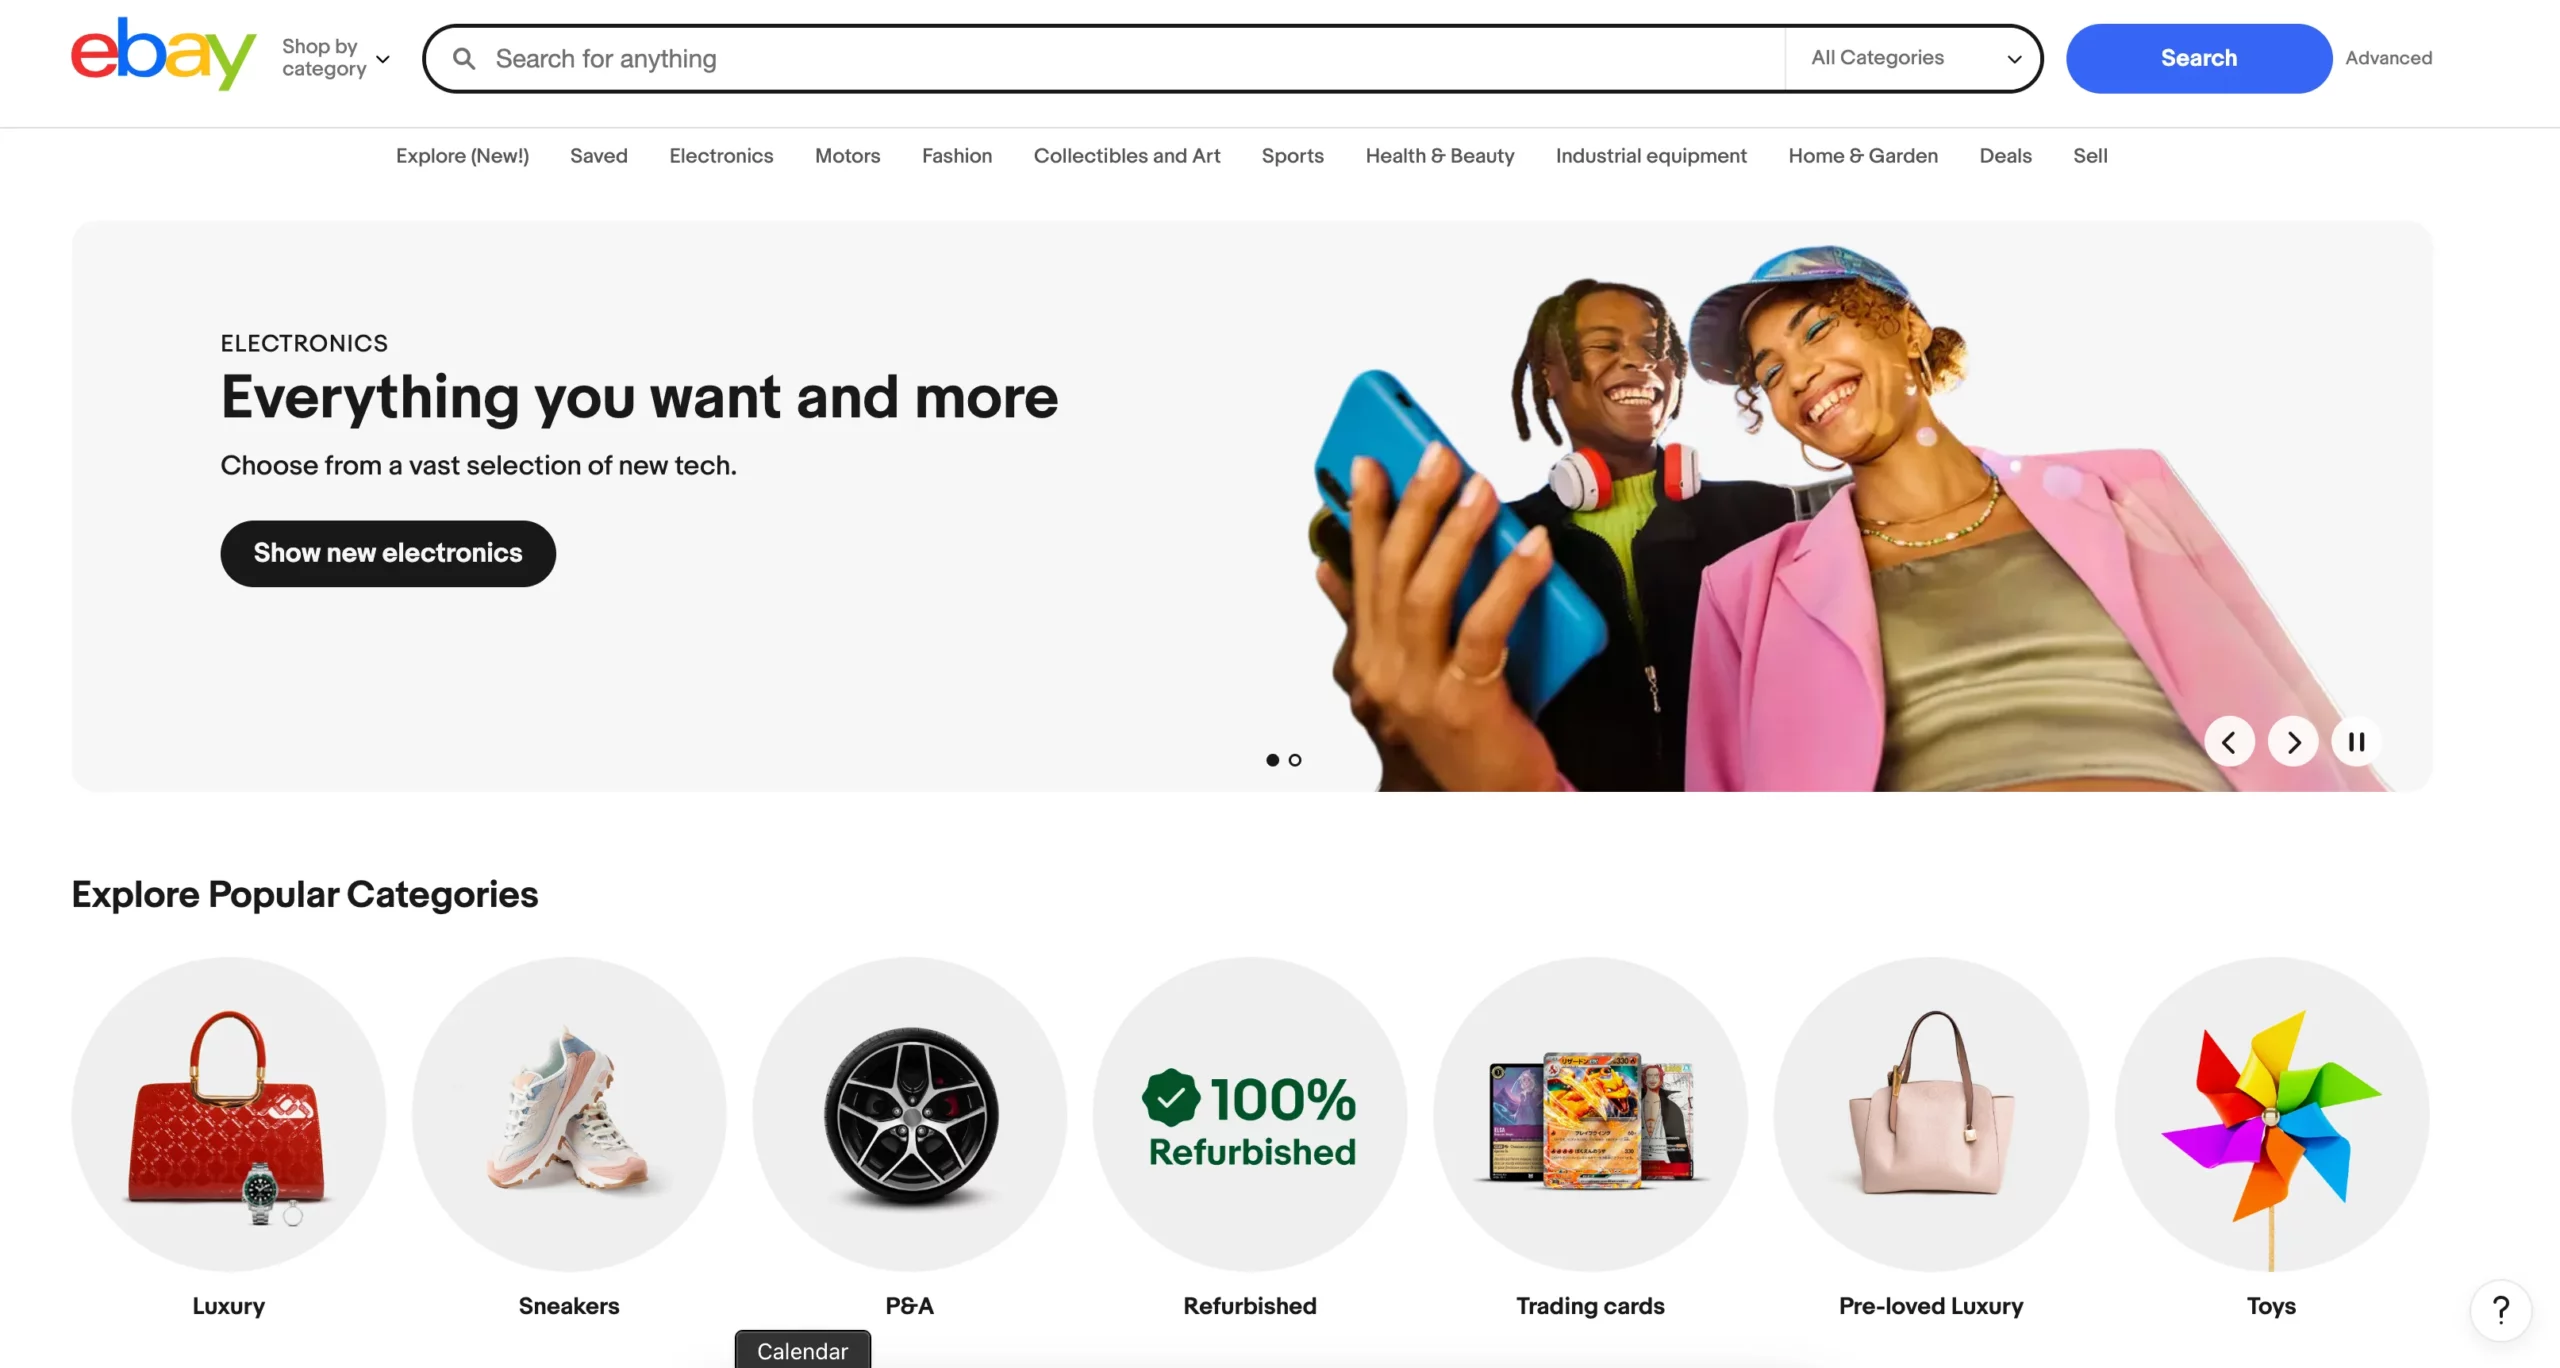
eBay and Craigslist have used listing fees in certain categories. If you want to post a job opening on a job board or sell a high-value product, you might need to pay a one-time fee to get listed.

Pros:

  • Generates revenue upfront, even before transactions happen.
  • Works well for marketplaces with high seller demand (e.g., real estate, recruitment platforms).
  • Keeps listings relevant—sellers won’t spam the platform with low-quality offers if they have to pay.

Cons:

  • Can discourage sellers, especially new ones who aren’t sure if they’ll make a sale.
  • Revenue isn’t tied to sales, so your marketplace might profit while sellers struggle.
  • Less effective for marketplaces that rely on high transaction volume.

iv. Hybrid Model

A hybrid model mixes different revenue strategies. You might charge a small listing fee plus a commission on sales or offer a free version with premium subscription upgrades.

Etsy combines a listing fee with a commission per sale, making it affordable for sellers while ensuring the marketplace earns revenue from successful transactions.

Pros:

  • Creates multiple revenue streams, making your marketplace more financially stable.
  • Gives sellers flexibility—some might prefer paying upfront, while others are okay with commissions.
  • Can be customized to fit your marketplace’s needs.

Cons:

  • More complex to set up and manage.
  • If not balanced properly, it could frustrate sellers.
  • Requires continuous testing to see which combination works best.

Which Model Should You Choose? The best revenue model depends on your marketplace type, audience, and goals. If your platform relies on high transaction volume, a commission model might work best. If you offer exclusive value, a subscription model could be a great fit. You can also mix and match based on what makes sense for your users. The key is to test and adapt as you grow.

4. Make Your Marketplace Easy to Manage and Scale

Once you’ve decided on a revenue model, your marketplace needs to run smoothly—even as it grows. If things get messy, buyers and sellers will leave.

Start with organized product listings. Make sure everything is easy to find with

  • clear categories,
  • filters,
  • and search options.

If buyers struggle to find what they need, they won’t stick around.

Next, order fulfillment and shipping need to be reliable. If sellers handle shipping, set clear guidelines to avoid delays. If your marketplace manages fulfillment, ensure quick deliveries and easy returns. Bad shipping experiences hurt trust and reduce repeat purchases.

Payments should be secure and hassle-free. Use trusted payment gateways and support multiple payment options so transactions go smoothly. If payments fail or seem unsafe, both buyers and sellers may stop using your platform.

To keep things running efficiently, automate as much as possible. AI-powered tools can help with customer support, pricing adjustments, and inventory tracking.

This reduces manual work and ensures your marketplace can handle more users without extra effort.

5. Keep Buyers and Sellers Coming Back

Now that you’ve established a solid foundation, keeping your marketplace vibrant is key.

A marketplace only works if both buyers and sellers stay active.

If there aren’t enough sellers, buyers won’t find what they need. If there aren’t enough buyers, sellers won’t stick around.

Keeping this balance is key.

Keep Buyers and Sellers Coming Back

To attract high-quality sellers, show them why your platform is worth their time. Offer lower fees, strong marketing support, or access to a specific audience. Highlight seller success stories to build trust and encourage more vendors to join.

For buyers, a great shopping experience keeps them coming back. Offer loyalty programs, personalized recommendations, and exclusive deals to encourage repeat purchases. If buyers feel valued, they’re more likely to stay.

Monitor key metrics like product availability, order volume, and buyer activity. If one side of the marketplace is struggling, adjust your strategy—whether that’s recruiting more sellers or running promotions to attract buyers.

6. Get More Customers from Multiple Channels

Once your marketplace is running smoothly, you need a steady stream of new buyers and sellers. Relying on a single source won’t be enough—different people discover list of online marketplaces in different ways. A multi-channel approach brings in more users and keeps your business growing.

i. SEO & Content Marketing

Ranking high on search engines helps people find your marketplace when they need it. Optimize your category pages, product listings, and blog content with relevant keywords.

seo & content marketing

High-quality guides, case studies, and tutorials can also attract organic traffic. The easier it is for users to find your platform on Google, the more marketplace Sales and sign-ups you’ll get.

ii. Social Media & Influencer Marketing

Social platforms help spread the word about your marketplace. Regular posts, short videos, and user-generated content keep your audience engaged.

social & influencer marketing

Influencers and industry experts can introduce your marketplace to their followers.

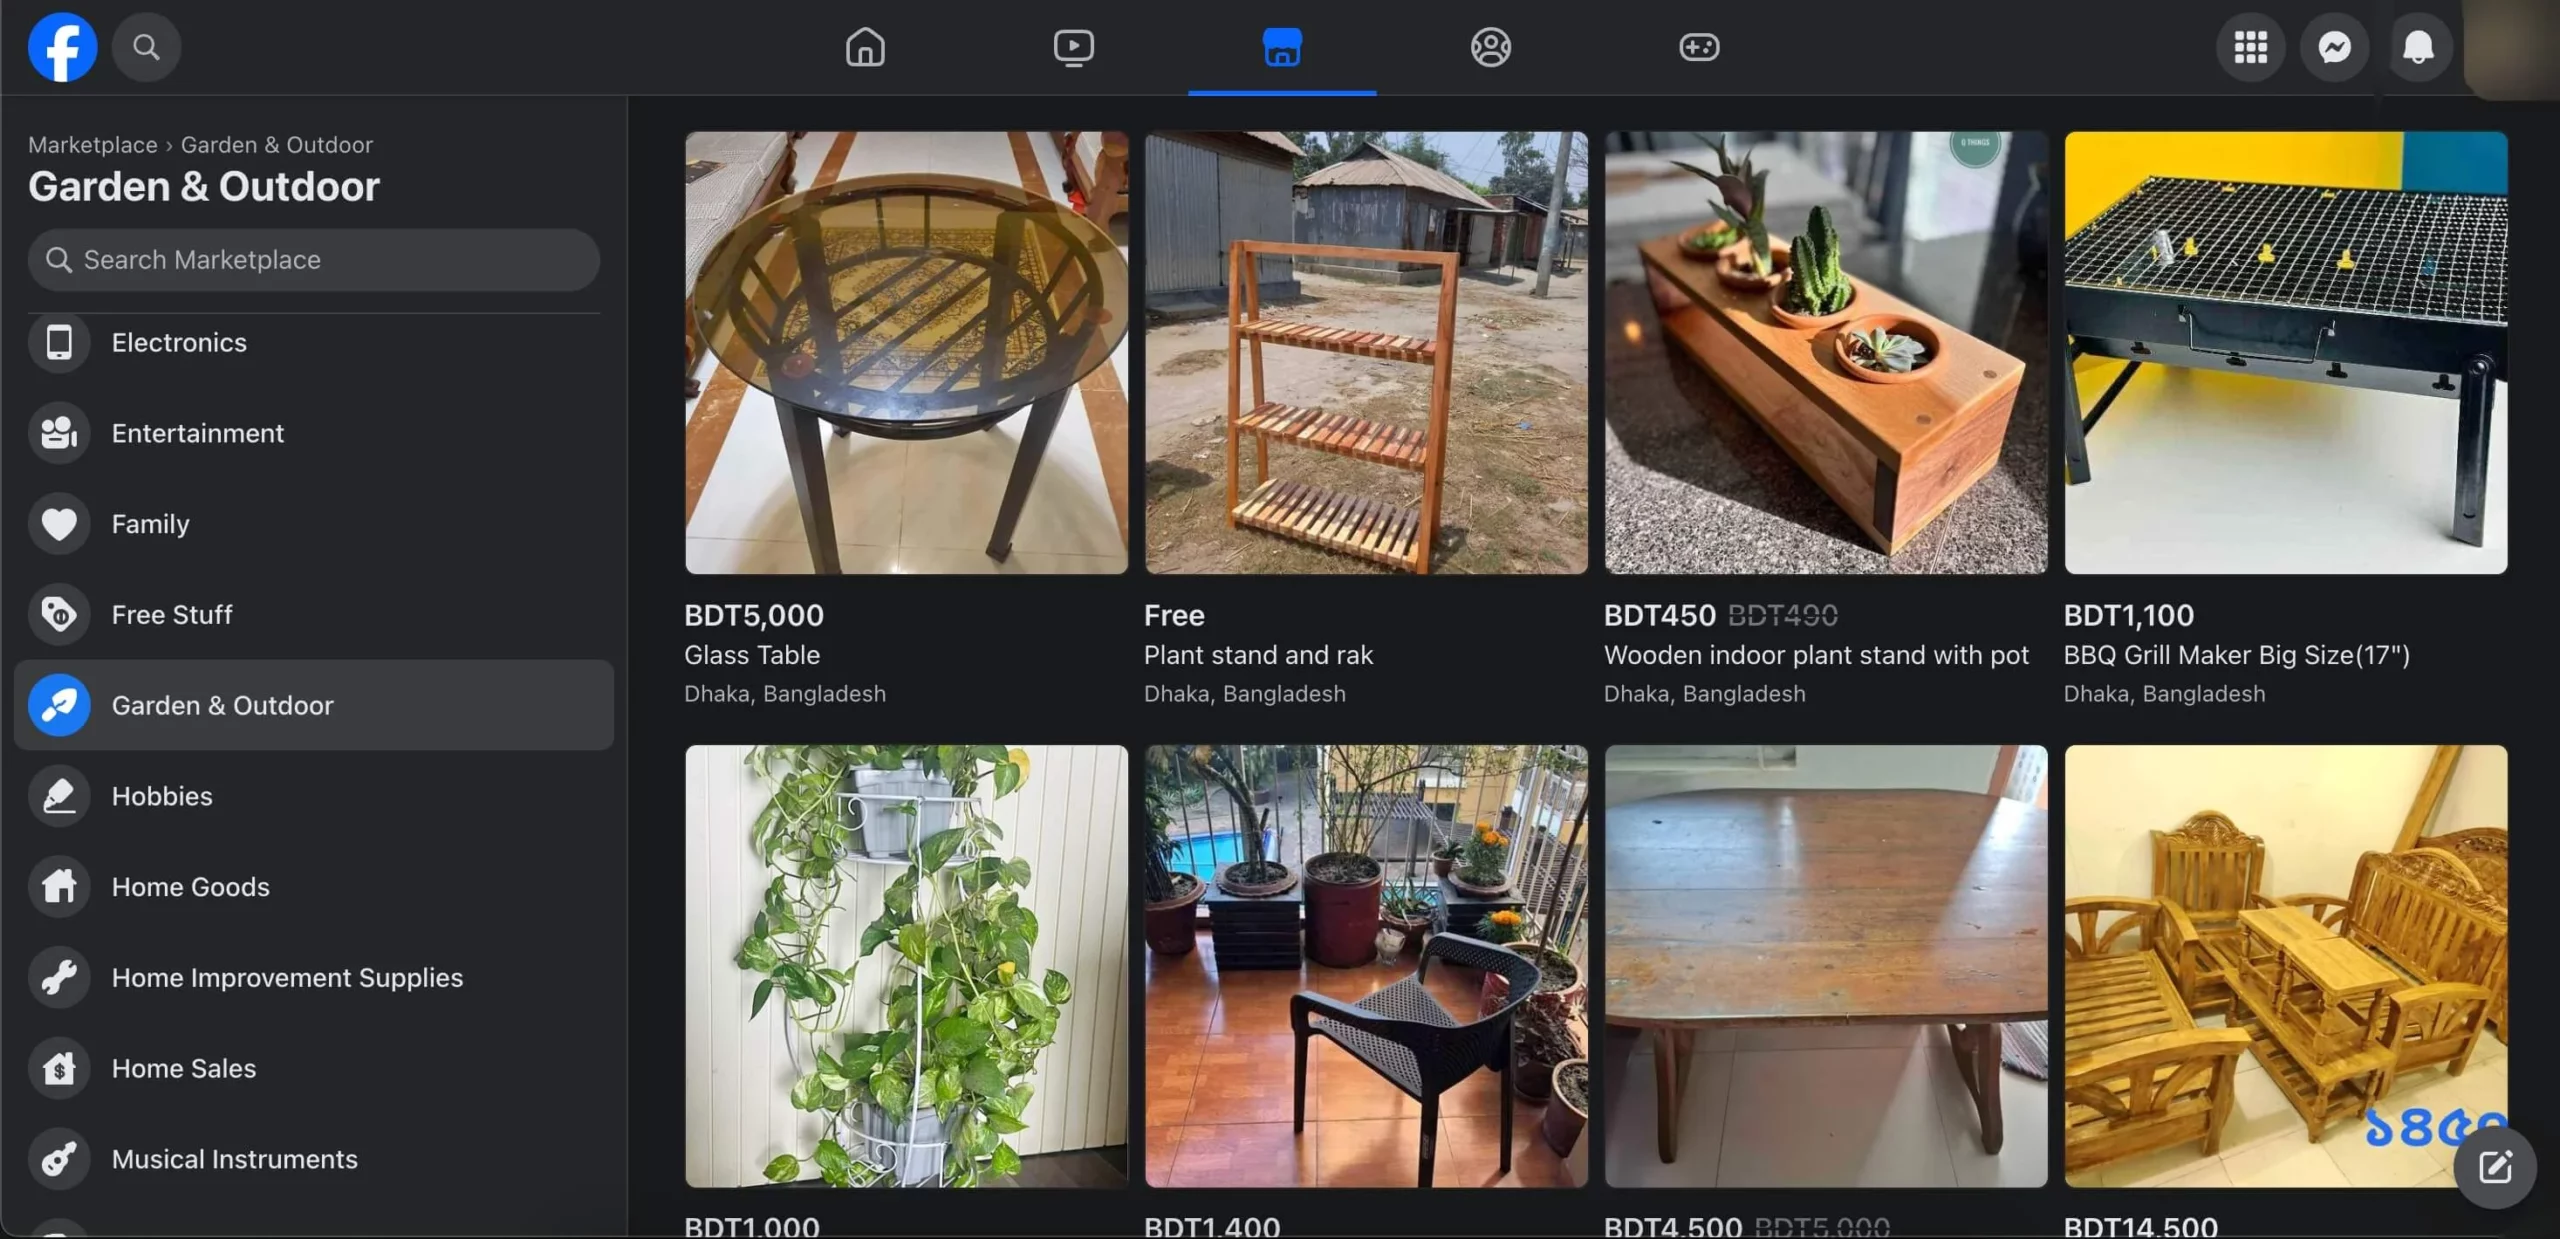
Focus on platforms where your target audience spends time, whether that’s Instagram, TikTok, LinkedIn, or Facebook.

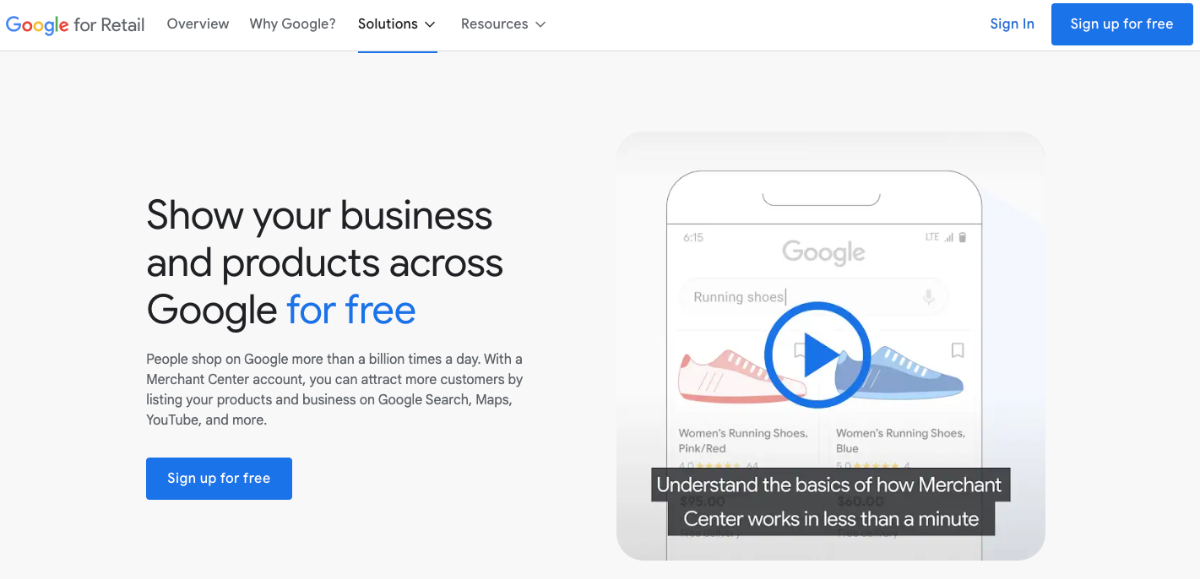
iii. Paid Advertising & Retargeting

Paid ads bring in users quickly. Google Ads work well for people actively searching for products, while Facebook and Instagram ads help with brand awareness.

Retargeting ads remind past visitors to return, increasing conversions. Running ads with clear offers, discounts, or benefits makes them more effective.

iv. Email Marketing & Community Engagement

Email keeps your marketplace top of mind. Send newsletters with new products, special deals, or trending items. Personalized recommendations based on past activity improve click-through rates.

An engaged community also helps—forums, live Q&A sessions, and interactive polls make users feel connected to your platform.

7. Make Your Marketplace Safe, Easy, and Reliable

Getting users to sign up is only half the battle. If your marketplace feels confusing or untrustworthy, they won’t stick around. A smooth, secure, and user-friendly platform keeps people coming back.

Make Your Marketplace Safe, Easy, and Reliable

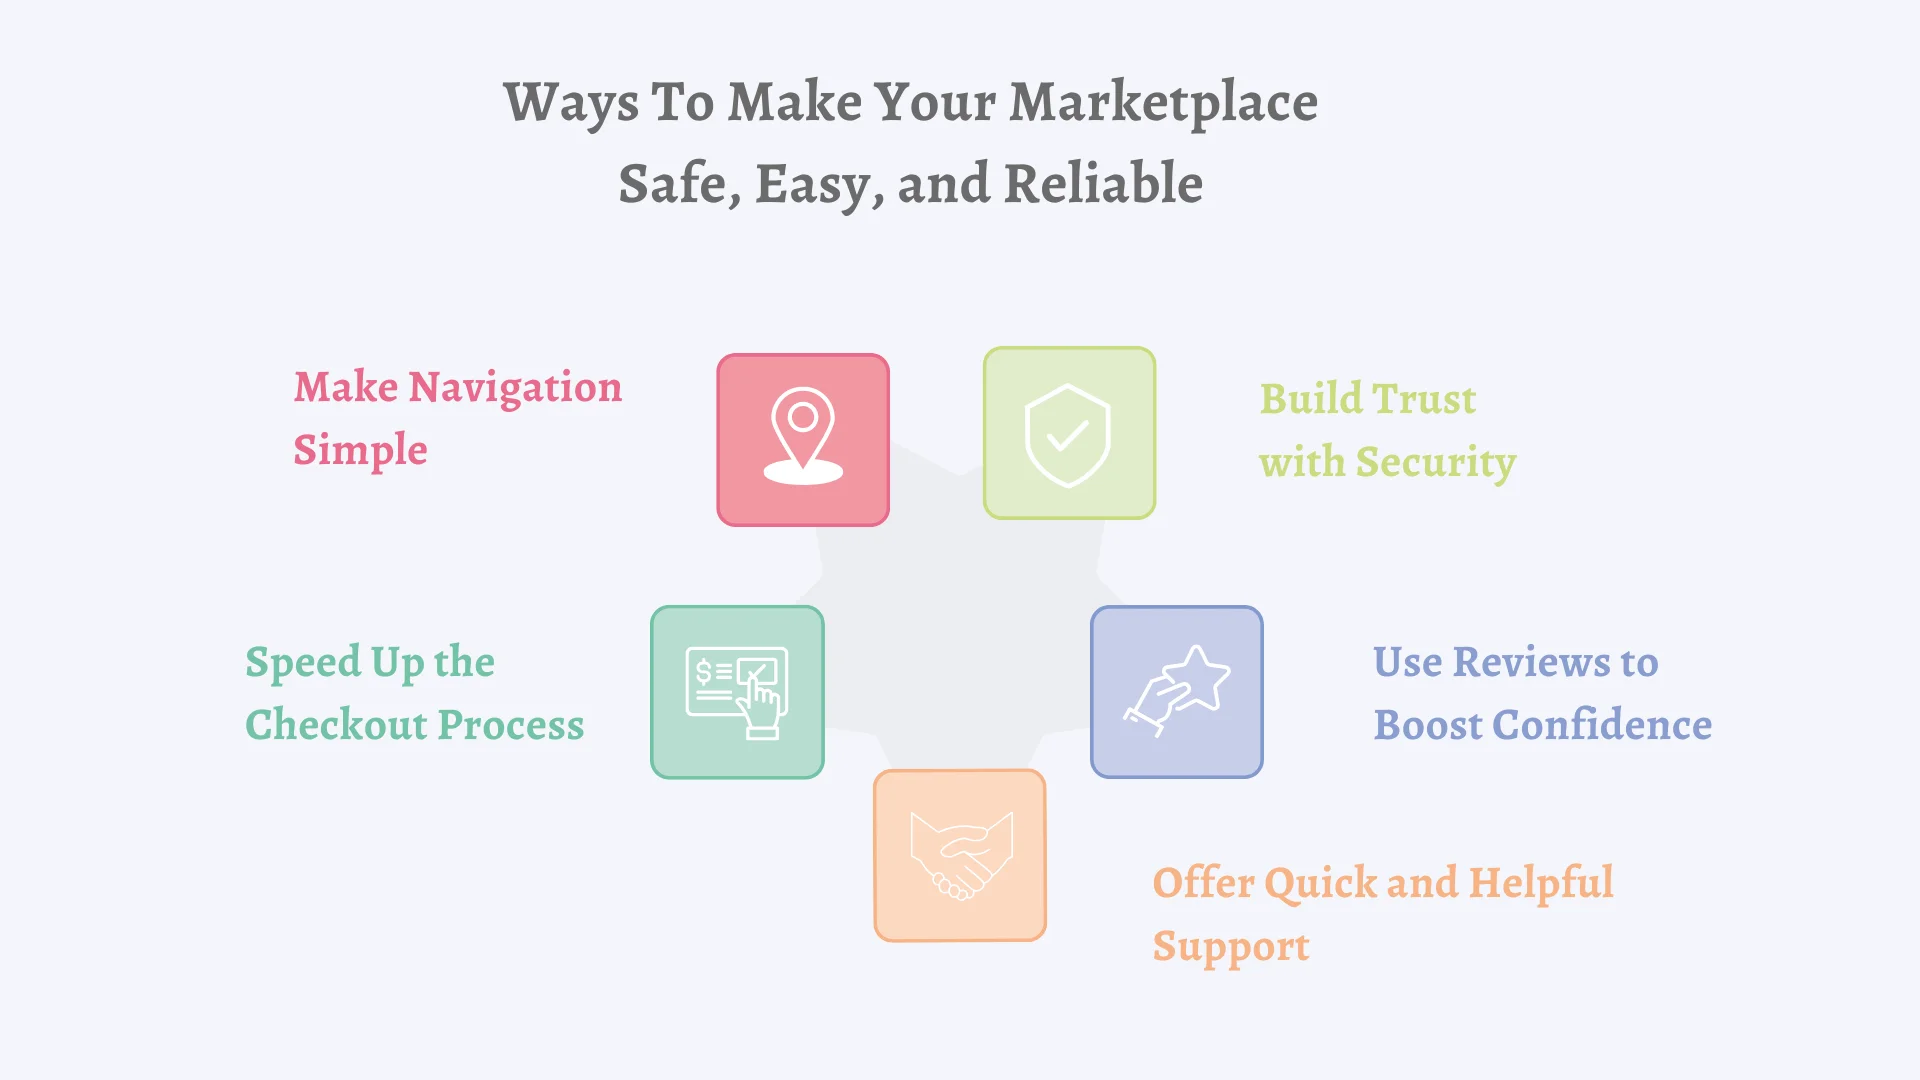
i. Make Navigation Simple

Nobody likes a confusing website. Buyers should find what they need in seconds, and sellers should manage their listings without hassle. A clear menu, smart search filters, and a clean layout make your marketplace easy to use.

ii. Speed Up the Checkout Process

Slow or complicated checkouts lead to abandoned carts. Keep forms short, support multiple payment methods, and remove unnecessary steps. A frictionless checkout means more completed purchases.

iii. Build Trust with Security

People won’t buy or sell if they feel unsafe. Use secure payment gateways, encrypt sensitive data, and prevent fraud. Clearly display trust badges and policies so users feel protected.

iv. Use Reviews to Boost Confidence

Buyers rely on reviews to make decisions. Allow verified buyers to leave honest feedback and highlight top-rated sellers. This keeps the marketplace fair and helps users shop with confidence.

v. Offer Quick and Helpful Support

When users run into issues, they should get help fast. Provide live chat, email support, or an easy-to-use help center. A well-organized FAQ section can also solve common problems without users needing to reach out.

A smooth and secure marketplace isn’t just good for users—it directly impacts your growth. When people trust your platform, they spend more and recommend it to others.

8. Keep Users Coming Back with Rewards and Freebies

A marketplace isn’t just about transactions—it’s about keeping people engaged. If buyers and sellers stay active, your platform grows naturally.

i. Use Rewards to Encourage Activity

Everyone loves perks. Offer discounts, cashback, or points-based rewards to keep buyers coming back. Sellers can also get incentives, like free listing upgrades for consistent sales.

Offer rewards

ii. Referral Programs Bring in More Users

Word of mouth is powerful. Give users a reason to invite friends by offering referral bonuses—like a discount for both the referrer and the new user. This grows your marketplace at a lower cost.

iii. Let Users Try Before They Commit

Free trials and special offers remove hesitation. Let sellers list a few items for free or give buyers their first purchase discount. Once they see the value, they’re more likely to continue using your platform.

iv. Build a Community, Not Just a Marketplace

A strong community makes users feel connected. Features like discussion forums, expert Q&As, and live events keep people engaged beyond just buying and selling. When users feel involved, they stick around longer.

9. Use Data to Improve Your Marketplace

Every action on your marketplace—searches, purchases, clicks—tells a story. Tracking and analyzing this data helps you make smarter decisions, improve the user experience, and boost sales.

i. Track User Behavior to Find What Works

Analytics tools show where users drop off, which products get the most views, and how buyers interact with your platform. Heatmaps, session recordings, and conversion tracking highlight areas that need improvement.

ii. Test and Adjust for Better Results

Small changes can make a big difference. A/B testing lets you compare different layouts, pricing strategies, or checkout processes to see what drives more sales. If a small tweak increases conversions, it’s worth rolling out across your marketplace.

iii. Use Data to Improve Personalization

People expect relevant recommendations. By analyzing shopping habits and past interactions, you can suggest products that match their interests. A personalized experience keeps buyers engaged and increases sales.

Data is one of your biggest assets. Using it wisely means better decision-making, improved user experience, and steady marketplace growth.

10. Grow Your Marketplace Beyond Borders

Once your marketplace is running smoothly, expanding to international markets can open up new opportunities. But global scaling comes with challenges, and you need to prepare for them.

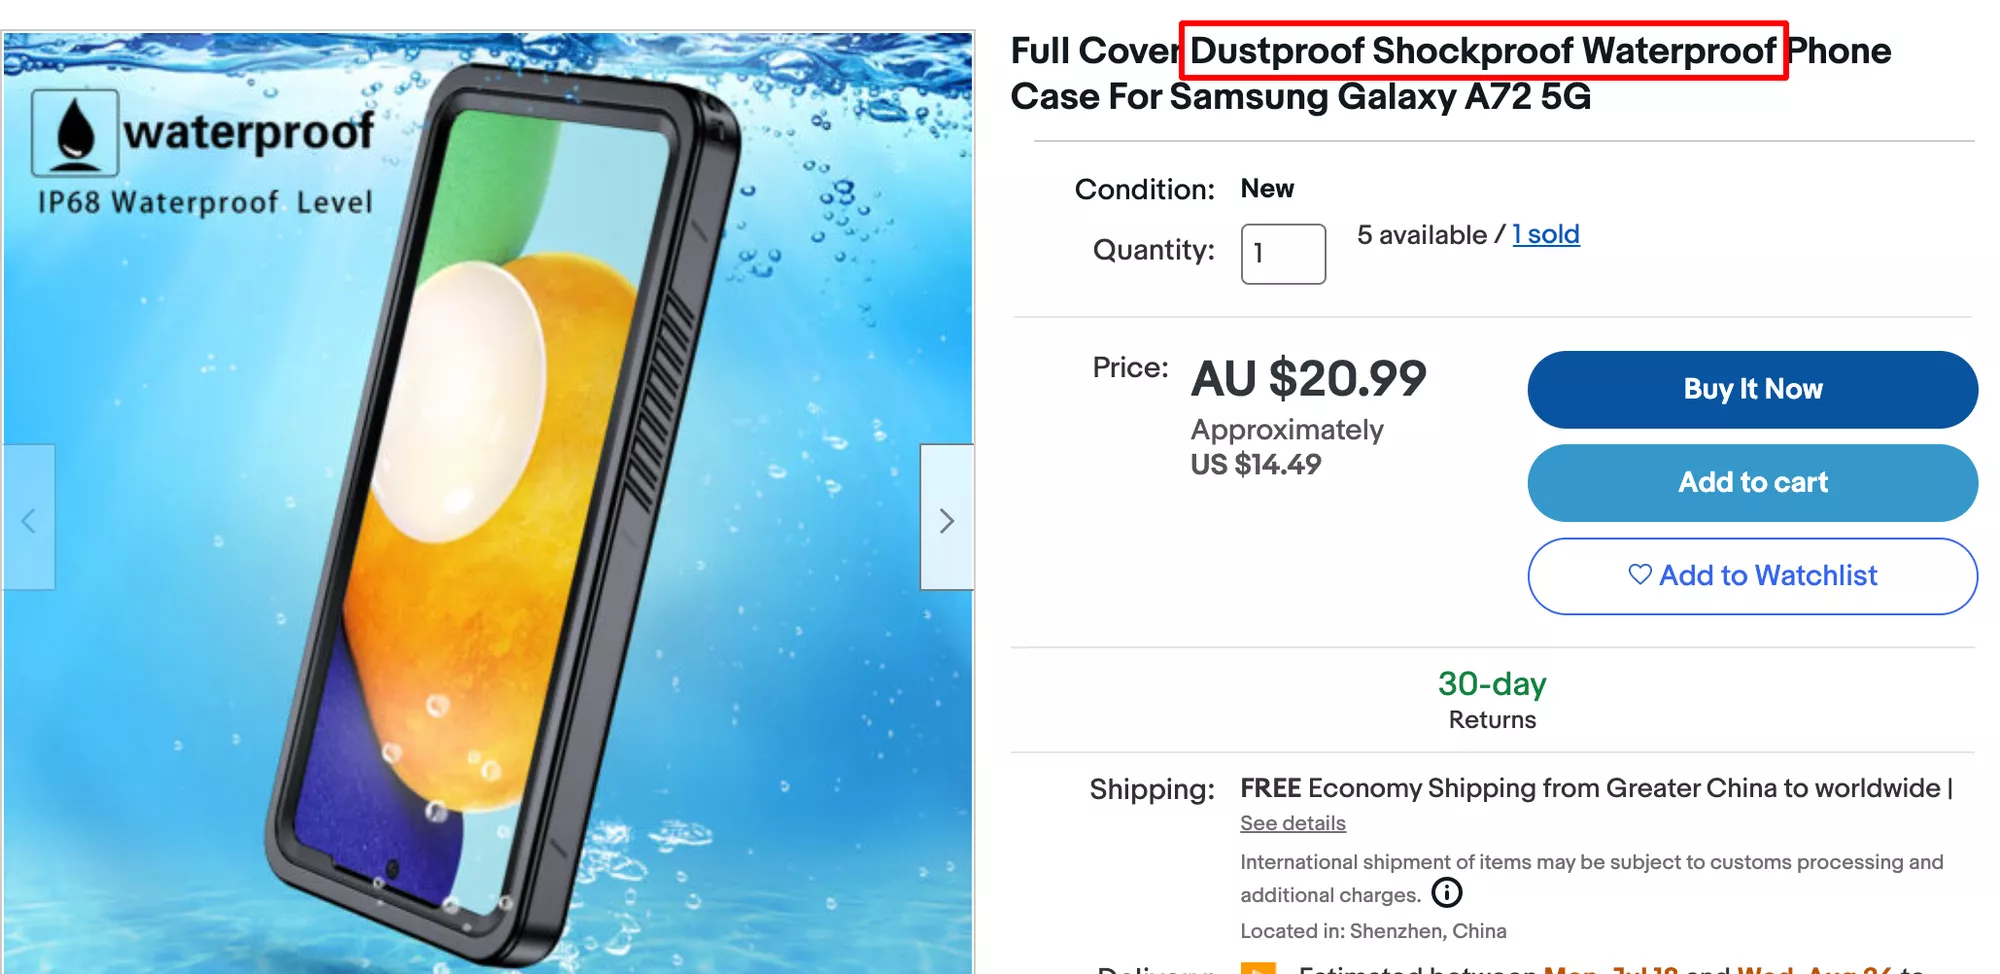
i. Make Your Product Listings Ready for Global Buyers

Different regions have different shopping habits. Optimize product feeds with localized descriptions, correct currencies, and relevant keywords. Ensuring accurate translations helps users feel comfortable making purchases.

ii. Offer the Right Payment Methods

Not all countries use the same payment options. Supporting local payment gateways—like Alipay for China or Klarna for Europe—removes barriers for international buyers. Flexible pricing and multi-currency support also improve the shopping experience.

choose the right payment system

iii. Stay Compliant with Local Laws

Every country has its own tax rules, shipping regulations, and data privacy laws. Researching these requirements early prevents legal issues later. Partnering with local logistics providers also ensures smooth delivery and better customer satisfaction.

Expanding globally isn’t just about selling to more people—it’s about adapting to new markets. A well-planned approach makes it easier to grow without running into unnecessary obstacles.

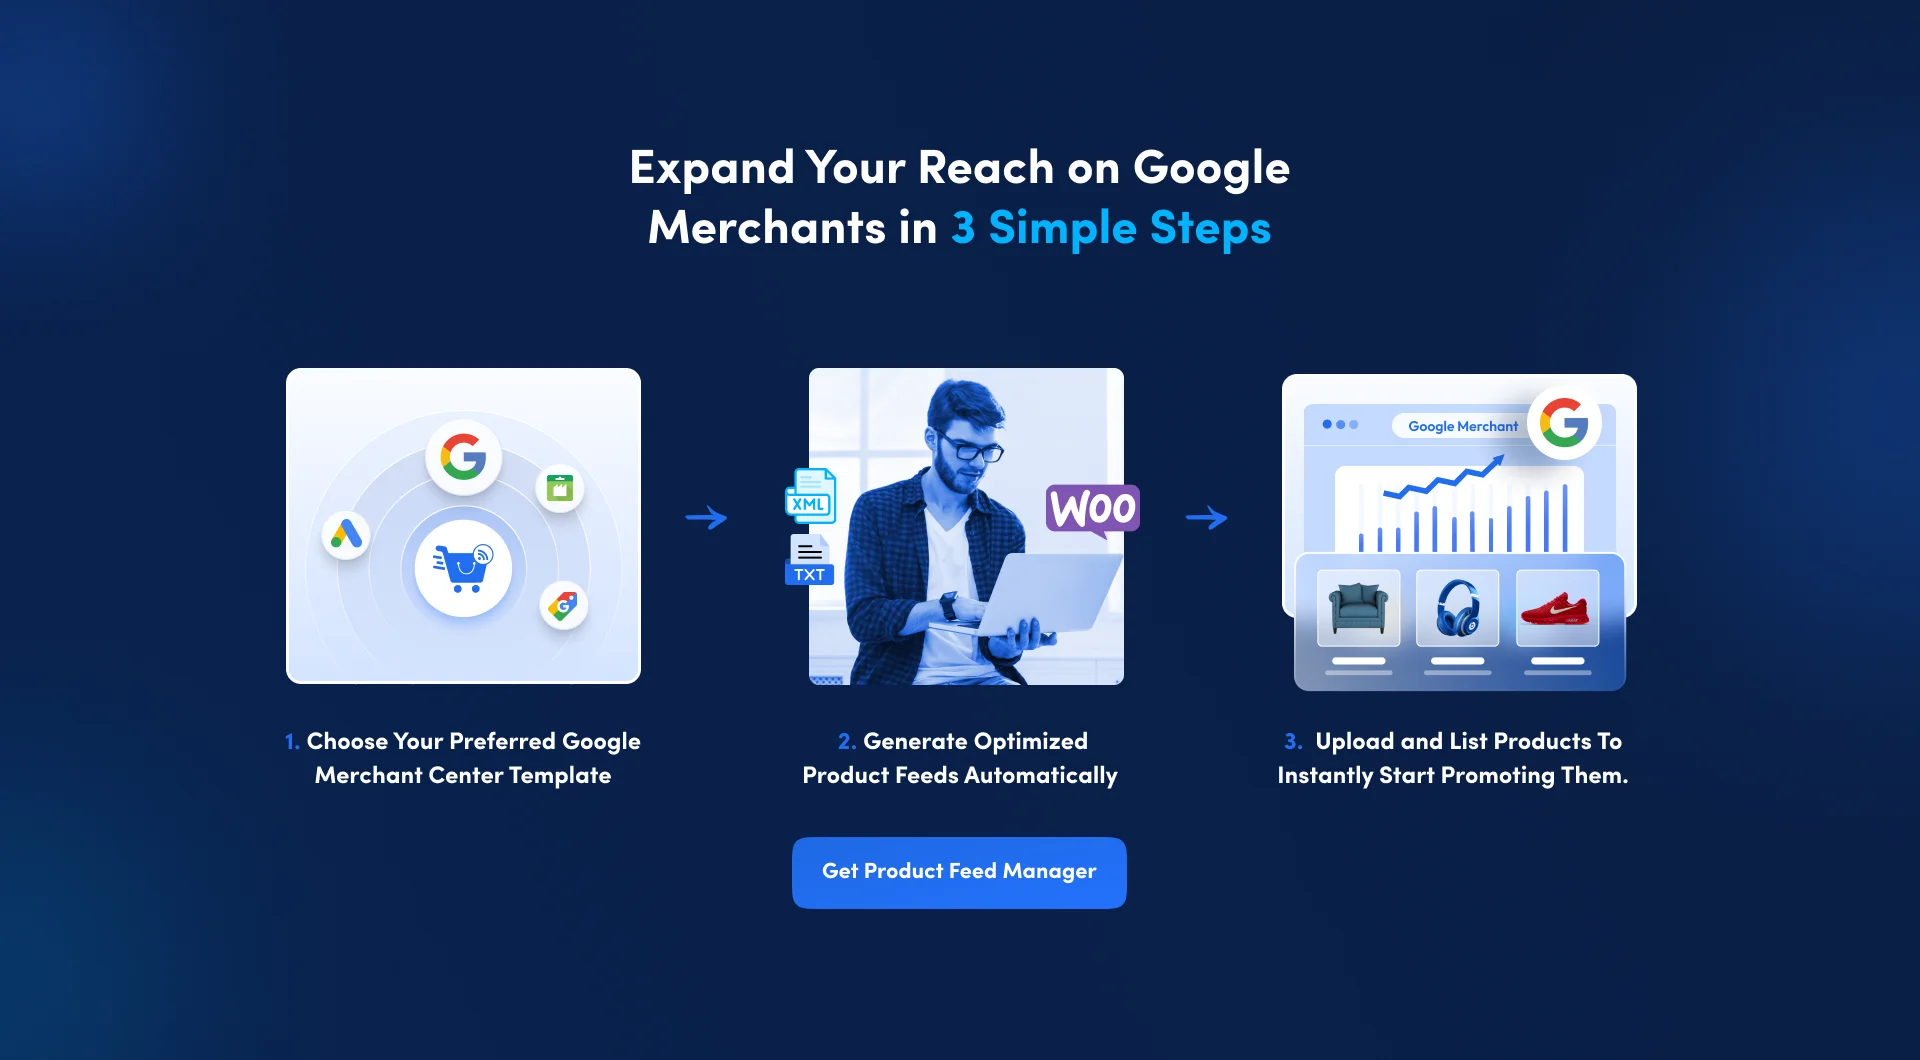
How Does A Feed Management Tool Lead to Marketplace Growth?

Expanding into new markets means managing product listings across multiple platforms. Keeping everything updated manually is time-consuming and prone to errors.

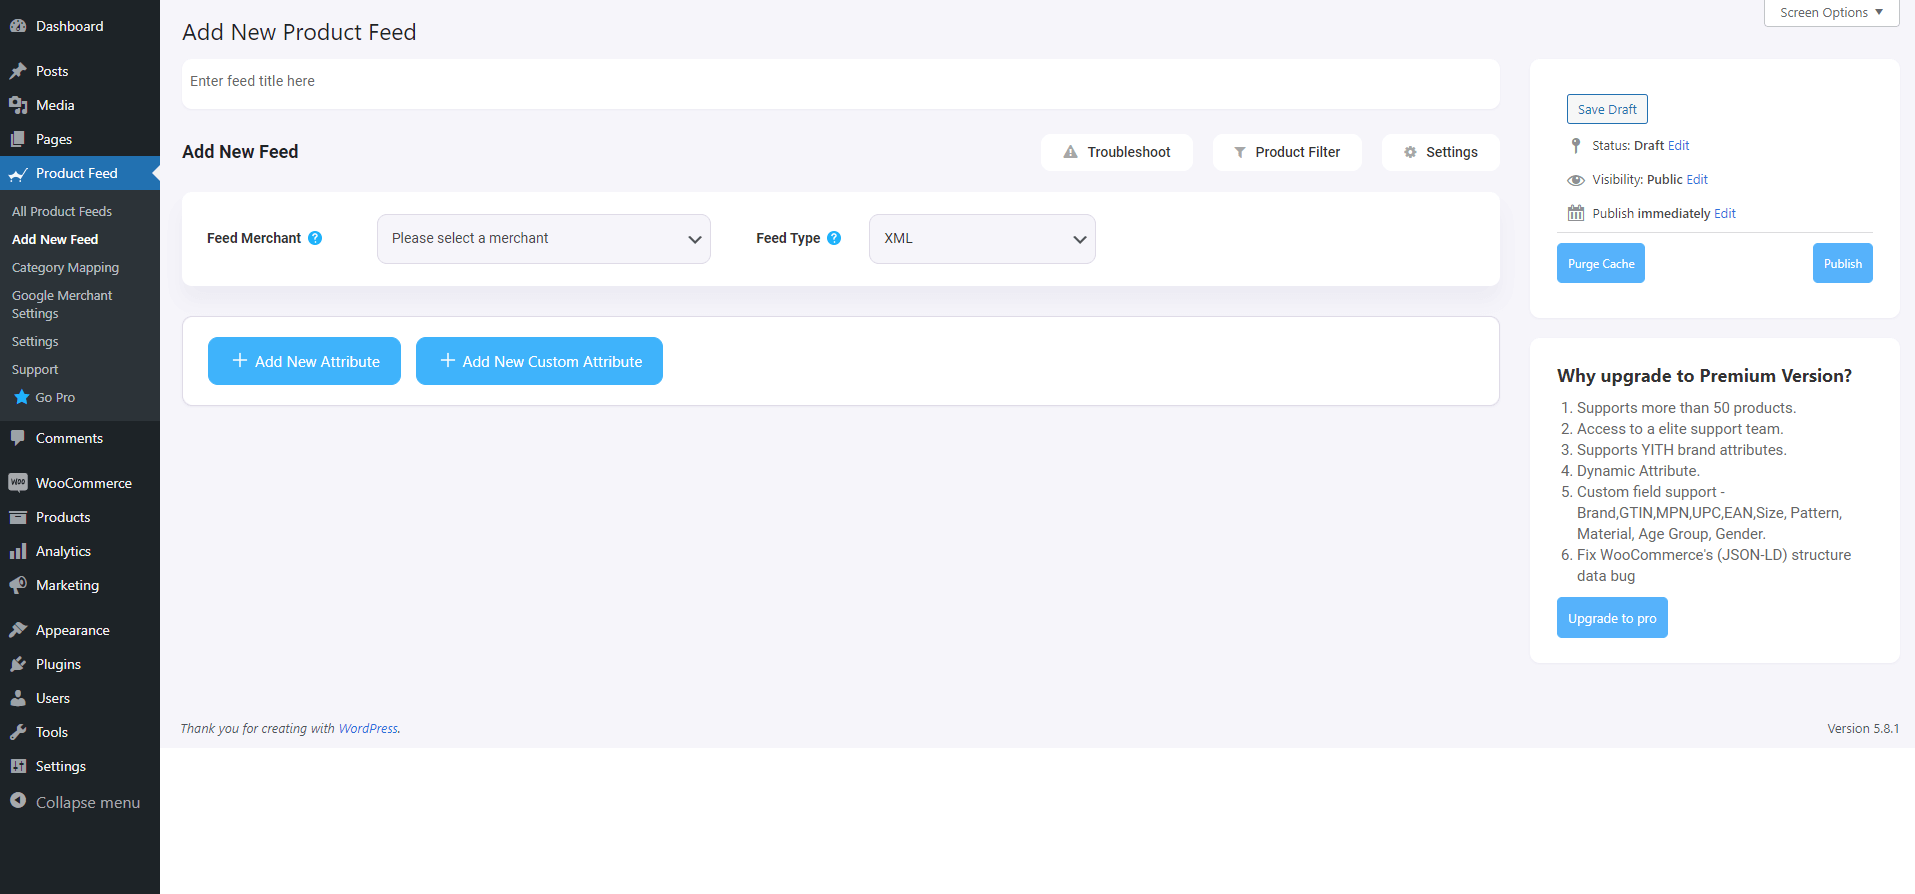
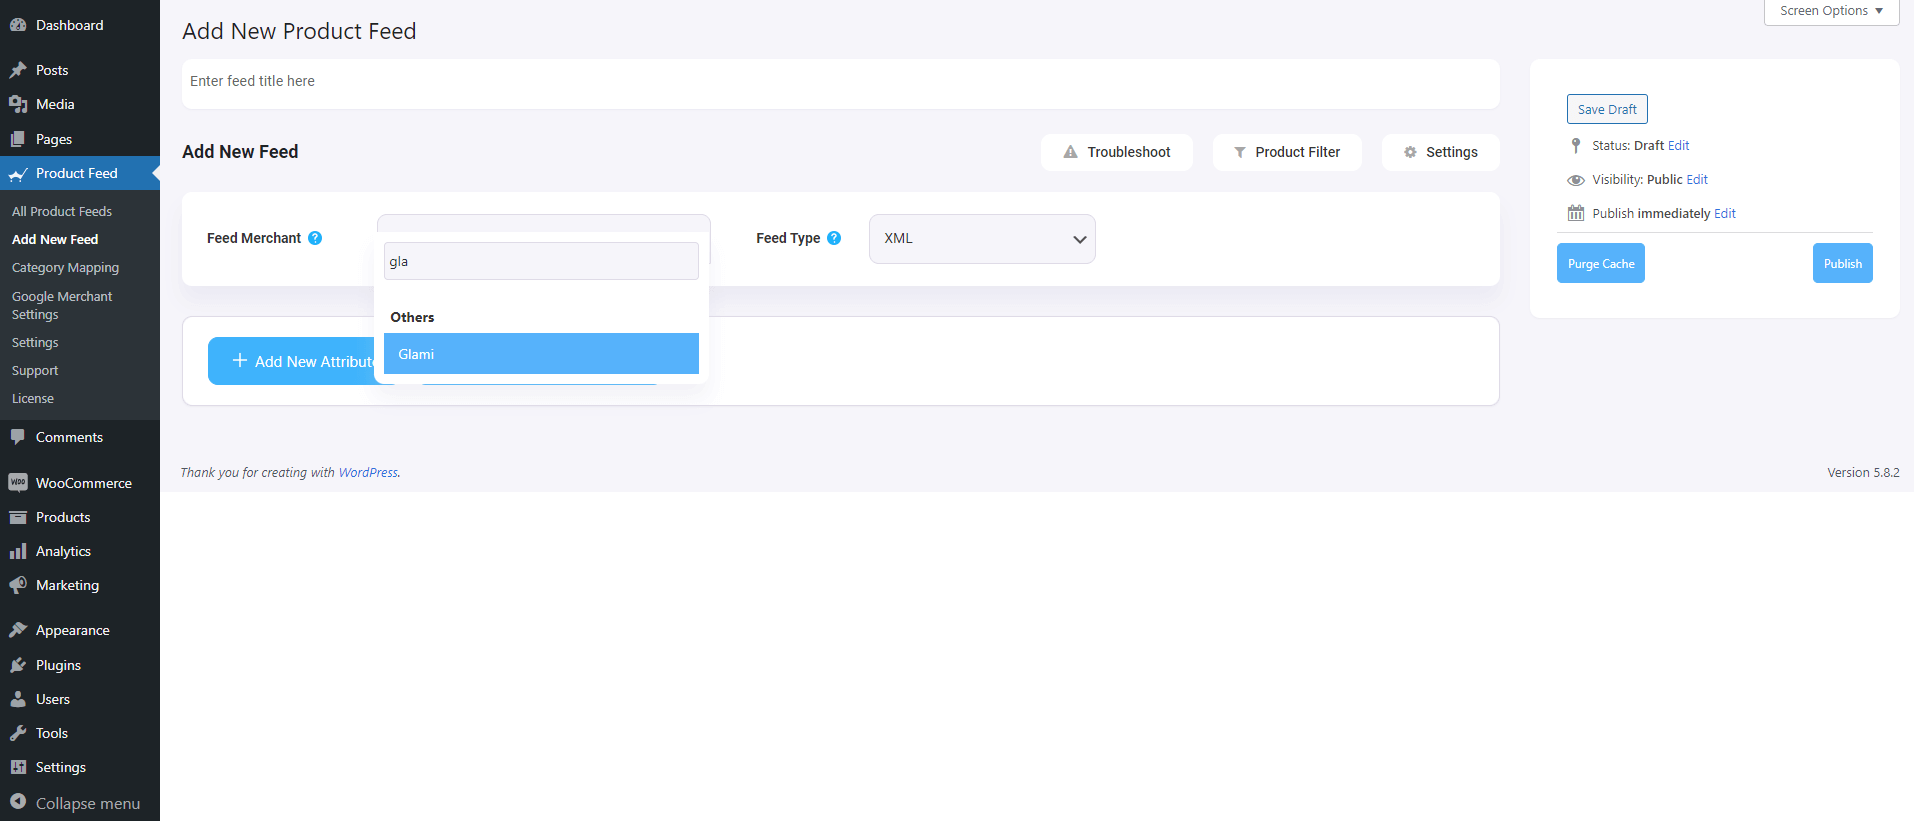
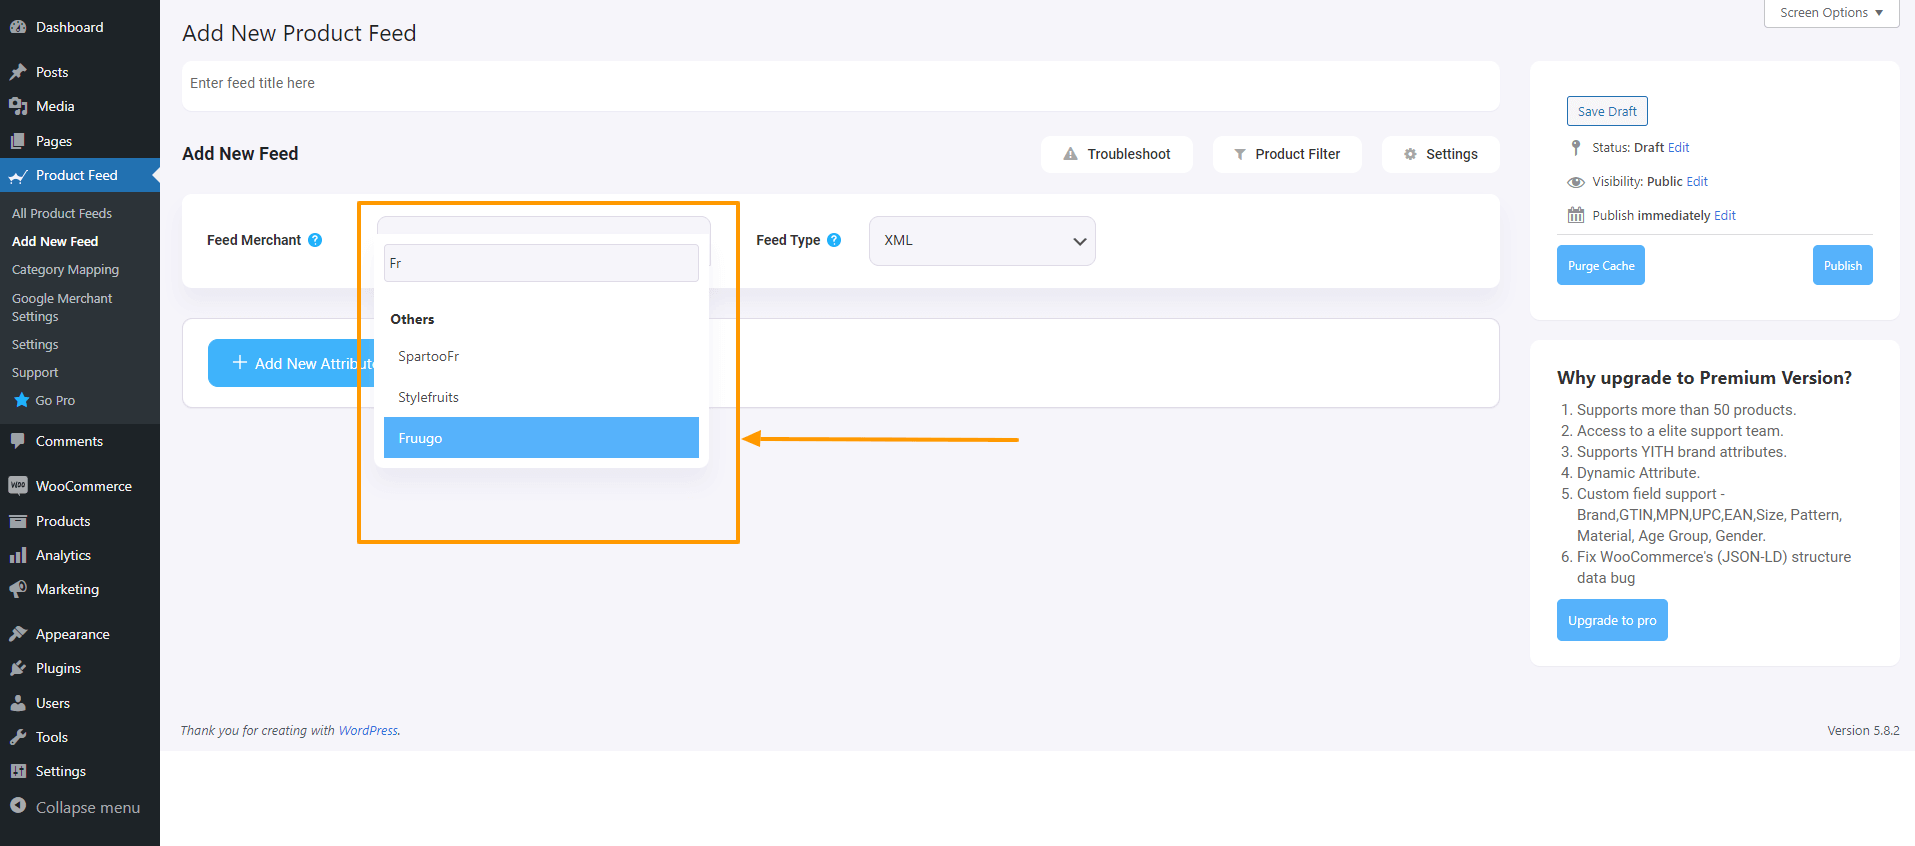
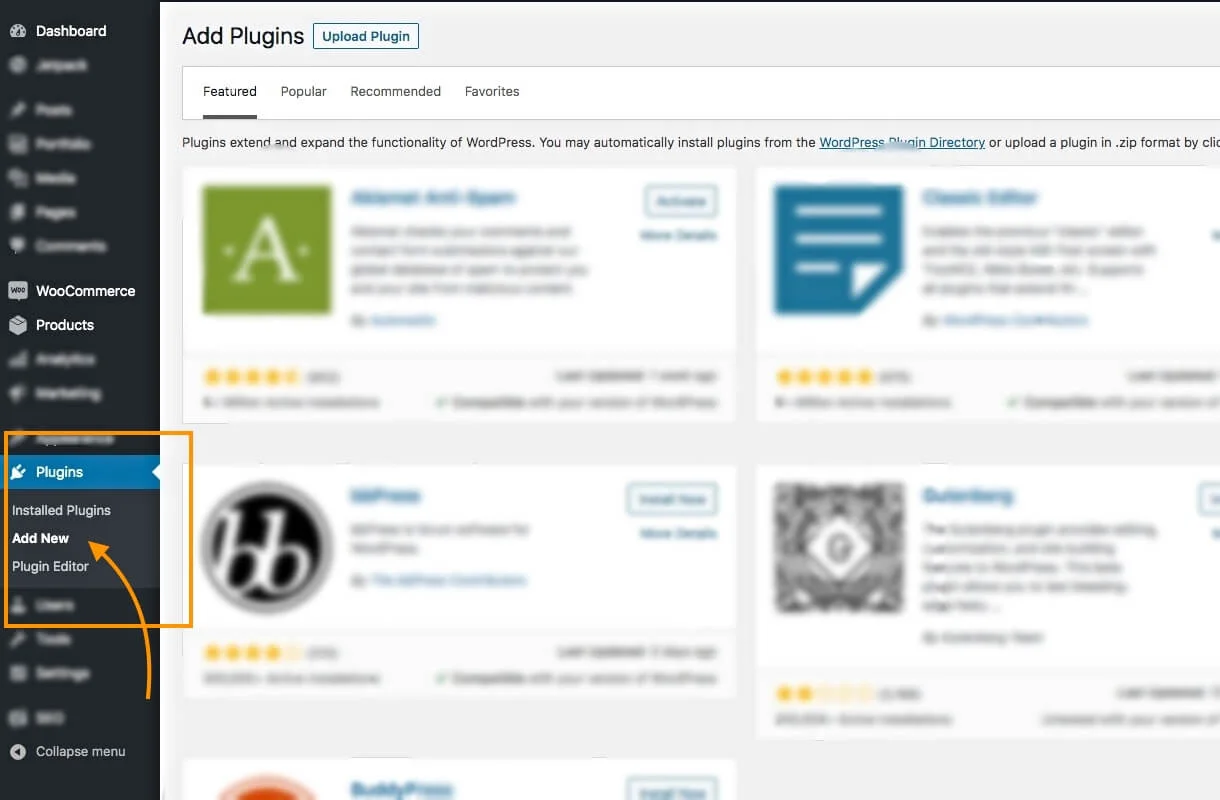
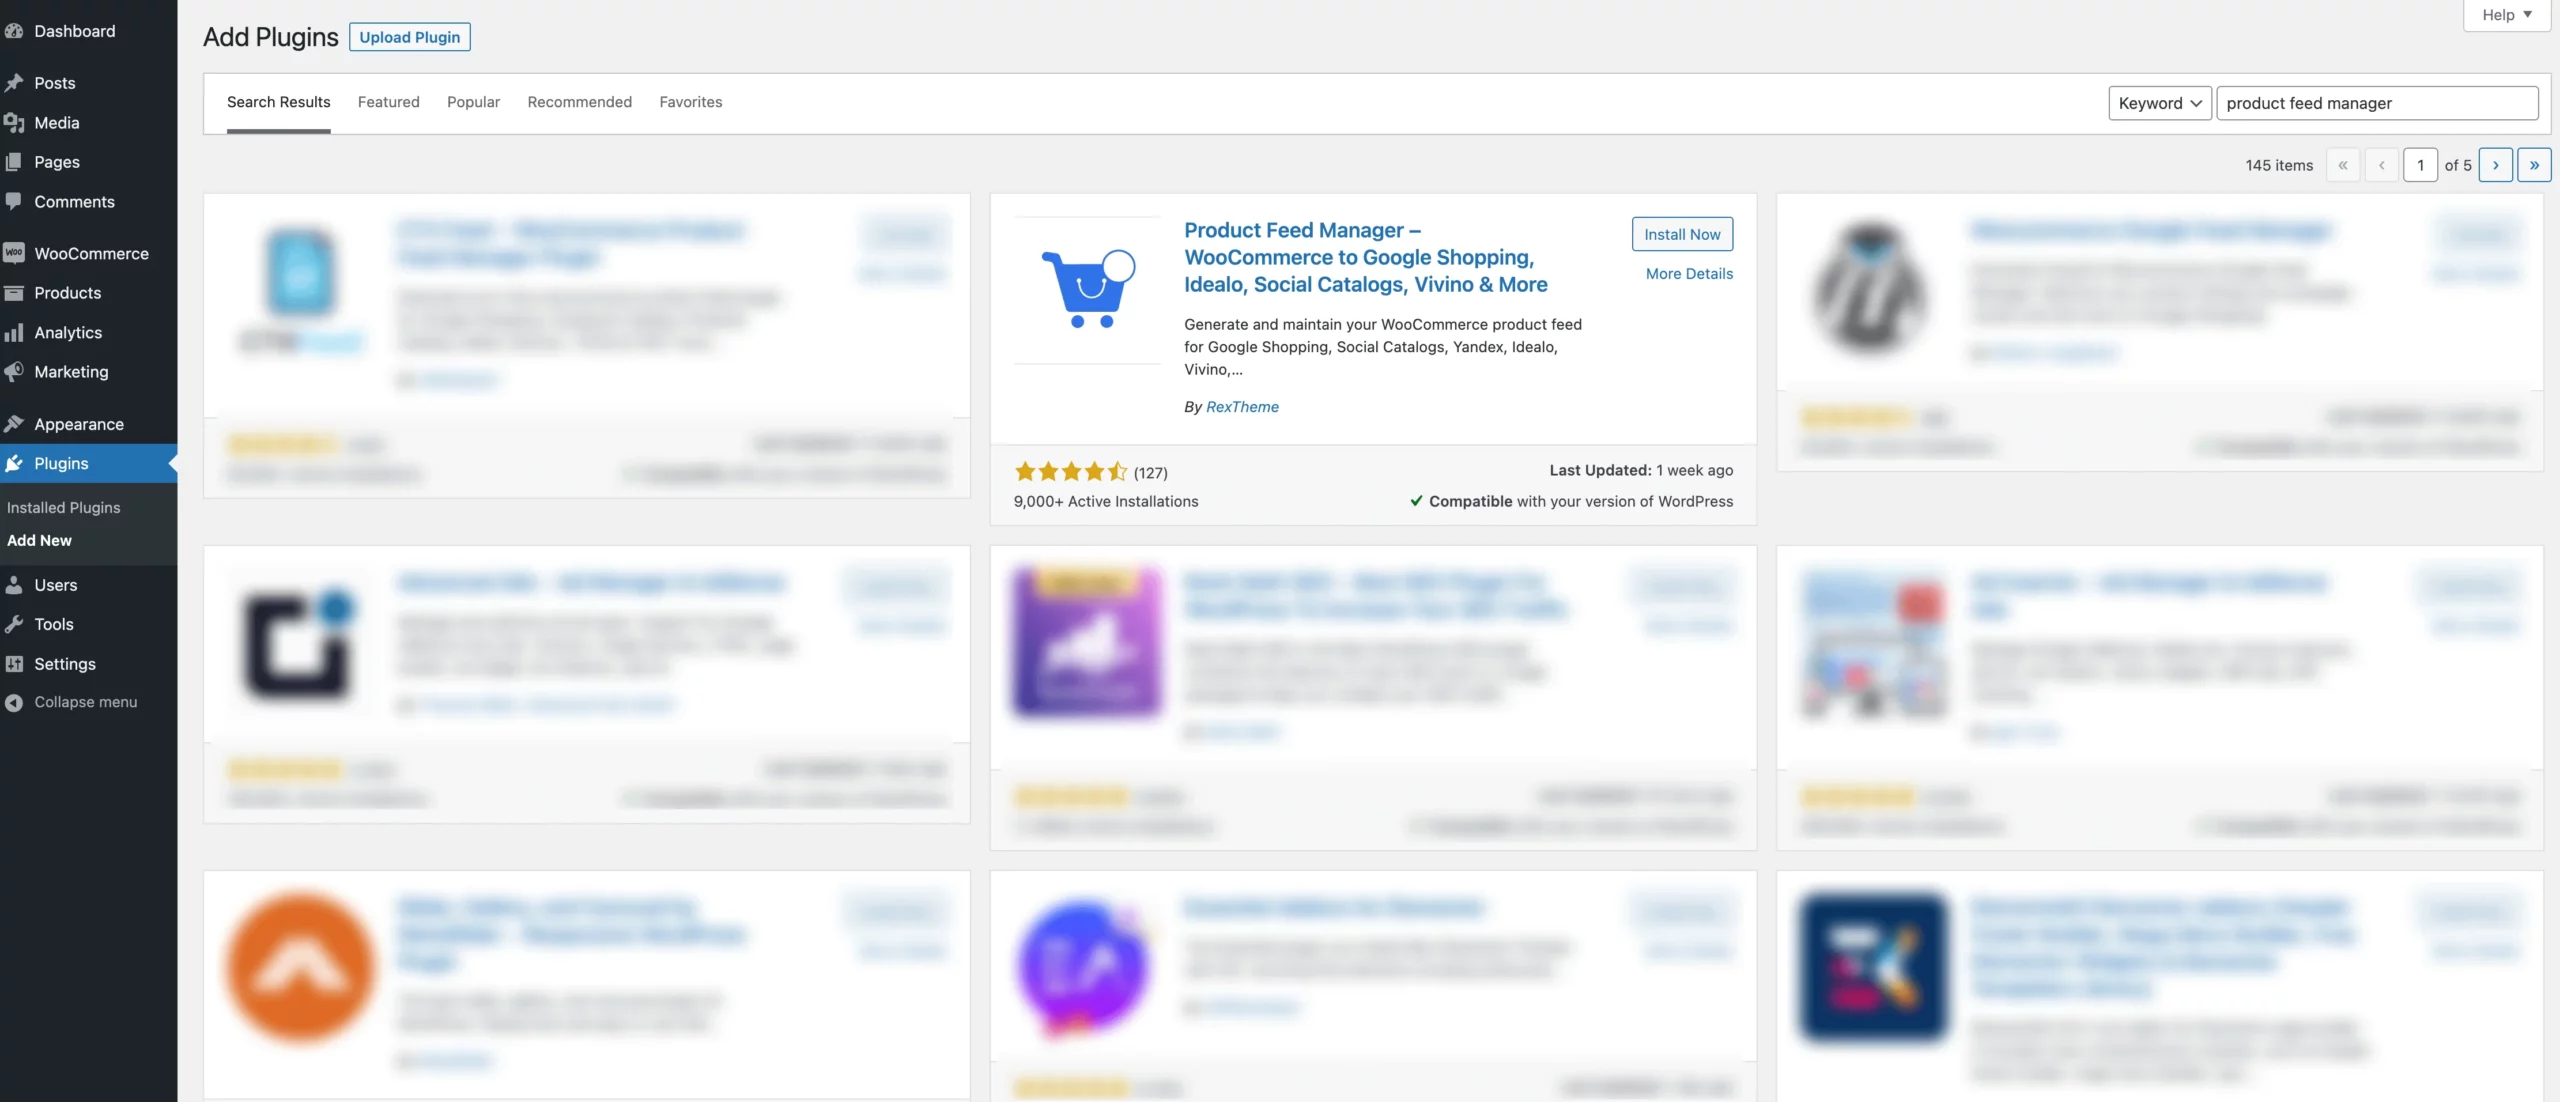
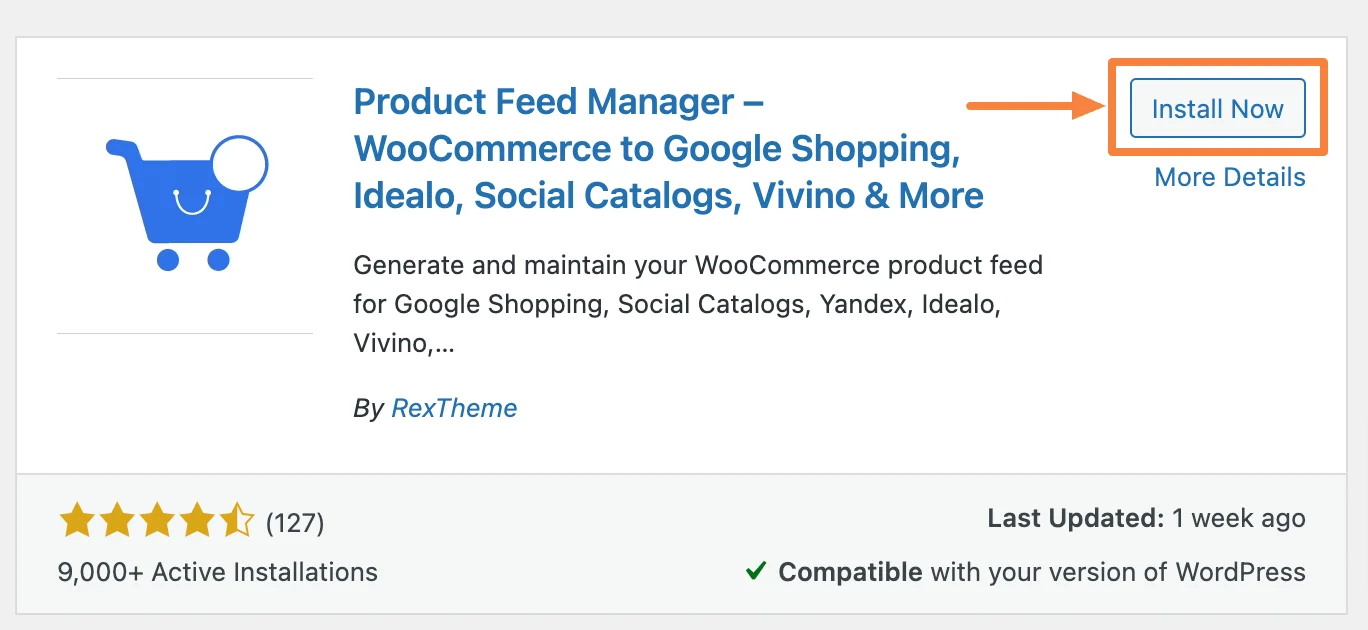
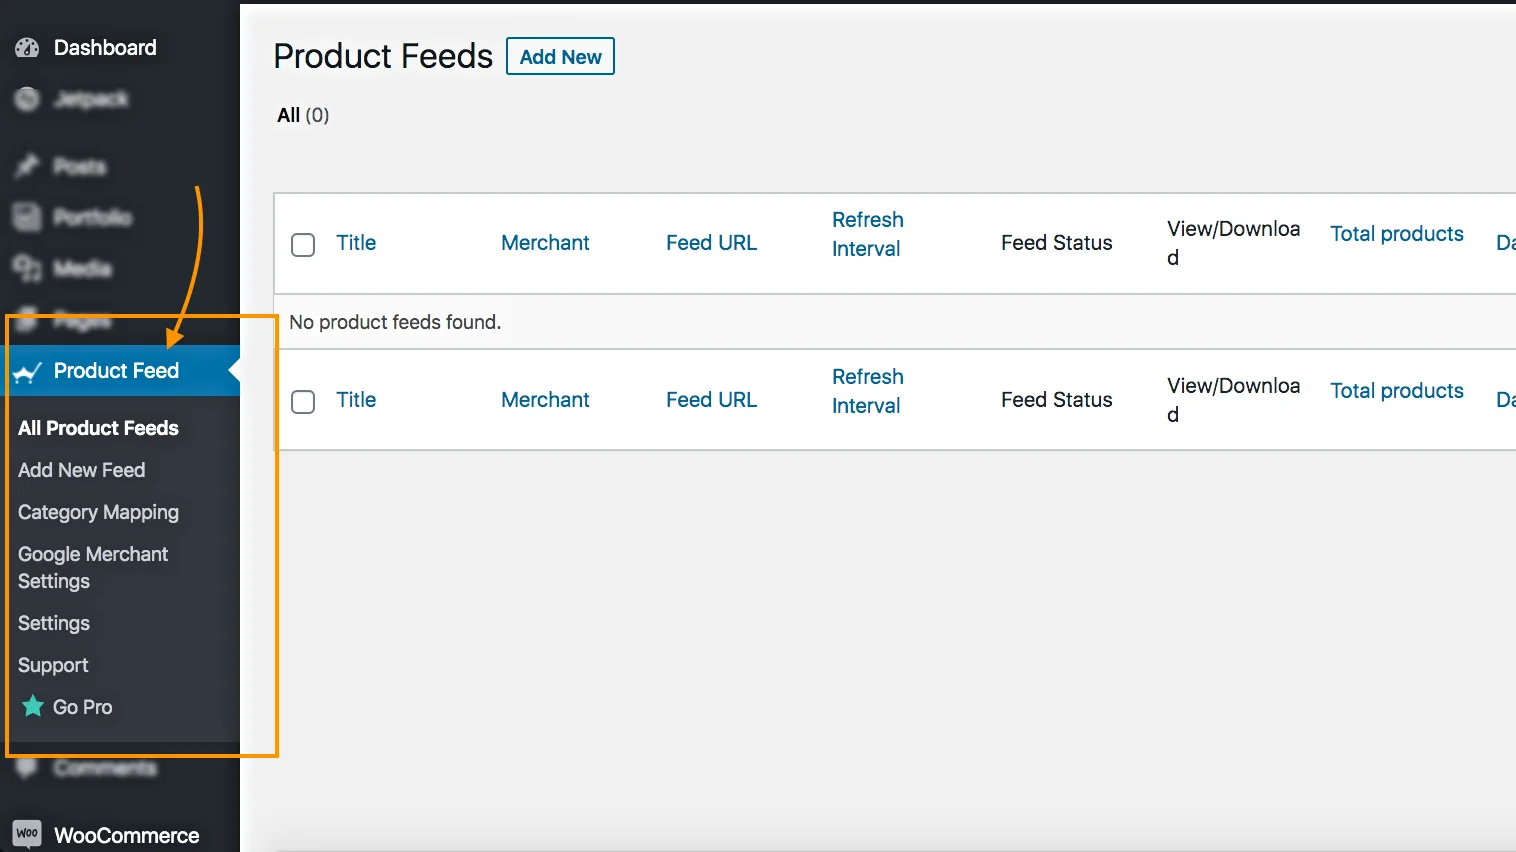
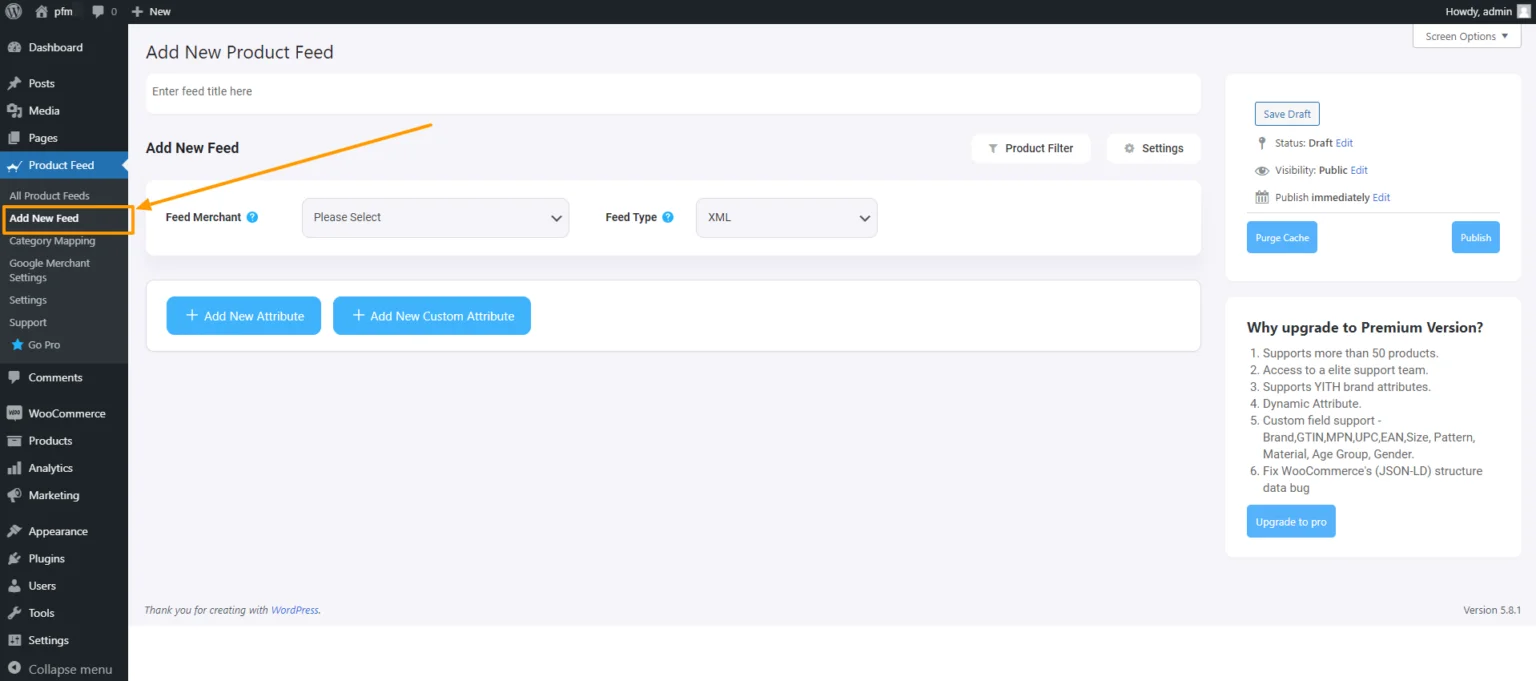
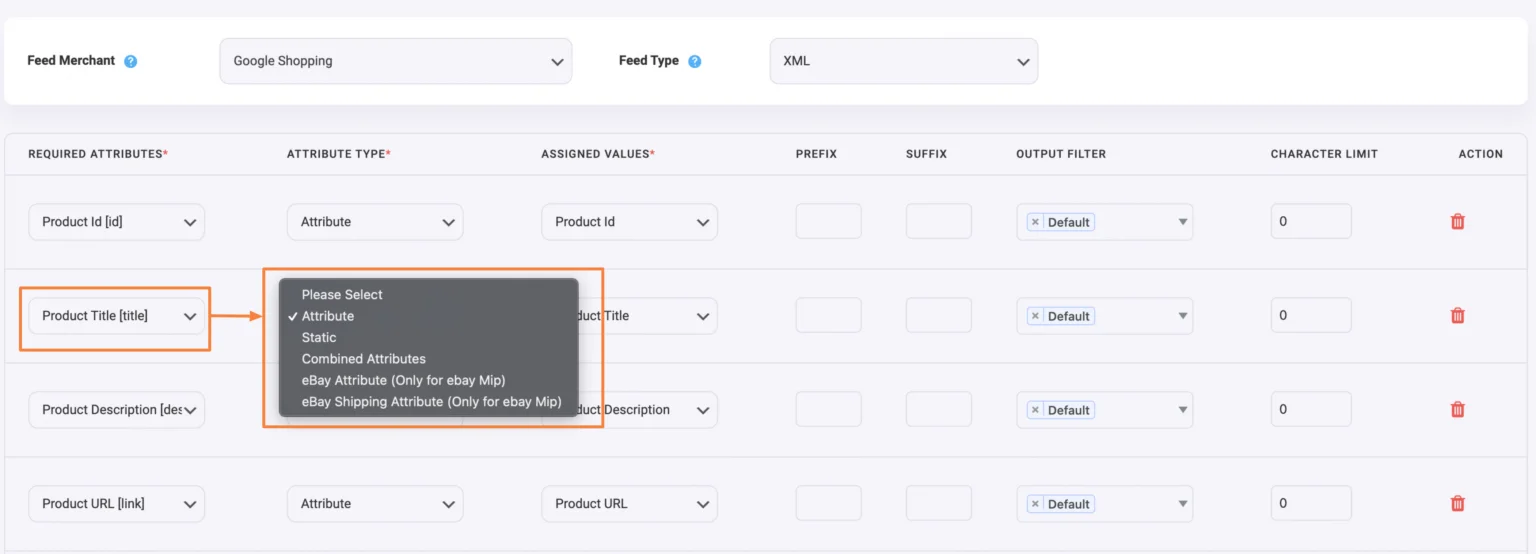
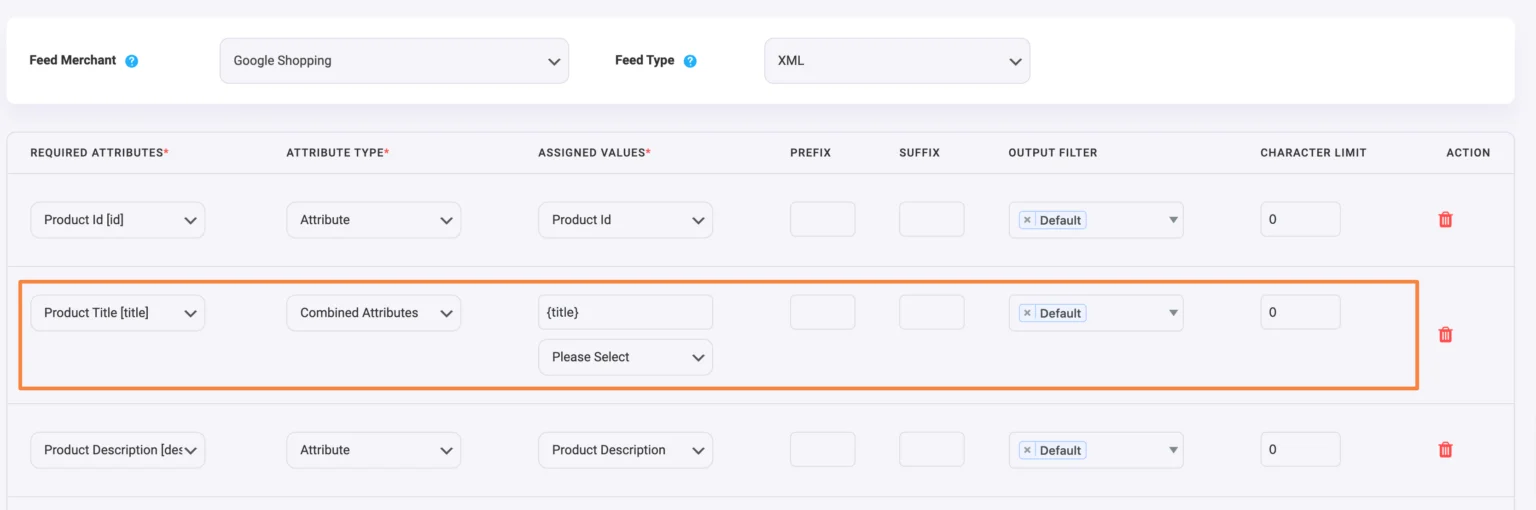
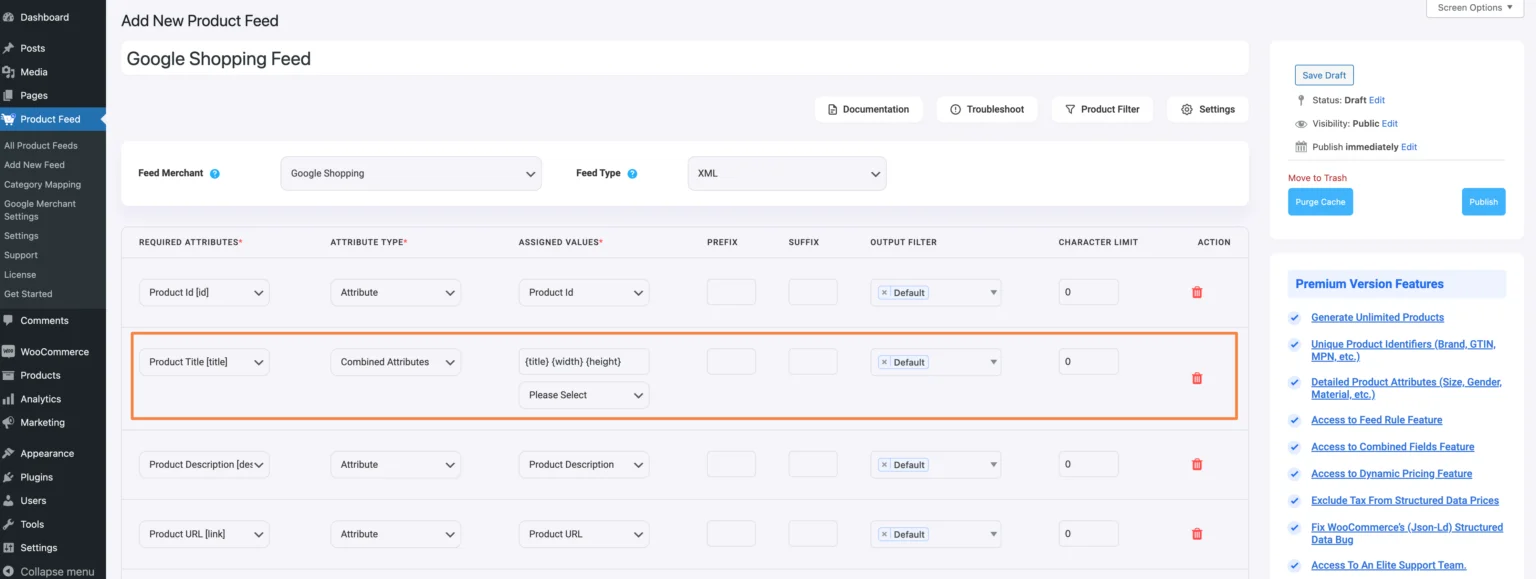
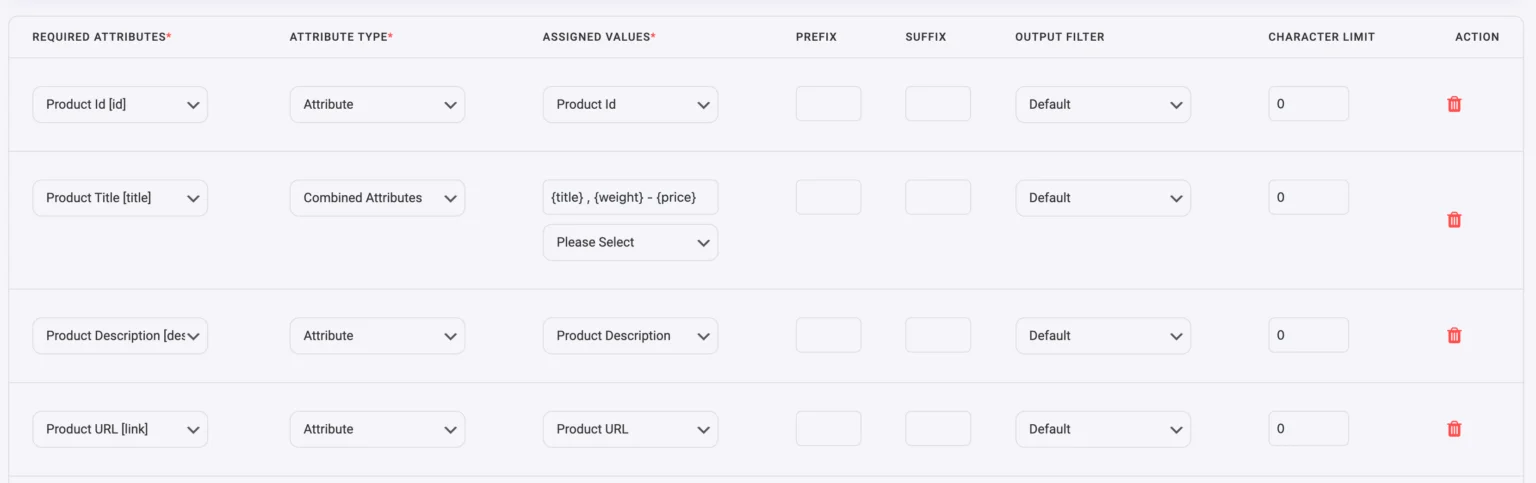
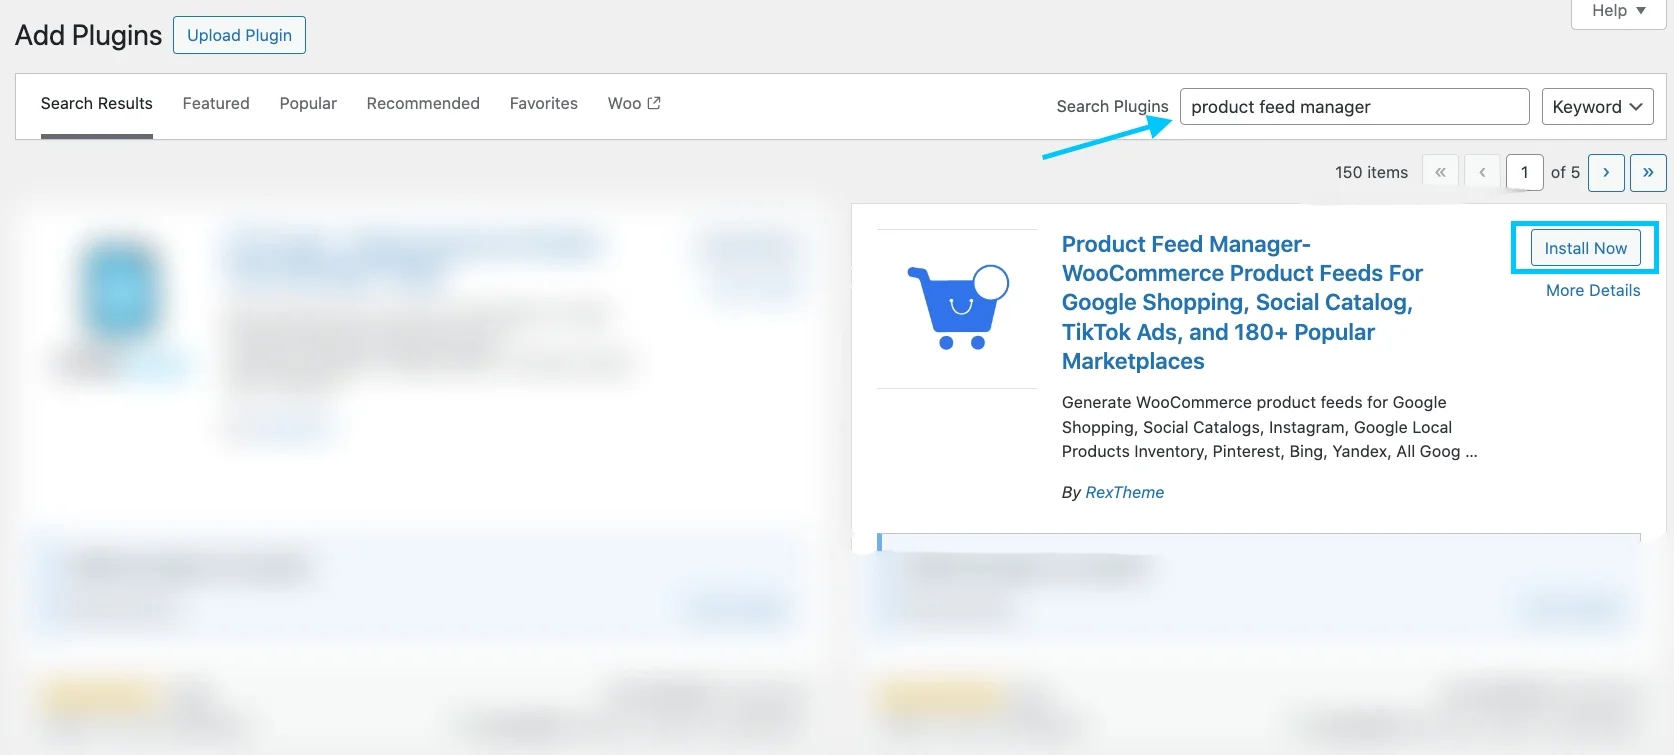
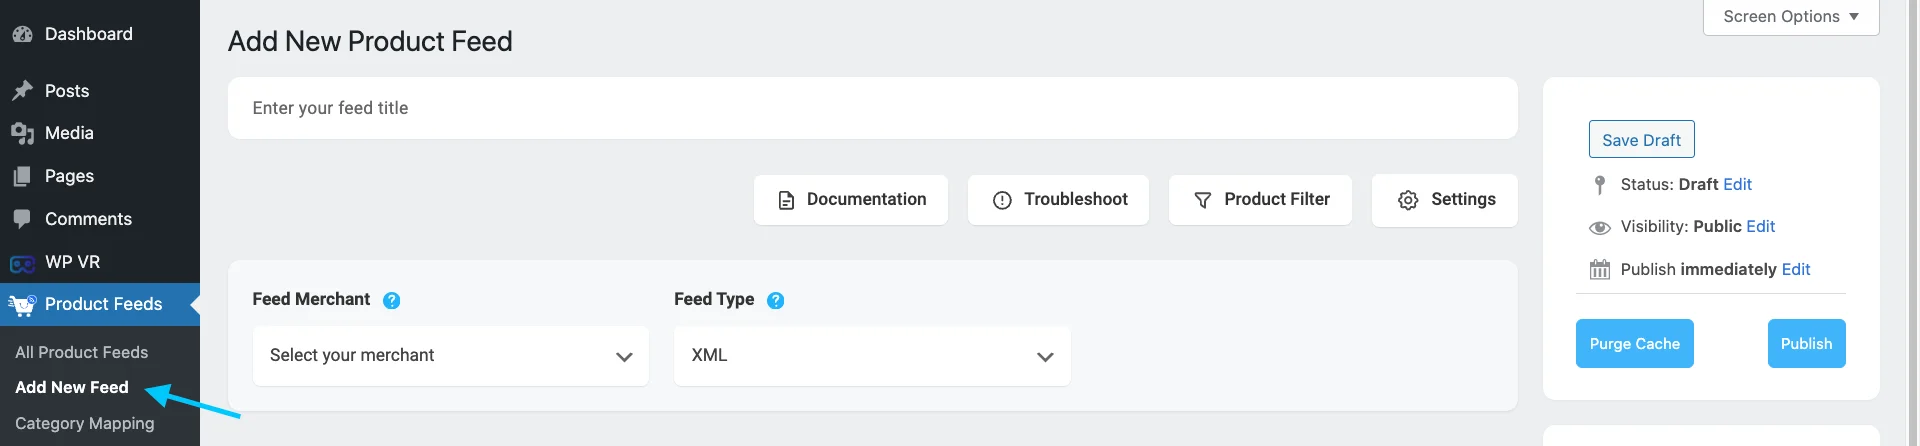
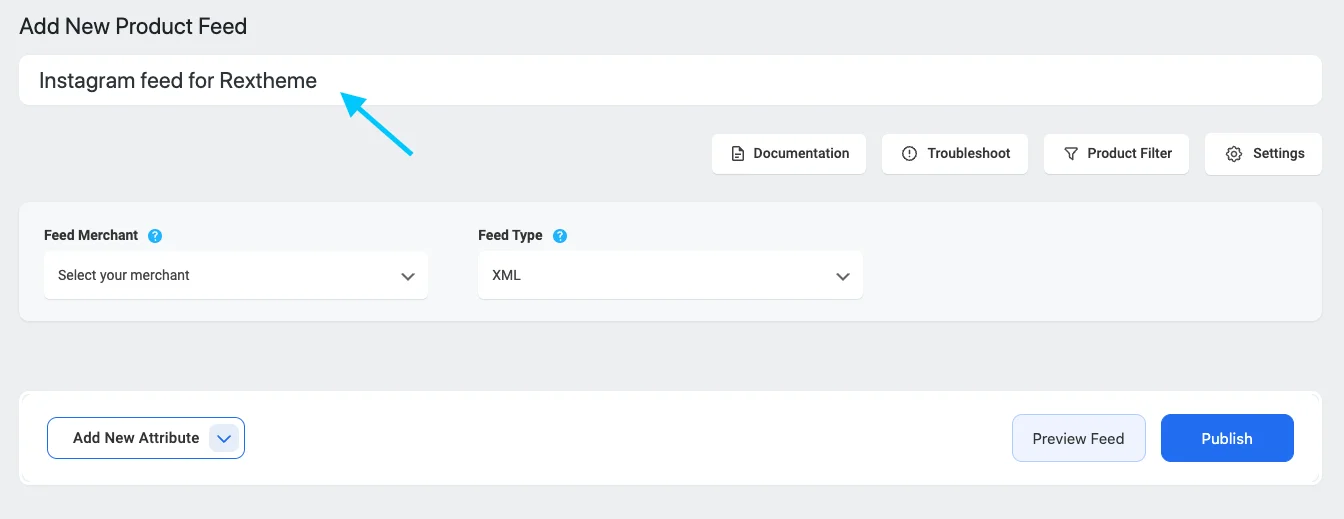
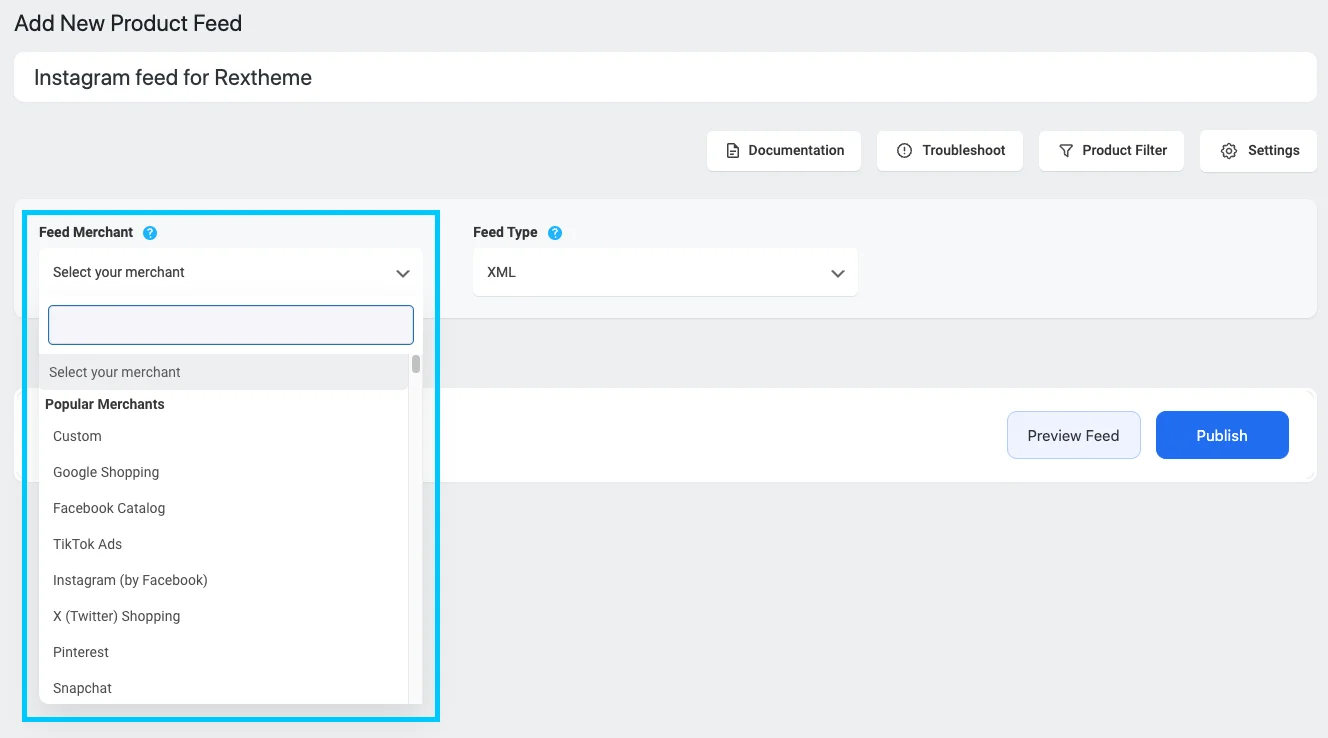
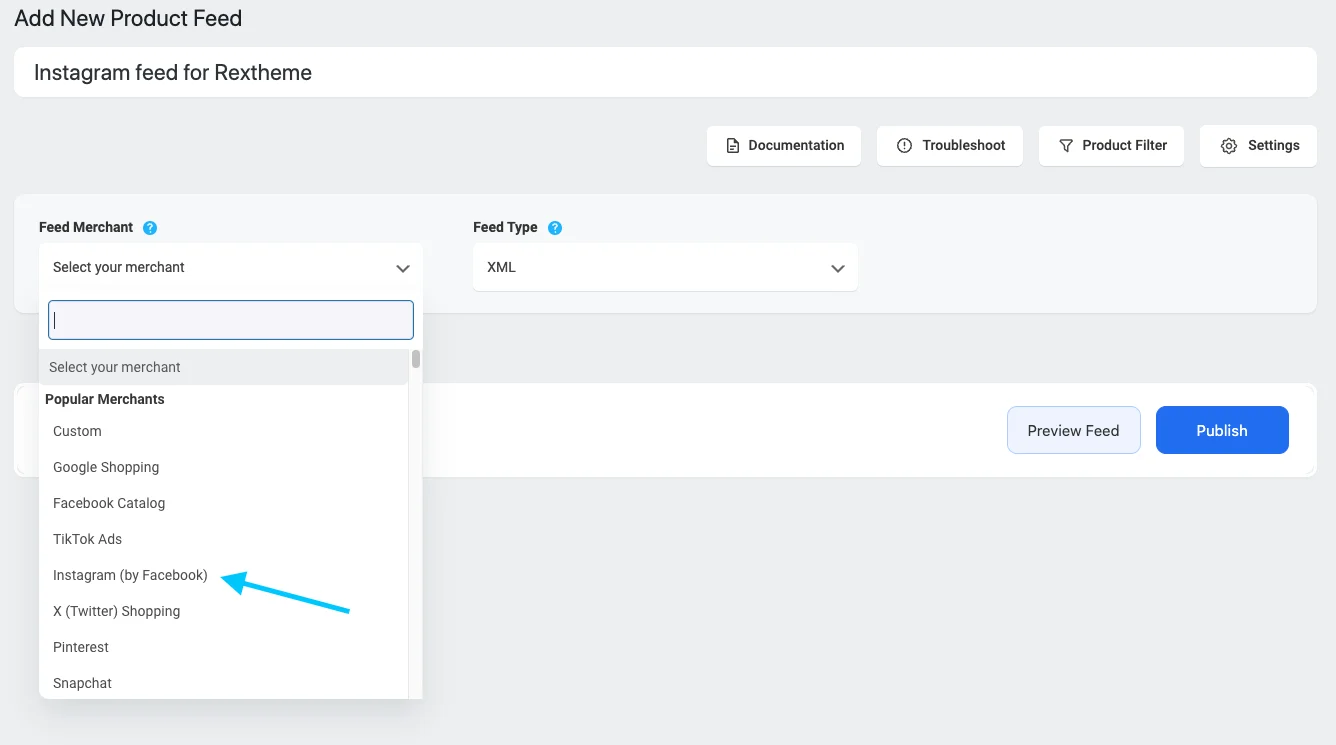
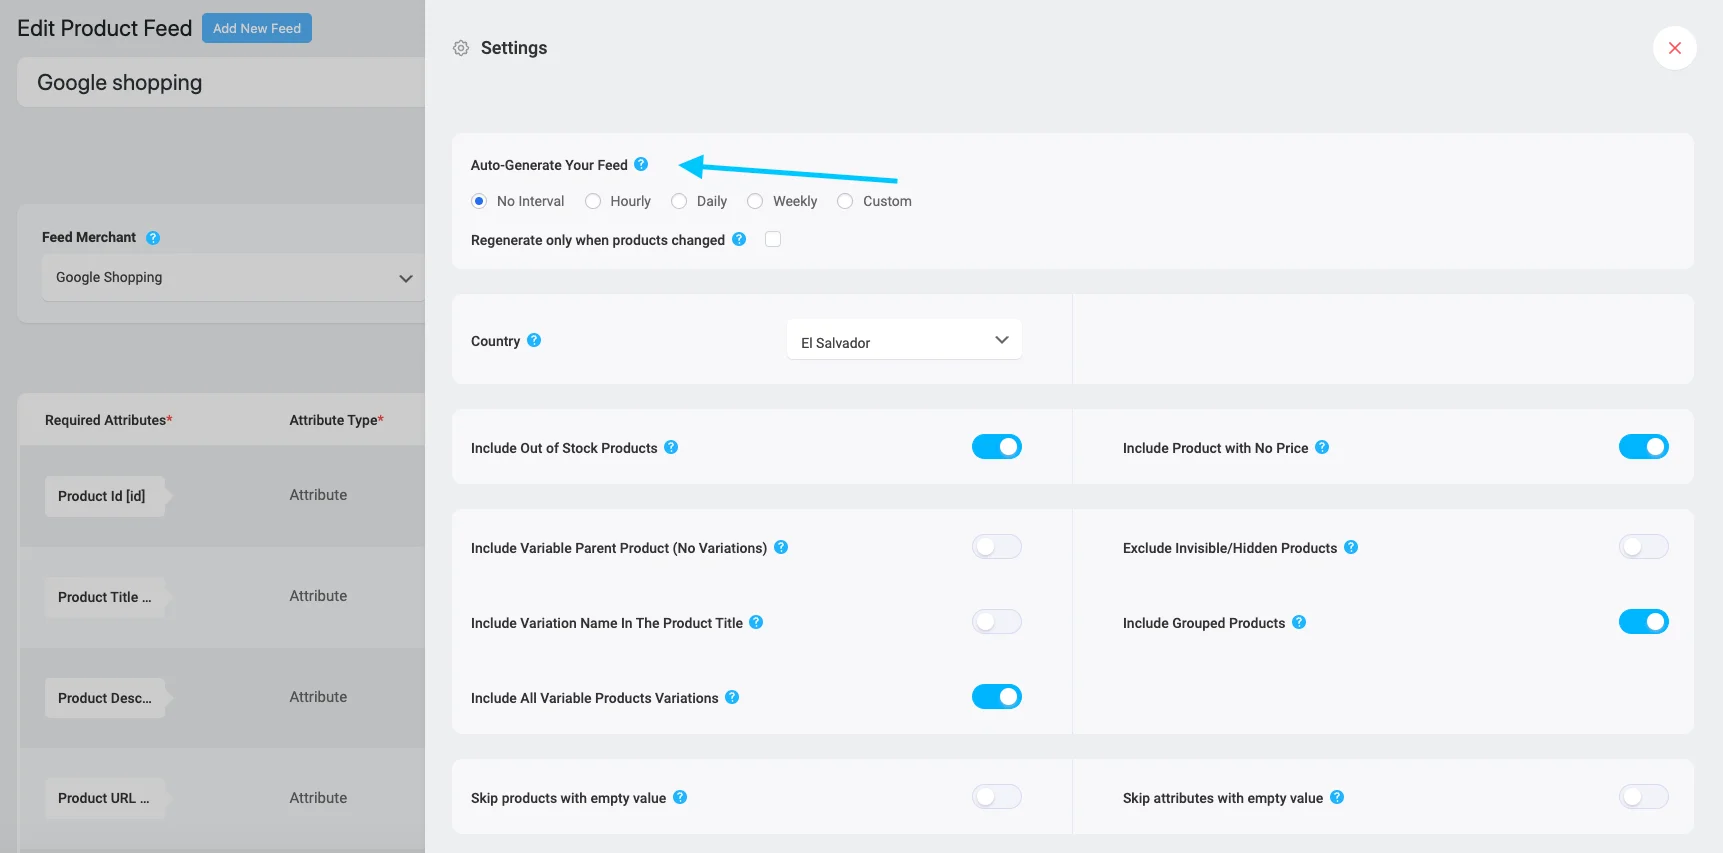
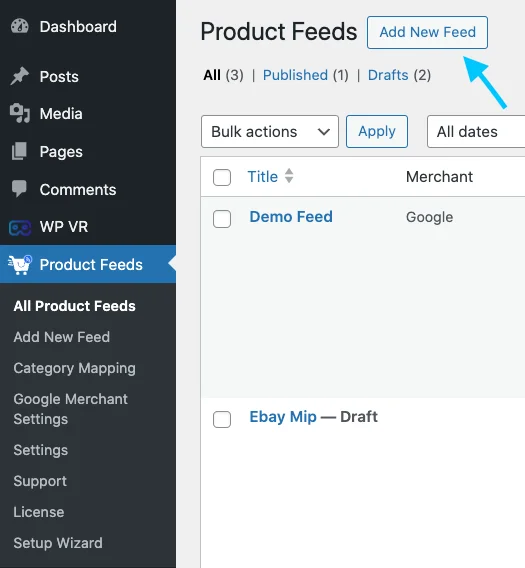
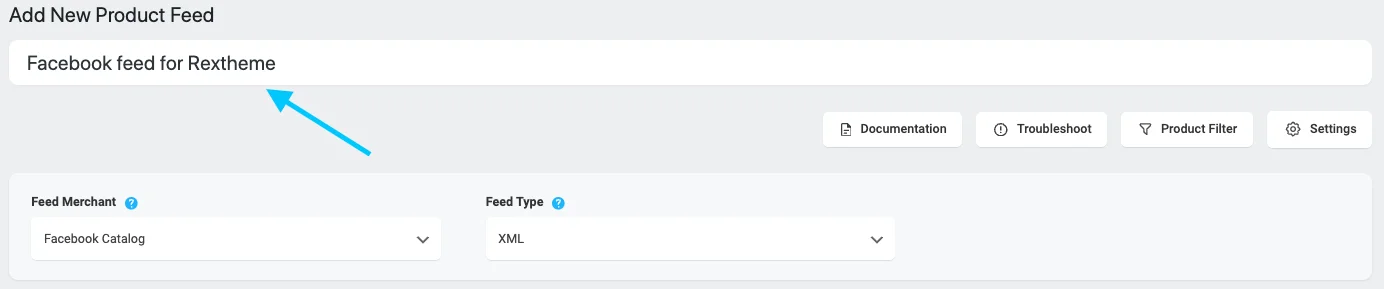
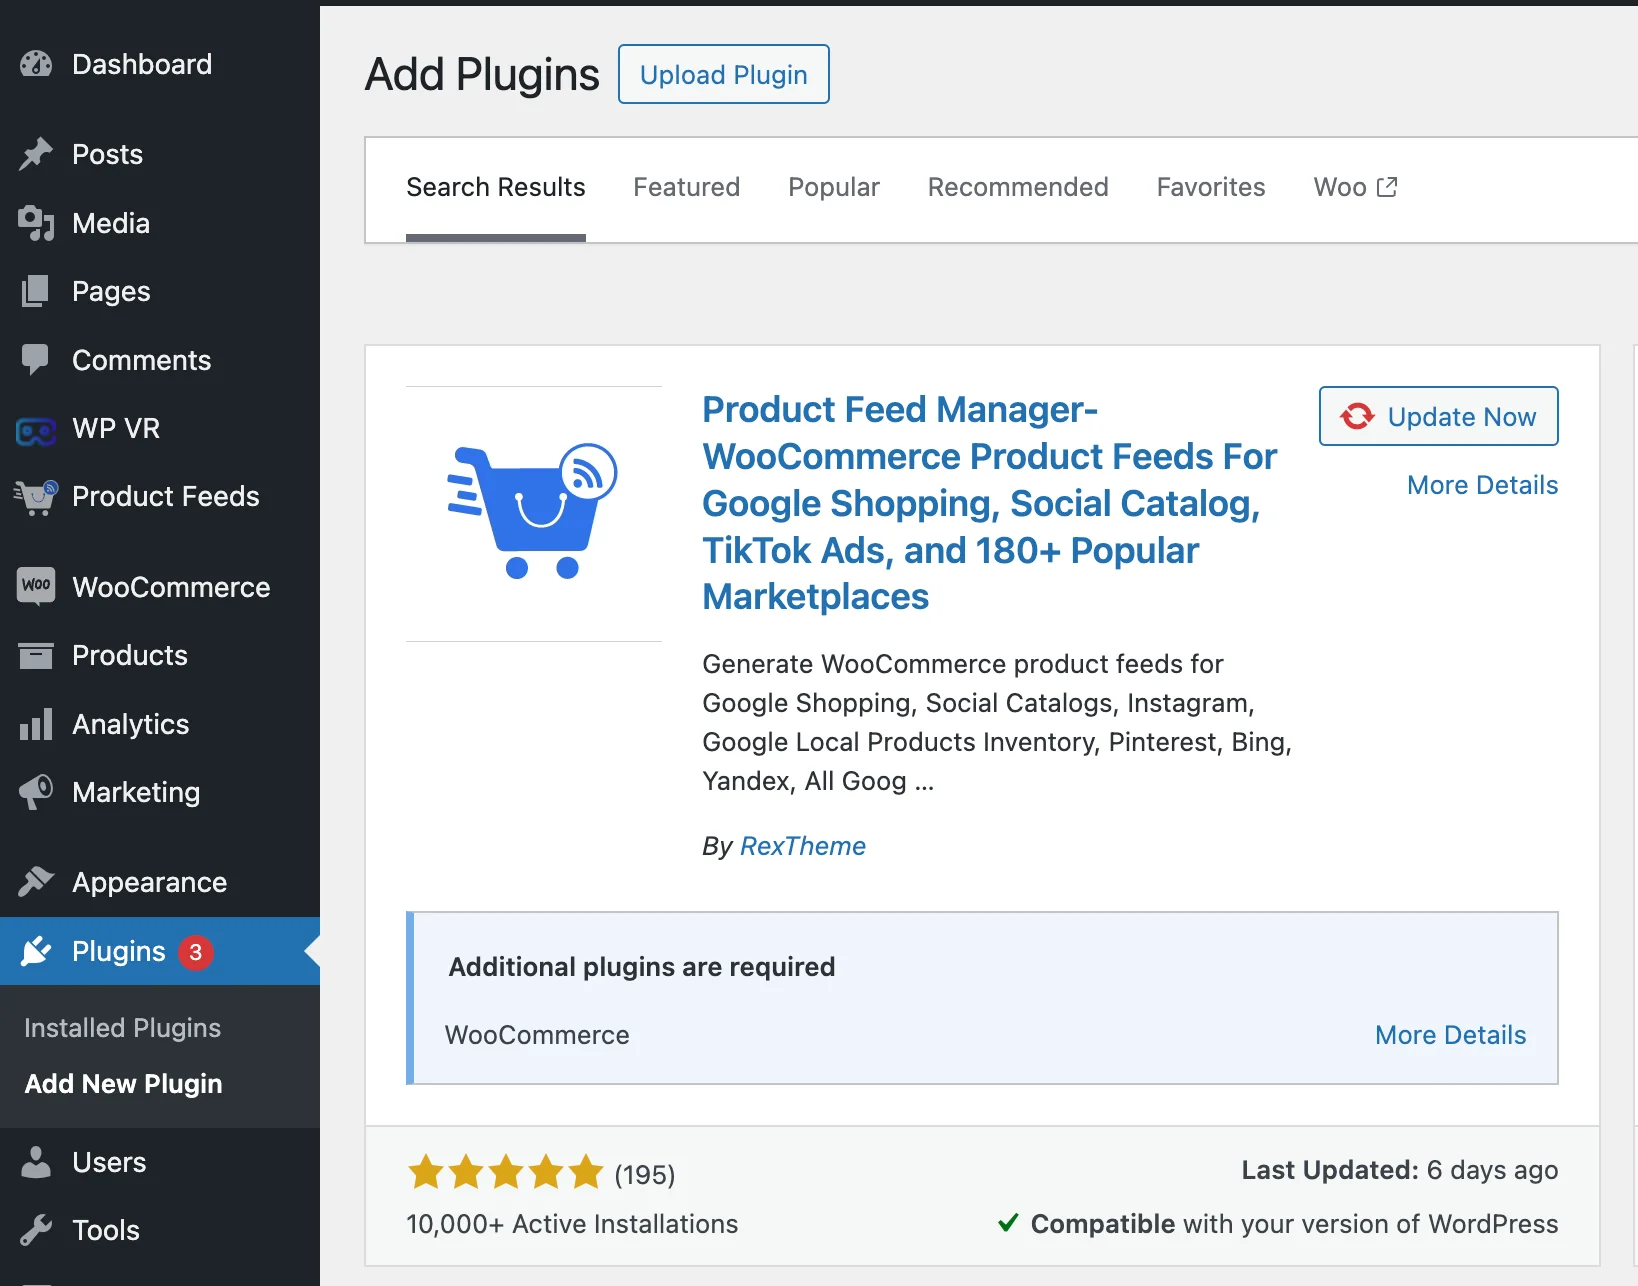
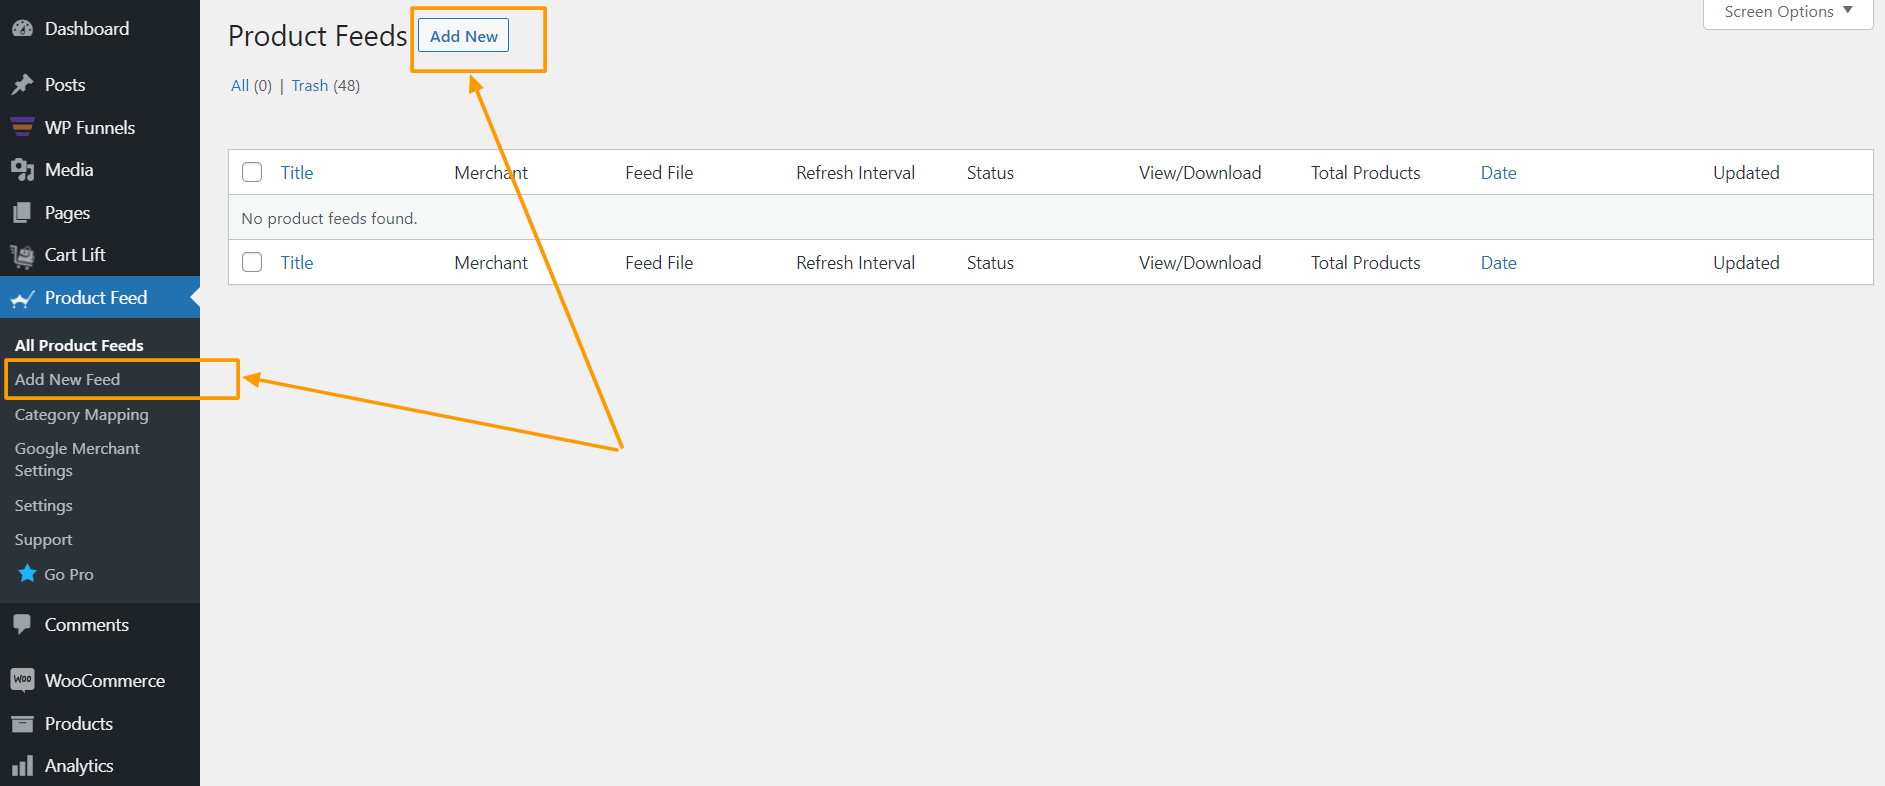
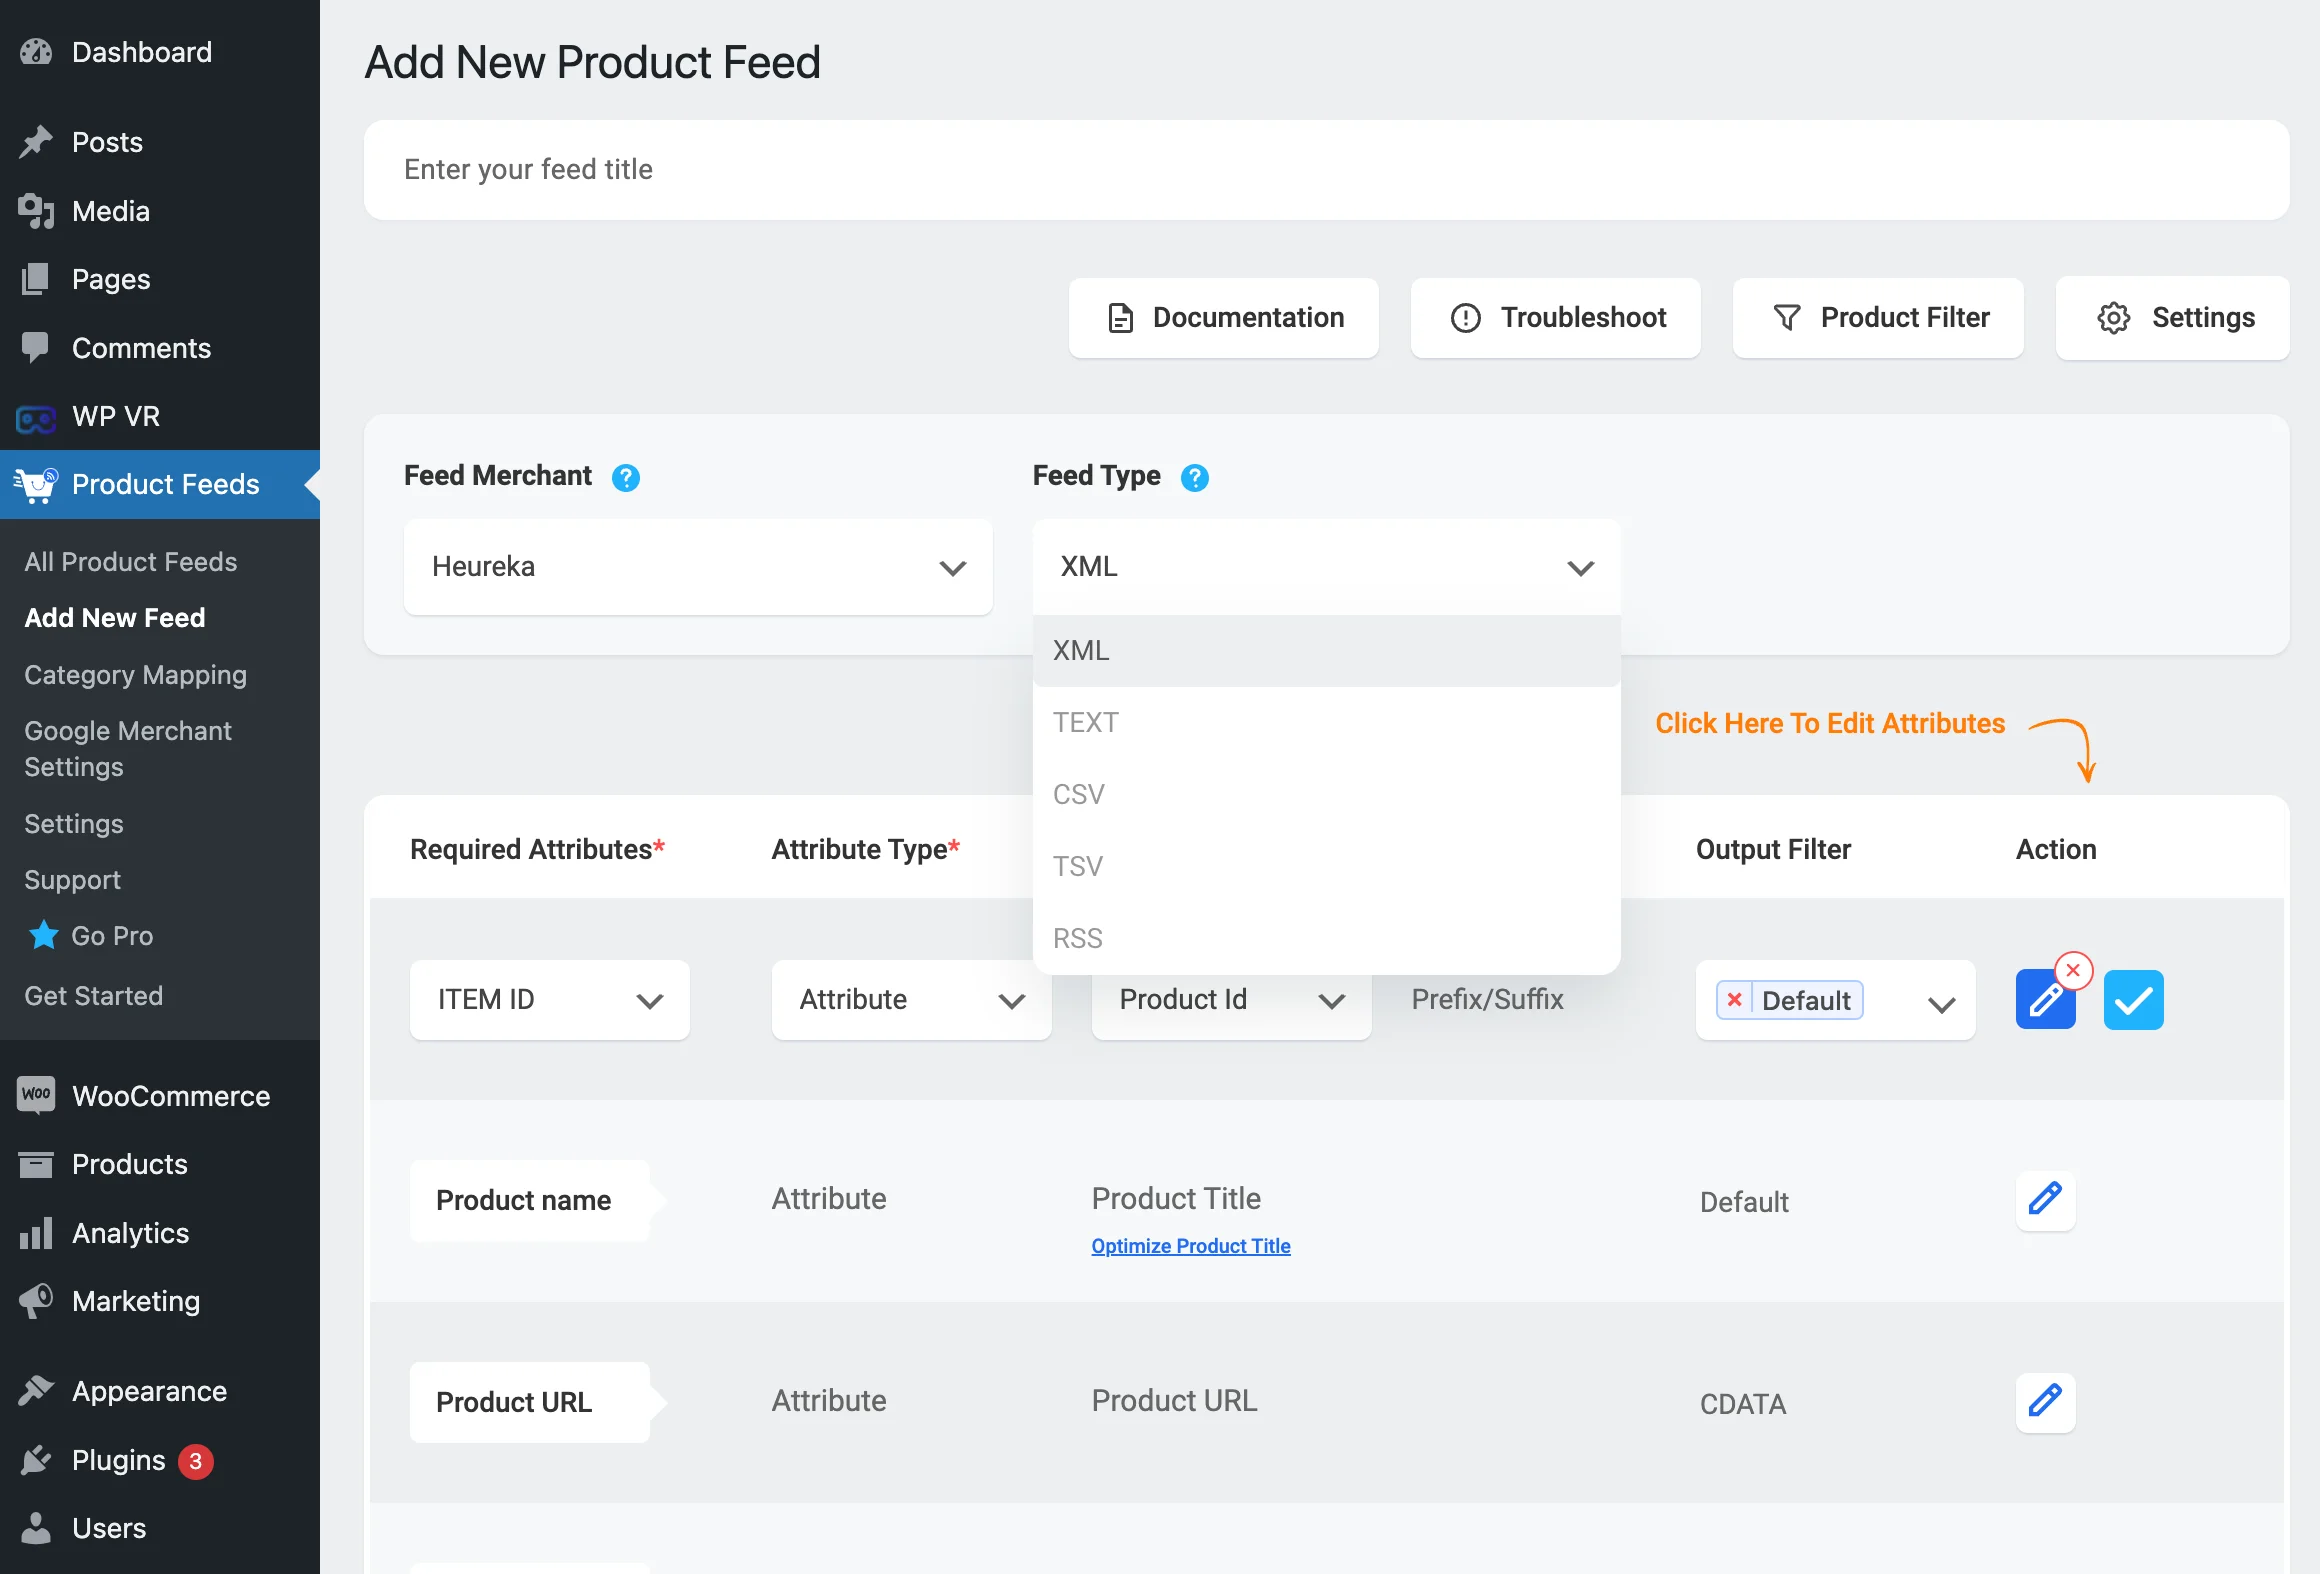
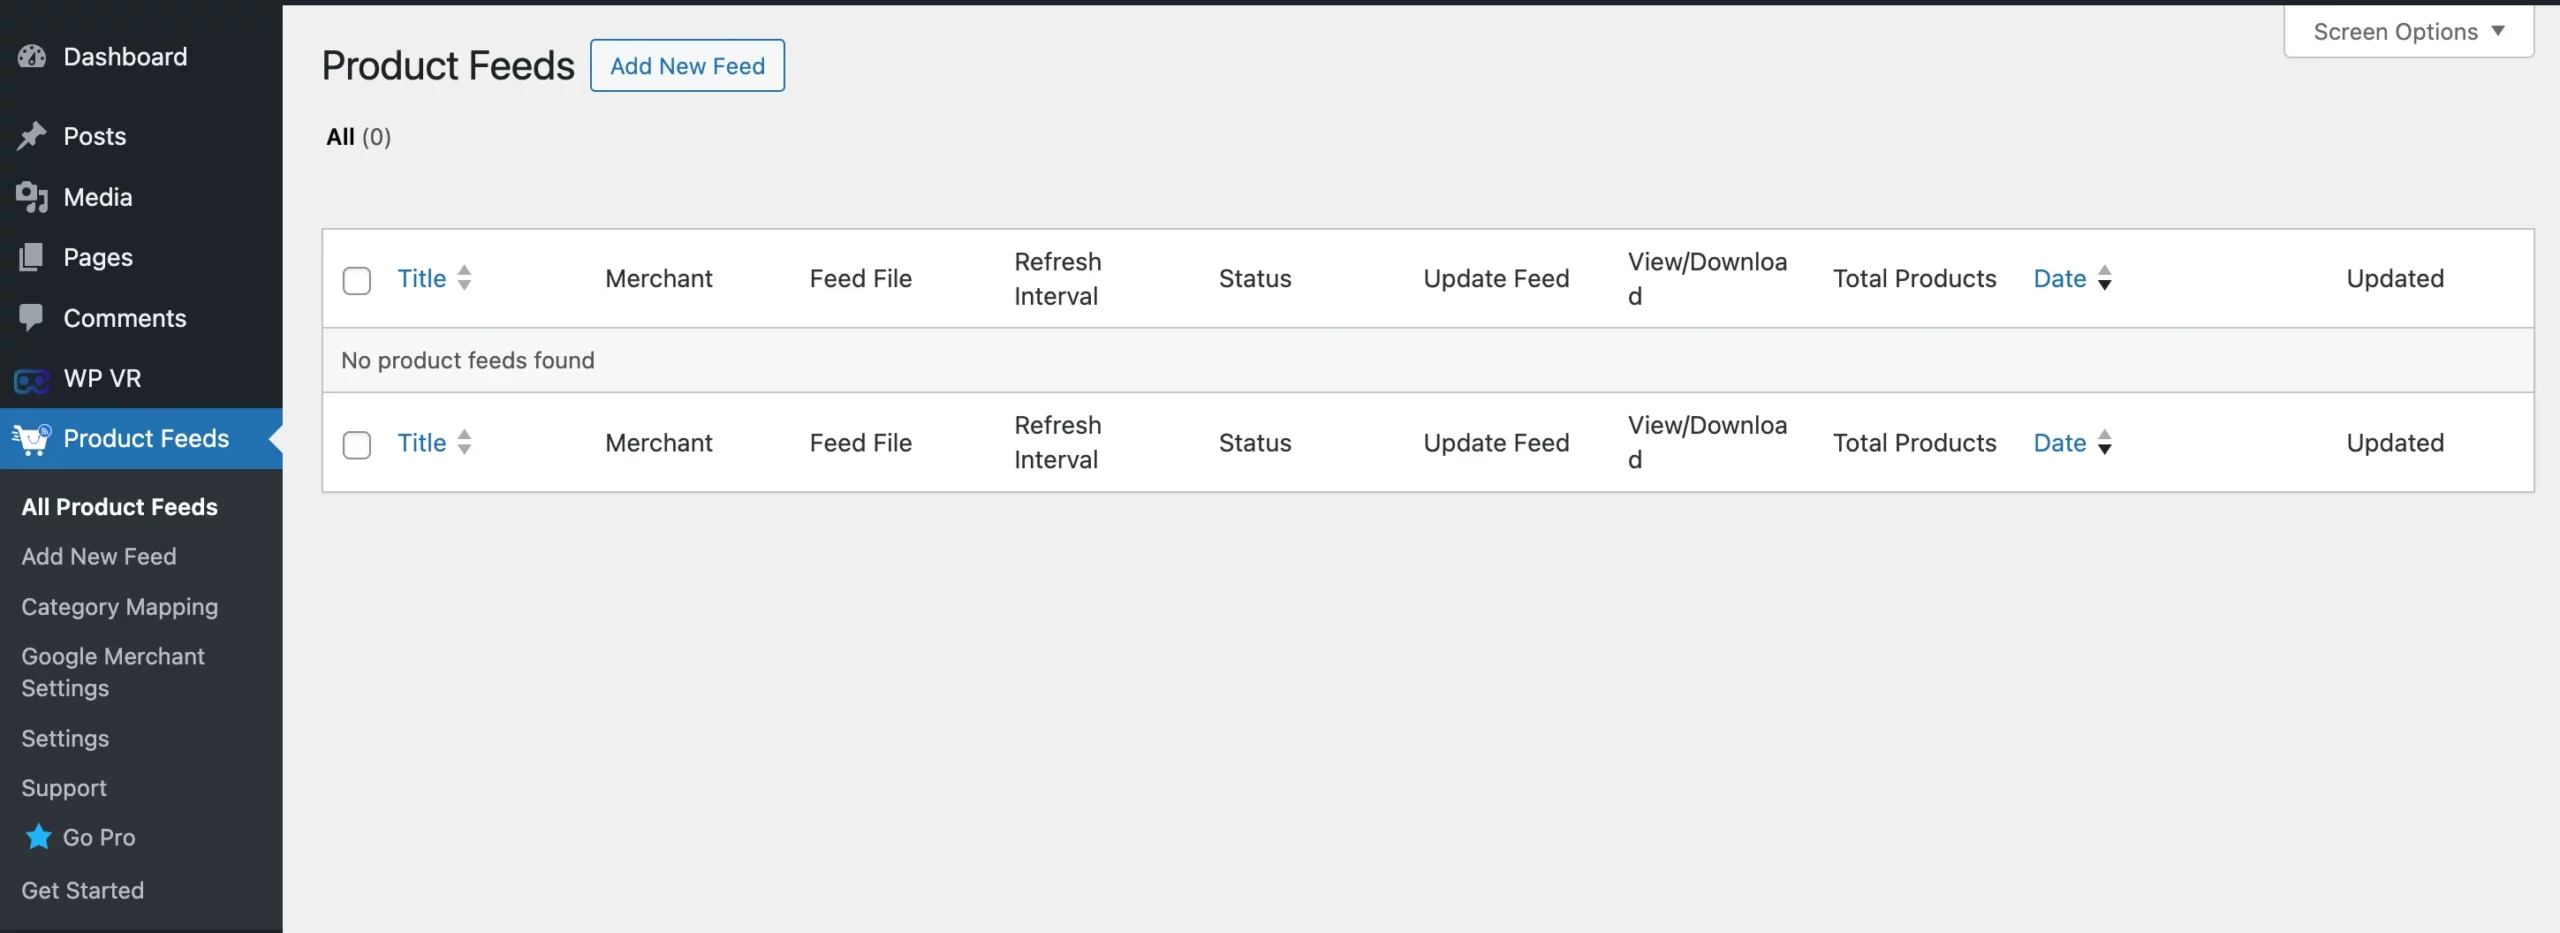
That’s where the Product Feed Manager For WooCommerce, a powerful product feed management tool, comes in.

PFM tool

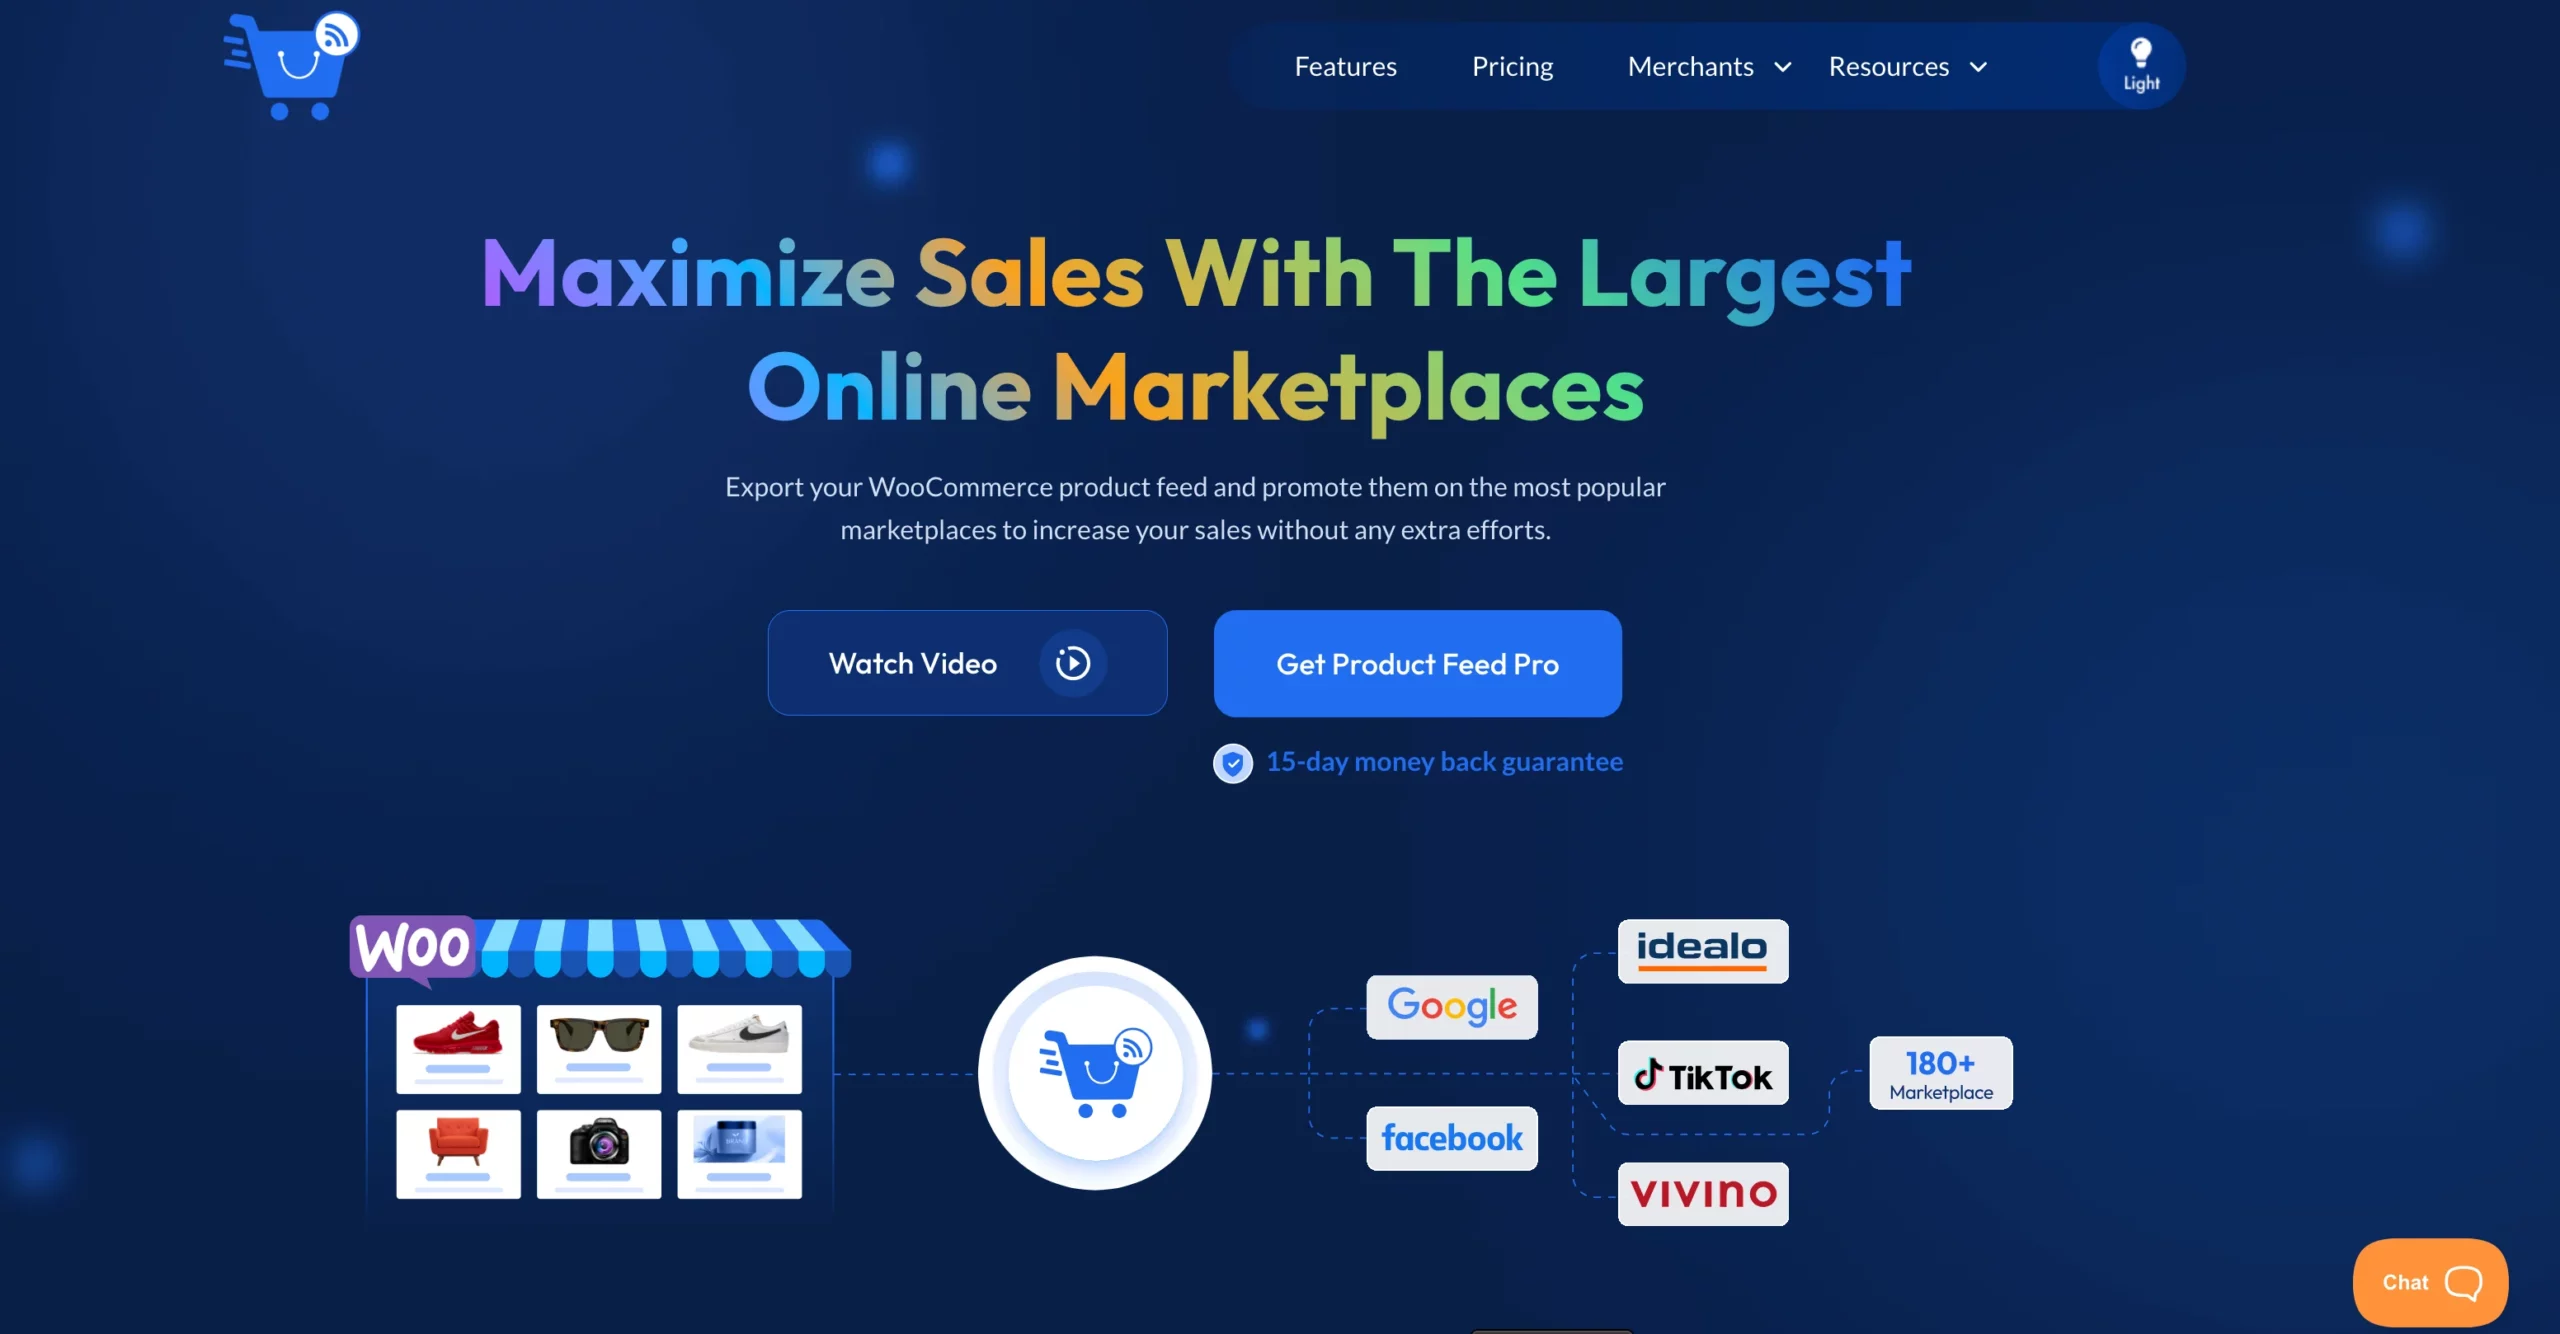
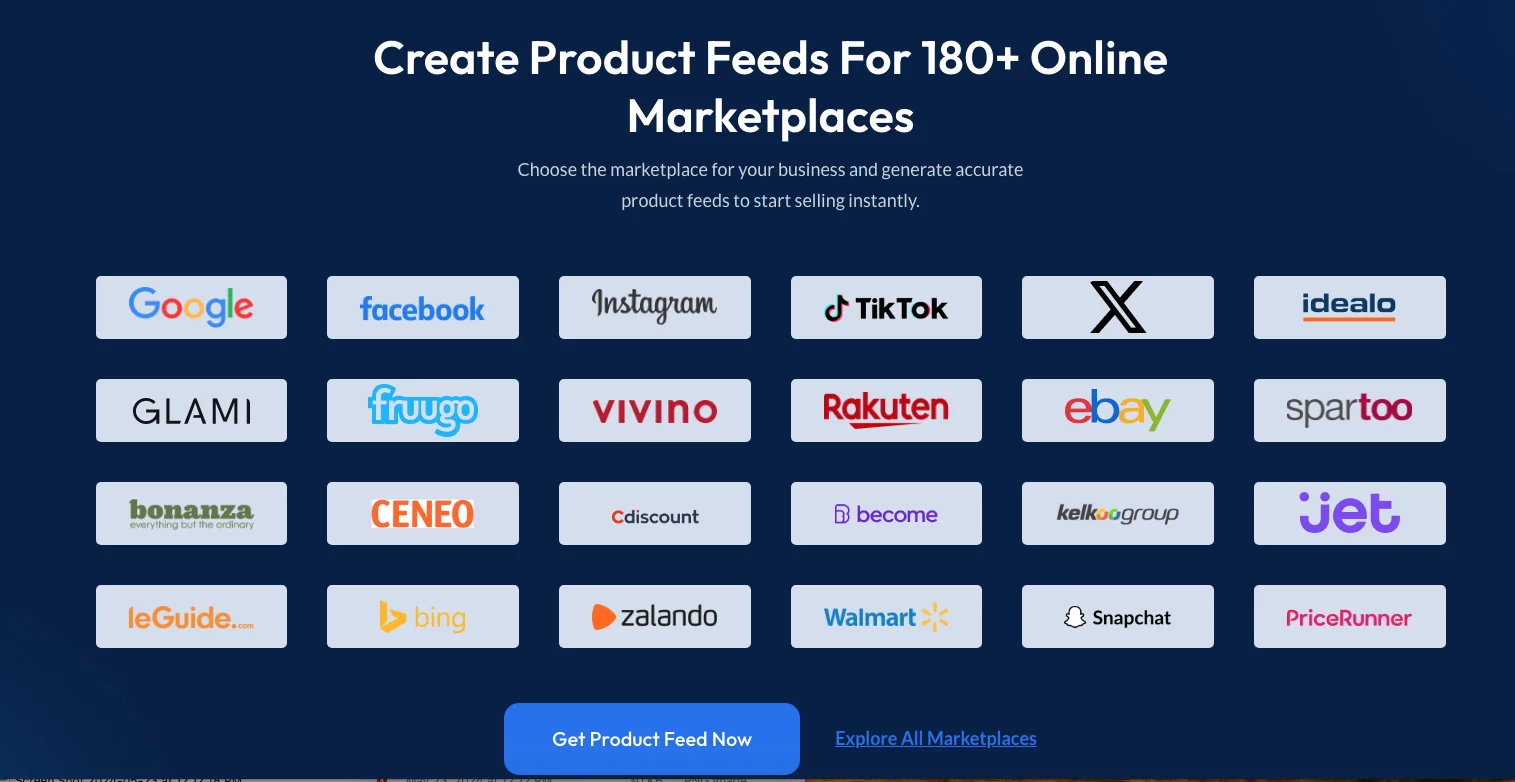
It supports over 180+ marketplaces, allowing you to optimize, automate, and synchronize your product listings from a single dashboard.

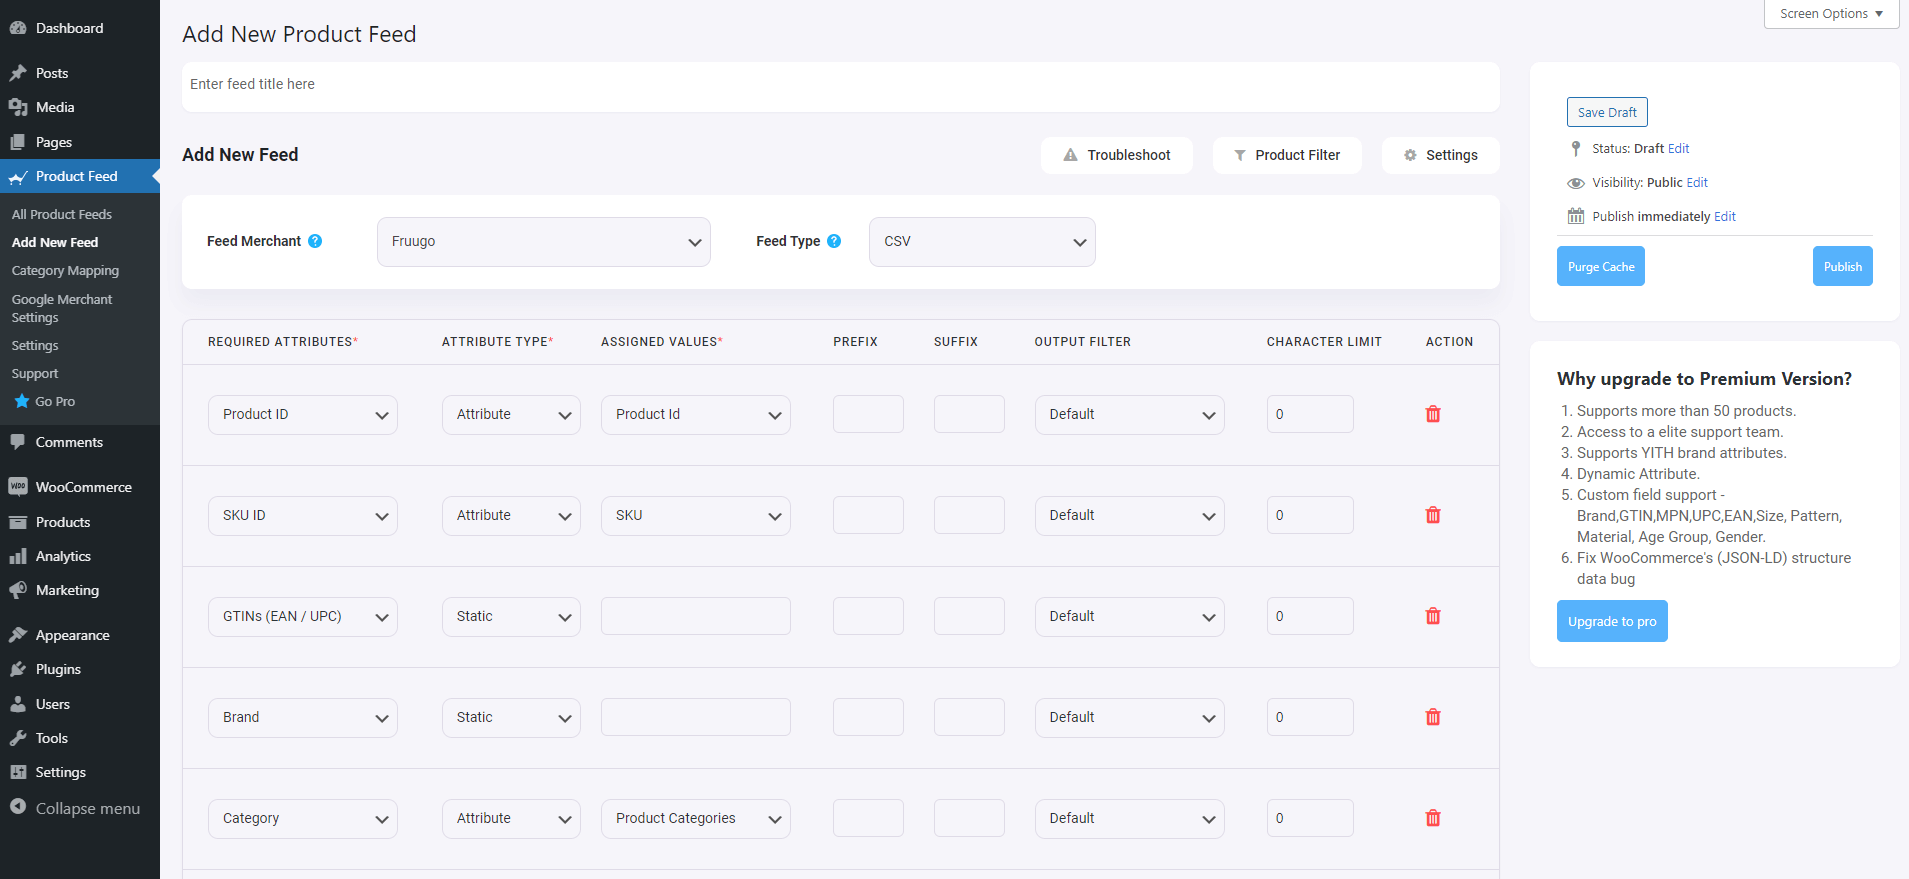
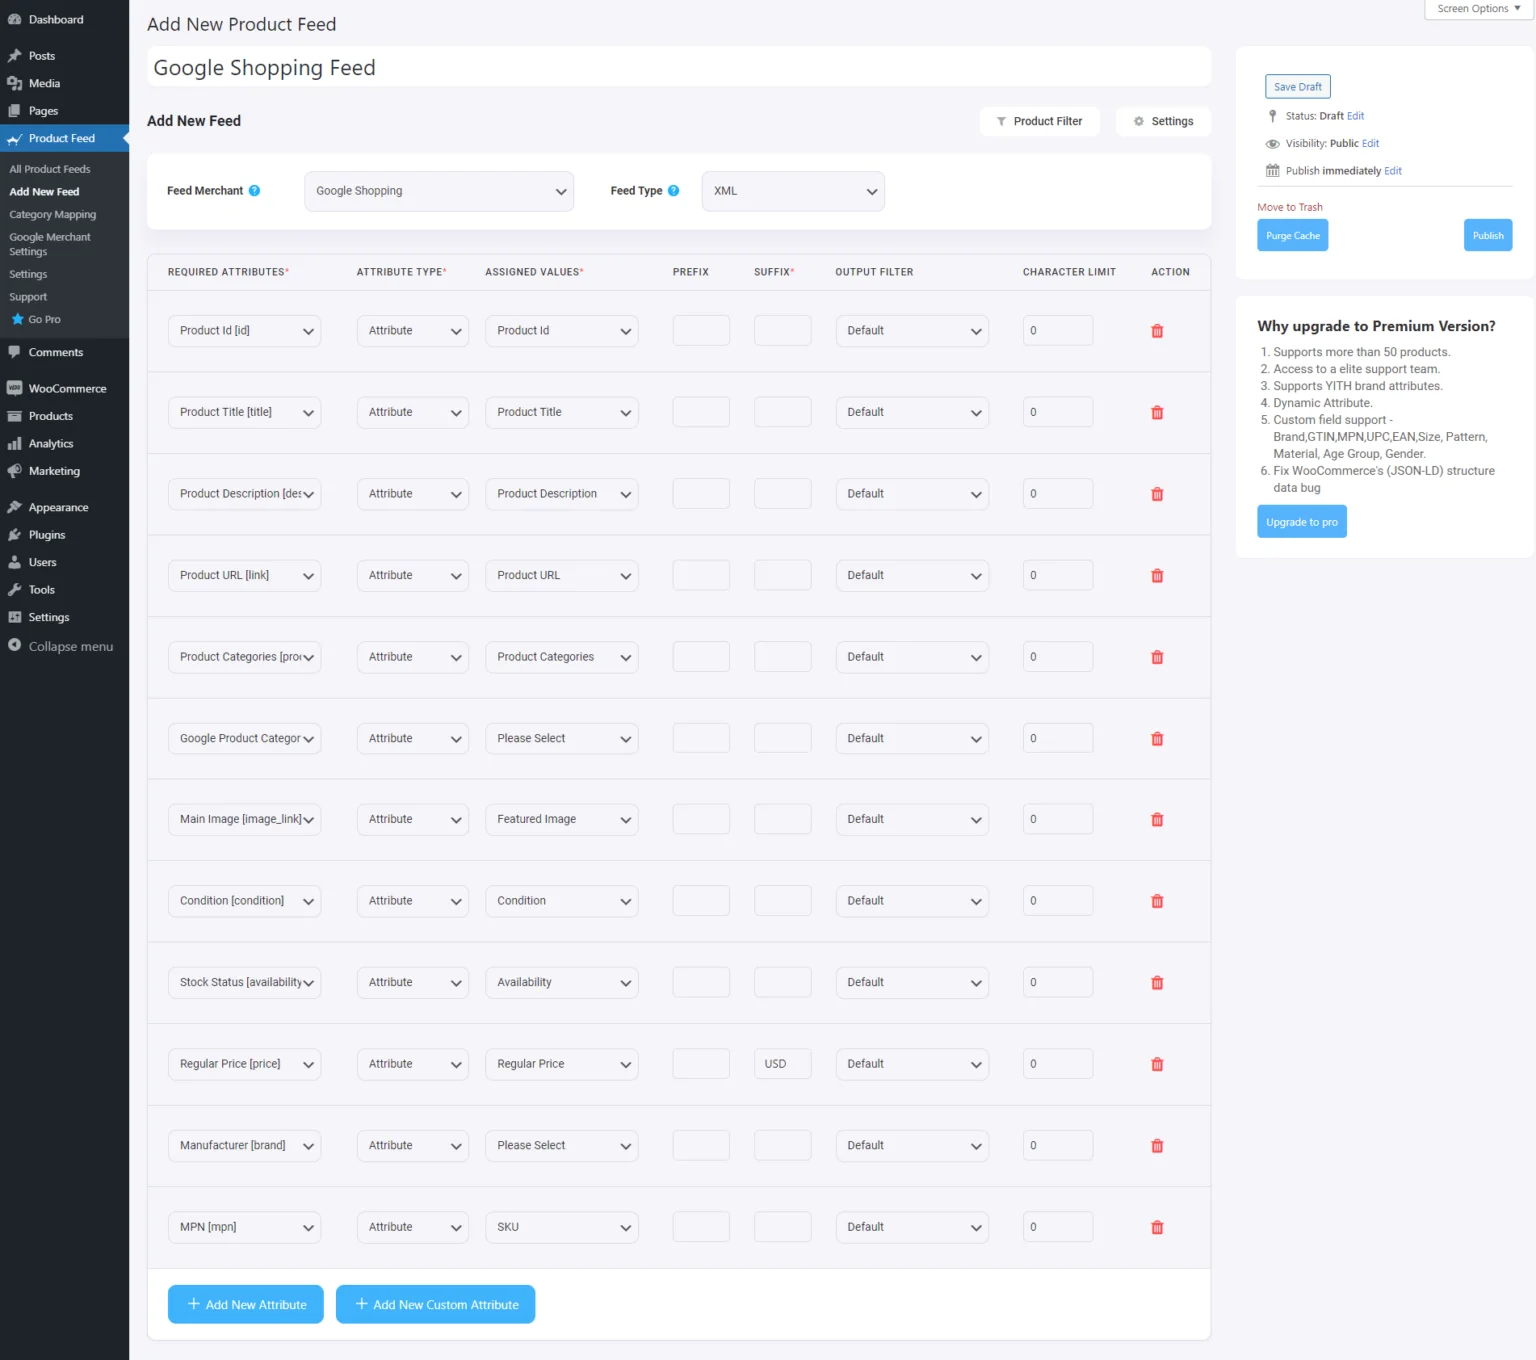
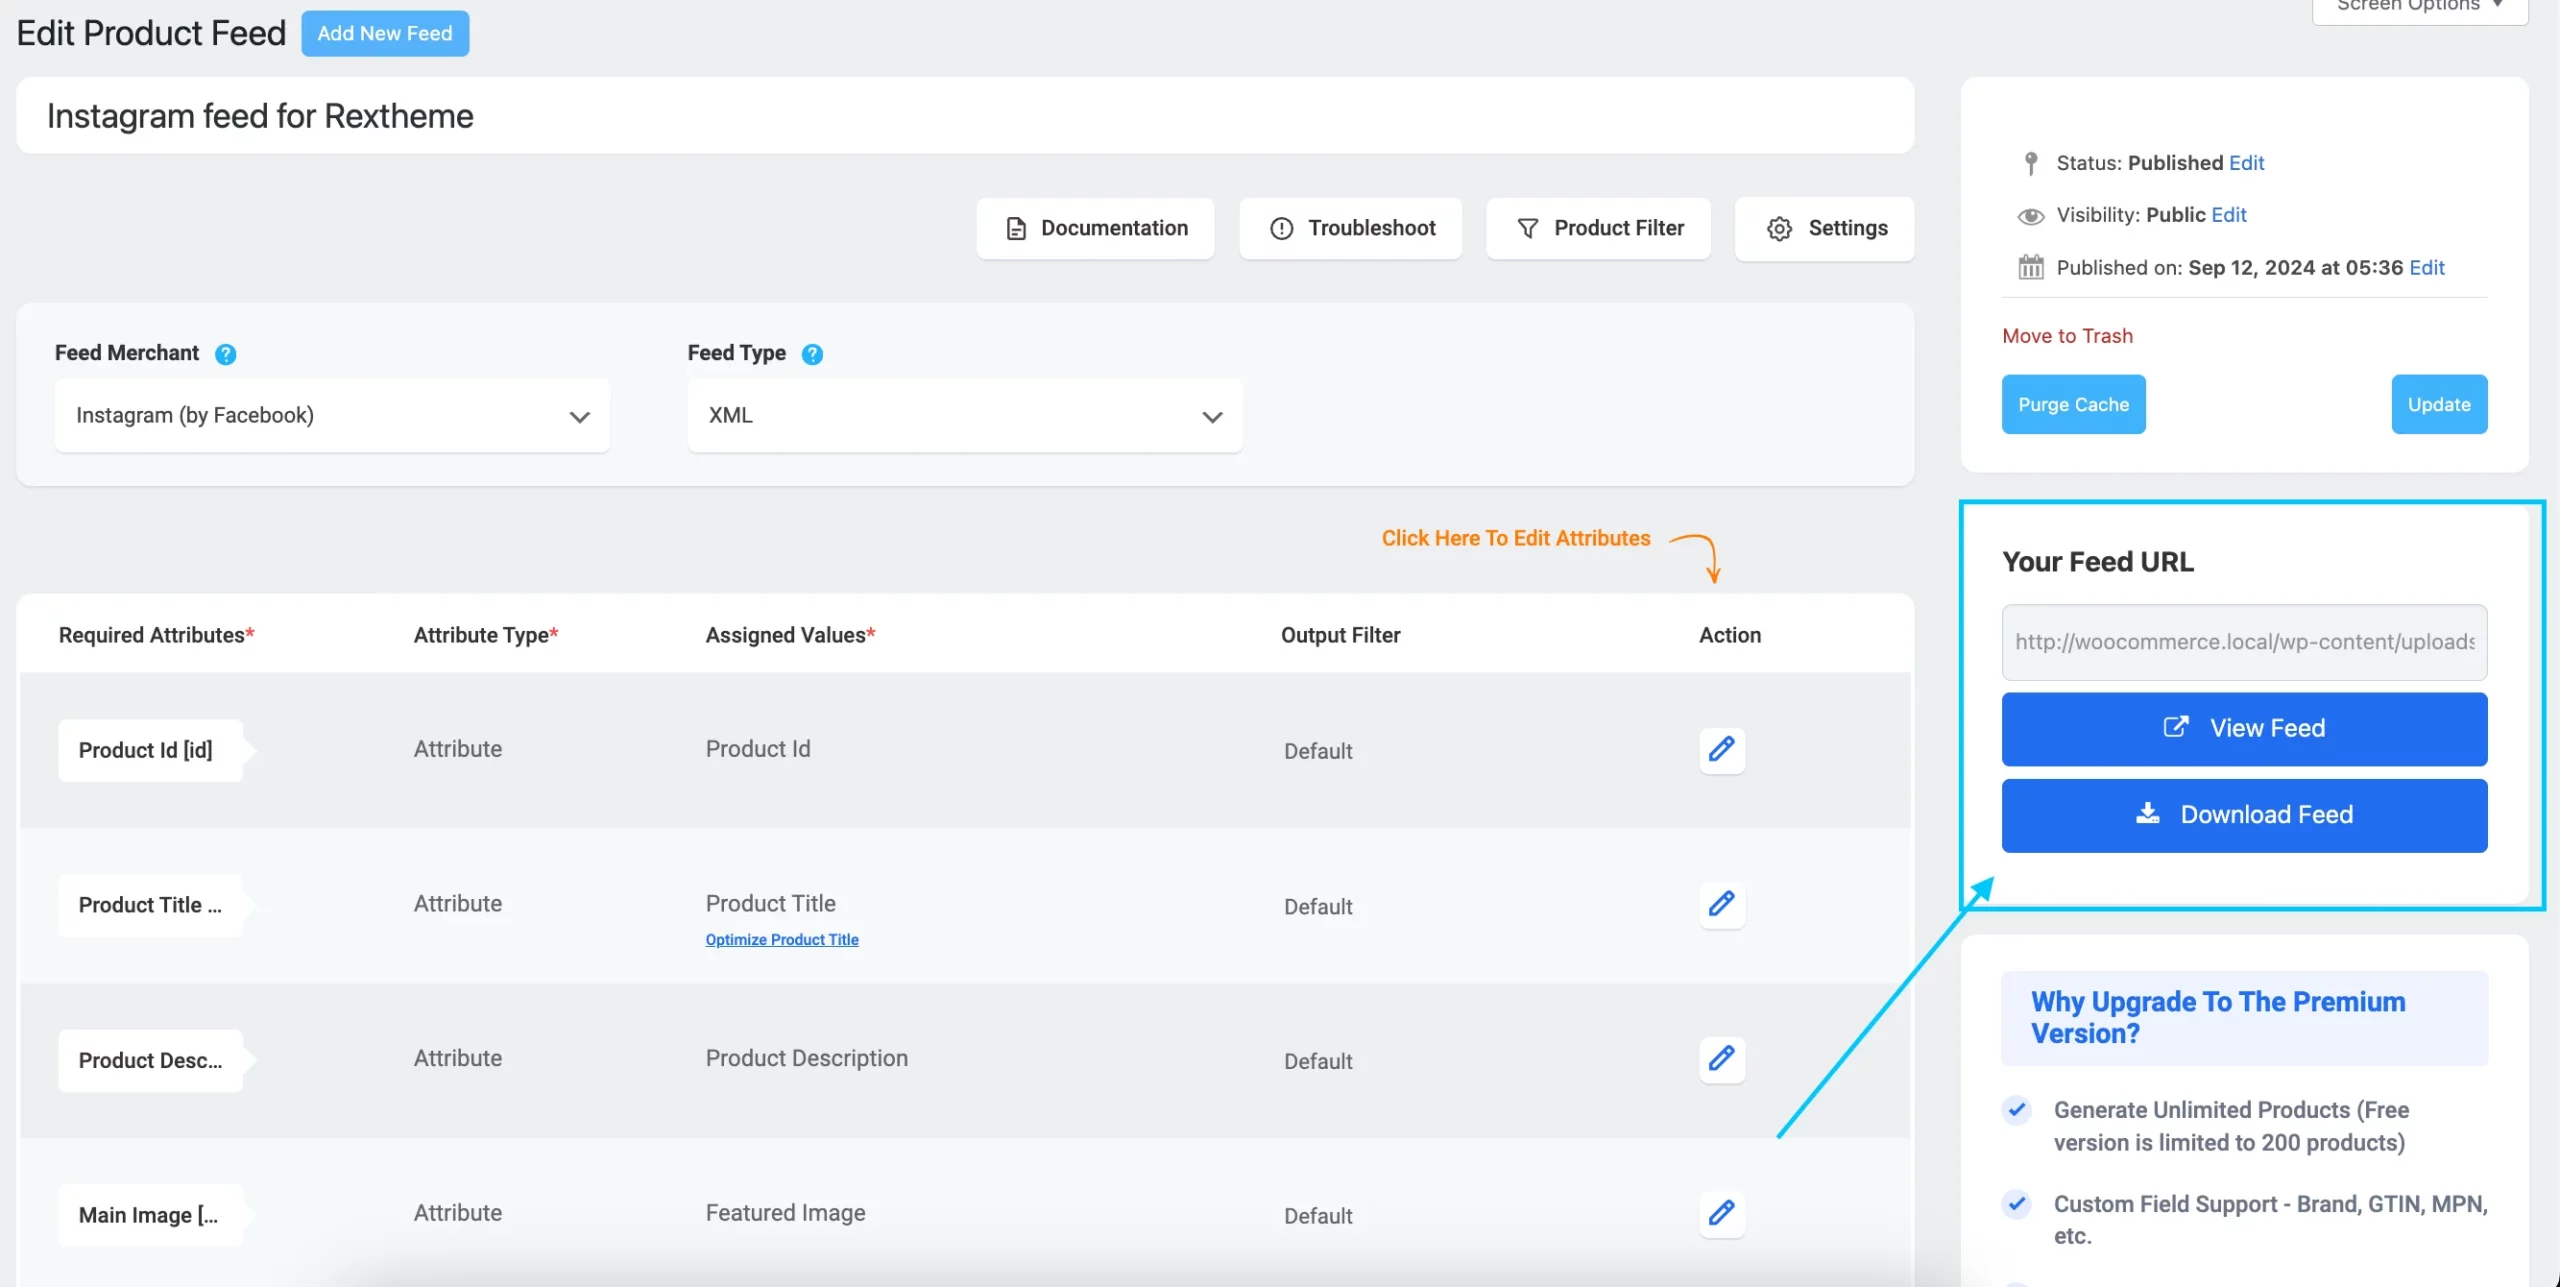
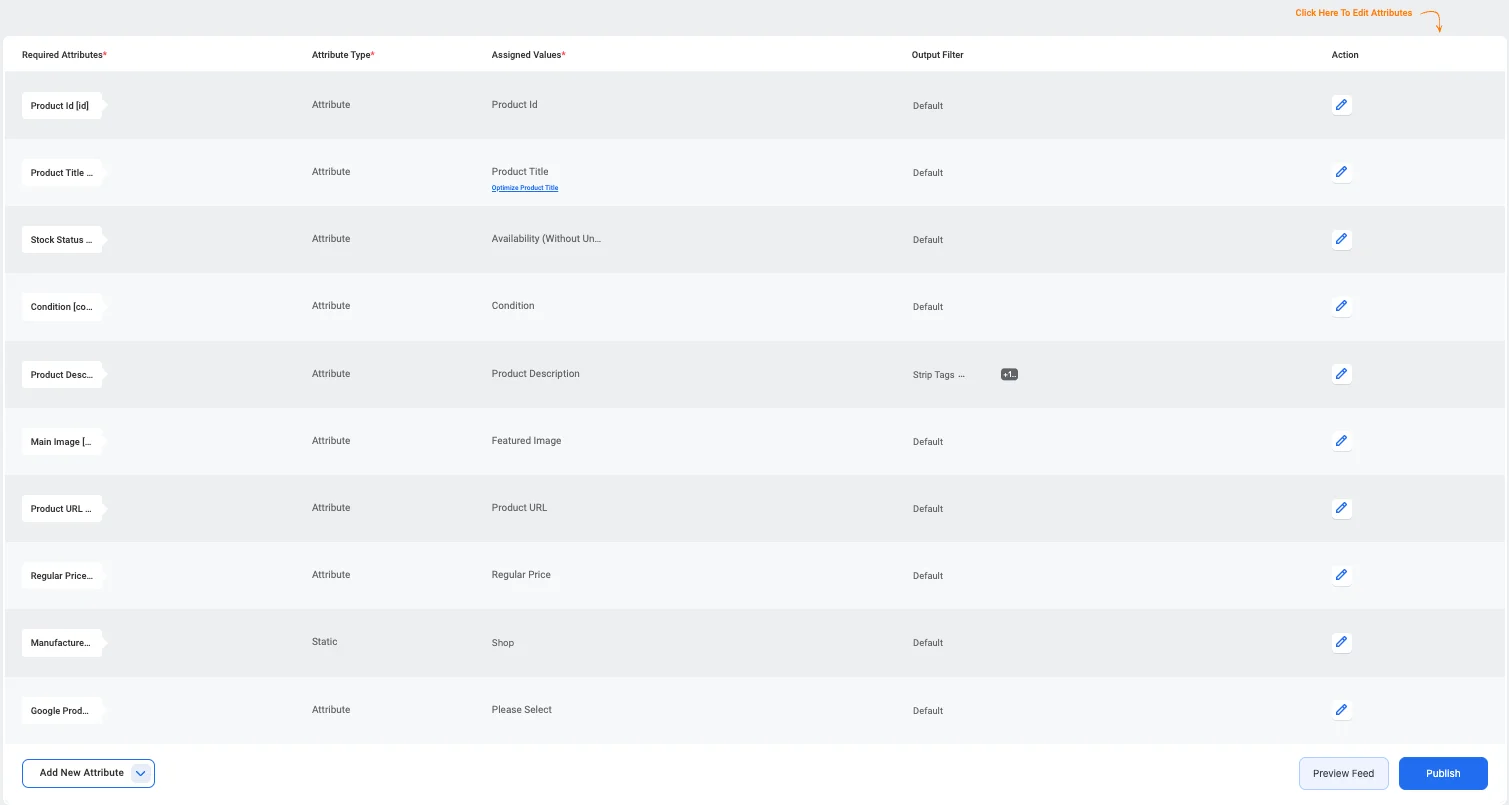
i. Accurate Product Data Across All Platforms

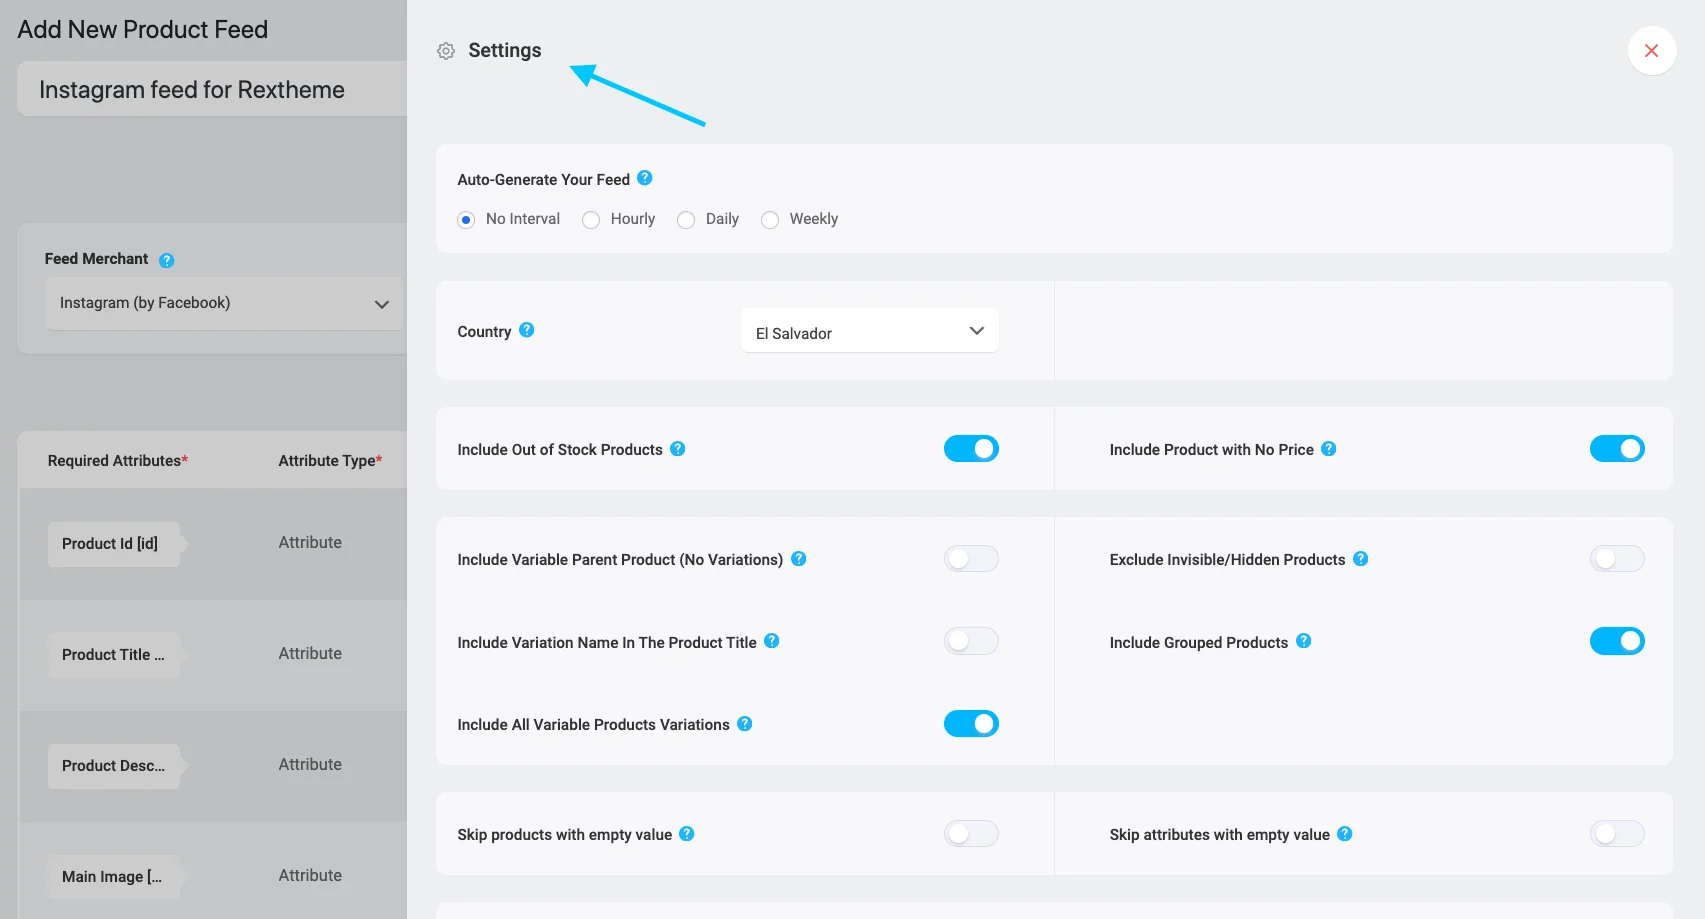
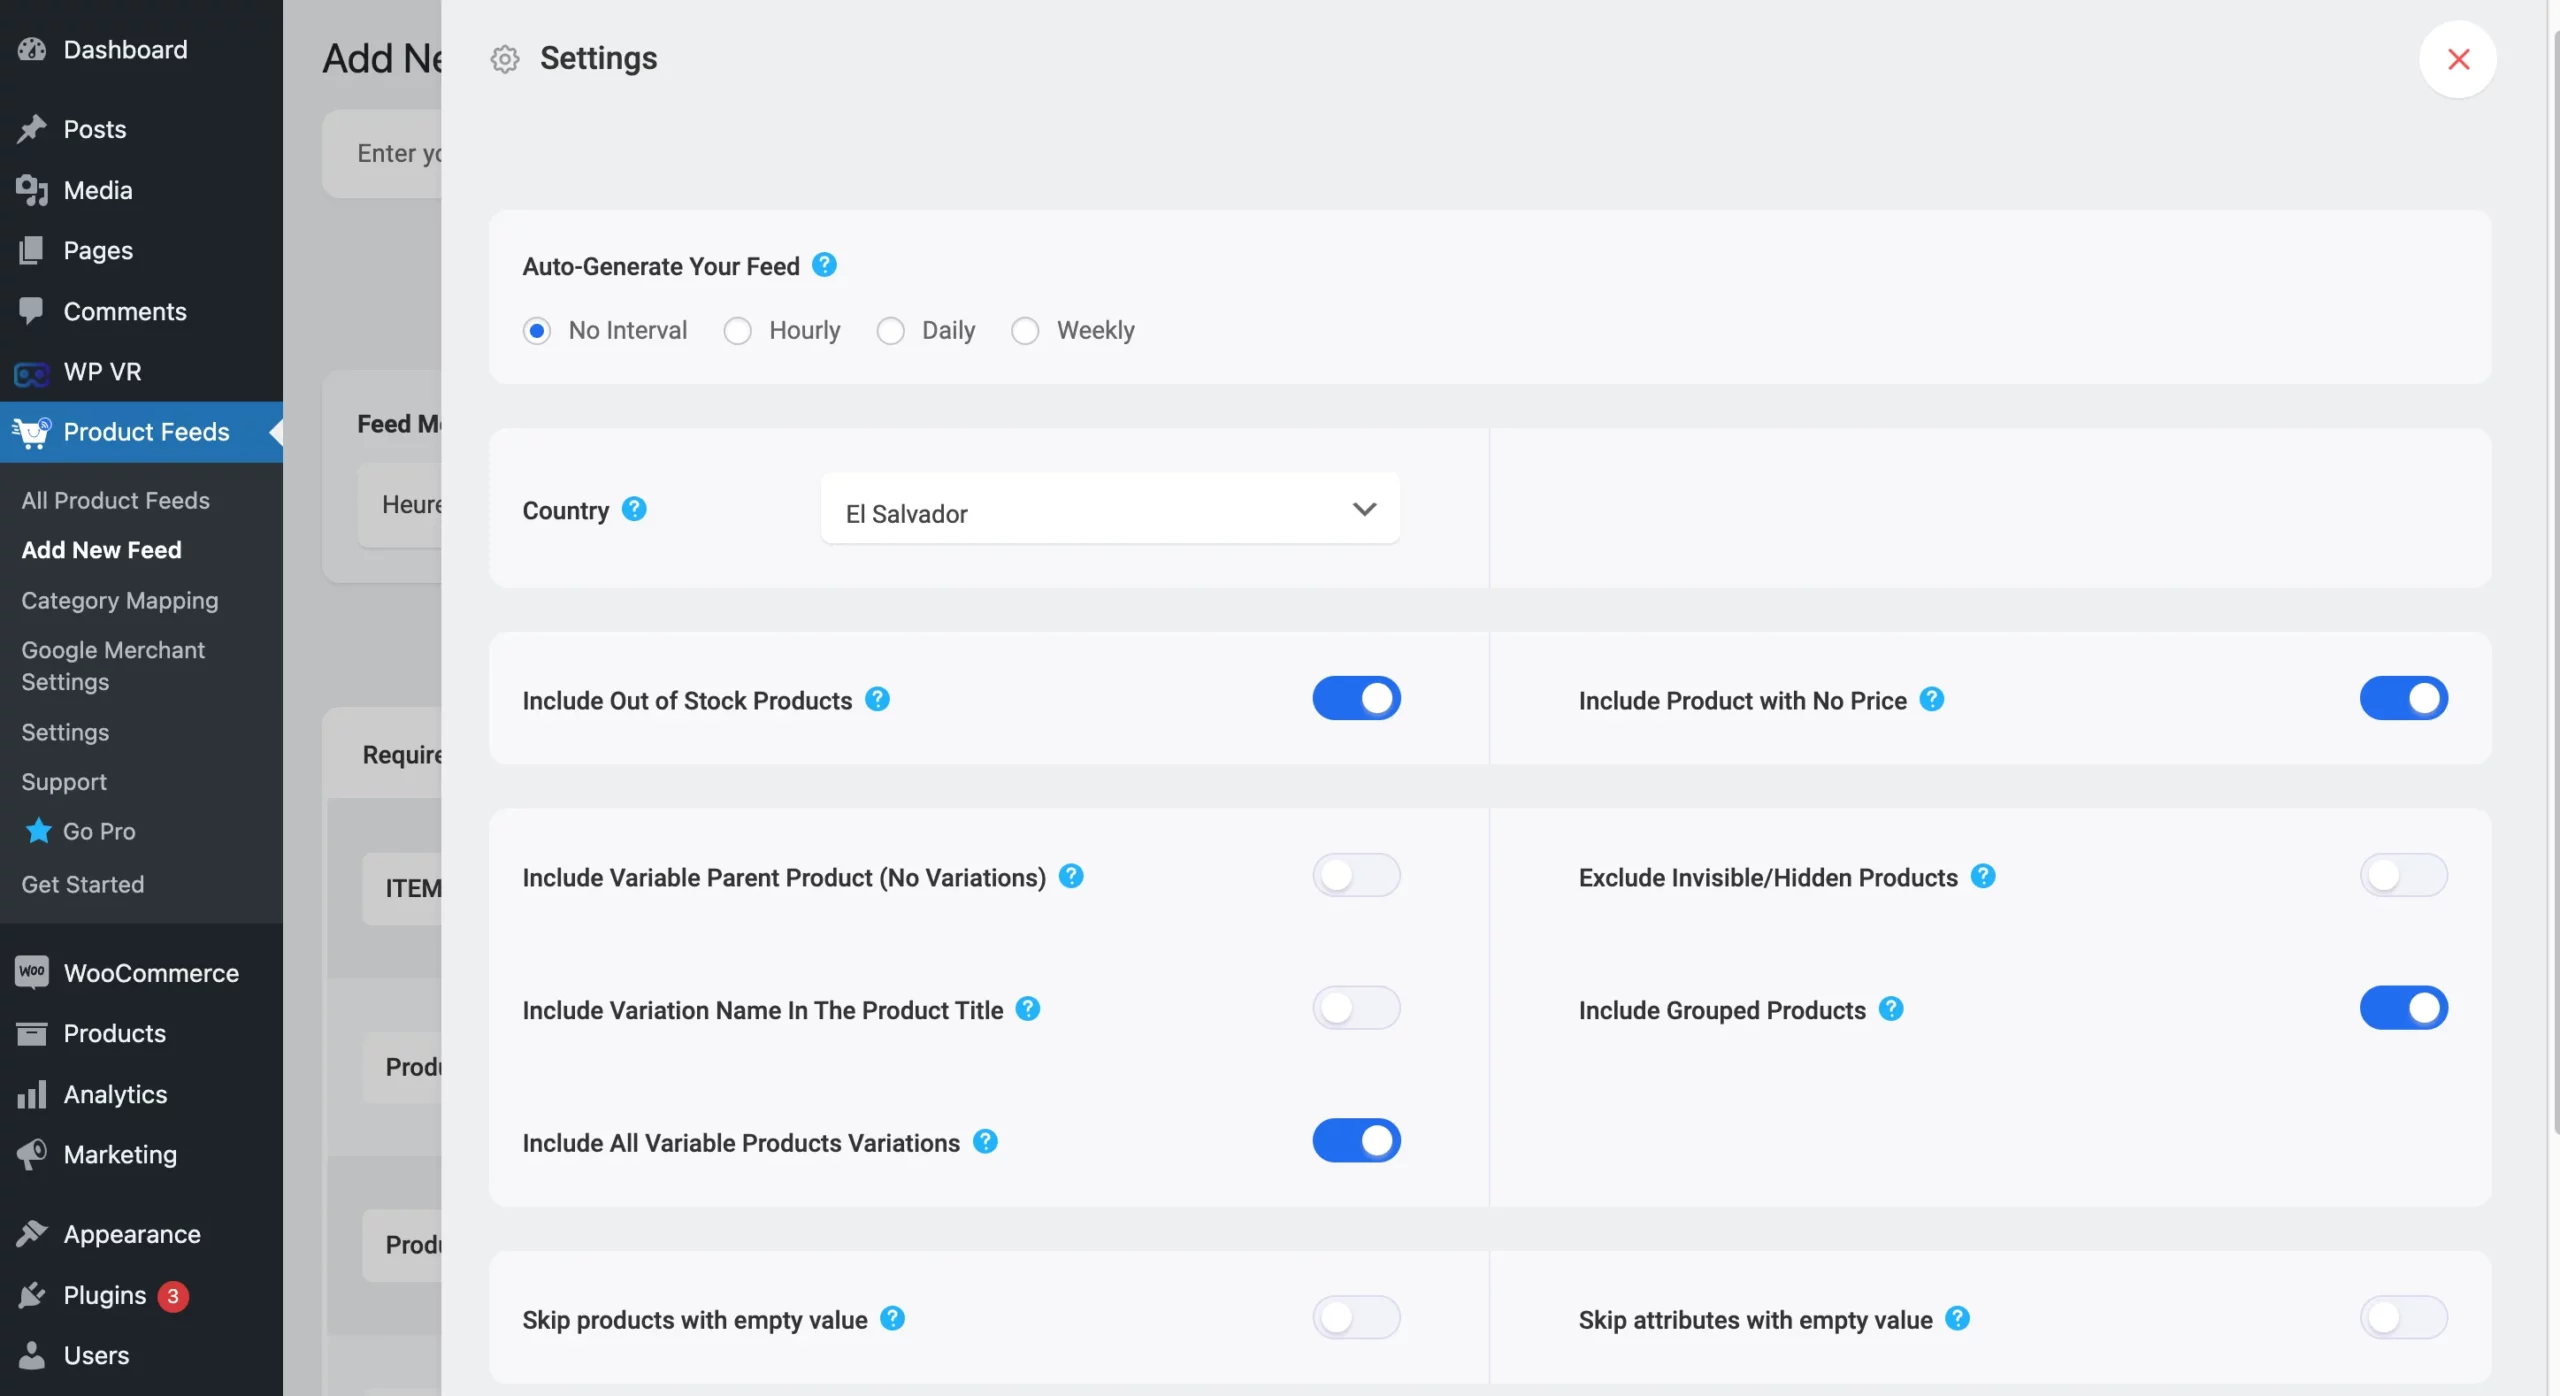
PFM ensures that product details—pricing, stock levels, and descriptions—stay consistent and up to date across every marketplace, reducing errors and mismatched information.

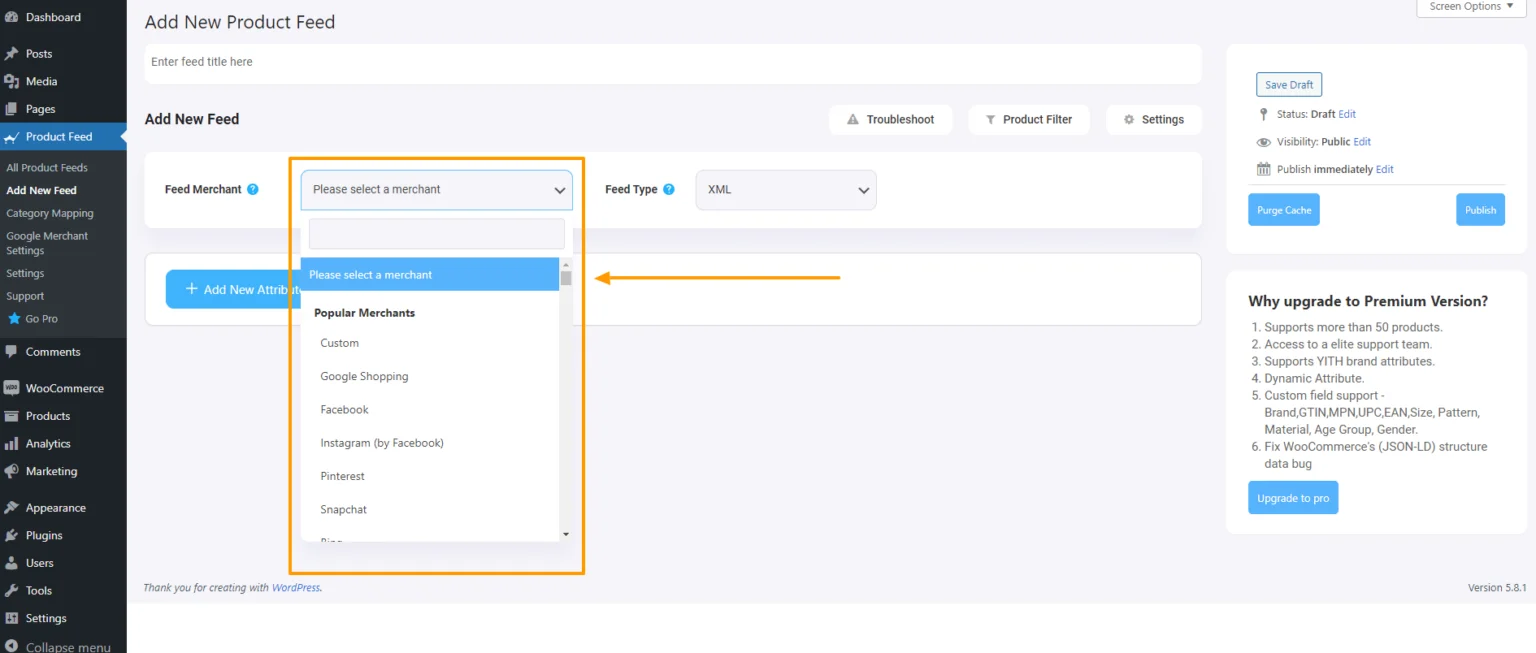
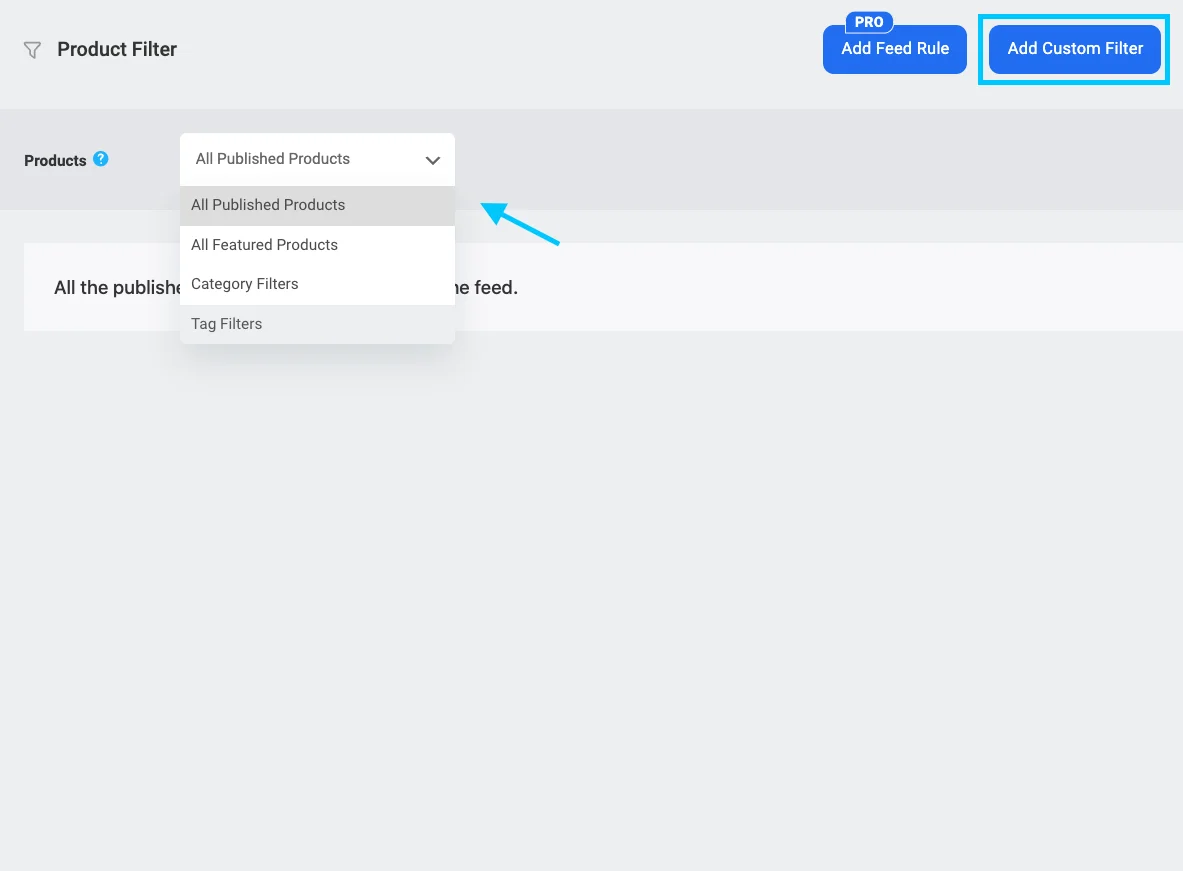
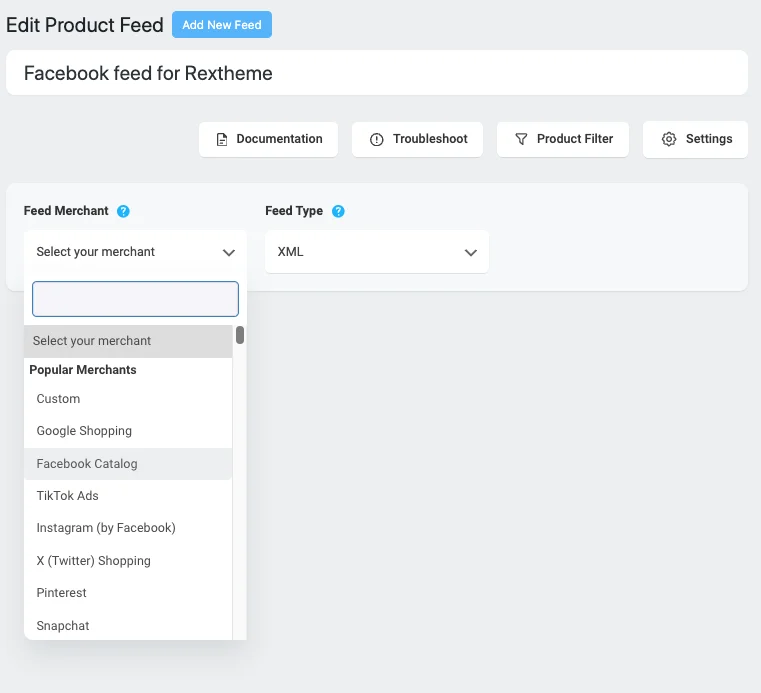
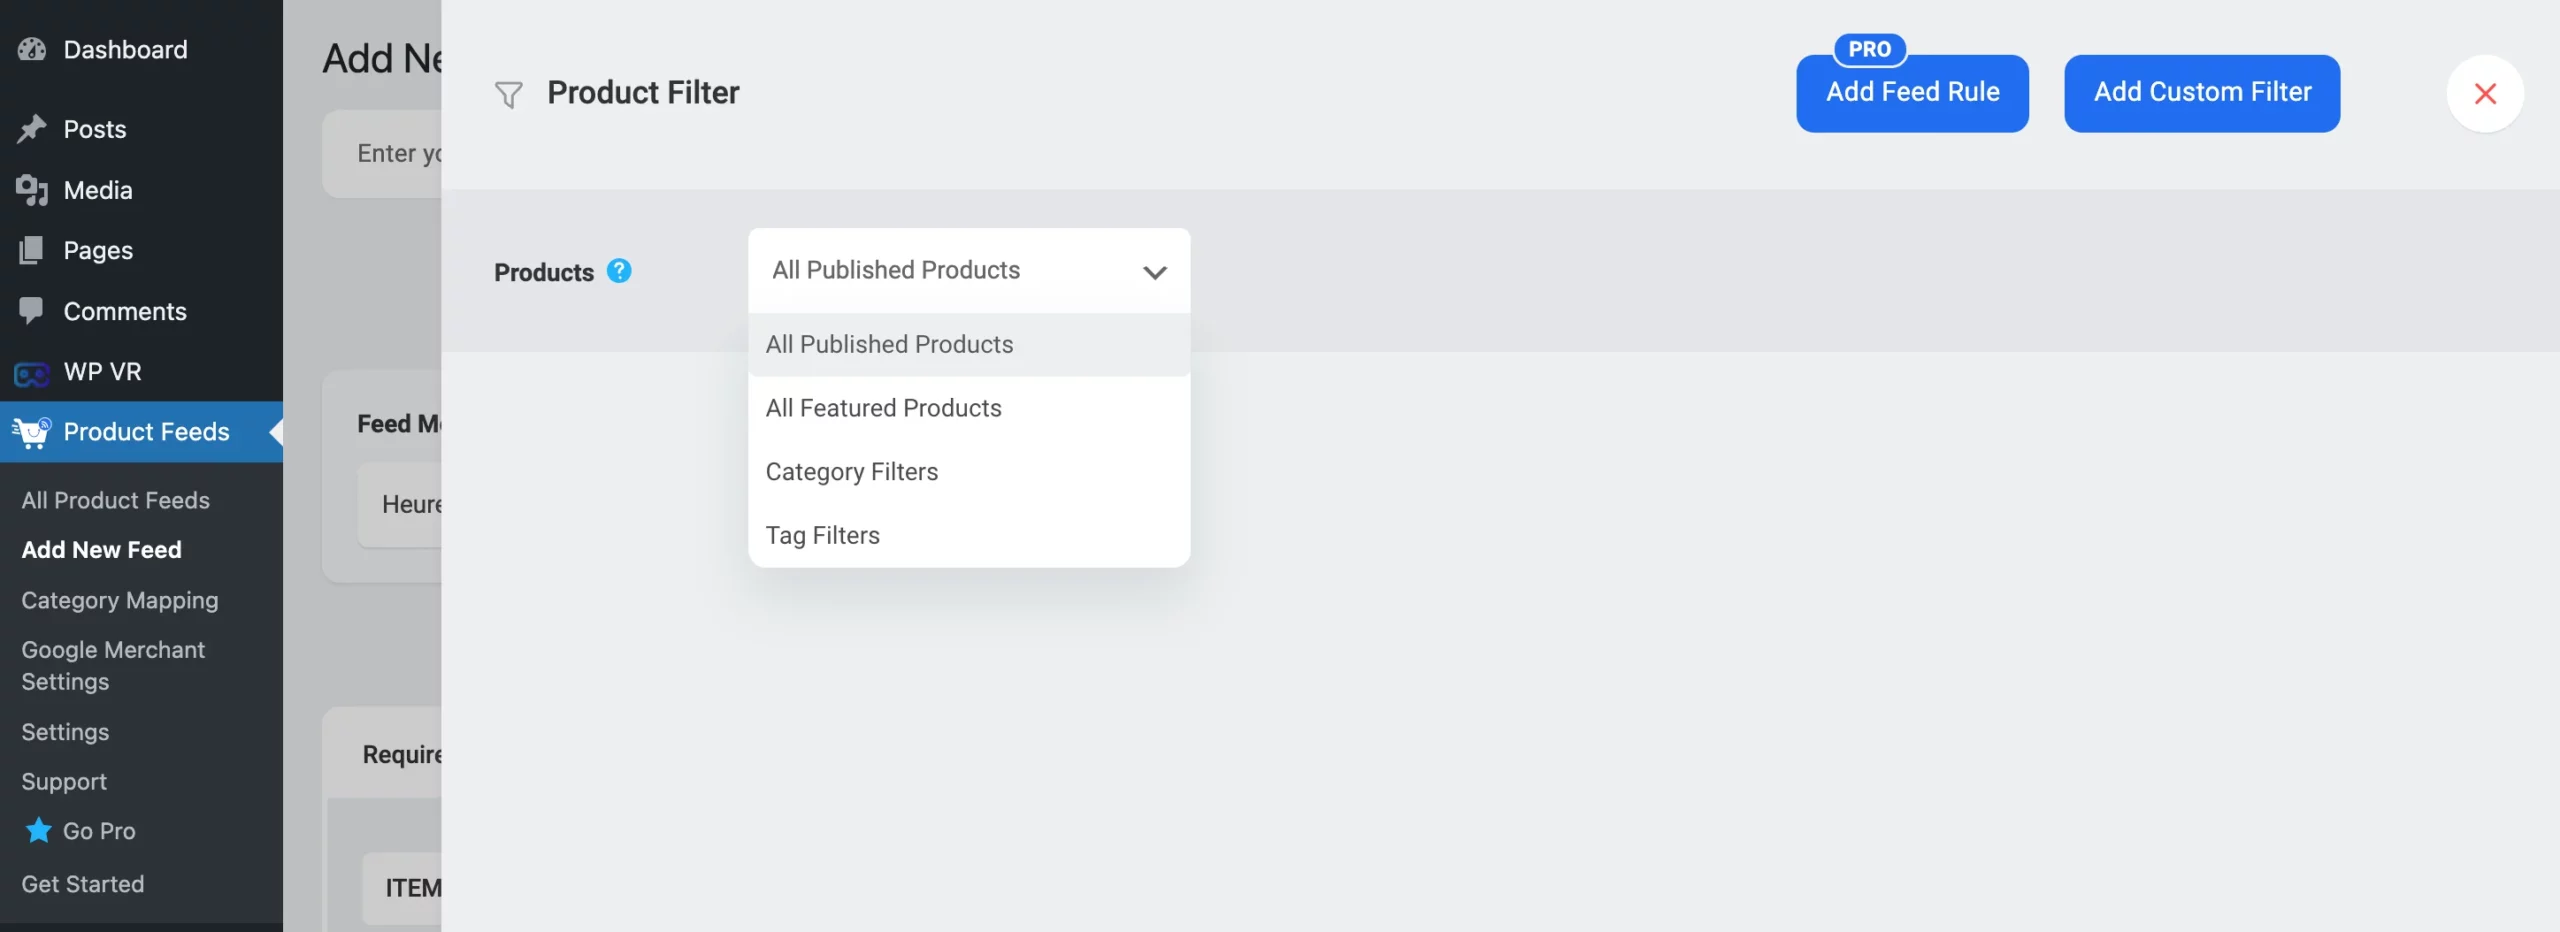
ii. Easier Multi-Marketplace Expansion

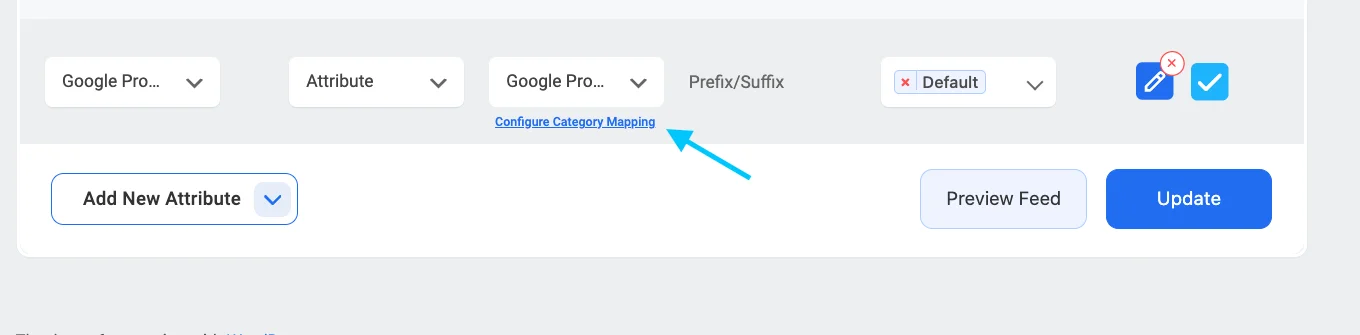
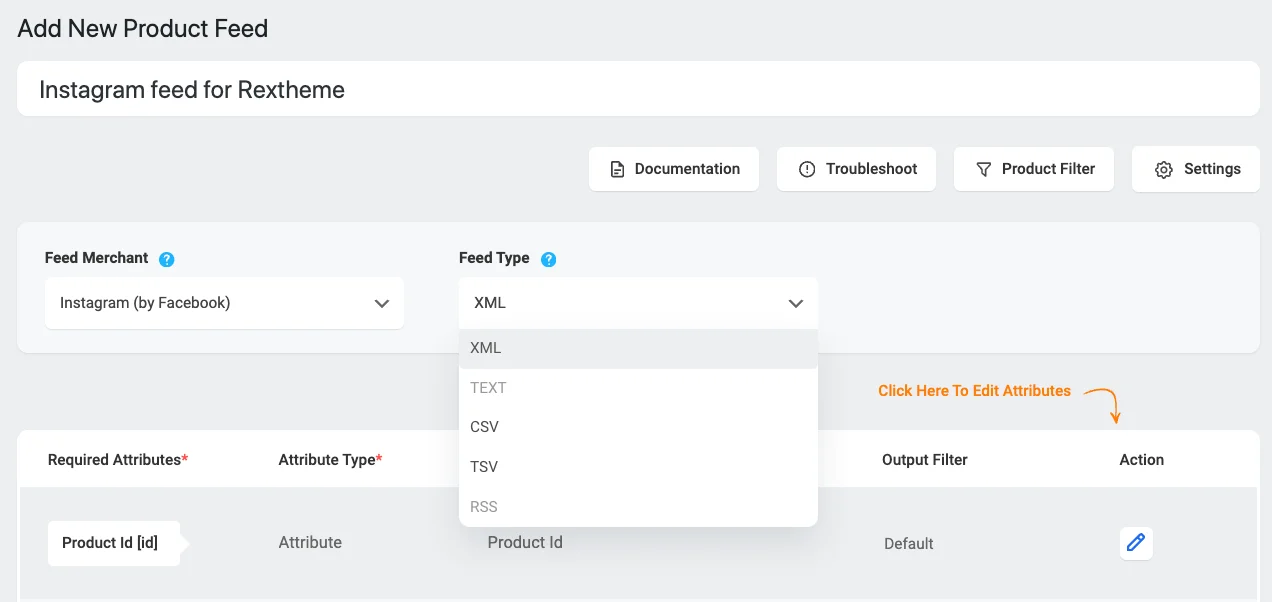
PFM automatically adjusts your product feeds to meet each marketplace’s requirements, making expansion simpler.

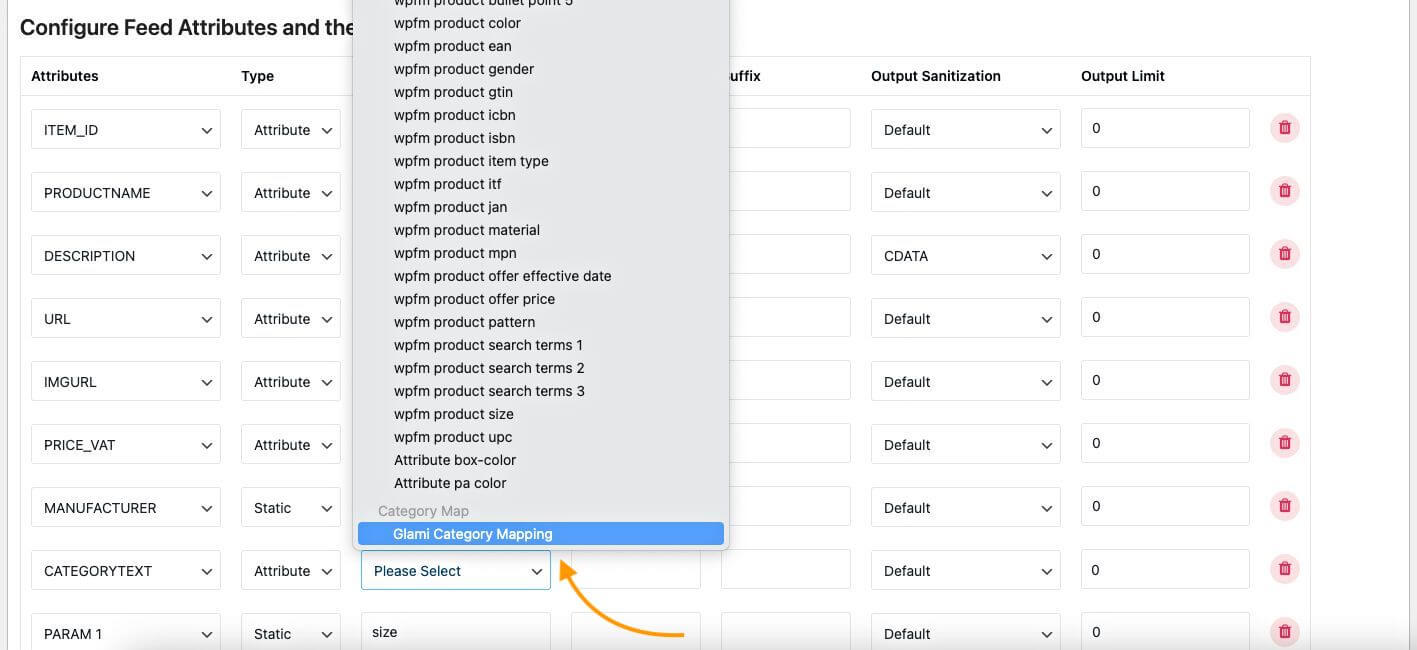
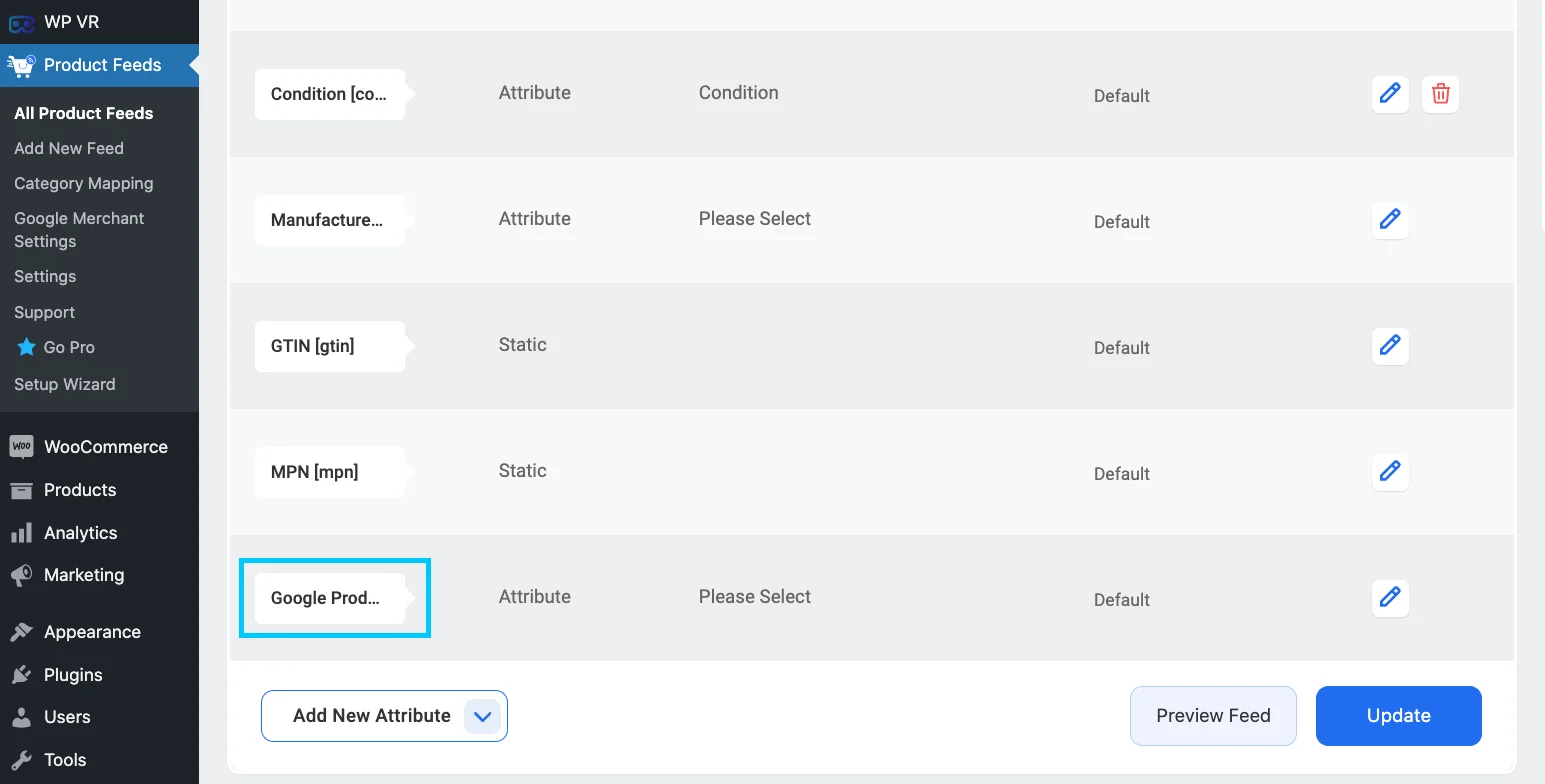
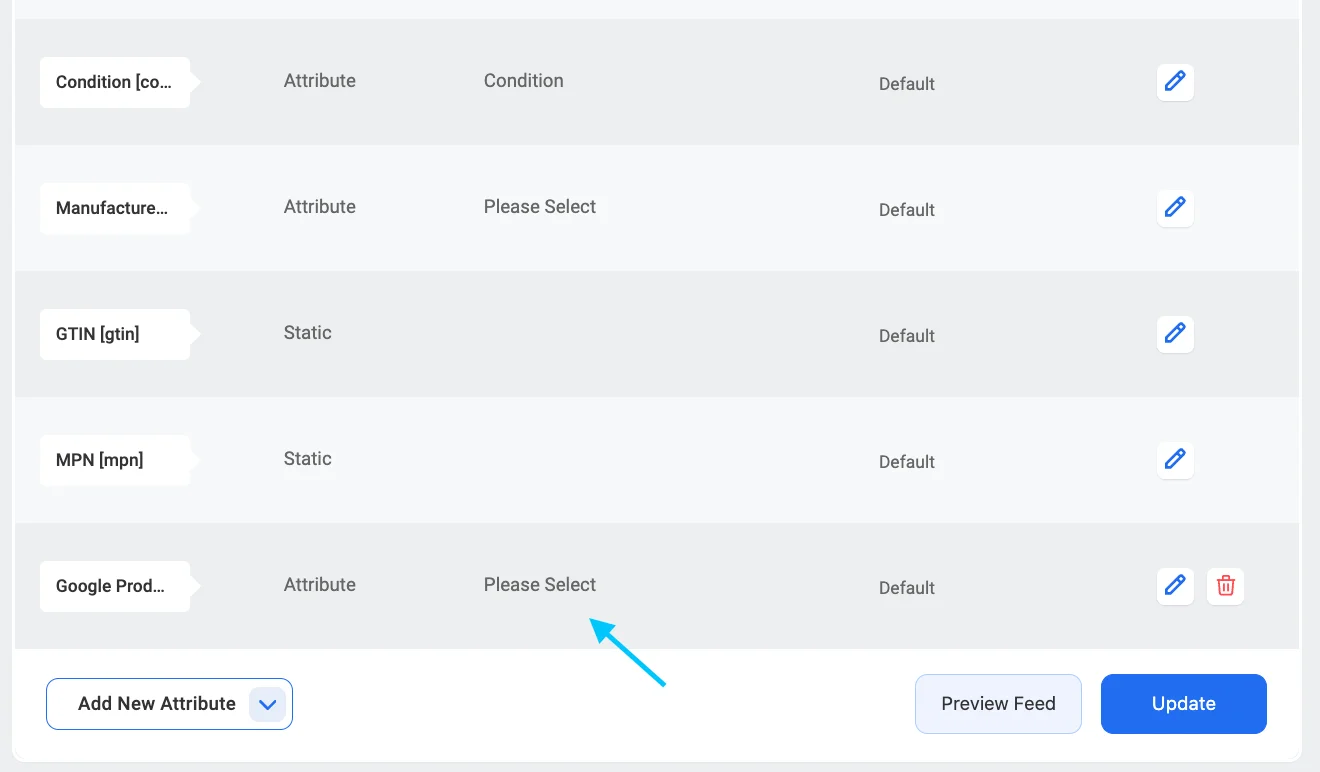
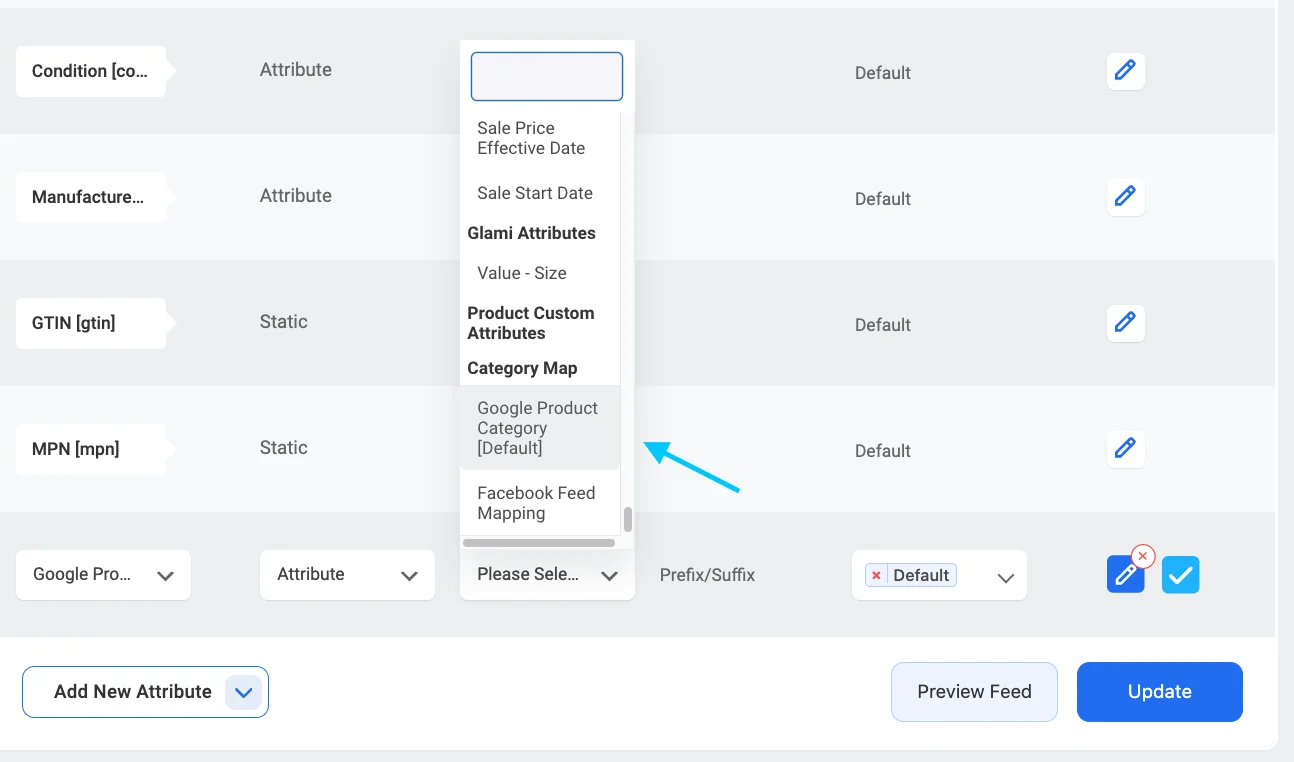
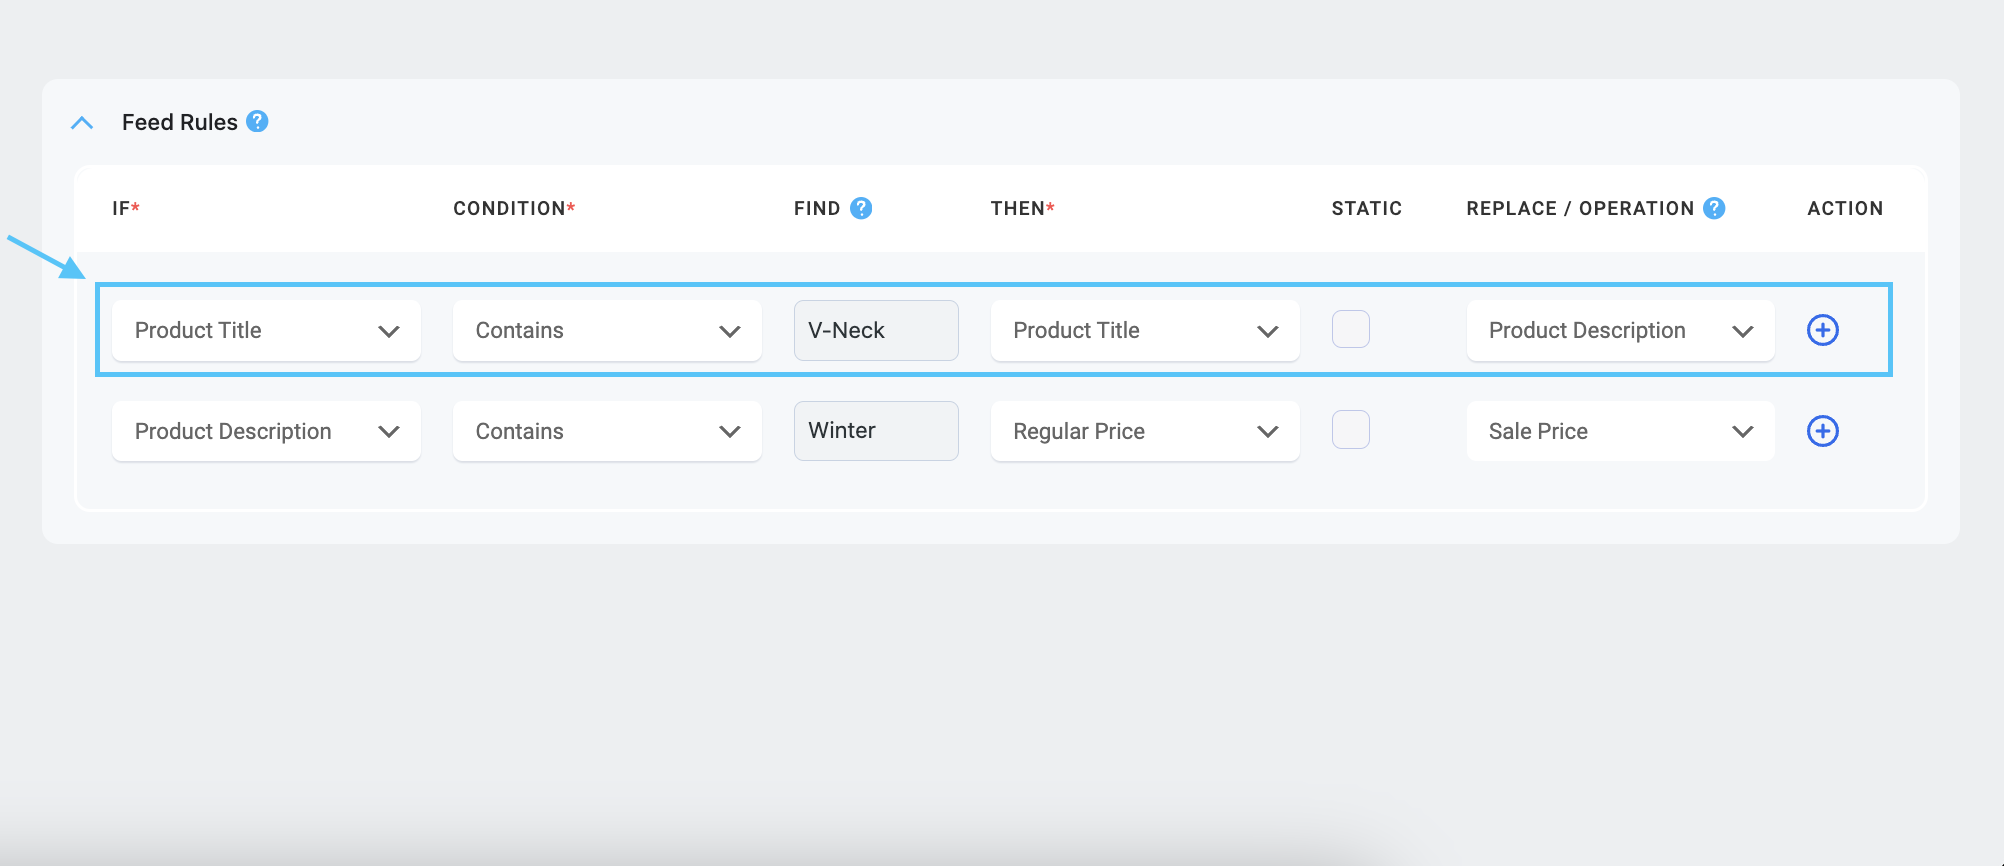
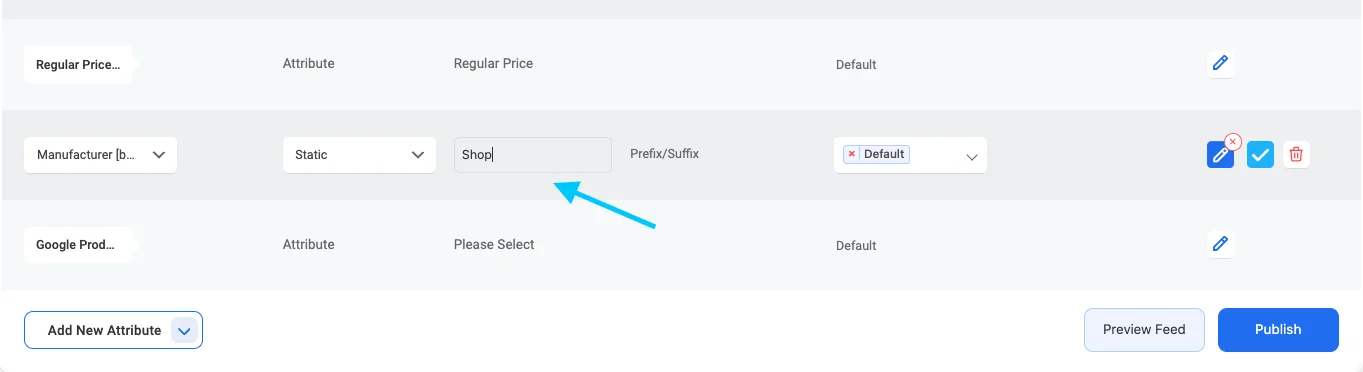
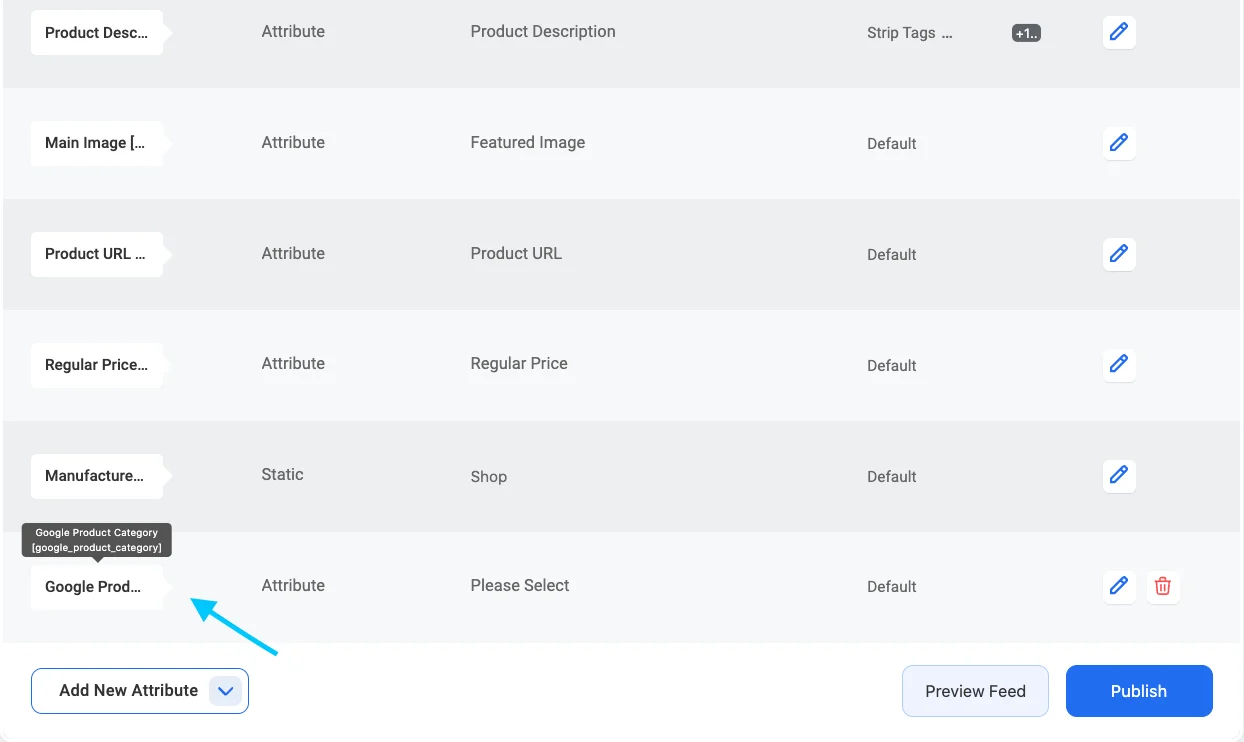
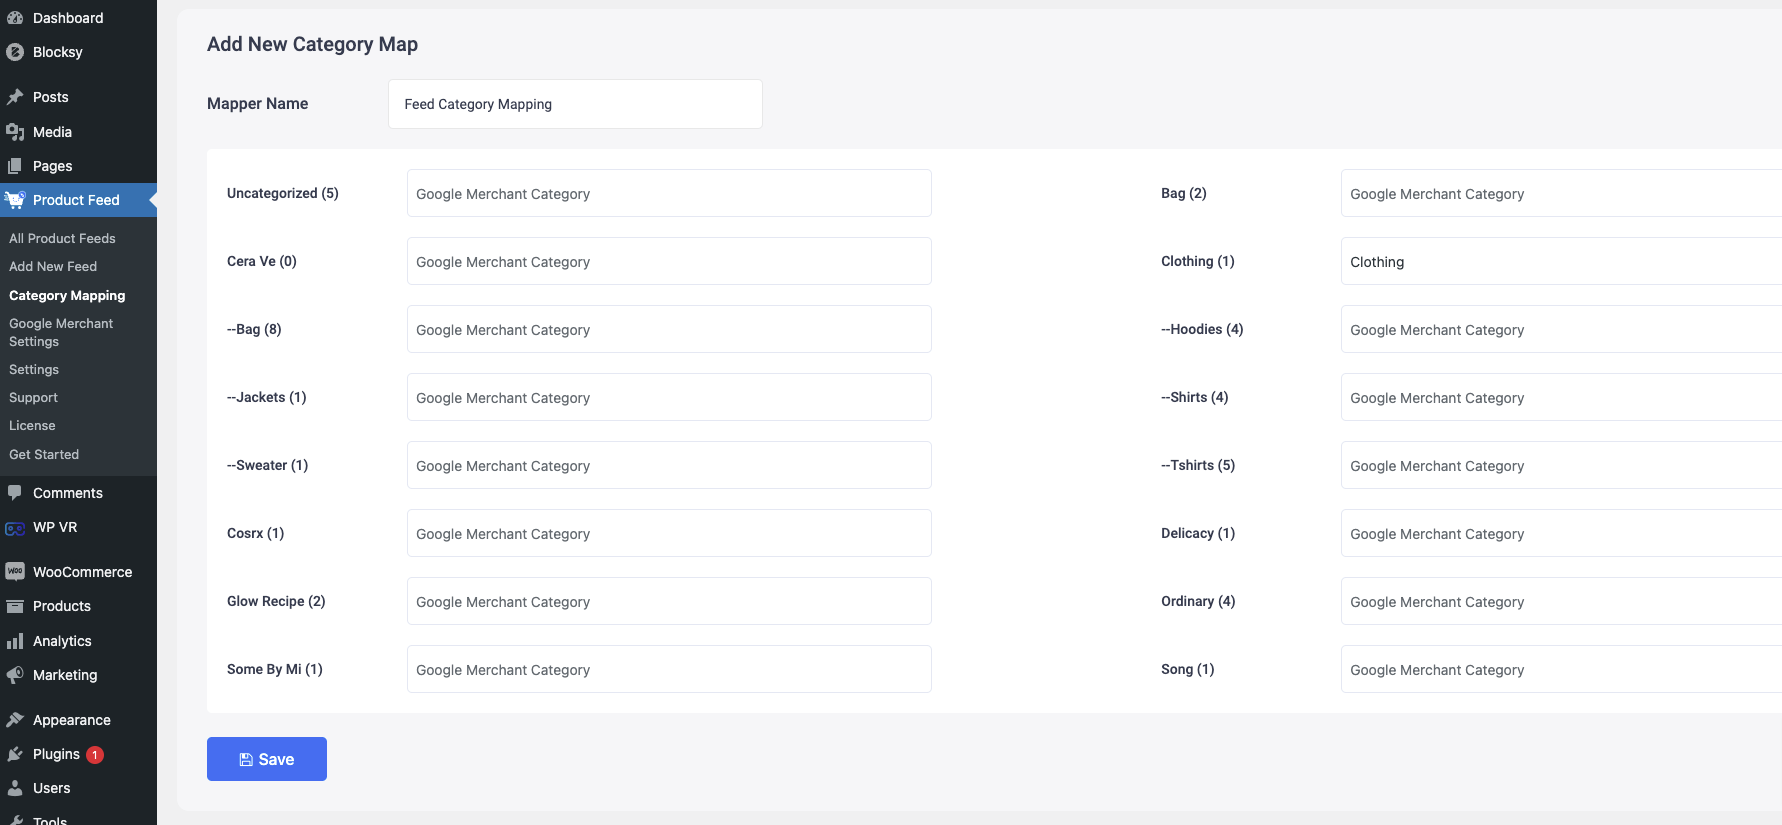
iii. Better Product Visibility

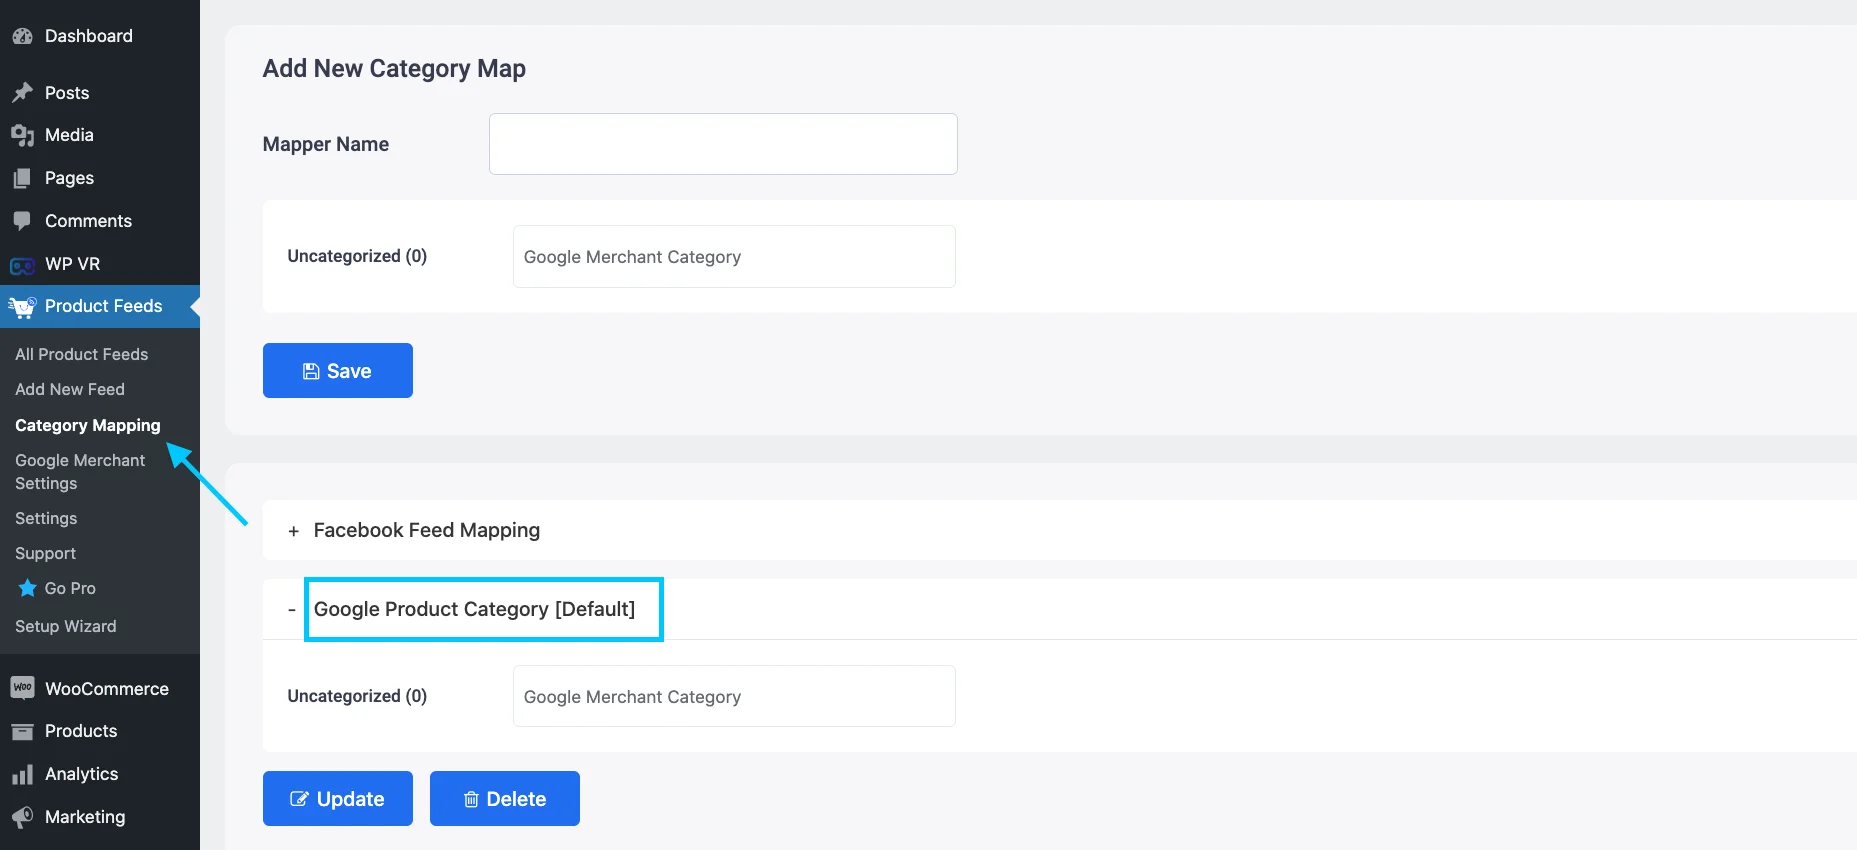
PFM automates keyword placement, category mapping, and structured data formatting to improve discoverability and drive more sales.

Final Thoughts

So, scaling a marketplace requires a structured approach. From choosing the right revenue model to optimizing operations and expanding globally, every step plays a role in long-term success.

Without a clear strategy, it’s easy to run into inefficiencies that slow growth.

Automating product feed management simplifies many of these challenges. PFM helps you keep listings accurate, expand to multiple marketplaces, and improve product visibility—all from a single platform. If you’re looking to streamline operations and scale faster-

FAQs

What are some ways to improve buyer and seller retention?

Effective marketplace optimization involves user engagement tactics, trust-building, and streamlined navigation to keep users active.

How can I develop a successful platform strategy?

A strong marketplace strategy focuses on multi-channel marketing, personalized user experiences, and data-driven improvements.

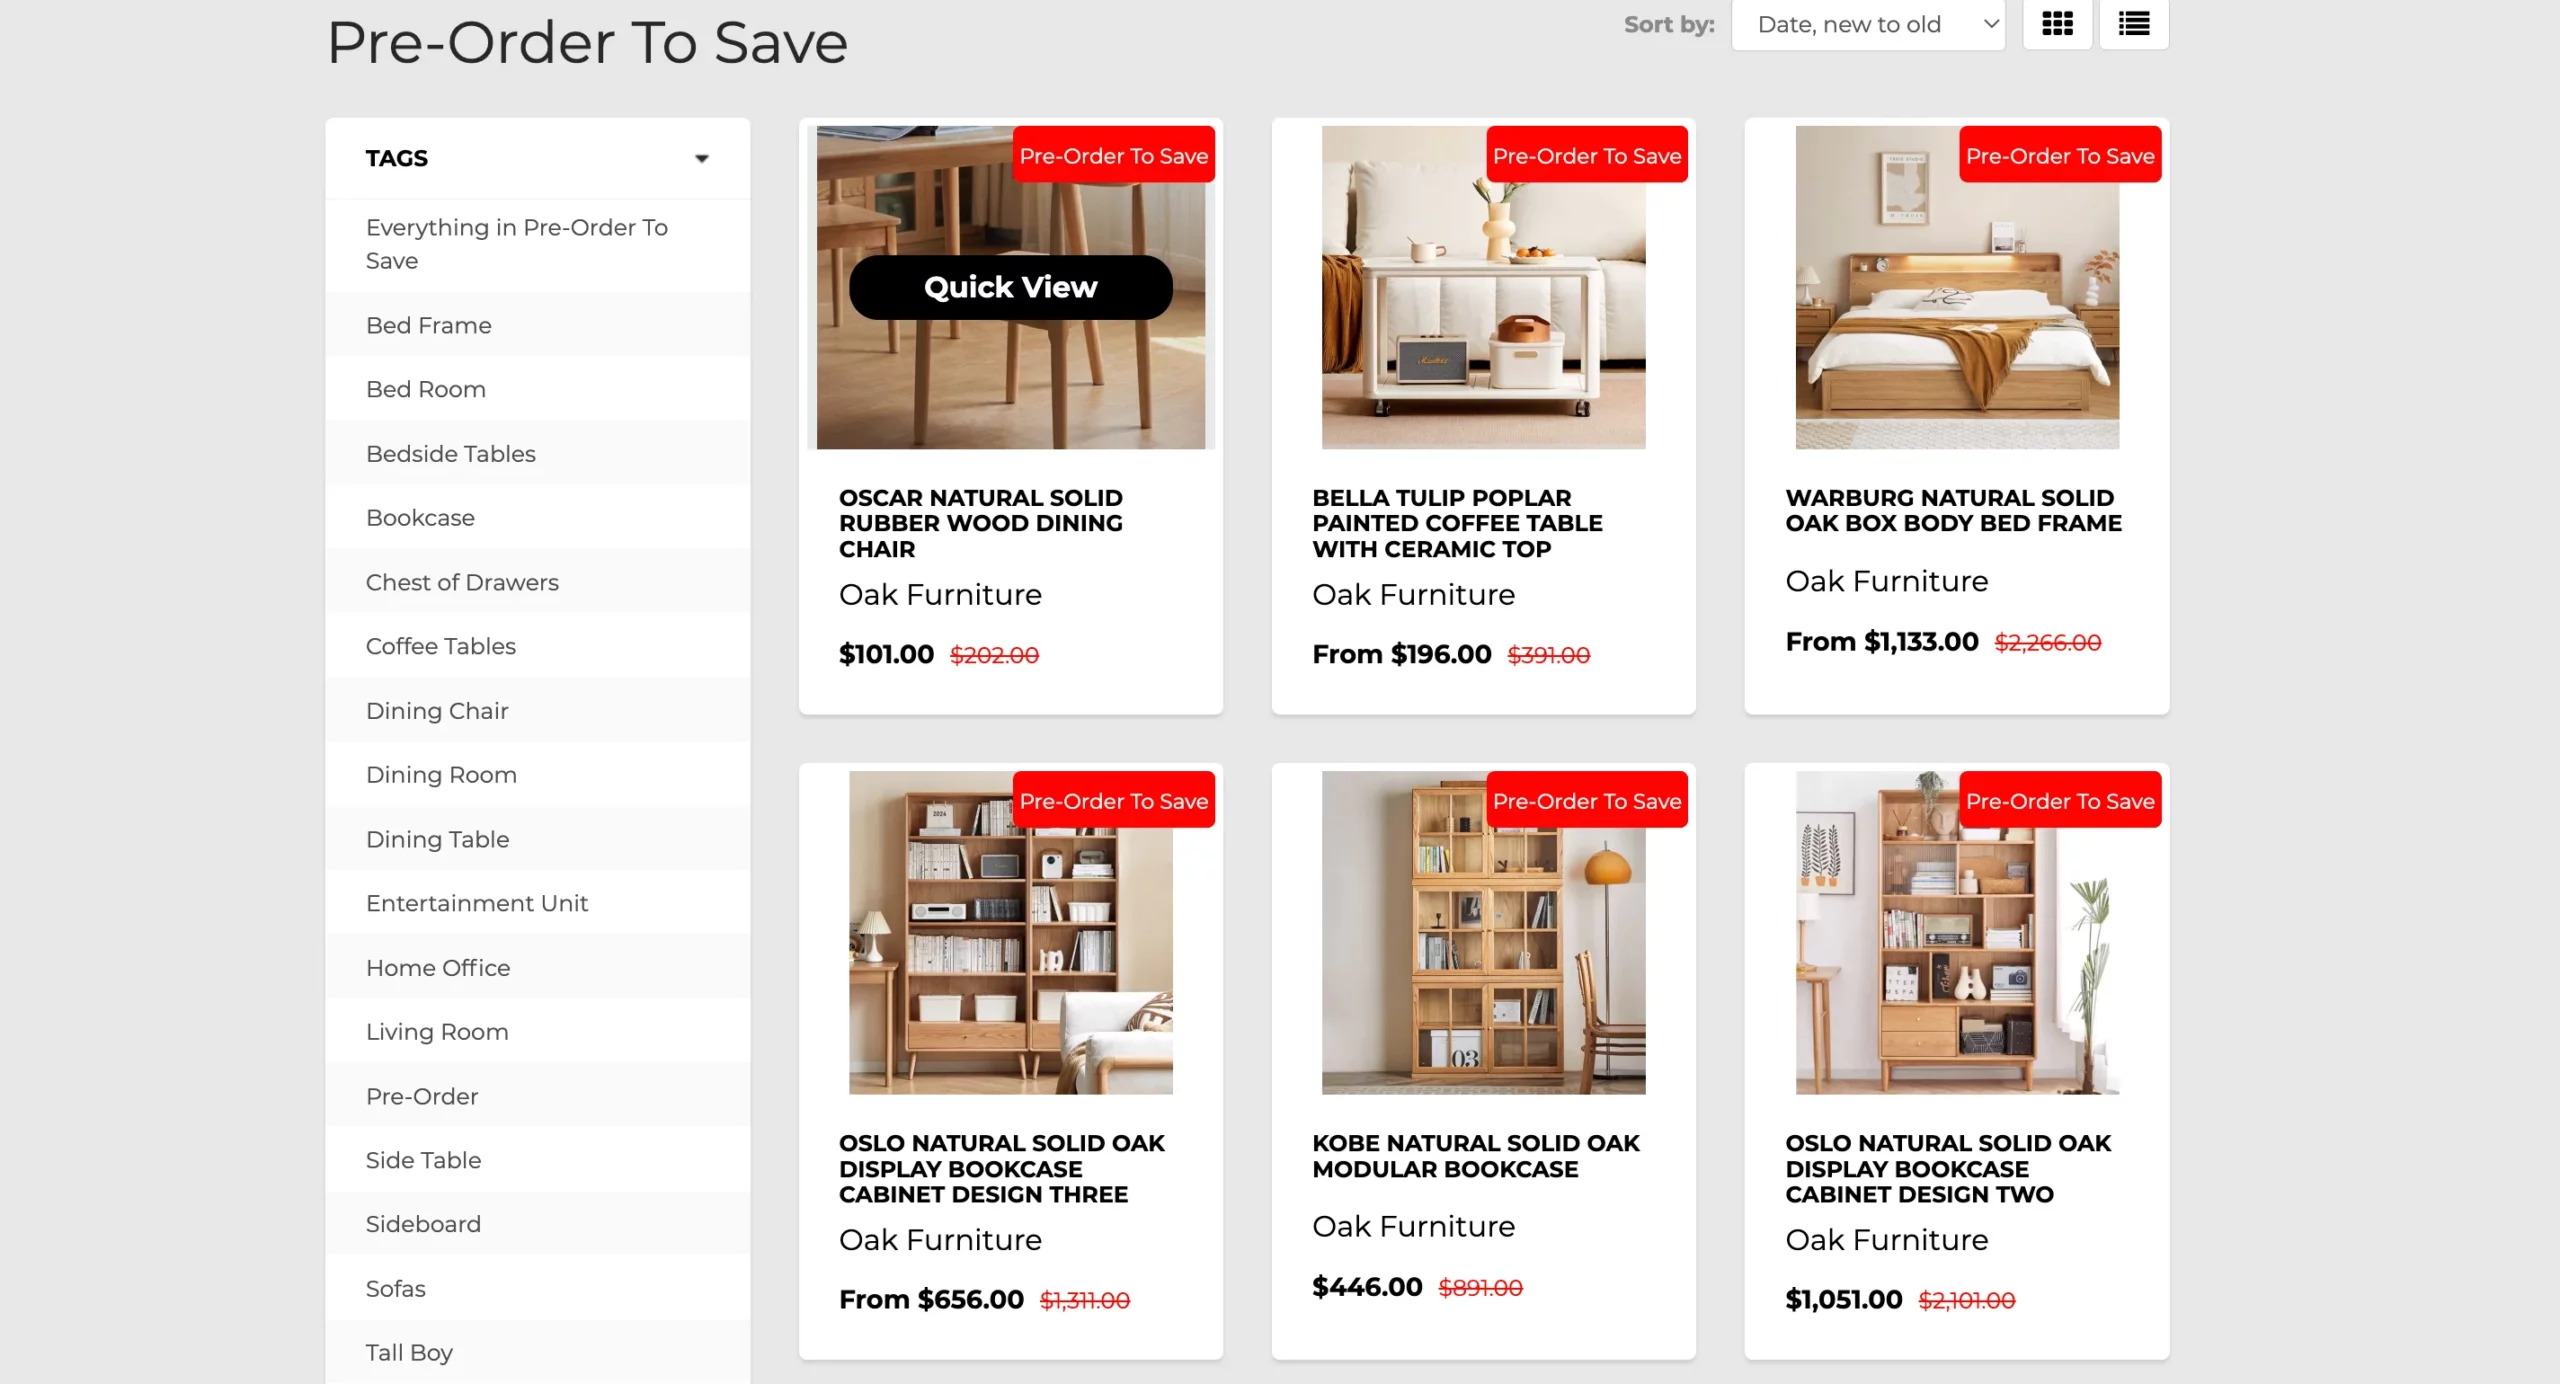
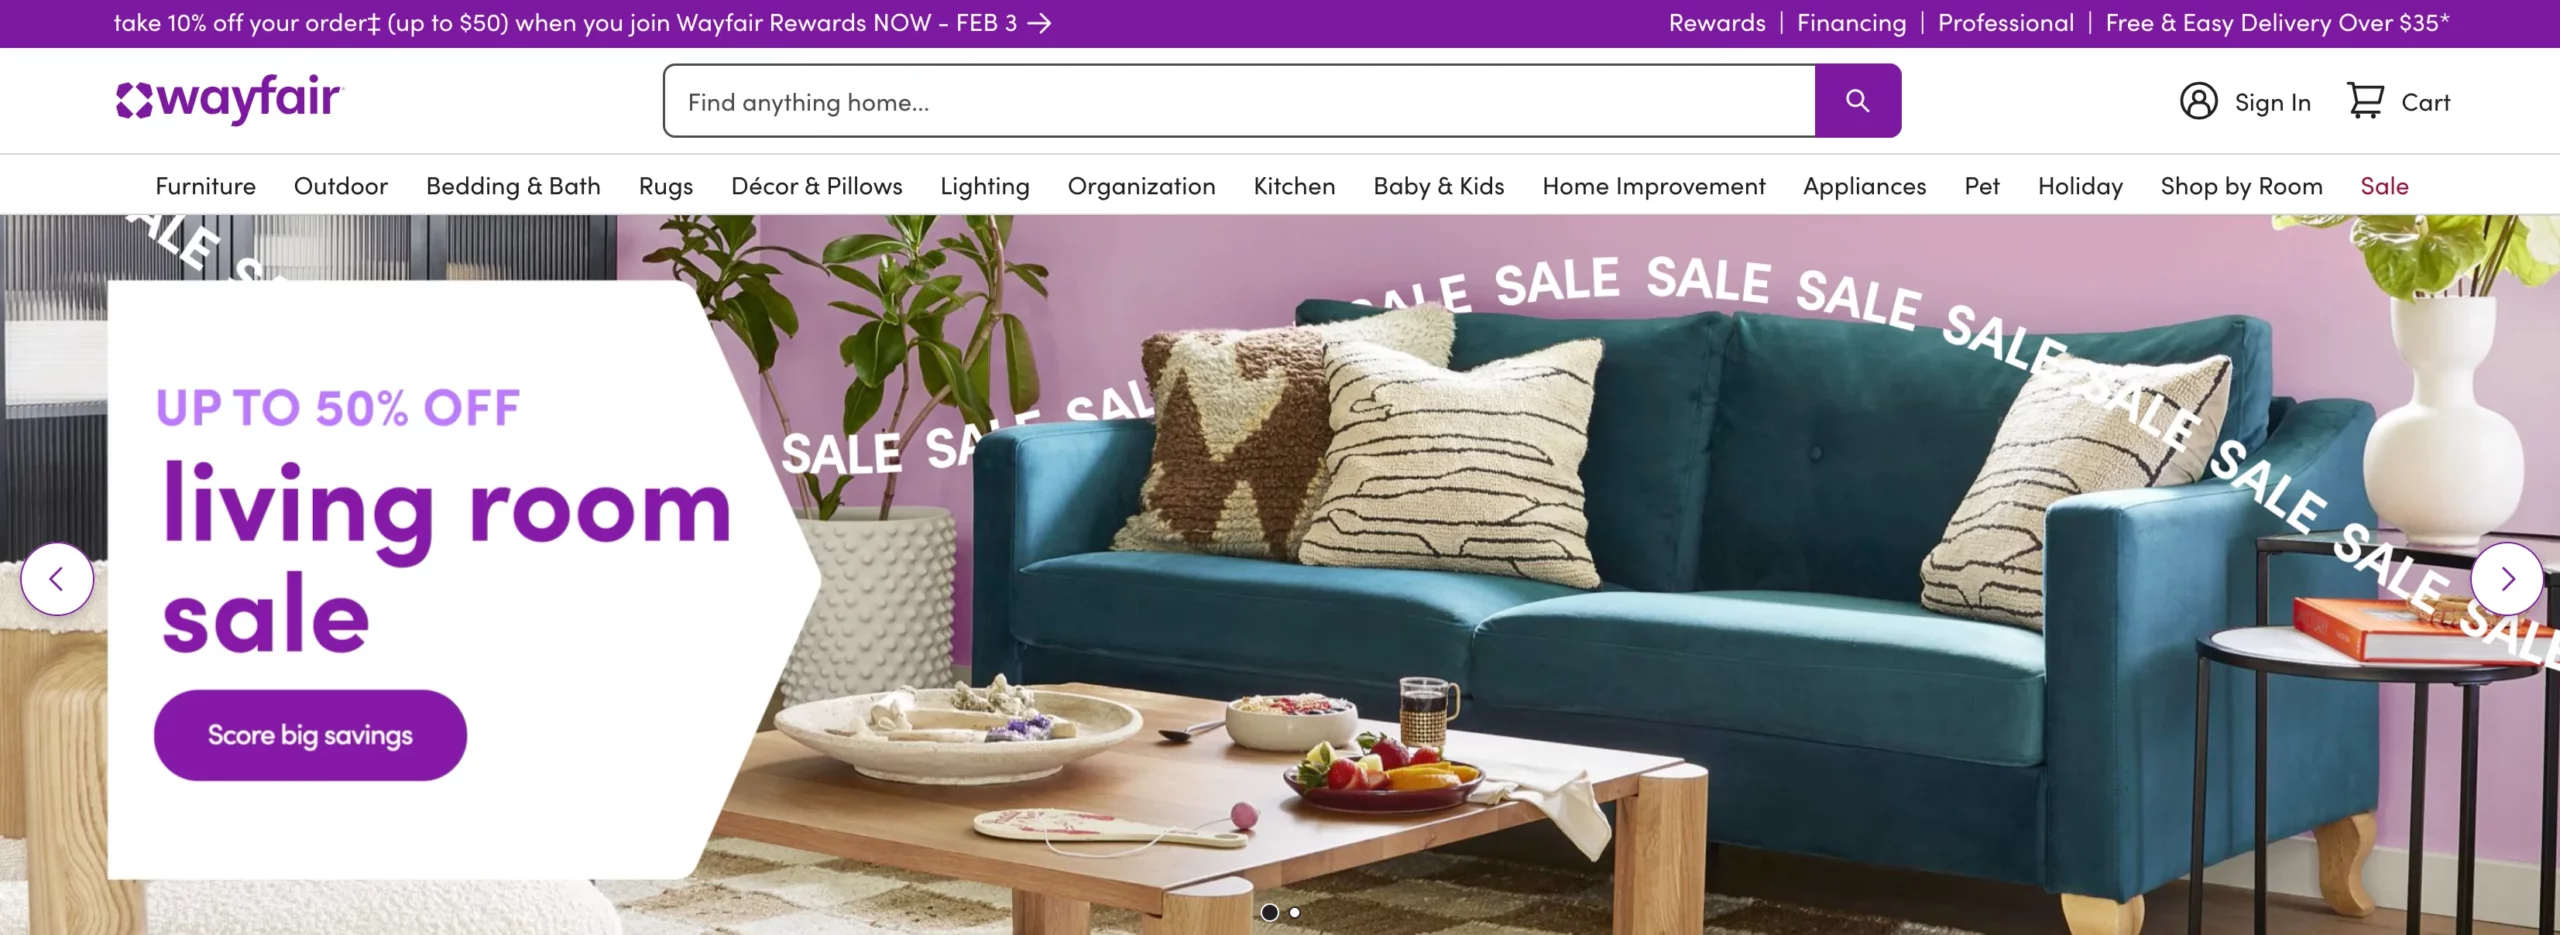
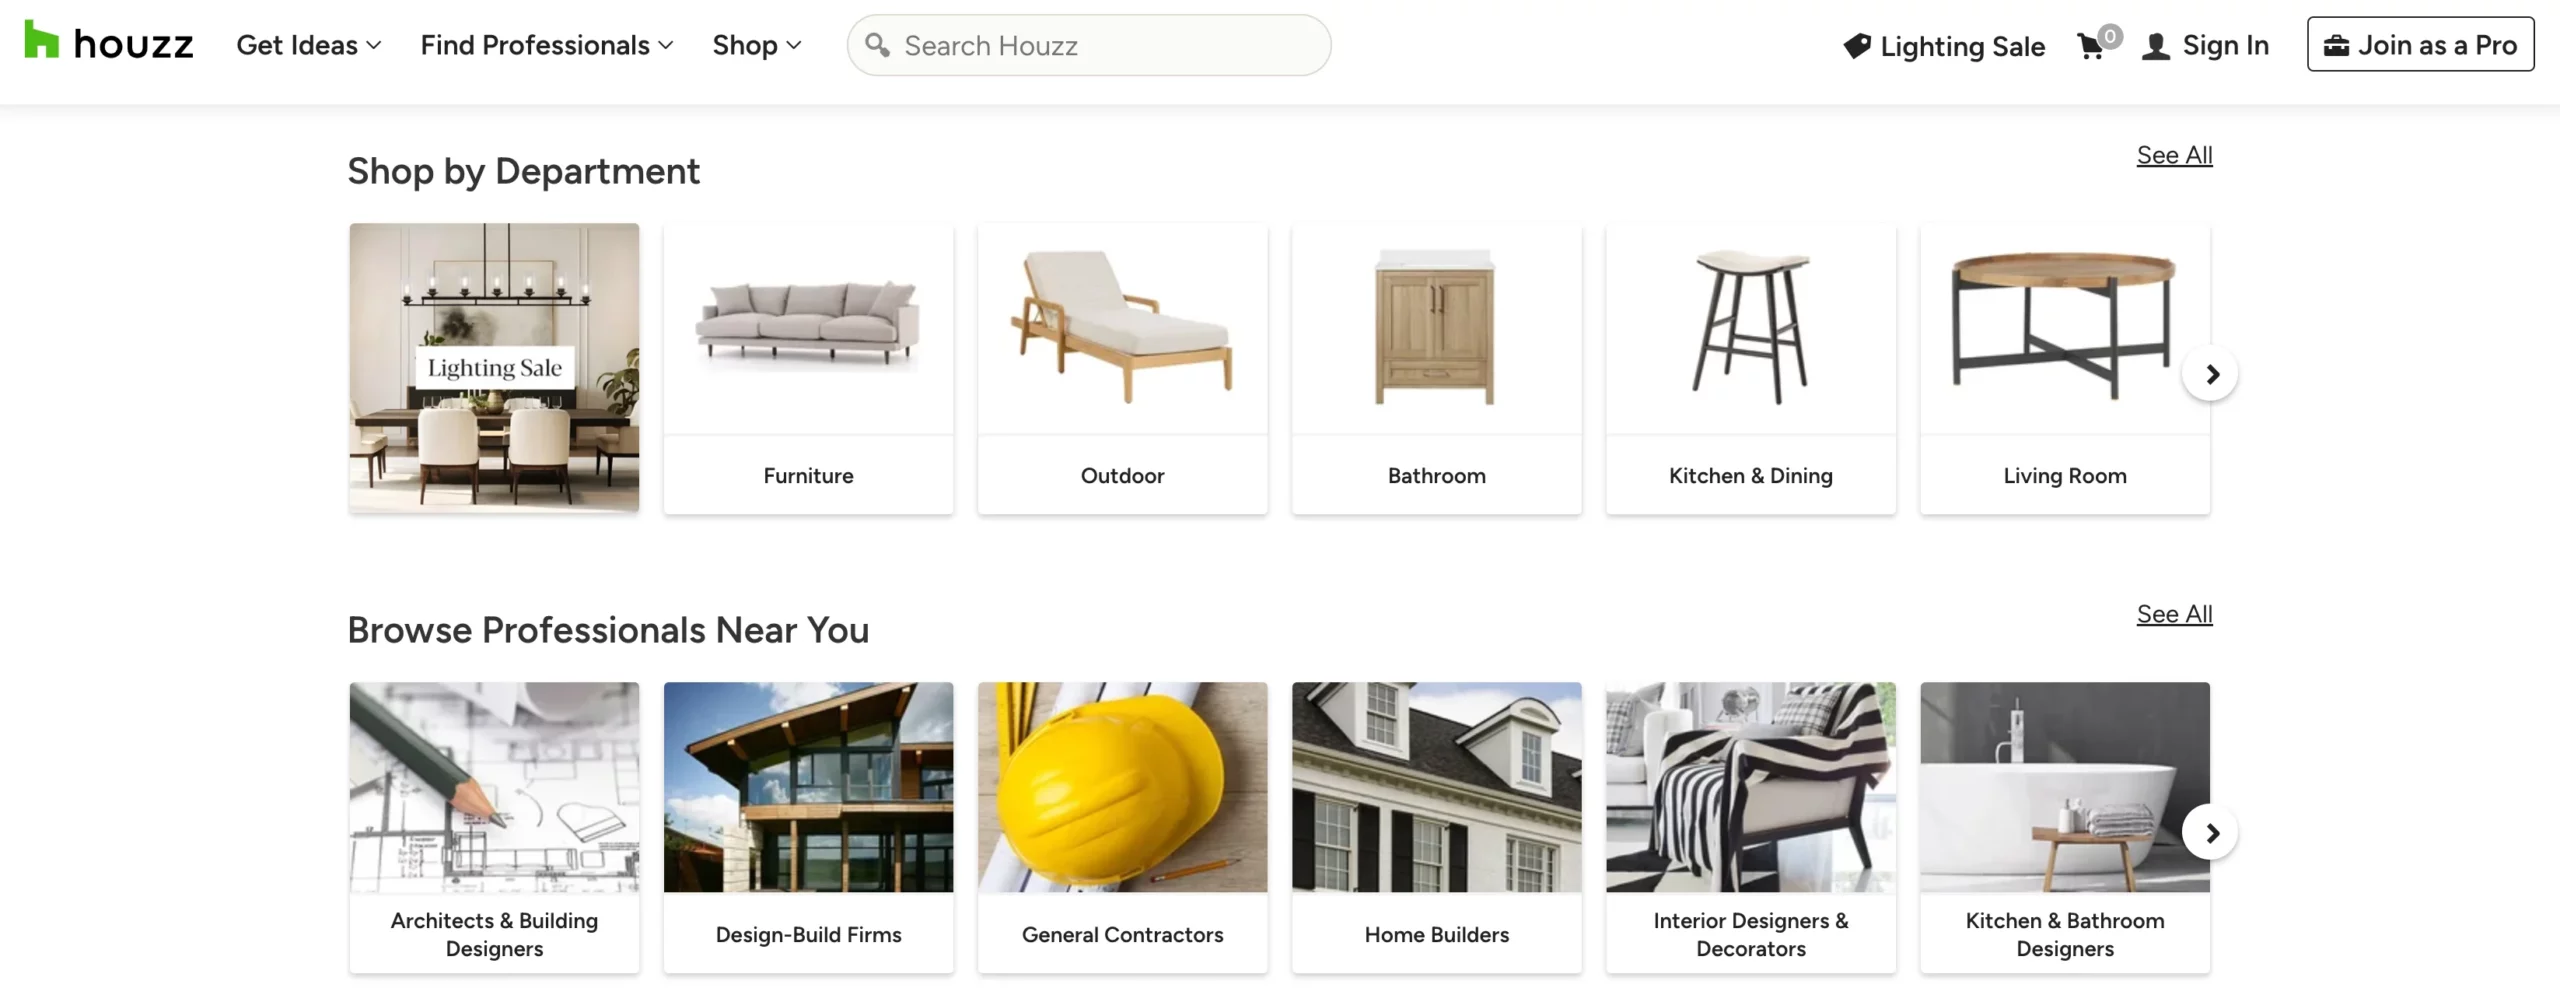
Which platforms should I consider for selling products?

A list of online marketplaces includes Amazon, eBay, Etsy, and niche platforms that cater to specific product categories.

How can I boost sales on my marketplace?

Marketplace sales increase with better product listings, targeted promotions, and leveraging buyer behavior data for recommendations.

What’s the best way to scale a marketplace?

Knowing how to grow a marketplace requires user retention efforts, global expansion readiness, and adapting to new market demands.

Categories
Product Feed Manager For WooCommerce WooCommerce

8 Proven Product Title Optimization Tricks You Should Apply [2025]

Imagine this: You’re searching for a product online. You skim through the results, and suddenly, one listing grabs your attention. Why? Because the title speaks directly to what you’re looking for.

Now, flip the script. Your potential customers are doing the same thing—scrolling, scanning, and deciding in seconds. Will your product title stop them in their tracks? Or will they scroll past?

Here’s the reality: Your product title is your first sales pitch. Get it right, and you drive more clicks, higher conversions, and better rankings. Get it wrong, and well… you’re just another listing lost in the noise.

In fact, according to WakeUpData, optimizing product titles can result in a 47% increase in click-through rate (CTR).

That’s nearly half more potential buyers landing on your page—just by tweaking a few words.

But don’t worry—you don’t have to guess your way through this. In this guide, I’ll share 8 proven ways to craft product titles that attract, persuade, and sell.

Let’s dive in and start turning those scrolls into sales.

What Basically is Product Title Optimization?

Product title optimization is simply making your product title as clear, accurate, and compelling as possible. It’s about choosing the right words, placing them in the right order, and including relevant keywords to ensure your product gets noticed.

For example, let’s say you’re selling a leather jacket. Instead of just calling it “Leather Jacket,” you optimize the title to something like: “Men’s Brown Leather Jacket – Stylish, Warm, Perfect for Winter”. This title is more detailed, includes keywords like “men’s,” “brown,” and “winter,” and it gives shoppers a clear idea of what to expect.

Now that you have a clear understanding, let’s look at why optimizing your product title is essential to your e-commerce success.

Why is Product Title Optimization Necessary?

You’re probably wondering, “Why put so much effort into tweaking my product titles?” Here’s why it matters:

i. Higher Click-Through Rate (CTR):

When your product title is clear and specific, it grabs the attention of shoppers.

Let’s say you’re selling a camera. A title like “Digital Camera with 4K Video & 30x Zoom” is more likely to get clicked than just “Digital Camera.”

It gives customers the details they care about, increasing the chances they’ll click on your product. The result? More traffic to your store.

ii. Better Search Results:

When your title includes the right keywords, it helps search engines understand exactly what your product is.

For example, if someone is searching for a “waterproof smartwatch,” a title like “Men’s Waterproof Smartwatch – Fitness Tracking & Heart Rate Monitor” will be picked up by search engines and shown in the search results.

This means your product has a better chance of being seen by people who are specifically looking for what you’re selling.

iii. Clearer Customer Expectations:

Think about it—if you were looking for a leather sofa, would you prefer a title like “Sofa” or one like “Comfortable Leather Sofa – 3-Seater, Durable & Easy to Clean”?

The second one gives you a clear picture of what the product is, what it’s made of, and its key features. This helps customers quickly understand what they’re getting, so they feel more confident about their purchase.

iv. Builds Trust:

When your product title is specific and descriptive, customers trust it more. If a title clearly explains what a product does and why it’s useful, shoppers are more likely to believe it’s a quality item.

For example, a title like “Wireless Headphones with Noise Cancelling” tells customers exactly what to expect, making them feel more confident in clicking through to learn more.

This kind of clarity builds trust and encourages sales.

Let’s now dive into the prime section- the ultimate tactics that will drive you more sales.

8 Effective Product Title Optimization Tactics To Drive More Sales

When a person is looking to purchase online, he/she may search for the product in various ways. He may search via the product brand, model number, or even one of its best features.

The challenge here is to identify which search terms are most commonly used for a certain type of product.

You need to avoid giving too many details, which ensures you have the most notable keywords included in a product title.

For example, the soap, Imperial Leather is quite popular to many, however, not everyone is familiar if it will match their skin type. When using soaps, people are normally very concerned about their skin types. So, instead of listing the product as “Imperial Leather Soap Bar,” it’s better to use “Imperial Leather Soap for Sensitive Skin.”

Another concern here would be the volume of the soup. Is it a 200g soap or a 100g soup? If a user needs to enter the product page to find it out, it’s more time-consuming. You can rather improve the title to “Imperial Leather Soap for Sensitive Skin – 100g.”

1. Search Optimize Title to Improve CTR

Words have immense power to convince. Use them to encourage your targeted audience.

Imagine how your ideal customers would define your products. You have to find out what they’re gonna search for while looking for the products.

As an eCommerce seller, you must know your consumer behavior. Identify the most important elements that will influence the customers’ decision to buy.

Consider the following questions when you think of crafting a title-

  • Who are your products for?
  • What can be their age range?
  • What are their demographics?
  • Which type of words they would appreciate?
product title optimization to Improve CTR

In this picture, the product titles contain all the key features of the product. Thus, it serves the customers’ search queries better.

However, in the product title optimization, nothing is fixed. Titles vary based on industries and niches.

So, to get the best results you need to analyze your targeted audience to understand their search intent.

2. Structure Product Title To Improve Traction

When it comes to optimizing product titles, it’s important to structure them in a way that catches the attention of potential buyers. However, with limited space for titles, it’s crucial to prioritize the most important information and use targeted keywords wisely.

One effective approach is to start with the most engaging information and relevant keywords. For example, if the product is a Samsung TV, start the title with “Samsung TV” to make it more likely to appear in search results when someone searches for that specific brand.

Another important consideration is the length of the title. Depending on the device being used to browse, the title may get cut off, so it’s essential to prioritize information and use a format that allows for the most critical details to be seen.

However, there is no significant approach for structuring product titles, but you can follow some formulas (shown in the examples).

Product Title Examples

Here I’ve listed a few formulas to help you find the right one for you.

product title format

3. Highlight Relevant Adjectives To Create Desirability

When it comes to online shopping, customers rely heavily on product descriptions to get an idea of what they can expect from a product. One way to make your product stand out is by using sensory adjectives in your product titles.

For instance, if you’re selling perfume, including descriptive adjectives such as “woody,” “floral,” or “citrusy” can help shoppers imagine the scent. Similarly, if you’re selling a jacket, mentioning its “soft,” “textured,” or “lightweight” features can give buyers a better understanding of the product.

By incorporating adjectives like “black,” “long,” “medium,” or “waterproof” into your titles, you can help your customers narrow down their search results and find your product more easily.

Moreover, including adjectives that specify who your product is for, such as “men’s,” “women’s,” or “children’s,” can further increase the chances of your product being seen.

adding adjectives in product title

However, it’s essential to use adjectives in a natural and organic way and avoid overusing them.

By finding the right balance and incorporating relevant sensory adjectives, you can create a more compelling product title that resonates with your customers and drives more sales.

4. Keyword Optimize To Stand Out In The Search Results

Keywords play a crucial role in driving traffic and increasing the visibility of your products. By using the right keywords in your product title, you can ensure that your ideal customers can easily find your products.

However, to create a successful keyword strategy, you need to conduct thorough keyword research to identify the most relevant and high-volume keywords for your products.

Let’s say, you sell skin care products. One of your products is an ‘oil-free face mask’. But your consumer can search by ‘face mask without oil’. Here, you need to check which keyword has a high search volume.

Pro Tip: If you are unsure about setting a product title, try searching on Google Shopping. You’ll get ideas about the search term perspectives.

Also, optimizing your store for Local SEO can help your products appear in more relevant searches, driving higher conversions.

**Check out our guide on optimizing local SEO to improve your search visibility further.

5. Include Your USP To Showcase Your Product Value

Including your Unique Selling Proposition (USP) in your product title can help you differentiate your product from others in the market. A USP can be anything that sets your product apart from the competition and gives your customers a reason to choose your product over others.

For instance, let’s say you’re selling a pair of running shoes. Your USP could be that the shoes are made from eco-friendly materials. Your product title could be ‘Eco-Friendly Running Shoes for Men’. This title incorporates your USP and provides customers with a clear idea of what they can expect from the product.

Another example could be a high-end smartphone that has a unique feature like a long-lasting battery life. Your product title could be ‘Premium Smartphone with Long-Lasting Battery Life’. This title highlights the unique feature of your product and makes it stand out from other smartphones in the market.

When you’re crafting your product title, think about what sets your product apart and what makes it unique. Incorporate your USP into the title in a way that is concise and attention-grabbing. This will help your product to stand out from the competition and catch the attention of potential customers.

6. Remove The Avoidable Factors For Maximum Impact

Below are some factors that you need to avoid while optimizing your product title:

Length

Do not exceed your title length of more than 150 characters. You have to make full use of the given character limit by enforcing the targeted keywords.

The optimal length of the eCommerce product title’s character is between 55-70 characters.

Separate Variants

Shoppers should be able to distinguish between your variants. Make the titles clear enough to identify the variations.

Suppose you are selling cakes of different variations, make sure to include flavor, color, and size in your product titles.

Promotional Texts

You definitely don’t want to drive your potential buyers away. Promotional texts can make that happen.

So, never include something like Buy One Get One, Flat Discount in your product title.

Grammatical Errors

Any grammatical or spelling errors will make the shoppers think you’re careless about your products. Don’t build an unprofessional image, take out the time and recheck your grammar.

7. Touch Up Your Titles To Convert More

What I meant by the touch-up phrase is, making your product title unique, eye-catching, and interesting.

Ask yourself what ‘extra’ you are offering that will convince the shoppers to buy. You have to add your special feature to stand out on the list.

improving product title

Try to make your title unique. You can do this by using multiple keywords.

Consider these factors for making the title unique:

  • Language quality
  • Title format
  • Personalized message for the targeted audience.

Suppose you’re selling skin care products, mention ‘authentic in the product title. Thus, your consumers won’t worry about its authenticity.

Your customers should know they are going to be benefited from the product by seeing your product title.

8. Spy Your Competitors To Stand Out In The Competition

Spying on your competitors is a crucial part of optimizing your product titles. By analyzing their product titles, you can gain valuable insights into what works and what doesn’t in your industry.

Here are some things to consider when spying on your competitors:

  1. Noticeable factors in their product titles: Look for commonalities and differences in their product titles. What keywords are they using? What unique selling points are they highlighting? This information can help you to refine your own product titles.
  2. Targeted keywords: Identify the keywords that your competitors are targeting. This will give you a sense of the language that resonates with your target audience.
  3. Ease of navigation: Evaluate how easy it is for users to find what they are looking for on your competitors’ sites. Are their product titles clear and descriptive? Are they using formatting (such as bullet points) to make the information more scannable?

By keeping a close eye on your competitors, you can stay ahead of the curve and continually optimize your product titles to drive more sales.

How To Optimize Your WooCommerce Product Feed Products Title

So far you’ve learned about how you can optimize your product title so that you can make your products more appealing to your audience, and so you can expect more conversion.

However, if you’re selling more than 100 products, it is quite difficult to optimize your product titles at once.

But there’s a way through which you can easily optimize your WooCommerce feed product titles while generating the product feed.

You can use the Combined Attributes feature of the Product Feed Manager for the WooCommerce plugin.

Let me show you how easily you can optimize your WooCommerce product feed product titles.

Step 1: Install Product Feed Manager for WooCommerce Plugin On Your WordPress Site

**Make sure you have WooCommerce installed on your site before installing the Product Feed Manager for WooCommerce plugin.

1. Go to your WordPress Dashboard and select Plugins. Click on the Add New button.

Add-new-plugin-on-dashboard

2. On the Keyword field, search for ‘Product Feed Manager For WooCommerce’, and the plugin will appear on the search results.

WordPress Add New Plugin Search Page (product title)

3. Click on the Install Now button.

Product Feed Manager Install Now Button (product title)

Once the plugin is installed, the Activate button will appear.

4. Click on it to activate the plugin on your site. Once the plugin is activated, a Product Feed menu will appear on the left side.

Product feed menu after installation and activate (product title)

That’s it. You now have a Product Feed manager for WooCommerce installed on your site.

Now, you need to install the Pro version of the plugin to use the Combined Attribute feature to optimize your WooCommere feed product titles.

You can get the Product Feed Manager Pro version here:
https://staging-rextheme.kinsta.cloud/best-woocommerce-product-feed/

Here’s a guide that you can follow to learn how to install and activate the Product Feed Manager for the WooCommerce Pro plugin and how to activate the license: HOW TO INSTALL AND ACTIVATE PFM PRO

If you download from the WordPress repository or the RexTheme website, then go to Dashboard > Plugins > Add New and on the top left side, you will see an ‘Upload’ button. Click on it. Then upload the plugin file, Install and Activate it.

Step 2: Create A New Feed

Go to your product feed dashboard.

Click on the Add New Feed button.

It will take you to the feed creation page.

PFM-Dashboard

Now, here,

1. On top, you will get the option to add a title to the feed. Give your feed a name.

Add Product Title

2. Just under the title, you will see an option to select your preferred merchant. Simply click on the Feed Merchant dropdown button and select your preferred merchant from the dropdown or you can search in the dropdown box.

Merchant List Dropdown ( (product title))

Select your preferred merchant and all the required attributes will be loaded below.

Let’s select Google Shopping for this feed.

Google Shopping Required Attributes (product title)

**Please note that Google Shopping only accepts XML feed submissions, so you will not get an option to choose the file format. However, for other merchants, you will get to choose a File Format next to the Feed Merchant option.

3. Here you can map your attributes. For Google, assigning a value to the Manufacturer attribute will let you create a working feed for you.

Step 3: Apply Combined Attribute Feature To Optimize Your Product Feed Products Title

Before I show you how to use this Combined Attribute feature to your title, I should let you know that you can use this feature on any of your feed attributes.

Here I will show you how you can easily optimize your product titles with the Combined Attribute feature of the plugin.

1. Click on the Attribute Type dropdown of the Product Title attribute.

Product Feed Manager Attribute Type Dropdown (product title)

2. Select Combined Attributes from this Attribute Type dropdown, and you will see that the Product Title attribute section structure has changed and a new text field editor has appeared where the ID of the attribute is already added.

Product Feed Manager Product Title Attribute Option (product title)

3. Click on the Attributes Values dropdown and here you will see all the values listed here.

You can select more than one value from this dropdown, one by one, and their IDs will be included in the Combined Attributes field:

Product Feed Manager Combined Attribute Values (product title)

4. Here, you can use any separators between the IDs too if you want.

Combined Attribute Values With Separator (product title)

You can type any value as a separator or you can simply select any separator from the dropdown. (You can use any text or symbol as a separator too)

Product Feed Manager Combined Attribute Separator values (product title)

You can manually add or remove attribute IDs on this field.

5. Once you are done with the merging, simply click on the Publish or Update button and then open the feed to see the changes.

However, if you don’t see any changes, you should clear your browser cache and Purge Cache from the plugin, and you should see them.

Final Thoughts

Product Title optimization plays a leading role in the conversion process of eCommerce shoppers. It sets the ground for you to dominate product searches and attract new potential buyers.

So, It’s high time you give special attention to product titles and follows these product title optimization tactics.

However, product title isn’t the only thing for driving more eCommerce sales. You have to optimize your product feed as well for promoting your products on different marketplaces.

Learn How to Generate WooCommerce Product Feed Optimized For Effective Promotion

FAQs

How can I optimize my WooCommerce product titles?

Focus on including relevant keywords, keeping the title clear and concise, and adhering to the platform’s title length restrictions for better visibility.

What are the common mistakes in product title optimization?

Avoid keyword stuffing, using unclear or overly generic terms, and ignoring the importance of formatting for better readability.

How does product title optimization impact SEO?

Optimizing titles helps search engines better understand your product, boosting your chances of appearing higher in search results, which can drive more traffic.

Does WooCommerce product title limit impact mobile shoppers?

Yes, long titles may truncate on mobile screens, making it harder for users to quickly understand the product details.

Should I use special characters in my product titles?

It’s best to avoid unnecessary special characters unless they directly enhance clarity or highlight key features of the product.

Categories
Product Feed Manager For WooCommerce WooCommerce

The Ultimate SEO for WooCommerce Guide To Increase Traffic [2025]

You have amazing products on your WooCommerce site. But what if they don’t pop up when your potential buyer searches for them?

All the effort you put into producing content will be pointless!

Here, optimization of SEO for WooCommerce comes to the rescue.

It is one of the most essential aspects of running a WooCommerce store as it helps you get better search rankings and conversion.

As products are always changing on the site, you need to make sure all the elements are properly optimized to make them appear in all relevant searches.

Now, SEO might sound tricky at first, but once you learn how to implement it correctly, you will love the outcome.

Today, I’m sharing a complete WooCommerce SEO optimization guide to help you understand the whole process easier.

By the end of the guide, you’ll be able to –

  • learn all the important SEO optimization practices,
  • implement them for your WooCommerce site to rank higher in search results,
  • and eventually, bring more shoppers to your site.

Is WooCommerce SEO friendly?

Let’s first look at whether WooCommerce is naturally SEO-friendly. The good news is that WooCommerce does come with features that help improve your site’s SEO right out of the box.

Woocommerce SEO

Here’s why:

  • Customizable Product Pages: WooCommerce allows you to add detailed product descriptions, tags, and categories. You can optimize these elements with targeted keywords to help your products rank better.
  • SEO Plugin Compatibility: WooCommerce works well with popular SEO plugins like Yoast SEO or Rank Math. These plugins make it easier to optimize your pages, improve readability, and add meta tags.
  • Mobile-Friendly Design: WooCommerce themes are typically responsive, meaning your site will automatically adjust for mobile devices. Google favors mobile-friendly sites, which can improve your rankings.
  • Clean URL Structure: WooCommerce generates URLs that are clean and SEO-friendly. For example, your product pages will have URLs like www.yoursite.com/product/product-name, making it easier for search engines to crawl and index.
  • Image Optimization: WooCommerce allows you to easily add alt tags to your product images. Alt tags help search engines understand what the image is about, improving your product’s visibility in image search results.

With these features, WooCommerce gives you a solid foundation for SEO. However, it’s important to continually optimize your store to ensure your products show up in relevant search results.

Prerequisites Before Diving Into WooCommerce SEO

Your WooCommerce store is up and running.

Now, before diving into SEO, there are two important things you should look at:

  • Themes
  • Pages

Whether you want to rank a certain page or a single product, theme and page optimization play a big role in your overall WooCommerce SEO goal.

Select A Suitable Theme That Reflects Your Brand

As a WooCommece store owner, you know how important it is to have a good first impression.

WooCommerce store pages are usually loaded with image-heavy content. Hence, a responsive & accessibility-ready WooCommerce theme is crucial to have a lasting impact on your audience.

The right WooCommerce theme can instantly capture your buyer’s attention.

With so many options available, you might find it difficult to select the best one for you.

Here are some theme suggestions you can consider:

While you choose your theme, make sure the theme is well-integrated with WooCommerce and strengthen your branding.

Include All The Necessary Pages For A Smooth Navigation

From the pre-purchase phase to making the transaction take place, your pages play a big role.

When you set up WooCommerce, a certain number of pages are automatically added to your site.

They are the shop page, account page, cart page & checkout page.

Now to properly function your WooCommerce store and enhance your shoppers’ experiences; you need to have all other necessary pages.

These pages help users easily understand the structure of your site and navigate smoothly.

Below we’re suggesting a list of WooCommerce pages that you can consider:

Home Page> Shop Page> Product Pages> Category Page >Registration & Accounts Page > Order Management Page> Privacy Policy> Terms Of Service> About Us> Contact Us> Checkout Page> Thank You Page

Once you’re done with themes and pages, it’s time to dive into SEO.

Get Started With WooCommerce SEO

Let’s say you are selling in the fashion industry. Your SEO goal is to increase sales in a particular category.

Now, you need to know who is your targeted audience. Knowing your niche will help you to optimize your overall SEO strategy.

As a beginner, it’s better if you prioritize a single niche. It will be then easier for you to implement different strategies and find out what’s working better.

For example, you can start with Men’s Fashion. Then later in the future, you may gradually grow for other niches if you wish to.

Now, let’s move on to the basic steps of WooCommerce SEO optimization:

1. Identify The Right Keywords

When starting with SEO, you should know what to optimize for your WooCommerce store.

There are a lot of content that are already ranking for similar products you sell. You need to find keywords that will help you to rank for the content you provide.

Identify The Right Keywords

It doesn’t matter in which niche you’re selling, you’re gonna always have competition.

According to UppercutSEO, Keyword research will help you to analyze your competitors and come up with a better SEO strategy.

Following are some suggestions for identifying the right keywords for your store –

  • Always look for similar products that your competitors are selling.
  • Have a deeper look at the titles, tags, and descriptions they use.
  • Identify the main keywords these sites rank for that goes with your main niche.

You’ll find some free online tools like semrush or Ahref to conduct keyword research extensively.

Now when you choose your keywords, make sure they –

  • are relevant to your niche
  • are searched keywords
  • have low competition
  • are related to conversion

Once you have this keyword list, you are ready for SEO optimization.

2. Setup Your SEO Tool

The next crucial step is to set up an SEO tool.

After doing the basic configuration of WordPress SEO, you should use a tool for enhancing WooCommerce product SEO.

There are a lot of built-in tools that can give you a detailed structure for keyword research, URL structure, and content optimization tips.

These tools will help you to manage your website’s titles, descriptions, and SEO metadata to improve your search rankings.

For example, you can use RankMath to enable Product Schema for your WooCommerce Products and assign a common OG image for the site.

You can also optimize the meta title and description of the home page to target the most appropriate keywords of your niche.

3. SEO Optimize the Home Page & Shop Page

You need to be very careful about the home page and shop page optimization. The purchasing decision of a buyer highly depends on these pages. Additionally, you need to do an on-page SEO check of the landing page to ensure it’s fully optimized for search engines and user experience.

Below we listed some major tips on home page & shop page SEO optimization –

  • You must have targeted keywords for your main niche and products. Make sure you target them on the home page.
  • On the front end, no matter what you display, you need to maintain the hierarchy.
  • Set up Menus for each main category (if you have less than 7 categories).
  • List down things like “Top products,” “Highest Rated products,” promotional banners, and a “Just for you,” section.
  • Customize the shop page with a list of categories on the left or top, and popular products in the middle.
  • Add a title and description on the Shop page that should be optimized with the main keyword. And these should be used as meta titles and meta descriptions as well.
  • Include a link to the shop page on the menu and on the footer of the website.

4. Optimizing SEO for WooCommerce Products & Categories

When you are done with the priority pages, it’s time to optimize product pages and category archive pages for SEO.

i. Choose The Right Category Names

Product category is an essential aspect of WooCommerce SEO as it helps your potential buyers to understand your store better. It will also increase your site’s visibility.

To implement proper categorization in your WooCommerce store follow the steps below:

  • First, list down all the products you have.
  • Find out similar products by searching on Google.
  • Visit their product pages and find out the category they put the product under.
  • You may also search for this product on eBay and visit the product page here.
  • Once you are there, you will see there is a navigation breadcrumbs of the categories this product fall under. For example, if you search Men’s jacket on eBay, you will find it falls under the following: Clothing, Shoes & Accessories > Men > Men’s Clothing > Coats, Jackets & Vests
  • You may follow the same category structure in your WooCommerce store. But it’s not mandatory to follow it word by word. You may wish to further break down a category into subcategories.
  • For example, in the scenario above, the category “Coats, Jackets & Vests” actually covers more than just jackets. But let’s say, you do not want to include all of them in a single category. In this case, under that category, you may further introduce 3 more sub-categories, named “Coats,” “Jackets,” and “Vests” respectively.
  • Then, in WooCommerce, create these categories and sub-categories.

ii. SEO Optimize Category Archives

When you create a new category on your store, that category will have an archive page. All the products related to this category will be listed there.

If you optimize the category archive pages, they can also rank for search terms like a regular page.

Here’s a checklist for your category archives SEO optimization:

Each category and sub-category should have its own archive.

The main keyword for such a page should be the category name itself.

Add a Title and short description on that page that should include the keyword. These will be used as Meta titles and meta descriptions as well.

Use a relevant featured image. Its name and alt text should be the keyword itself. This will act as the OG image. It’s best to have different OG images per category.

iii. Optimizing Product SEO for WooCommerce

Once the categories are set for SEO, it’s time to focus on your products.

Following are some tips to accomplish your SEO goal:

>1. Search for a product on google and find out the top 3 pages that are ranking for the product you want to sell.

>2. Next, search in Ahref with the Page URLs of those product pages and find out the top commercial keywords that are generating traffic to these pages.

>3. Your target will be to rank for these keywords for your product, but initially, choose 3 main keywords that are commercial for this product.

>4. Use the product schema from RankMath.

>5. Write a detailed product description with all the keywords you found earlier. And mention the category name in the description at least once.

>6. Modify the product title with a keyword and its USPs in the title.

>7. Create attributes using keywords relevant to the product features. If none were found, then include one or two of the product features that are visible or notable, such as its USPs or color.

>8. Add multiple images of the product where the main image must have the same name as the product itself, along with its alt text. The rest could be named with relevant keywords (having the same for the alt txt as well).

>9. Create tags that match the keywords.

>10. Enable breadcrumbs to have a navigation menu above, showing which category this product is under.

>11. Add a reviews section to accept reviews

>12. Enable commenting to allow Q&A related to the product. (which will create engagement and signal to SERPs that this page is more desirable)

iv. Blogging SEO for WooCommerce competition

Now, this is a broader approach where you need to do in-depth keyword research on your competitors and your product keywords and write informational blogs that people read before making a commercial decision. You can always take the help and advantage of an AI writer to streamline the creation of informative blogs part by part tailored to strategically target keywords, enhancing your online visibility and driving potential customers”

For example, if you have Track Suits for Men, and you found that “tracksuits for men” is a keyword that your competitors are ranking on and getting good traffic, you may write an article on “Effective Ways To Improve Your Exercise Activity”

In this article, you can rank for “Tracksuits for men” and you may look to rank for other products (if you sell them), such as tank tops, sweatpants, joggers, gym clothes, etc.

Similarly, you may plan other content that is useful to your ideal customers. In the articles, you may add links to your products for healthy internal linking, and often get direct sales via these articles.

But you have to be careful that since it’s a WooCommerce website, your product collection may change and you may choose to stop selling a certain type of product. In that case, you need to remember to update your blogs with the right products and remove irrelevant links and content.

What’s next?

Once you have optimized your site for SEO, you should focus on getting traffic to your site.

A good option here would be to list your products on large online marketplaces, especially popular local marketplaces. For example, if you are in Germany, listing your products on Idealo.de would be a great option. Plus, you could go for universal marketplaces such as Google Shopping, Facebook Marketplace, Pinterest, etc. they can give a good early boost to your products.

You may also open up social profiles on Facebook and Twitter, where you may regularly share your products from time to time.

Another great option would be to start affiliate marketing for other bloggers to promote your products for a commission. However, this normally won’t help a startup. Once your business is established, then the affiliate program can do wonders in terms of revenue.

Apart from these, you may choose to run Paid Ads, and initiate re-targeting Ads for your products. Plus, you may set up abandoned cart recovery campaigns to bring back buyers that left without completing the purchase.

Final Thoughts

SEO plays the most important part when it comes to your WooCommerce store’s growth. Without proper SEO optimization, you won’t be able to reach your targeted buyers, let alone produce sales.

This guide will help you start your WooCommerce SEO strategy and will give you an instant SEO advantage.

Let me tell you, these SEO for WooCommerce tactics are proven to grow results for more than 6 months.

So, start optimizing your SEO and get the most out of your WooCommerce store.

However, if you want to find some more amazing guides, click here:

FAQs

How can I improve my store’s visibility in search engines?

Optimizing product descriptions, images, and metadata can enhance your search rankings for better visibility.

What are the key elements to optimize on a WooCommerce site?

Focus on product pages, categories, and SEO-friendly URLs to improve your site’s overall performance.

How do I make my WooCommerce store more attractive to search engines?

By ensuring fast load times and mobile responsiveness, you can make your store more search-engine friendly.

Why is proper content optimization crucial for WooCommerce success?

Well-optimized content improves rankings, which leads to higher traffic and more potential buyers.

How can product variations impact search rankings on WooCommerce?

Properly optimizing product variations helps increase your chances of appearing in a wider range of search queries.

Categories
Product Feed Manager For WooCommerce WooCommerce

8 Online Furniture Marketing Tactics To Increase Your Revenue

The furniture industry has seen rapid growth in recent years, ever since businesses started to sell furniture online.

According to Oberlo, the e-commerce sector for furniture marketing has a sales growth rate of 3.5 % per year!

Though this sounds promising, it also means that it’s now getting more competitive. And if you own a furniture business, you must start implementing careful tactics that will help you get more sales despite this competition.

In this article, you will learn about 8 reliable tactics that can help you stay ahead of the competition online and get more revenue.

So let’s get started.

Why You Should Have a Furniture Marketing Strategy in Place?

Selling furniture isn’t just about having great products—it’s about making sure the right people see them at the right time. Without a clear marketing strategy, you risk losing potential buyers to competitors or missing out on easy sales.

right marketing strategy

Here’s why having a strategy in place is essential:

i. Customers don’t buy on impulse when it comes to furniture

Unlike small purchases, furniture is a big investment. Most buyers take time to compare options, read reviews, and consider their budget. Without a marketing plan, you’re relying on luck for them to return. A strategy ensures you stay in front of them with retargeting, follow-ups, and personalized offers to close the sale. Additionally, tracking your website performance helps refine the user experience.

ii. Your competition is already targeting your potential buyers

If you’re not actively marketing, someone else is. Shoppers often browse multiple stores before making a decision. If they see a competitor’s ad with an exclusive discount or faster delivery, they might never come back to you. A well-planned strategy helps you stay competitive and keeps potential buyers engaged with your brand.

iii. Most furniture buyers need guidance before making a purchase

Many customers get stuck choosing between styles, materials, or sizes. Without a clear marketing approach, they might leave without deciding. A structured strategy includes informative content, comparison guides, and targeted messaging to help them make confident decisions—so they don’t abandon their purchase.

iv. Seasonal demand and trends affect furniture sales

Buying behavior shifts throughout the year—people shop for outdoor furniture in spring, home office setups in back-to-school season, and cozy interiors before winter. A marketing strategy ensures you’re promoting the right products at the right time instead of missing key sales opportunities.

v. Without a strategy, you’re wasting time and budget

Random promotions or occasional social media posts won’t bring consistent sales. A structured plan helps you focus on high-impact activities, so you’re not throwing money at ads that don’t convert or spending hours on marketing efforts that don’t drive results.

Now, let’s get into the specific tactics that deliver results.

8 Online Furniture Marketing Strategies To Skyrocket Your Revenue

Suppose you have a WooCommerce site where you have listed your products for online promotion. If it’s a new website, then initially, you may struggle to get enough traffic organically.

Hence, you have to resort to running paid Ads on Facebook and Google. Plus, you have to SEO optimize your product descriptions so that they gradually start ranking on SERPs.

But apart from these, how can you ensure you get more potential customers and close more sales?

The following 8 tactics are some ways you can enhance online furniture marketing for your WooCommerce store.

1. Offer ‘ Fast & Free Delivery ‘ on Expensive Furniture

If you’re selling expensive pieces of furniture online, offering free shipping can be a great way to attract potential buyers.

Free delivery has a powerful psychological effect that increases confidence in buying expensive goods.

In the case of furniture, the shipping costs are usually quite high. As a result, you can afford to give free shipping for products that cost less. However, for the products where you have a higher profit margin, this could be a cost you may bear to trigger more sales.

Imagine you have a premium sofa set listed on your WooCommerce store, priced at $2,000. Let’s assume that the shipping cost for the premium sofa set is $200.

And, you decide to offer free delivery exclusively for this item within 5 days.

This will make the buyer excited as he will save $200.

Now, sure, you are making $200 less from a buyer. But on the bright side, you will be able to close about 24% more sales just by offering free shipping.

Scenario 1: Charging Customers for Shipping

Number of units sold: 100

Price per unit: $2,000

Total revenue: 100 * $2,000 = $200,000

Scenario 2: Offering Free Shipping (with 24% increased sales)

Number of units sold: 124 (24% increase)

Price per unit: $2,000

Total Shipping fee paid: 124 * $200 = 24,800

Total revenue: (124 * $2,000) – 24800 = $223,200

Result: $23,200 increased revenue.

How to implement this tactic?

  • First, you have to focus on the product image. Add a tag that says “Fast & Free Delivery” on the images for such products so that it’s easily noticeable on the shop page.
  • You may create a separate category or page to list down products that will include this benefit.
  • In WooCommerce, set up free shipping for these products. To do so, you can use shipping classes for all your products and make it $0 only for the products you want to offer at free delivery.
    Here’s a guide to help you out.
  • On the product description, if possible, include a section to show the amount they will save with free shipping.
  • Highlight this offer on the home page by using a specific banner to promote Free Delivery for specific products.

Overall, this tactic is a win-win offer for you and your customers.

Lifemate furniture is a good example of this.

Free Delivery - Lifemate

2. Give Pre-order Discounts For Exclusive Collection

Offering pre-order discounts on your new and exclusive collection is a great furniture marketing tactic.

The idea is you do not bring in large supplies of a product, rather, you bring in a sample. You then run a full promotional campaign by creating videos, social posts, and Ads to highlight this product.

So, this will not only act as a special furniture discount campaign for greater reach but also help you get guaranteed sales even before you bring in your supplies.

You could try this with a new upcoming furniture collection that you plan on bringing in, maybe in a month or two. It will definitely give you an extra edge over other competitors who are likely to have access to the same supplier.

Here are some tips for implementing this furniture marketing tactic effectively:

  • Once you get hold of a supplier with an upcoming design that you suspect may become trending soon, request a sample immediately. If you like it, finalize a deal with the supplier for the full delivery, let’s say in 45 days.
  • With the sample at hand, you now have to prepare your marketing materials for promoting this upcoming furniture.
  • Decide on a suitable discount. To do so, first, calculate the price you will sell it at and the profit you will make. In this case, you may choose to make a lower profit and give a larger discount to get more guaranteed sales. Suppose you decided to offer 40% off.
  • In WooCommerce, add the product and set it to the status “On backorder.”
  • On the product image, set a tag that says “Pre-order for 40% Off.”
  • Create a special banner with the image of the product and mention that the buyer can save big by pre-ordering. You may place this on your website’s home page and share it on social media as well.
  • Mention the deadline for pre-ordering, which can be a couple of days before the supply arrives.
  • Once you have everything ready, you may run Paid Ads and share the promo video on social media.
  • You may shoot emails to your current regular buyers with this exciting offer.

Now, you have to understand that the pre-order campaign is quite unpredictable in terms of results. It will totally depend on if the product is really something your prospects will like. Hence, this is a tactic that you should use only if you are part of the furniture industry for a while. Your experience will help in bringing the right products based on market demand.

And then, the rest lies in how well you managed to market this offer.

In the end, if done right, will have tons of orders already placed, i.e., profit promised even before you have the supply at hand.

Here’s an example from Oak Furniture Store.

Prebook discount-  OAK Furniture store

3. Promote On A Popular Online Furniture Marketplace

One of the most common furniture marketing ideas that has brought great results for several furniture shops is promoting on a popular or local online furniture marketplace.

Here are a few online marketplaces where you may consider listing your furniture products to get more sales.

i. Wayfair

Wayfair- Homepage

Wayfair is a specialized online furniture marketplace in the USA and Canada where you will find all sorts of furniture products listed.
This platform’s targeted audience consists of customers actively searching for furniture and home furnishings, i.e., your ideal customers.
If you are in their region, you will get great exposure just by listing your products there.

ii. Houzz

Houzz - Homepage

Houzz is another popular online marketplace for homeowners and interior design enthusiasts. You will find furniture listed there for delivery to all over America (not limited to the USA). Plus, some of the companies that list products there also deliver internationally.
If you have an exquisite furniture collection, then this is a great website to promote.

iii. eBay

Ebay- homepage

eBay is a well-established online marketplace known for its wide range of product categories, including furniture. Plus, it operates and lists products from companies all over the world.
You may easily list your furniture products on eBay and take advantage of its large customer base and diverse audience.
eBay’s auction-style listings and Buy It Now options provide flexibility in pricing and sales strategies, allowing you to attract different types of buyers and earn more profit.

Other than these, you may look into some of the local online marketplaces that allow furniture promotion.

The idea here is to list your products on these marketplaces and get exposure to their regular set of audience (which is much greater than yours if you are relatively new). The way it works is people will find your products, pricing, and offers listed there. And when they will try to purchase a product, they will be directed to your website.

Some of these marketplaces may charge a small fee per sale done, or for listing on their site, but that’s a small cost you may consider bearing to get a larger outcome.

Now, you might think it is a hassle to upload your furniture products to these marketplaces individually. But don’t worry. You don’t have to do it manually.

If your online furniture store is created with WooCommerce, then you can actually generate all the furniture listings for these marketplaces in just a few clicks.

All you have to do is use a reliable product feed generation plugin.

You may try using Product Feed Manager for WooCommerce, which is, right now, the easiest plugin to help you generate product feeds for almost all popular online marketplaces.

4. Promote Exclusive Furniture Bundles

Offering bundles is a common tactic for increasing online sales and it really works if you can bundle up the right products at the right time.

For instance, customers may be searching for outdoor furniture and patio sets during the spring season. So, during this time, you may bundle up a patio dining set, outdoor lounge chairs, and a sunshade as part of a single discounted package.

Again, if someone is decorating his new bedroom to live in after marriage, he would probably want a bed, a wardrobe, and a dressing table. So you may bundle these three products from the same brand and offer a lucrative discount.

Usually, the conversion rate of a bundle really depends on if you have managed to offer the right products together and if they are in high demand.

For example, if you bundle up a dinner table with a bed, it is less like to convert as people do not usually think of buying both of these together.

So you have to understand the dependencies of the products and the market trend to pile up an attractive bundle. And then, the discount will act as a trigger to make people take action.

Here is how Selacy Furniture promotes its bundle offer.

Promote Exclusive Furniture Bundles- Selacy

Overall, this is a great online furniture marketing strategy if you can make good decisions based on your experience.

5. AR Furniture Showcase

AR Furniture Showcase

A new technology that you may incorporate into your furniture marketing strategy is Augmented Reality (AR).

Basically, what you can do is invest in creating a mobile app for your online furniture store and infuse AR into it for customers to judge if their choice of furniture fits well in their home/office.

There have been numerous cases where people bought a piece of furniture, but then returned it because they felt “it didn’t fit the home decor.” But with AR, they will be able to see how the furniture looks in their home through their phones and then make a decision.

It will help buyers to make a more accurate decision before placing an order.

Plus, the idea of an AR furniture app will act as a trigger of excitement for buyers. Hence they will be more hooked into making decisions rather than considering moving to other websites for more options (as long as you have well-designed furniture).

You will find several AR apps out there for e-commerce which you may integrate with your WooCommerce shop for using this advanced feature and stay ahead of the competition.

6. Use Personalized Exit-Intent Offers

Many visitors browse furniture stores but leave without making a purchase. Instead of losing them, trigger an exit-intent offer based on their browsing behavior.

For example:

  • If they view a sofa, offer a limited-time discount on that model.
  • If they were exploring multiple furniture categories, suggest a personalized style guide in exchange for their email.
  • If they added items to the cart but didn’t check out, show a “Last Chance” deal with free delivery.

This prevents potential buyers from leaving empty-handed and encourages immediate action.

7. One-Click Upsells After Checkout

Your customer has already made a purchase—this is the best time to offer a complementary furniture item with a one-click upsell.

For example:

  • If they purchased a bed frame, suggest a premium mattress with free delivery.
  • If they ordered an office desk, promote an ergonomic chair for a complete setup.

Since they’re already in buying mode, a well-placed upsell increases your revenue instantly.

8. Limited-Time Bonus for Cart Abandoners

Furniture shoppers often browse multiple options but hesitate at checkout. Instead of waiting, send an email or SMS within minutes offering a limited-time incentive to finalize their purchase.

For example:

  • “Complete your order in the next 15 minutes and get free assembly service!”
  • “Still thinking about your new sofa? Checkout now and receive a $50 store credit for your next order.”
  • “Your cart is reserved! Buy now and get a free home decor item as a bonus.”

This eliminates hesitation and drives immediate conversions.

**To make sure potential buyers don’t leave their carts without completing the purchase, you need a strategy in place. Check out 6 major strategies to avoid abandoned carts to learn how to recover lost sales and keep customers moving toward checkout.

Summing Up

It’s high time you start implementing these furniture marketing ideas so that you can keep up with the growing e-commerce popularity among furniture brands.

Using the AR furniture app will definitely give you an edge over most competitors as it is still a trend in progress.

Plus, if you are new, then promoting via online furniture marketplaces would be one of the mandatory tactics you should follow if you want to grow fast.

In fact, the rest of the tactics have just as much potential to get you more sales.

So go ahead and start creating a profitable furniture marketing process and boost your revenue.

Cheers.

FAQs

What are some effective digital marketing for furniture business tactics?

Focus on SEO, social media ads, and retargeting campaigns to drive traffic and convert potential buyers.

How to increase furniture sales quickly?

Offer limited-time discounts, optimize your website for conversions, and use personalized follow-ups to close more deals.

Why is a furniture marketing strategy important?

A well-planned strategy helps you attract the right audience, build trust, and consistently drive sales without relying on luck.

What are some creative furniture marketing ideas?

Use interactive AR tools, showcase customer testimonials, and create engaging product demos to boost engagement.

How to increase sales in furniture business with existing customers?

Upsell complementary products, offer loyalty discounts, and send targeted email campaigns to encourage repeat purchases.

Categories
Guide Product Feed Manager For WooCommerce WooCommerce

8 Best Google Shopping Feed Optimization Tips To Drive More Sales [2025]

Since Google is the number one search engine today, its shopping campaigns always bring the best results.

According to The Media Campaign, 46% of all product searches are made via Google.

If you own a WooCommerce store, then promoting your products on the Google Merchant Center will be a game-changer to drive more sales.

And for that, you need to create a product feed for Google Shopping and optimize it properly.

In this article, you will learn a few important Google Shopping Feed optimization tactics that you should embrace if you want successful results.

After reading this article you will learn

  • Why it is important to optimize Google product feed
  • Which product data should be optimized for the best results
  • How you can optimize these data to convert more buyers

And in the long run, you will be able to get more sales from Google Shopping campaigns and grow your business.

So let’s begin.

What is a Google Shopping Feed?

A Google Shopping feed is a file that contains all the details about the products you want to list on Google Shopping. This includes information like product titles, descriptions, prices, images, and other essential attributes.

google shopping feed

Think of it as a structured file that acts as the bridge between your WooCommerce store and Google Merchant Center. Once you upload this feed, Google uses it to display your products in relevant search results or shopping ads.

For example, if you’re selling sneakers, the shopping feed ensures your products show up with accurate information when someone searches for “running shoes” or “comfortable sneakers.”

Why should you optimize your Google Shopping Feed?

To get the best results from Google Shopping, you need more than just uploading a product feed. Optimizing it ensures your products appear in front of the right audience and perform better.

Here’s why it’s important:

  • Increases product visibility: An optimized feed helps Google understand your product better, improving its chances of appearing in search results.
  • Attracts relevant customers: When your product data matches the customer’s search intent, it makes them more likely to click on your listing.
  • Improves ad performance: A detailed and accurate feed leads to higher-quality ads, which typically results in better click-through rates and conversions.
  • Reduces rejection issues: Google has strict guidelines for product feeds. Optimizing ensures you meet their standards, avoiding unnecessary rejections.
  • Simplifies management: A clean, optimized feed is easier to update and maintain over time, saving you effort in the long run.

Optimizing your Google Shopping feed is not an extra step but a crucial part of your product marketing strategy. It ensures your products are presented accurately and attractively to potential buyers.

Challenges Of Promoting Products via Google Shopping

As much as Google Shopping drives sales, there are a few challenges that you need to overcome to get the best outcome.

  1. Your product feed data must meet Google’s feed structure
    Google Shopping has its own defined feed structure which you need to follow if you want to list products there. What most store finds difficult to do is to make sure they have met all the criteria explained in their product data specification. So you should create a product feed that meets all requirements.
  1. Rejection of product feed by Google
    The biggest issue people face is that the data people submit are rejected by Google for one or more reasons. The most common reasons Google rejects are
    • mismatched data between the website’s schema, feed, and frontend view
    • missing required product data
    • dynamic pricing issue
    • wrong currency, and
    • variation product data mismatch.

Try to solve the above problems but if you still struggle then Google Consultants are experts who can come in handy for navigating Google’s requirements and optimizing your data for approval.

  1. Products listed on Google Shopping but not getting results
    This is a blind spot for many online shops that sell via Google Shopping. Many believe that just listing products there should bring results. But the fact here is, that you need to optimize some of your product data to get better results. This may include the product title, images, category, offer prices, and even your website’s design.

    **Submitting basic product data will not trigger potential buyers to purchase, you have to make sure to optimize the data so that the product Ads and listings will convince the prospect to make a buying decision.

Throughout this article, you will learn all the possible ways to optimize your Google shopping feed that will make your Google Shopping campaign successful.

6 Proven Google Shopping Feed Optimization Tips That Can Trigger More Sales

To learn how to optimize Google shopping feed, you can apply these 6 proven Google merchant center optimization techniques :

1. Optimized Product Title To Match Search Queries

The product title is a vital element that you can use to drive the right traffic.

It is a crucial element that is not only necessary to optimize your Google Shopping feed but also plays a key role in conversion rate optimization, helping you maximize sales and performance.

When your customer is looking for a product, the title is one of the first things the prospects will judge your product by.

You have to make the title meaningful in a way so that just by reading it, your targeted buyer feels like this is what he/she was looking for.

This will help to trigger more potential buyers to click on the Google Shopping Ads for your products that appear above the search results. In this simple way, you can do your Google shipping optimization.

The best way to optimize a product title is to add some extra elements to the title that will highlight its specialty or features.

product title Optimization

For example, let’s say you are selling a cream in France called ‘Avène Tolérance Extrême Cream.’

Now, if you leave the name as is, only the buyers who are familiar with Avène or have researched the brand will recognize this product. Others may not click on the Shopping Ad with that title.

But, let’s consider naming it ‘Avène Tolérance Extrême – Moisturizer for Sensitive Skin, 50ml.’

This title specifies that

  • this cream is by Avène (i.e. the product brand)
  • it’s a Moisturizer (not a beauty cream)
  • it’s for Sensitive Skin (i.e. skin type), and
  • it is the ’50ml’ pack.

As you can see, this title will tell a buyer, who has zero knowledge about this product, if it is for her, i.e., a higher chance of a conversion.

Just like that, you can optimize the product title for any product by adding elements such as the product brand, color, size, capacity, quantity, special feature, model, who it’s for, or even its use case.

Here are a few more examples for different product types:

  • Books or Novels – Book Name + Genre + Author Name
    Example: The Da Vinci Code – Mystery Thriller by Dan Brown
  • Electronics – Product Brand + Product Name + Model + Special feature
    Example: OnePlus Nord N20 5G – 13 + 3 + 3 MP Camera, 64GB RAM
  • Clothing Products – Brand + Product Name + Color + Size + Material
    Example: Gant The Original T-Shirt – Red, XL, 100% Cotton

This approach is a proven tactic and easy to embrace.

Things to avoid when optimizing product titles:

  • Avoid Promotional terms on the title.
  • Don’t stuff keywords if it doesn’t fit
  • Don’t use all capital letters in a title.
  • Avoid special symbols.

2. Unique Image Optimization Tricks To Connect With Buyers

Once you list on Google Shopping, the product image plays a huge part in convincing buyers to choose your product among others.

Thus this plays a vital role in Google shopping ads optimization.

So you must make sure you use images that clearly show what the product is. This is especially important for products such as clothing and accessories, decoratives, tech products, toys, etc.

The most common advice photographers will give you is to take product images with a white background (or a contrasting background if your product is White).

This is the best approach if you want to clearly keep your buyers focused on your product.

When people search for products on Google, a lot of products are suggested in a single row.

So the idea of a distraction-free view of the product doesn’t really apply there unless the product has a catchy color combination.

Image Optimization

Here are a couple of unique tactics you can follow that may help you stand out in Google merchant center optimization.

  • Use a shaded-white background
    The concept here is to use a gradient background with a mix of white and light grey to give a shaded feel at the back. This creates an unexpected classy impression of the product in the center.
  • Find the most uncommon color for your niche
    If you have competition in the market, you can do a quick search on Google with your product title and look at the suggested product Ads. See which background colors are commonly used. Then you can decide on an uncommon background color that may make your Ad stand out among most other product Ads.
    *It’s best to consult with a professional UX designer for this as they will be more expert in suggesting backgrounds that stand out. A user experience enhancements audit can also help identify the best visual choices for better ad performance and visibility.
  • Use contrast backgrounds
    Large brands such as Zara have embraced the concept of solid contrast background colors and it delivered great results. So it’s a proven approach you can choose to embrace as well.
  • Choose an angle that highlights the best feature(s)
    Often you have to be creative about how you take the picture. You will see that in modern-day eCommerce, most shoe brands take the approach of placing two shoes in two ways – one is laid on the ground and the other is kept upright. This is to try and show all views of the shoes.
  • If Possible, Use Square Images
    Since all Google Shopping Ads are displayed with square images, it’s best if you too could provide images in that size. In most shops, people tend to keep a longer height for the product images. What this will do is that Google will fit the image via the longest dimension, in this case, the height, making the image smaller in the process. A square image will maintain the right dimension ratio and view your product in the best possible size.

    **If you use square images, you can also try using an image border to make your product stand out.

It’s best you make these changes in your WooCommerce store and then use those image links in the product feed data for Google for the best results.

For Product variations, make sure to have specific images for each variation rather than just a single image for all variants.

Things to avoid when optimizing product images:

  • Do not use unclear or blurry images
  • Avoid including product price in the images
  • Avoid using promotional words in the images (e.g. Special offer, 10% discount, etc)
  • Do not cluster the product background with unnecessary elements

3. Follow Google’s Category Hierarchy In Your Store To Optimize Google Shopping Feed

The product category is important to help buyers find a certain type of product they are looking for.

At the same time, Google also maintains a categorization of products to display your shopping ads to the right audience. This is one kind of Google shopping optimization you get for free.

Google doesn’t make it mandatory for you to submit a product category field, but it does look for the category in your store in order to place a product under its right search intent category.

So you must maintain proper categorization in your store.

It’s best to maintain your product category structure as per Google as most other marketplaces also follow the same category hierarchy.

Google Category Mapping

You can get help from Google’s taxonomy list to optimize the categories on your website.

However, just maintaining the categories is not the only product feed optimization. You have to ensure you are assigning your product to the most relevant possible product category.

For example, if are selling a Baby Bathtub, then do not just assign it under the category ‘Baby & Toddler’ or the ‘Baby & Toddler > Baby Bathing’. It should rather go under the further child category ‘Baby & Toddler > Baby Bathing > Baby Bathtubs & Bath Seats.’

This will help you keep track of your products more efficiently and help Google display your products to the right audience.

Tips To Optimize Product Category

  • In WooCommerce, when choosing a child category, make sure to mark the parent category as well.
  • Even if you do not follow Google’s taxonomy, make sure to keep the categories meaningful. Google can relate to the meanings of your set categories.
  • Avoid using special characters in category names.

4. Try To Maintain Consistent Product Data Everywhere To Optimize Google Shopping Feed

It is important to make sure your buyers do not get confused with your products.

For example, if you have one title in your WooCommerce store and another title in your Google Shopping listings, it may cause some confusion – the buyer may initially get baffled and start looking for the description, or often, if they are in a hurry, they will simply close the tab and look for other options.

The same can be the same if you have a different meta title and schema which will alter your traditional search result Title and the title Google bot will find in the schema.

So the best practice is to try to keep all your product data same whereever it is listed to optimize google shopping feed better.

google shopping ads optimization

What to do if you have already added a lot of products without optimized data?

Yes, it can be hectic to change the titles, descriptions, images, or other product data for optimization for all the products that you have already added to your WooCommerce store.

If you have fewer products in-store, then it’s best to take the time and make the changes.

In case you have a lot of products, you can leave them as-is and start optimizing the data for all the new products that you will add in the future.

This will ensure that you will get the best sales results for your new products.

Over time, the old products will eventually be sold out and there will be a time when your store will have all products with optimized data.

Should you not optimize the product feed data for the old products?

One of the questions that may arise is if you keep the old product data unchanged, should you simply submit those data without optimizing them?

The answer is NO.

Even if you can’t take the time to optimize the product data in your store, you should at least optimize some elements of the product when adding them to the Google product feed – the product title and category.

This may not solve the confusion issue due to different content, but it will still trigger more buyers to at least visit your store.

  • Google normally does not reject your feed due to the title as long as the main Title keywords are included in your product title in the feed.
  • The category is important as it helps Google to properly display your products to the right audience.

Apart from this, you should also consider making sure all the required product data by Google is consistent in both your product schema and your product page.

This is important because Google will crawl your website before approving your product feed and may reject products if a mismatch exists for required attributes. And this point is highly important for Google merchant center optimization.

5. Include All Required Product Data In WooCommerce

The required product attributes that Google recommends are more than just for product feed.

If you make sure to include those data for your products properly, then it will also help you rank in terms of SEO. Also, it is highly important for Google shopping optimization.

Without including the required product data, google merchant center optimization is incomplete.

Following are the recommended attributes by Google that you should include for products in your WooCommerce store as well:

  • Product ID
  • Product Title
  • Product Description
  • Product Link/URL
  • Product Category
  • Product Image URL
  • Stock Availability
  • Regular Price
  • Product Condition
  • Manufacturer/Brand Name
  • GTIN (Global Trade Item Number)
  • MPN (Manufacturer Part Number)
  • Specific product attributes
    • Material
    • Age Group
    • Color
    • Gender
    • Size

Let’s dive deeper into some key attributes and how to optimize them.

i. Product ID Optimization

Your Product ID is a unique identifier that distinguishes each item in your store. It’s crucial for tracking and managing your product listings, especially when you have a large inventory.

  • Use simple, consistent formats (e.g., numeric IDs or SKU codes).
  • Avoid duplicating IDs, as this can cause errors in your Google Merchant Center feed.

ii. Product Description

A well-written product description not only helps with Google SEO but also convinces customers to click.

  • Keep it detailed but concise—highlight the key benefits and features.
  • Use bullet points for technical details and maintain a natural flow for readability.
  • Include keywords naturally without keyword stuffing.

iii. Product Price

Your product price should always reflect the actual cost customers will pay.

  • Ensure your prices are competitive for your industry.
  • Match the price displayed in your feed with the price on your product page—discrepancies can cause rejections in Google Merchant Center.

iv. Product Stock Availability

Accurate stock information is crucial for maintaining customer trust and ensuring your products qualify for ad campaigns.

  • Update your inventory regularly to prevent showing out-of-stock items.
  • Use labels like “In Stock” or “Out of Stock” in your product feed.

v. Managing Product Links

Each product should have a dedicated URL that leads directly to the product page.

  • Avoid redirecting links or using generic URLs.
  • Make your product links user-friendly by including descriptive terms (e.g., /products/blue-running-shoes).
manage product link

vi. Product Category & Subcategory

Assigning the right category to your products ensures they appear in the relevant search results.

  • Use Google’s recommended category structure to map your products accurately.
  • Include subcategories when possible, as they provide better targeting for niche audiences.

vii. Using Correct GTIN & MPN

Google requires specific identifiers like GTIN (Global Trade Item Number) and MPN (Manufacturer Part Number) for products to improve search accuracy.

  • Add GTIN and MPN for each product, especially if they’re brand-specific or globally sold items.

viii. Add as Many Additional Product Images

Customers are more likely to convert when they can view a product from multiple angles.

  • Upload high-quality images that showcase your product’s features.
  • Include close-ups, variations (like colors or styles), and lifestyle shots for better engagement.
  • Optimize image file sizes to maintain page loading speeds.

Some of these are important for proper product Ads distribution, for example, the GTIN can help identify your product’s legitimacy and help Google to choose a more appropriate category.

Some of these data can also be used to trigger conversion on the product page. For example, the specific product attributes are things buyers look at when considering buying something for personal use, such as a Jacket. Plus, these attributes can also be used to create variations of the same product.

Now, some of the data here cannot be included in the default WooCommerce.

For example, there is no default product field for GTIN, MPN, or Brand. In this case, you may use different plugins to get the custom fields.

Note that, just using a custom field is not enough. The data saved there should be part of the product structured data or Schema Markup. Plus, in the case of variable products, these attributes have to be specific for each variant.

Following are a couple of tools you can consider looking at:

6. Dynamic Display of Products

Dynamic product views let you tailor how your products appear based on what shoppers are searching for. This means the product images, titles, and descriptions can adjust dynamically to match search terms, making your listings more relevant and appealing.

Here’s why this matters:

  • It helps improve your click-through rate since shoppers see exactly what they’re searching for.
  • It increases conversion rates by displaying product details that match buyer intent.

To get the best results, use relevant and descriptive keywords in your dynamic views. These keywords help Google understand your product better and show it in the right search results.

7. Include Shipping Information

The shipping details in your product feed play a big role in customer decisions and Google Shopping rankings. Shoppers want clarity on courier service costs and delivery times, so optimizing this information is essential.

Shipping info

Here’s how to make the most of your shipping details:

  • Offer free shipping: This can make your product more attractive and encourage more buyers to click and purchase.
  • Provide expedited shipping options: Fast delivery sets your product apart from competitors, especially for time-sensitive buyers.
  • Track your shipping performance: Monitor delivery times and product condition on arrival. Keeping shipping reliable and consistent helps build trust and customer satisfaction.

8. Use A Feed Generation Plugin For Accuracy

Now, despite putting enough effort into making your product data optimized for conversion, it is also important to generate the product feed in the right format and with the right product data.

As per Google’s product data specification, you have to maintain a set XML format with all the required attributes as tags.

In this regard, you can either partner up with a feed management SAAS tool such as Feed Army, or, you can rather consider going with a much more affordable WordPress plugin, Product Feed Manager for WooCommerce.

Product Feed Manager For WooCommerce (PFM)

Product Feed Manager is a simple and easy-to-use plugin that helps to generate product feed for several marketplaces (including Google Shopping) in the right format in just a few clicks.

The specialty of this plugin is its pre-built feed template, which you can set up in just a few minutes, even without any prior knowledge of Google product feed.

If you want to avoid getting your feed rejected due to a human error, you should consider using this plugin to list your products on Google Shopping easily.

PFM has all the tools required to optimize Google shopping feed :

  • The plugin comes with the combined field feature which can help with optimizing product titles for the Google shopping feed optimization.
  • Its category mapping feature will help to optimize the category in the feed data without changing your store’s original categories.
  • This plugin also comes with custom fields for GTIN, MPN, and Product Brand to help you set up your products in an optimized way before generating the feed.
  • Plus, its one-click JSON-LD structured data ensures data mismatch in the schema.

Following is a glimpse of how you can generate a Google product feed using PFM:

On your PFM dashboard –

  1. Click on Add New Feed.
  2. Enter A feed title.
  3. Select Google from the merchant list.

Once you map all the attributes with the correct product data, click on the publish button.

And, your feed will be ready to upload in the Google Merchant Centre. This way you can pull up Google merchant center optimization very easily.

Create product feeds in 3 simple steps

Common Errors While Optimizing Google Shopping Feed

Even with the best intentions, it’s easy to make mistakes when optimizing your Google Shopping feed. These errors can hurt your product visibility and lead to missed opportunities. Here are some of the most common ones you should watch out for:

  • Leaving out critical product attributes: Forgetting to include fields like GTIN or product category can cause Google to disapprove your product listings. For instance, if you’re selling branded shoes and don’t add the correct GTIN, your listing might never reach the right audience.
  • Using vague or generic titles: Titles like “Stylish Shirt” don’t help shoppers or Google understand what you’re selling. Be specific: “Men’s Cotton Polo Shirt – Navy Blue, Size L” works much better.
  • Uploading low-quality product images: A blurry or poorly cropped image can deter shoppers. Always use high-resolution images that clearly display your product.
  • Incorrect pricing or availability: If your feed shows a different price or indicates “in stock” when your product is actually sold out, shoppers will lose trust, and Google might flag your listing.
  • Missing keywords in descriptions: A plain description without relevant search terms can prevent your product from showing up in searches. Use keywords naturally in a way that highlights your product’s benefits.
  • Skipping regular feed updates: Product details, like prices and stock levels, change frequently. Not keeping your feed updated can lead to outdated information being displayed, which frustrates shoppers.

Read our guide if you want to know more about the google feed errors.

Author’s Note

Since WooCommerce is your source of earning money, you need to invest some time to optimize your Google shopping feed and then go for promotions.

And when it comes to product promoting your products, listing products on Google Shopping is a must.

The tactics mentioned above are just 6 among many other ways you can do google merchant center optimization or even Google Shopping ads optimization.

If you haven’t already, start optimizing your product data and make your marketing efforts fruitful.

FAQs

1. How often should you update your Google Shopping feed?

You should update your feed whenever product details like price, stock, or availability change. Regular updates keep your listings accurate and improve performance.

2. What happens if your product images are low quality?

Low-quality images can reduce clicks and conversions. Google might even disapprove your listings if images don’t meet their guidelines.

3. Why is GTIN important for your products?

GTIN helps Google identify and categorize your products accurately. Without it, your listings might not show up in relevant searches.

4. Can incorrect shipping details impact your feed?

Yes, inaccurate shipping info can confuse shoppers and lead to lower sales or negative reviews. Always double-check your shipping parameters.

5. Do product titles affect search visibility?

Absolutely. Clear, specific titles with relevant details improve your product’s chances of appearing in the right searches.


Categories
Product Feed Manager For WooCommerce WooCommerce

WooCommerce Targeted Advertising: Reach Out To The Right Audience [2025]

Getting a lot of traffic but not enough sales? Chances are, you’re not reaching the right audience.

To increase your sales, you need more than just random marketing—you need targeted advertising.

In recent years, Targeted advertising has become increasingly important for WooCommerce store owners like you!

According to gitnux, 78.3% of US companies use targeted advertising to reach and engage with consumers.

I’ll explore these targeted advertising strategies here. They are:

  • Organic Targeted Advertising
  • Paid Targeted Advertising
  • Advance Strategy For enhanced result

By following these strategies, you can do your product promotion more effectively.

I will also give you tips on implementing those strategies properly.

So, let’s get started.

What is Targeted Advertising?

Targeted advertising is a focused way to show ads to people who are most likely to be interested in your products or services. Instead of displaying the same ad to everyone, it uses data to ensure that your message reaches the right audience.

Targeted advertising

Imagine you own an online store that sells fitness gear. Showing your ads to anyone who visits the internet would be random and ineffective. But with targeted advertising, you can specifically reach people who actively search for gym equipment, follow fitness influencers, or read articles about healthy lifestyles.

This way, your ad feels relevant to them, increasing the chances they’ll click and buy.

In the past, this concept worked in simpler ways. A cosmetics company might have placed ads in women’s magazines, knowing that was the primary audience.

Today, technology takes this to the next level by collecting user data like browsing history, search queries, and purchase behavior. This makes your ads feel personalized and timely, making your marketing efforts much more effective.

Now that you understand what targeted advertising is, let’s explore how it works step by step.

How does targeted advertising work?

Targeted advertising uses data to match your ads with the people most likely to respond. Here’s a simplified breakdown of how it works:

  1. Collecting data Every interaction online leaves behind a trail of data. From browsing behavior to purchase history, this data gives you insights into what your audience wants. For instance, if someone searches for “best running shoes,” they’re likely a fitness enthusiast looking for quality gear.
  2. Analyzing data After collecting this information, it’s time to make sense of it. You look for patterns—what are their interests? Do they prefer budget-friendly options, or do they lean toward premium products? These details help you understand how to speak directly to their needs.
  3. Segmenting your audience Not everyone is the same, so you segment your audience into smaller groups. Let’s say you’re selling fitness equipment. One group might include seasoned athletes, while another might be beginners just starting their fitness journey. Each group gets tailored messaging.
  4. Personalizing ads Once you have your segments, you create ads that feel personal and relevant. For example, an ad for an advanced fitness tracker might appeal to experienced athletes, while beginners might see ads for simple workout gear.
  5. Placing the ads Where your ads appear matters. They could show up on social media, in search engine results, or on websites your audience frequently visits. It’s all about meeting them where they are, at the perfect moment.
  6. Tracking and optimizing Once your ads are live, you monitor how they perform. Are they getting clicks? Are they leading to sales? If something isn’t working, you adjust. Maybe the headline needs tweaking, or the imagery could be more engaging. It’s a constant cycle of learning and refining.

For example, if someone buys a pair of hiking boots, they might start seeing ads for accessories like backpacks or water bottles. This approach keeps the ads relevant and adds value to their experience.

By following these steps, you’re not just showing ads; you’re connecting with the right people in a way that feels meaningful and helpful.

What Are the Types of Targeted Advertising?

When it comes to reaching the right audience, targeted advertising offers several approaches. Each type focuses on delivering ads tailored to specific preferences, behaviors, and needs. Here’s a closer look:

  • Interest-Based Targeting This type focuses on what people are passionate about. For example, if someone frequently reads blogs about fitness or watches workout videos, they’ll likely see ads for gym equipment or activewear.
  • Demographic Targeting This approach ensures that ads are relevant based on age, gender, income level, or even education. For instance, a college student might see ads for affordable gadgets, while a professional might see premium work tools.
  • Geographic Targeting Location plays a key role in this type. Businesses use it to show ads to people in specific cities, regions, or countries. For example, a local restaurant may target customers within a 10-mile radius with lunchtime promotions.
  • Behavioral Targeting Behavioral targeting focuses on users’ online activities, such as websites visited or items browsed. If you’ve added a product to your cart but didn’t check out, you might see ads reminding you to complete the purchase.
  • Programmatic Targeting This type uses automated systems to buy and place ads in real time. These systems analyze user data and decide the best ad placement for maximum effectiveness, ensuring your ad reaches the right person at the right moment.

By leveraging these types of targeted advertising, businesses can create campaigns that feel relevant and timely.

Up next, let’s explore how these approaches benefit both businesses and consumers.

What Are the Benefits of Targeted Advertising?

When done right, targeted advertising creates a win-win situation for businesses and customers. It ensures you reach the right people at the right time, while customers get ads that actually matter to them. Here’s how:

How Businesses Gain from Targeted Advertising

  • Efficient Spending: By targeting people who are most likely to buy, you avoid wasting money on uninterested audiences.
  • Higher Conversions: Showing ads to customers with a clear buying intent boosts your chances of making a sale.
  • Improved Loyalty: Relevant ads create a positive connection with your audience, encouraging repeat purchases.
  • Better ROI: The more focused your campaigns, the greater the return on every dollar spent.

Why It’s Better for Customers Too

  • Relevant Recommendations: Customers get ads for products they need or might enjoy, making their shopping experience easier.
  • Less Clutter: Instead of being overwhelmed with ads they don’t care about, they see tailored suggestions that matter.
  • Convenience: Ads often appear at the right time, helping customers find what they need without searching.
  • Personalized Experience: Relevant ads foster a sense of connection with brands that understand their preferences.

With all these targeted advertising benefits, it’s clear that targeted advertising has immense potential.

But as useful as it is, it comes with a responsibility to address a critical concern—Privacy.

Privacy Issues in Targeted Advertising

To make advertising effective, companies rely on data about your online behavior. While this helps in creating personalized experiences, it also opens the door to privacy concerns.

Imagine you’re searching for a new phone. After just one search, ads for phones, accessories, and even financing options follow you across every app and website. It feels like you’re being watched. That’s because companies use cookies and tracking tools to collect data about your activities—sometimes across multiple platforms.

Privacy Issues in Targeted Advertising

The Risks of Collecting Too Much Data

  • Data Breaches: The more data companies store, the bigger the risk of it being stolen in a breach. Personal information in the wrong hands can lead to identity theft or fraud.
  • Detailed Profiles Without Consent: Some tracking practices create detailed profiles of users without clear or informed consent, making people feel uneasy about how much is known about them.
  • Misuse of Ads: In some cases, targeted ads have been exploited for manipulative purposes, such as spreading misinformation or influencing political opinions.

Why People Are Concerned

Many users now prefer more transparency about how their data is collected and used. They want control over what information is shared and how it’s handled. This growing awareness has led to stricter regulations and increased demands for ethical advertising practices.

Targeted advertising offers undeniable advantages, but it’s equally important to ensure that it respects privacy. By finding the right balance, you can make advertising both effective and trustworthy.

2 Proven Targeted Advertising Strategies for WooCommerce

For targeted promotion of your WooCommerce products, you need to first select your strategy.

There are 2 proven strategies you can go for :

1. Organic targeted advertising and

2. Paid advertising

Why paid advertising?

You can not always reach your goal by only organic targeted advertising. That’s where you have to consider paid advertising.

Before going to paid targeted advertising, let’s put light on organic advertising.

1. Woocommerce Targeted Advertising For Organic Traffic

Suppose you own a WooCommerce store of outdoor sporting goods.

Your product range includes items such as camping gear, hiking equipment, and fishing accessories.

Besides having a strong online presence on your WooCommerce website, you need to place your products in front of your targeted audience who are actively searching for outdoor sports products on different marketplaces.

In this case, you must choose those online marketplaces that are popular for this kind of product, such as Amazon or eBay.

As these marketplaces have a dedicated customer base that actively seeks outdoor sports gear, you can choose them as ideal platforms to showcase and sell your products.

But remember that all marketplaces are not specialized or ideal for all types of your products.

When listing your products on different marketplaces, you must have to focus on proper execution.

So, when people search for your product types, they immediately appear in front of them.

Now, let’s focus on how to do that properly –

Strategies To Execute Organic Targeted Advertising Effectively

Here are some tips with targeted advertising examples for successfully enlisting your products on different marketplaces:

  • Research and choose the right marketplaces
    First, Identify marketplaces that align with your product categories and target audience. For example, if you sell handmade crafts, promoting your products on Etsy will be a good choice.
  • Create your product listing
    Once you have selected your marketplace, create your product list. Choose the product that you want to promote on the marketplace and create your desired product feed.
  • Optimize your product feed
    When listing, ensure that your product feed is accurate, up-to-date, and optimized for each marketplace’s specific requirements. Include relevant attributes such as product title, description, images, pricing, and availability.
  • Stay updated with marketplace policies
    Besides feed optimization, You should follow the policies, guidelines, and updates of the marketplaces you’re selling on. Compliance with marketplace rules is essential to maintain a strong presence and avoid penalties or account suspensions.

Drive stronger results with the proper tools

Now, after choosing your targeted marketplace next question that may arise in your mind is- how to implement this easily.

There are several tools that can help you list your WooCommerce products on different marketplaces.

One such reliable plugin is Product Feed Manager for WooCommerce.

180+ marketplaces of PFM

As It has 180+ pre-defined marketplace templates, you can easily create your product feed for your desired merchant.

And, coming to curating your listing, you can easily filter your products to create the perfect feed.

This way, you can promote your targeted products in your preferred online marketplaces.

Besides organic targeted advertising, you can consider paid advertising to promote products to the targeted audience.

Let’s find out how you can do that-

2. Woocommerce Targeted Advertising For Paid Traffic

When your organic product promotion comes into your mind, reaching your targeted audience may still be difficult for you. Here, paid advertising offers an additional level of control and precision in promoting your WooCommerce products to a targeted audience.

By investing in paid targeted advertising strategies, you can amplify your reach and drive targeted traffic to your store. Thus, you can increase your chances of converting potential customers into buyers.

Imagine you have a WooCommerce store specializing in fitness apparel and accessories.

For product promotion, you decide to run paid advertising campaigns on social media platforms like Facebook and Instagram.

Let’s discuss targeted advertising on Facebook. For that, you can do the following-

  • Set up custom audiences based on interests such as fitness, gym memberships, and active lifestyle
  • Then, ensure your ads are shown to individuals who are more likely to be interested in your products. For that, do as follows-
    – Create visually appealing ads featuring your latest workout gear
    – Offer a limited-time discount
    – Entice potential customers to click through and make a purchase on your WooCommerce store.

Let’s see two effective paid targeted advertising strategies for your WooCommerce store:

Facebook Advertising for Higher Reach

let’s say you run a WooCommerce store that sells handmade jewelry.

You have a new product line that you want to promote to your target audience on Facebook. With Facebook, You can create targeted campaigns easily that reach users who are interested in your handmade jewelry and fashion accessories.

To achieve this, let’s assume you already have a Facebook ad account. Here’s how you can effectively utilize Facebook-sponsored advertising in your jewelry store example:

  1. Define your targeted audience:
    • Set parameters based on demographics, interests, and behaviors. For instance, you can target individuals who have previously liked similar jewelry pages or have made purchases of handmade jewelry in the past.
  2. Create lookalike audiences:
    • Capitalize on your existing customer data to create lookalike audiences. This allows you to expand your reach and target potential customers who share similar characteristics and behaviors as your existing customer base.

Implementing Facebook Advertising Effectively

Now, let’s explore some strategies for implementing Facebook advertising effectively in your jewelry store:

  1. Choose your advertising objective:
    • Consider your business goals and select the most relevant advertising objective provided by Facebook. For example, if your aim is to boost sales, you can choose the objective of increasing conversions.
  2. Craft your ad:
    • Here, Opt for visually appealing ad formats, such as stunning images, captivating videos, or engaging carousels. Showcase your exquisite WooCommerce jewelry products in a way that grabs attention. Furthermore, craft ad copy that directly addresses the needs and aspirations of your target audience, highlighting the uniqueness and craftsmanship of your handmade jewelry.
  3. Launch and monitor your campaign:
    • Once your campaign is live, closely monitor its performance. Keep a close eye on key metrics like click-through rates, conversions, average revenue per user, and engagement. Make necessary adjustments to optimize your Facebook advertising campaigns continually. A/B testing different ad elements and targeting strategies can help you refine your approach and maximize results.

Following are the targeted advertising strategies for Facebook advertising.

But, What if you fail to achieve your goal with this approach?

Let’s explore dynamic remarketing as a solution for that.

Advance Targeted Advertising for Enhanced Results

To maximize your product promotion, you can integrate dynamic remarketing with Facebook advertising.

Let’s explore how the integration of dynamic remarketing and Facebook advertising can work together in your handmade jewelry store example:

  1. Set up dynamic remarketing with Google Ads:
    • Begin dynamic remarketing through Google Ads, following the steps mentioned earlier. Set up the remarketing tag on your WooCommerce store to track user behavior and create customized remarketing lists based on product views and cart abandonments.
  2. Create your dynamic product feed:
    • Then, Generate a product feed that includes all your handmade jewelry products along with relevant attributes, such as product names, captivating images, and prices. This feed will be used for both Facebook advertising and dynamic remarketing campaigns.
  3. Implement Facebook remarketing:
    • Now, Integrate your dynamic product feed with Facebook. This will allow you to synchronize your inventory and create Facebook remarketing campaigns. Also, enables you to target users who have shown interest in your handmade jewelry products.
  4. Set up targeted Facebook advertising campaigns:
    • As mentioned earlier in the previous section, you have to set targeted advertising on the Facebook platform. If you fail to achieve your goal through targeted advertising, go for dynamic marketing.
  5. Implement dynamic remarketing on Facebook:
    • Use the dynamic product feed created earlier to deliver personalized ads on Facebook. Showcase the exact handmade jewelry products that users have viewed or added to their carts, But didn’t complete their purchase. This can Increase the chances of your conversion.
      ****Don’t forget to Use compelling visuals and persuasive ad copy that resonate with your target audience’s needs and aspirations.
  6. Continuously monitor and optimize:
    • After running your targeted advertising, don’t forget to monitor the results. Regularly monitor the performance of your Facebook advertising and dynamic remarketing campaigns. Track key metrics like click-through rates, conversions, and engagement. Analyze the data to identify areas for improvement and make necessary adjustments to optimize your campaigns further.

This integrated approach enhances your overall targeted advertising efforts. Also, increase your product promotion reach and conversions.

Wrapping Up

Targeted advertising is an essential component of your WooCommerce marketing strategy.

After identifying your targeted audience, you can develop highly effective targeted advertising campaigns that resonate with your audience and drive conversions. For that, you have to promote your products in different marketplaces.

To effectively enlist your products into the product feed and do your targeted advertising, consider trying Product Feed Manager for your WooCommerce.

It has advanced features and an intuitive interface to help you create high-quality product feeds that are optimized for multiple advertising channels, including Google Shopping, Facebook, and more.

Start implementing these targeted advertising strategies in your WooCommerce store today.

And, enjoy the positive impact they can have on your business!

Frequently Asked Questions(FAQs)

How can I set up targeted advertising for my WooCommerce store?

Setting up targeted advertising for your WooCommerce store involves several key steps. First, choose an advertising platform that aligns with your goals, such as Facebook Ads or Google Ads. Next, install the necessary plugins or integrations to connect your store data with the chosen platform. Create custom audiences based on your store data, including past customers, site visitors, or specific product interests. Design ads that are tailored to these audiences, considering their preferences and behaviors. Set up proper tracking to measure the performance of your campaigns accurately.

What are some effective targeting options for WooCommerce stores?

WooCommerce stores have access to a variety of effective targeting options to reach the right audience. Retargeting past visitors or cart abandoners can help re-engage potential customers who have shown interest in your products.

How can targeted ads be beneficial for businesses?

Targeted ads help businesses focus on the right audience, reducing wasted ad spend and boosting sales effectively.

What makes targeted advertising better for customers?

Customers see ads that match their interests, making their online experience more relevant and enjoyable.

Is my privacy at risk with targeted advertising?

While targeted advertising relies on data, most companies use safeguards to protect personal information.

Categories
Product Feed Manager For WooCommerce WooCommerce

How To Create Instagram Product Feed For WooCommerce – A Complete Guide [2025]

Instagram isn’t just for food pics and cute puppy videos any more—it’s practically a digital mall.

And guess what?

Over 54% of users end up buying something they see there.

You know what that means: your products should be front and center.

And all it takes is setting up an Instagram product feed for your WooCommerce store. It’s easier than convincing yourself you don’t need another pair of shoes after scrolling through Instagram.

In this guide, I’ll walk you through the exact process that smart WooCommerce owners use to drive traffic and boost sales.

Let’s jump in.

What is Instagram Product Feed?

A WooCommerce Instagram Product feed is a spreadsheet containing all your product information, including titles, prices, categories, tags, descriptions, and more.

For example, an Instagram product feed for WooCommerce could be a simple Excel spreadsheet, and you can enter your product data with titles like ID, title, description, link, condition, price, etc.

Attributes Of Instagram Product Feed

Knowing Instagram Product Feed’s terms will help you understand the process better.

Instagram Feed Attributes For Woocommerce

Here’s a list of things you should know:

  • Product ID: A special number every item has to make it easy to find and keep track of.
  • Title: A heading to describe the product clearly so everyone knows exactly what it is.
  • Description: A brief paragraph containing all the important info so buyers can make a decision.
  • Product URL: This is the link that takes you right to the product on any website.
  • Image URL: This is the web address for the picture of a product on a website.
  • Availability: To let your customers know if it’s in stock or not so they know what to expect.
  • Condition: To tell buyers if the product you are selling is brand new, gently used, or refurbished.
  • Manufacturer This is the name of the company that makes the product you are selling. If you are the one making the product, just put your company name here. If you have different brand names for different products, you’ll need to save that info somewhere else and then use it here.
  • GTIN(Global Trade Item Number)– This is a special number that helps identify your product. It helps Google show your products to more people. The GTIN number is given to you by the company that makes the product. If you don’t have this number, just leave the field blank. Don’t put in a random number!
  • MPN (Manufacturer Part Number)– This is a unique number for each product as a product identification number given by the manufacturer.
  • Google Product Category – This is about matching up your product categories with Google’s categories.

Each platform on Meta, like Instagram Shop, has different requirements for attributes than other platforms.

Make sure you check the specific guidelines for the Instagram platform before creating your product feed.

Create an Instagram Product Feed for Your WooCommerce Store

Let’s now create an Instagram Product Feed for the WooCommerce Store.

I am using the free version of the plugin product feed manager for Woocommerce to demonstrate the process step-by-step.

Make sure you have installed Woocommerce on your WordPress site.

Go to your Dashboard> Plugins> Add new plugin.

add new plugin

Type ‘Product Feed Manager For WooCommerce‘ in the search bar and hit enter.

Install Product feed manager For WooCommerce

The plugin will pop up in the search results for you to install. Click on the button install.

That’s all. The product feed manager for WooCommerce is installed on your site.

Step 1: Create New Feed & Feed Mapping

Head over to your product feeds dashboard.

Find the button that says Add New Feed and give it a click.

add new feed

This will bring you to the page where you can create your feed.

At the top, you can choose a title for your feed. Think of a name that aligns with your brand identity to give your feed!

asdd feed name

Choose the merchant you want to use.

select merchant in PFM

I am going to pick Instagram.

select instagram merchant

All the important details are shown below.

You’ll see that many details are already set up for you, but you might need to adjust a few things. Feel free to change anything you need to.

Feed page

For Instagram, there are a couple of details that need to be fixed.

  • Manufacturer – This is the name of the company that makes the product you are selling.
  • GTIN – The GTIN number is given to you by the company that makes the product
  • MPN– The MPN number is a special code of a product given by the company that made it.
  • Google Product Category– This is about matching up your product categories with Google’s categories.

Now, let’s map the Google product category.

You can do category mapping in two ways. You can use a category mapper that’s already set up for Google Shopping, which you can also use for Instagram. Or you can create your category mapper.

For the first one,

Scroll down on the attribute list, you will find the Google product category attribute at the end.

choose google product category attribute

Click on the assigned value option beside the Google product category attribute. Click on the edit button on the right. Then click on the assign value button shown in the image :

 select assign value option in google category in PFM

As you can see, a scroll-down list will come up, from here select the Google product category[default] option.

google category mapping

As you select it, you see a blue write-up “configure category mapping” below the selected assigned value.

google category mapping set up

Click on the Configure Category Mapping button which you will find under the Category Mapping value, and a new tab will be opened with the default category mapper – Google Product Category.

google category mapping set up

Map your categories here and click on the Update and Close button to go back to the attribute section.

However, you can create a new Category Mapper too. You need to click on the Category Mapping button from the WordPress dashboard and there you will get the option to create a new Category Mapper and to configure the mapper.

You can follow this doc to learn how to create a new Category Mapper for your feed.

Now, you need to choose the feed type. Click on the Feed Type labeled box and all the available types will come.

feed type

Just so you know, Instagram can handle XML, CSV, and TSV feeds. You can pick which type of feed you want from the dropdown menu. CSV is usually the best choice.

Step 2: Feed Configuration

Go back to the top of the page and you’ll see four choices.

feed configuration in pfm
  • Documentation
  • Troubleshoot
  • Product Filter
  • Settings

Let’s start by setting up the Product Settings.

Click on the Product Settings button, and a menu will pop out from the right side of the screen.

feed configuration setting option

The first thing you’ll see is Auto-Generate Your Feed.

auto generate feed

This lets you schedule when your feed updates automatically.

Choose a time interval or select “No interval” if you don’t want it to update on its own.

Now,

Close the menu and click on Product Filter. Another menu will pop out from the right side.

select product filter option in pfm

You can choose which products to include in your feed.

product filter option

You can include all your products, or use filters Category Filter, and Tag Filter to select specific products.

If you want to add a custom filter, on the right side you can click on the add custom filter.

Here’s an example,

custom product filtering

All of it you can do in the free version. For a simple feed, that’s enough.

If you want to add any Feed Rule, you can take the pro version.

Here’s how you can set up Feed Rules,

Feed Rule Feature in Product Feed

Learn more about Feed Rules from this doc. ->

Step 3: Publish The Instagram Product Feed for WooCommerce

Alright, now that you’ve set up your feed just the way you want it, it’s time to publish it!

Just go back up to the top of the page and look for the big button that says “Publish” on the right side.

publish feed option in product feed manager

Click that button and your feed will be published.

Once you publish your feed you’ll get the URL or the download link of the Feed.

Publish Instagram Product feed

On the right panel, you will find the button “Update”. If you want to make any changes you can simply click on these options and update.

How To Create Instagram Product Feed For WooCommerce – A Complete Guide [2025] 3
Type caption (optional)

That’s all! Your Instagram product feed is ready!

Integrate WooCommerce Store With Instagram Shop

Just creating an Instagram product feed is half done work, You need to connect your Woocommerce store with the Instagram shop.

Headache is:

How would you connect it?

First, Go to your Facebook business page.

create business account in commerce manmager
Type caption (optional)

If you already have a Facebook account, log in and head over to your Facebook Business page. If you don’t have an account yet, create one.

Once you’re on your Facebook Business page, you’ll be redirected to the dashboard.

home page of business account
Type caption (optional)

Next, is to set up your Instagram Business account.

Go to the Instagram account and click on the three bars in the top right corner.

Select “Settings” and then “Business“.

Click on “Connect to Facebook” and follow the prompts to link your accounts.

Now, it’s time to create a Catalog where you can showcase all your products.

To do this, go to Facebook Commerce Manager and click on the Add Catalog button.

Add catalogue
Type caption (optional)

Choose the type of Catalog you want to create, and once it’s confirmed, you can start adding products.

Select type of catalogue
Type caption (optional)

Give a name to your catalog select the upload method and click on the Create button.

configure settings
Type caption (optional)

Click on View Catalog to begin adding items.

catalogue create
Type caption (optional)

When you click on View Catalog, you’ll see the Category Overview section.

Click on Add Item to start adding products to your Catalog.

overview section of facebook commerce manager
Type caption (optional)

To add products from your Facebook feed, click on Data Sources and then Add Items.

This will take you to the Add Items window where you can start uploading your products.

set uo commerce manager
Type caption (optional)

Select Data Feed and click on the Next button.

set up commerce manager
Type caption (optional)

Here you will some new options to set the data feed source. Select Yes and click on the Next button.

Set up commerce manager
Type caption (optional)

Now, you have to submit your feed here.

You can upload a feed from your Computer, from an external URL, or by using Google Sheets.

set up facebook commerce manager
Type caption (optional)

that’s how you upload your data feed to Facebook Commerce Manager.

As you upload it on Facebook Commerce Manager, It will automatically upload to your Instagram feed.

Now that you’ve met the prerequisites, you’re ready to connect your Woocommerce store:

Now,

  • Log in to your Woocommerce store’s WordPress dashboard.
  • Go to “Plugins” and click on “Add New“.
  • Search for “Instagram Shopping” and select the plugin from the search results.
  • Install and activate the plugin.

After you’ve added the plugin and turned it on, you’ll need to set it up.

Here’s how:

  • Go to your Woocommerce store’s WordPress dashboard and pick Instagram Shopping from the menu.
  • Click on Connect to Instagram and follow the instructions to link your Instagram Business Account to the plugin.
  • On the plugin settings page, make sure to turn on Enable Instagram Shopping.
  • Customize the other settings however you want, like syncing products and tagging options.

Alright, so now it’s time to link your Woocommerce store to Instagram:

  • Go to your Woocommerce store’s WordPress dashboard and find the Instagram Shopping option in the menu.
  • Click on Connect to Instagram and then just follow the instructions to give your store permission to connect to your Instagram Business Account.
  • Once everything is connected, your products will automatically show up on both your Woocommerce store and Instagram

Reasons To Avoid Manual WooCommerce Instagram Feed Creation

To create a WooCommerce Instagram Product Feed Manually, You need to organize the data of all of your products in a spreadsheet.

You can use Google Sheets or Excel for this.

You have to make sure to put each detail in a separate column at the top of the spreadsheet.

It’s kind of like filling out a long form! Which is very TIME CONSUMING!

If you have a big online store with lots of products, it’s not a good idea to manually create a data feed.

Another important thing for online stores is running sales and offering discounts. This means you’ll need to change your product prices often.

For example, if you’re having a Black Friday sale, you’ll need to update your prices for that specific time.

If you’re selling your products on different platforms, like Instagram, it’s crucial to keep everything in sync.

This means you need to update prices and sale details everysheet your products listed.

Managing all this manually can be a real headache.

Every time you make a change to your store, you’ll have to update all your product feeds with the latest info and upload them to every platform.

That’s why my suggestion is to use a Product Feed plugin.

You can SURELY choose the Product Feed Manager For Woocommerce that I have demonstrated here.

In the free version, you can generate product feed for up to 200 products per feed.

With this plugin, you can generate the feed in 3 simple and easy steps. It also takes much less time than manual setup.

If you are satisfied with the result, you can upgrade to the pro version and use this plugin to the full extent.

Benefits of Integrating Your Woocommerce Store With Instagram

81% of consumers trust a brand that has a strong brand identity.

By linking WooCommerce & Instagram together, you can create a strong brand identity that will help you attract more customers.

There are some more insightful data regarding Instagram marketing

  • Instagram has 2 billion active monthly users, which means if you integrate your Woocommerce store you get massive traffic and increase your brand visibility.
  • Instagram has been gaining a ton of new users every year, around 70 million to be exact. This has been happening since 2020 and it’s been staying pretty steady.

When you connect your WooCommerce store to Instagram, you open the door to a more interactive shopping experience for your customers. Here’s what you gain:

  • Increased Product Visibility: Showcase your products to millions of potential buyers on Instagram’s visually-driven platform.
  • Seamless Shopping Experience: Customers can browse and purchase directly from Instagram without leaving the app.
  • Real-Time Product Updates: Automatically sync inventory, prices, and descriptions for accurate product listings.
  • Boosted Engagement: Tagging products in posts and stories encourages more interaction and click-throughs.
  • Improved Sales Insights: Access Instagram’s analytics to track performance and refine your marketing strategy.

That means you can have a high growth rate if you integrate and market on Instagram properly.

Getting Started With WooCommerce Products on Instagram

To get these benefits, get started promoting your products on Instagram.

Just do it the right way so that you can save your time.

The manual process of creating an Instagram product feed is highly challenging.

As you can see, you have more work left to promote on Instagram like

  • Connecting it with your WooCommerce store
  • Researching trending hashtags
  • Work on graphics or product images and more.

It’s better just to use a plugin to create an Instagram product feed.

You can simply generate it the way I’ve shown you with the Product Feed Manager For Woocommerce.

Here’s a video you can go through for more clarity-

If you have any questions about this article, just comment below!

FAQs

1. How do I show my WooCommerce products on Instagram?

You’ll need to complete the Instagram shopping feed setup so your store products sync directly to Instagram.

2. What’s the best way to sync product updates with Instagram?

Using an Instagram product feed plugin ensures your product descriptions, prices, and stock updates stay accurate.

3. Can I automate product listings on Instagram?

Yes, the right Instagram product feed plugin automatically syncs new products and updates in real-time.

4. What’s required to get my WooCommerce store approved for Instagram Shopping?

Your Instagram shopping feed setup should include accurate product info and a Facebook catalog linked to WooCommerce.

5. How do I tag products in Instagram posts and stories?

After setting up your Instagram product feed, you’ll be able to tag products in posts for easy shopping.

Categories
Product Feed Manager For WooCommerce WooCommerce

Generate Facebook Product Feed For Woocommerce – A Complete Guide [2024]

Facebook is the third most visited site in the whole world right now!

More than one-third of the people who use Facebook shop there too.

Why? Here’s the answer-

Ads and posts in Facebook feeds come automatically when people randomly scroll to spend time.

And, if anyone clicks on a certain product suppose I clicked on a bag.

Facebook will automatically suggest all the online bag stores near me in my Facebook feed.

So, If you have an online store using WooCommerce, you must pay attention to Facebook.

With much less effort you can get sales instantly.

You can set up a whole store on Facebook, run ads that change based on who’s looking at them, and even list your products on Facebook Marketplace.

Facebook has many cool features that can help you sell your products without you doing ALMOST NOTHING.

All you need to do is create a Facebook product feed for WooCommerce. [We have shown below the easiest steps]

Before going into the process, let’s gather some knowledge about the WooCommerce Facebook feed :

What is WooCommerce Facebook Product Feed?

WooCommerce Facebook Product Feed is like a file that has all the important info about the stuff you’re selling on your online store in the Facebook marketplace or shop.

You can use this file to show your products on Facebook in real-time.

Facebook Marketplace

Facebook Marketplace makes it easy for businesses that sell directly to customers to promote their products.

Here are some important things about Facebook Marketplace:

  • You can make catalogs of your products.
  • Reach more people who might want to buy your stuff.
  • Connect your online store data with Facebook.
  • Show ads that change based on what people like.
  • Let people buy your products right on Facebook.

One great thing about Facebook Marketplace is that you don’t need to be a tech expert to set up your store.

With the RIGHT TOOL to make WooCommerce Facebook Product Feeds, you can easily connect your online store with Facebook Marketplace.

You need to create a catalog on Meta Commerce Manager and use one single Facebook catalog feed to list your products on both platforms.

Before going deep into these, let’s know some requirements you need to create your Woocommerce Facebook product feed.

Facebook Product Feed Requirements

Different channels have their own rules for what information you need to include about your products.

These rules are called product feed guidelines. Attributes are the specific details about your products that you need to include in your product feed.

For example, when you’re creating a product feed for Facebook, you’ll need to include things like the title, availability, price, and category of each product. These details are called attributes.

Here are some examples of the attributes you’ll need to include in your Facebook product feed:

  • ID
  • Title
  • Description
  • Availability
  • Condition
  • Price
  • Link
  • Image link
  • Brand, MPN, or GTIN (include at least one)

Each platform on Meta, like Instagram Shop or Facebook Marketplace, may have slightly different requirements for attributes.

Make sure you check the specific guidelines for each platform before creating your product feed.

Now that you know what attributes are, let’s dive into how to create a product feed for Facebook.

Creating a Facebook Product Feed Using The Product Feed Manager

Remember when we talked about how to make a list of all your products for Facebook?

Well, you can do it by copying and pasting some important details into an Excel file. Then, you just add in all your product info underneath.

But what if you change your products a lot, like adding new ones or changing prices?

You’ll need to update your list every time you make a change. To remove this hassle you must use a product feed plugin.

I am going to use Product Feed Manager For Woocommerce to create a Facebook product feed.

This awesome WooCommerce plugin helps you connect your products to Facebook easily and quickly, so you can spend less time worrying about it and more time making sales. You can create Facebook product feed with 3 SIMPLE STEPS.

Create WooCommerce Facebook Product Feed in 3 steps

So, now I will go through step by step and create a Facebook product feed.

Generate WooCommerce Facebook product feeds

First, you need to generate a Woocommerce Facebook product feed.

Go to your WordPress dashboard and install the Product Feed Manager For Woocommerce. Then activate the plugin and set the license key.

Step 1: Create a new feed for Facebook

Now, go to the left panel, and click on the plugin. Next, look for the Add New Feed button and give it a click.

Woocommerce facebook product feed

This will bring you to the feed creation page :

Now, here’s what you need to do:

i. At the top, you’ll see a spot to give your feed a title. Go ahead and name your feed.

Add New Feed in PFM Woocommerce Facebook product feed

I’ve named my feed “ Facebook feed for Rextheme”

ii. Just below the title, you’ll find a dropdown menu to choose your preferred merchant. Click on Select Your merchant option.

Woocommerce Facebook Product Feed

Click on the Feed Merchant dropdown button and pick your favorite merchant from the list or search for them in the box.

As you scroll, you will find the Facebook catalog option. Click on it and then it’s time to choose your feed types.

You will get 2 feed types :

 Woocommerce Facebook product feed feed type
  • XML: A text file format that uses extensible markup language.
  • CSV: A text file format that uses commas to separate values, and newlines to separate records.

Once you’ve selected your merchant, all the necessary attributes will pop up below.

Step 2: Mapping Facebook Attributes

Now you gotta connect your WooCommerce Product Fields with Facebook attributes. The plugin will do most of the work for you by matching up the right fields.

But if you want to get fancy and customize things even more, you can use the drop-down menu to manually connect the fields yourself.

Step 3: Mapping WooCommerce Categories with Facebook categories

So once you’re selected you will see all the record attributes will be listed below :

Woocommerce facebook product feed

You’ll also find the attributes are already configured.

what you have to do is assign any unmapped attribute with the right product data now for Facebook.

You will see two unmapped attributes the first one is manufacturer or brand

Now Facebook requires you to submit either a brand name or GTL or MPM so if you have any brand value saved in your Woocommerce store.

you can simply select this option from this drop-down menu but if you’re the sole manufacturer you don’t need to change it as it is already set as static.

Now select the edit button on the left.

Then you can provide your company name from here :

Woocommerce facebook product feed

Then click the correct mark and you will be saved.

Alright, now you have to set the Google product category.

If you scroll down you will find you will get the Google Product Category field :

google product category

Now, fill out all the other sections and be ready to share your feed with the world.

Then go back up to the top of the page and hit the Publish button to make your feed live.

But wait, it’s not quite finished yet!

Next up, it’s time to configure the Google Product Category.

Applying Category Mapping :

Once you’ve set up a category mapping rule, you can make it work when you’re creating a new feed by picking the category mapper you made under “Value for an attribute.”

category mapping for Google

First, make sure you remember the name of the Mapper you saved.

In this case, we have saved it as Feed Category Mapping.

Click on the “Assigned Values” option for the Google Product Category attribute. Scroll down and you’ll find the Mapper you created.

choose-mapper

Choose the mapper you need. For Google Shopping, you have to use it as the value for the Google Product Category attribute.

Next, it’s time to publish the feed. Go back to the top, see on the right panel, and click on the “Publish” button.

Pubish WooCommerce Facebook Product Feed

Now, when you update the feed, you’ll see the value of the attribute that will use the mapped value based on the category you assigned to the product.

That’s it! Now you can go ahead and use it to create a perfect product feed for Facebook.

Final Thoughts

When you start promoting your WooCommerce store’s products on Facebook Marketplace, it makes it easier for people to find and buy your stuff.

Since most people already use Facebook, they’ll feel right at home browsing your products on Facebook Marketplace.

Plus, you can chat with customers in real-time using Messenger and the comment section. That means you can increase customer engagement with your store.

All you need to pick the right plugin and start generating your Woocommerce Facebook product feed. If you don’t want to research plugins, you can simply go for the most reliable plugin Product Feed Manager for WooCommerce.

I hope this article helped you learn more about WooCommerce Facebook Product Feeds.

If you found it useful, drop a comment and let us know!

Frequently Asked Questions (FAQs)

FAQ 1: How can I use Facebook for WooCommerce Integration?

-Integrating Facebook with WooCommerce can greatly enhance your e-commerce capabilities. Start by installing and activating the “Facebook for WooCommerce” plugin on your WordPress site.

Once activated, connect your Facebook account and either create a new Facebook page or select an existing one for your business. Next, set up your product catalog in Facebook Business Manager. Configure the product sync settings in the plugin to ensure your WooCommerce products are accurately represented on Facebook

FAQ2: How do I integrate a website with a Facebook page?

Begin by adding Facebook social plugins to your website, such as Like and Share buttons, and the Comments feature. Install the Facebook Pixel on your site for comprehensive tracking and analytics. Implement Facebook Login to offer users an easy authentication method. Add the Facebook Page Plugin to showcase your Facebook page’s feed directly on your website. Create Facebook Open Graph tags for your web pages to control how your content appears when shared on Facebook.

Categories
Product Feed Manager For WooCommerce WooCommerce

Best Online Marketplaces to Promote WooCommerce Products [2024]

Running a WooCommerce store can be difficult at times and you have to put in a lot of effort to increase your sales.

However, you can leverage the benefits of best online marketplaces and speed up the process. It also helps to expand your reach without the constant struggle.

According to digital commerce 360, the online marketplace is projected to reach $3.832 trillion in 2024, highlighting its immense growth and potential.

Popular online marketplaces are a goldmine for traffic and customer engagement. By leveraging these platforms, you can tap into a vast audience ready to discover and purchase your products.

Upload your WooCommerce products on any popular online marketplace and see the results in less time. So let’s get started with why promoting products online on the popular marketplaces.

Why Promote Products On the Best Online Marketplaces?

If you look at statistics, popular marketplaces such as Google Shopping, Facebook Dynamics, eBay, Amazon, Connexity, Vergelijk, and other large online marketplaces get thousands of traffic regularly.

A large marketplace has mutual trust from thousands of customers who frequently purchase products from the same website.

When you list your WooCommerce products on these sites you are sure to get more sales without much hassle.

With time, you will be able to expand the number of products you sell and make a substantial amount of profit. By uploading your products to online marketplaces, you can utilize their immense traffic to generate more sales

All 4 of these online merchants operate in almost every country all over the world. Plus, they all have easy interfaces that let you easily upload WooCommerce products, and promote in targetted countries.

It is highly recommended that you promote your WooCommerce products to at least one of the marketplaces among Google Shopping, Facebook Dynamics, Amazon, and eBay.

Let’s explore one by one.

1. Google Shopping:

Google Shopping - Best Online Marketplaces

Google Shopping is the largest online marketplace, making it an essential platform for promoting products online.

To maximize your sales, start by optimizing your product data. Include core keywords in your titles, such as brand names, models, and common product terms, to enhance online marketplace promotion.

Use high-quality, eye-catching images with unique colors and appropriate alt text. Categorize your products accurately using Google Product Categories to improve visibility.

Ensure all necessary attributes are included in your product feed, such as price, availability, and detailed descriptions. Optimize for local visibility if applicable by including local terms and offering local pickup options.

2. Facebook Dynamic Ads:

Facebook Dynamic Ads - Best Online Marketplaces

Facebook Dynamic Ads is the largest online marketplace, perfect for promoting products online. To boost your sales, I recommend focusing on effective online marketplace promotion.

Use Facebook’s targeting to reach your ideal audience by demographics and interests. Create ads with high-quality images and engaging descriptions that highlight your product’s best features.

Dynamic product ads can show the most relevant items to potential buyers based on their browsing history. Keep an eye on your campaigns and adjust them to improve results.

By using Facebook Dynamic Ads, you can reach more people and increase your sales effectively.

3. Amazon Seller Central:

Amazon Seller Center - Best Online Marketplaces

Amazon Seller Central is the largest online marketplace, perfect for promoting products online. If you’re looking to boost your sales, I highly recommend using this platform for online marketplace promotion. Amazon’s vast customer base and trusted reputation can help you reach millions of potential buyers.

First, set up your account and list your products with detailed descriptions and high-quality images. Optimize your product titles, bullet points, and descriptions to highlight key features and benefits.

Next, take advantage of Amazon’s advertising tools like Sponsored Products and Sponsored Brands to increase visibility. Monitor your campaigns regularly and adjust your bids and keywords to improve performance.

With Amazon Seller Central, you can reach a massive audience and boost your sales significantly. By promoting products online through Amazon, you leverage their platform’s credibility and extensive reach to grow your business.

4. eBay MIP Global:

eBay MIP Global

eBay MIP Global is a fantastic platform for promoting products online, tapping into one of the largest online marketplaces. If you’re looking to boost your sales, I highly recommend leveraging eBay for effective online marketplace promotion.

Start by creating an account and listing your products with clear descriptions and high-quality images. Use relevant keywords to ensure your items show up in searches. Utilize eBay’s promotional tools, like Promoted Listings, to increase your product’s exposure.

Regularly monitor and adjust your listings to improve performance. By promoting products online through eBay MIP Global, you can reach more customers and grow your business effortlessly.

However, there are so many more online marketplaces you can promote your products on. Below is a list of over 70+ online marketplaces where you can upload your WooCommerce products and boost sales.

Look for the ones that operate in your required countries and start planning on getting more sales through them.

List Of Trusty Online Marketplaces To Boost Sales On WooComerce Stores

Every merchant shop has its own set of dedicated customers who regularly purchase from them. As long as the product is posted there, most customers will not care who the manufacturer is. They will expect to get good quality.

Here are some of the best marketplaces including (Google Shopping, Facebook Dynamics, Amazon, and eBay) where you can promote your products.

Now I am going to explain some special features of these particular marketplaces so that you can choose which one is more beneficial for you.

Comparison Shopping Engines:

  • Google Shopping: Showcase your WooCommerce products to a vast audience with targeted ads.
  • Kelkoo.co.uk: List your products on Kelkoo to reach UK shoppers looking for deals.
  • Vergelijk.nl: Promote your WooCommerce products on this Dutch comparison site to attract local customers.
  • PriceSpy (UK): Compare prices and promote your products to UK shoppers on PriceSpy.
  • Heureka: Reach Central European customers by listing on Heureka, a popular price comparison site.
  • Prisjakt (Sweden): Promote your products to Swedish customers on Prisjakt’s comparison site.
  • Idealo: Compare and promote your products to price-conscious customers on Idealo.
  • Twenga: Increase product visibility in Europe by listing on Twenga.
  • Guenstiger: Reach German customers by promoting on Guenstiger’s comparison site.
  • Ceneo.pl: Promote your products to Polish customers on Ceneo.pl.
  • PriceRunner: Compare and promote your products on PriceRunner’s comparison site.
  • PriceMasher: Increase your product visibility with PriceMasher’s comparison service.
  • PriceSearcher: Increase visibility by listing on PriceSearcher’s comprehensive comparison site.
  • Koopkeus: Promote your products to Dutch and Belgian consumers on Koopkeus.
  • Preis.de: Reach German customers by listing on Preis.de’s comparison platform.

Affiliate Networks:

  • CJ Affiliate: Increase sales through affiliate marketing by listing your products on CJ Affiliate.
  • PassiveWP: Supercharge your affiliate marketing strategy and optimize your time and productivity with PassiveWP.
  • Pepperjam: Boost sales with affiliate marketing by using Pepperjam.
  • Daisycon: Use affiliate marketing through Daisycon to boost your product sales.

Marketplaces and Retailers:

  • Marktplaats: Sell directly to Dutch customers by uploading your products to this leading marketplace.
  • Target: Increase visibility by selling your products on Target’s online marketplace.
  • Rakuten: List your WooCommerce products on Rakuten to reach a global audience.
  • eBay Seller Center: Manage and promote your products efficiently through eBay’s Seller Center.
  • Amazon Seller Central: Reach millions of customers worldwide by selling on Amazon.
  • Walmart: List your products on Walmart to reach a vast customer base in the US.
  • Sears: Reach American customers by listing on Sears’ online marketplace.
  • Bol.com: Access the Belgian and Dutch markets by listing on Bol.com.
  • Otto: List your products on Otto to reach a wide German audience.
  • Fnac: Access French-speaking customers by listing on Fnac’s marketplace.
  • CDiscount: Sell to French customers by promoting your products on CDiscount.
  • Fruugo: Expand your global reach by selling on Fruugo’s marketplace.

Social Media and Advertising Marketplaces:

  • Google AdWords: Drive traffic to your WooCommerce store with targeted Google AdWords campaigns.
  • Facebook Dynamic Ads: Retarget and attract customers with personalized ads on Facebook.
  • Instagram: Attract customers with visually appealing ads and posts on Instagram.
  • Pinterest: Showcase your products with visually appealing pins to attract Pinterest users.
  • Snapchat: Use Snapchat ads to target younger demographics with your products.
  • Bing Ads: Drive traffic to your store with targeted ads on Bing.

Other Marketplaces:

  • Connexity: Use Connexity to reach a broad audience through comparison shopping and advertising.
  • Yandex: Access Russian customers by promoting your products on Yandex.
  • ShopMania: Increase your product reach by listing on ShopMania’s comparison platform.
  • Zalando: List your fashion products on Zalando to reach fashion-forward shoppers.
  • CoolBlue: Attract tech-savvy Dutch and Belgian customers by selling on CoolBlue.
  • Sears: Reach American customers by listing on Sears’ online marketplace.

How To Upload Products On A Large Online Marketplace? 

Of course, it makes no sense to manually upload your products to several online marketplaces one by one.

Rather, generate a product feed of your WooCommerce products using a WordPress plugin and upload it to the best online marketplaces you wish to promote.

You can easily generate product feeds in the correct formats of any popular online marketplace using Product Feed Manager For WooCommerce.

Why Use Product Feed Manager For WooCommerce?

Generate product feed for online marketplaces with WPFM

Product Feed Manager For WooCommerce is currently the most stable plugin to generate accurate product feeds.

You will be able to use features such as category mapping, category filter, add advanced custom fields, custom and category filters, scheduled updates, and many more.

You will be able to auto-sync your WooCommerce store with Google Shopping Center.

The main reason to use Product Feed Manager For WooCommerce is that it already has pre-built templates of product feed for over 70+ major online marketplaces where you can promote your products.

This means that you do not need to go through hours of tutorials to set up a product feed for each merchant shop.

You can simply select the merchant shop and assign the data correctly. That’s it. The feed will be generated in an acceptable format for the merchant you selected.

It will only take you a few clicks to generate a product feed for each online merchant shop.

Conclusion

If you are running a WooCommerce store, I advise that you promote your products to at least 3 of these marketplaces. Trying to grow with your site alone won’t work.

Plus, I already referred to a great tool to make things easier for you. Go ahead and use Product Feed Manager For WooCommerce to generate accurate product feed easily and start promoting on a large marketplace ASAP.

The more prospects you reach, the more products you can sell. So it’s only wise to increase your market presence.

If you ask me, I suggest promoting on Google Shopping is a must for any WooCommerce store. Also if you have a good social presence, then definitely promote on Facebook Dynamic Ads.

Hence, take advantage of these online marketplaces and boost your store performance.

** FAQs **

How do I choose the right online marketplace for my WooCommerce products?

Start by looking at where your competitors sell and where your customers shop most. Google Shopping and Amazon are great for general items, while niche products might do better on platforms like Etsy.

Can I manage multiple marketplace listings from one place?

Yes, use tools like Product Feed Manager For WooCommerce to create and sync feeds for various marketplaces. It saves you time and ensures consistency.

What are the costs associated with listing products on these marketplaces?

It depends on different factors: some platforms like Google Shopping charge per click, while others like Amazon and eBay have listing fees and sales commissions. Check each platform’s fee structure first.

How often should I update my product feeds?

Regular updates are important. With Product Feed Manager For WooCommerce, you can schedule automatic updates to keep your listings current and avoid selling out-of-stock items.

What if I encounter issues with my product feeds?

If you run into problems, first check that your feed meets the marketplace’s requirements. Product Feed offers support to help troubleshoot, and you can also reach out to the marketplace’s support team for assistance.

Categories
Guide Product Feed Manager For WooCommerce WooCommerce

Generate Heureka XML Feed (Easiest way): Increase Sales of Your Woocommerce Products

If you are from the Czech Republic and Slovakia, then Heureka. cz and Heureka. sk is the perfect marketplace to market your Woocommerce products.

Because Heureka regularly showcases deals, discounts, and promotional offers, serving a dual purpose to the targeted customer using separate websites for each country.

It helps consumers find the best value while providing retailers like you with an effective marketing tool to attract potential buyers.

Heureka incorporates customer reviews and ratings. With positive reviews and ratings, you can attract more potential clients.

So, if you are a WooCommerce store owner willing to sell on Heureka’s websites, in this article,

Here, I’ll talk about:

1. Why it’s good to sell your products on Heureka

2. Mandatory and other optional Product Attributes To Include In The XML Feed

3. How easily you can create an XML feed for Heureka using the right plugin (ONLY 7 STEPS)

I’ll explain everything in a simple way, whether you’re new to Heureka or already using it.

By reading this, you’ll learn how to show your products to more people and thus sell more.

But first, let’s know the reasons for choosing the Heureka marketplace to sell your products

Reasons To Sell on Heureka

Heureka provides a platform to showcase your products to a wide audience from the start.

Not many marketplaces provide these benefits. You have to wait longer to get wide audiences in other marketplaces.

This platform is user-friendly and allows sellers like you to manage their stores with ease.

It supports multiple payment options, so you can offer diversified payment options to your customers.

Heureka’s partnerships with major companies like Google help drive traffic to your store. The platform prioritizes security, using encryption to protect customer data.

So, Heureka can be a great way to expand your online business and increase your sales.

Mandatory Product Attributes To Include In The XML Feed

Following are the required product attributes that you must submit for every product you want to promote on the Heureka marketplaces.

ITEM_ID

Example Format:
<ITEM_ID>3252</ITEM_ID>

This is the unique product id.

PRODUCTNAME

Example Format:
<PRODUCTNAME>Adidas Superstar 2 W EUR 36</PRODUCTNAME</PRODUCTNAME>

Use a product title that defines exactly what the product is, along with its most notable features such as color, size, etc.

For different types of products, you are recommended to include different types of information in the product title.

Product name structures guide per category:
– Web View
– PDF View

DESCRIPTION

Example Format:
<DESCRIPTION>V rámci kolekce Originals uvádí adidas sportovní obuv The Superstar, která je již od svého vzniku jedničkou mezi obuví. Jejím poznávacím znamením je mimo jiné detaily designové zakončení špičky. Díky kvalitnímu materiálu a trendy vzhledu, podtrženého logy Adidas uvnitř boty i na ní, bude hvězdou vašeho botníku.</DESCRIPTION>

Provide a description of the product with real data.

Do not include any HTML tags or shortcodes in the description.

URL

Example Format:
<URL>https://www.yourdomain.cz/adidas-superstar-2-w7ref?eur-36</URL>

Submit a valid URL of the product on your WooCommerce store.

For variable products, each variant should have its unique URL.

Make sure the link has no spaces or diacritics.

IMGURL

Example Format:
<IMGURL>https://www.yourdomain.cz/adidas-superstar-2-36-img-1.jpg</IMGURL>

Use the link to the main product image for this attribute.

For product variants, you may use the featured image for each variant respectively.

Make sure the link has no spaces or diacritics.

PRICE_VAT

Example Format:
<PRICE_VAT>36</PRICE_VAT>

Submit the price that is a total of all the fees, except shipping, such as the base price + tax + extra packing charges, etc.

No need to include the currency.

MANUFACTURER

Example Format:
<MANUFACTURER>Adidas</MANUFACTURER>

If the product is manufactured by a renounced Brand, then you have to include the brand name in the product name as well as under this attribute.

CATEGORYTEXT

Example Format:
<CATEGORYTEXT>Oblečení a móda | Obuv | Dámská obuv</CATEGORYTEXT>

Heureka has its own category list, and you need to submit which category each of your products may fall under.

You may view all categories here:
– XML view
– PDF View

**You will find category lists in your required language on the knowledge page for your respective country.

P.S. You may use category mapping in our suggested plugin to submit the right category as per Heureka’s requirements without changing the actual categories in your WooCommerce store.
**I’ll explain how later in this guide.

DELIVERY_DATE

Example Format:
<DELIVERY_DATE>0</DELIVERY_DATE>

Use this attribute to indicate how soon the product is available for shipping, i.e., if it is in stock.

If you have the product in stock, then use the value as 0.
Else, mention the number of days after which the product will be in stock.

*Do not submit any product that is only available on request.

ITEMGROUP_ID

Example Format:
<ITEMGROUP_ID>3251</ITEMGROUP_ID>

For the variants of a variable product, submit a common item group ID to indicate that they are variants of the same product.

These are the necessary attributes. If you include these data in your product feed, you can then submit it to your merchant account.

Other Optional Product Attributes You May Submit

You may include a few more additional attributes to the product data to increase product presence and conversion.

PRODUCT

Example Format:
<PRODUCT>didas Superstar 2 W EUR 36 – novinka</PRODUCT>

You may submit this attribute to indicate some extra product benefits.

Following accepted information you may include:

  • Extended warranty
  • x year warranty on engine, parts..
  • “to your door” delivery surcharge/ convenience fee
  • Extension of warranty/post-warranty service
  • Free maintenance
  • Extended return policy
  • Only in-person pick up
  • Gift-wrapping and other services regarding the product
PARAM (For Variations)

Example Format:
<PARAM>
<PARAM_NAME>size</PARAM_NAME>
<VAL>41</VAL>
</PARAM>

For variable products, you may submit extra parameters by which the product varies under the attribute group, PARAM. For example, if a product varies by size, then you have to submit the size values as a separate attribute.

For multiple variation terms, you may submit this attribute multiple times.

You may also use it to submit additional product attributes such as material, pattern, etc. (For material, you may submit a percentage as well – PARAM_PERCENTAGE).

IMGURL_ALTERNATIVE

Example Format:
<IMGURL_ALTERNATIVE>https://www.yourdomain.cz/adidas-superstar-2-36-img-1.jpg</IMGURL_ALTERNATIVE>

You may submit additional product images by submitting this attribute multiple times.

DELIVERY

Example Format:
<DELIVERY>
<DELIVERY_ID>CESKA_POSTA</DELIVERY_ID>
<DELIVERY_PRICE>120</DELIVERY_PRICE>
<DELIVERY_PRICE_COD>120</DELIVERY_PRICE_COD>
</DELIVERY>

If you use multiple delivery services, then submit this attribute group multiple times to Indicate the delivery price and the service that will be used for the products

Use the Delivery Price COD only when you also accept cash on delivery. Else, just the Delivery Id and Delivery Price is enough.

– Support delivery carriers by Heureka

EAN

Example Format:
<EAN>5051571703857</EAN>

If you have the EAN of the product available, it’s recommended to submit it as well.

ISBN

Example Format:
<ISBN>9978-0-123456-47-2</ISBN>

For books, you may submit the ISBN number.

VIDEO_URL

Example Format:
<VIDEO_URL>https://youtu.be/gG4gtcTHb_Y</VIDEO_URL>

If you have a product review video on Youtube, you may submit the link to the video using this attribute.

HEUREKA_CPC

Example Format:
<HEUREKA_CPC>50</HEUREKA_CPC>

If you want to get a special feature on Heureka, then you may bid for a higher position by submitting the highest you are willing to spend as CPC (i.e., cost per click). The higher the bid, the higher are your chances to be featured in more popular sections.

The highest you can bid is 100 CZK.

If you want to use this, make sure to use it only on your most popular products. Otherwise, it’s not worthed.

ACCESSORY

Example Format:
<ACCESSORY>show laces</ACCESSORY>

If the product comes with some additional accessories, then you may mention them under this attribute, separating each item with a comma.

GIFT

Example Format:
<GIFT>Adidas Badge</GIFT>

You may also mention a gift that you may provide along with the product.

If you give away multiple gifts for a product, then submit this attribute multiple times to mention each gift separately.

Example XML Feed In The Right Format

Now that you know about the required and optional attributes you can include in the XML feed, take a look at the format in which products are added to the XML feed.

The following is an example of two variants of a variable product.

<?xml version="1.0" encoding="utf-8"?>
<SHOP>
     <SHOPITEM>
         <ITEM_ID>3252</ITEM_ID>
         <PRODUCTNAME>Adidas Superstar 2 W EUR 36</PRODUCTNAME>
         <DESCRIPTION>V rámci kolekce Originals uvádí adidas sportovní obuv The Superstar,
            která je již od svého vzniku jedničkou mezi obuví. Jejím poznávacím znamením je
            mimo jiné detaily designové zakončení špičky. Díky kvalitnímu materiálu a trendy
            vzhledu, podtrženého logy Adidas uvnitř boty i na ní, bude hvězdou vašeho botníku
         </DESCRIPTION>
         <URL>https://www.yourdomain.cz/adidas-superstar-2-w7ref?eur-36</URL>
         <IMGURL>https://www.yourdomain.cz/adidas-superstar-2-36-img-1.jpg</IMGURL>
         <PRICE_VAT>36</PRICE_VAT>
         <MANUFACTURER>Adidas</MANUFACTURER>
         <CATEGORYTEXT>Oblečení a móda | Obuv | Dámská obuv</CATEGORYTEXT>
         <DELIVERY_DATE>0</DELIVERY_DATE>
         <DELIVERY>
            <DELIVERY_ID>CESKA_POSTA</DELIVERY_ID>
            <DELIVERY_PRICE>120</DELIVERY_PRICE>
         </DELIVERY>
         <ITEMGROUP_ID>3251</ITEMGROUP_ID>
         </SHOPITEM>
         <SHOPITEM>
         <ITEM_ID>3253</ITEM_ID>
         <PRODUCTNAME>Adidas Superstar 2 W EUR 37</PRODUCTNAME>
         <DESCRIPTION>V rámci kolekce Originals uvádí adidas sportovní obuv The Superstar,
            která je již od svého vzniku jedničkou mezi obuví. Jejím poznávacím znamením je
            mimo jiné detaily designové zakončení špičky. Díky kvalitnímu materiálu a trendy
            vzhledu, podtrženého logy Adidas uvnitř boty i na ní, bude hvězdou vašeho botníku
         </DESCRIPTION>
         <URL>https://www.yourdomain.cz/adidas-superstar-2-w7ref?eur-37</URL>
         <IMGURL>https://www.yourdomain.cz/adidas-superstar-2-37-img-1.jpg</IMGURL>
         <PRICE_VAT>36</PRICE_VAT>
         <MANUFACTURER>Adidas</MANUFACTURER>
         <CATEGORYTEXT>Oblečení a móda | Obuv | Dámská obuv</CATEGORYTEXT>
         <DELIVERY_DATE>0</DELIVERY_DATE>
         <DELIVERY>
            <DELIVERY_ID>CESKA_POSTA</DELIVERY_ID>
            <DELIVERY_PRICE>120</DELIVERY_PRICE>
         </DELIVERY>
         <ITEMGROUP_ID>3251</ITEMGROUP_ID>
     </SHOPITEM>
     <SHOPITEM>
     ...
     </SHOPITEM>
</SHOP>

7 Steps To Generate Heuraka XML Feed With Your WooCommerce Products

In WooCommerce, you will find an easy-to-use plugin, Product Feed Manager for WooCommerce, with which you can generate an XML feed in just a few clicks.

PFM Marketplace feature page (heureka)

This is because the plugin has a pre-built template for Heureka with the right XML format and product attributes.

Follow this step-by-step guide and use the plugin to generate the required product feed.

Step 1 – Install And Activate Product Feed Manager For WooCommerce

  1. Go to your Dashboard. Then hover on Plugins and click on the Add New button.
WordPress Dashboard - Add New Plugin
  1. Type “Product Feed Manager” in the search box, and you will find the plugin. Click on Install.
  2. Once installed, Activate the plugin.
PFM Install

You will find a new menu called ‘Product Feeds’ among your dashboard menus.

Step 2 – Import Heureka Template For Feed Generation

1. On your dashboard, click on Product Feed and then click on Add New Feed option.

Add New Feed

It will take you to the feed creation page

PFM adde new feed

Here, on the top you will get an option to give a name to your feed, you can skip it too.

2. Click on the Feed Merchant Dropdown and you will get the list of all the supported merchants.

You can scroll down this merchant dropdown list or you can type Heureka in the search box, and you will get both Heureka and Heureka (availability).

Generate Heureka XML Feed (Easiest way): Increase Sales of Your Woocommerce Products 4

If you select Heureka (availability), in this way all the required attributes of Heureka will be loaded below.

Generate Heureka XML Feed (Easiest way): Increase Sales of Your Woocommerce Products 5

If you select Heureka, in this way all the required attributes of Heureka will be loaded below.

Step 3 – Create A New Product Feed

Now, you can see three buttons under the Feed Title text box, Troubleshoot, Product Filter, and Settings.

feed setting

1. If you are having any issues generating feed, click on this Troubleshoot button, it will take you to the Troubleshoot page, which could be helpful for you.

2. If you want to use any filter or condition, you can click on the Product Filter option, and a drawer will slide in from the right side of the window, and there you will get the following filters:

Product filter option in PFM

You can select any filter option and use them as per your need and click on the Close button when done.

3. Now, to schedule your feed or to choose which type of products will be included in your feed, click on the Settings button, and you will get a list of options to exclude or include products.

setting of pfm

Change the options as per your need and click on the Close button when done.

Step 4 – Use The Heureka XML Feed Template

1. If you look at the Feed Merchant dropdown button, there you will get another dropdown “Feed Type”, you can click here to set the type of this feed.

heureka feed- PFM

You can set different types of feeds depending on what types of feeds this merchant supports or what types of feeds this Product Feed Manager has the support for.

For Fruugo, CSV will be selected by default.

2. Now, in the attributes section, you will see that all the attributes are under the Required Attributes column, and their values are set according to the attributes under the Assigned Values column.

You can change any values to any attributes, simply click on the value dropdown, and select your preferred value.

All the required attributes will appear below. Now, most of the attributes will already be configured but notice that some of these attributes are unassigned.

Step 5 – Assign The Right Values To Unassigned Attributes

Most of the attributes are already configured. You need to assign values for the unassigned attributes.

  1. You will need to assign values for the following:
  • Manufacturer
    If you are the sole manufacturer of all of your products, you can set the type as Static and input your company name as the value.
    If you have different brand names for different products, you will have to save the value in a custom field or product attribute and then use that value here.
    **You may try using Perfect Brands for WooCommerce to assign the brand names more easily.
Manufacture Static
  • Category Text
    To assign the category text, you will need to use category mapping, which will be done in the next step. For now, leave it as it is.
  • Delivery date-
    If all of your products are in stock, then mark this attribute to static and assign the value as 0.

    If some products are subject to be in stock in a few days, then the value has to be saved in a field within the product and use that field value here.
Delivery Static
  1. Next, scroll up and Publish the feed.

Once the feed is published, it’s time to use Category Mapping.

Step 6 – Use Category Mapping Using The Accepted Heureka Category List

To use category mapping, first, you will need the category list supported by Heureka.

Then follow the instructions below.

  1. On your Dashboard menus, under Product Feed, click on Category Mapping. You will be taken to the category mapping page.
category mapping

Here, all the categories in your store will be listed.

  1. Give a name on the Mapper Name field.
  1. Next, for every category listed here, find a relevant/appropriate category from Heureka’s category list. Then copy the category’s full name and paste it in the field beside the respective category.
  1. Scroll down and click on the Save button, and your mapper will be saved.

Step 7 – Update & Generate Your Accurate XML Feed

  1. Go to Dashboard > Product Feed > All Product Feeds, and edit the feed you were creating.
Update heureka feed in PFM
  1. Once it loads, on the right side, click on the Purge Cache button.
  1. Next, scroll down to the Feed Configuration section and click on the value field for the Category Text attribute.
  1. At the very bottom of the value list, you will find the category map you created. Select it.
  1. Now, scroll up and click on Update.

That’s it. You have created your required product feed. The next thing to do is upload your products to Heureka.

Conclusion

If you are a local online shop owner in the Czech Republic or Slovakia, then it’s high time you start promoting your WooCommerce products on Heureka and take advantage of its huge audience.


You can go for Product Feed Manager for WooCommerce to generate the XML feed in minutes and start boosting your sales.
Go ahead and start selling on Heureka.

Categories
Guide Product Feed Manager For WooCommerce WooCommerce

How to Generate Glami XML Feed to Sell Fashion Products for WooCommerce [2024]

If you own an online store in Europe to sell fashion products, then you can easily boost your sales by promoting on a popular online marketplace – Glami.

With over 47 million monthly visitors, and 450,000+ orders generated per month, the Glami marketplace is surely a platform you can rely on.

Now, to promote your products on Glami, it is crucial to submit your product data in the right format. Glami has its own format for XML feed to upload your products to their marketplace.

The good news is, if you run a WooCommerce store, then you can generate this product feed in just a few clicks.

In this guide, you will learn about the required product data you need to include in the Glami XML feed, and about a reliable plugin that will help you generate the product feed in a matter of minutes.

So, let’s begin.

What is Glami XML Feed?

An XML feed is a structured data format that allows you to share information between different systems. It uses tags to define data elements, making it easy for computers to understand and process.

In e-commerce, XML feeds are used to share product details like descriptions, prices, and images with various platforms.

How to Generate Glami XML Feed to Sell Fashion Products for WooCommerce [2024] 6

A Glami XML Feed, also known as a Glami product feed, is designed specifically for the Glami fashion search engine. It includes your product titles, descriptions, prices, categories, images, and availability.

By using an XML feed generator or a tool for WooCommerce product feed, you can easily create a Glami feed. This also ensures your products are accurately represented and easily found by shoppers.

Requirements to Join Glami to Promote WooCommerce Products

To start selling on Glami, you must meet the following requirements:

  • Ensure that you have a valid e-commerce store that is SSL-certified.
  • Prepare a proper XML Feed in the format that they accept (explained later in this article).
  • Implement Glami Pixel on your products manually or using Google Tag Manager.
  • Fill out the registration form and submit your product feed.

And that’s it. After that, you will be notified in two business days if your products were uploaded successfully or if there is an error.

Once your products are approved and published, you will start getting more traffic in no time.

FYI: Glami has a flexible CPC module. It ensures that the products with higher costs have higher CPC, whereas products with lower costs will have less CPC charged.

Also, certain product categories can have seasonal changes in CPC; for example, Summer products will have a lower CPC during the winter and a higher CPC in the summer.

Now that you know the requirements, let me guide you on generating its product XML feed.

XML Feed Structure to Upload Products on Glami

Normally, the feed structure is as follows:

<?xml version="1.0" encoding="utf-8"?>
<SHOP>
	<SHOPITEM>
            ---PRODUCT ATTRIBUTES AND DATA HERE--- 
	</SHOPITEM>
	<SHOPITEM>
            ---PRODUCT ATTRIBUTES AND DATA HERE--- 
	</SHOPITEM>
</SHOP>

**Each product is considered a SHOPITEM in the feed.

If you have a WooCommerce store, you do not need to worry about creating this format on your own. You can simply use the plugin, Product Feed Manager for WooCommerce, to generate this feed in just a few clicks.

Now, let us look at a list of the required product attributes that you must include for every product. Later, I will show you an example XML feed with product data and guide you on how you can generate this feed real quickly.

Required Product Attributes for Glami Feed

How to Generate Glami XML Feed to Sell Fashion Products for WooCommerce [2024] 7

The following are the mandatory attributes you need to submit for each product.

  • ITEM_ID
  • PRODUCTNAME
  • DESCRIPTION
  • URL
  • IMGURL
  • PRICE_VAT
  • MANUFACTURER
  • CATEGORYTEXT
  • SIZE
  • DELIVERY_DATE
  • ITEMGROUP_ID

Read details about each of these attributes below

AttributeFormat With Example
ITEM_ID

This is the unique ID of a product. In WooCommerce, you may use the Product ID or the SKU as the value for this attribute.
<ITEM_ID>1031</ITEM_ID>
PRODUCTNAME 

This is the title of the product. You may use your product title from WooCommerce as its value.

It is recommended to add features to the title such as gender, material, color, or other notable features that may define your product (except the size).
*This will also help to rank products in your own store.

Do not add any promotional terms to the product name, such as ‘free delivery’ or ‘discount,’ etc.
<PRODUCTNAME>Pullover Hoodie For Men – Red</PRODUCTNAME>
DESCRIPTION

You may include a short product description explaining more about the product features.

Do not provide any false information about the product.

Submit the description in the correct language of your local Glami marketplace. For example, if you are selling in Czechia, then the description must be in the Czech language.
<DESCRIPTION><![CDATA[ This hoodie has a branded logo on front and a half-zip closure ]]></DESCRIPTION>
URL 

This is the link to the product page on your website.

*Make sure it is SSL certified.
<URL>https://www.yourdomain.cz/products/pullover-hoodie-1</URL>
IMGURL 

This is the link to the main image of the product.

You must submit a real image of the product. It should not have any graphics, enhancements, watermarks, or promotional texts.

Also, there should not be any other objects visible in the image – it should just be the product with a light background.

The image must be at least 500 px in width.

If it’s a product variant, then the image should match the exact variant. For example, if a t-shirt varies in colors, Red and Blue, then the Red variant should include the image of the Red t-shirt, and the Blue variant should include the image of the Blue t-shirt.
<IMGURL>https://www.yourdomain.cz/pullover-hoodie-1-img1.png</IMGURL>
PRICE_VAT 

This is the net price of the product.

No need to include the currency as that is decided based on the location you are promoting on.

Do not use any thousand separators. You may only use a decimal(.) or comma(,) to indicate a factional amount.
<PRICE_VAT>29.99</PRICE_VAT>
MANUFACTURER 

This is the brand name of the product. Submit this attribute only when the product falls under a brand listed in Glami.

So before adding this attribute, browse through Glami’s brand list to find out if you have products that fall under them.
<MANUFACTURER>Adidas</MANUFACTURER>
CATEGORYTEXT 

Glami has its own category list, and you need to indicate which category each of your products may fall under.

You may view all categories here:
Glami.cz –
XML view
PDF view

Glami.eco –
XML view
PDF view

**You will find category lists in your required language on the knowledge page for your respective country.

P.S. You may use category mapping in our suggested plugin to submit the right category as per Glami’s requirements without changing the actual categories in your WooCommerce store.
**I’ll explain how later in this guide.
<CATEGORYTEXT>Glami.eco | Men’s sustainable clothing and shoes | Men’s sustainable clothing</CATEGORYTEXT>
SIZE 

For every product, you need to submit the size parameter.

By default, the value is considered as EU or INT size system.

If you follow any other size system, then also include the attribute “SIZE_SYSTEM”, to indicate the system you follow.
<PARAM>
<PARAM_NAME>size</PARAM_NAME>
<VAL>41</VAL>
</PARAM>
DELIVERY_DATE 

This attribute actually indicates how soon the product is available for shipping, i.e., if it is in stock.

If you have the product in stock, then use the value as 0.
Else, mention the number of days after which the product will be in stock.

*Do not submit any product that is only available on request.
<DELIVERY_DATE>0</DELIVERY_DATE>
ITEMGROUP_ID

For a variable product, every variant should be submitted as a separate shop item, but they all should have a common item group ID to indicate that they are variants of the same product.
<ITEMGROUP_ID>1030</ITEMGROUP_ID>

Optional Product Attributes You Can Include in The Feed

You can also submit a few additional attributes for better performance.

  • URL_SIZE: If you have a variable product that varies with size, then you can include this attribute and submit the product link with the size selected by default.
Format:

<URL_SIZE>https://www.yourdomain.cz/products/pullover-hoodie-1?size=41</URL_SIZE>
  • IMGURL_ALTERNATIVE: You can submit additional images of your product using this attribute. Submit this attribute multiple times to include multiple additional images.
Format:

<IMGURL_ALTERNATIVE>https://www.yourdomain.cz/pullover-hoodie-1-img2.png</IMGURL_ALTERNATIVE>
<IMGURL_ALTERNATIVE>https://www.yourdomain.cz/pullover-hoodie-1-img3.png</IMGURL_ALTERNATIVE>
  • PARAM: You can submit extra parameters or features of the product using these attributes (same as the size attribute).
Format:

<PARAM>
    <PARAM_NAME>colour</PARAM_NAME>
    <VAL>green</VAL>
</PARAM>
  • MATERIAL: You have the option to submit the material and the percentage of material used in the product. Its format is similar to the Size and the Param attribute but has an additional Percentage tag.
Format:

<PARAM>
    <PARAM_NAME>material lining</PARAM_NAME>
    <VAL>cotton</VAL>
    <PERCENTAGE>50%</PERCENTAGE>
</PARAM>
  • SIZE_SYSTEM: If you use a size system other than EU or International, you can submit this attribute to indicate which size system you use. – Supported size systems.
Format:

<PARAM>
    <PARAM_NAME>size_system</PARAM_NAME>
    <VAL>US</VAL>
</PARAM>
  • DELIVERY: You can add additional delivery information for a product if you deliver that particular product using a postal service other than your default delivery method. You need to include the delivery ID, the delivery price, and the delivery price COD.
Format:

<DELIVERY>
    <DELIVERY_ID>PPL</DELIVERY_ID>
    <DELIVERY_PRICE>45</DELIVERY_PRICE>
    <DELIVERY_PRICE_COD>90</DELIVERY_PRICE_COD>
</DELIVERY>
  • EAN: If you have the product EAN, you can submit it via this attribute.
Format:

<EAN>1234567890123</EAN>
  • More Relevant Parameters: You can also submit additional parameters or features of your products to make them more relevant. For example, if you have a costume for Halloween, you can submit a parameter for ‘occasion’ with the value ‘Halloween.’ Each parameter you submit will be a separate product feature it will rank for in the marketplace. Here are a few more examples:
<PARAM>
    <PARAM_NAME>occasion</PARAM_NAME>
    <VAL>halloween</VAL>
</PARAM>
<PARAM>
    <PARAM_NAME>pattern</PARAM_NAME>
    <VAL>checkered</VAL>
</PARAM>
<PARAM>
    <PARAM_NAME>season</PARAM_NAME>
    <VAL>winter</VAL>
</PARAM>

Example Feed for Glami in The Right Format

Here’s a sample feed structure with the mandatory attributes and example data.

<?xml version="1.0" encoding="utf-8"?>
<SHOP>
	<SHOPITEM>
		<ITEM_ID>1031</ITEM_ID>
		<PRODUCTNAME>Pullover Hoodie For Men - Red</PRODUCTNAME>
		<DESCRIPTION><![CDATA[ This hoodie has a branded logo on front and a half-zip closure ]]></DESCRIPTION>
		<URL>https://www.yourdomain.cz/products/pullover-hoodie-1</URL>
		<IMGURL>http://images.example.com/adidas-superstar-ii-2015.jpg</IMGURL>
		<PRICE_VAT>29.99</PRICE_VAT>
		<MANUFACTURER>Adidas</MANUFACTURER>
		<CATEGORYTEXT>Glami.eco | Men's sustainable clothing and shoes | Men's sustainable clothing</CATEGORYTEXT>
		<PARAM>
		<PARAM_NAME>size</PARAM_NAME>
		<VAL>41</VAL>
		</PARAM>
		<DELIVERY_DATE>0</DELIVERY_DATE>
		<PARAM_NAME>colour</PARAM_NAME>
		<VAL>blue</VAL>
		</PARAM>
		<PARAM_NAME>style</PARAM_NAME>
		<VAL>lifestyle</VAL>
		</PARAM>
		<ITEMGROUP_ID>1030</ITEMGROUP_ID>
	</SHOPITEM>
</SHOP>

Now that you have a good idea of the required product data you need to submit on Glami let us look at how you can generate an XML feed of your WooCommerce products in just a few clicks.

7 Steps to Generate Glami Product Feed in Your WooCommerce Store

In WooCommerce, you will find an efficient tool, Product Feed Manager for WooCommerce, to generate an XML feed for all of your products in just a few clicks.

The plugin has a pre-built template with the required product data for Glami in the right format.

This guide will give you step-by-step instructions on using the plugin and generating the required feed real quickly.

Step 1 – Install & Activate Product Feed Manager

1. Go to your Dashboard. Here, go to Plugins and click on the Add New button

WordPress Dashboard - Add New Plugin

2. Type “Product Feed Manager” in the search box, and you will find the plugin Product Feed Manager for WooCommerce.

WordPress Dashboard - Search For Plugin

3. Click on the Install Now button and then Activate the plugin.

Activate Product Feed Manager

Once you activate the plugin, you will find the Product feed menu on your dashboard menus.

Step 2 – Import Glami Template for Feed Generation

1. On your dashboard, click on Product Feed and then click on Add New Feed option.

Add New Feed Option

It will take you to the feed creation page

Add New Feed

Here, on the top, you will get an option to give a name to your feed, you can skip it too.

2. Click on the Feed Merchant Dropdown and you will get the list of all the supported merchants.

You can scroll down this merchant dropdown list or you can type Glami in the search box, and you will get the Glami option in the list.

Glami Feed Merchant Option

Select Glami and all the required attributes of Glami will be loaded below.

Glami Required Attributes

Step 3 – Create A New Product Feed

Now, you can see three buttons under the Feed Title text box, Troubleshoot, Product Filter, and Settings.

1. If you are having any issues generating feed, click on this Troubleshoot button, it will take you to the Troubleshoot page, which could be helpful for you.

2. If you want to use any filter or condition, you can click on the Product Filter option, and a drawer will slide in from the right side of the window, and there you will get the following filters:

  • All Featured Items
  • Custom Filter
  • Category Filter
  • Tag Filter
  • Product Filter (Pro)

You can select any filter option and use them as per your need and click on the Close button when done.

3. Now, to schedule your feed or to choose which type of products will be included in your feed, click on the Settings button, and you will get a list of options to exclude or include products.

Change the options as per your need and click on the Close button when done.

Step 4 – Use The Glami XML Feed Template

1. If you look at the Feed Merchant dropdown button, there you will get another dropdown “Feed Type”, you can click here to set the type of this feed. You can set different types of feeds depending on what types of feeds this merchant supports or what types of feeds this Product Feed Manager has the support for.

For Favi, XML will be selected by default.

2. Now, in the attributes section, you will see that all the attributes are under the Required Attributes column, and their values are set according to the attributes under the Assigned Values column.

You can change any values to any attributes, simply click on the value dropdown, and select your preferred value.

All the required attributes will appear below. Now, most of the attributes will already be configured but notice that some of these attributes are unassigned.

Step 5 – Assign The Right Values To Unassigned Attributes.

1. You will simply need to assign values for the following:

  • Manufacturer: If you are the sole manufacturer of all of your products, you can set the type as Static and input your company name as the value. If you have different brand names for different products, you will have to save the value in a custom field or product attribute and then use that value here. **You can try using Perfect Brands for WooCommerce to assign the brand names more easily.
  • Category Text: To assign the category text, you will need to use category mapping, which will be done in the next step. For now, leave it as it is.
  • Size value: You can see the attribute ‘size’ is added as a parameter. For the value, you have to assign the field name or the attribute name in which you saved the size.

2. Next, scroll up and Publish the feed.

Once the feed is published, it’s time to use Category Mapping.

Step 6 – Use Category Mapping Using The Accepted Glami Category List

To use category mapping, first, you will need the category list supported by Glami.

Follow the instructions below.

1. On your Dashboard menus, under Product Feed, click on Category Mapping. You will be taken to the category mapping page.

category mapping

Here, all the categories in your store will be listed.

2. Give a name on the Mapper Name field.

3. Next, for every category listed here, find a relevant/appropriate category from Glami’s category list. Then copy the category’s full name and paste it in the field beside the respective category.

4. Scroll down and click on the Save button, and your mapper will be saved.

Step 7 – Update & Generate Your Accurate XML Feed

1. Go to Dashboard > Product Feed > All Product Feeds, and edit the feed you were creating.

2. Once it loads, on the right side, click on the Purge Cache button.

3. Then, scroll down to the Feed Configuration section and click on the value field for the Category Text attribute.

Glami category mapping value

4. At the very bottom of the value list, you will find the category map you created. Select it.

5. Now, scroll up and click on Update.

That’s it. You have created your required product feed. The next thing to do is implement Glami Pixel and upload your fashion products to the Glami marketplace.

Simply check the requirements to promote on Glami and get your products uploaded on their huge marketplace to start getting more sales.

Conclusion

Generating a Glami XML feed for WooCommerce is important for effectively selling your fashion products on the Glami platform.

By ensuring your product titles, descriptions, prices, categories, images, and availability are accurately represented, you can significantly boost your visibility and sales.

Using an XML feed generator for WordPress simplifies this process, making it easy to create and manage your Glami product feed.

So, optimizing your WooCommerce store with a well-structured Glami XML feed can enhance your presence on the Glami fashion search engine, attracting more customers and driving sales. You can easily generate your Glami XML feed with a product feed manager.

** FAQs **

How do I create a Glami product feed for my WooCommerce store?

  • To create a Glami product feed for your WooCommerce store, use an XML feed generator plugin like PFM. It simplifies the process by automatically generating the required Glami XML feed with your product details, including titles, descriptions, prices, and images.

Why should I use a Glami XML feed?

  • Using a Glami XML feed helps you showcase your fashion products on the Glami platform, increasing your visibility and attracting more customers. It ensures your listings are accurate and up-to-date, improving your chances of making sales.

What information should I include in my Glami feed?

  • Your Glami feed should include product titles, descriptions, prices, categories, images, and availability. This ensures that your listings are comprehensive and attractive to potential buyers on the Glami platform.

Can I update my Glami XML feed automatically?

  • Yes, you can set up automatic updates for your Glami XML feed using an XML feed generator plugin for WordPress. This ensures your product information is always current, helping you maintain accurate listings and avoid any potential issues with outdated data.

How do I optimize my Glami product feed?

  • To optimize your Glami product feed, make sure your product titles are clear and include relevant keywords. Use high-quality images and provide detailed descriptions. Regularly update your Glami feed to keep your listings fresh and competitive. By doing so, you increase your chances of attracting more customers and boosting sales.
Categories
Guide Product Feed Manager For WooCommerce WooCommerce

How to Generate Fruugo Product Feed for WooCommerce [2024]

Selling products from your WooCommerce store can be challenging, but promoting on popular online marketplaces can significantly boost your sales.

One of the most reliable online marketplaces to promote your products on is Fruugo. If you run a WooCommerce store, you should also consider selling on the Fruugo marketplace.

According to AIMGroup, revenue at online marketplace Fruugo has been doubled and EBITDA rose more than 6x from £1.3 million to £8.1 million in 2022.

In this guide, I will discuss how you can prepare your WooCommerce product data to start selling on Fruugo without any hassle.

So let’s get started.

What is Fruugo Marketplace?

Fruugo - Product feed

Fruugo Marketplace is a global online platform that connects buyers and sellers from various countries, enabling cross-border shopping.

As a Fruugo seller, you can list your products on this marketplace to reach a broader audience. The platform supports multiple currencies and languages, making it accessible to international shoppers.

It operates on a commission-based model, where sellers pay a fee for each sale made through the platform.

With features like automated feed updates and country-specific platforms, It offers an easy selling experience for your business looking to expand its global reach.

Which countries are supported by Fruugo?

Fruugo supports customers in 46 countries, enabling global shopping and selling opportunities. These countries include:

  • Europe: Austria, Belgium, Czechia, Denmark, Estonia, Finland, France, Germany, Greece, Hungary, Ireland, Italy, Latvia, Lithuania, Luxembourg, Netherlands, Norway, Poland, Portugal, Romania, Russia, Slovakia, Spain, Sweden, Switzerland, United Kingdom
  • Asia: China, India, Japan, Malaysia, Philippines, Singapore, South Korea
  • Middle East: Bahrain, Israel, Kuwait, Qatar, Saudi Arabia, Turkey, United Arab Emirates
  • North America: Canada, United States
  • Oceania: Australia, New Zealand
  • Africa: Egypt, South Africa

For more details, visit the Fruugo Countries page.

What are the benefits of selling on Fruugo Marketplace?

Selling on Fruugo Marketplace offers numerous benefits:

  • Global Reach: Fruugo provides access to customers from 46 countries, significantly expanding your market and allowing you to reach a diverse international audience.
  • Multi-currency Support: It supports multiple currencies, making transactions easier for international buyers and enhancing their shopping experience.
  • Ease of Integration: With plugins like Product Feed Manager, integrating your WooCommerce store with Fruugo is straightforward. This simplifies product listing and management, saving you time and effort.
  • Increased Sales Potential: By tapping into Fruugo’s established customer base and marketing efforts, you can boost your sales and grow your business more effectively.
  • Automated Updates: Fruugo offers automated feed updates and real-time inventory management. This reduces manual workload and minimizes errors. It also ensures your product information is always accurate and up-to-date.

These benefits make Fruugo Marketplace an excellent platform for expanding your eCommerce business and reaching a global audience.

How to Generate Fruugo Product Feed for WooCommerce

To create a Fruugo product feed for WooCommerce, you’ll need to follow specific steps to ensure your product information is formatted correctly for integration with the Fruugo platform.

Let’s walk through the process together.

1. Getting Started As A Seller On Fruugo

The first thing to do is to register as a Seller on the Fruugo Marketplace. You simply need to fill out a registration form to start selling on Fruugo.

Now, there is no upfront fee to register as a seller. Fruugo will only take a small commission when you make a sale.

Fruugo will charge 15% of the shopper’s basket value (excluding VAT). And 2.35% of the transaction value will be deducted as the transaction processing fee.

So basically, you can take advantage of the huge audience and only pay a small commission when you make money.

Frankly speaking, this is a small fee compared to the huge amount of sales that you can expect from this marketplace.

2. Required Data To Upload Products On Fruugo

To upload your WooCommerce products on the Fruugo marketplace, you first need to generate a product feed with the right product data.

The best option is to generate a CSV feed with the required product attributes and upload your products directly or via one of Fruugo’s integration partners.

Let us look at the mandatory product attributes that you need to include in the product feed.

Required Product Attributes For Fruugo Feed

Product ID (ProductId)

This is the same as the WooCommerce product ID.

It is ideal for the Product ID to be unique for every product and its variants for variable products.

SKU Id (SkuId)

You may use the product SKU from your WooCommerce store for this attribute.

It is ideal for the SKU to be unique for every product and its variants for variable products.

GTINs – EAN / UPC (EAN)

Depending on where your products are manufactured from, you should have a unique global identifier such as GTIN, UPC, EAN, UCC, etc.

You need to submit this identifier value for every product and every variant of a variable product.

**You don’t normally have any default field to add this value in the product data section. So, your options are to add a custom field for each product and save the value there or add it as a product attribute to the product – the latter won’t work for variable products.

(P.S. we will later discuss how you can get that custom field easily without using codes).

Brand (Brand)

This will either be the manufacturer name or the brand name of the product.

Again, there is no default field in WooCommerce for Brand. But you can easily assign it to every product using a product attribute, a custom field, or using a WooCommerce Brand plugin.

Category (Category)

Fruugo has its own set of categories that you need to map your products into.

However, you do not need to change your WooCommerce categories to achieve this. We will learn about a tool later on in this article with which you can set up proper category mapping when generating product feed.

Image URL 1 (Imageurl1)

Use the link to the main image or the featured image of your WooCommerce product for this attribute.

Make sure this image is at least 400px x 400px in size and is an original image of the product with a white background. No texts, watermarks, or placeholders should be there.

Stock Status (StockStatus)

This should indicate if your product is available in your store or not.

Accepted values:

  • INSTOCK
    – When the product is in stock.
  • OUTOFSTOCK
    – When the product is currently out of stock but may re-stocked soon.
  • NOTAVAILABLE
    – When the product won’t be sold anymore and needs to be removed from the marketplace.

**Submitting the available quantity is not mandatory, but if you want to include that, then use the “StockQuantity” attribute instead.

Product Title (Title)

You may use your WooCommerce Product Title/Name for this attribute.

It is recommended to include the brand name in the product title. But do not include any promotional text, attribute names, or pricing info to the title.

Description (Description)

Describe your product briefly and try to highlight the best features of the product.

You may simply use your product description in your WooCommerce store for this attribute as long as there are no external links, emails, or contact details leading to the exit of the page.

Normal Price (NormalPriceWithVAT or NormalPriceWithoutVAT)

You may submit the current price of your products on your WooCommerce store, either with VAT or without VAT.

  • If your product prices are VAT inclusive, then submit the attribute header NormalPriceWithVAT.
  • If your product prices are exclusive of VAT, then use the attribute header, NormalPriceWithoutVAT

Submit any one of these attribute headers depending on your website’s price.

VAT Rate (VATRate)

For EU-based retailers, you have to submit the VAT rate in your country.

Do not include the % symbol; just submit the numerical value of the rate.

If no VAT is applicable in your country of sale (which is common for non-EU retailers), then use the value 0 for this attribute.

Now, let us look at how you can generate a product feed that includes these mandatory attributes for all of your WooCommerce products.

3. Generate Fruugo Product Feed with Your WooCommerce Products

In WooCommerce, you will find a reliable plugin called Product Feed Manager for WooCommerce with which you can generate a CSV feed for all of your products in just a few clicks.

Once you have the plugin, follow the steps below and see how easily you can generate a CSV feed with the right product attributes real quick.

Step 1 – Import Fruugo Template For Feed Generation

1. On your dashboard, click on Product Feed and then click on Add New Feed option.

Add New Feed - Fruugo Product feed

It will take you to the feed creation page

Add New Feed - Fruugo Product feed

Here, on the top, you will get an option to give a name to your feed, you can skip it too.

2. Click on the Feed Merchant Dropdown and you will get the list of all the supported merchants.

You can scroll down this merchant dropdown list or you can type Fruugo in the search box, and you will get the Fruugo option in the list.

Fruugo Product feed

Select Fruugo and all the required attributes of Fruugo will be loaded below.

Fruugo Product feed

Step 2 – Create A New Product Feed

Now, you can see three buttons under the Feed Title text box, Troubleshoot, Product Filter, and Settings.

1. If you are having any issues generating feed, click on this Troubleshoot button, it will take you to the Troubleshoot page, which could be helpful for you.

2. If you want to use any filter or condition, you can click on the Product Filter option, and a drawer will slide in from the right side of the window, and there you will get the following filters:

  • All Featured Items
  • Custom Filter
  • Category Filter
  • Tag Filter
  • Product Filter (Pro)

You can select any filter option and use them as per your need and click on the Close button when done.

3. Now, to schedule your feed or to choose which type of products will be included in your feed, click on the Settings button, and you will get a list of options to exclude or include products.

Change the options as per your need and click on the Close button when done.

Step 3 – Use The Fruugo CSV Feed Template

1. If you look at the Feed Merchant dropdown button, there you will get another dropdown “Feed Type”, you can click here to set the type of this feed. You can set different types of feeds depending on what types of feeds this merchant supports or what types of feeds this Product Feed Manager has the support for.

For Fruugo, CSV will be selected by default.

2. Now, in the attributes section, you will see that all the attributes are under the Required Attributes column, and their values are set according to the attributes under the Assigned Values column.

You can change any values to any attributes, simply click on the value dropdown, and select your preferred value.

All the required attributes will appear below. Now, most of the attributes will already be configured but notice that some of these attributes are unassigned.

Step 4 – Assign The Right Values to Unassigned Attributes

1. You will need to assign values for the following:

Though almost all of them will be configured by default, you will need to assign the correct values for the following:

  • GTINs: On the value field, choose the value of the custom field or attribute name that you used to assign the GTIN to your WooCommerce store products.

**With Product Feed Manager for WooCommerce, you will get a set of custom fields added to your products and product variants, which you can use to assign unique identifiers.

  • Brand: On the value field, choose the value of the custom field or attribute name that you used to assign the Brand to the products.

**You can try using Perfect Brands for WooCommerce to assign brands easily and use that as the value here.

  • Category: Since you need to assign each product to Fruugo’s dedicated categories, you need to use category mapping if you do not want to change your WooCommerce store’s current categories.

**With Product Feed Manager for WooCommerce, you will get the category mapping feature that will allow you to achieve this easily. For now, keep this attribute unassigned, configure the rest, and Publish the feed. Then follow this guide to use category mapping easily.

  • VAT Rate: On the value field, choose the custom field value you used to assign the VAT rate to your products.

For the Price, be sure to use the right attribute depending on how the prices are set up in your WooCommerce store.

Step 5 – Publish The Feed And Upload to Fruugo

1. Scroll up and click on the Publish button and the feed will be generated.

2. Setup category mapping and update your feed configuration with your mapped data. (See the previous step to understanding what to do here.)

3. Update your feed with all the default attributes assigned. Then you will be able to download your feed.

And that’s it. You can then go ahead and upload your products on the Fruugo marketplace and start getting more sales.

Conclusion

Generating a Fruugo product feed for WooCommerce is crucial for selling on this global marketplace. It involves formatting your WooCommerce product data to meet Fruugo’s requirements.

To simplify this process, consider using a product feed manager plugin for WooCommerce. These tools automate feed generation, update product information, and synchronize inventory easily.

By leveraging this tool, you can save time, maintain listing accuracy, and enhance visibility on Fruugo. This strategic approach not only improves efficiency but also increases sales potential.

If you are aiming to expand your market reach and effectively manage your Fruugo listings, utilizing a product feed manager is highly recommended.

** FAQs **

How do I start selling on Fruugo?

  • To begin selling on Fruugo, you need to create a seller account on their platform. Once registered, you can list your products directly from your WooCommerce store using the PFM plugin. Ensure your product feed meets Fruugo’s specifications for easy integration.

What are Fruugo’s feed specifications?

  • Fruugo requires specific product feed formats, including details like Global Trade Item Numbers (GTINs) for each product. Using automated feed generators tailored for WooCommerce helps ensure your listings are compliant and optimized for visibility.

Can I sell internationally on Fruugo?

  • Yes, Fruugo operates in 46 countries. It allows you to reach a global audience through their marketplace. Utilize WooCommerce’s store categories to categorize your products effectively for different regions.

How safe is selling on Fruugo?

  • Fruugo is a trusted online marketplace with positive reviews from both sellers and shoppers. They provide secure transactions and a user-friendly platform for conducting international trade.

How does Fruugo benefit shoppers?

  • Fruugo offers shoppers the comfort of comparing prices from various sellers across different countries. This allows them to make informed purchasing decisions based on product availability and competitive pricing.