As a WooCommerce store owner, it is natural for you to look for more and more effective ways to increase your sales.
One advantage of WooCommerce is that you will find tons of plugins that are designed to help you optimize your sales process. Tactics such as smart discounts, sales funnels, external marketplace promotion, and many more sales tactics are easily possible.
But that’s not the best part.
Did you know? You can actually Double your WooCommerce sales by using a few free plugins?
That’s right. There are a few FREE WordPress plugins that will help you devise a highly converting sales process to help you boost your revenue.
Today, you will learn about 12 amazing free plugins that are ideal for helping you increase your sales. Each of these plugins is unique and will give you a whole new scope of attracting more buyers and closing more sales.
Fangen wir also an.
Best Free WooCommerce Plugins to Increase Your Store Sales
The one uncanny advantage of WooCommerce is that it offers you a wide range of plugins and addons. However, finding the ones that will actually make a difference in your WooCommerce sales for free is not easy.
We’ve handpicked those free WooCommerce plugins that you can start using immediately.
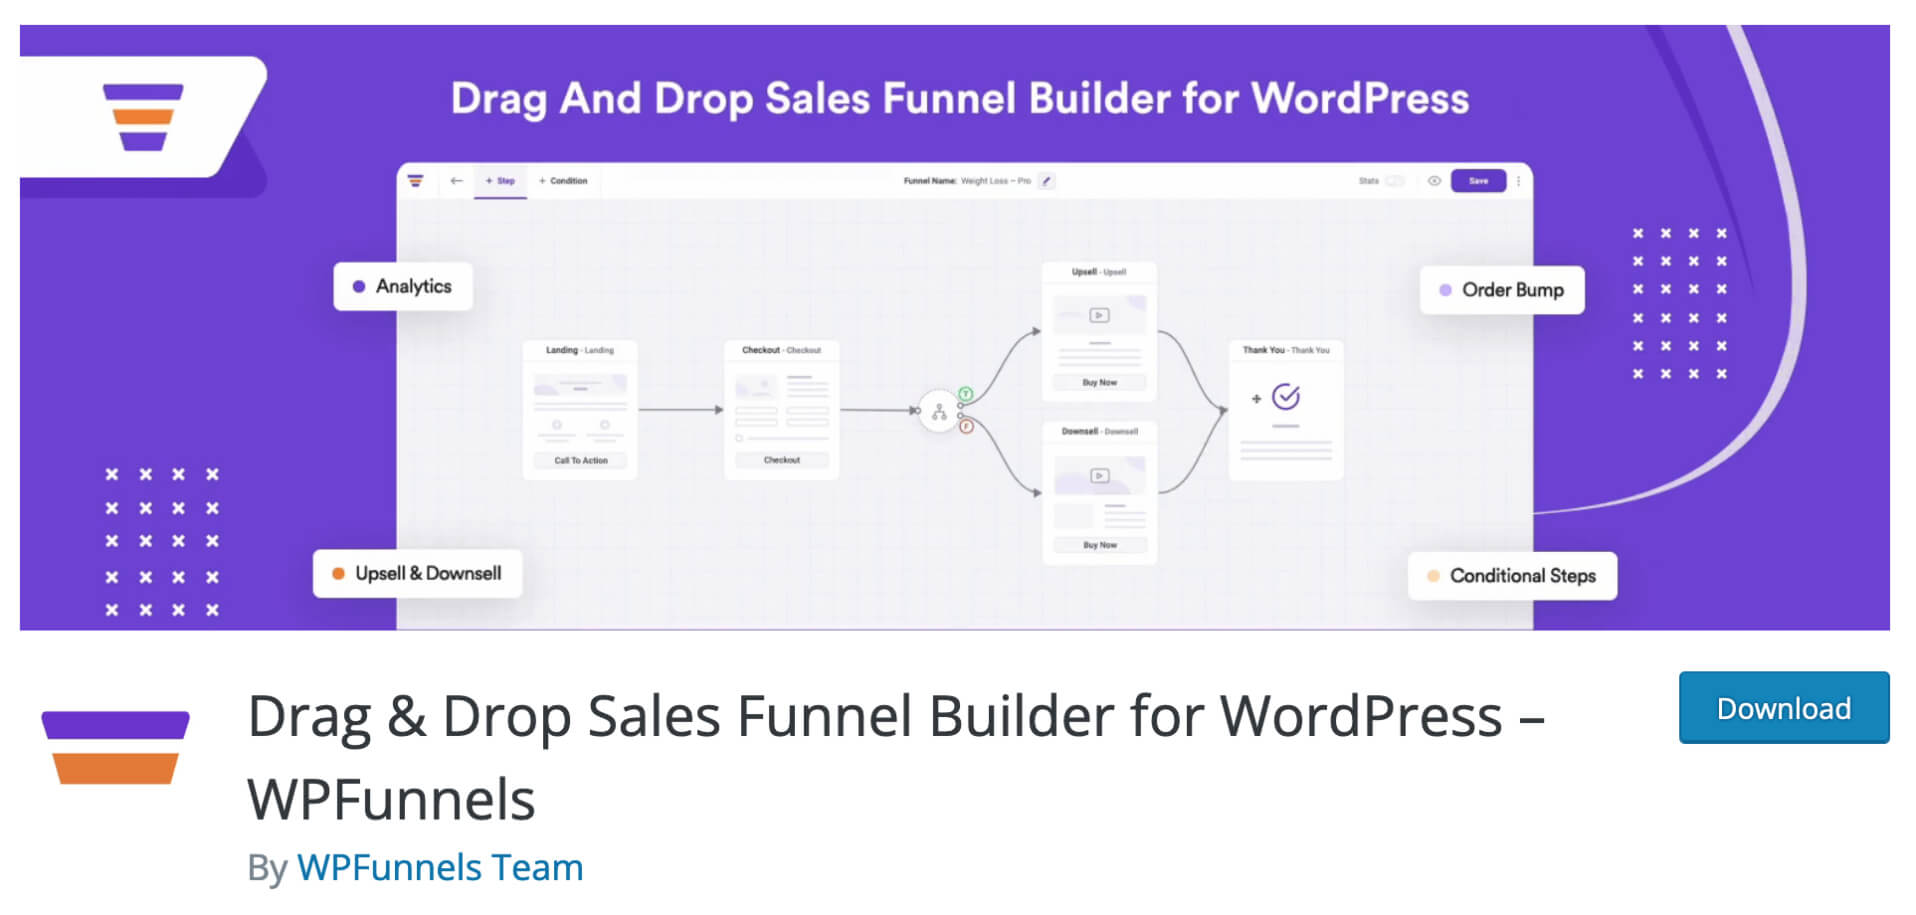
WPFunnels is the most powerful drag-and-drop sales funnel builder for WordPress.
With WPFunnels, you can quickly and easily create effective WooCommerce sales funnels without any prior funnel-building expertise.
Whether you’re selling products or ebooks, offering courses, growing your email list, or simply trying to generate leads, WPFunnels will help you get the most out of your store.
You can use WPFunnels on your eCommerce store to reduce cart abandonment, increase WooCommerce sales conversions, show targeted website messages, onsite re-targeting, order bumps, upsells, downsells, and more.
Crafting an effective WooCommerce sales funnel has never been easier – simply design and execute with WPFunnels.
So if you’re looking to take your online business to the next level, be sure to give WPFunnels a try.
Best Features of WPFunnels:
Drag-and-Drop Canvas To Build Funnels Easily: Plan your funnels without any hassle. Use a visual drag and drop funnel builder to plan and organize your funnel steps.
Pre-made Sales Funnel Templates: Design your funnel from scratch or choose from dozens of niche-specific funnel templates that are optimized for high conversion.
Major Page Builder Integration: It integrates seamlessly with all major page builders such as Elementor, Divi, Beaver Builder, or the core Gutenberg builder.
Order Bump Offers: Add an attractive order bump offer during the checkout and increase the WooCommerce sales revenue.
One-click Upsell And Downsell Offer: Trigger one-time offers or any exclusive offers as upsell or downsell after checkout, to attract your buyers to purchase even more.
Detailed analytics for every funnel: Get detailed reports to track the performance of each of your funnels with real-time insights.
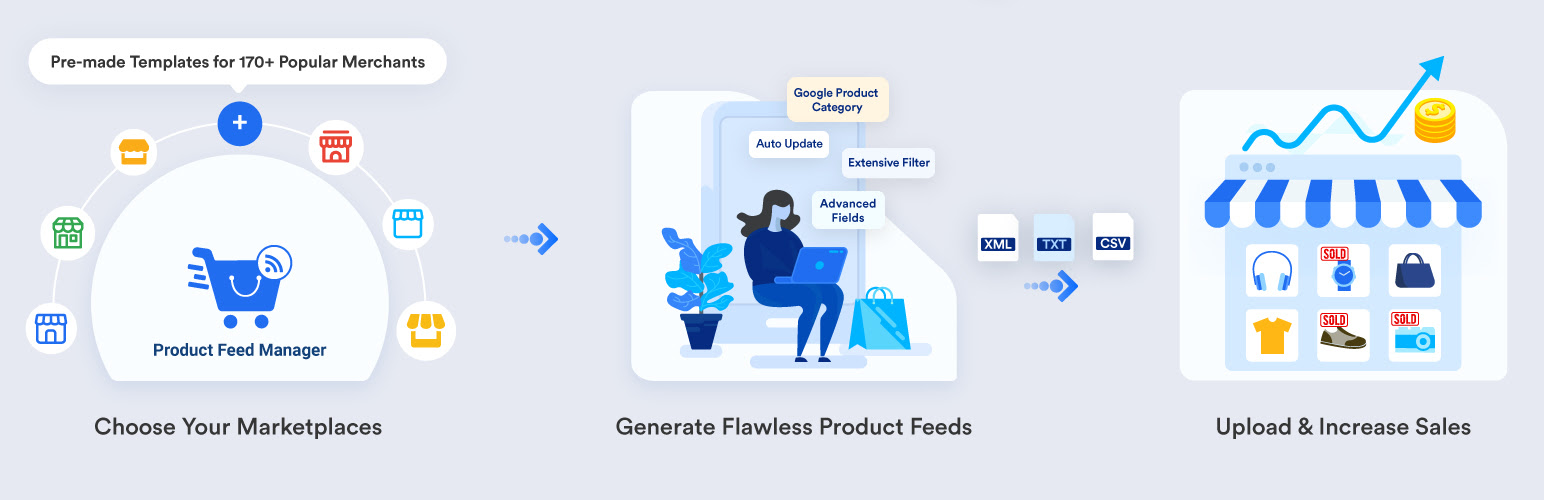
Product feed manager is the easiest and the most effective plugin to generate flawless WooCommerce feed for over 180+ merchants.
Any marketplace you want to list your products on, you can generate an accurate product feed with your WooCommerce products in just a few clicks.
Simply select your desired marketplace, configure the product data, and hit Generate Feed – it’s that easy!
Your feed is ready and you can start selling in your desired marketplace.
Most of the features are pre-configured so that you can generate a feed with the least effort possible, and start promoting on your desired marketplaces immediately.
Best Features of Product Feed Manager:
Auto-sync with Google Shopping: You can auto-sync your store products with Google Merchant Shop. You do not need to download and upload the feed for Google Shopping Center manually.
Category Mapping: You can use the category mapping feature to map your store categories according to Google. So your store’s categories will still be the same while your products will be placed under the relevant Google category on the product feed.
Extensive Filter Options: You can use the smooth filter options to include or exclude the required products of your store from the product feed.
Advanced Custom Fields: WooCommerce doesn’t provide certain fields such as Brand, GTIN, UPC, Age-group, Gender, etc. Many merchant shops require this data. However, the Product Feed Manager for WooCommerce creates these custom fields for you so that you can generate accurate product feed without any hassle.
Google Analytics and Facebook Pixel Support: You can now add Facebook pixel and UTM Tracking code to your store and track the performance of every product you upload.
FooBar is a feature-rich platform that will enable you to create a WordPress notification bar within minutes.
With FooBar, you can easily add any number of notification bars, messages, or cookie notifiers to your site – all without annoying your users or disrupting their experience.
And its best use is when you run discount campaigns, especially during the holiday seasons.
Setting up and using this plugin are both simple. Interestingly, it comes with dozens of pre-made floating bar templates that you can use right away, thus saving you the trouble of building one from scratch.
Best Features of FooBar:
AnnouncementBar Settings: It shows a simple announcement message with an optional link and link text.
Call To Action Bar Settings: The call-to-action bar shows a message with a call-to-action (CTA) button. You can also override the position of the Call-To-Action button.
Cookie Notice Bar Settings: The cookie notice bar shows a cookie notice with an accept button.
Countdown Setting: It shows a countdown and call to action button to create a FOMO effect.
Appearance Settings: You can choose from one of the pre-defined color schemes available for your bar.
Visibility Settings: You can select the page on which pages you want to show the bar.
A free WooCommerce add-on called WooCommerce UPS Shipping Plugin aids in streamlining WooCommerce shipping.
Both a free and a paid version of the plugin are accessible. The premium WooCommerce plugin priced at $69 allows you to print shipping labels, request carrier pickups, and handle sophisticated shipping needs.
Best Features of Free WooCommerce UPS Shipping Plugin:
Interacts With WooCommerce: This shipping plugin completely interacts with your WooCommerce site and shows UPS real-time shipping rates on the Cart and the Checkout page.
Shipping Solution: It is a UPS-ready shipping solution. The product weight and dimensions, the shipper’s address, the customer’s address, and the shipping rates set up for your account are some of the variables that affect the UPS shipping prices.
Extensive Plugin Support: The UPS domestic, international, and SurePost shipping services are supported by this free plugin for WooCommerce. Additionally, it works with WPML, WCFM, Vendors Pro, Dokan Multi-Vendor, and WooCommerce Product Vendors.
Looking to transform your WooCommerce store into a sales powerhouse?
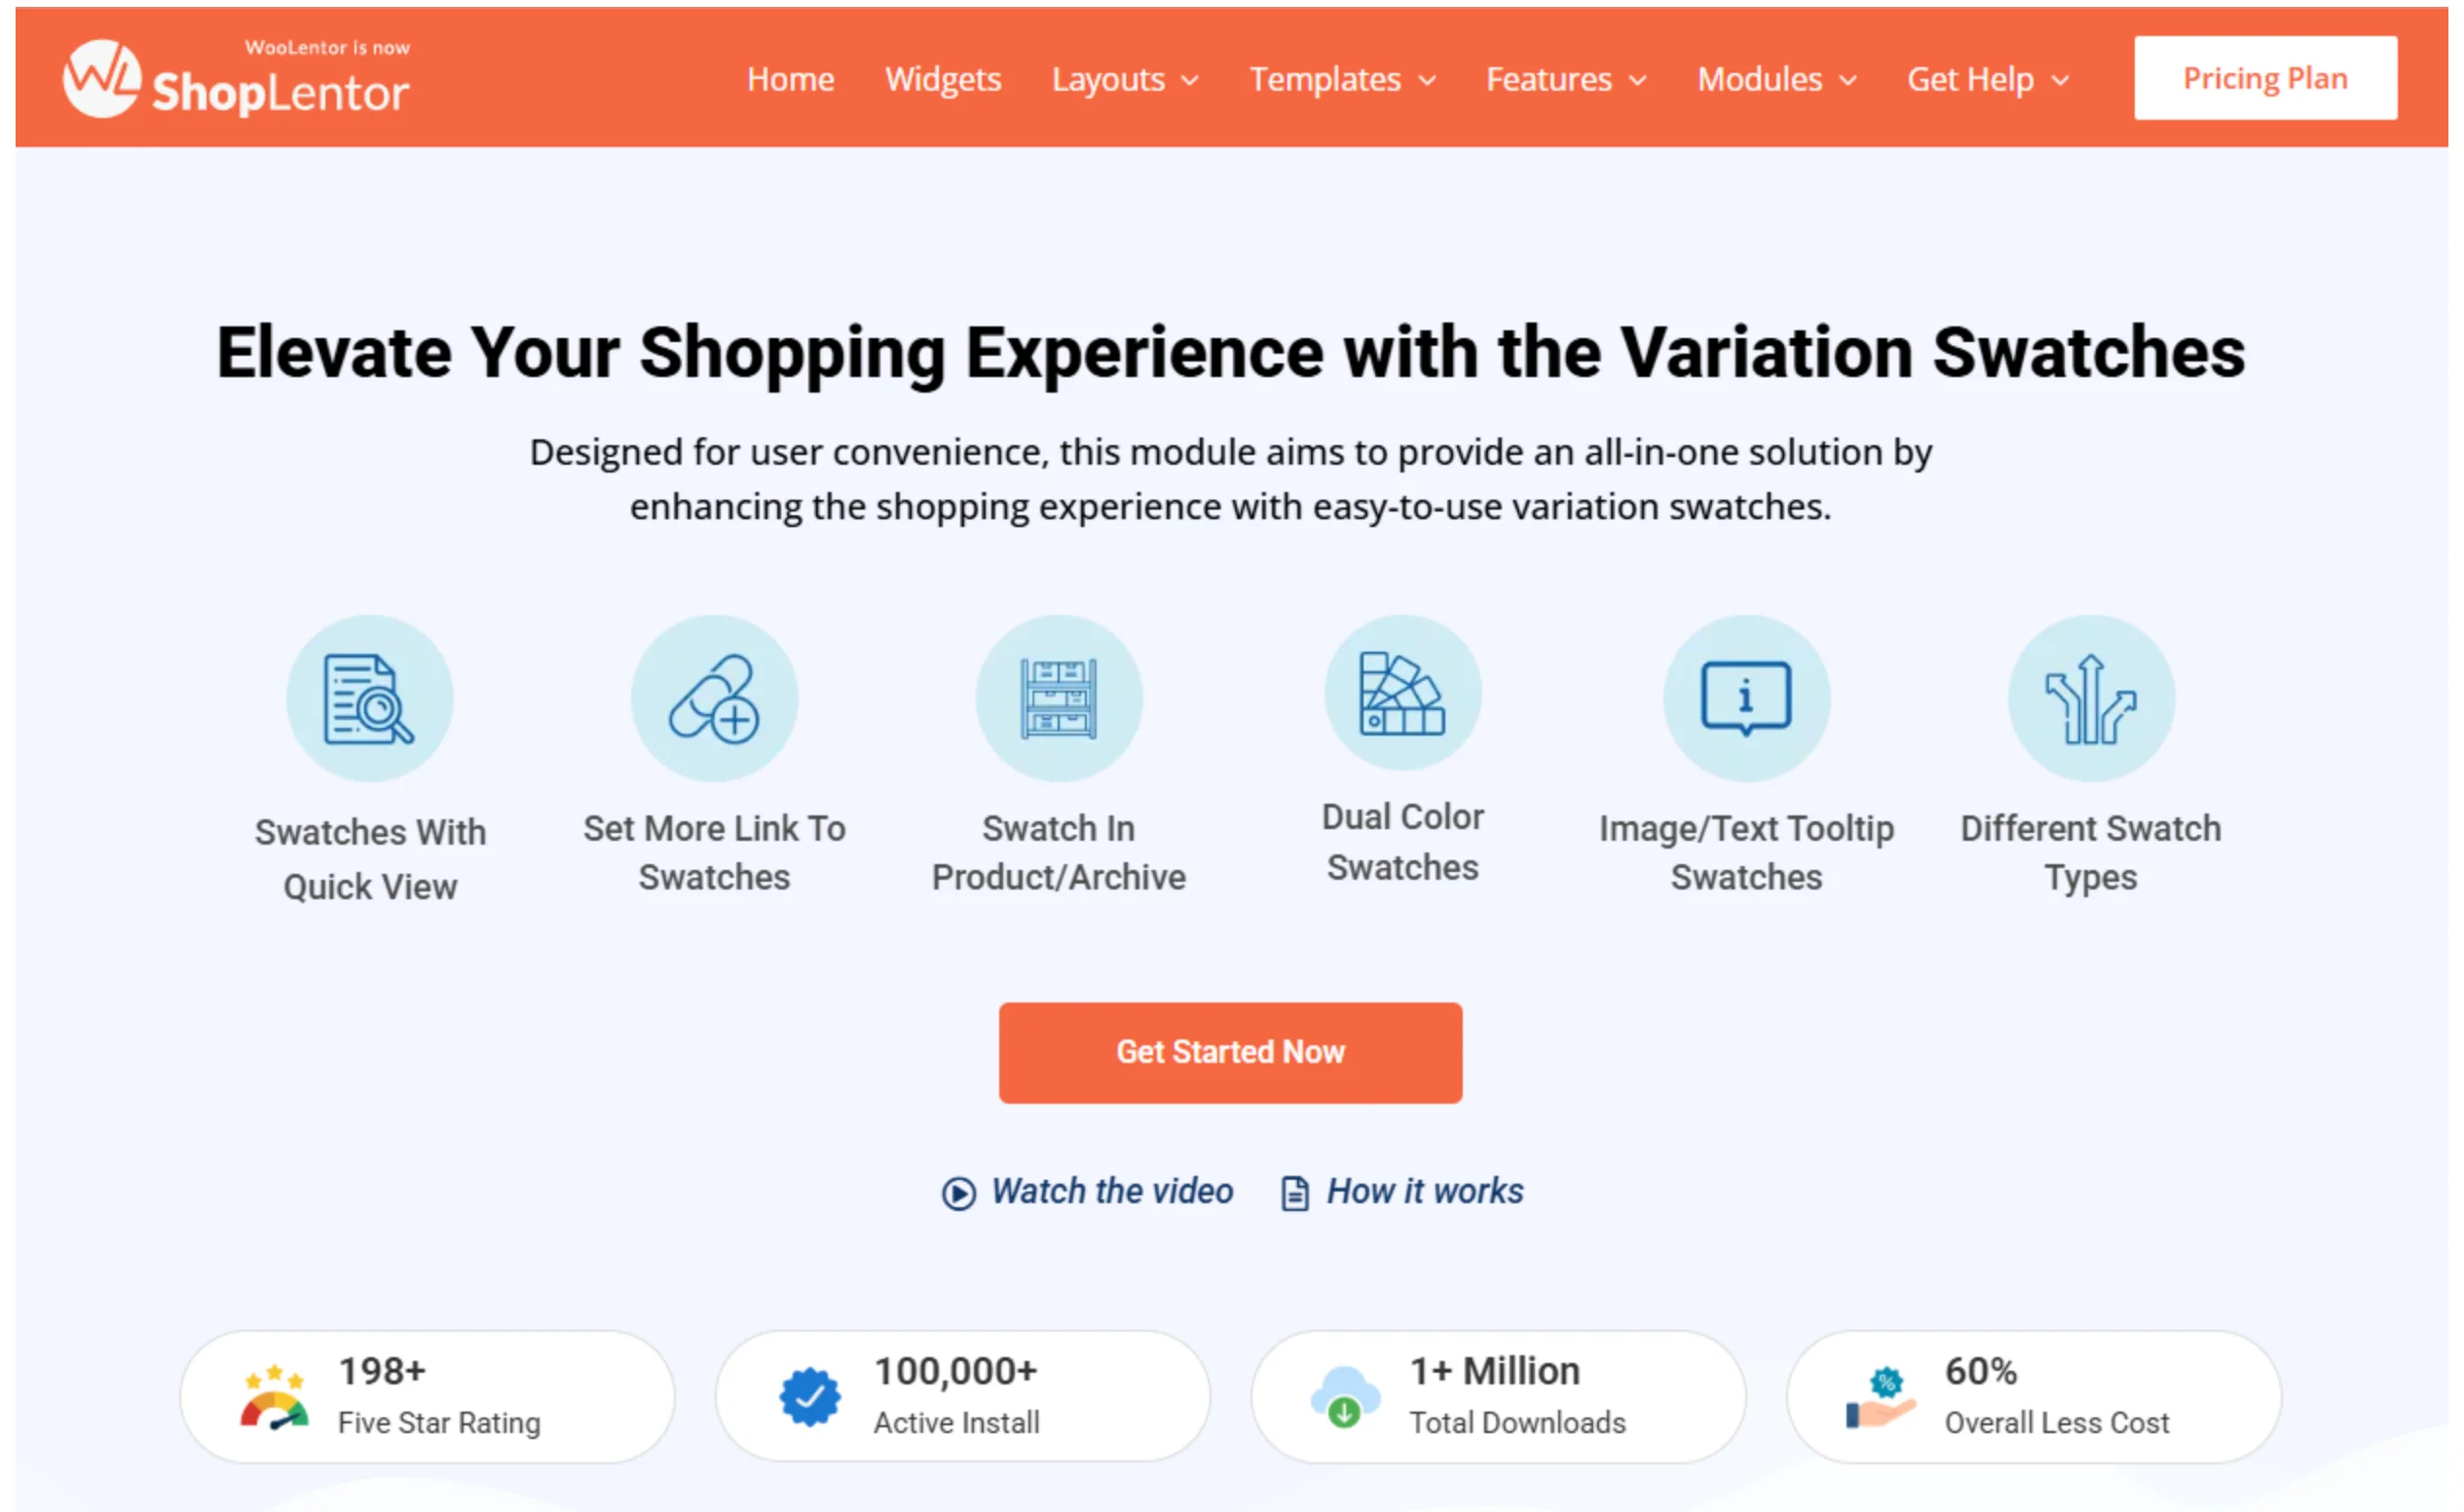
Meet ShopLentor, the ultimate free WooCommerce store builder trusted by 100,000+ store owners worldwide.
This comprehensive solution packs 112+ Elementor widgets, 82+ Gutenberg blocks, and 34 specialized modules into one powerful plugin.
With ShopLentor, you can create high-converting product pages, optimize checkout experiences, and enhance user engagement effortlessly.
It enables flexible pricing strategies, AJAX-powered shopping experience, multi-step checkout, and advanced sales funnel optimizations.
Whether you want to increase conversions, improve user experience, or simplify store management, ShopLentor is the plugin you need—without writing a single line of code.
Best Features of ShopLentor for WooCommerce:
Advanced Product Grid Layouts: Showcase your products with multiple layout styles, including sliders, carousels, and grid formats, for a visually appealing shopping experience.
Shopify-Style Checkout: Reduce cart abandonment with a streamlined checkout process that mimics Shopify’s high-converting one-page checkout.
Flash Sale Countdown Timer: Create urgency and drive instant purchases by adding limited-time countdown timers to product pages.
Product Quick View: Allow customers to view product details and make purchasing decisions without leaving the current page.
Real-Time Sales Notifications: Boost credibility and trust by displaying live sales notifications that showcase recent purchases.
Custom Product Filters & AJAX Search: Help customers find exactly what they need with advanced filtering options and real-time search functionality.
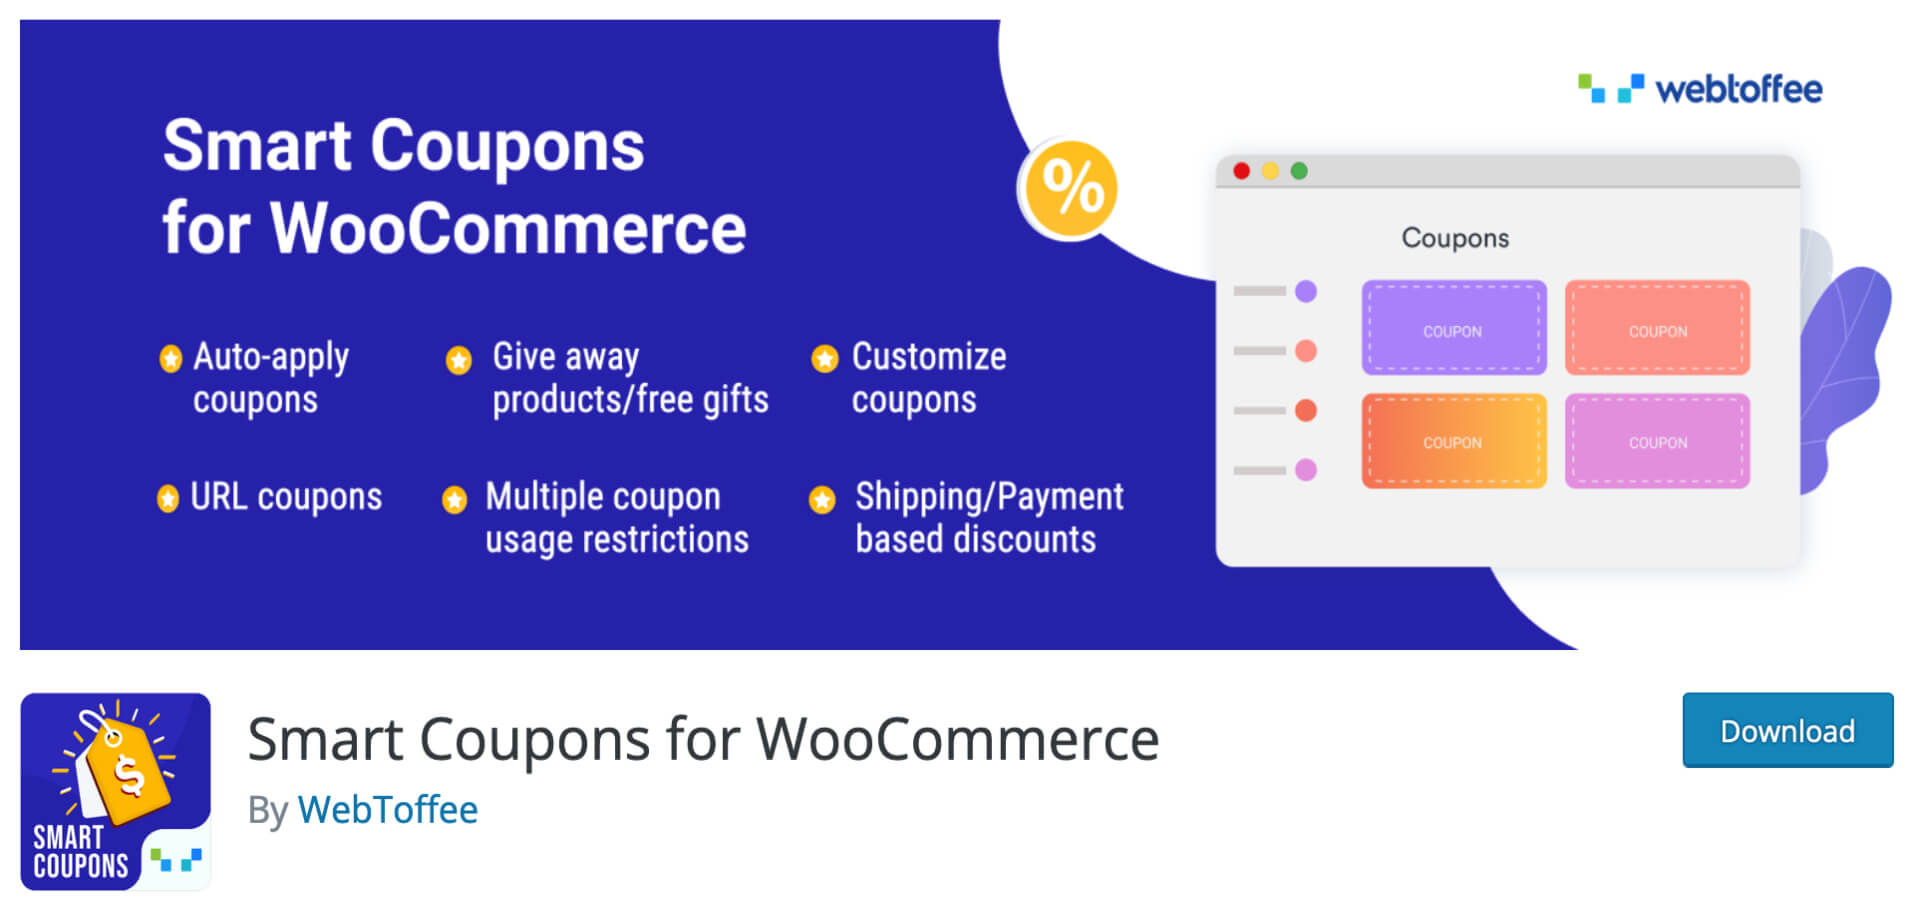
Smart Coupons for WooCommerce offers simple but powerful ways to increase client loyalty and get more WooCommerce sales.
With Smart Coupons for WooCommerce, you can increase WooCommerce sales and encourage customers to buy more than one item at a time with automatically applied coupons at checkout.
Smart Coupons make it easy for customers to redeem coupons, which can encourage them to return to your store again and again.
You can have more control over the default WooCommerce coupons you can create a variety of restrictions, auto-apply coupons, giveaway offers, easy coupon management, and more.
As one of the best free WooCommerce plugins, it’ll work for your online store right out of the box — no complex setup needed.
Best Features of Smart Coupons for WooCommerce:
Auto-apply of coupons: Create smart coupons that can be applied automatically when a product is added to the cart.
Apply coupon restrictions: Restrict coupon usage based on products, categories, and user roles.
Create product quantity/subtotal-based discounts: Filter coupons further with maximum or minimum quantity/subtotal of products purchased.
Shortcodes for coupons: All coupons in your store are created automatically using shortcodes. You may use coupon shortcodes to display the coupon code, description, or other information extracted from the coupon settings on your site wherever you want.
Give away coupons: Embed giveaway products to coupons.
Coupon customization: Customize coupon appearance with categorized coupon styling options for expired, used, and active coupons.
Cart Lift is a great example of an abandoned cart recovery plugin that can help you recover lost WooCommerce sales and boost your bottom line.
With Cart Lift you can recover lost carts by automatically sending emails to customers who have abandoned their carts.
The emails remind customers of their forgotten items and provide a link to return to their cart quickly and easily.
You can also set up your recovery campaign real quick.
Simply decide on the Subject line and a compelling email copy, and activate the campaign. The plugin will do the rest.
However, you can automatically send reminder emails to customers who have left items in their cart, increasing your chances of completing the sale.
Best Features of Cart Lift:
Track Abandoned Cart Automatically: The plugin can keep track of your site’s abandoned carts automatically. The plugin gathers data from each cart that is left on your site and begins the recovery campaign at predetermined intervals.
Set Up Your Campaign: It’s simple to get started with your recovery campaign. Simply pick a subject line and compelling email copy, then turn on the campaign.
Set Strategic Intervals To Send Emails: Set up a series of emails to be sent as reminders for cart abandonment. Set the amount of time until each recovery email is delivered after the cart abandonment.
Get Full Analytics On Recovered Revenue: The plugin supplies you with a correct analytics board that shows you how many abandoned carts you had, the amount they were worth, how many of them you were able to retrieve, and how much money you gained back.
Build Up Your Mailing List: The Add To Cart Popup Modal is a unique component of the plugin. A persuasion pop-up will appear when a guest visitor clicks on the Add To Cart button, and they will be asked for their email address. It’s a fantastic approach to growing your mailing list and increasing abandoned cart recovery rates by offering guests an offer for an email subscription.
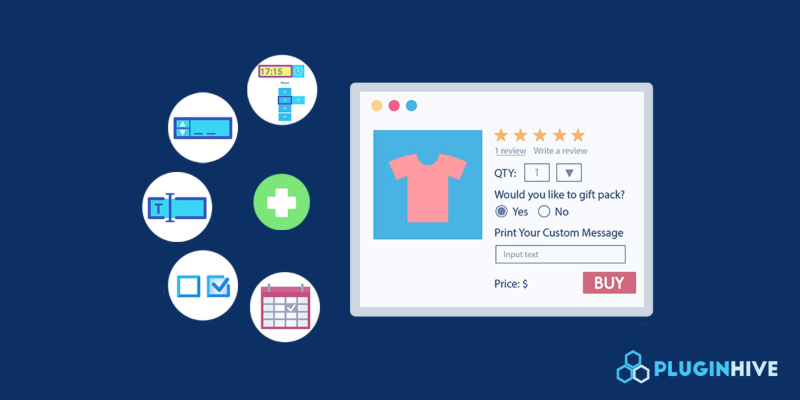
If you’re running a WooCommerce store, you know the importance of providing customization options to your customers. That’s where the WooCommerce Extra Product Options (Custom Addons) plugin comes into play.
With 19+ different custom field types and a range of features, this plugin allows you to create a personalized shopping experience, such as additional product data fields, custom color pickers, dynamic fields, and many more.
The main idea is to create a customized shopping experience for your customers to increase conversion.
Best Features of Extra Product Options for WooCommerce:
Diverse Custom Product Options: Add any field you want to collect additional details from your customers. Choose from options like text boxes, radio inputs, dropdowns, color pickers, date pickers, and more.
Dynamic Fields: Customize the user experience by showing or hiding custom fields in the form based on the rules and values you set.
File Upload Capability: Allow customers to upload files, images, and other relevant data directly on the product page.
Section Positioning: Take control of where the “Add To Cart” button appears on your product page to optimize conversions.
10. Checkout Field Editor and Manager for WooCommerce
When it comes to streamlining your WooCommerce checkout process and capturing essential customer information during checkout, you will love Checkout Field Editor & Manager for WooCommerce (by ThemeParrot).
The plugin has exclusive features to help you align your checkout fields necessary to meet your customer needs. You may customize the text, size, and priority of existing checkout fields and create new custom fields where required.
Its simple UI makes it easy to edit the checkout fields quite easily.
Best Features of Checkout Field Editor & Manager for WooCommerce:
Extensive Customization Options: Access 17+ different custom checkout fields to capture additional customer information during the checkout process. Easily edit both custom and default checkout fields to meet your specific needs.
Multiple Sections for Editing: Edit fields in Billing, Shipping, Order, and Custom sections, providing a curated and efficient checkout experience for your customers.
Checkout Customization With Extra Control: Effortlessly ensure error-free submissions and customize your checkout fields with CSS classes for a polished, compatible experience across WordPress themes.
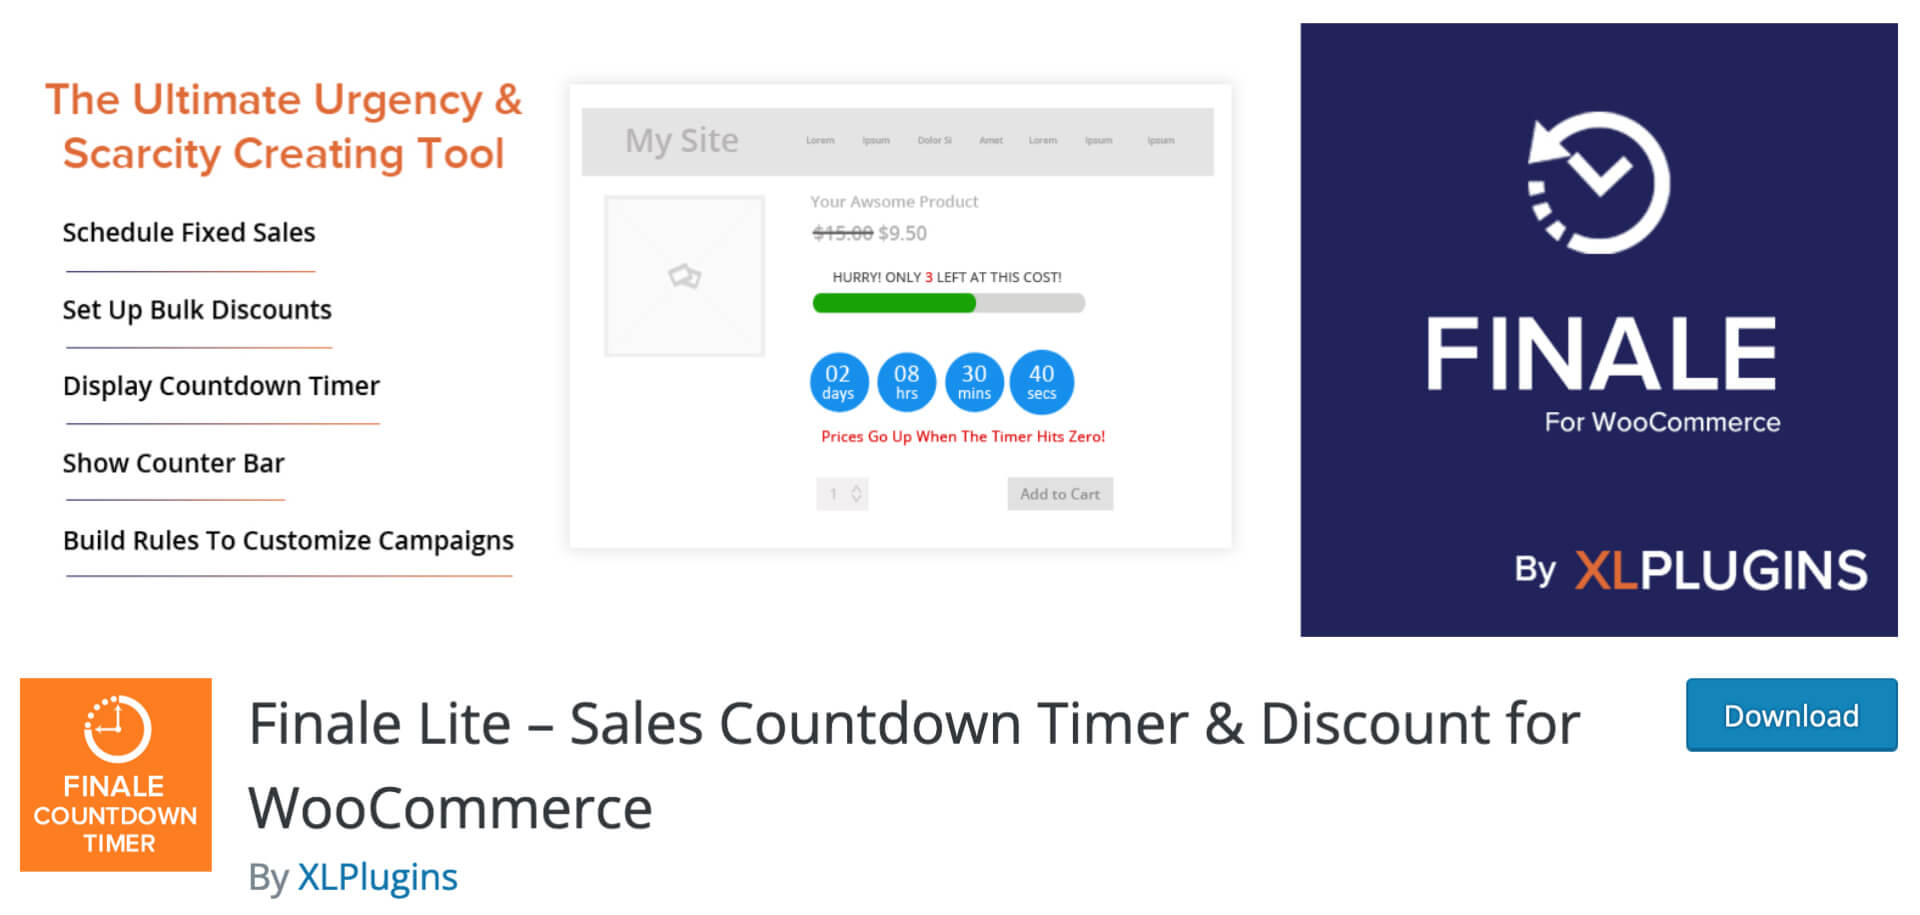
Finale Lite is a free WooCommerce plugin that can help you double your WooCommerce sales. It includes a countdown timer to create a sense of urgency and a discount code field to increase conversions.
You can use Finale lite to run planned WooCommerce sales campaigns such as flash sales, seasonal discounts, coupon code-led discounts, pre-launch offers, daily deals, faster shipping deadlines campaigns, instant discounts, early bird savings, and recurring offers, and more.
In WooCommerce, you cannot start a campaign at a set time. However, You can use Finale Lite to run all sorts of WooCommerce sales tactics, like happy hours or daily deals.
Best Features of Finale Lite:
Set up High-Converting Sticky Header & Footer: You can put up urgency-triggering elements like the sticky header/footer on your store. Introduce new arrivals, announce campaigns, category-wide or store-wide discounts, and time-limited offers with class diagrams.
Countdown Timer In Your Email Campaigns & More: Grab the shortCodes and utilize them to create visually appealing countdown timers or counter bars on dedicated landing pages, blog articles, pop-ups, and more.
Set up Smart Events: Instruct Finale to execute decisions based on real-time status. Bump up discounts when the campaign expiry time is close.
WooCommerce Product Addon is a great free plugin to offer your customers customized products.
You can add custom fields to your items using the plugin, including Text, Numbers, Date, Color, Text Area, Password, Phone number, Time, and more.
So, you have the ability to sell customized products that ensure customer satisfaction.
Best Features of WooCommerce Product Addon plugin:
Customization: Personalize your products by adding various add-ons to your product page.
Add Various Addon Types: You can choose add-on types like Checkboxes, Radio Buttons, Text, Dropdown, and Text Areas.
Rearrange addons: Addons can be rearranged in the order in which they appear on the product page.
Add Addons To WooCommerce Products: You can add product customization addons to WooCommerce products like simple products, variable products, and bookable products.
Create An Unlimited Group Of Addons: You can create different categorized add-ons that can be applied to the products in the shop, such as all products, a group of products, or specifically to a single product.
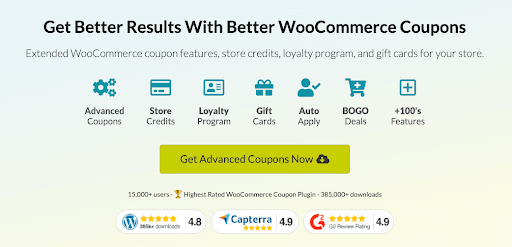
Advanced Coupons is the perfect solution for expanding your WooCommerce coupon features and marketing your store more effectively. With this plugin, about 15,000+ store owners have taken their coupon marketing game to a new level.
Best features of the Advanced Coupons Free plugin:
Create “Buy One Get One” deals with single products, groups of products, or even whole product categories.
Incentivize and reward your customers with loyalty program points they can redeem for coupons later.
A complete store credit system is included right out of the box. Don’t pay for a feature that should be free.
Check for products in the cart, subtotal amount, final order products, and many other advanced conditions.
Schedule coupons so they’re only used when they’re meant to, and show customers a lovely message.
Give coupons that automatically add products to the cart for free or with a special discount.
So there you have it! The best free WooCommerce plugins that will help you increase your WooCommerce sales. Spend some time making your store ready for more sales optimized and start growing your business.
Virtual reality has been booming since late 2019. And after the Covid-19 outbreak & lockdowns, more and more people started to embrace advanced technology.
In fact, virtual reality is now one of the prime technologies in demand.
The most significant form of VR technology today is virtual reality tours or simply virtual tours.
Today, you will be able to get a thorough in-depth understanding of ‘what is a virtual tour’.
I’ve gathered all the essential information you need to learn.
I started with the basic definitions and went to the advanced uses of the virtual tour.
Today, you will be able to get a thorough understanding of ‘what is a virtual tour’.
I have gathered every essential information you may want to learn, starting with the basic definitions to advanced uses of the virtual tour.
After reading this article, you’ll learn:
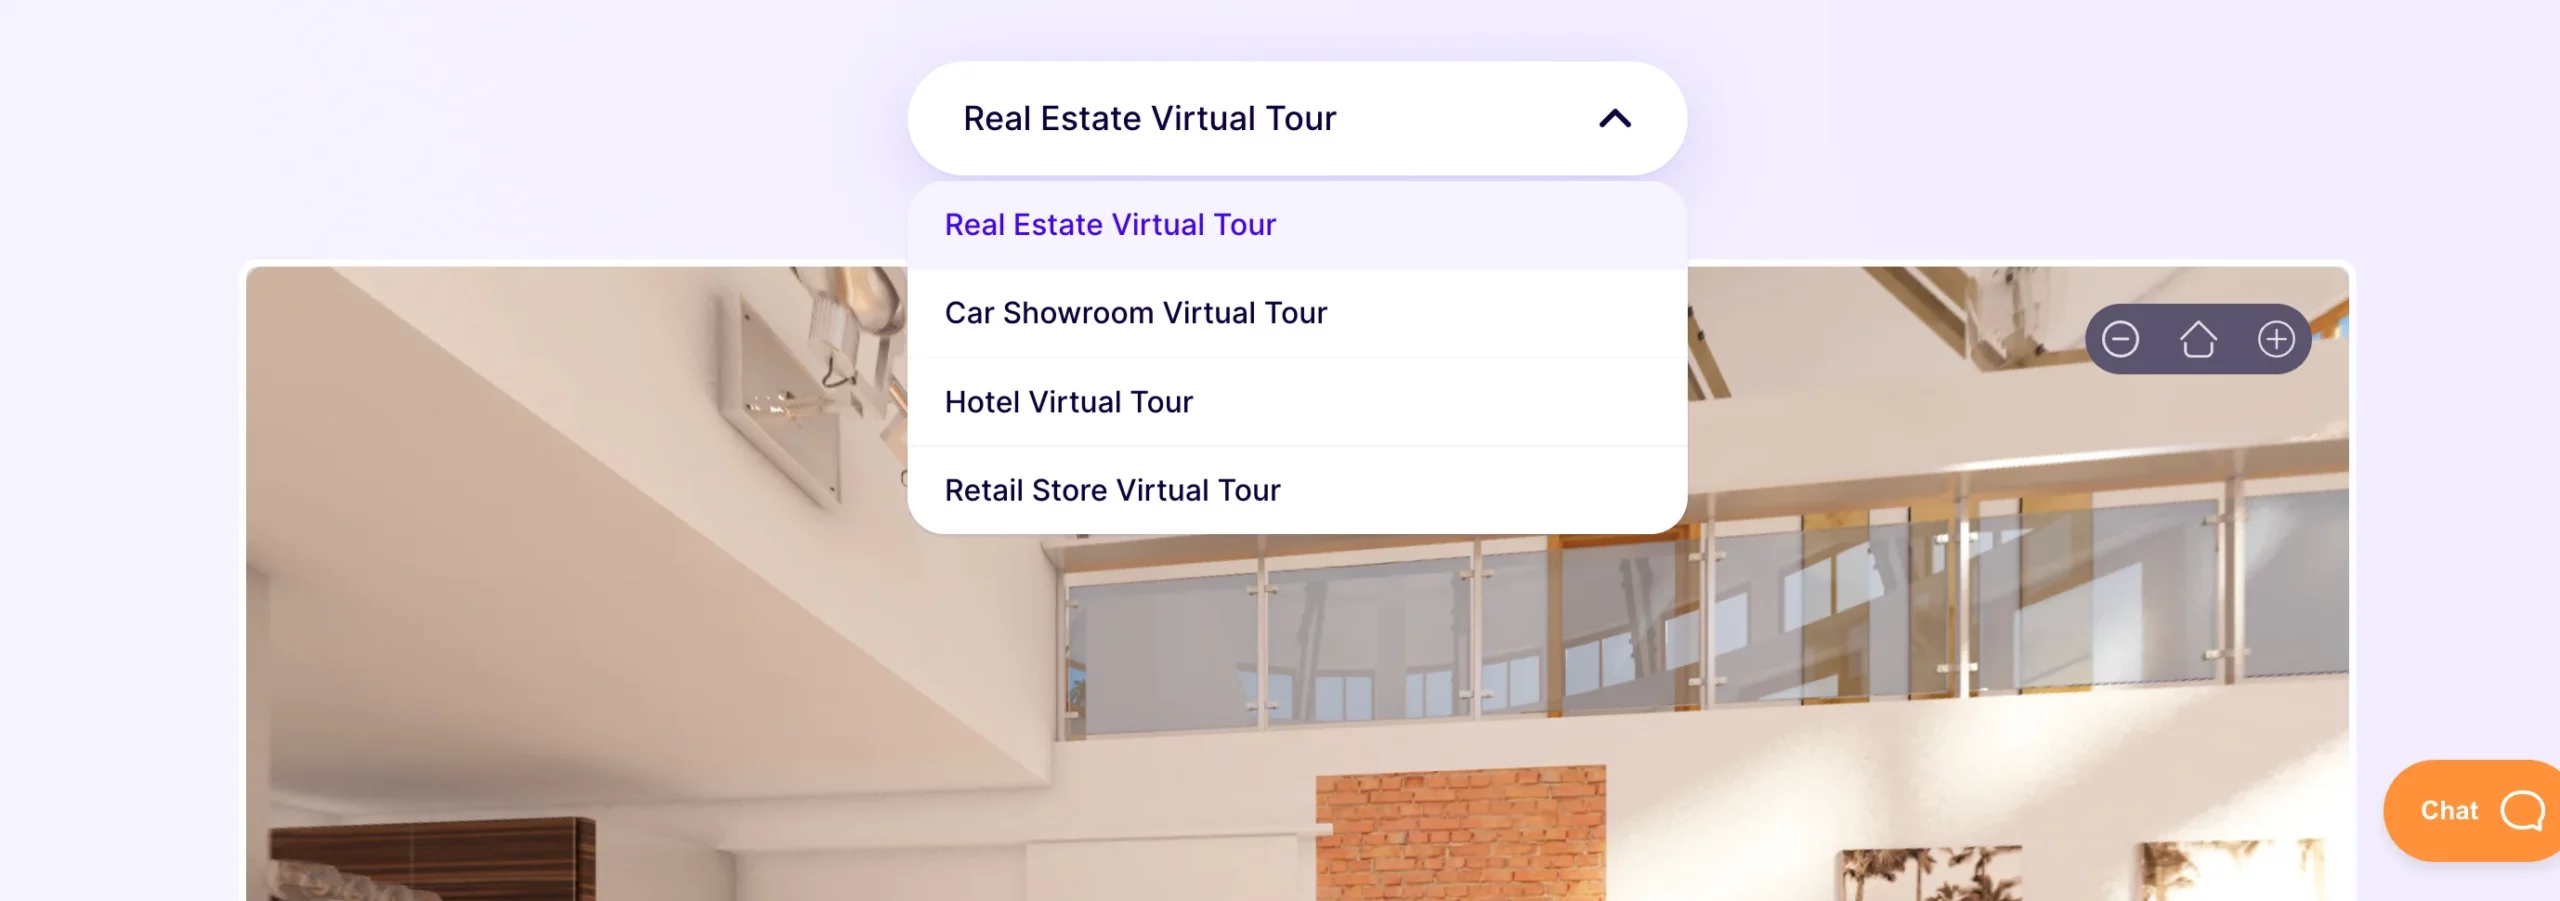
What a virtual tour is and it’s purpose
Knowledge on different type of virtual tours
How a virtual tour is beneficial to your business
Affordable solution to creating a virtual tour
Basic knowledge on creating a virtual tour on your own
Example implementation of virtual tours.
In short, you will know exactly why you should start using virtual tours to grow your business.
Fangen wir also an.
Learn All About Virtual Tours
What is A Virtual Tour?
To fully understand what is a virtual tour, you need to know the meaning, definition and need to be clear about confusion that commonly arrise.
Let’s Understand What Virtual Tour Mean First:
A panoramic view or video simulation of an existing or conceptual place that can be viewed online, i.e., exploring a realistic place virtually.
Imagine you live somewhere in the US and you always wanted to visit the Eiffel Tower in Paris.
What you can do is use your smartphone and search for ‘Eiffel Tower virtual tour’ on Google or Duckduckgo. On the search results, you will find the first choice is a virtual tour of the Eiffel Tour. Click on it and you will be looking directly at the Eiffel Tower through your phone screen!
Notice that you can listen to the tourists’ chitchat and move your phone to look around the place. It’s as if you are really there and you are enjoying a tour of the Eiffel Tower.
This is exactly the realistic experience you can get with any virtual tour.
A virtual tour is usually a virtual representation of a real place, which you can explore remotely from your phone or computer.
Just like the Eiffel Tower, you can create virtual tours of any place for various reasons. For example, realtors often use virtual tours of properties to attract buyers.
Let’s look at Virtual Tour Definition Elaborately:
A virtual tour is a type of semi-immersive virtual reality where you view a virtual environment for a semi-realistic experience.
Let us look at it more elaborately.
Virtual reality comes in many forms and the virtual tour is one of them. While defining a virtual tour, you may look at a few features that make a virtual tour different from other forms of VR.
It’s when you view a virtual environment through a device, but you do not necessarily need to move to view the tour. Neither you control a character.
You simply get a view of the environment as if you are looking at it in reality (often referred to as the first-person view), and you can look around using a mouse or a keyboard on a PC, or by swiping your fingers on a smartphone screen.
The first example of a virtual tour dates back to 1994 (as per Wikipedia). An interpretive tour was created for a museum that included a 3D walkthrough of Dudley Castle (1550) virtually reconstructed.
Most virtual tours have Gyroscope support, which somewhat gives you a near-realistic experience since you have to move the phone to look around.
The ones that are supported by VR boxes, those virtual tours feel more realistic as when you experience one, you will feel like you are standing in the center of the place.
However, you will only be moving your face or turning around – movements of your body parts won’t have any impact on the tour.
Nevertheless, it is still the most effective and affordable VR solution.
Let’s Clear The Confusion : Virtual Tour And Virtual Reality
Virtual reality can be referred to as any form of a virtual environment that requires engagement. This could be fully immersive (e.g. virtual medical training), non-immersive (e.g. RPG strategy games), semi-immersive (e.g. virtual tour), etc.
A virtual tour is a type of semi-immersive virtual reality experience.
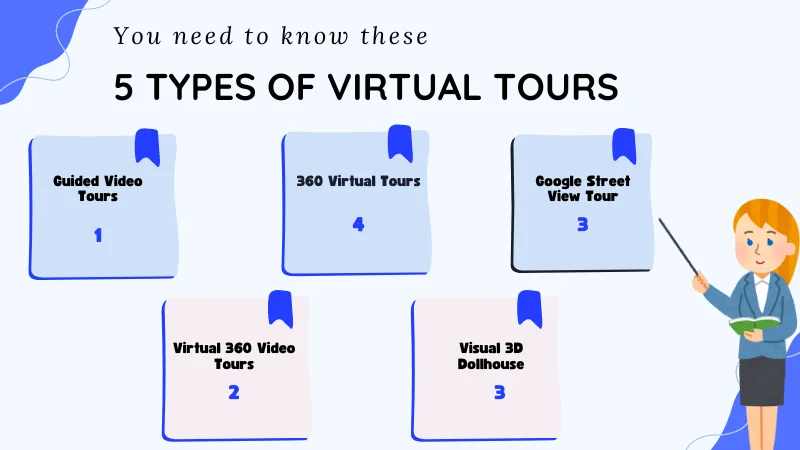
2. Types Of Virtual Tours
As you now understand what virtual reality is, I will now explain these 5 types of virtual tours below :
Let us look at these types of virtual tours in depth :
1. Guided Video Tours
When thinking about developing virtual experience, the early so-called virtual tours were actually guided video tours where a sequence of videos was used to give you a tour of a location.
Apparently, virtual tours evolved gradually with technology to increase the engagement it has today.
In the past, guided video tours were often referred to as virtual tours.
Though it can be considered as a virtual experience, it is rather a tour where you, as a viewer, have no control. You will only look at what is being shown in the video.
As per modern-day knowledge, a guided video tour is no longer considered a VR experience.
2. 360 Virtual Tours
People have long advanced from guided video tours and started using 360 virtual tours.
A 360 virtual tour is basically where you can get a complete virtual 360-degree view of the environment – you can view the place from the center, with more control over navigation.
Virtual 360 Degree Meaning – You will be able to completely turn in a circle in any direction whether top and around or sideways within a virtual environment.
This is the modern-day virtual tour that most businesses use nowadays. In fact, it is the most affordable form of virtual tour solution out there today.
3. Google Street View Tour
Google also came up with an exclusive solution for virtual tours. Since Google already has the Street View feature in the maps, they decided to allow users to extract the virtual view of a certain location and embed it on their website or mobile app.
This Street View tour is a typical virtual tour connected to the Street View world in Google maps. So initially, you will start at the intended location, but then you can navigate yourself to other places just like you do in Google Earth. As this technology gains popularity, often near tourist attractions scanable brochures or banners can be seen for virtual tours on a QR code.
4. Virtual 360 Video Tours
Then emerged the new form of virtual reality, 360 video tour. It is a form of a virtual tour where you get to experience a 360 video and navigate in a 360 view while the video is playing.
These types of virtual tours became possible thanks to the high-quality 360 digital cameras that were invented and released in the last two decades.
However, as amazing as it sounds, it still didn’t get as much popularity as an ordinary 360 virtual tour simply because of the high expenses involved, and the lack of engagements compared to a traditional virtual tour.
5. Visual 3D Dollhouse
The most advanced form of a virtual tour was developed by a handful of companies, the most notable one being Matterport.
They introduced the Visual 3D Dollhouse form of virtual tours. It’s the only form of a virtual tour that is closest to a real walking tour.
However, it is also the most expensive form of a virtual tour (ranging from 2k to 8k dollars for a single tour).
Initially, you will get a 3D model of the house, and then you may enter the house to get a virtual tour where you can click to move here and there within the house. It doesn’t stay limited to the center of a room; rather you can move positions within a room.
The dollhouse concept was mainly used by Home Development Companies and Architects before a house was built. But many large firms invested in creating a Dollhouse virtual tour for themselves and to get more online traction.
Comparing A 360 Virtual Tour And A Virtual 360 Video Tour
360 Virtual Tour
Virtual 360 Video Tour
Created by converting a 360 panoramic image into an equirectangular virtual environment.
A 360 video can be directly recorded using digital 360 cameras.
More scope of interaction with tooltips, click-to-play videos, multiple scenes, custom hotspot icons, etc.
Limited to the video itself with just 360-degree navigation from the center.
Less expensive to create and develop professionally.
More expensive when hiring a professional.
Tools to embed a virtual tour on a website offer more interactive customizations to increase engagements.
Embedding a 360 video tour on a website has no extra customization scopes, hence no extra engagements.
Gives more control to the visitor and creates more interactions, thus helping to trigger a buyer’s interest when using virtual tours for business purposes such as selling a house, promoting hotel rooms, etc.
It is more ideal for fun and social activities such as traveling, vlogging, or parties, but not engaging enough to help in boosting business revenue.,
So in short, use 360 virtual tours when it is a business purposes, and use virtual 360 video tours when it is for fun and entertainment.
3. Who Uses Virtual Tours And Why?
In parallel, the field of enterprise mobile application development is increasingly integrating virtual reality elements to enhance user engagement and provide innovative solutions in various sectors.
Here is the list of industries or businesses that should use virtual tours (if not using already) as a part of their marketing strategies.
i. Real Estate
This is probably the industry that is using virtual tours more than any other.
When selling a house or property, or simply renting out an apartment, a virtual tour can help buyers get hooked immediately.
The potential client will get to experience a realistic view of your property, which is way more engaging than regular images.
So you will have a better chance to get calls from interested clients.
Sadly, many prominent realtors are still hesitant about using such technology and prefer going the old traditional way.
This will have to change soon if they want to stay in the competition for long.
ii. Hotel & Resort
You will find that a lot of international hotels are now using hotel virtual tours to attract tourists and travelers.
Most people usually like to find out how a hotel looks and get information on the services and charges, before deciding where to reside during vacation or tourism.
And you can show them every little detail about the rooms you’re offering by adding a ton of information inside the virtual tour itself using tooltip hotspots and other customizations.
iii. Museums:
Since the pandemic began, most museums have gone through some really tough times.
But a few museums managed to keep their reputations up by offering free virtual tours of some of their sections while promoting paid virtual tours on other sections.
Virtual tours are also a great way to preserve historic relics online.
iv. Restaurants & Bars
When visiting a bar or restaurant, people tend to notice if the environment is suitable for hanging out or comfortable, else they refrain from coming back.
If you are confident about your restaurant or bar, then you may create a virtual tour and place it on your website. This will help to grab the attention of the people who are researching online to find out a suitable place to hang out or probably dine in.
A well-made virtual tour of your restaurant will always encourage your customers to consider taking a visit and if they enjoy their first visit, they will definitely become returning customers.
You may also provide your menu and contact details on the tour, or even add a contact form for home delivery.
v. Art Gallery or Exhibition Halls
One of the more potential industries that can flourish using virtual tours is Art Galleries or Exhibition Halls.
Most art galleries and exhibitions regularly organize live events to showcase the artworks which are often open to auctions or purchasing.
The good news is, these creative arts can be auctioned and sold online as well. But rather than creating an e-commerce style online market, you can consider using a virtual tour.
In that regard, online visitors will enjoy the tour and will get to view all the available arts in a realistic way.
Plus, you can use tooltip hotspots to provide extra details about the arts such as the meaning or the thought behind the artwork or the artist details, etc. And you may even add a contact form for inquiries related to purchasing and auctions.
If your artworks are not for sale and you are organizing a paid event, then you can use virtual tours for two exclusive purposes:
All a free virtual tour of a small section of the exibit and ask your visitors to buy tickets to the actual event.
You can run an online virtual event and allow people to take access to the exibit for a small fee.
Whichever way you use virtual tours, it will get you great exposure and good business.
In fact, a virtual tour will mean people from all over the world can take part, and you can get visitors 24/7.
4. Traditional Virtual Tour Creation
Once you know the basics about virtual tours, your next question is probably “How to create a virtual tour?”.
Creating a typical virtual tour can be very affordable or expensive depending on how you create it or what purpose you are creating it for.
Normally, to create a 360 virtual tour, you will need 360 panoramic images and a virtual tour builder.
360 Panoramic Image –
A type of image that is captured through Panoramic photography and can be converted into a 360 virtual tour using an appropriate tool.
You may seek professional help to create virtual tours, which can be quite expensive since 360 photography costs a lot (ranging from 1500 to over 3000 dollars), and agencies tend to charge a high fee when building virtual tours (commonly around $500). But you will get quality output.
However, it is possible to reduce that cost by capturing 360 panoramas on your own and using an online virtual tour builder.
Creating A Virtual Tour On Your Own
If you have time, then it’s best to create your own virtual tour without any professional help and believe me, it’s not as complicated as it sounds.
To create a virtual tour on your own, you will simply need to follow the 3 steps below-
i. Collect the right virtual tour equipment to capture 360 images
When capturing 360 images, you will need a digital 360 camera and a Monopod. We suggest you use the Ricoh Theta V camera.
Initially, a digital 360 camera may seem expensive. However, as you saw earlier, professionals would charge almost twice as much just to create one single tour. But with your own camera, you can capture as many as you want.
Once you have the two pieces of equipment, you can capture the 360 panoramic images easily. Simply follow few smart tips and you will be good to go.
It’s best to capture images of multiple scenes or locations of your house/property that you can include in the virtual tour. For example, if you are creating a virtual tour of a house, you may capture a panoramic image for each room it has.
ii. Use a reliable virtual tour creator
You will find several tools out there that you can use to create virtual tours.
However, you should go for a virtual tour builder that is
Easy to use and has actionable tutorials,
Customizable for optimized engagements,
Cost-effective with quality output.
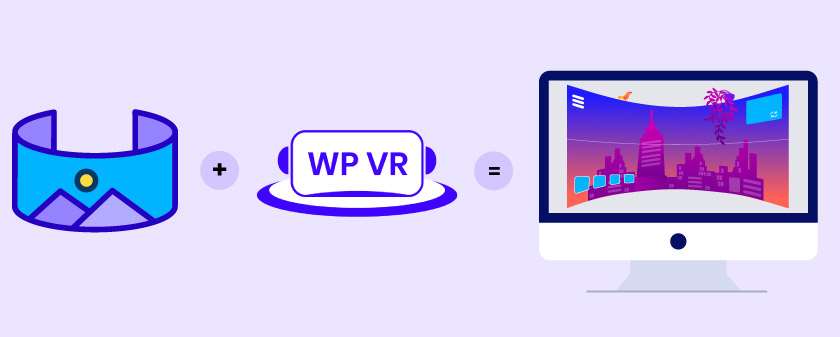
If you run a WordPress site, then you will find a reliable plugin, called WPVR.
WPVR is currently the best virtual tour builder in WordPress that is both cost-effective and convenient as it has detailed actionable tutorials to start using the plugin immediately.
Plus, you will be amazed with some of the tours that it’s users have made so far. Take a look.
Simply use the virtual tour creator to convert your captured 360 panoramic images into a virtual tour.
iii. Optimize the virtual tour for your target audience
Now, a virtual tour is only as good as its engagement potential.
Even if you use high-quality panoramic images, how well the visitors will respond to it completely depends on how you optimized it for engagement.
Most VT creators will allow you to add extra details such as tooltip hotspots, website links, custom hotspot icons, etc.
But it’s up to you how well you make use of them.
For example, in an art gallery tour, it’s ideal to add a small tooltip for every artwork to give more details about the art and the artist.
For restaurants, you may rather use a hotspot near the counter to add a click-to-view menu.
Plus, as I mentioned earlier, it’s best to have multiple panoramic images so that you can allow visitors to move between each scene within a single virtual tour for a realistic feel.
You may also include a scene gallery to let the visitor know of all the available scenes in a quick preview.
Try to use all the relevant features you will get with the tool and aim to create a welcoming and engaging virtual experience.
For example, in the case of WPVR, you can use:
Auto-rotation.
Company Logo and Information.
Tour Location Details.
Interactive hotspots.
Custom Controls.
Gyroskop-Unterstützung.
You may also use engaging hotspot actions to view:
Text.
Audio.
Video.
Website URL.
Contact Form.
Und viele mehr.
The idea is to use the engaging elements that you think your target audience will find appealing. Give the visitor the most interactive experience possible and get him/her interested and intrigued right away.
5. Affordable Solution For Virtual Tour
By now I believe you probably can realize that a good virtual tour depends a lot on the tool you choose. But you should also look at the cost.
Simply put, using an expensive solution may not generate as many conversions as required to cover up the cost.
Choosing a tool that is both affordable and provides enough features to create engaging virtual tours is a vital factor for your business.
If you’re using WordPress, then you won’t have to worry about it. WPVR is a plugin that was built to meet these requirements.
Take a look.
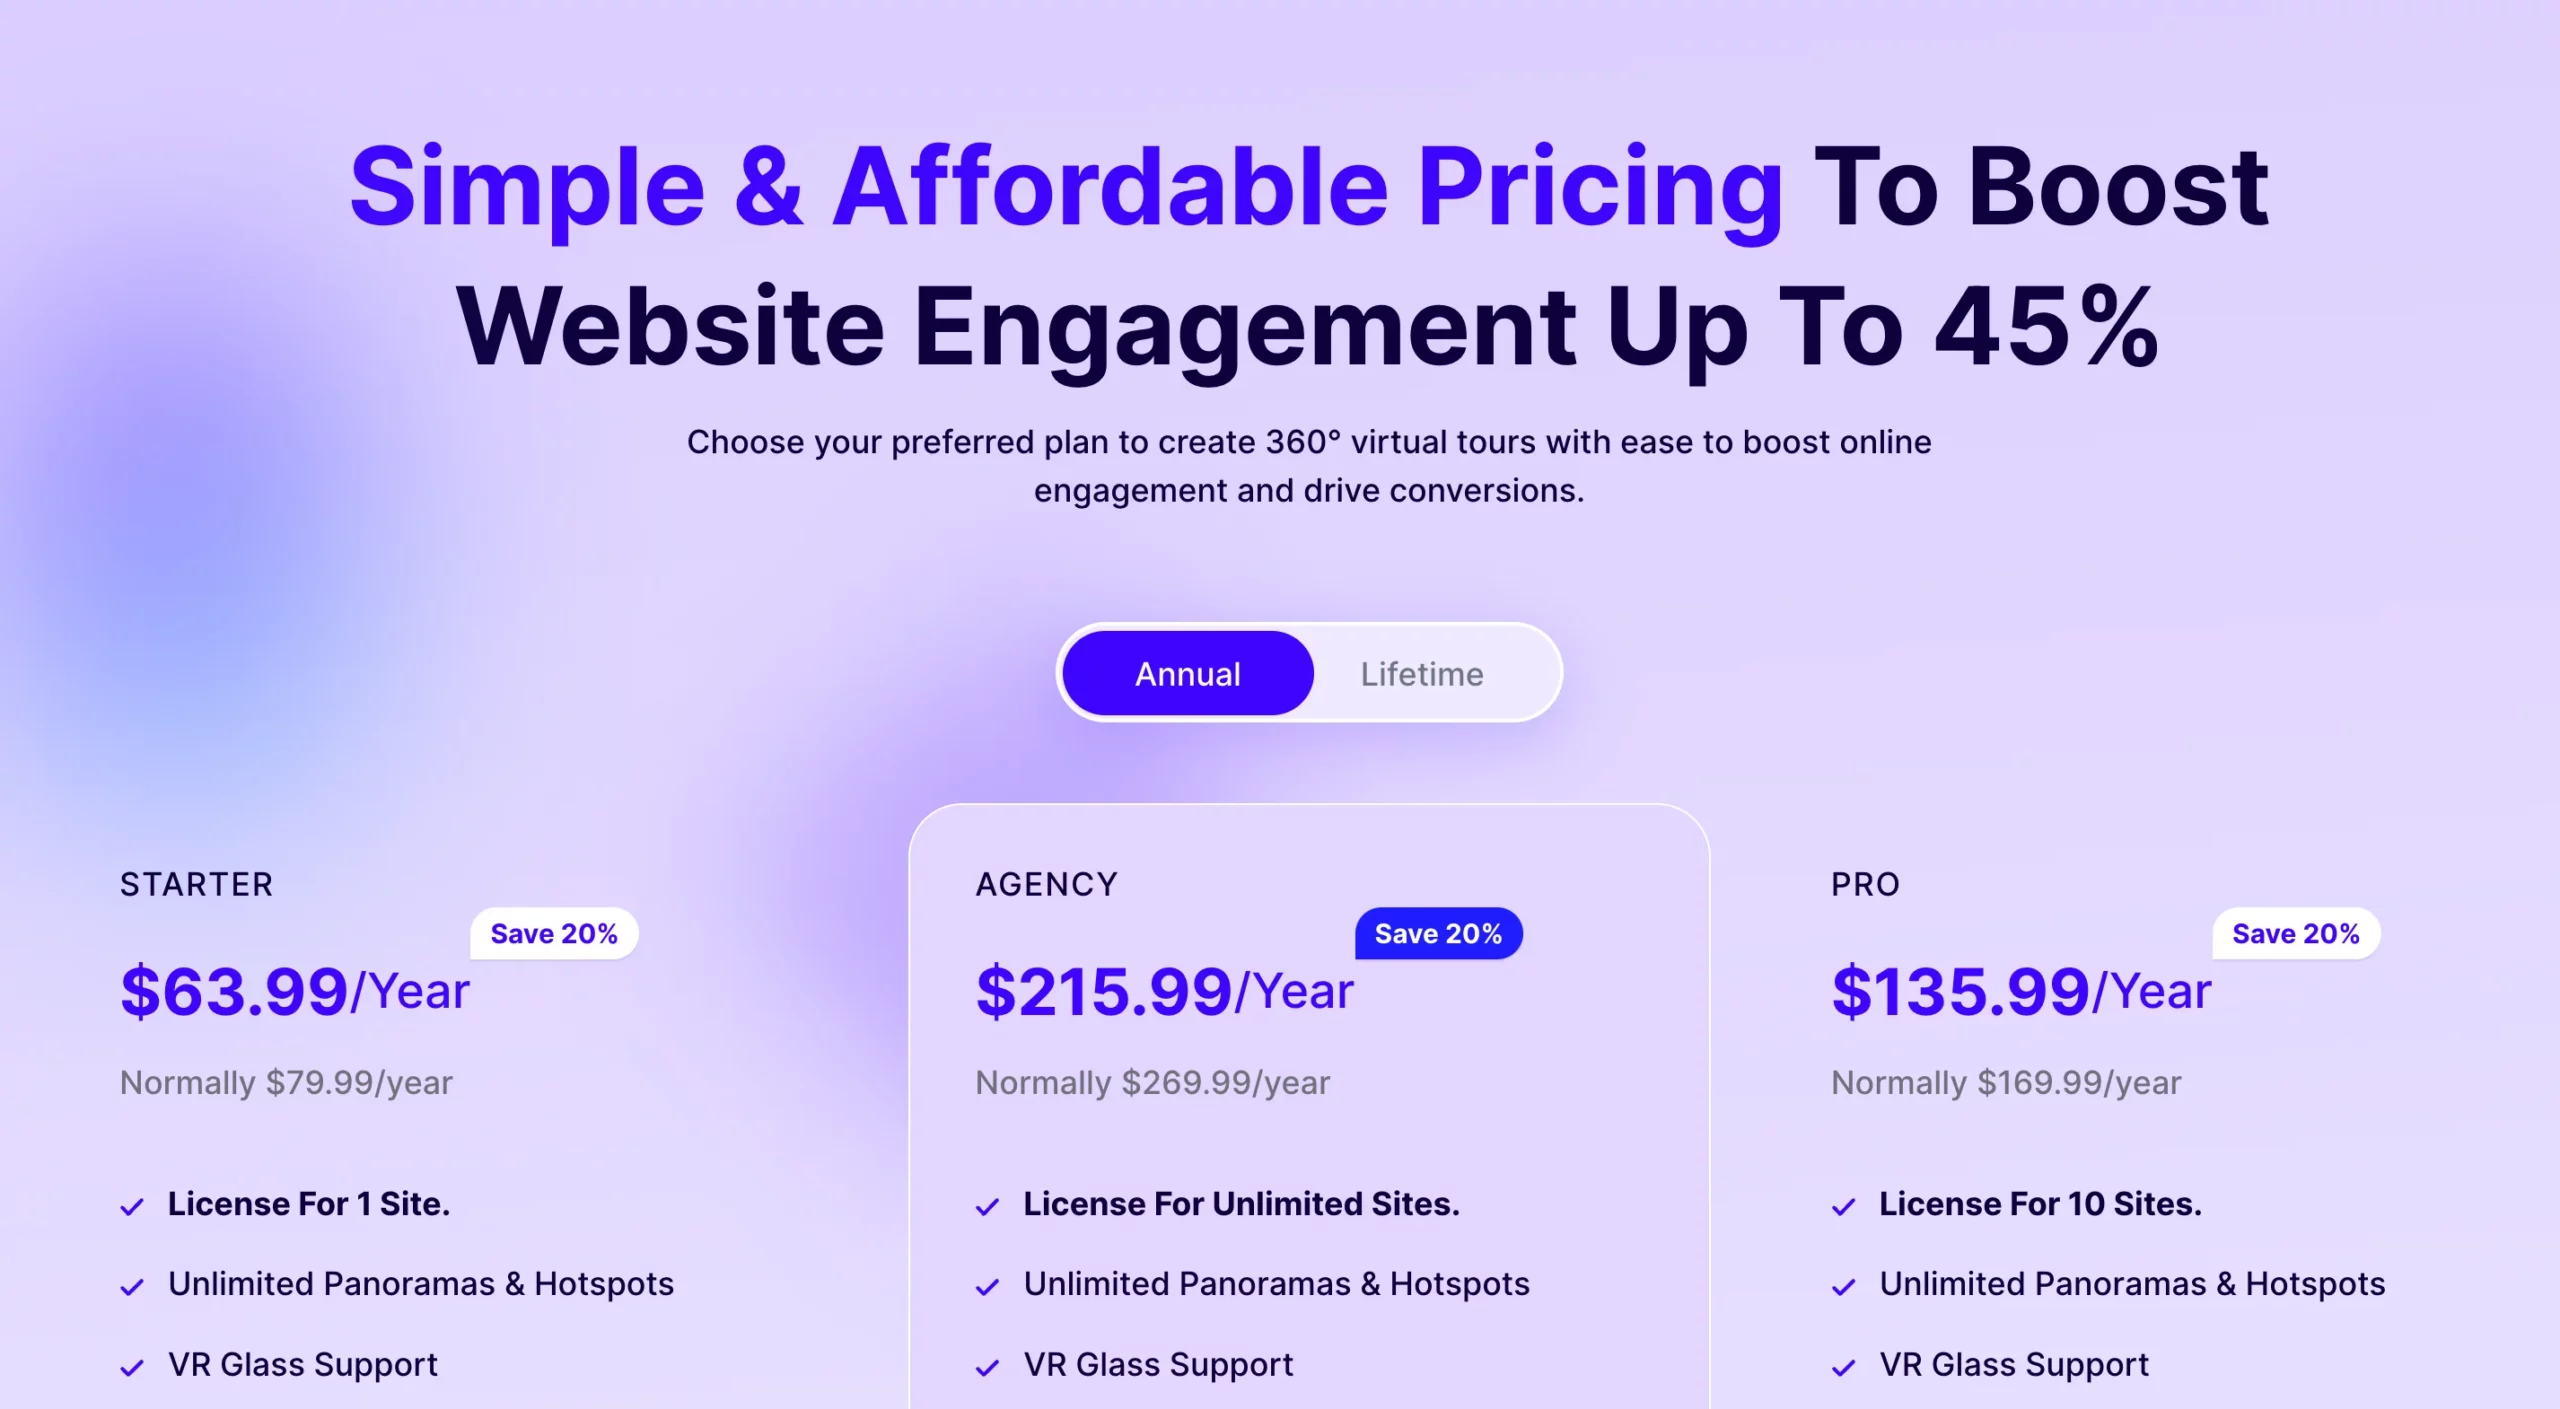
Virtual Tour Pricing
i. WPVR Yearly Plans
ii. WPVR Lifetime Plans
The lifetime plans may seem a bit high at first glance. But keep in mind that, you’ll be paying only once and you can use the plugin for as long as you want (One-time virtual tour pricing).
WPVR comparatively costs way less than most other virtual tour creators when considering the quality of output and ease of use.
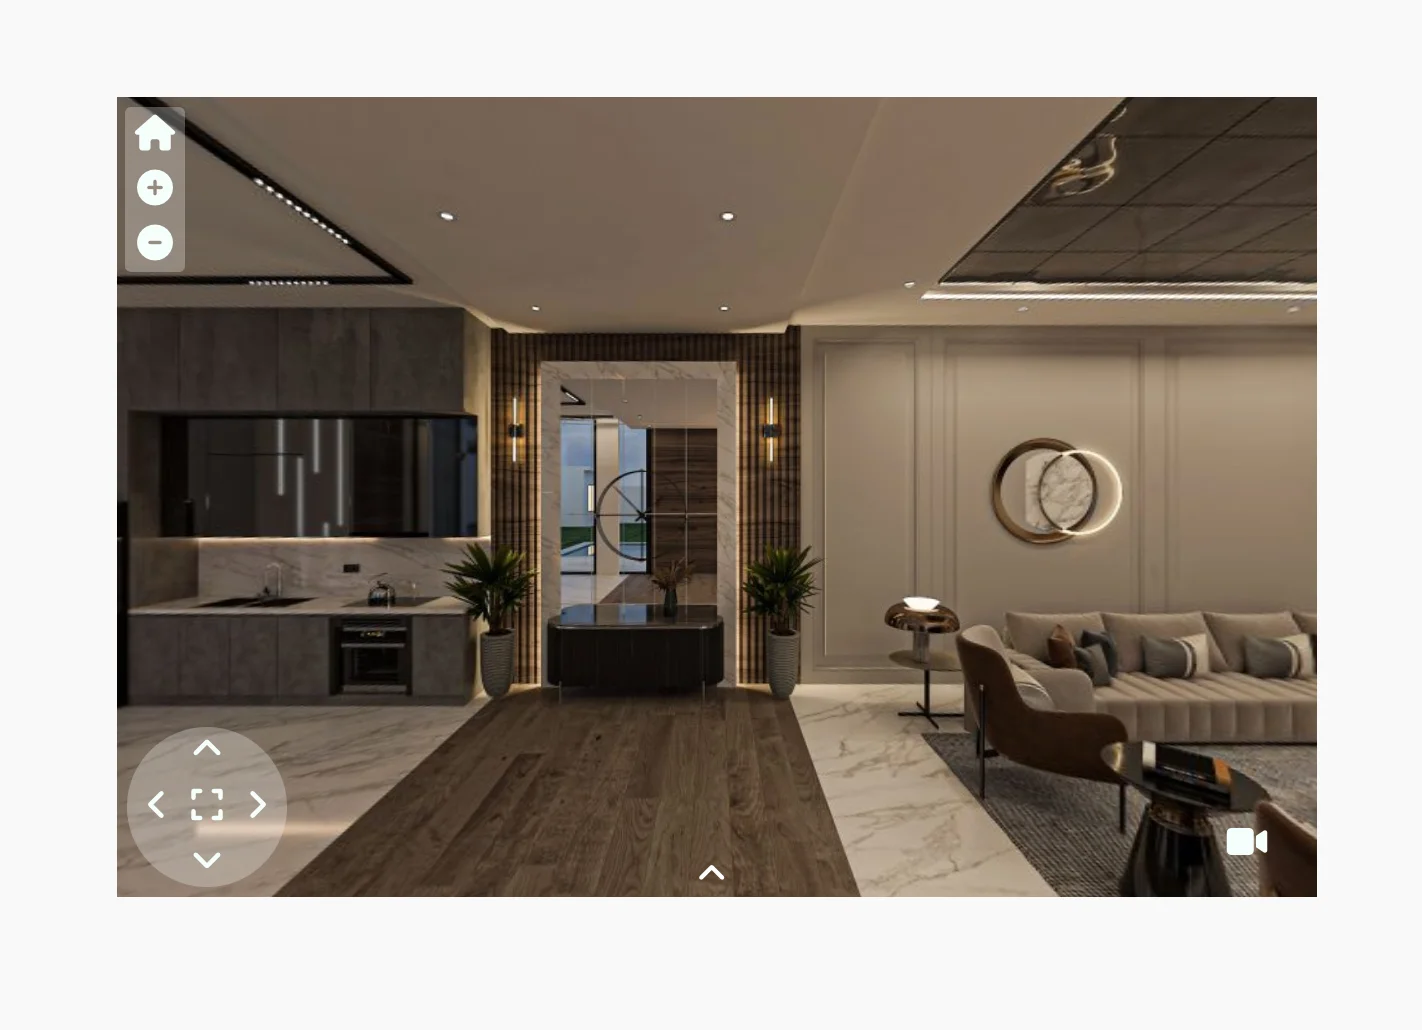
6. Some Example Virtual Tour Ideas Implementation
Below is the implementation of some virtual tour ideas that you can experience:
Here you can see how beautifully the hotspots were used to make it engaging.
You can create a similar virtual tour for your house as well.
ii. Virtual Tour of Hotel Room
Take a look at this hotel room tour which is ideal for tourists.
**Click on the Form Icon on the yellow wall. You will see, there is a contact form to book the room.
This is a great way to promote hotel room booking.
iii. Virtual Tour of A Car Showroom
You can even promote your car showroom using a virtual tour.
**Hover on the hotspots above the cars to see how you can highlight the car details elegantly.
Whether you are the manufacturer or simply own a car showroom to sell cars from multiple brands, a virtual showroom tour such as this one can be a great medium to increase sales.
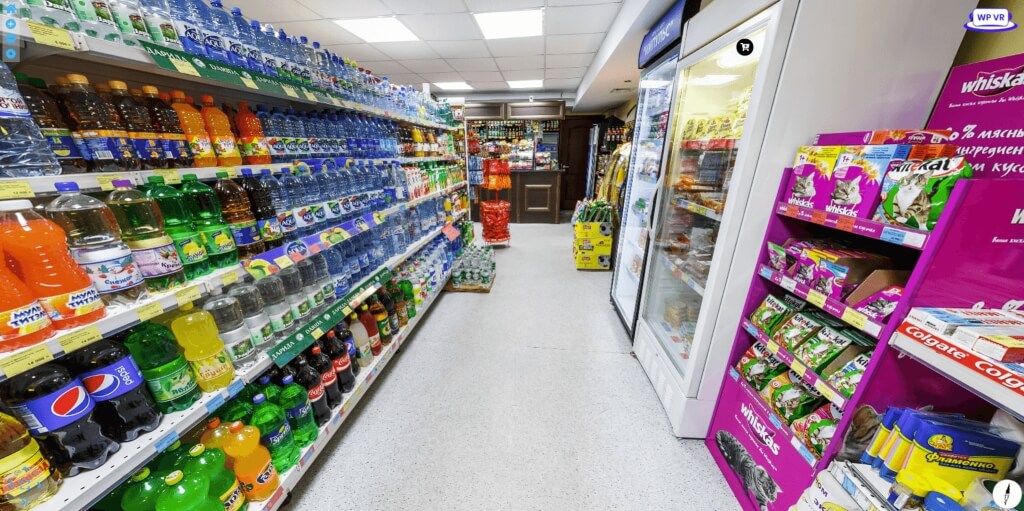
iv. Virtual Tour of Grocery Store
Online sales have seen a great surge since the pandemic, And online grocery sales have reached their peak this year.
And having. a virtual grocery store tour can be a great way to sell your grocery products.
**Click on the hotspot icons for each product to see how you can sell WooCommerce grocery products through a virtual tour.
This is a great, modern way to sell on eCommerce sites. You can use the same type of tours to promote a supermarket, bakery, general convenience store, clothing store, or whichever store you may have.
v. Virtual Tour of Pub
So local bars or pubs have embraced virtual tours to attract more local regulars.
Most people want to feel comfortable about how a pub looks like when visiting and a virtual tour online can definitely attract the ideal prospects.
Take a look at how this virtual tour of a Pub is so welcoming to the locals.
Just like these amazing virtual tours, you may use your creativity to craft your own virtual tours that can bring you more business.
Common Questions & Answers Regarding Virtual Tours
Let us look at some common questions people have regarding virtual tours.
1. Do People Like Virtual Tours?
People will stay 5 to 10 times longer on your website if have at least one virtual tour.
This is justified since virtual tours are interactive and users can control and look around them.
So the answer is Yes, people love virtual tours.
2. Do Virtual Tours Increase Sales?
According to TIG Global, using virtual tours as a marketing method resulted in up to a 67% rise in conversion and successful bookings.
Remember, engagement is the key to conversion. And a virtual tour can definitely connect with visitors more effectively than texts and images, or at times, even videos.
Needless to say, this is the century of the millennials, i.e., people aged between 18 to 34. Any technology that can target this age group successfully will definitely flourish.
– The millennial population of the US is 72 million. – 44% of the millennials are interested in purchasing a VR device.
This is a clear indication that any VR content is ideal to grab the attention of millennials.
– According to Yulio Technologies, 41% of all adults would give VR technology a try, if they’re more available.
So the question is how many VR users are there in 2021?
– Approximate 58.9 million people are using VR technology once a month in the US.
This number is around 17.7% of the total US population, i.e., almost 1 out of every 5 US citizens are now using VR technology every month.
Though it’s hard to craft an exact number on how many people may prefer virtual tours, looking at the numbers in the US, it can easily be said that billions of users are interested in VR technology all over the world.
5. How Do I Make A Virtual Tour for Free?
Some of you may have the question “Are virtual tours free?”
Well, most VR tools are very expensive, while a few are more affordable.
The good news is, there are a few virtual tour creators that released a FREE version with limited features.
In WordPress, you will find the plugin WPVR, which will allow you to create great virtual tours for free.
Though many of its exclusive premium features are not available, WPVR free version will still let you create high-quality virtual tours which you may use on your website.
A quality virtual tour for your business should have these features:
– Proper indications to help you move around the tour. – List of the rooms and spaces in the tour. – High-quality image support. – Hotspots or pointers where you can learn more about any specific place or object. – A way to contact your business for inquiries or booking.
At the end of the day, the tour has to be interactive.
8. How Do I Create A Virtual Tour Completely On My Own?
It’s quite easy to create a virtual tour on your own with a little guide.
9. What Is A Virtual Tour of A Property? / What Are Real Estate Virtual Tours? / What’s A Virtual Apartment Tour?
Real estate virtual tours are created using multiple 360 degree panorama images of that property combined together. They give you a realistic view of a property or apartment and move in and out inside the property.
You can visit different locations inside the house, choose to view every room, and interact with the materials inside the apartment.
10. How Do You Do A Virtual Apartment Tour?
You can easily create a virtual tour of your property or apartment using panorama images taken by you.
Use a 360 virtual tour software to convert the panorama images into a functional apartment virtual tour.
However, if you’re aiming for superior quality, you can use a camera specialized for capturing 360 degree panorama images.
Then your job will become even easier with the 360 virtual tour software.
11. How Much Does A Virtual Tour Cost?
The average cost for 360-degree photography is around $350 in the US.
A quality 360-degree shot takes time to perfect and adjust for the photographer.
You’ll be paying this price one time only and then you can keep on using them.
12. Are Virtual Tours Profitable?
According to Entrepreneur, A virtual tour business can generate up to $100,000 per year in revenue.
On the other hand, if you’re planning to use virtual tours as a marketing strategy for your business, you can consider these 2 stats:
– In the real estate industry, using virtual tours decreased wasted viewings by 40%.
– For the hospitality industry, customers aged between 18 to 34 are 130% more likely to book a place if there is a virtual tour.
13. Should I Start A Virtual Tour Business? / How Do I Start A 360 Virtual Tour Business?
If you’re already providing any photography service, then adding 360-degree photography to your list will give you an opportunity for extra income.
Most of the latest DSLR cameras can capture 360-degree panoramic images and there are a few moderately priced 360 virtual tour software that will help you to create the tour.
At first, you’ll have to invest some time to learn 360-degree photography and the virtual tour software itself (which is less than $100).
However, since you can charge around $350 for a single project, you can find it profitable after just 3 projects. In the beginning, you should focus on creating virtual tours for your local businesses like:
– Your local real estate agents. – Small shops, cafes, & restaurants.
Once you’ve gathered some experience and learned your way around it, you can move to expand your service even more.
14. Do Virtual Tours Help Sell Houses?
Here’s a simple rundown of the impact of virtual tours in the real estate industry, run by realtor.com:
– Property listings with a virtual tour received 87% more views than the regular ones. – 54% of the potential buyers choose to skip a listing that doesn’t offer any virtual tours. – 75% of the buyers think that virtual tours are a significant factor in taking decisions like, whether to visit the property in person & rent/purchase the property.
15. What Is The Best Virtual Tour Software?
This actually depends on the requirements and features you’re looking for in the virtual tour software.
There are 2 tools that you can check out: – Matterport – Popular for their Dollhouse virtual tour. However, they do have a simplified virtual tour creator. Price: $200 to $7000+ per year.
– WPVR – A plugin that is currently the best virtual tour creator for WordPress. It includes the features you actually need to create an engaging virtual tour and has an easy-to-use interface. Plus, it is among the most affordable virtual tour solutions out there. Price: $79.99 to $269.99 per year.
16. What Is The Best Free Virtual Tour Software?
If your website is made with WordPress, the best free virtual tour software for you is WPVR – Virtual Tour Creator.
This free virtual tour software has the following features: – Unlimited virtual tours. – Super high-quality image support. – Image, Text, Video, & GIF file support inside the tours. – Keyboard, mouse, & mobile control. – Made with a mobile-first approach.
Einpacken
“What is a virtual tour?” is probably no longer a question in your mind. You also saw how a virtual tour can help businesses attract prospects. Plus, you now have the guidelines to start creating a virtual tour on your own.
Now the next question is when will you start using a modern-day virtual tour?
If you run a WordPress site or run an agency that develops WordPress sites, I suggest you try using WPVR once just to see how you may benefit from using this virtual tour builder. – Try WPVR Free version – Get WPVR Premium
If you have more questions regarding virtual tours or if you find any particular topic regarding virtual tours was missed in this article, feel free to let us know in the comments section.
Whether you sell properties, own a hotel or restaurant, or simply have a corporate business, having a quality virtual tour will help you to attract more relevant visitors to your site, make your prospects stay longer on your website, and create instant interest in prospects to make a decision.
So, it’s highly convenient for you to be able to create a virtual tour without any complications and within the budget.
Let’s look at the steps on how to make a virtual tour with iPhone.
When creating a virtual tour, you will go through 3 quick processes:
Capture Panoramic Images Using An iPhone Panorama App.
Turn Those Panoramic Photos Into Virtual Tours Easily Using WPVR.
Use This Virtual Tour On Your Site And Attract More Prospects.
Follow the quick steps below to carry out these processes easily.
1. Take Panorama On iPhone – Using An App
To capture a panoramic image with your iPhone, you need to use a VR app that is dedicated to capturing panoramas.
This app will assist you to capture a wide-angle panoramic image of your surroundings, which is difficult to do on your own.
You may try out the following two iPhone panorama apps in the Apple Store:
DMD Panorama
Virtual Tours & Panoramas: P360
Both of them are suitable iPhone panorama apps with useful features and have a user-friendly interface. But we recommend DMD Panorama app as it’s easier to use. Additionally, for those concerned with online privacy while uploading and sharing your virtual tours, using a service to hide IP can provide an extra layer of security, ensuring that your internet activity remains confidential.
On your app, you will find two markers. Match the markers and capture, and one section is captured. You’ll then get a new pair of markers to the left. Rotate the phone to the left to match these two markers and capture them again. Continue the same process.
Keep the phone steady and do not tilt the phone too much when doing this.
Step 5 – Continue Till Your Panorama Is Captured
Follow this process until all angles have been captured and the app starts processing the panoramic image.
And that’s it. Your panoramic image will be generated.
FYI – The panoramic image you capture using your iPhone panorama app is often referred to as a partial panorama. That’s because it is rather a 180-degree panorama.
But no worries – I will show you how you can use this image to create an engaging virtual tour.
Here’s a video to show the app in action:
As you can see, it’s really simple and if done right, your panoramic image will be as good as a professionally captured panorama photo.
Now that you have captured the required panoramic image, it’s time to create a virtual tour.
2. Turn Your Panorama Into A Virtual Tour Easily Using WPVR
Once you have captured the panoramic images, the next step is to use a reliable virtual tour builder to convert this panoramic image into a virtual tour.
WPVR is currently the most popular and stable plugin for creating virtual tours on WordPress websites.
In the next few steps, you will get a guide to turning your panoramic image into a fully-functional virtual tour.
5 Steps To Convert A Partial Panorama Into A Virtual Tour
The first thing to do is to install and activate the plugin, WPVR on your WordPress site.
Once you have WPVR on your site, follow the steps below to turn your panoramic image into a virtual tour.
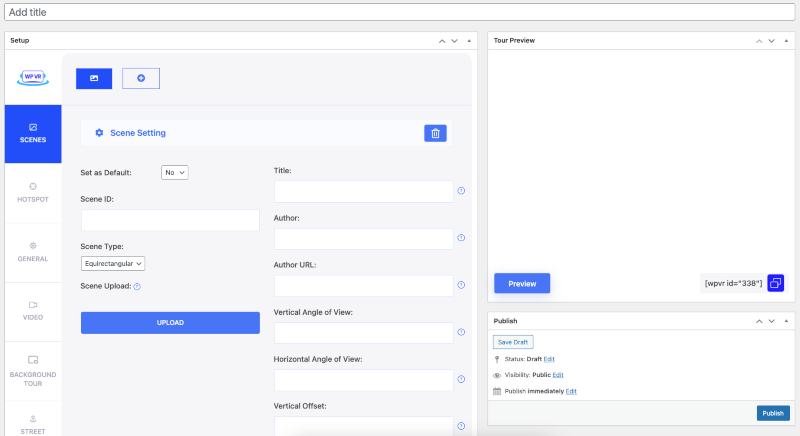
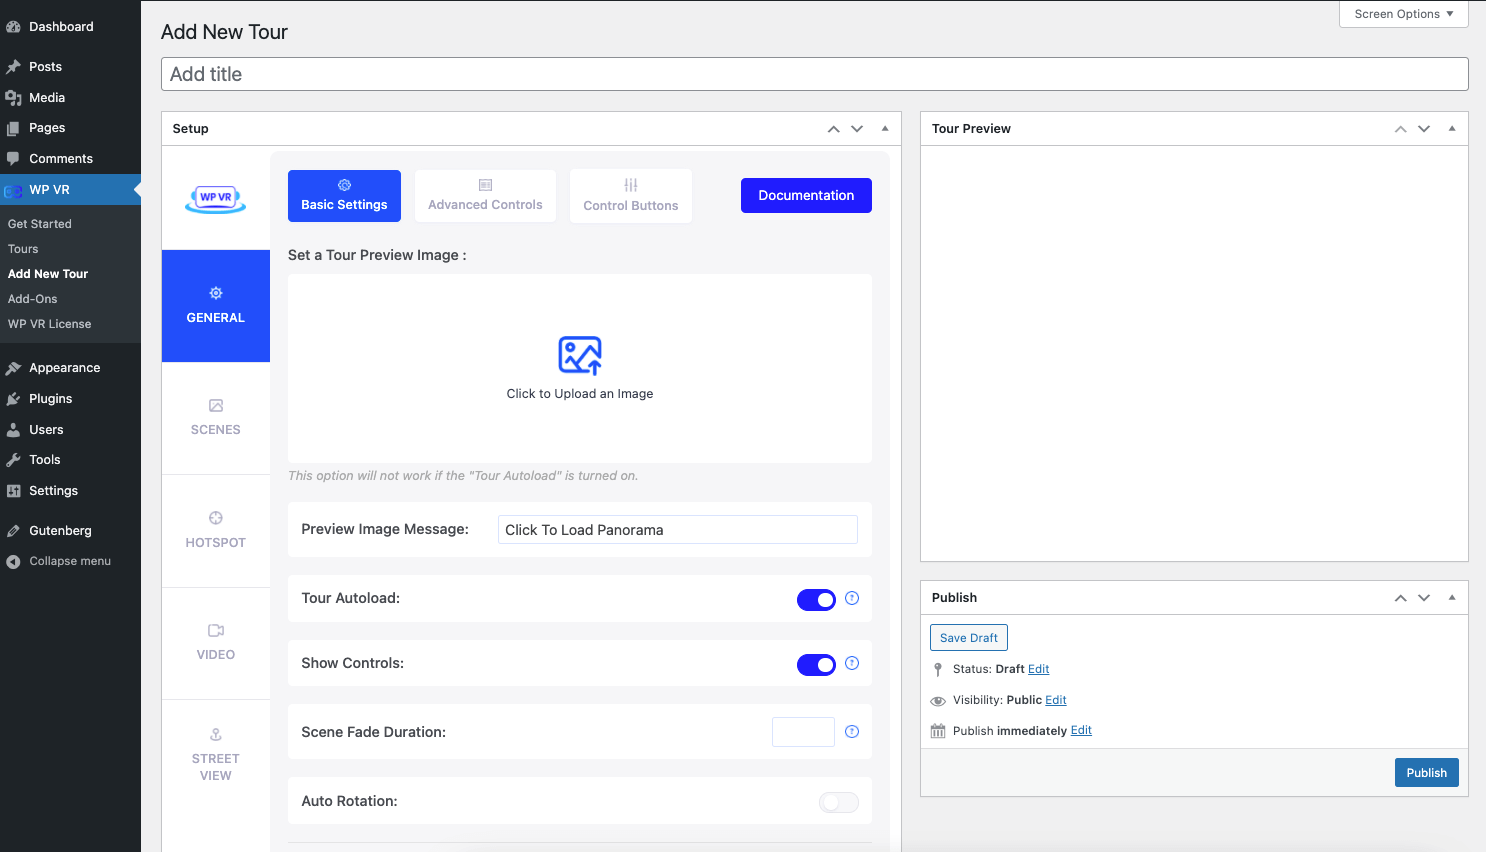
Step 1 – Create A New Tour
Go to your WordPress Dashboard > WP VR and click on Add New Tour. It will take you to the tour creation page.
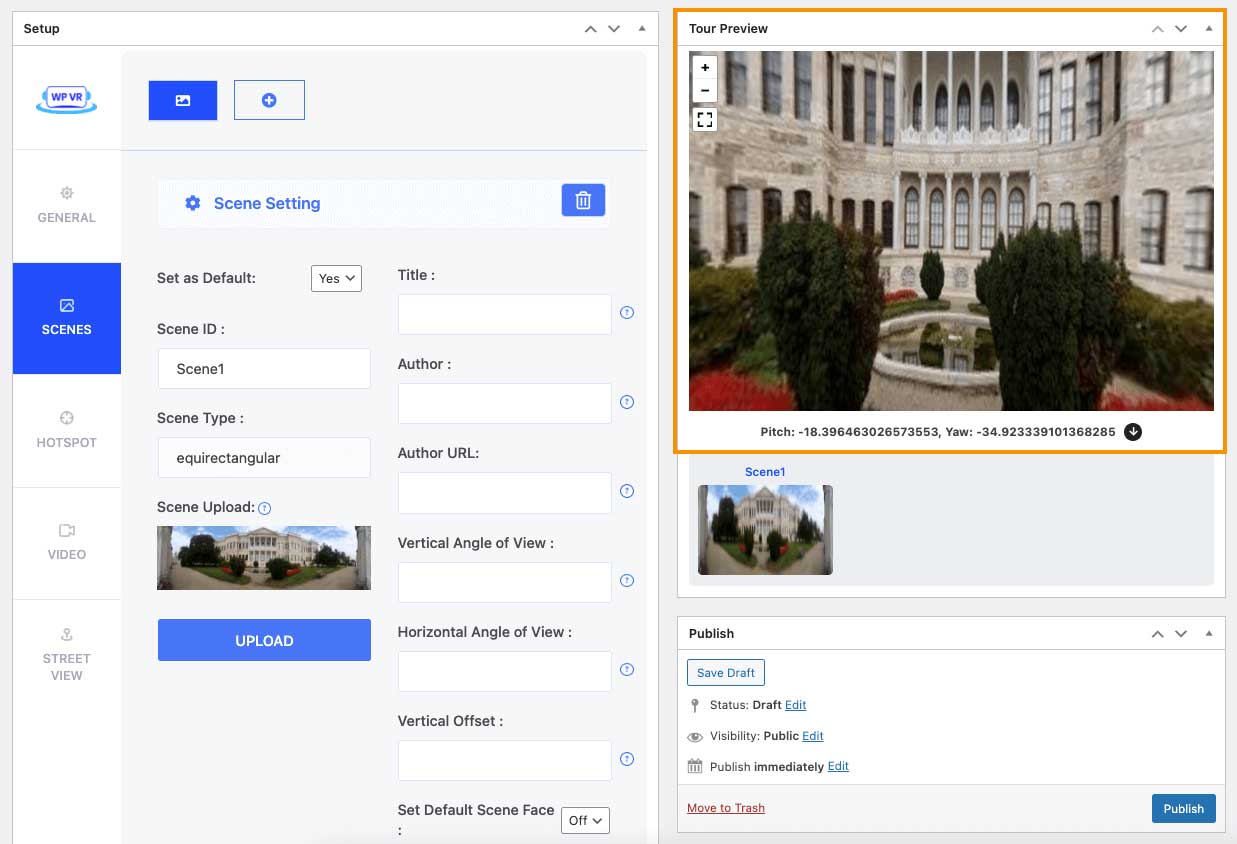
Step 2 – Upload And Preview Your Panoramic Image To The Plugin
i. First give a title to the tour.
ii. Then go to the Scenes tab.
iii. Set this scene as the Default scene.
iv. Assign a unique Scene ID.
v. Click on the blue Upload button and upload the panoramic image you had captured with your iPhone.
vi. Now scroll down to the bottom and click on the Preview button.
A preview of your scene will appear on the Tour Preview section on the right side.
Step 3 – Optimize The Tour For Partial Panorama
Once you preview the tour, you’ll notice that the virtual tour is not proper; the image is overly stretched out than what is expected.
This is because a partial panorama does not cover a full 360 view. You need to make some small adjustments to make it proper. Let me show you how.
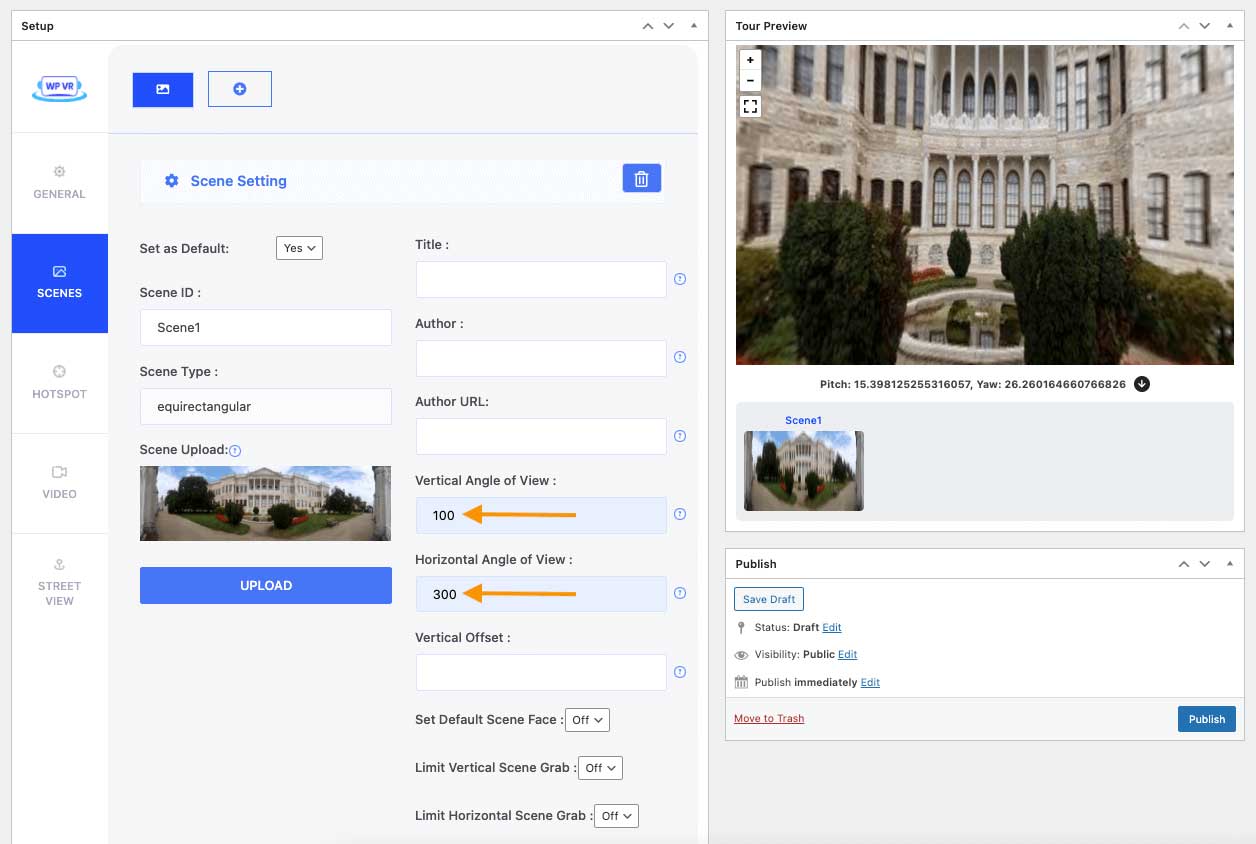
i. Use the following settings in the plugin:
In the Vertical Angle of View field, set the value as 100.
In the Horizontal Angle of View field, set the value as 300 degrees.
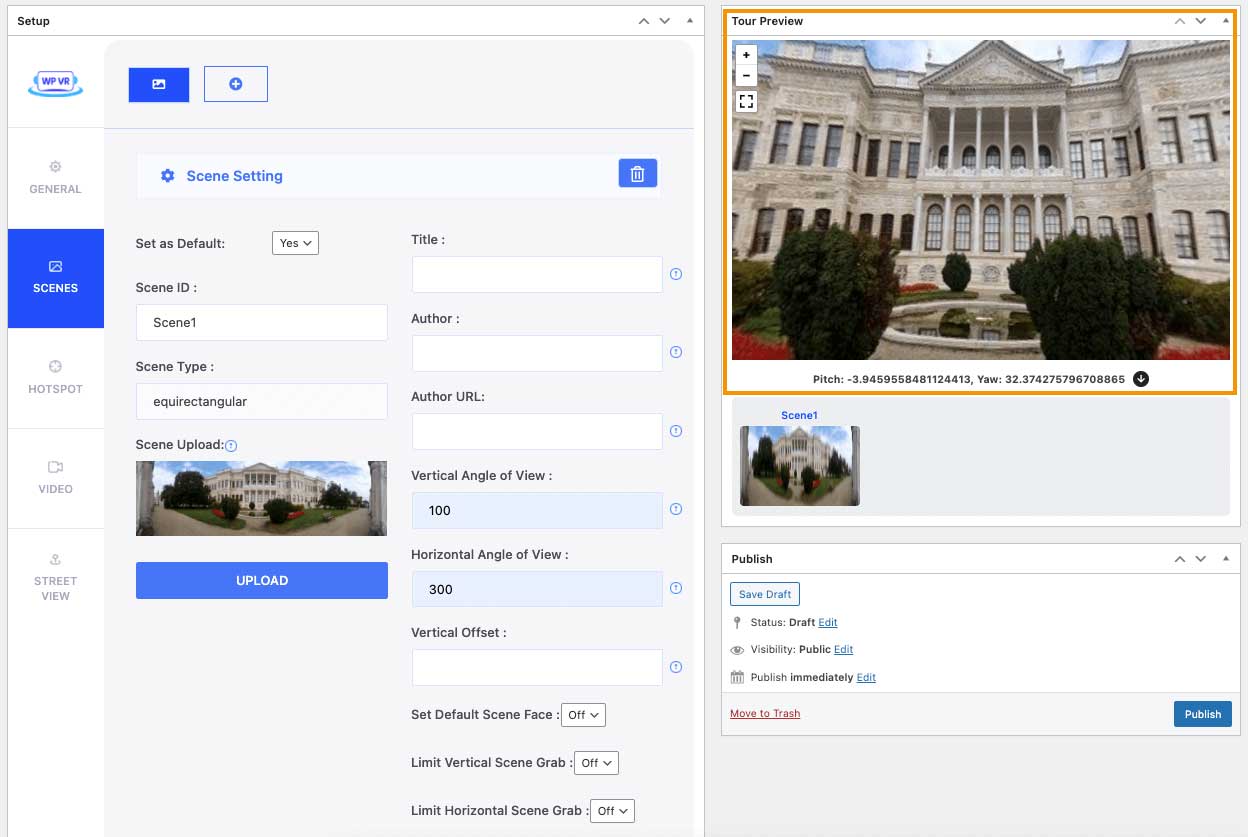
ii. Now, scroll down and click on the Preview button.
**The values of Horizontal & Vertical Angle of Views will be different depending on the dimensions of each individual panoramic image. So sometimes you have to play around with the numbers and preview a few times until you find the right angle.
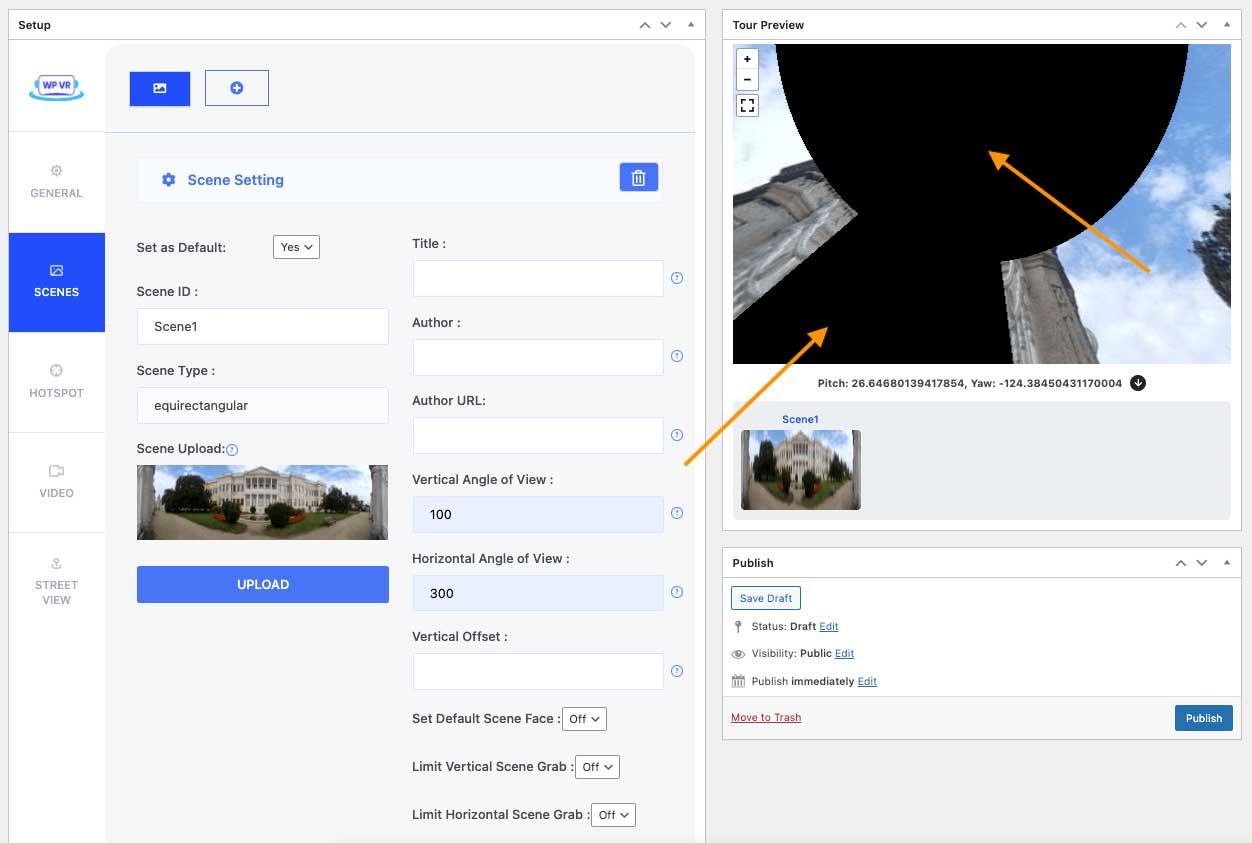
However, when you move around in the virtual tour, you’ll find that there are now some blank spaces in the tour view as shown in the image below.
These are there because of the custom angle of views we’ve applied. Let’s fix them.
We will apply the following advanced settings to this scene in the next few steps:
Limit Vertical Scene Grab.
Limit Horizontal Scene Grab.
Customize Scene Zoom.
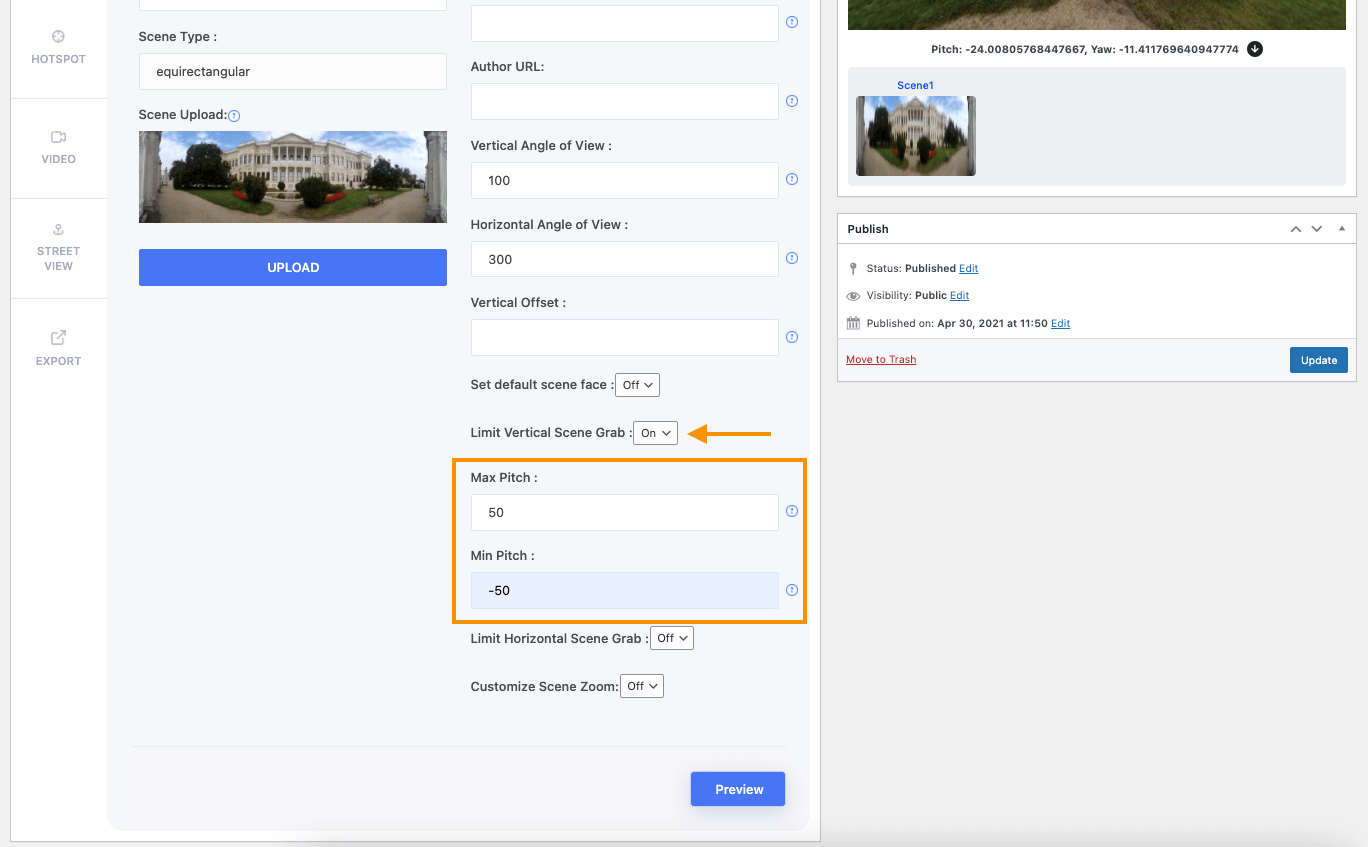
Sep 4 – Set A Vertical Grab Limitation To The Tour
i. Scroll down and turn on the Limit Vertical Scene Grab option.
ii. You’ll find 2 new fields, Max Pitch and Min Pitch. These 2 fields will help you to restrict the view of the dark sections of the virtual tour vertically.
iii. Since the Vertical Angle of view is set to 100 degrees, the ideal value of the Max Pitch would be 50 and the ideal value of the Min Pitch would be -50.
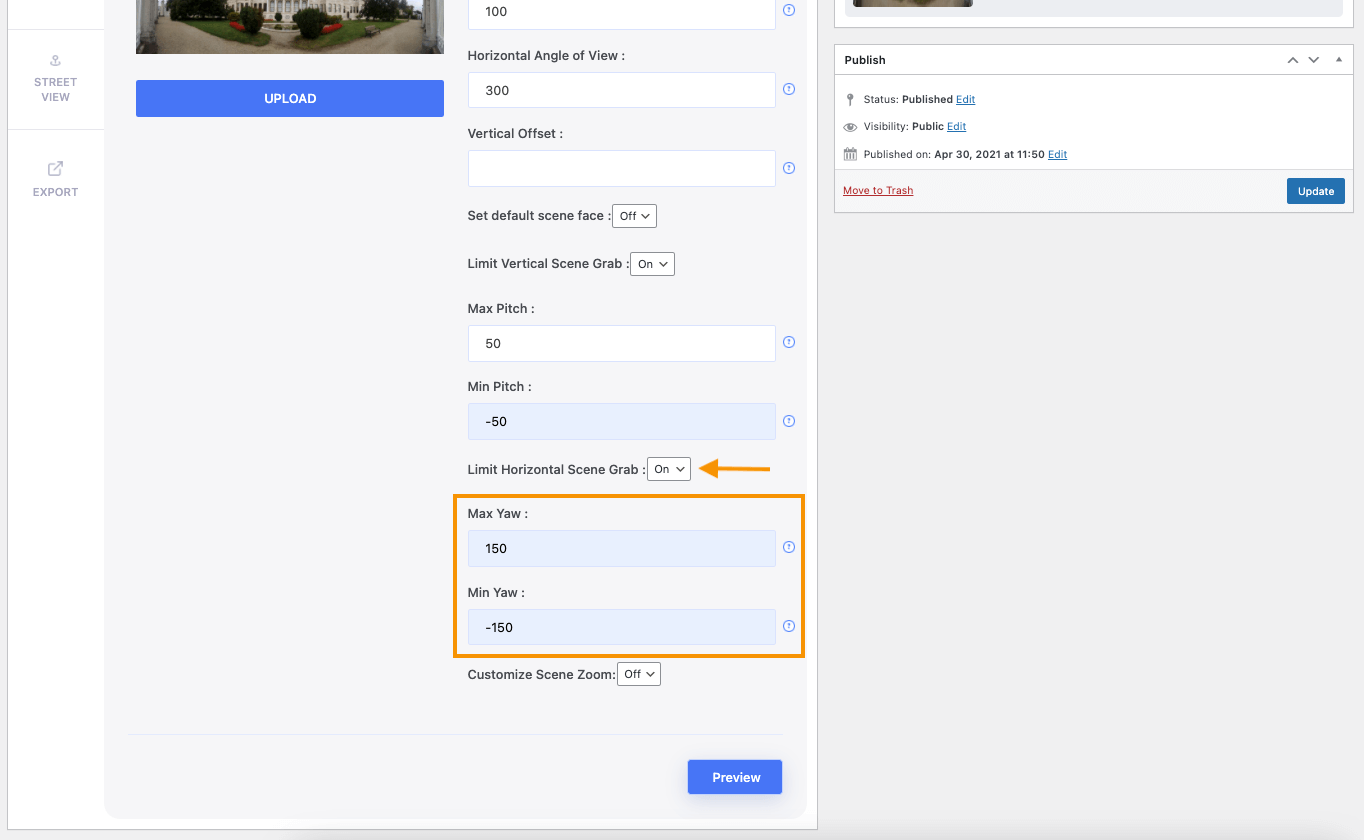
Sep 5 – Use A Horizontal Grab Limitation To The Tour
i. Turn on the Limit Horizontal Scene Grab option.
ii. You’ll find 2 new options, Max Yaw and Min Yaw. These 2 fields will help you to restrict the view of the dark sections of the virtual tour horizontally.
iii. Since the Horizontal Angle of view is 300 degrees, the ideal value of the Max Yaw would be 150 and the ideal value of the Min Yaw would be -50.
iv. Click on Preview and check out the output. You will see that the black spaces are no longer accessible.
That’s it. You have created a virtual tour using the panoramic image that you captured using your iPhone. You can then Publish the tour and use it on your website.
You may also add more scenes to the tour if you have captured multiple panoramas, and connect them via hotspots to make the virtual tour more realistic and engaging.
Now, before I show you how you can publish the tour on your site, I would like to give you a few tips to customize this virtual tour and make it even better for greater results.
Tips To Customize Your Virtual Tour Into An Attractive Experience
Let’s look at how you can use different features of WPVR to make it more interactive.
i. Add A Scene Gallery
If you’ve created the tour using multiple images, you can activate a scene gallery on your tour.
This will allow a visitor to get a quick glance at the available scenes in the virtual tour, and visit any desired scenes by double-clicking on the image from the gallery.
Now you know, how to make a virtual tour with iPhone Panorama and WPVR. And the best part of it is that it will not cost you a fortune, while still giving you the opportunity to increase your revenue.
Now that you know the easiest way to create a virtual tour, go ahead, and start using virtual tours to grow your business.
Trick or Treat! The spooky Halloween season is here.
Halloween is currently the fourth most lucrative holiday for WooCommerce businesses, after Christmas, Thanksgiving, and Easter.
It’s an event that WooCommerce entrepreneurs cannot afford to ignore.
During Halloween, it is expected to get huge online sales, especially in the last 3 days till Halloween, as people are making last-minute preparations. And you can get huge sales if you do it right.
The first thing to do is give your buyers a Halloween festive feeling as soon as they come to your site. Along with that, little customizations to create engagements can take your store a long way.
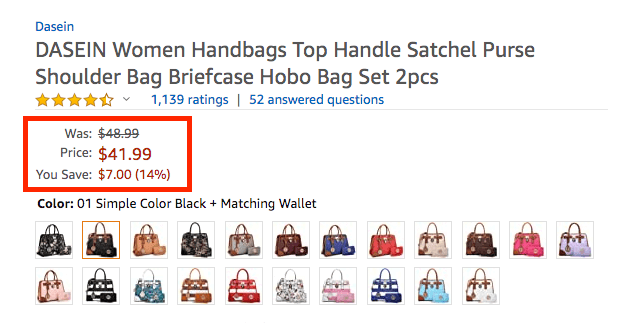
You must specifically focus on customizing product pages to grab the buyers’ attention such as changing Add to Cart button text, or by adding an on-page offer, etc.
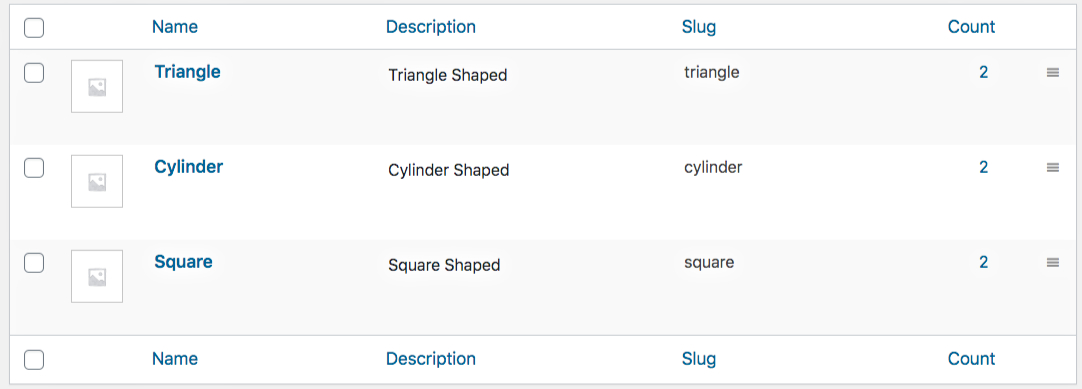
A more simple but effective way to attract buyers is to use beautiful image variation swatches to present product variations.
Today you will learn how you can present different types of Halloween products in an attractive way using variation swatches on the product page and possibly, get higher engagements.
Special Halloween Variation Swatches Ideas You Can Use
People love to decorate their homes during Halloween and naturally, decorative sell the most during this time. But besides that, people are also fond of t-shirts, masks, candies, costumes, and many other Halloween items.
If you do sell some of these products, it’s best to make sure your buyers know all about your offers in the most simple way possible, while still getting the Halloween vibes.
I’m not talking about a costly re-design of your website. Rather than making your Halloween offers easier to redeem, and adding simple visuals such as variations swatches can catch the eye of the buyers during Halloween.
Here’s a quick Actionable Tip
You might often think that adding tons of Halloween products will attract more buyers. But that is not really the best concept.
The best way to sell more is to tell your buyers about all the products and offers you have for Halloween, as soon as possible.
The easier they find to buy your products the better.
One way to make it happen is, rather than posting multiple products of the same type, add them as variants.
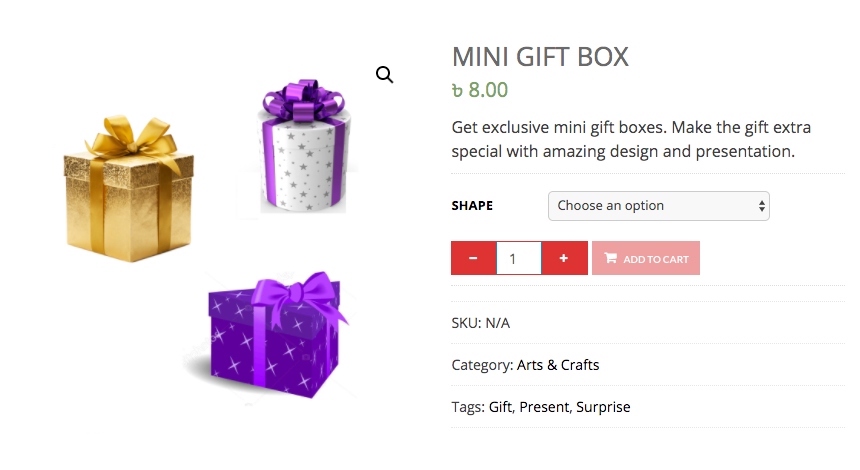
For example, if you sell Masks in different shapes, simply create one variable product called, let’s say, ‘Spooky Halloween Masks’ in WooCommerce, and add the different types of masks as the variants.
That way, people will be able to choose the masks from one place and make a faster purchase decision, rather than spending a long time through the shop when browsing different masks from the shop page.
You can do the same for costumes in different patterns, candies in different shapes, lanterns in if various shapes and colors, and even t-shirts.
Let us look at how you can use cool icons as variation swatches for common Halloween products.
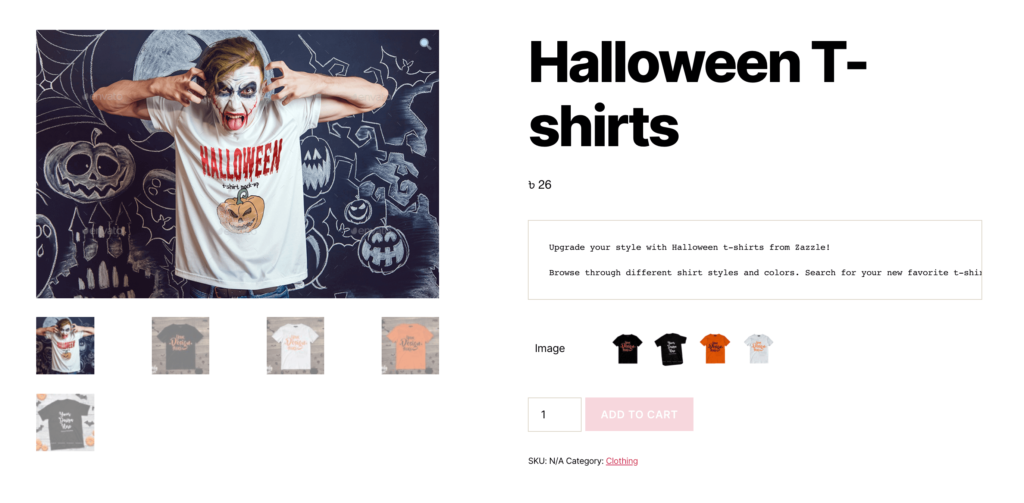
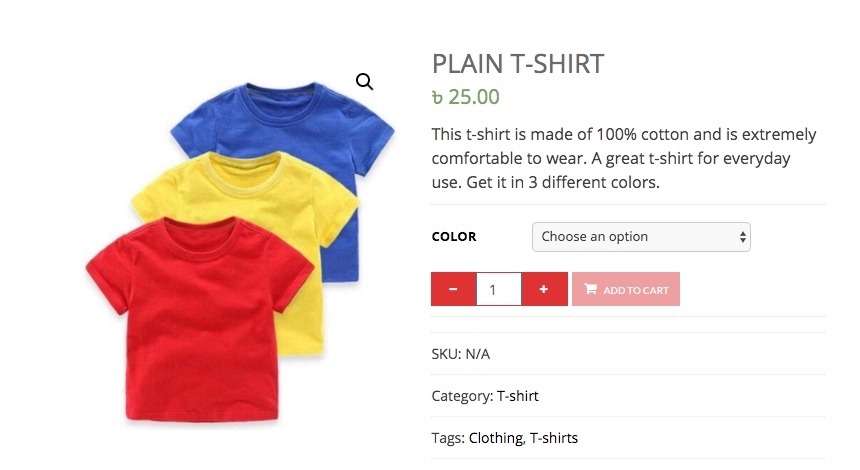
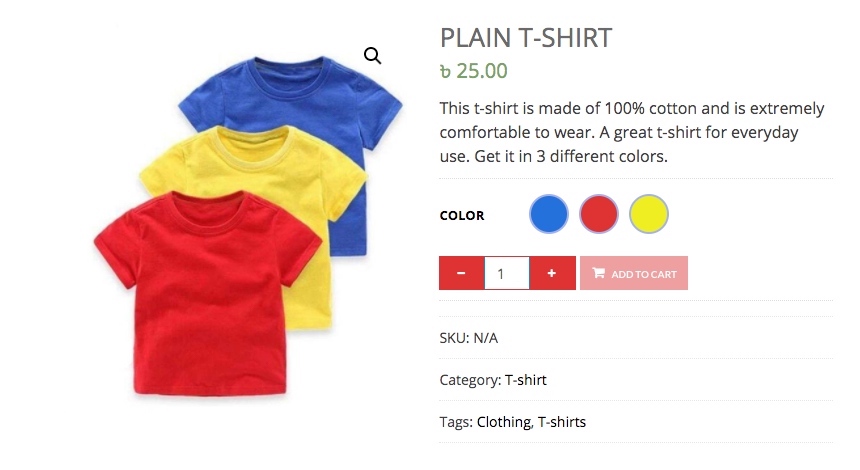
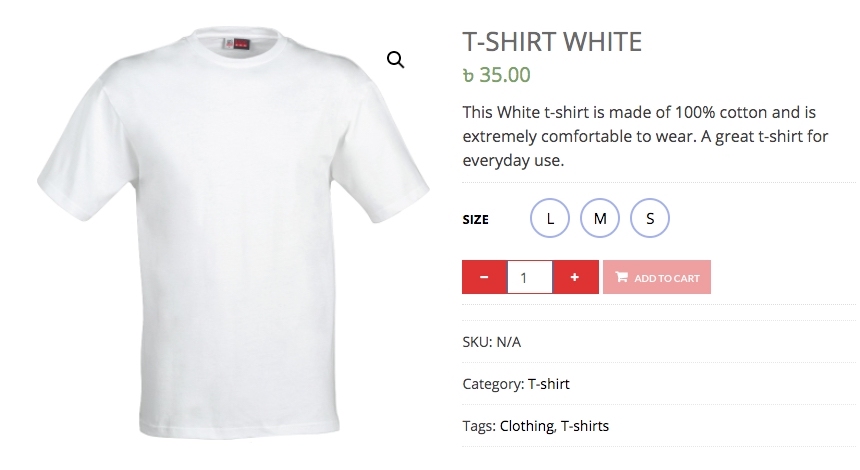
Catchy T-shirt Icon Variation Swatches
For t-shirts that are available in various colors, you can present the option to choose the colors using attractive image swatches.
This can be a great attraction around a holiday to the buyers and they will know which colors are available for that design.
For example, a Halloween themed t-shirt might come in several colors. So using colored image swatches of t-shirts is a great way to grab the buyer’s attention.
As you can see above, you can specify the available colors for this t-shirt and make it look charming using tiny image swatches.
This will often get buyers curious to click and choose multiple colors of the same t-shirt, even if they did not intend to in the first place.
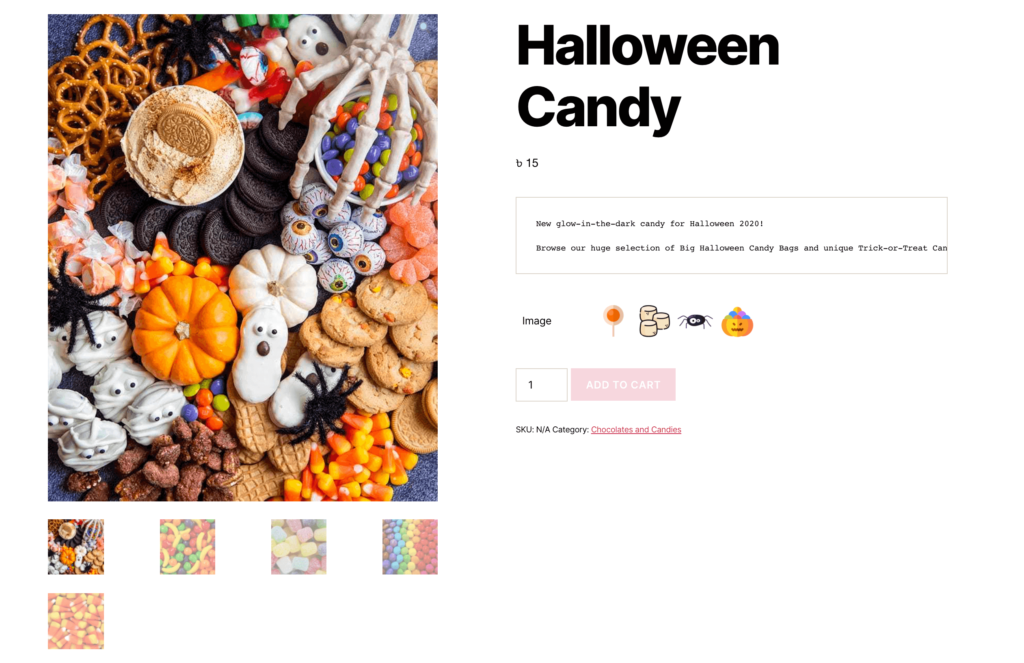
Delicious Fancy Candy Swatches
Candies are the most desirable delicacy during Halloweens and kids get well dressed in costumes to collect candies in the neighborhood. So you can expect to get a lot of orders for various candies.
And you can offer your candies in an exciting way using tiny candy icons.
The idea is to put up different shaped candies as variants and present them using attractive variation swatches on your WooCommerce store.
This will work really well especially if you have fancy candies that are prepared and shaped just for Halloween.
For example, you can use image variation swatches such as a spider icon to represent spider-shaped candy, and pumpkin icons to represent pumpkin face candies, and so on.
The swatches will let the buyers know that you have all the Halloween candies they were looking for and will surely help to trigger more sales.
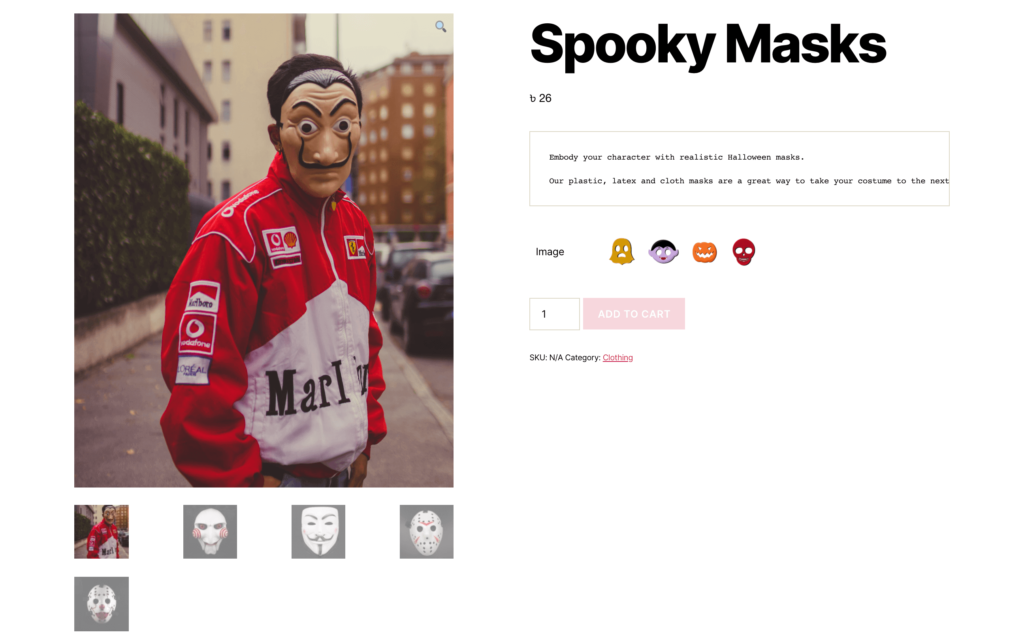
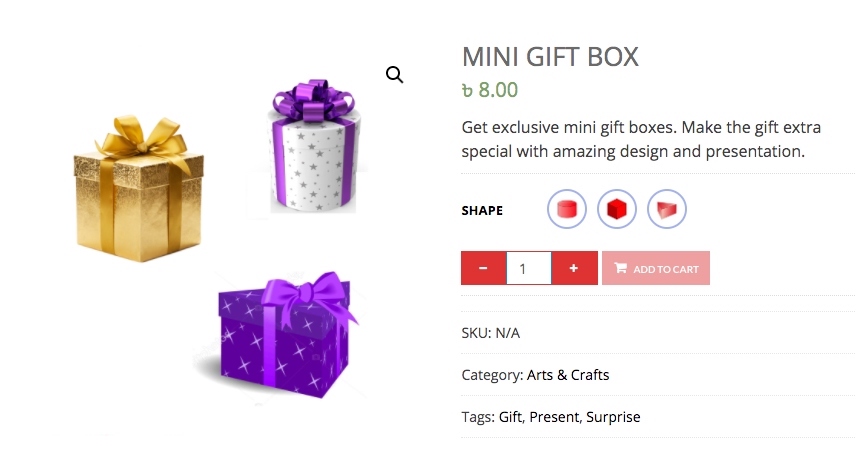
Spooky Mask Image Swatches
Costumes are in high demand during Halloween, so naturally, they are a bit expensive during the occasion. So many rather buy scary masks along with Halloween t-shirts.
If you are an online clothing store or costume store, I am expecting that you will consider stocking up Scary Masks to sell at least during Halloween.
And to get people excited about the different masks you have, you can present the variants using mask icons.
For instance, if your store is selling V-killer venomed masks this year, make sure to include a gallery with the different types of killer masks you have in stock.
And spice it up a little more with tiny mask icons to choose the shapes. This might seem like small customization, but it will help to make the buyer more curious about what they might get.
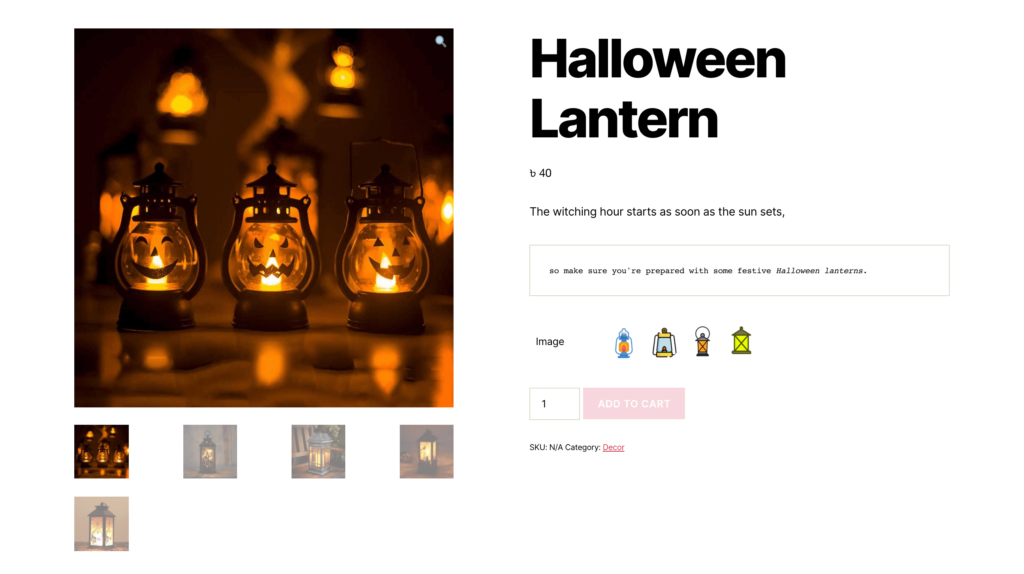
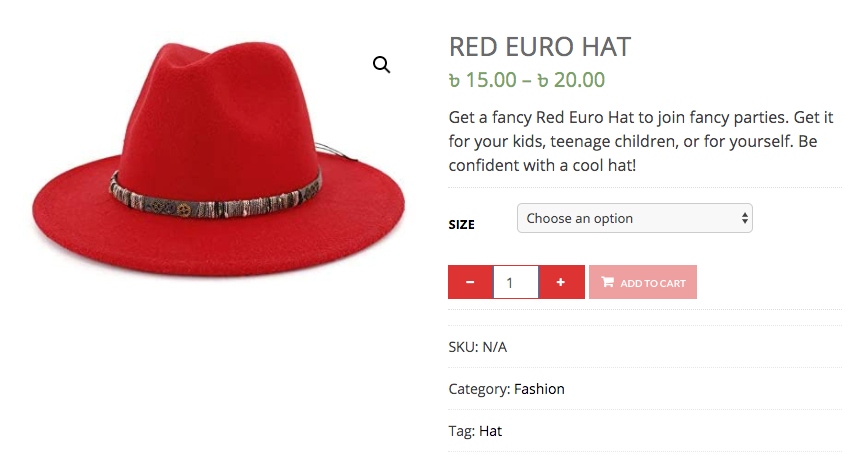
Haunting Lantern Icons To Choose From
On Halloween, the witching hour starts as soon as the sun sets, so people love to decorate the house with some festive lanterns.
If you do sell lanterns, get various lantern icons to use as variation swatches and offer the buyers the different shapes and colors you can deliver.
Normally, images for lanterns look amazing. But the dull dropdown selection on default WooCommerce doesn’t look too appealing.
You can see in the image above, the small image swatches of the lanterns look much more festive for Halloween.
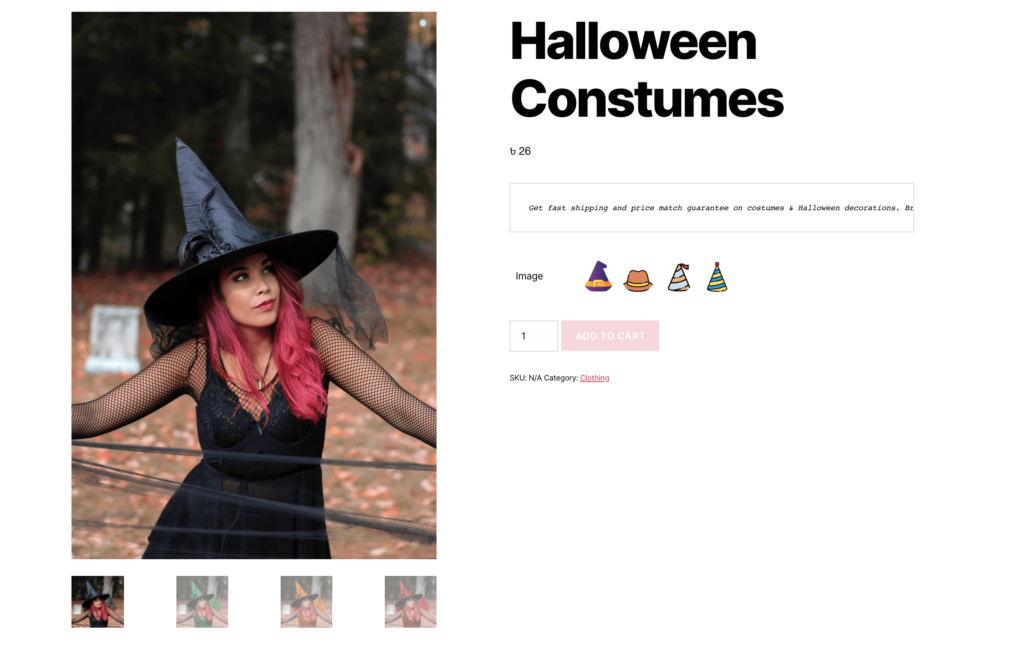
Witch Hats In Various Spooky Patterns
As I said, costumes have high demand during Halloween, and witch hats are among the most popular ones that girls and ladies love to wear at Halloween parties.
Offer witch hats in various patterns using relative image swatches on the product page.
Clicking on the icons will display the hats in that pattern. A great way to engage with interested buyers.
How To Find Halloween Icons For Variation Swatches
So far you just saw how it will look with variation swatches, but how will you get those icons?
It’s best to use images or icons that are relative to the product itself when using image variation swatches.
I only showed you examples of 5 products, but there are tons of other products, and preparing custom swatches might be a hassle. Rather you can find these icons or vector images to use as Halloween variation swatches easily.
Here is a list of sites where you can collect your desired icons or images in high quality, and most often, for free.
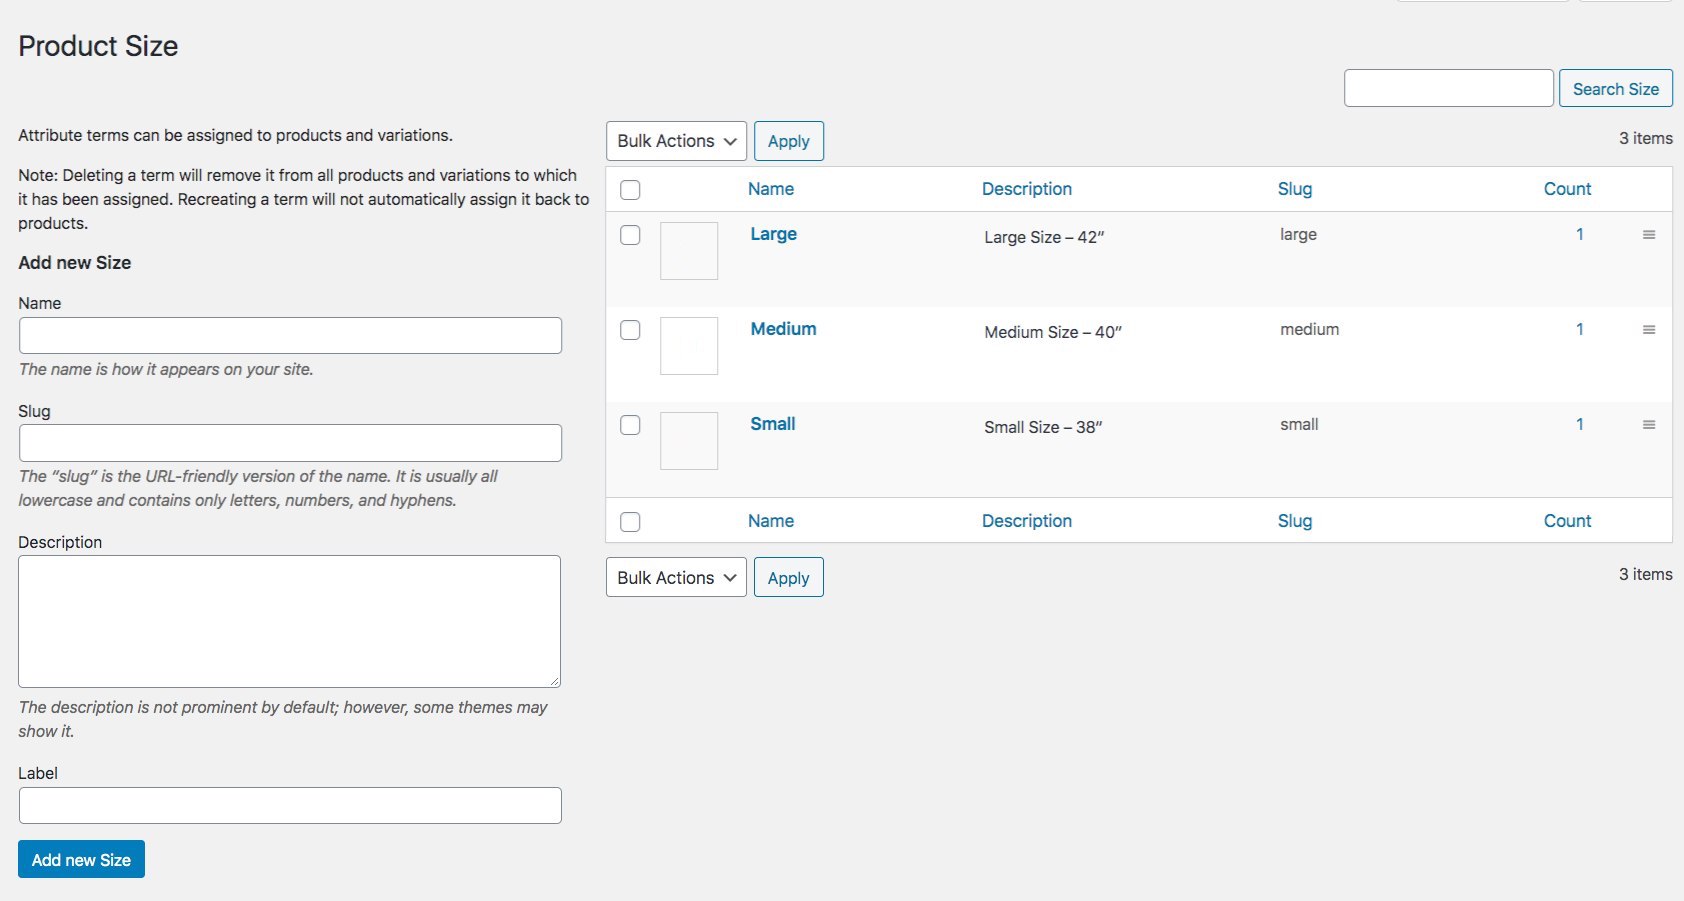
Adding variation swatches is really easy in WooCommerce.
Simply use the plugin Variation Swatches for WooCommerce, and in just a few minutes, you can set up image swatches for product variants.
This is probably the smallest customization you can make, for a great advantage in increasing your sales.
Moreover, you are able to do it without any extra cost. So go ahead and start using smart variation swatches to boost your Halloween sales.
Schlussbemerkungen
Special occasions should always be considered a great opportunity for any WooCommerce store to increase sales, and Halloween is one of the biggest occasions there.
So it’s best to find unique ideas to boost your Halloween sales, and using smart image variation swatches can be a great way to attract more buyers.
There are many more unique techniques you can use to make your Halloween more profitable. Here is an actionable guide you can follow to successfully sell more products during Halloween:
Nowadays, cloud service is way more convenient rather than using shared or dedicated hosting servers. With data centers situated all over the world, cloud services ensure your constant uptime and superfast data transfer rate with the ultimate data backup solution.
Here, you will learn why you should use cloud services and the basic structure of cloud computing.
You will be able to get some key insights into
how cloud services are growing over the years,
public cloud adoption for enterprises, and
basic price comparison of the top cloud storage.
Take a look at the detailed infographic.
Key Take-Aways:
What Is Cloud Service?
Cloud services offer you a wide range of services over the internet, including cloud-based video conferencing. These services provide you easy & affordable access to your web applications and resources from almost any device without the need for any internal infrastructure or hardware.
Why Use Cloud Service?
Save money – Cloud storage offers you a pay-as-you-go service, through which you will only pay for the storage space you use, hence you can reduce your overall hosting costs significantly.
Increase page loading speed – Cloud storage optimizes your site data and serves from the super-fast web server, as a result, your site will be faster than ever.
Backup site data – Cloud copies your data into multiple locations and syncs your data as you make changes, hence if you accidentally delete files, or if one of the server crashes, your data will still be safe.
Maximum security for your sensitive data – Cloud providers offer you native security products such as WAF, DDoS protection, etc., which provide you the maximum security for your sensitive information.
Some Interesting Facts
53% of users leave a site that takes longer than three seconds to load
Faster pages result in a 16.5% increase in conversion rate
And you can overcome both of these issues by using a Cloud service!
Moreover, Cloud service can reduce your server costing by 37% over a three-year time period
Cloud Computing Structure
Cloud Deployment Types
Öffentlich
Private
Hybrid
Community
Cloud Service Models
SaaS
IaaS
PaaS
Cloud Service Providers
AWS S3
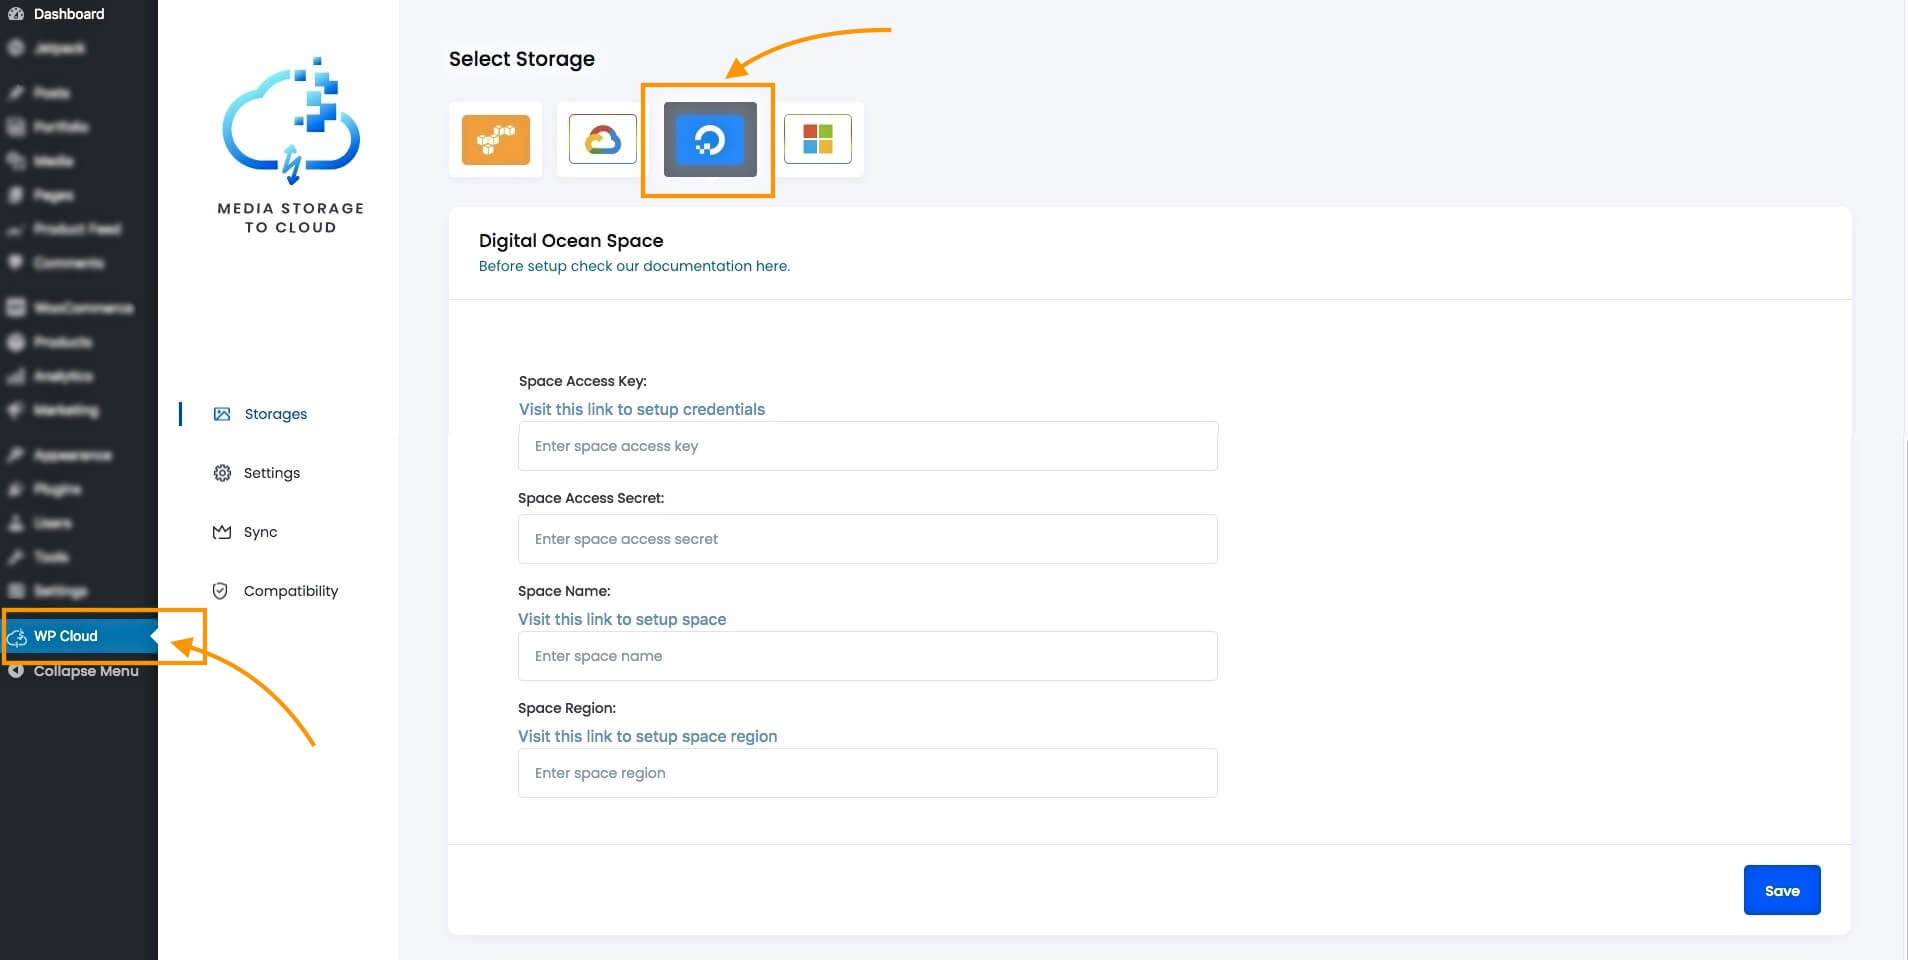
DO
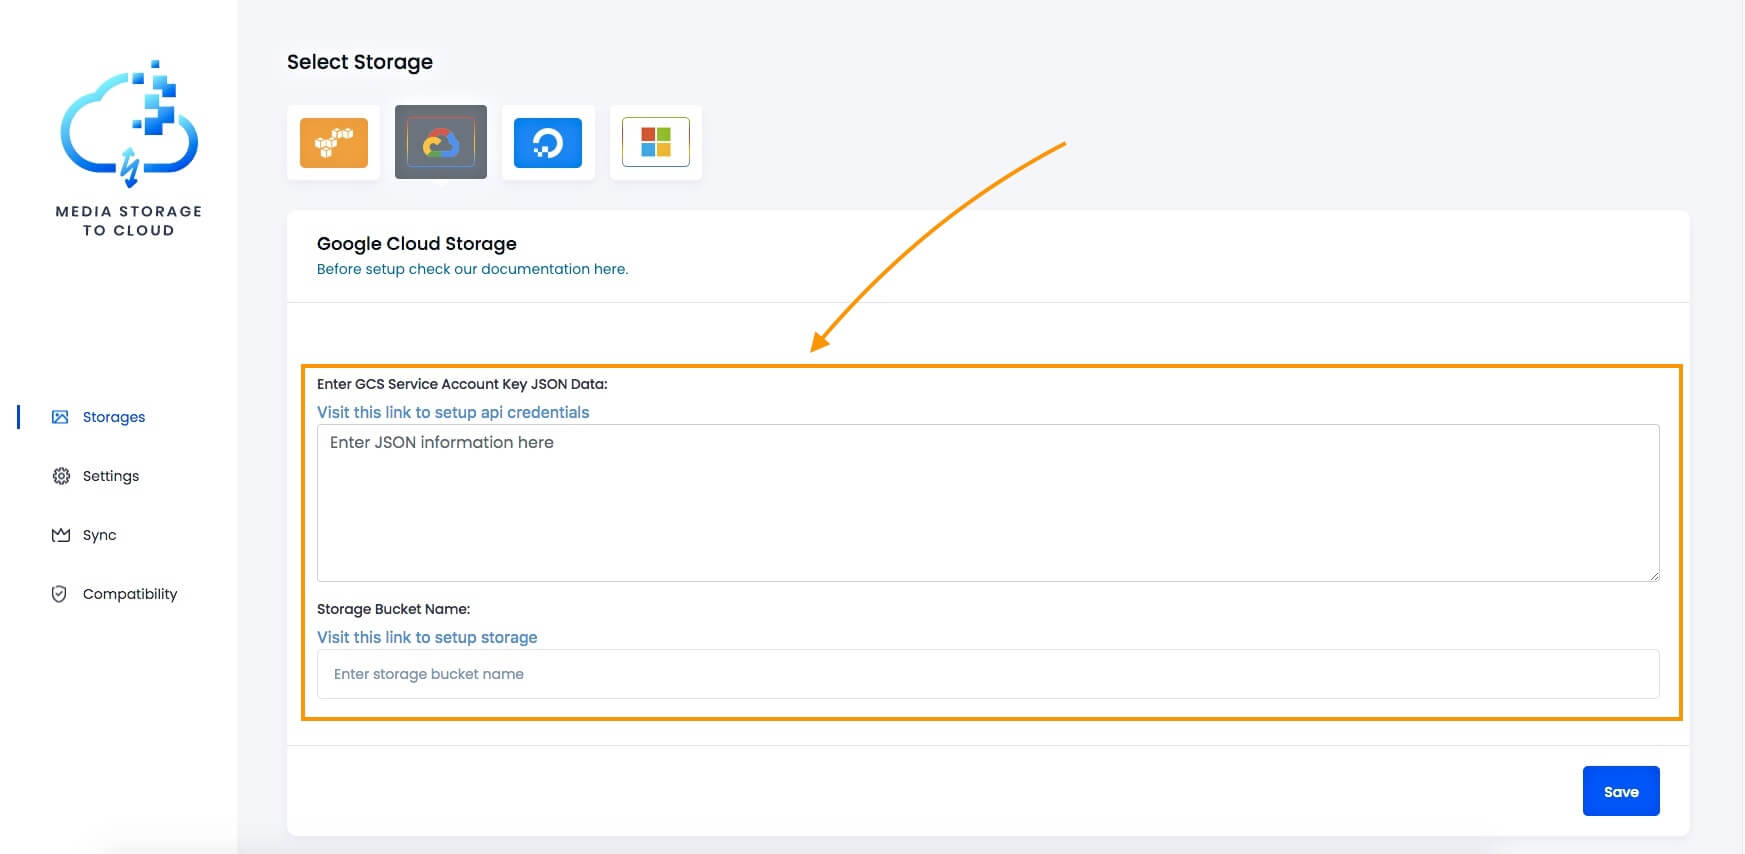
GCS
Azure
Cloud Deployment Types – The cloud deployment model is an infrastructure owned by a single business. It offers you a more controlled environment, through which you will have the access to the IT resources with a more centralized business model. This model can be built on external hosting or in-house.
The cloud deployment types are:
Öffentlich
Private
Hybrid
Community
Cloud Service Models – Cloud models serve different purposes based on various businesses. Also, they can interact with each other to form one comprehensive model of cloud computing.
Cloud models come in three types:
SaaS (Software as a Service),
IaaS (Infrastructure as a Service), and
PaaS (Platform as a Service).
Reliable Cloud Service Providers Among many cloud service providers, here are some of the most reliable ones:
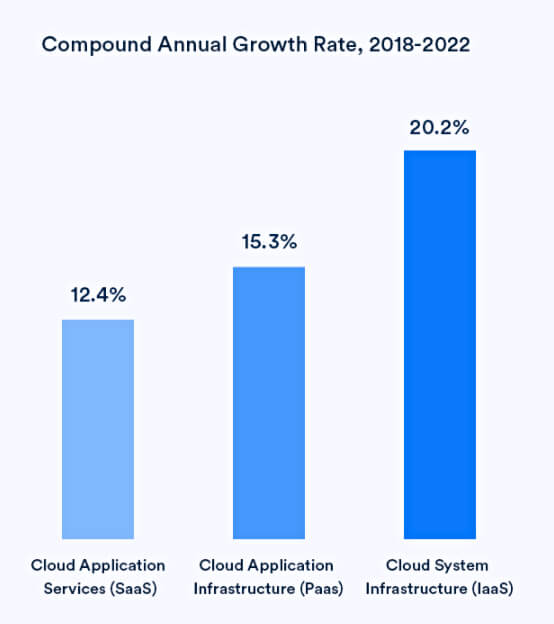
From this Comparing Compound Annual Growth Rates (CAGRs) graph, we can see the future forecast of the rapidly growing IaaS platform. In here, it is anticipated that by the end of the year 2022, Cloud System Infrastructure Services (IaaS) growth will be more than 20%.
Cost comparison between Amazon S3, Google Cloud Storage, Microsoft Azure and DigitalOcean
AWS Lightsail
Google Cloud
DigitalOcean
Azure
Memory
2
1.7
2
2
CPU
1 vCPU
1 vCPU
1 vCPU
1 vCPU
Storage
60 GB SSD
50 GB SSD
50 GB SSD
50 GB SSD
Monthly Price
$10/mo
$26.76/mo est
$10/mo
$28/mo
Here’s a basic price comparison chart for AWS, GCP DO and Microsoft Azure.
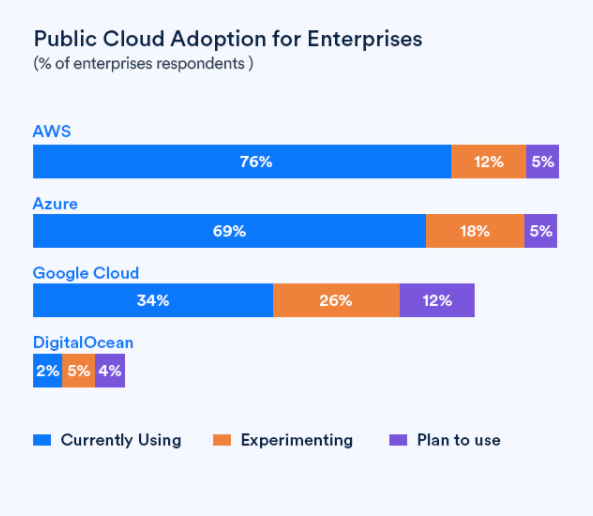
Public Cloud Adoption for Enterprises
From this Public Cloud Adoption for Enterprises graph, we can see that Microsoft Azure is closing the gap with AWS, followed by Google Cloud Platform. Although DigitalOcean is far behind, it’s trying to catch up fast.
Not every company will migrate to the cloud, not yet, but the way Cloud computing is advancing, the sooner you adopt Cloud service, the better your chances of staying ahead of your competitors.
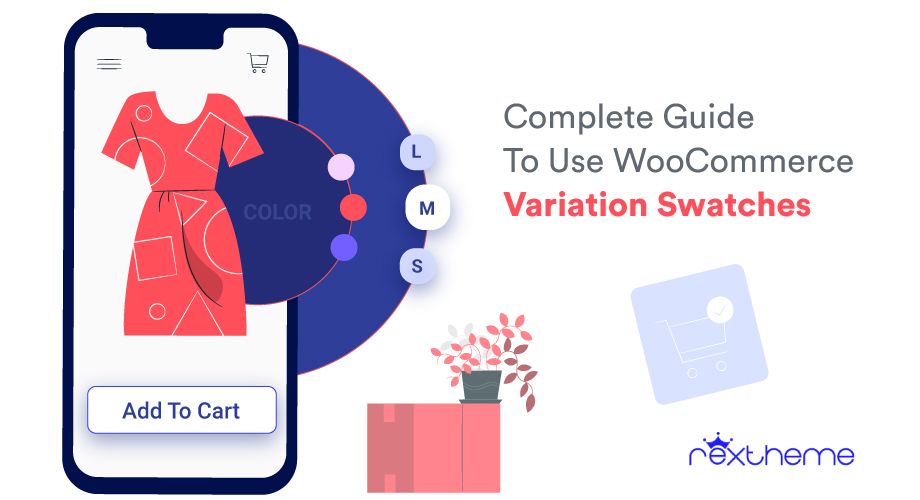
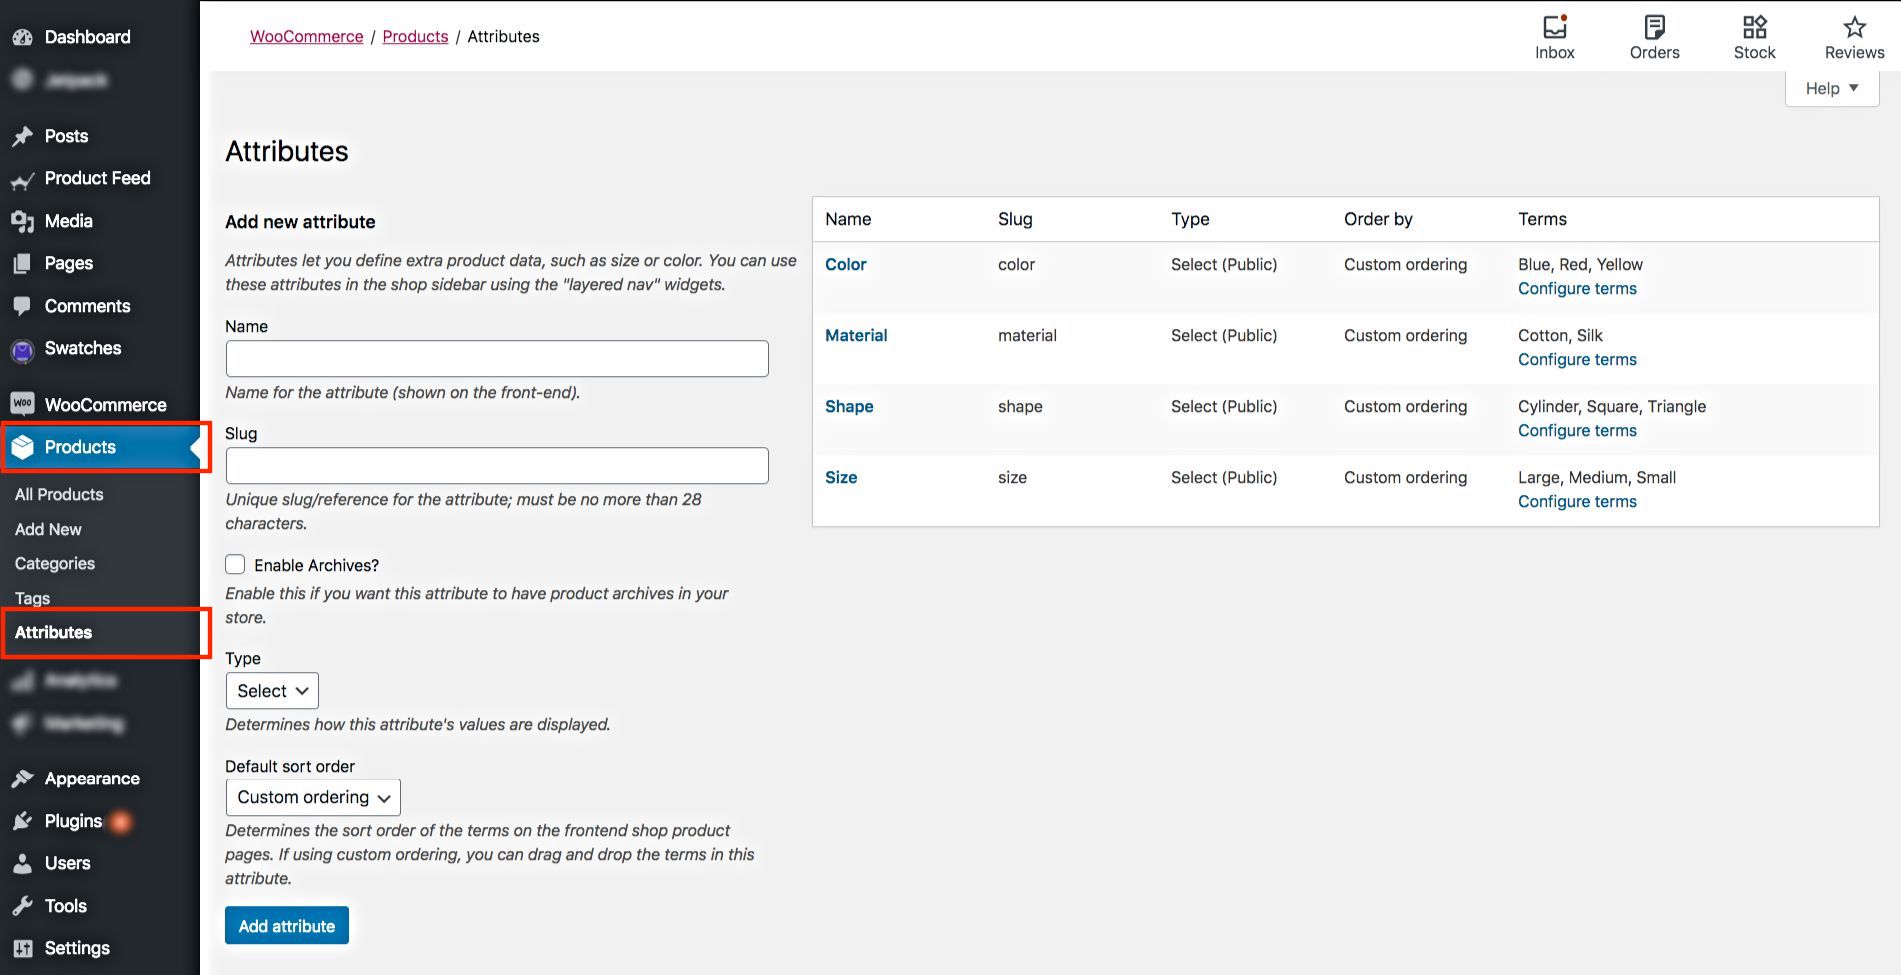
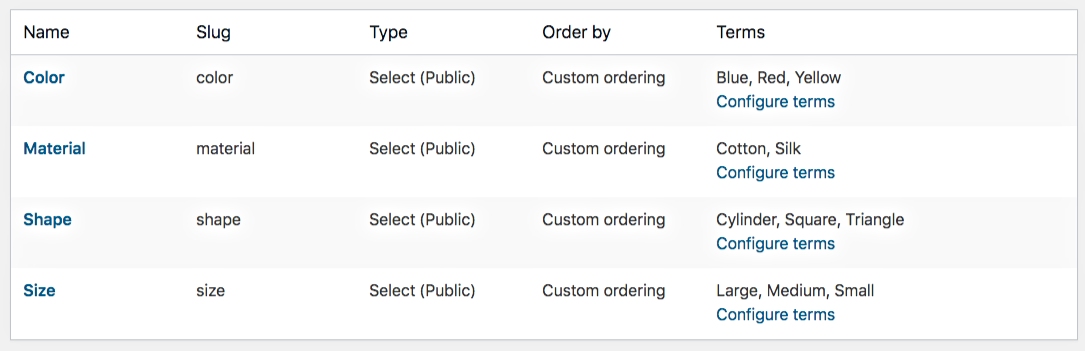
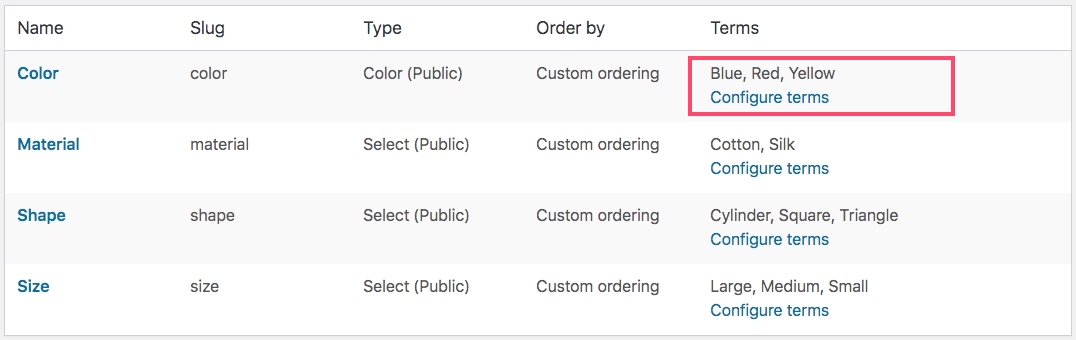
According to a global report, 31% of the current eCommerce market use WooCommerce. This indicates the fact that most successful businesses trust Woo to run their online stores.
You will find several ways to customize your store. However, a simple but effective way to attract buyers is to use smart variation button swatches to present the variants of the clothes you sell.
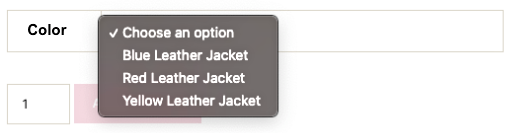
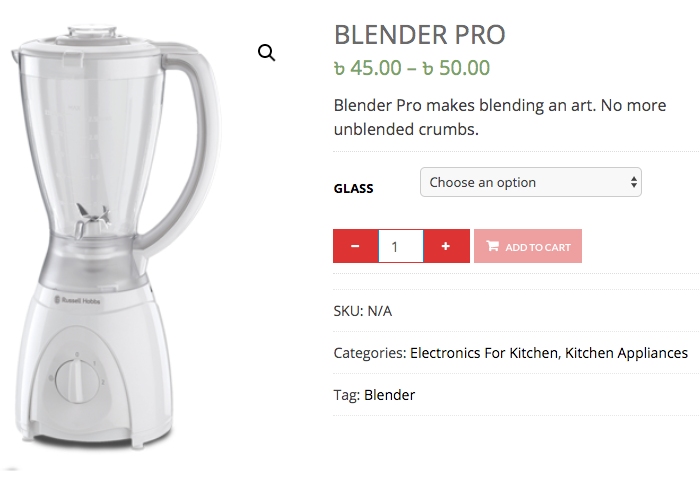
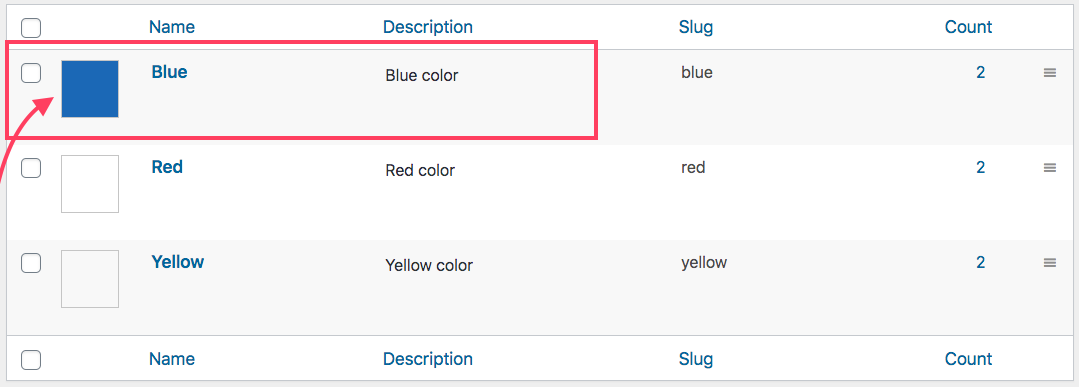
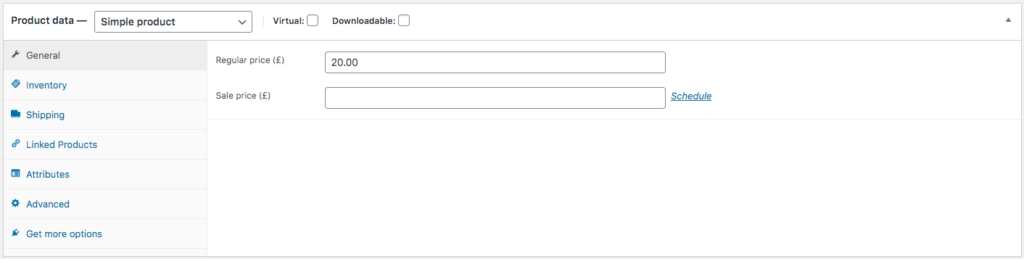
Suppose you sell a jacket that’s available in the colors Blue, Red, and Yellow.
In the default WooCommerce, these variants will appear in a dropdown menu on the product page.
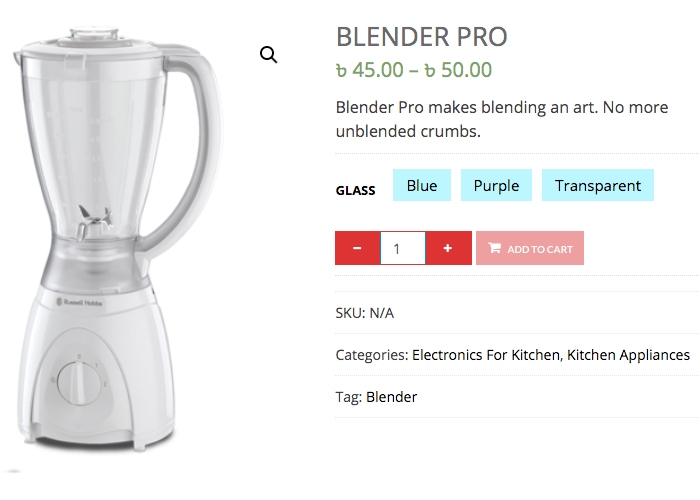
It would be much more engaging if a buyer could get a visual of all the available colors at a glance.
That’s precisely what you can achieve using Variation Swatches for WooCommerce.
Today you will look at how you can use variation swatches for WooCommerce on a clothing store — to help you deliver a better customer experience, — influence more buyers to choose a variant, — and help you boost sales.
Am Ende dieses Leitfadens werden Sie in der Lage sein
Learn Smart ways to use variation swatches for clothing products
Use a reliable tool to achieve this easily
Expect higher engagements from buyers, and possibly get more sales
Smart Use Of Variation Swatches For An Online Clothing Store
Most clothing products have common variants, such as size or colors. Some may have unique variations in terms of material, or collar type, etc.
If you use appropriate swatches for the right variant terms, buyers will be tempted to select one.
The idea is to let buyers know exactly what variants are available at a glance, in an attractive way.
Let us look at different scenarios where you can use proper variation swatches depending on the variant terms.
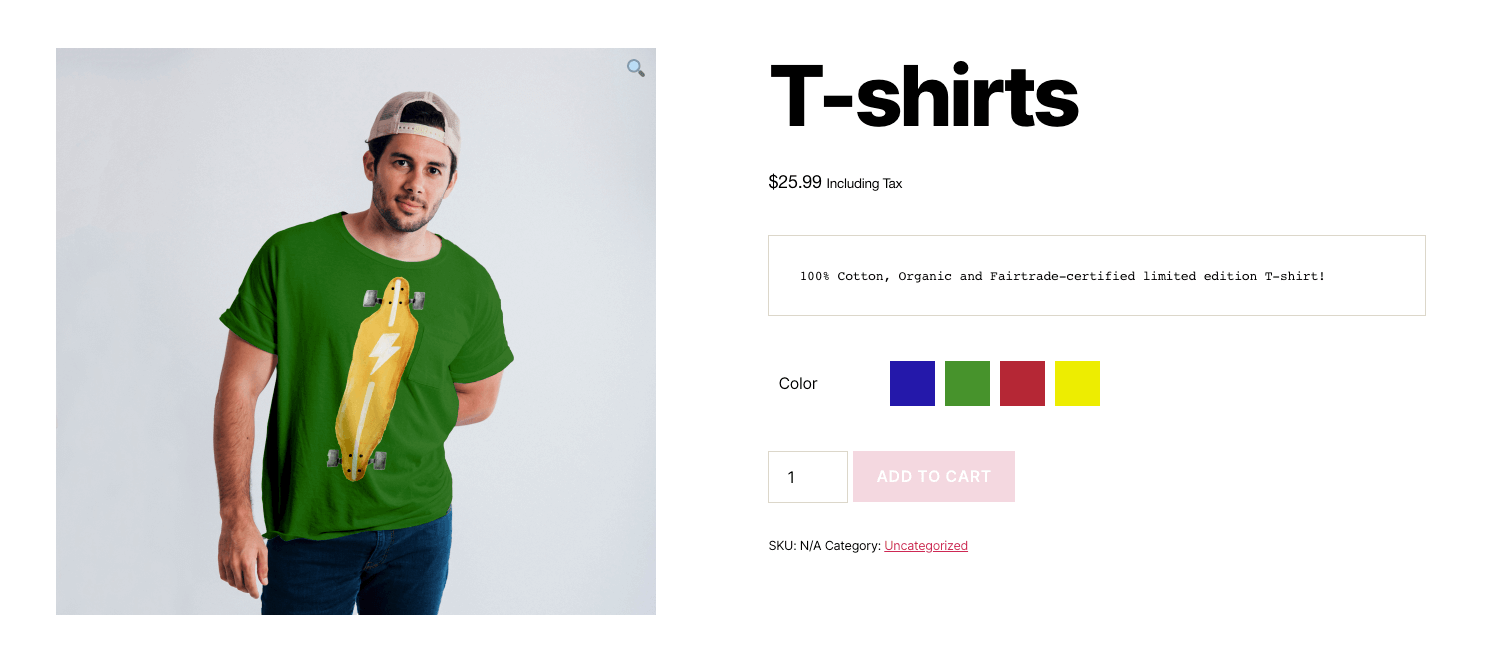
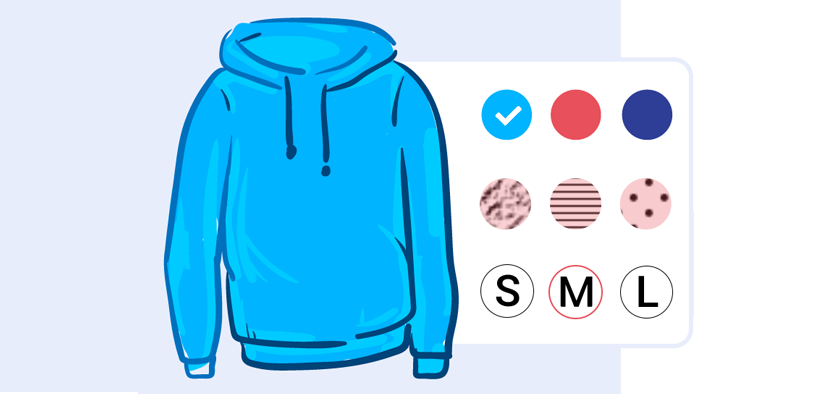
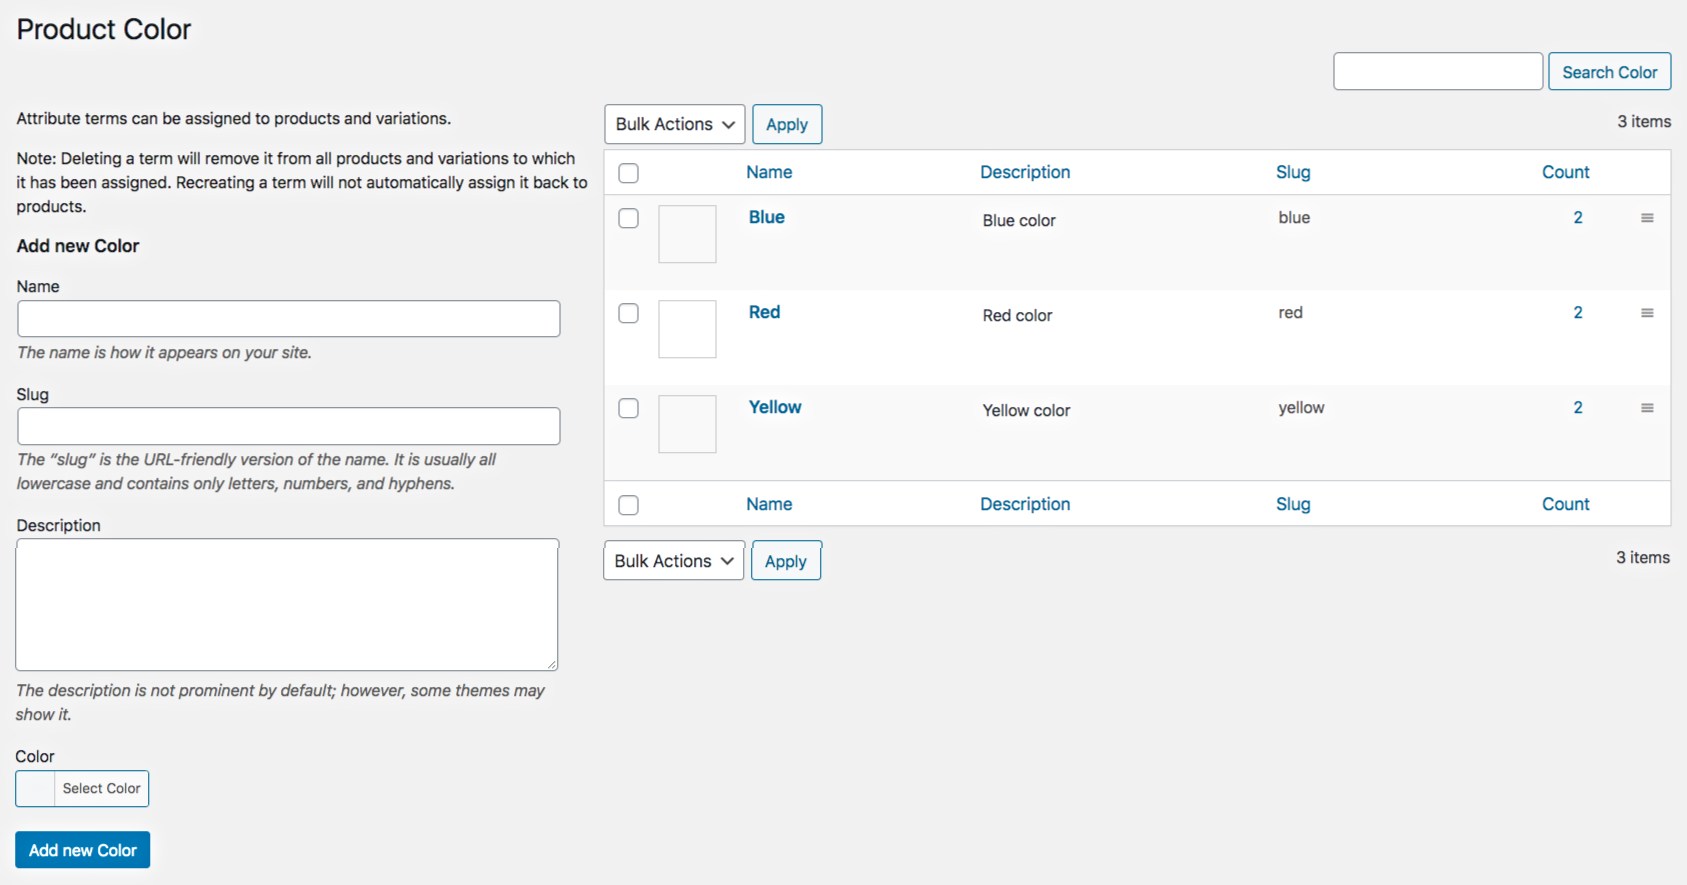
1. Highlight Your Product Colors With Elegant Color Swatches
For clothes that are available in various colors, you can present the option to choose the colors using attractive color swatches.
This will give the buyers a visual of the color they are choosing. Plus, they will get to know exactly what colors are available for that particular product.
For example, let’s say you are selling a t-shirt that is available in four colors,
Persian Blue
Spring Green
Crimson Red
Sunshine Yellow
Now, I can imagine that they are the color shades of Blue, Green, Red, and Yellow. However, unless I see the actual t-shirt, it’s difficult to understand if, for example, this Blue shading is the one I want.
As per default WooCommerce, I will need to select the option, Persian Blue, from the dropdown menu. And if an Image of that colored t-shirt is available, only then I will know how it looks.
Rather, you can use color swatches, and it will remove all the confusion.
Color Swatches for Color Variants
As you can see, the colors are visible, and now I can easily tell how Persian Blue looks in reality, just by looking at the swatches.
This is a great way to help your buyers to find the right color for the attire they are looking to buy and create a chance to tempt them to buy multiple colors of the same product.
Tip: You should upload relative product images for each color variant. So let’s say a person chooses Persian Blue, then the product image should change to the image of the blue t-shirt.
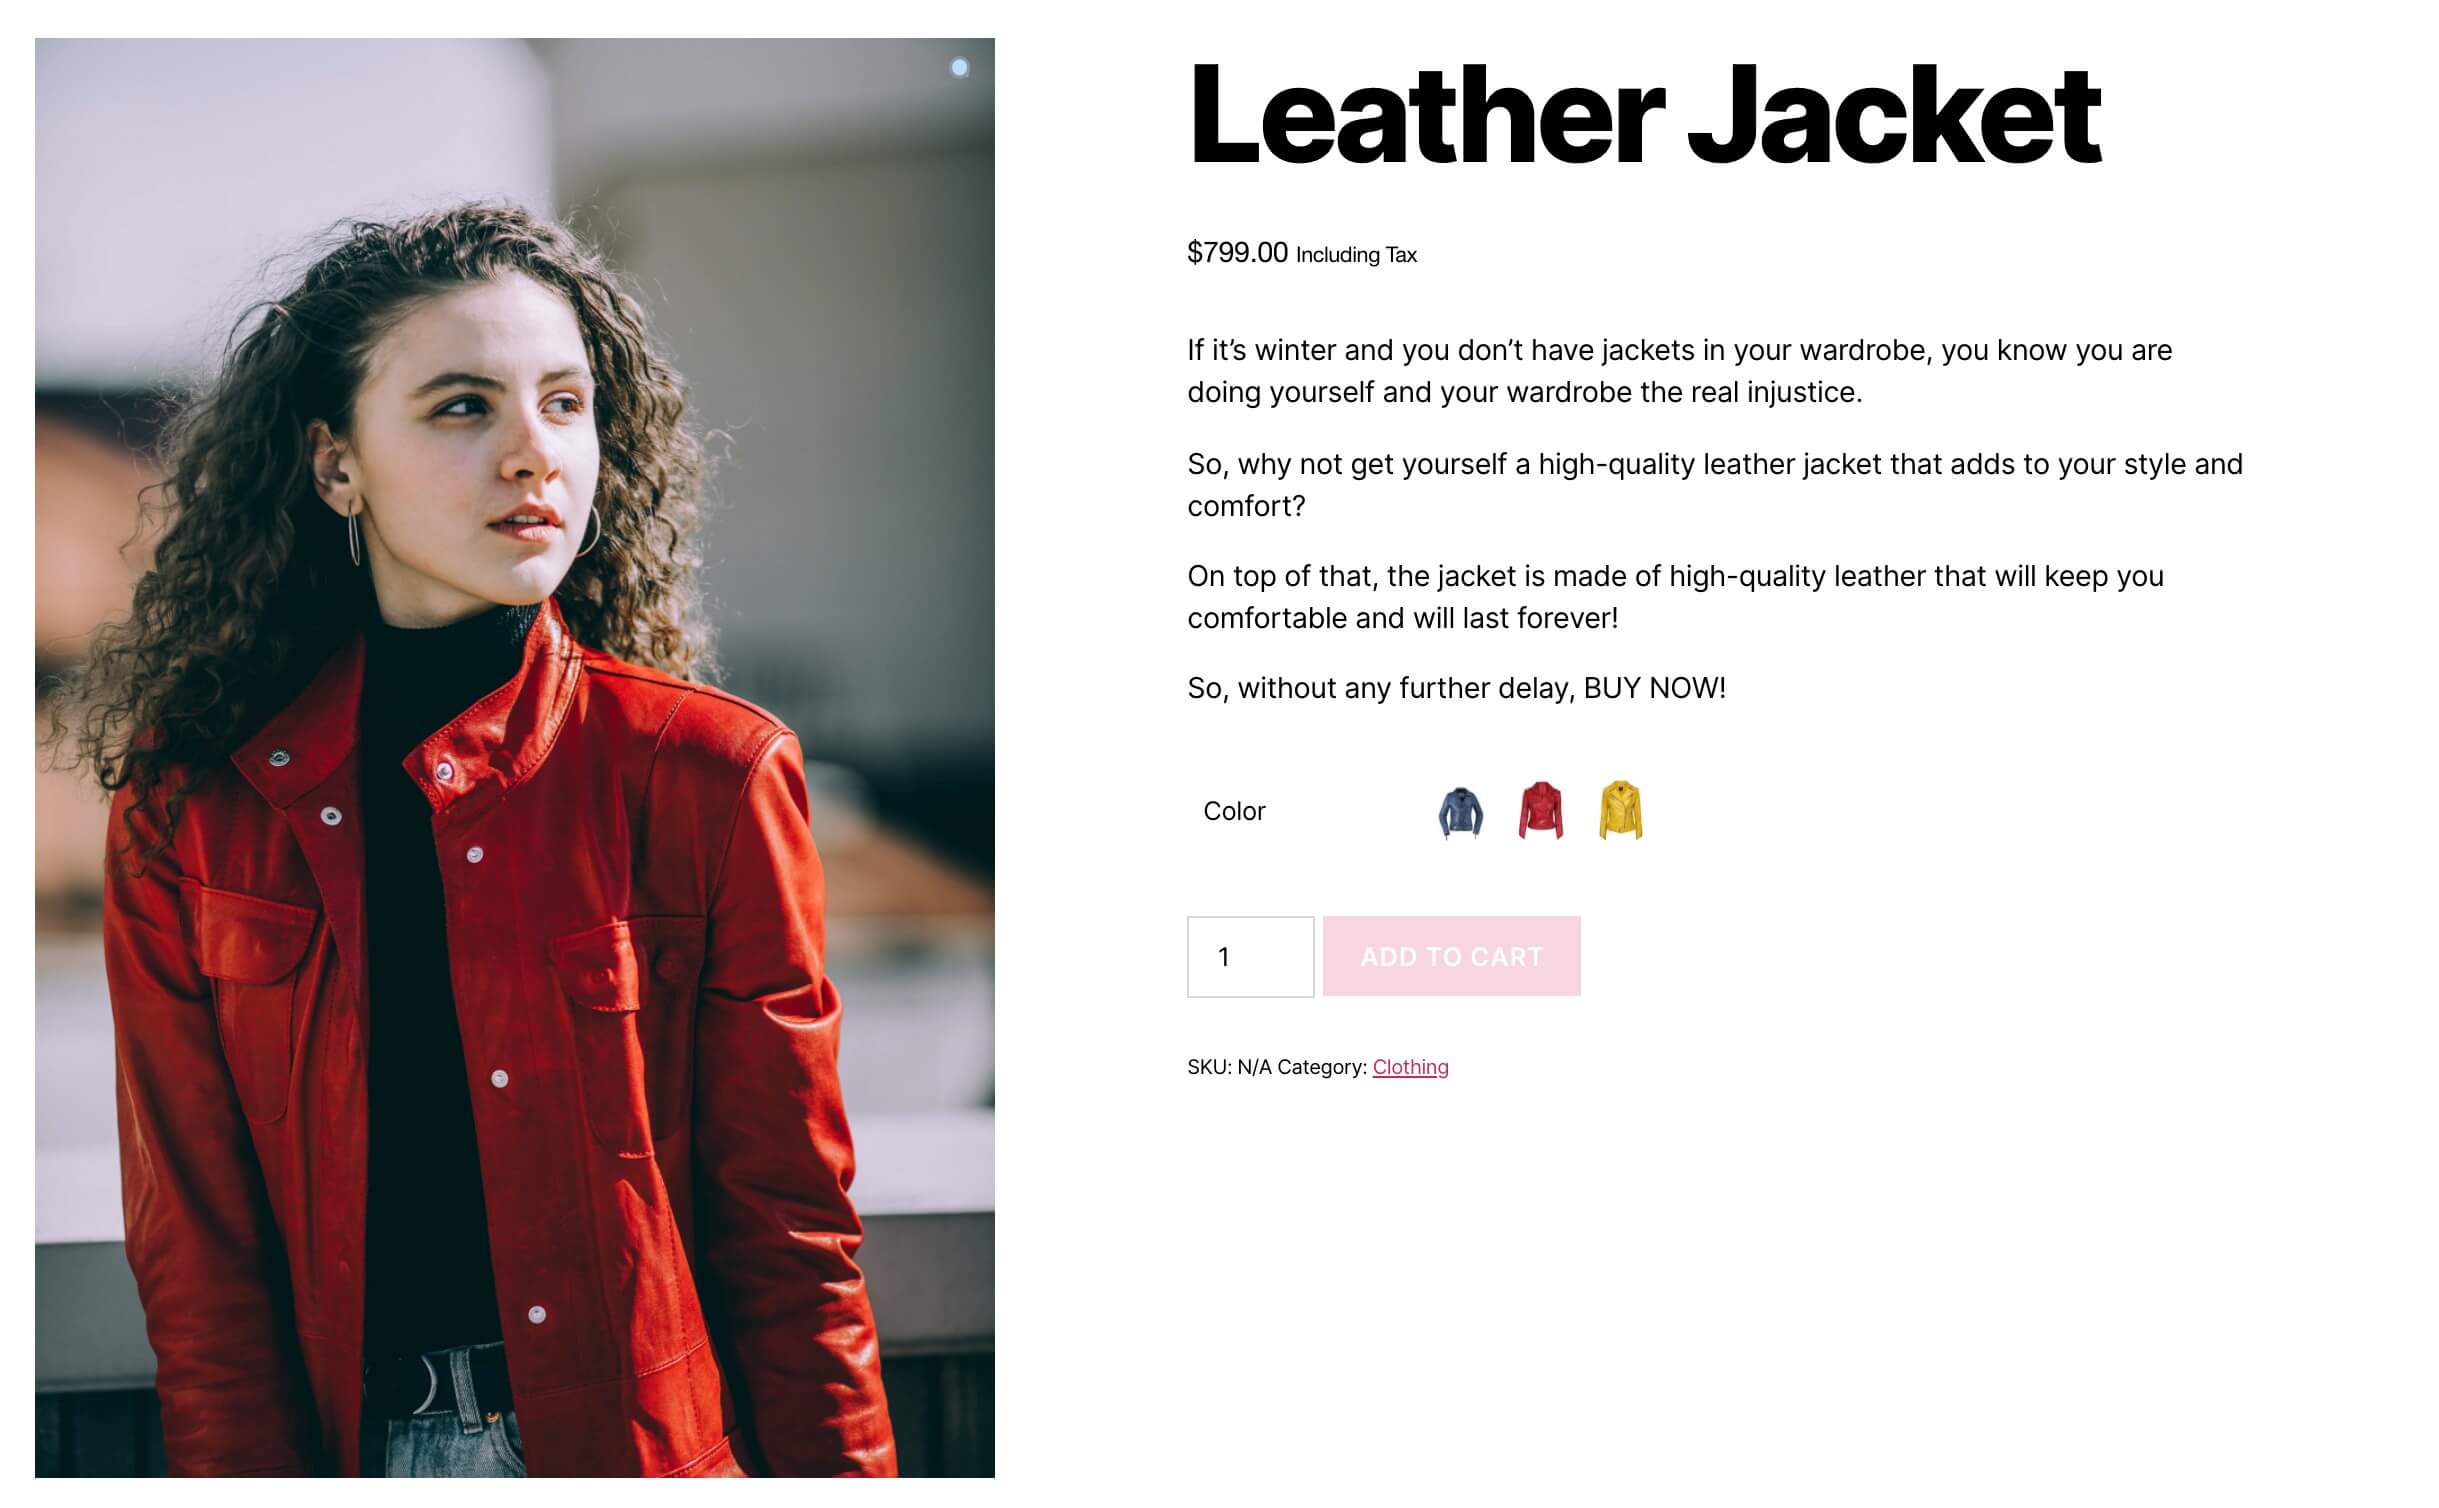
2. Make Buyers Curious With Catchy Image Swatches
Often, rather than using color swatches, you can take one step further and use image swatches to present the variations in a more attractive way.
Images swatches can be a great way to make shopping more exciting for buyers.
For example, suppose you are selling a jacket. In that case, you can use tiny jacket icons that are colored according to the available color variants.
Image Variation Swatches For WooCommerce
As you can see above, you can distinguish the available colors for this jacket and find it charming to see the tiny image swatches. This will often get buyers curious to click and choose a variant, even if they did not intend to in the first place.
3. Display Available Sizes In An Easy Way
Products that have size variants really doesn’t have much difference to show through images. But buyers will certainly want to know if their required size is available.
You may use the label button swatches to present them at a glance on the product page.
This will contribute to improved customer shopping experience and help in increasing buyer engagements.
Tip: Do make sure to provide a size chart link or a size distribution table in the product description. This will help buyers make a more informed decision.
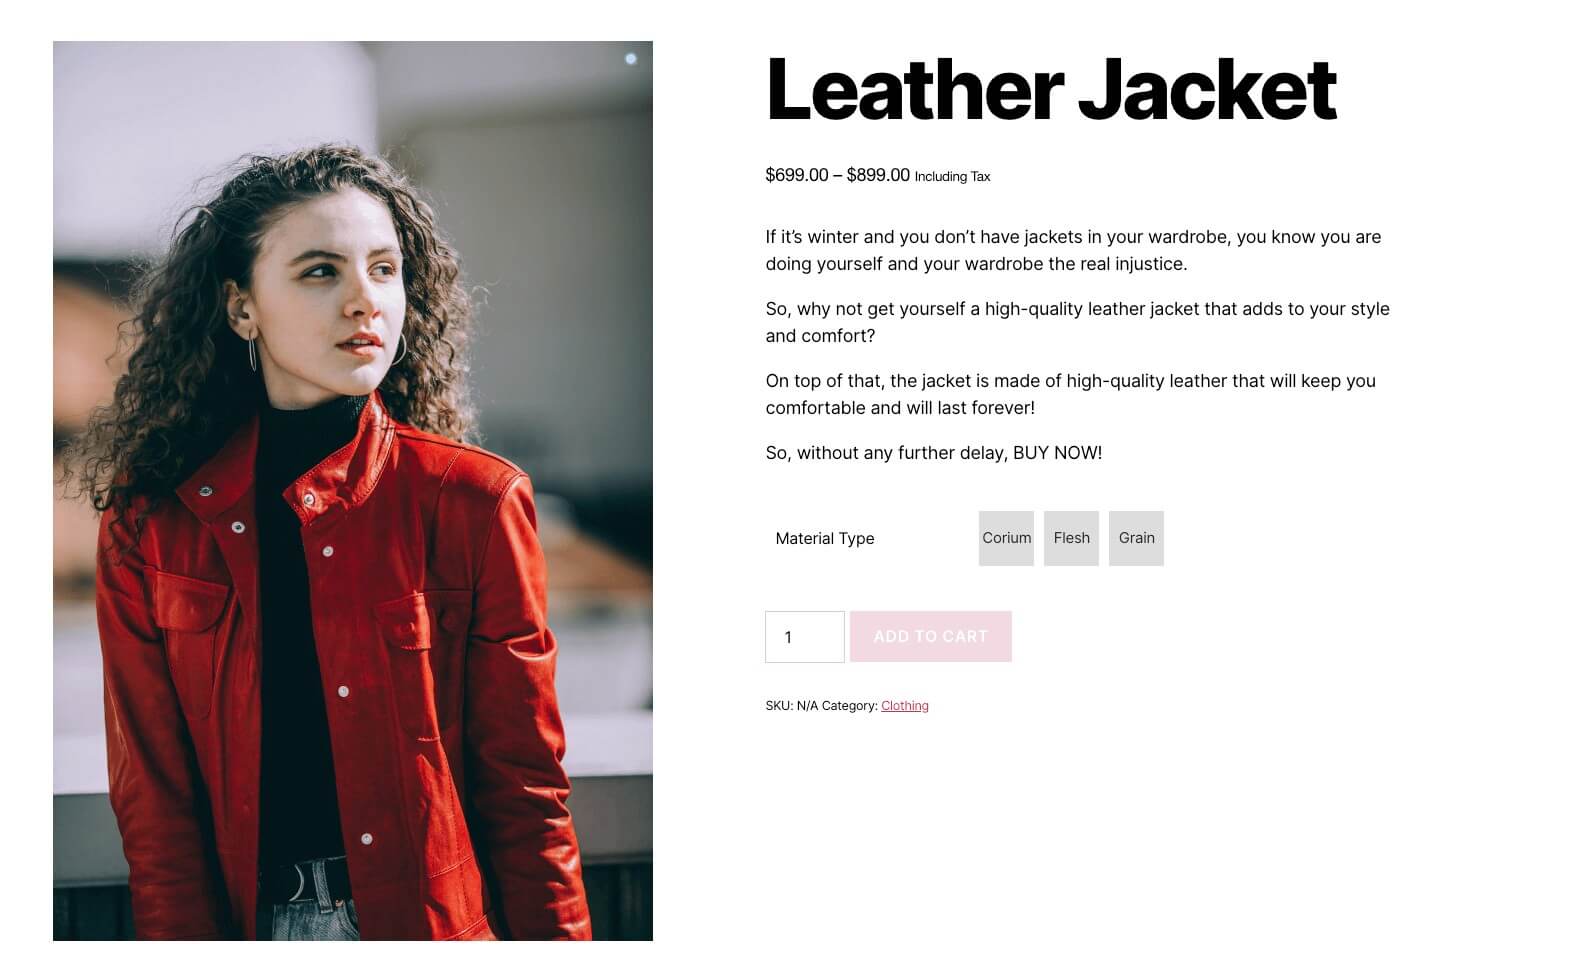
4. Offer Unique Variants Using Smart Button Swatches
Certain clothing products may vary in terms of unique factors such as material, closure style, collar style, etc. These variant terms are abstract and cannot be explained using color or image swatches.
For instance, you may sell a leather jacket that is available in three different fabric qualities, Corium, Flesh, and Grain. Now, there is no way to explain these via colors or images.
So the best way to offer these variants is by using text button swatches.
As you can see, a buyer will know the available fabric qualities for this leather jacket at a glance and can easily choose the one desired.
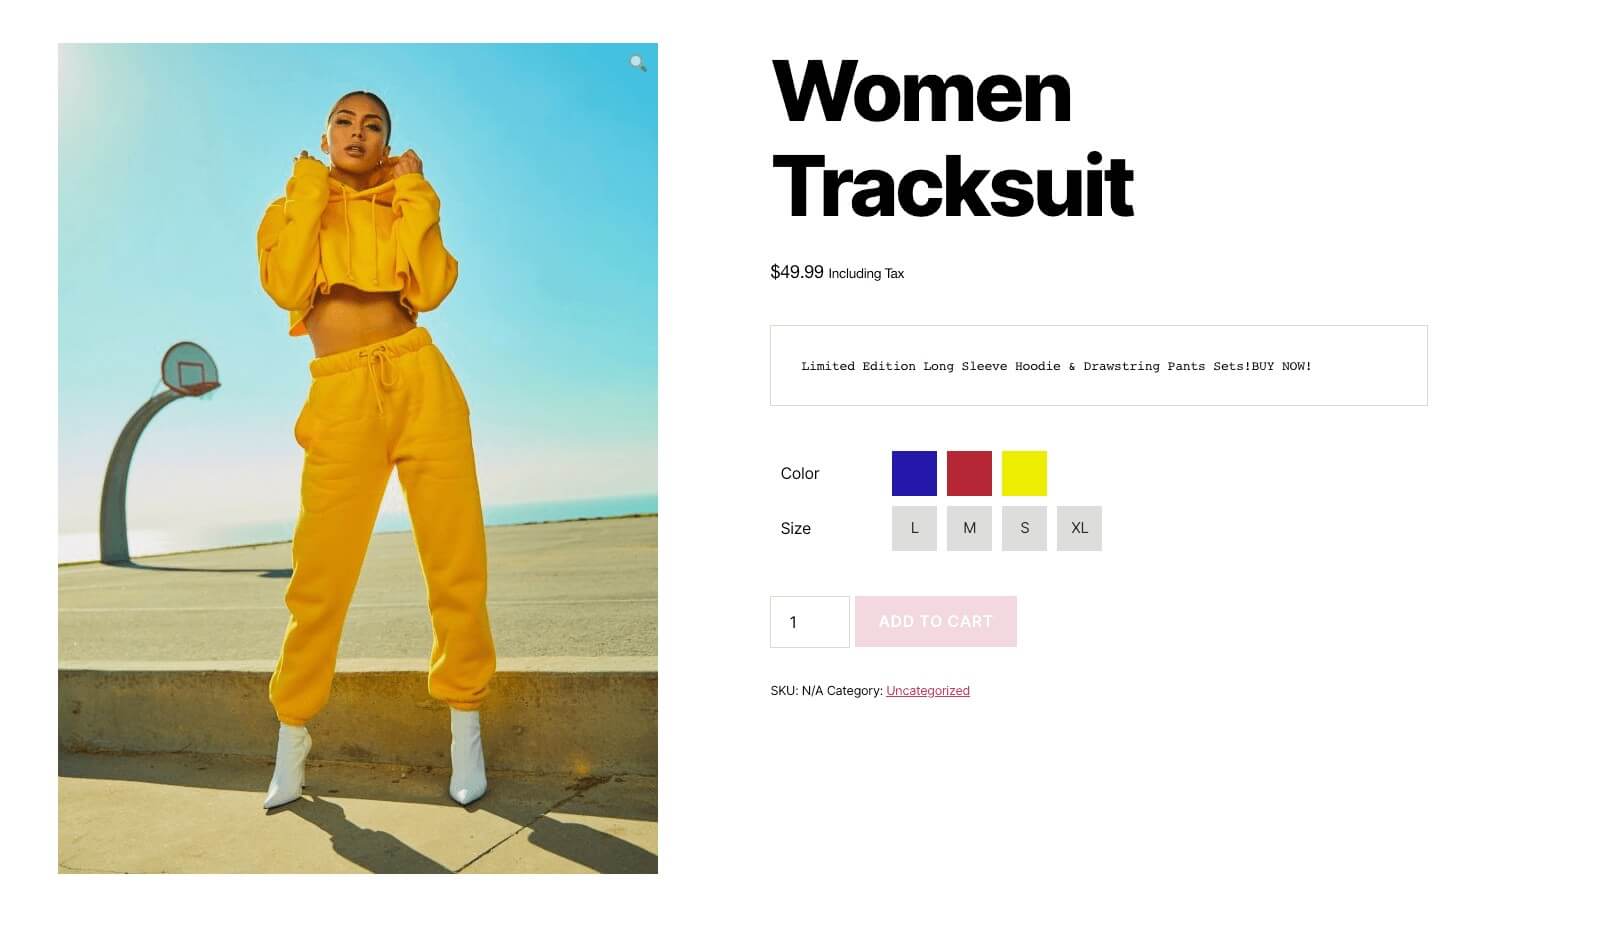
5. Make The Choice Of Multiple Variants Easy For Buyers
A product may have multiple variation factors. For example, a Tracksuit may be available in different colors, and you may have different sizes available for each color.
In WooCommerce, normally, they will appear as two drop-down menus. It will look less appealing, and a buyer will have to take extra effort to choose a variant.
However, you can use variation swatches to display these variants with no hassle.
In the case of the Tracksuit above, you can see that the color variants and the size variants are available in a simple and smart way. A buyer can easily choose the one he/she wants with just a couple of clicks.
This will not only create more interest in the buyer, but it will also speed up the purchase process and increase conversion.
As you saw so far, you can use the different types of swatches throughout your store and easily grab buyers’ attention in variable product pages.
If you’re looking to add a clothing store app for your brand, we recommend giving this plugin a try!
AppMySite is a perfect Clothing Store App Builder. It is compatible with almost all WordPress themes and plugins and creates a great interface for your customers. You should check it out.
Now, let us look at how easily you can use variation swatches to present product variations in your clothing store.
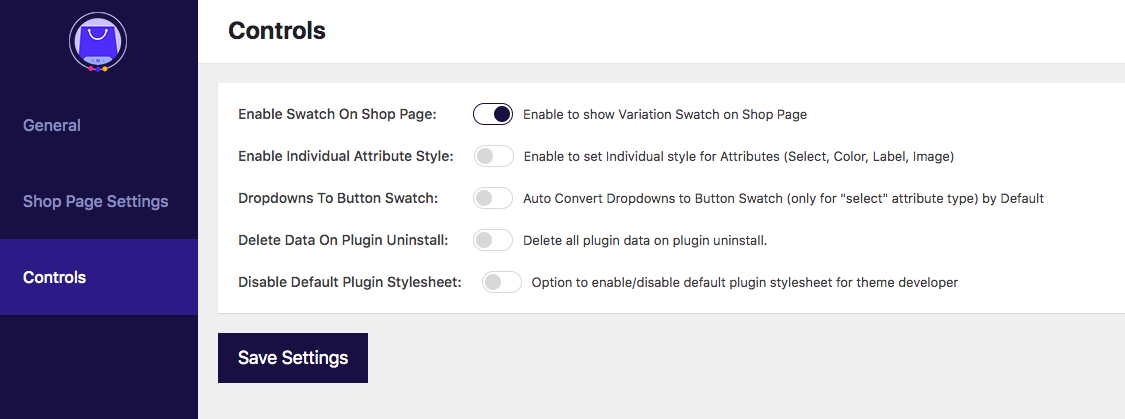
How To Implement Variation Swatches On Your WooCommerce Store
As I mentioned earlier, WooCommerce comes with several extensions that you can use to your advantage when customizing and promoting variable product pages.
To use variation swatches, you can use the plugin Variation Swatches for WooCommerce.
Get Variation Swatches For WooCommerce
This plugin is specialized in letting you use smart variation swatches easily, real quick.
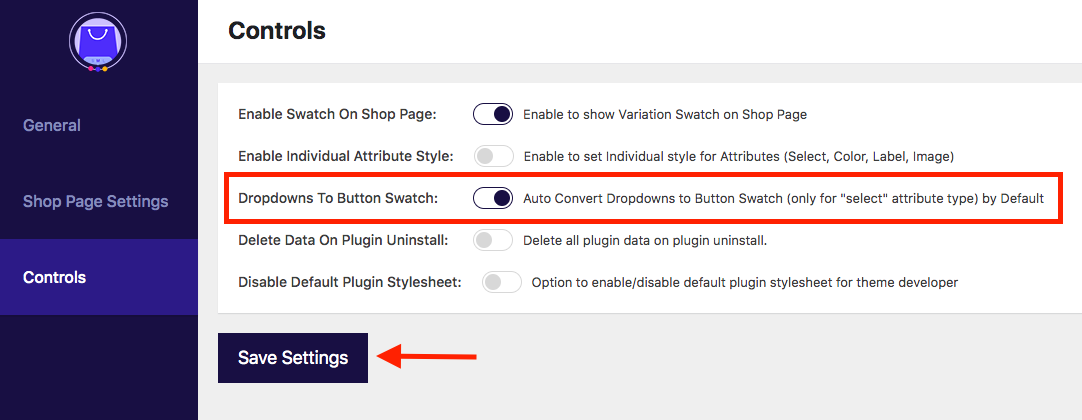
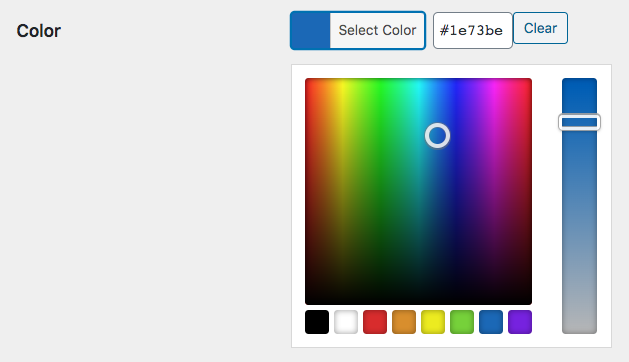
You can change all the dropdown variant selection to button swatches in your WooCommerce store with just a single click.
Then you can set color, image, or label swatches to product variation attributes in just a few clicks.
With less than 5 mins effort, you can make your WooCommerce store more attractive and engaging to buyers.
It’s really easy to get started – only 5 simple steps.
Install and activate Variation Swatches for WooCommerce
Enable drop-down to button swatch in a single click
Assign swatch types to product variation attributes
Assign swatches to variants
Display product variants with smart swatches and win more prospects
Selling clothes online means staying busy on a regular basis. And it makes perfect sense to try and drive more prospects without wasting too much time.
Small customizations such as using variation swatches can prove to be very useful in increasing your store’s performance.
Die Leistung Ihrer Website hängt stark von Ihrem Hosting-Plan und der Anzahl der Mediendateien ab, die Sie auf Ihre Website laden.
Wenn Sie eine WordPress-Website mit vielen Mediendateien und Assets betreiben, wird Ihre Website mit der Zeit wahrscheinlich langsamer und es werden mehr Serveranfragen beim Hosten Ihrer Dateien gestellt.
Dies hat große Auswirkungen auf Ihren ROI, da die Besucher dazu neigen, Ihre Website zu verlassen, wenn sie zu langsam ist. Und wenn die Serveranfragen das Limit Ihres Hosting-Anbieters überschreiten, kann Ihr Website-Server sogar abstürzen, was zu weiteren Geschäftseinbußen führt.
Eine der besten Lösungen hierfür ist das Hosten und Bereitstellen der Mediendateien Ihrer Website in einem Cloud-Speicher.
Wenn Sie die Mediendateien Ihrer Website in den Cloud-Speicher auslagern, können Sie vermeiden, dass Sie die Speichergrenzen Ihres Hostings überschreiten. Und wenn Sie diese Mediendateien aus der Cloud auf Ihrer Website bereitstellen, wird dies die Ladezeit Ihrer Website-Medien erheblich beschleunigen.
Langfristig sparen Sie dadurch mehr an Hosting-Kosten.
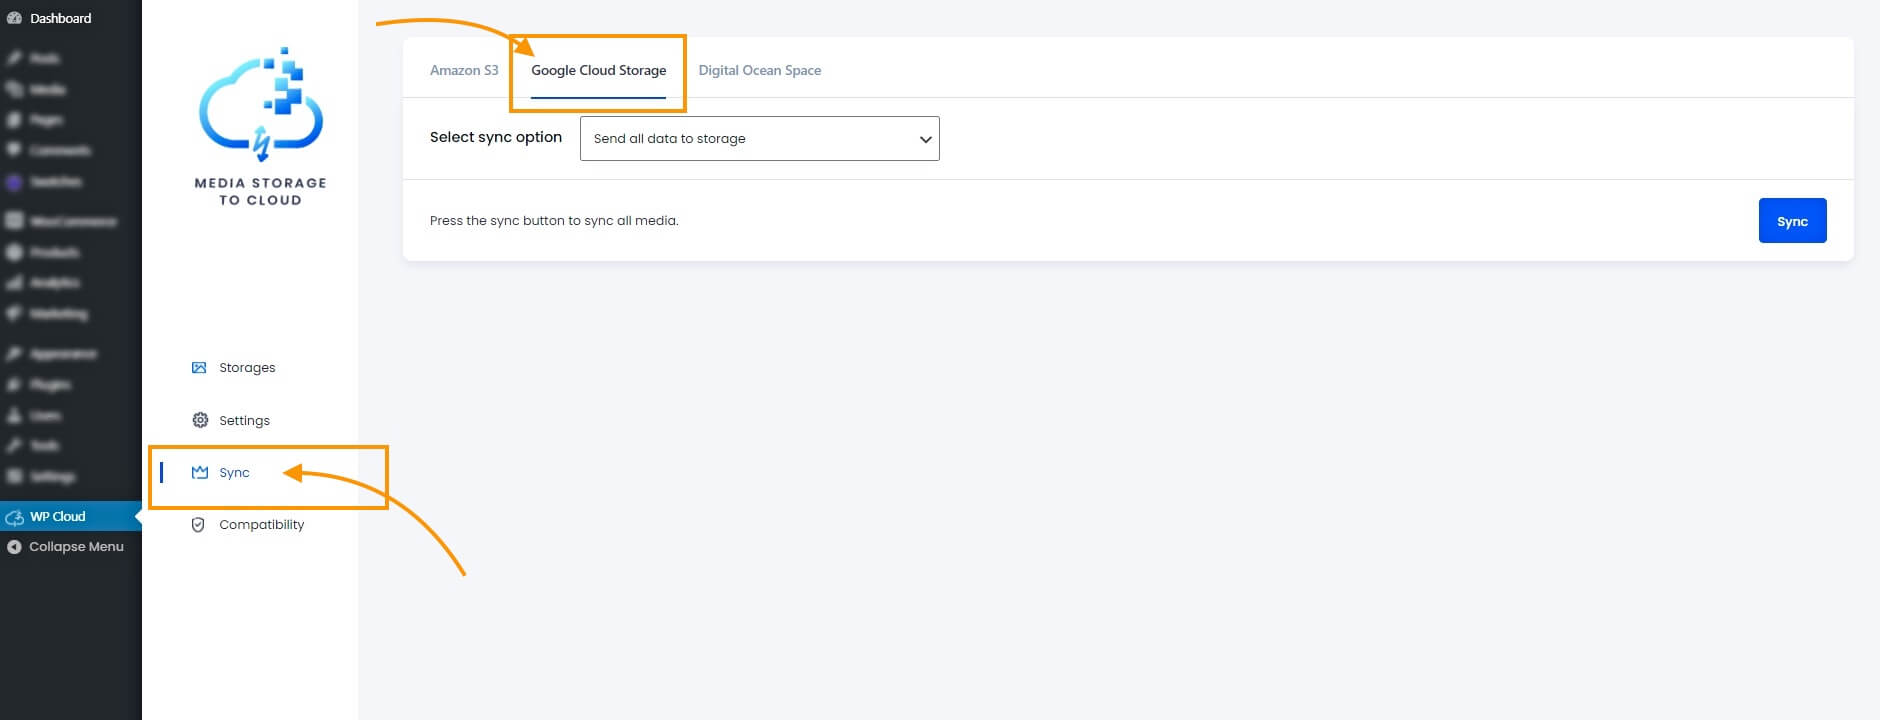
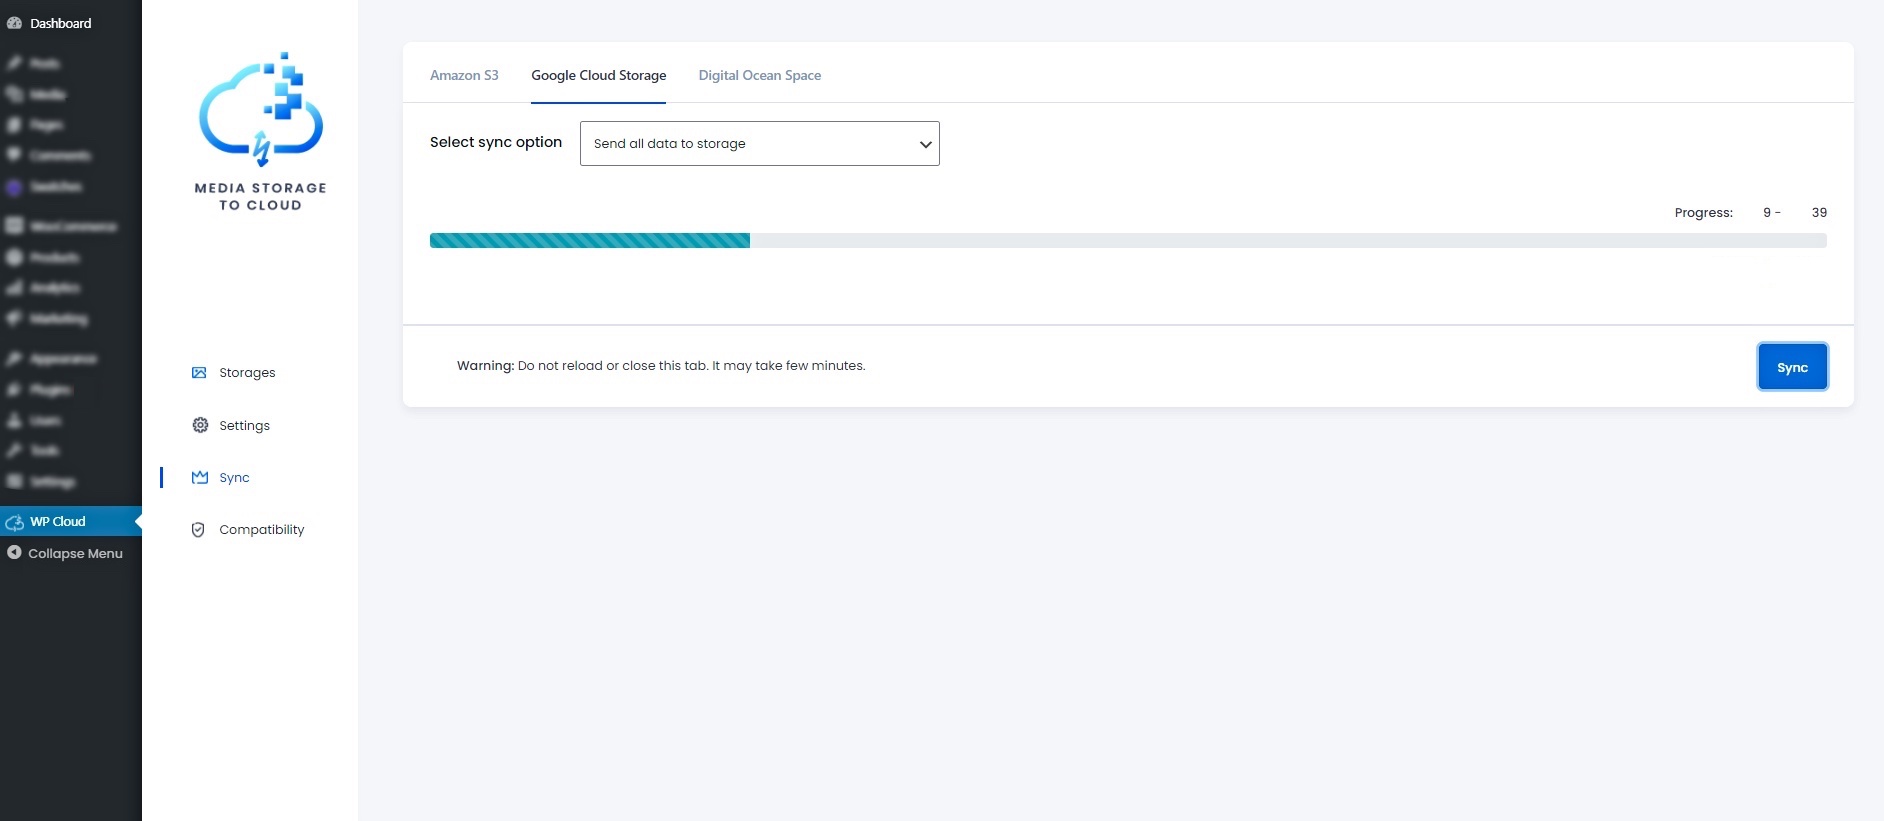
Heute werde ich Ihnen eine Schritt-für-Schritt-Anleitung geben, wie Sie Ihre WordPress-Mediendateien ganz einfach auf Ihren bevorzugten Cloud-Speicher auslagern können.
Nach der Lektüre dieses Leitfadens werden Sie in der Lage sein -
Erfahren Sie, wie Sie über Ihren Hosting-Anbieter Geld verlieren
Verstehen Sie, warum Cloud-Speicher eine bessere Lösung ist
Erfahren Sie mehr über die zuverlässigsten Cloud-Speicherdienste
Einfaches Auslagern Ihrer WordPress-Mediendateien in einen Cloud-Speicher
Wenn Sie all das gelernt haben, werden Sie schließlich in der Lage sein, eine schnellere Website zu erstellen, ohne dass der Server überlastet wird, und die Hostingkosten zu senken.
Warum Cloud Storage Service für Website-Mediendateien verwenden
Die erste Frage, die sich Ihnen stellt, ist wahrscheinlich, warum Sie sich bei der Bereitstellung von Mediendateien auf einen Cloud-Dienst verlassen sollten und nicht auf Ihren vertrauten Hosting-Anbieter.
Dafür kann es viele Gründe geben, aber ich möchte Ihnen die wichtigsten nennen.
Hören Sie auf, Unmengen von Geld für Hosting-Kosten zu verschwenden
Vermeiden Sie Serverausfälle bei starkem Datenverkehr
Bessere Website-Leistung zu jeder Zeit
Lassen Sie uns also genau erfahren, wie dies möglich ist.
1. Hören Sie auf, tonnenweise Geld für Hosting-Kosten zu verschwenden
Wenn Sie einen dedizierten Server von Anbietern wie WP Engine oder GoDaddy nutzen, wissen Sie wahrscheinlich, dass Sie einen begrenzten Speicherplatz pro Plan haben. In dem Moment, in dem Sie dieses Limit überschreiten, müssen Sie auf den nächsten Plan wechseln, um mehr Speicherplatz zu erhalten, was zusätzliche 10 bis 15 US-Dollar pro Monat kosten kann.
In solchen Situationen sind Cloud-Speicher viel bequemer. Amazon S3 bietet beispielsweise einen Standardtarif an, bei dem Sie nur einen geringen Betrag zahlen, z. B. 0,023 pro GB, was einem Betrag von 1,15 USD pro Monat für bis zu 50 GB Datenvolumen entspricht. Das ist eine große Ersparnis, die sich auf über 90 USD pro Jahr beläuft.
2. Vermeiden Sie Serverausfälle bei starkem Datenverkehr
Ein großes Problem für die oben genannten Hosting-Anbieter ist die Fähigkeit, großen gleichzeitigen Datenverkehr zu bewältigen. Wenn Sie einen plötzlichen Anstieg des gleichzeitigen Datenverkehrs haben, sagen wir etwa 1000 Besucher auf einmal, besteht die Gefahr, dass Ihr Server abstürzt.
Dies ist etwas, was Cloud-Speicher besonders gut können, da sie über viel mehr Datenzentren verfügen als ein Hosting-Anbieter. Selbst wenn viele Menschen dieselbe Mediendatei zur gleichen Zeit abrufen, besteht also keine Gefahr eines Serverausfalls.
3. Hohe Website-Leistung zu jeder Zeit
Jetzt könnten Sie auf Shared-Hosting-Anbieter wie Bluehost oder Dreamhost stoßen, die mit einem verrückten Marketing-Schema werben und behaupten, dass Sie unbegrenzte Bandbreite und 50 GB Speicherplatz für weniger als 5 Dollar pro Monat erhalten.
Wow, das ist ein tolles Angebot, oder? Aber es gibt ein paar Haken.
Erstens: Auch wenn behauptet wird, dass Sie unbegrenzte Bandbreite erhalten, werden Sie, sobald Sie eine bestimmte Grenze erreicht haben, mit einer Hosting-Drosselung konfrontiert, d. h., die Ladezeit Ihres Servers wird absichtlich erheblich verlangsamt.
Dies ist eine gängige Praxis der meisten Shared-Hosting-Anbieter, um eine Überlastung des Servers zu vermeiden, der von vielen anderen Benutzern gemeinsam genutzt wird.
Zweitens gehen solche Shared-Hosting-Anbieter davon aus, dass Sie Ihr Limit nicht überschreiten werden. In dem Moment, in dem Sie das tun, werden sie Ihnen mitteilen, dass sie nicht in der Lage sind, Ihnen eine hohe Leistung in einer Shared-Hosting-Umgebung zu bieten und werden Ihnen vorschlagen, ihren dedizierten Hosting-Server zu nutzen. Doch selbst wenn Sie sich für ihre dedizierten Server entscheiden, wird es immer noch das gleiche Problem mit der Handhabung von gleichzeitigem Datenverkehr geben.
Ein weiterer wichtiger Punkt ist die Möglichkeit, ein Rechenzentrum für die Bereitstellung von Medien in einem Cloud-Speicher auszuwählen. Angenommen, die meisten Ihrer potenziellen Kunden kommen aus Deutschland. Dann können Sie für Ihren Cloud-Speicher ein nahe gelegenes Rechenzentrum wählen, von dem aus Sie Medien bereitstellen. Bei einem gewöhnlichen Hosting-Anbieter haben Sie diese Möglichkeit nicht. Dies wirkt sich positiv auf die Ladegeschwindigkeit der Website aus, insbesondere wenn Sie große Mediendateien oder viele Mediendateien auf einer einzigen Webseite haben.
Da Sie nun wissen, dass ein Hosting-Anbieter nicht immer die beste Wahl ist, wenn es darum geht, riesige Mediendateien für eine Website bereitzustellen, wollen wir uns die zuverlässigsten Cloud-Speicher ansehen, die es gibt.
Beste Cloud-Speicherdienste zum Auslagern und Bereitstellen von WordPress-Mediendateien
Es gibt viele Cloud-Speicherdienste, aber lassen Sie uns einen Blick auf die besten Cloud-Speicherdienste werfen, die wir für Ihre WordPress-Website empfehlen.
1. Amazon S3 (AWS)
Amazon S3 ist ein Kernbestandteil von Amazon Web Services, mit dem Sie beliebige Datenmengen speichern und abrufen können, und zwar jederzeit und überall im Web.
Sie ist nachweislich sehr schnell und zuverlässig und bietet Ihnen vergleichsweise sehr niedrige Speicherkosten.
Netflix, Airbnb, SmugMug, Nasdaq, etc. are some of the prominent users of Amazon S3. For building or migrating applications to AWS, certain AWS application development services can be useful. However, organizations may choose to migrate to alternate cloud platforms like Microsoft Azure for various reasons. In such cases, enlisting AWS to Azure Migration Services can greatly facilitate the transition.
Einige bemerkenswerte Vorteile von Amazon S3 -
Hochgradig gesichert
Einfache Verwaltung und Migration
Umfassende Dokumentation
Entwicklerfreundlich
Mehrere Regionen
Server-seitige Verschlüsselung
2. Google Cloud-Speicher
Google Cloud Storage ist ein Teil der Google Cloud Platform, die Sie bei der Erfüllung der Online-Speicheranforderungen Ihres Unternehmens unterstützt.
Die Cloud-Plattform selbst kann Ihnen helfen, Software oder sogar Websites zu hosten; sie ist jedoch eher für ihren Cloud-Speicherdienst bekannt.
Google Cloud bietet Ihnen die Leistung und Skalierbarkeit der erweiterten Sicherheits- und Freigabefunktionen von Google.
Außerdem bietet es Ihnen drei Arten von Speicherdiensten:
Persistente Festplatten für Blockspeicher
Filestore für die Speicherung von Netzwerkdateien
Cloud-Speicher für Objektspeicher
Diese Dienste sind das Herzstück der Plattform und werden von der Mehrheit der Nutzer der Google Cloud-Dienste verwendet.
Einige bemerkenswerte Vorteile des Google Cloud-Dienstes.
Verbesserte Leistung
Bessere Preisgestaltungspläne
Redundante Backups
Einfache Integration
Ausführliche Dokumentation
Viele Regionen zum Speichern Ihrer Daten verfügbar
3. DigitalOcean
DigitalOcean ist für die Bereitstellung von Hochleistungsservern bekannt. Heutzutage ist es definitiv eine der ersten Wahl, um Ihre Website-Assets und -Daten zu hosten.
Es konzentriert sich vor allem auf drei wichtige Verkaufsargumente - Einfachheit, Preisgestaltung und leistungsstarke virtuelle Server.
Obwohl der Schwerpunkt auf Cloud Computing liegt, bevorzugen viele den Service DigitalOcean Spaces, der 250 GB Speicherplatz und 1 TB ausgehende Bandbreite für nur 5 US-Dollar pro Monat umfasst.
Wenn Sie den zugewiesenen Speicherplatz und die zugewiesene Bandbreite überschreiten, werden Ihnen $0,01 pro zusätzlichem GB übertragen und $0,02 pro zusätzlichem GB gespeichert berechnet. Dies ist ein großartiges Angebot, wenn Sie tonnenweise Mediendateien zu übertragen haben.
Einige bemerkenswerte Vorteile von DigitalOcean-
Geringere räumliche Entfernung
Laden statischer Inhalte aus der Cloud
Reduzierte Dateigröße zur Erhöhung der Website-Geschwindigkeit
Software-Entwicklung freundlich
Ausgezeichnete Dokumentation.
Benutzerfreundliche UI
Wie kann man Mediendateien von WordPress auf einen Cloud-Speicher auslagern?
Es gibt mehrere Möglichkeiten, Mediendateien von Ihrer WordPress-Website in den Cloud-Speicher zu verlagern.
Wenn Sie sich jedoch für einen der drei bereits erwähnten Cloud-Speicherdienste entscheiden, ist es am besten, ein zuverlässiges Plugin zu verwenden, mit dem Sie diese Angelegenheit problemlos erledigen können.
Media Storage to Cloud ist ein WordPress-Plugin, mit dem Sie Ihre WordPress-Mediendateien ganz einfach auf den gewünschten Cloud-Speicher auslagern können, darunter Amazon S3, Google Cloud Service und DigitalOcean. Außerdem können Sie Ihre WordPress-Website Mediendateien direkt von Ihrem Cloud-Speicher über dieses Plugin dienen.
Die besten Eigenschaften von Media Storage To Cloud (M2C)
Einfaches Auslagern von WordPress-Mediendateien in einen Cloud-Speicher - Sie können alle Ihre WordPress-Mediendateien mit nur wenigen Klicks in einen Cloud-Speicher auslagern.
Bedienen Sie Ihre Website-Medien und -Inhalte direkt vom Cloud-Speicher - Sobald Sie Mediendateien in den Cloud-Speicher ausgelagert haben, können Sie WP-Mediendateien mit einem einzigen Klick direkt von Ihrem Cloud-Speicher-Server bedienen. Kein manueller Aufwand und keine Zeitverschwendung.
Automatische Synchronisierung mit dem Cloud-Speicher bei Änderungen in Ihren Medien und Dateien - Sie können Ihre WordPress-Mediathek automatisch synchronisieren. Wenn Sie Bilder in Ihre Mediathek hochladen, werden sie automatisch in Ihren Cloud-Speicher übertragen.
Wenn Sie also auf der Suche nach einem Plugin sind, das Ihre WordPress-Website mit einem Cloud-Speicherdienst verbindet, sollten Sie unbedingt Media Storage to Cloud verwenden.
Schauen wir uns nun an, wie Sie Ihre WordPress-Mediendateien auf jeden dieser Cloud-Speicher mit Media Storage To Cloud auslagern können.
3. Klicken Sie nun auf die Schaltfläche " Speichern", und Sie erhalten eine Bestätigungsmeldung in der oberen rechten Ecke.
Das bedeutet, dass Sie jetzt erfolgreich Media Storage To Cloud mit Amazon S3 verbunden haben.
Schritt 2 - Auslagern von Mediendateien auf Amazon S3
1. Gehen Sie nun auf die Registerkarte Sync und wählen Sie Amazon S3.
Sie können sehen, dass es eine Option namens Synchronisierungsoption auswählen gibt.
Hier können Sie wählen, ob Sie Medien auf zwei Arten entladen möchten.
Alle Daten an den Speicher senden - Wählen Sie diese Option, wenn Sie alle Ihre Mediendateien an Amazon S3 übertragen möchten.
Unsynchronisierte Daten an den Speicher senden - Wählen Sie diese Option aus, wenn Sie neue Medien an Amazon S3 übertragen möchten, und nicht die, die Sie bereits zuvor übertragen haben.
Wenn Sie ein Erstbenutzer sind, wählen Sie Alle Daten in den Speicher senden.
2. Klicken Sie anschließend auf die Schaltfläche Synchronisieren .
Während des Entladens von Mediendateien in den Amazon S3-Bucket wird ein Fortschrittsbalken angezeigt.
Es kann einige Zeit dauern, bis alle Mediendateien entladen sind, aber ändern Sie nicht die Registerkarte, da dies den Synchronisierungsprozess behindern könnte.
Nachdem die Synchronisierung abgeschlossen ist, erscheint oben rechts eine Erfolgsmeldung.
Das war's. Sie können dann Ihren Amazon S3-Bucket überprüfen. Sie werden sehen, dass alle Ihre WordPress-Mediendateien in den Amazon S3-Bucket kopiert wurden.
WordPress-Mediendateien auf Google Cloud Storage auslagern
Führen Sie die folgenden Schritte aus, um Ihre WordPress-Mediendateien mit Google Cloud Storage zu verbinden und dorthin zu übertragen.
**Stellen Sie sicher, dass Sie Media Storage To Cloud installiert und aktiviert haben.
Um Ihre Website mit Google Cloud Storage zu verbinden, vergewissern Sie sich, dass Sie bereits ein Google Service-Konto und ein Google Cloud Storage Bucket haben.
Schritt 1 - Verbinden Sie Ihr WordPress mit Google Cloud Storage
1. Suchen Sie in Ihrem Dashboard nach dem Menü WP Cloud. Klicken Sie es an.
Sie gelangen zur Plugin-Oberfläche und befinden sich zunächst auf der Registerkarte " Speicher".
Wählen Sie hier Google Cloud Storage.
2. Geben Sie die erforderlichen Daten ein, um Google Cloud Storage zu verbinden.
Hier müssen Sie die folgenden Anmeldedaten für Google Cloud Storage angeben:
GCS Service Account Key JSON Data - Sie müssen die Service Account Key JSON Data von Ihrem Google Cloud Storage-Konto sammeln.(Sie können sie hier abrufen.)
3. Klicken Sie nun auf die Schaltfläche " Speichern", und Sie erhalten eine Bestätigungsmeldung in der oberen rechten Ecke.
Das bedeutet, dass Sie jetzt erfolgreich Media Storage To Cloud mit Google Cloud Storage verbunden haben.
Schritt 2 - Auslagern von Mediendateien auf Google Cloud Storage
1. Gehen Sie nun auf die Registerkarte " Sync" und wählen Sie Google Cloud Storage.
Sie können sehen, dass es eine Option namens Synchronisierungsoption auswählen gibt.
Hier können Sie wählen, ob Sie Medien auf zwei Arten entladen möchten.
Alle Daten an den Speicher senden - Wählen Sie diese Option, wenn Sie alle Ihre Mediendateien an Google Cloud Storage übertragen möchten.
Unsynchronisierte Daten an den Speicher senden - Wählen Sie diese Option, wenn Sie neue Medien an Google Cloud Storage übertragen möchten, und nicht die, die Sie bereits zuvor übertragen haben.
Wenn Sie ein Erstbenutzer sind, wählen Sie Alle Daten in den Speicher senden.
2. Klicken Sie anschließend auf die Schaltfläche Synchronisieren .
Während des Entladens von Mediendateien in Google Cloud Storage wird ein Fortschrittsbalken angezeigt.
Es kann einige Zeit dauern, bis alle Mediendateien entladen sind, aber ändern Sie nicht die Registerkarte, da dies den Synchronisierungsprozess behindern könnte.
Nachdem die Synchronisierung abgeschlossen ist, erscheint oben rechts eine Erfolgsmeldung.
Das war's. Sie können dann Ihre Google Cloud Storage-Ordner überprüfen. Sie werden sehen, dass alle Ihre WordPress-Mediendateien in Google Cloud Storage kopiert wurden.
Wie man WordPress-Mediendateien auf DigitalOcean Spaces auslagert
Führen Sie die folgenden Schritte aus, um Ihre WordPress-Mediendateien mit DigitalOcean Spaces zu verbinden und auszulagern.
**Stellen Sie sicher, dass Sie Media Storage To Cloud installiert und aktiviert haben.
Um Ihre Website mit DigitalOcean zu verbinden, stellen Sie sicher, dass Sie bereits ein DigitalOcean-Konto und einen DigitalOcean-Space eingerichtet haben.
3. Klicken Sie nun auf die Schaltfläche " Speichern", und Sie erhalten eine Bestätigungsmeldung in der oberen rechten Ecke.
Das bedeutet, dass Sie jetzt erfolgreich Media Storage To Cloud mit DigitalOcean verbunden haben.
Schritt 2 - Auslagern von Mediendateien auf DigitalOcean Spaces
1. Gehen Sie nun auf die Registerkarte Sync und wählen Sie DigitalOcean.
Sie können sehen, dass es eine Option namens Synchronisierungsoption auswählen gibt.
Hier können Sie wählen, ob Sie Medien auf zwei Arten entladen möchten.
Alle Daten an den Speicher senden - Wählen Sie diese Option, wenn Sie alle Ihre Mediendateien an Google Cloud Storage übertragen möchten.
Unsynchronisierte Daten an den Speicher senden - Wählen Sie diese Option, wenn Sie neue Medien an Google Cloud Storage übertragen möchten, und nicht die, die Sie bereits zuvor übertragen haben.
Wenn Sie ein Erstbenutzer sind, wählen Sie Alle Daten in den Speicher senden.
2. Klicken Sie anschließend auf die Schaltfläche Synchronisieren .
Während des Entladens von Mediendateien auf DigitalOcean Spaces wird ein Fortschrittsbalken angezeigt.
Es kann einige Zeit dauern, bis alle Mediendateien entladen sind, aber ändern Sie nicht die Registerkarte, da dies den Synchronisierungsprozess behindern könnte.
Nach Abschluss der Synchronisierung wird in der oberen rechten Ecke eine Erfolgsmeldung angezeigt.
Das war's. Sie können dann Ihre DigitalOcean Spaces überprüfen. Sie werden sehen, dass alle Ihre WordPress-Mediendateien auf DigitalOcean kopiert wurden.
Wie man WordPress-Mediendateien von Cloud-Servern bereitstellt
Sobald Sie Ihre WordPress-Mediendateien in Ihren bevorzugten Cloud-Speicher geladen haben, können Sie die Medien Ihrer Website direkt aus dem Cloud-Speicher bereitstellen.
Wenn Sie zum Beispiel Ihre Mediendateien auf Amazon S3 ausgelagert haben, können Sie es so einrichten, dass die Mediendateien Ihrer Website von Amazon S3 gehostet und bereitgestellt werden.
Befolgen Sie dazu die nachstehenden einfachen Schritte.
1.Klicken Sie auf die Einstellungen und wählen Sie den Cloud-Speicher, in den Sie Ihre Mediendateien ausgelagert haben.
Hier finden Sie die folgenden drei Optionen:
Serve Media File From Bucket - Aktivieren Sie diese Option, um Ihre Website-Mediendateien aus dem ausgewählten Cloud-Speicher bereitzustellen.
Upload Media Files On Bucket When Uploaded On Media Library - Wenn Sie diese Option aktivieren, wird beim Hochladen neuer Dateien in Ihre Medienbibliothek eine vollständige automatische Synchronisierung durchgeführt. Das heißt, wenn Sie eine neue Mediendatei in WordPress hochladen, wird sie automatisch in Ihren synchronisierten Cloud-Speicher kopiert.
Delete Media From Bucket When Deleted From The Media Library - Wenn Sie diese Option aktivieren, wird beim Löschen von Dateien aus Ihrer Medienbibliothek eine vollständige automatische Synchronisierung durchgeführt. Das heißt, wenn Sie eine Mediendatei aus WordPress löschen, wird sie auch automatisch aus Ihrem Cloud-Speicher entfernt.
2. Aktivieren Sie die erste Option, um die Bereitstellung von Website-Medien aus dem Cloud-Speicher zu starten, und aktivieren Sie die beiden anderen, wenn Sie die automatische Synchronisierung anwenden möchten. Klicken Sie dann auf Speichern.
3. Jetzt können Sie in Ihrer WordPress-Mediathek überprüfen, ob die Links der Mediendateien geändert wurden.
Der Link der Medien wird bei der Bereitstellung von Amazon S3 geändert
Die Mediendateien werden jetzt von Ihrem Cloud-Speicher bereitgestellt.
Das war's. So einfach ist es, Ihre Website-Medien von Amazon S3, Google Cloud Storage oder DigitalOcean auszulagern und bereitzustellen.
Anmerkung des Autors
Wie Sie sehen können, ist es wirklich einfach, Ihren Cloud-Speicher mit WordPress zu verbinden, indem Sie Media Storage to Cloud verwenden.
Sicherlich könnten Sie sich fragen, was ist, wenn Sie einen anderen Cloud-Speicher verwenden. Mein Rat wäre, eine der drei hier genannten zu verwenden, weil sie zuverlässig sind. Andere Clouds sind gut, aber diese drei sind in Bezug auf Sicherheit und Leistung unschlagbar und liefern jeden Tag ein besseres Ergebnis.
In diesem Leitfaden habe ich mich mehr auf das Offloading von Mediendateien konzentriert. In meinem nächsten Leitfaden werde ich Ihnen einen detaillierten Einblick in die Bereitstellung von Mediendateien für Websites über die drei hier erwähnten Cloud-Speicher geben.
Wenn Sie einen WooCommerce-Shop mit vielen variablen Produkten betreiben, dann möchten Sie sicherlich Wege finden, um die WooCommerce-Produktvariationen zu verbessern und den Umsatz zu steigern.
Wussten Sie, dass Produkte mit Variationen mehr verkauft werden können, wenn Sie einige intelligente Anpassungen und Verbesserungen vornehmen?
Vielleicht können Sie bestimmte Plugins verwenden, um einige spezielle Anpassungen vorzunehmen.
Wenn Sie zum Beispiel ein T-Shirt mit mehreren Farbvarianten haben, können Sie das Plugin Variation Swatches for WooCommerce verwenden, um die Varianten als Farbmuster auf der Produktseite anzuzeigen.
Dadurch wird die Aufmerksamkeit des Käufers geweckt und der Wunsch geweckt, sich für eine Variante zu entscheiden.
Hier habe ich einige der besten WooCommerce-Erweiterungen oder Plugins, die Ihnen helfen, WooCommerce Produkt-Variationen auf der Produktseite zu verbessern, so dass Sie mehr Menschen anziehen können und den Umsatz zu steigern aufgeführt.
Also, gehen wir der Sache auf den Grund.
Beste WordPress-Plugins zur Verbesserung von WooCommerce-Produktvariationen
Alle unten aufgeführten Plugins wurden getestet und liefern nachweislich die Ergebnisse, die Sie sich für Ihren WooCommerce-Shop wünschen.
Ich habe beschlossen, mich speziell auf die Auswahl von Plugins zu konzentrieren, die helfen, den Umsatz für variable Produkte zu steigern.
1. YaySwatches - Variation Swatches für WooCommerce
YaySwatches ist eines der am einfachsten zu bedienenden WordPress-Plugins zur Anpassung von WooCommerce-Produktvariationen.
Mit zahlreichen Optionen wie Form, Größe, Stil, Rahmenfarbe, Tooltip mit variablem Wert, Bildauflösung, Positionierung usw. können Sie Ihre Produktpräsentation nach Herzenslust gestalten.
Es sind nur 3 einfache Schritte nötig: Wählen Sie Ihre Mustertypen aus, passen Sie deren Design an und veröffentlichen Sie Ihr beeindruckendes Produktregal.
Sie erhalten weitere Funktionen wie zum Beispiel:
Verwandeln Sie Ihr eintöniges Produktgitter in einen globalen Botschafter auf Shop-, Kategorie-, Katalog- und Archivseiten.
Passen Sie die Effekte der ausverkauften Varianten auf verschiedene Weise an: Original, Original mit Kreuz, ausgegraut, und mehr.
Synchronisieren Sie Ihre WooCommerce-Produktoptionen mit YaySwatches.
Wenden Sie ein Swatch-Hover-Styling an, um die Aufmerksamkeit Ihrer Besucher zu erregen.
Verwenden Sie automatisch vorhandene Bilder von Produktvariationen, um Bildmuster zu erzeugen.
Das funktionsreiche WooCommerce Variation Swatches Plugin verfügt über eine moderne und vereinfachte Benutzeroberfläche, die bereits vorhandene Attribute und benutzerdefinierte Produktattribute in einem Dashboard vereint.
Just try out YaySwatches for free and you’ll be sure to choose from all the available product attributes and select the styles that best suit your needs.
What else you can expect, YaySwatches offers the best possible customer experience – 24/7 Live Chat Support, as well as third-party integrations implemented upon request for added convenience.
Das WooCommerce Bulk Variations Plugin von Barn2 ist ein leistungsfähiges Tool, das WooCommerce Produktvariationen sowohl für Shopbetreiber als auch für Kunden verbessert.
Mit diesem Plugin können Shop-Betreiber die Variationen eines bestimmten Produkts mühelos in großen Mengen bearbeiten und so Zeit und Mühe sparen.
Darüber hinaus fügt das Plugin Bestellformulare für Massenvariationen zu den Produktseiten hinzu, wodurch es für Kunden schneller und einfacher wird, Variationen auszuwählen und sie ihrem Warenkorb hinzuzufügen.
Eine der wichtigsten Funktionen des Plugins WooCommerce Bulk Variations ist die Vereinfachung der Verwaltung von Produktvariationen.
Anstatt jede Variante einzeln zu bearbeiten, können Shop-Betreiber das Plugin verwenden, um Massenänderungen an den Varianten eines bestimmten Produkts vorzunehmen.
So können Sie beispielsweise Variationen anhand ihrer Attribute auswählen und Aktionen wie das Festlegen von Variationsbildern und -preisen massenhaft anwenden.
Dies kann eine erhebliche Zeitersparnis bedeuten, insbesondere bei Geschäften mit einer großen Anzahl von Varianten pro Produkt.
Eine weitere wichtige Funktion des Plugins ist das Hinzufügen von Bestellformularen für Massenvarianten zu den Produktseiten.
Diese Formulare ermöglichen es den Kunden, schnell und einfach die gewünschten Varianten auszuwählen und in den Warenkorb zu legen.
Dies kann die Nutzererfahrung auf der Website eines Geschäfts verbessern, da es für die Kunden einfacher ist, die Produkte zu finden und zu kaufen, an denen sie interessiert sind.
Insgesamt ist das Plugin WooCommerce Bulk Variations von Barn2 ein wertvolles Werkzeug für jeden Shopbetreiber, der WooCommerce nutzt, um Produkte mit Variationen zu verkaufen.
Die Möglichkeit der Massenbearbeitung von Produktvariationen und der Erstellung von Bestellformularen für Massenvariationen kann für Sie und Ihre Kunden einen großen Unterschied machen. Seine Funktionen umfassen:
Massenauswahl und Bearbeitung von Varianten für ein bestimmtes Produkt.
Erstellen Sie unterschiedliche Bestellformulare, mit oder ohne Bilder und Preise.
Wählen Sie zwischen Bestellformular und Preismatrixmodus.
Ideal für Geschäfte, in denen Kunden mehrere Varianten auf einmal kaufen, z. B. Bekleidungs- und WooCommerce-Großhandelsgeschäfte.
3. Erweiterte dynamische Preisgestaltung für WooCommerce
Advanced Dynamic Pricing ist ein großartiges Plugin, mit dem Sie benutzerdefinierte Werbeaktionen und Rabatte einrichten können, die angezeigt werden, wenn eine Person die Website besucht.
Wie Sie wissen, sind Kunden immer auf der Suche nach den besten Angeboten für ein Produkt, und es ist noch besser, wenn Sie solche Angebote ohne großen Aufwand anbieten können.
Im Gegensatz zur Verkaufspreis-Option in WooCommerce liegt der Hauptgrund für die Verwendung dieses Plugins darin, dass Sie dynamische Preise auf der Grundlage von Kategorien, Tags oder sogar Produktattributen einrichten können.
Das bedeutet, dass Sie sogar spezielle Werbeaktionen auf der Grundlage bestimmter Variationsmerkmale in Ihrem Geschäft festlegen können.
Sie können zum Beispiel einen Rabatt von 10 % für jedes Produkt mit einer blauen Farbvariante in Ihrem WooCommerce-Shop einrichten.
Außerdem erhalten Sie weitere Funktionen wie:
Filtern Sie die Artikel im Warenkorb nach Produkten, Kategorien, Tags oder benutzerdefinierten Feldern.
Ändern Sie den Preis für jedes Produkt einzeln.
Legen Sie den Gesamtpreis für das gesamte Set fest.
Warenkorbrabatte und Gebühren anwenden.
Validieren Sie Bedingungen für Warenkorbartikel, Benutzerrollen oder Daten.
WooCommerce Multilingual, besser bekannt als WCML, gilt als das beste Plugin zur Verwaltung mehrerer Sprachen für Ihre Produkte.
Angenommen, Sie betreiben einen WooCommerce-Shop in den USA und in Spanien. Dann können Sie dieses Plugin verwenden, um mehrere Versionen Ihrer Produkte in jeder der beiden Sprachen zu erstellen.
Dann können Sie es so konfigurieren, dass eine Person, die die Website aus den USA besucht, die Produktdaten in Englisch mit Dollarpreisen erhält, während eine Person, die die Produktseite aus Spanien besucht, die Produktdaten in Spanisch mit Europreisen erhält.
Obwohl es sich nicht um ein Plugin handelt, das Produktvarianten manipuliert, hilft es dabei, Produkte in mehreren Sprachen anzuzeigen. Dieses Plugin ist deshalb so nützlich, weil die Darstellung einer Website in der Muttersprache eines Standorts mehr Nutzer mit mehr Konversion und Verkäufen zurückbringt.
Sie erhalten weitere Funktionen wie z. B.
Übersetzen Sie alle WooCommerce-Produkte mit einem einzigen Klick.
Einfaches Übersetzungsmanagement für Produkte, Kategorien und Attribute.
Behält eine gleichwertige Sprache während des Bezahlvorgangs bei.
Sendet E-Mails an Kunden und Administratoren in deren Sprache.
Ermöglicht die Bestandsverfolgung ohne Unterteilung der Produkte in Sprachen und vieles mehr.
ShopLentor is a comprehensive WooCommerce page builder plugin to enhance your online store’s functionality and user experience.
One of its standout features is the Variation Swatches Module, which transforms standard product variation dropdowns into engaging and intuitive swatches.
The Variation Swatches elevate the shopping experience by converting default dropdowns into visually appealing swatches, such as colors, images, or labels.
Its user-friendly interface allows customers to easily select product variations, increasing engagement and higher conversion rates.
With customizable options like tooltip support, adjustable swatch shapes, and seamless integration on shop or archive pages, this module ensures a cohesive and user-friendly product selection process.
Additionally, it effectively manages out-of-stock variations by clearly indicating their status, enhancing overall customer satisfaction.
Sie erhalten weitere Funktionen wie zum Beispiel:
Display product variations using color, image, or label swatches for a more intuitive selection process.
It offers additional information with tooltips that appear on swatch hover, enhancing user understanding.
Show swatches directly on shop or archive pages, allowing customers to select variations without navigating to individual product pages.
Clearly indicate unavailable options by blurring, hiding, or marking them, improving transparency.
Override global swatch settings for specific products, offering flexibility in presentation.
Häufig möchten Sie zusätzliche Details zu einer Produktvariante anzeigen, wenn eine Person diese auswählt. Zum Beispiel könnten Sie zusätzliche Details wie die Materialart hinzufügen.
Nun könnten Sie diese Informationen in die Produktbeschreibung einfügen, aber was ist, wenn Sie diese Informationen in einem anderen Feld als der Beschreibung anzeigen möchten? Dann können Sie das Plugin WooCommerce Custom Fields For Variation verwenden.
Das Plugin ermöglicht es Ihnen, zusätzliche Variationsdaten für Ihre Kunden anzuzeigen und zu organisieren. Sie können ganz einfach benutzerdefinierte Felder zu Ihren Produktvariationen hinzufügen, und zwar auf eine Art und Weise, die sich nativ für WooCommerce anfühlt und es Ihnen leicht macht, zusätzliche Produktdaten einzugeben und sie Ihren Interessenten anzuzeigen.
Ein sehr praktisches Plugin.
Sie erhalten weitere Funktionen wie zum Beispiel:
Die Benutzer können 2 Arten von Feldern erstellen, z. B. Textbereich und Textfeld.
Für die Eingabefelder Radio, Checkbox und Dropdown können Sie den Standardwert der Option festlegen.
Im Feld Datums- und Zeitauswahl können Sie entweder das Datum oder die Uhrzeit oder sowohl Datum als auch Uhrzeit anzeigen.
Unterstützt Negativpreiswert.
Es ermöglicht Ihnen, mehrere Felder zu Eingabefeld hinzuzufügen.
Additional Variation Image Gallery ist ein geniales Plugin, das es Ihnen ermöglicht, separate Bildergalerien für jede Ihrer Produktvarianten eines variablen Produkts hinzuzufügen.
Es ist wirklich schwierig, Produkte mit vielen Varianten über eine einzige Produktbildgalerie zu bewerben. Dieses Plugin macht es einfacher, da Interessenten nur die Bildergalerie sehen, die Sie für jede Variante eines Produkts zuweisen.
Sie erhalten weitere Funktionen wie zum Beispiel:
Unbegrenzte Anzahl von Variationsbildern pro Produktvariation anzeigen.
Anzeige von YouTube, Vimeo und gehosteten Videos pro Produktvariante.
Automatisches Galerie-Bild-Dia.
Linke, rechte und untere Galerie-Miniaturansichtssteuerung.
YITH WooCommerce Quick View ist ein unverzichtbares Plugin, das die Entscheidungszeit der Kunden bei der Produktauswahl verkürzt.
Normalerweise müssen Sie für die Anzeige von Produktdetails in WooCommerce die Produktseite besuchen. Mit diesem Plugin können Sie eine Vorschau des Produkts von der Shop-Seite erhalten.
So können sich Ihre potenziellen Kunden einen guten Überblick verschaffen, ohne Zeit mit dem Hin- und Herblättern zwischen der Produkt- und der Shop-Seite zu verlieren.
Sie erhalten weitere Funktionen wie zum Beispiel:
Wählen Sie, welche Art und wo die Schaltfläche angezeigt werden soll.
Produkte in der Schnellansicht durchsuchen.
Zeigen Sie verschiedene Arten von Bildern.
Wählen Sie die Informationen, die angezeigt werden sollen.
Wählen Sie die Lüftungsmethode für die Schnellansicht und vieles mehr.
Woo Variations Table ist ein weiteres Plugin, das Ihnen hilft, Produktvariationen auf ansprechendere Weise anzuzeigen.
Der Hauptzweck dieses Plugins besteht darin, die Produktvarianten eines variablen Produkts in Form von Tabellen darzustellen, um die Auswahl für Interessenten zu erleichtern.
Das Plugin zeigt alle Varianten in einer einzigen Tabelle mit dem Preis und anderen Attributen in Spalten zum Vergleich an.
Sie erhalten weitere Funktionen wie zum Beispiel:
Die Werte der Variationsattribute als Spalten in der Tabelle anzeigen.
Suchen Sie nach Variationen, indem Sie Ihre Suchbegriffe eingeben.
Filtern Sie die Varianten anhand der Werte der Attribute als Auswahlfelder.
Sortieren Sie die Tabellenspalten nach Ihren Wünschen mit einer einfachen Drag-and-Drop-Tabelle in den Einstellungen.
Wählen Sie aus, wo die Variationstabelle auf der Produktseite angezeigt werden soll und vieles mehr.
Auch, wenn Sie für eine große WooCommerce Produkt-Funktionen Video-Plugin für Ihren Shop suchen, können Sie prüfen, die WooCommerce Product Video Plugin von MotifCreatives.
Es wird Ihnen helfen, Produktdemovideos hinzuzufügen, um die Aufmerksamkeit der Kunden zu gewinnen.
10. Product Gallery Slider for WooCommerce
WooCommerce Produktgalerie Slider Plugin ermöglicht es Ihnen, mehrere Produktbilder in einem Schieberegler anzuzeigen.
Ihre Kunden können alle Produktbilder im Slider mit Hilfe der Auto-Play-Funktion sehen.
Wenn den Kunden mehr Bilder gezeigt werden, führt dies zu einer höheren Konversionsrate und einem besseren Engagement der Nutzer.
Sie können einen Galerie-Slider für bestimmte WooCommerce-Produkte und -Kategorien mit mehreren Navigationsschaltflächen hinzufügen.
Verbessern Sie die Nutzererfahrung und erleichtern Sie ihnen die Auswahl von Produktvariationen, indem Sie ihnen eine Vorschau der Produkte im Lightbox-Slider ermöglichen.
Sie erhalten weitere Funktionen wie zum Beispiel:
Option zum Hochladen oder Einbetten von Videos in die Produktgalerie
Mehrere Layouts für den Galerie-Slider
Hinzufügen eines Galerie-Sliders für bestimmte Produkte und Kategorien
Ermöglichen Sie den Kunden, die Produktbilder zu vergrößern
Automatische Wiedergabe von Produktvariationen im Schieberegler
WooCommerce-Produktvariationen sind ein Werkzeug, das Ihnen helfen kann, Kunden zum Kauf weiterer Produkte zu bewegen.
Und wenn Sie intelligente Anpassungen verwenden, werden Sie mehr Anpassungen haben.
Alle hier erwähnten Plugins haben ihren eigenen speziellen Nutzen. Ich persönlich empfehle Ihnen, Variation Swatches für WooCommerce auszuprobieren, da es eines unserer eigenen Plugins ist und wir zuversichtlich sind, dass es besser ist als andere solche Plugins da draußen.
Wenn Sie weitere Plugins empfehlen möchten, lassen Sie es uns bitte in den Kommentaren wissen. Pass auf dich auf.
Bei RexTheme ist die Entwicklung und Verbesserung eines benutzerfreundlichen Produkts ein ständiger Prozess.
Vor ein paar Monaten haben wir uns selbst herausgefordert und beschlossen, einige große Änderungen an unserem Plugin für virtuelle Touren, WP VR, vorzunehmen.
Unser Hauptziel war es:
Ändern Sie die Schnittstelle des Plugins, um es benutzerfreundlicher zu machen.
Veröffentlichung einiger wichtiger Funktionen zur Verbesserung der Benutzerfreundlichkeit.
Wir sind wirklich froh, Ihnen sagen zu können, dass wir es erfolgreich für Sie getan haben.
Sie können jetzt virtuelle Touren einfacher erstellen und eine hohe Konversionsrate mit all den neuen aufregenden Funktionen wie Fluent Forms-Integration, WooCommerce-Integration, Multi-Site-Unterstützung und vielem mehr erzielen.
To increase sales in your online store, the first step is to impress your potential customers visually. And to do so, you must optimize your product pages.
The easier you make for buyers to choose their products, the higher the conversion.
If you have variable products in your store, you want to display all the variations of a product in a user-friendly way.
One of the latest trends that have seen great results is the use of swatches to present variations, rather than drop-down menus.
Hence, use WooCommerce variation swatches to present product variants in a more engaging and appealing way.
Create greater buyers’ intent because:
Buyers will get a preview of the variants rather than text. For example, they will see the color red visually, rather than selecting a text ‘Red’, hence helping to take a practical decision.
It’s easier to browse through variants by clicking on swatch buttons, rather than drop-down menus.
The swathes will attract the buyers to check through the variants, and possibly create a buyer’s intent. As they say, the more you spend time on a product, the more you wish to buy it.
Today we will discuss how you can use variation swatches on your WooCommerce store in the most result-driven way.
You will learn how to apply the right type of variations swatches depending on your product variants to enhance the buyers’ intent.
Nachdem Sie diesen Leitfaden gelesen haben, werden Sie in der Lage sein:
Understand how each variation swatch type is important
Set up color, image or label swatches for variants on your own
Your variable products may have different types of variations. You can’t set up unique variation swatches for different variants to create maximum engagements.
Color Variation Swatches
A product may be available in various colors.For example, let’s say you are selling a t-shirt that has three colors, Red, Blue, and Yellow.
Then you can use color variation swatches to let your customers choose from the variants.
By default, WooCommerce lets people choose through a boring drop-down menu. But you can make it more engaging with colored swatch buttons.
See the difference yourself:
Default
Default WooCommerce variations selection for color
Using Color Variation Swatches
Using WooCommerce Color Variation Swatches
As you see, the colors are clearly visible. So a person will find the selection easier and more practical.
Image Variation Swatches
Certain products are more versatile and you may present the variants using image variation swatches.
For example, let’s say you sell gift boxes with different shapes. So rather than presenting the drop-down selections, you may display variants with image swatches.
Here’s how amazing it becomes:
Default
Default WooCommerce variations selection for shape
Using Image Variation Swatches
Using WooCommerce Image Variation Swatches
As you can see, the variants are presented in small swatches for the shapes thus making it more attractive.
Tip: It is always ideal to have an image with all variants together as the featured image for the product. In case you don’t have any, then use the image of the most popular variant as the featured image.
Label Variation Swatches
Certain factors such as Size or Length are difficult to portray visually.
For example, if you are selling a t-shirt with sizes, L (for large), M (for Medium), and S (for Small), then you have no way to visually show the actual sizes.
In that case, you can still make it attractive by presenting the variants using label variation swatch buttons.
Here’s how it will still make a difference:
Default
Default WooCommerce variations selection for size
Using Label Variation Swatches
Using WooCommerce Label Variation Swatches
Despite no size visualization, the swatches make the selection more appealing. People will often click on the swatches just out of curiosity.
Text Variation Swatches
Similar to sizes, few other variation factors such as material or age-group related variations, etc, can not portrayed visually, nor they can be portrayed as labels.
For example, let’s say you are selling a hat in the Kids size, Teen size and Grow-up size.
In that case, you can turn them in to attractive buttoned text swatches.
The advantage here is that all the variations available will be listed in front of the buyer and he/she can make the selection simply by clicking on the button(s).
Here’s a preview:
Default
Default WooCommerce variations selection for size
Using Text Variation Swatches
Using WooCommerce Text Variation Swatches
Tip: If you have size labels other than numbered values, then keep a chart in your site to find the exact values of the sizes. Stores often lose sales due to the lack of this chart. Customers are not patient enough to knock you on customer care to find out the exact size.
As you saw, changing variation menus to swatches make it so much more attractive and engaging.
Now, if you want to implement these attractions, then you can easily do so using the plugin Variation Swatches For WooCommerce.
Variation Swatches For WooCommerce
Variation Swatches for WooCommerce is a simple plugin with which you can change the basic dropdown selection of variants to button swatches easily. It takes only a few clicks.
Let me give you a step by step guide on how you can easily set up variation swatches on your online shop using Variation Swatches for WooCommerce.
How To change dropdown to button swatches for WooCommerce variations?
As discussed earlier, WooCommerce displays variations as dropdown options on the product page.
However, you can easily convert the variation options from dropdown to button swatches in just a few clicks, using the plugin.
Here’s how you can do it step by step.
1. First, install and activate Variation Swatches for WooCommerce.
On your admin dashboard, you will get a new menu called Swatches. Click on it.
It will take you to the plugin dashboard.
Variation Swatches for WooCommerce Dashboard.
2. Set basic swatch style and design
On General Settings, you will find the options to set color and border of swatches as normally displayed, when hovered, or when selected.
Plus you will be able to set the font size.
Configure these settings as you like.
3. Go To Controls Tab
Click on the Controls tab on the left.
The Controls tab will have many options.
4. Enable Dropdown To Button Swatches
Aktivieren Sie hier die Option Dropdown zu Schaltflächenfeldern.
Then save settings. Now you will see that the variations on product pages will be displayed in the form of button swatches.
Default Dropdown Selection
Button Swatches For Variations
Once you have enabled the dropdown to button swatches for your store, now you can customize the swatches into color, image or label swatches easily, in few simple steps.
How to Set Up WooCommerce Color Swatches for Color Variations
By using Color swatches, you can give a visual idea of the color the buyer will be choosing. So the there will be no hesitation.
And as you saw earlier, color swatches are very attractive compared to the ordinary dropdown selection.
To to set set up color swatches, follow the steps below.
1. Dropdown-Felder für Schaltflächen aktivieren
First follow the steps to enable dropdown to button swathes as explained earlier.
The variation terms are usually grouped in to attributes.
Go to Dashboard > Products > Attributes and you will find the list of attributes you have already created in your store, and the option to add new attributes.
Auf der rechten Seite sehen Sie die Liste der erstellten Attribute, die Sie haben.
3. Ändern Sie Ihr gewünschtes Attribut als Farbtyp
Hover your mouse on the attribute name for which you want to use color swatches.
You will get the options to Edit or Delete. Click on Edit and it will take you to the Edit attribute page.
Once you are on the Edit Attribute page, you will see you have a field for Type.
Click on it and choose the option “Color”.
Then click on the Update button below.
4. Set Color Swatches For Variation Terms
Once you have set the attribute type to “Color”, now you can assign color swatches to the variant terms under this attribute.
Go back to Dashboard > Products > Attributes and on the right side of the attribute (you just set as Color type), you will get the option to “Configure terms”.
Click on Configure terms and it will take you to the the following page:
Here, you can either add terms for color variations or, on the right side you can see the variant terms that you all ready have for colors on your store.
Hover your mouse on one color term and you will find the option to Edit.
Click on edit and it will take you to the edit page. Here, below you will see that you have the option to choose a color.
Click on “Select Color” and you will get the option to assign a color.
Wählen Sie eine geeignete Farbe und klicken Sie erneut auf Farbe auswählen.
Then click on the Update button below.
Gehen Sie nach der Aktualisierung zurück und Sie werden sehen, dass eine Vorschau der Farbe direkt neben dem Namen des jeweiligen Farbvariantenbegriffs angezeigt wird.
Blue color swatch selected for Blue variation term
Do the same for the rest of the color variations and that’s it. Now your products will have color variation swatches instead of dropdown selection for color variants.
Using Color Variation Swatches
How to set up image swatches for WooCommerce product variations?
By using Image swatches, you can display certain variants as attractive swatches when viewing product(s).
And as you saw earlier, image swatches are very engaging, compared to the ordinary dropdown selection.
To to set set up images swatches, follow the steps below.
1. Dropdown-Felder für Schaltflächen aktivieren
First follow the steps to enable dropdown to button swathes as explained earlier.
The variation terms are usually grouped in to attributes.
Go to Dashboard > Products > Attributes and you will find the list of attributes you have already created in your store, and the option to add new attributes.
Auf der rechten Seite sehen Sie die Liste der erstellten Attribute, die Sie haben.
3. Assign Your Desired Attribute As Image Type
Hover your mouse on the attribute name for which you want to use image swatches.
You will get the options to Edit or Delete. Click on Edit and it will take you to the Edit attribute page.
Once you are on the Edit Attribute page, you will see you have a field for Type.
Click on it and choose the option “Image”.
Then click on the Update button below.
4. Set Color Swatches For Variation Terms
Once you have set the attribute type to “Image”, now you can assign image swatches to the variant terms under this attribute.
Go back to Dashboard > Products > Attributes and on the right side of the attribute (you just set as Image type), you will get the option to “Configure terms”.
Click on Configure terms and it will take you to the the following page:
Here, you can either add terms for variations or, on the right side you can see the variant terms that you already have (under this attribute).
Hover your mouse on one term and you will find the option to Edit the term.
Click on edit and it will take you to the edit page. Here, below you will see that you have the option to upload or add an image.
Click on “Upload/Add Image” and you can either upload an image or choose an image from your media library.
Choose an appropriate image then click on the Update button below.
Once updated, go back and you will see that a preview of the image is there just beside the name of the variant term.
Triangle image swatch selected for Triangle Shaped variation term
Do the same for the rest of the variants and that’s it. Now your products will have image variation swatches instead of dropdown selection for these variants.
Using Image Variation Swatches
How to set up a label variation swatches for variable products?
By using Label swatches, you can display certain variants that can be recognized with single letters or numbers.
And as you saw earlier, Label swatches are more catchy, compared to the ordinary dropdown selection.
To to set set up label swatches, follow the steps below.
1. Dropdown-Felder für Schaltflächen aktivieren
First follow the steps to enable dropdown to button swathes as explained earlier.
The variation terms are usually grouped in to attributes.
Go to Dashboard > Products > Attributes and you will find the list of attributes you have already created in your store, and the option to add new attributes.
Auf der rechten Seite sehen Sie die Liste der erstellten Attribute, die Sie haben.
3. Assign Your Desired Attribute As Label Type
Hover your mouse on the attribute name for which you want to use label swatches.
You will get the options to Edit or Delete. Click on Edit and it will take you to the Edit attribute page.
Once you are on the Edit Attribute page, you will see you have a field for Type.
Click on it and choose the option “Label”.
Then click on the Update button below.
4. Set Label Swatches For Variation Terms
Once you have set the attribute type to “Label”, now you can assign label swatches to the variant terms under this attribute.
Go back to Dashboard > Products > Attributes and on the right side of the attribute (you just set as Label type), you will get the option to “Configure terms”.
Click on Configure terms and it will take you to the following page:
Here, you can either add terms for variations or, on the right side you can see the variant terms that you already have (under this attribute).
Hover your mouse on one term and you will find the option to Edit the term.
Click on edit and it will take you to the edit page. Here, below you will see that there is a field for you to enter a Label character.
Input the Label you want to display.
Then click on the Update button below.
Once updated, go back and you will see that a preview of the label is there just beside the name of the variant term.
Do the same for the rest of the variants and that’s it. Now your products will have label variation swatches instead of dropdown selection for these variants.
Using Label Variation Swatches
Schlussfolgerung
It is clear that dropdown selection for variable products is no longer preferred. The best way to offer variations is by using swatches.
And the best part is, it’s super easy to implement and can be done in just a few clicks using the plugin Variation Swatches for WooCommerce.
So I suggest you try out the plugin and leverage the benefit of WooCommerce variation swatches. Take advantage of attracting buyers easily without much effort.
If you want to learn how to create a variable product, you can follow this guide:
Als Besitzer eines WooCommerce-Shops möchten Sie den Umsatz Ihres Shops immer auf die bestmögliche Art und Weise steigern.
Eine der effektivsten Möglichkeiten, die Anzahl der Verkäufe in Ihrem Geschäft zu erhöhen, besteht darin, die Produkte Ihres Geschäfts auf den größten Marktplätzen zu bewerben, insbesondere wenn Sie einen relativ neuen Online-Shop besitzen.
Mit 2,31 Milliarden monatlichen Besuchern, d.h. 77 Millionen täglichen Käufern, ist Amazon der größte Marktplatz der Welt, auf dem Sie für Ihre Produkte werben können.
Die Werbung auf einem gigantischen Marktplatz wie Amazon Seller Central wird Ihrem Unternehmen zugute kommen, weil
Bei Amazon erreichen Ihre Produkte mit viel weniger Aufwand weit mehr Käufer als Ihr eigenes Geschäft.
Amazon verfügt über detaillierte Informationen über ihre Käufer, so dass Ihre Produkte den Käufern gezeigt werden, die eine echte Kaufneigung haben werden.
Käufer vertrauen Amazon und den dort gelisteten Produkten, während Sie bei Erstkäufern mit Vertrauensproblemen in Ihrem Geschäft konfrontiert sein können.
Durch die Generierung eines Produkt-Feeds können Sie Produkte in großen Mengen auf Amazon hochladen, was Ihnen eine enorme Zeitersparnis bringt.
Sie können ganz einfach Produkte bei Amazon einreichen, wodurch automatisch strukturierte Produkte erstellt werden und bei den Suchergebnissen besser abschneiden.
Aber zuerst müssen Sie wissen, wie Sie einen genauen Produkt-Feed Ihrer Produkte erstellen, um sie bei Amazon Seller Central einzureichen.
Es gibt bestimmte Möglichkeiten für Sie, den Produkt-Feed für maximale Verkäufe über Amazon Seller Central zu optimieren.
Nachdem Sie diesen Leitfaden gelesen haben, werden Sie in der Lage sein:
Erstellen Sie einen genauen und perfekten Produkt-Feed für den Amazon Marketplace.
Wie Sie ein zentrales Amazon-Verkäufer-Konto eröffnen, um Ihre Produkte zu bewerben
Bevor Sie beginnen, Ihre Produkte vom WooCommerce-Shop auf dem Amazon Marketplace zu bewerben, müssen Sie ein Konto bei der Amazon-Verkäuferzentrale eröffnen.
Doch zunächst wollen wir uns ansehen, was Sie vor der Eröffnung des Kontos benötigen.
Voraussetzungen zur Eröffnung eines zentralen Amazon-Verkäufer-Kontos
1. International akzeptierte Kreditkarte
Sie müssen im Besitz einer Kreditkarte sein, die international akzeptiert werden kann und mit Ihrer gültigen E-Mail-Adresse verbunden ist.
2. Informationen zur Steueridentifikation
Amazon wird nach der Steueridentifikationsnummer (EIN, wenn Sie sich in den Staaten befinden) von Ihnen oder Ihrem Unternehmen fragen.
3. Geschäftliche Informationen
Ihr gesetzlicher Firmenname, Ihre Adresse, E-Mail-Adresse und andere Kontaktinformationen werden benötigt.
4. Informationen zum Bankkonto
Außerdem benötigen Sie ein Bankkonto und andere grundlegende Informationen.
Sobald Sie diese gesammelt und organisiert haben, befolgen Sie die folgenden Schritte, um ein Amazon Seller Central-Konto zu erstellen.
Schritt 1 - Beginnen Sie mit der Anmeldung
Gehen Sie auf den folgenden Link, um den Anmeldeprozess zu starten:
Hier zeigen wir Ihnen, wie Sie ein Konto für einen einzelnen Verkäufer eröffnen können.
Sobald Sie auf den obigen Link gehen, sehen Sie eine gelbe Schaltfläche Verkaufen starten.
Klicken Sie auf die Schaltfläche Start Selling (Verkauf starten), und Sie werden zur Registrierungsseite für Amazon Seller Central weitergeleitet.
Geben Sie Ihren Namen und Ihre E-Mail-Adresse an, legen Sie ein Passwort fest und klicken Sie auf die Schaltfläche Weiter.
Schritt 2 - Einrichten Ihrer Geschäftsinformationen
Im nächsten Schritt müssen Sie Ihre Geschäftsinformationen wie Geschäftsstandort, Geschäftstyp usw. angeben.
Schritt 3 - Persönliche Informationen
Hier müssen Sie weitere Informationen wie das Land Ihrer Staatsbürgerschaft, Ihr Geburtsland, Ihr Geburtsdatum und die vollständige Geschäftsadresse angeben.
Sie müssen auch Ihre Kontaktnummer angeben. Sie erhalten einen Anruf oder eine SMS, um zu bestätigen, dass es sich um Ihre gültige Nummer handelt.
Schritt 4 - Einrichten Ihrer Abrechnungsmethode
In this step, you have to set up the billing method for your Amazon Seller Central account. You’ll see the cost details of your plan.
Amazon kann jedoch Produkte fast in die ganze Welt verschicken.
Wie erstellt man einen optimierten WooCommerce-Produkt-Feed für Amazon?
Wie bei den meisten anderen Marktplätzen müssen Sie auch bei Amazon Daten in bestimmten Formaten übermitteln. In der Tat gibt es einige Details, die zwingend erforderlich sind, um für den Verkauf zugelassen zu werden.
Produktdaten-Spezifikation
Ein typisches Amazonas-Produktfutter sieht wie folgt aus:
Sie sollten immer angeben, unter welche Kategorie Ihre Produkte fallen.
Wenn Sie in Ihrem Geschäft Unterkategorien haben, versuchen Sie, diese anzugeben, da Sie dadurch bessere Ergebnisse erzielen.
Preis
Attribut
Preis
Beispiel
20.00 GBP
Feed-Daten
<price>20.00 GBP</price>
Das Attribut Preis sollte mit der Währung als Suffix eingereicht werden. Wie GBP oder USD.
So wird der Produktpreis auf den Produktseiten von Amazon angezeigt (hier können Sie auch die Rabattdetails einsehen).
Sie können die Produktpreise von hier aus in Ihrem WooCommerce-Shop einstellen.
SKU
Attribut
sku
Beispiel
Woo-Bohnen-Logo
Feed-Daten
<sku>Woo-beanie-logo</sku>
KU oder Lagerhaltungseinheit ist ein Begriff aus der Bestandsführung, den Sie verwenden können, um die verfügbaren Bestände aus Listen, Bestellformularen und Rechnungen zu identifizieren.
Hier sind die Bedingungen für SKU in Amazonien:
Jedes Produkt in Ihrem Produktfeed muss einen eindeutigen SKU-Wert haben.
Jeder SKU-Wert, der auf Amazon hochgeladen wird, erzeugt einen neuen Datensatz.
Da jeder SKU-Wert einzigartig ist, dürfen Sie ihn nicht ändern. Diese Werte bleiben auf Ihrem Feed, bis Sie ihn löschen.
Wenn Sie ein Produkt mit einem bereits vorhandenen SKU-Wert hochladen, ersetzen die neuen Produktdaten die alten Produktdaten für diese SKU.
<bullet_point1>This product is waterproof!</bullet_point1>
Aufzählungspunkte sind Teil Ihrer Produktbeschreibung. Dieses Attribut ermöglicht es, das Hauptmerkmal Ihrer Produkte in Aufzählungspunkten hervorzuheben.
Amazon erlaubt den Verkäufern, bis zu 10 Aufzählungspunkte hinzuzufügen. Verkäufer können bis zu 5 Aufzählungspunkte hinzufügen.
In diesen Aufzählungspunkten dürfen Sie nur Ihre Produktmerkmale beschreiben.
Die Verletzungen des Aufzählungspunktes sind die gleichen wie die Verletzungen der Produktbeschreibung.
Hier sehen Sie ein Beispiel für die Aufzählungspunkte auf den Produktseiten von Amazon.
Höhe
Attribut
Höhe
Beispiel
2 M
Feed-Daten
<height><[Product height]></height>
Hier müssen Sie die Höhe jedes Ihrer Produkte angeben.
Länge
Attribut
Länge
Beispiel
2M
Feed-Daten
<length><[Product length]></length>
Hier müssen Sie die Länge jedes Ihrer Produkte angeben.
Breite
Attribut
Breite
Beispiel
2M
Feed-Daten
<width><[Product width]></width>
Hier müssen Sie die Breite jedes Ihrer Produkte angeben.
Gewicht
Attribut
Gewicht
Beispiel
2 KG
Feed-Daten
<weight><[Product weight]></weight>
Hier müssen Sie das Gewicht jedes Ihrer Produkte angeben. Dieses Attribut kann je nach Ihren Versandregeln entscheidend sein.
Wenn Sie Produkte in Packungen oder Bündeln verkaufen, müssen Sie hier die Artikelpaketmenge angeben.
Angenommen, Sie haben ein Kaffeepaket mit Kaffeebohnen und Zuckerwürfeln, dann müssen Sie hier 2 Produkte erwähnen.
Modell-Nummer
Attribut
Modell_Nummer
Beispiel
2384
Feed-Daten
<model_number>2384</model_number>
Wenn Sie Ihre eigenen Marken- oder Fertigprodukte verkaufen, müssen Sie Ihren Produkten möglicherweise die Modellnummer zuweisen.
Ansonsten brauchen Sie dieses Attribut nicht zu verwenden.
Schlüsselwörter
Attribut
Schlüsselwörter1
Beispiel
Lavendelholz braun groß
Feed-Daten
<Keywords1>Lavender Wood Brown Large</Keywords1>
Sie können Ihren Produkten Schlüsselwörter zuordnen, um bessere Ergebnisse bei der Amazon-Suche zu erzielen.
Folgen Sie dieser Amazon-Anleitung, um sich über die Bedingungen und Einschränkungen bei der Verwendung von Schlüsselwörtern zu informieren und diese perfekt für Ihre Produkte einzurichten.
Wenn Sie weitere Bilder zu Ihren Produkten hinzufügen möchten, verwenden Sie dieses Attribut und geben Sie die URLs Ihrer zusätzlichen Produktbilder an.
Bei Amazon können Sie bis zu 9 Produktbilder pro Seite anzeigen lassen. Normalerweise werden jedoch 7 Produktbilder auf jeder Produktseite angezeigt.
Laden Sie Ihren Produkt-Feed zu Amazon hoch
Sobald Sie Ihren Produkt-Feed erstellt haben:
Go to the Inventory page on your Amazon Seller Central account.
Klicken Sie auf die Datei Upload Your Inventory File, um die Produkte über eine Produkt-Feed-Datei hochzuladen. Sie können den Dateityp auch aus dem Abschnitt Dateityp auswählen.
Hier sehen Sie, wie ein Produkt-Feed für Amazon im TEXT-Format aussieht.
Hier sehen Sie, wie ein Produkt-Feed für Amazon im XML-Format aussieht.
Werbung auf den großen Marktplätzen wird Ihnen immer mehr Verkäufe mit dem geringsten Aufwand bringen.
Amazon ist der beste Ort für Sie, wenn Sie die Verkäufe Ihres WooCommerce-Shops steigern möchten. Daher ist es höchste Zeit, dass Sie beginnen, Ihre Produkte über Amazon Seller Central zu bewerben.
Hier sind die Anleitungen zur Erstellung genauer und optimierter Produkt-Feeds für die beliebtesten Marktplätze:
Wenn Sie einen bestimmten Marktplatz haben, für den Sie einen Leitfaden für den Produkt-Feed wünschen, lassen Sie es mich in den Kommentaren wissen. Ich werde versuchen, einen für Sie zu erstellen.