Categories
Product Feed Manager For WooCommerce WooCommerce

5 Best Global Online Marketplaces for International Promotion [2025]

Running a WooCommerce store is always a challenge. You constantly need to explore different ways to generate new sales and stay ahead of the competition.

One of the most efficient ways to sustain your WooCommerce business is by promoting your products on different global online marketplaces.

According to InternetRetailing, Third-party marketplace sales will take over 59% of all global e-commerce by 2027.

But, as a beginner, you might get confused when deciding which global online marketplaces to promote to get maximum exposure and sales, especially if you are selling in an international market.

Today, you’ll explore the best marketplaces where you can promote your products to reach more potential international clients.

So let’s get started.

What are global online marketplaces?

Global online marketplaces are some of the best places for you to sell online, enabling buying and selling across borders.

These digital platforms serve as international e-commerce hubs where you can reach a diverse global audience. They are essential for expanding your business’s reach and boosting sales worldwide.

For example, Amazon and eBay offer robust seller tools and broad audience reach. You can also sell on Alibaba which stands out as an international online marketplace connecting businesses globally.

These platforms support various currencies and secure transaction methods, making them ideal for your business.

Benefits of Selling on Global Online Marketplaces

There are numerous benefits of selling your products on global online marketplaces. Some benefits are given below:

  1. Wider Reach: Access a vast international customer base. It helps to expand your market beyond local limits. This also allows you to reach customers you wouldn’t normally have access to.
  2. Increased Sales: Exposure to millions of potential buyers boosts your sales volumes. The large user base on these platforms leads to more opportunities for sales.
  3. Diverse Audience: Reach different demographics and markets worldwide. This diversity helps you tap into various customer segments and increase your market share.
  4. Lower Marketing Costs: Leverage the marketplace’s traffic and marketing, saving you money. You can benefit from the marketplace’s established customer base without spending heavily on advertising.
  5. Established Trust: Use the marketplace’s reputation to build trust with new customers. Buyers often feel more secure purchasing from well-known platforms.
  6. Easy Setup: Quickly list products, manage inventory and process payments. The streamlined process makes it simple for you to start selling without technical expertise.
  7. Scalability: Efficiently grow your business using the marketplace’s logistics. You can handle increased order volumes without investing heavily in infrastructure.
  8. Analytics and Insights: Access detailed performance data to optimize your listings. Use these insights to make data-driven decisions and improve your sales strategy.
  9. Multi-currency Support: Handle transactions in various currencies easily. This convenience attracts international buyers who prefer to pay in their local currency.
  10. Enhanced Visibility: Increase your product visibility through marketplace algorithms. These algorithms help your products get discovered by more potential buyers.

5 Best Marketplaces to Sell Your WooCommerce Products Online

Following are the 5 best marketplaces in the world where you can start promoting your products and expect to get better results.

1. eBay: Expanding Your Reach with Auctions & Buyer Offers

eBay - Global online Marketplace

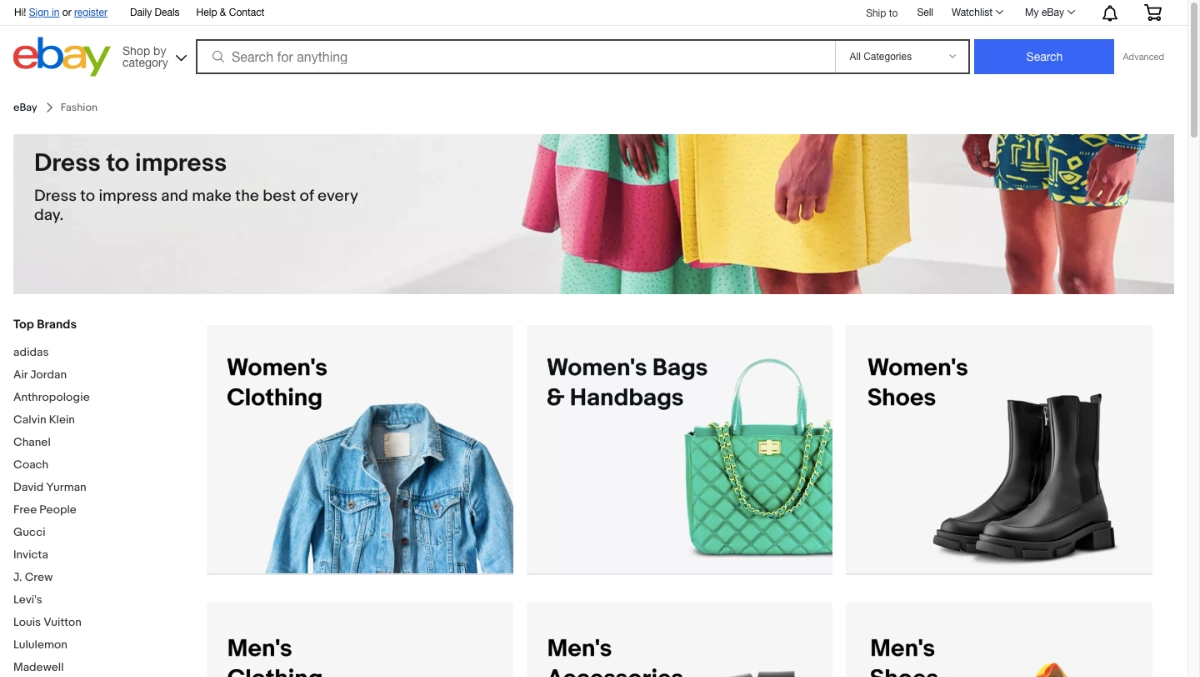
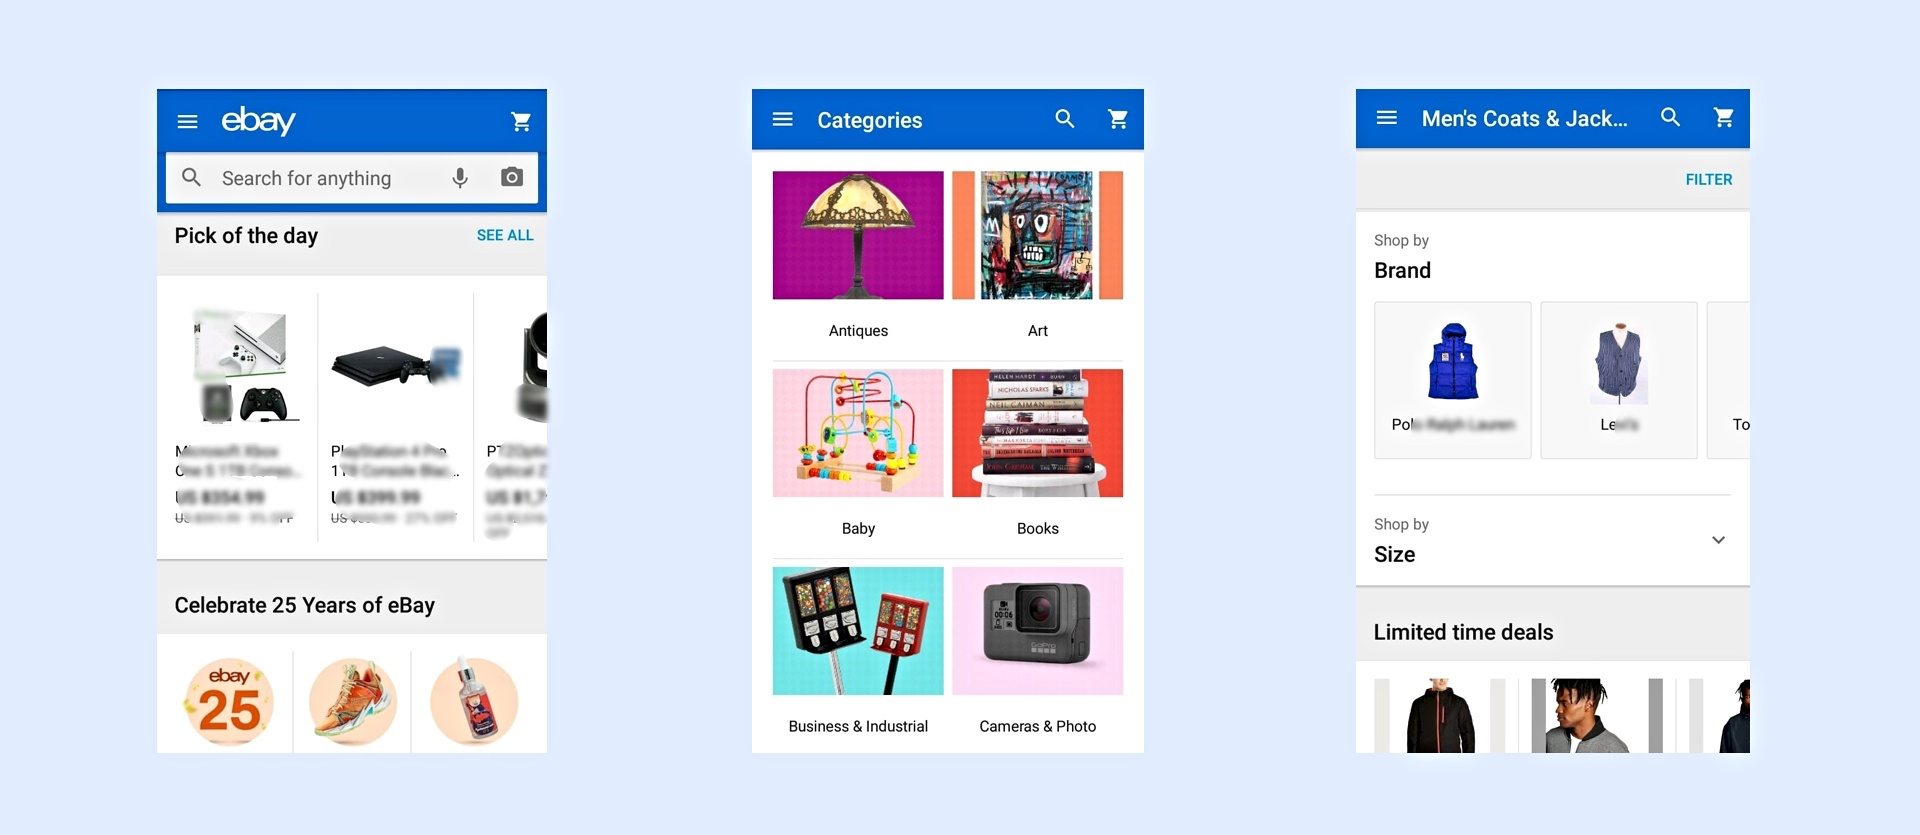
eBay is the best marketplace in the world that can provide a unique opportunity for you to reach a broad customer base.

With over 132 million active buyers, eBay can be a lucrative marketplace for your Woocommerce.

Advantages of eBay platforms:

You will get several benefits when uploading products on eBay:

  • Auction Format: You can auction your products. It allows your buyers to bid and potentially generate higher profits.
  • Buyer Offers: Here, buyers can make offers on your products, which can sometimes be much higher than your planned sale price.
  • Customizable Storefront: You can create a customized store that is hosted on eBay to showcase your brand and provide a unique shopping experience.
  • Seller Protection: You can benefit from seller protection policies to safeguard your business against fraudulent buyers. It also has built-in tools to manage returns and refunds easily.

When should you promote products on eBay?

If you specialize in unique or hard-to-find items like vintage records, then eBay is a great marketplace to rely on.

It has a diverse audience where many actively seek rare and desirable products. You can list your items for auction-style bidding or as fixed-price options, whichever you find more feasible.

Sometimes the bidding can go very high, which is a great opportunity for you to earn extra. However, sometimes prices may not go as high as you want.

Hence, if you have a product on which you do not wish to compromise the price, listing it under the “Buy it Now” format would be the right option.

You can also set up an eBay store and integrate your WooCommerce products into it. With an eBay store, you can create customized listings, showcase your brand, and organize your products into different categories.

Tips on getting started with eBay:

  • Create an eBay seller account to manage your listings, track sales, and communicate with customers. You can also create an eBay seller center product feed to upload your listing quickly.
  • Optimize your product listings with high-quality images, detailed descriptions, and relevant keywords to rank higher in search results.
  • Set competitive prices, considering eBay’s highly competitive marketplace. Consider offering free shipping or bundle deals to attract customers.
  • Provide excellent customer service, responding quickly to inquiries and resolving any issues or complaints promptly.
  • Utilize eBay promotions such as sales, discounts, and coupon codes to attract more customers and boost sales.
  • Monitor your performance metrics to adjust your strategies as needed.
  • optimize your eBay MIP channel to get targeted audiences from this marketplace.

Thus, you can integrate your WooCommerce store with eBay and expand your online presence with a proven digital marketplace.

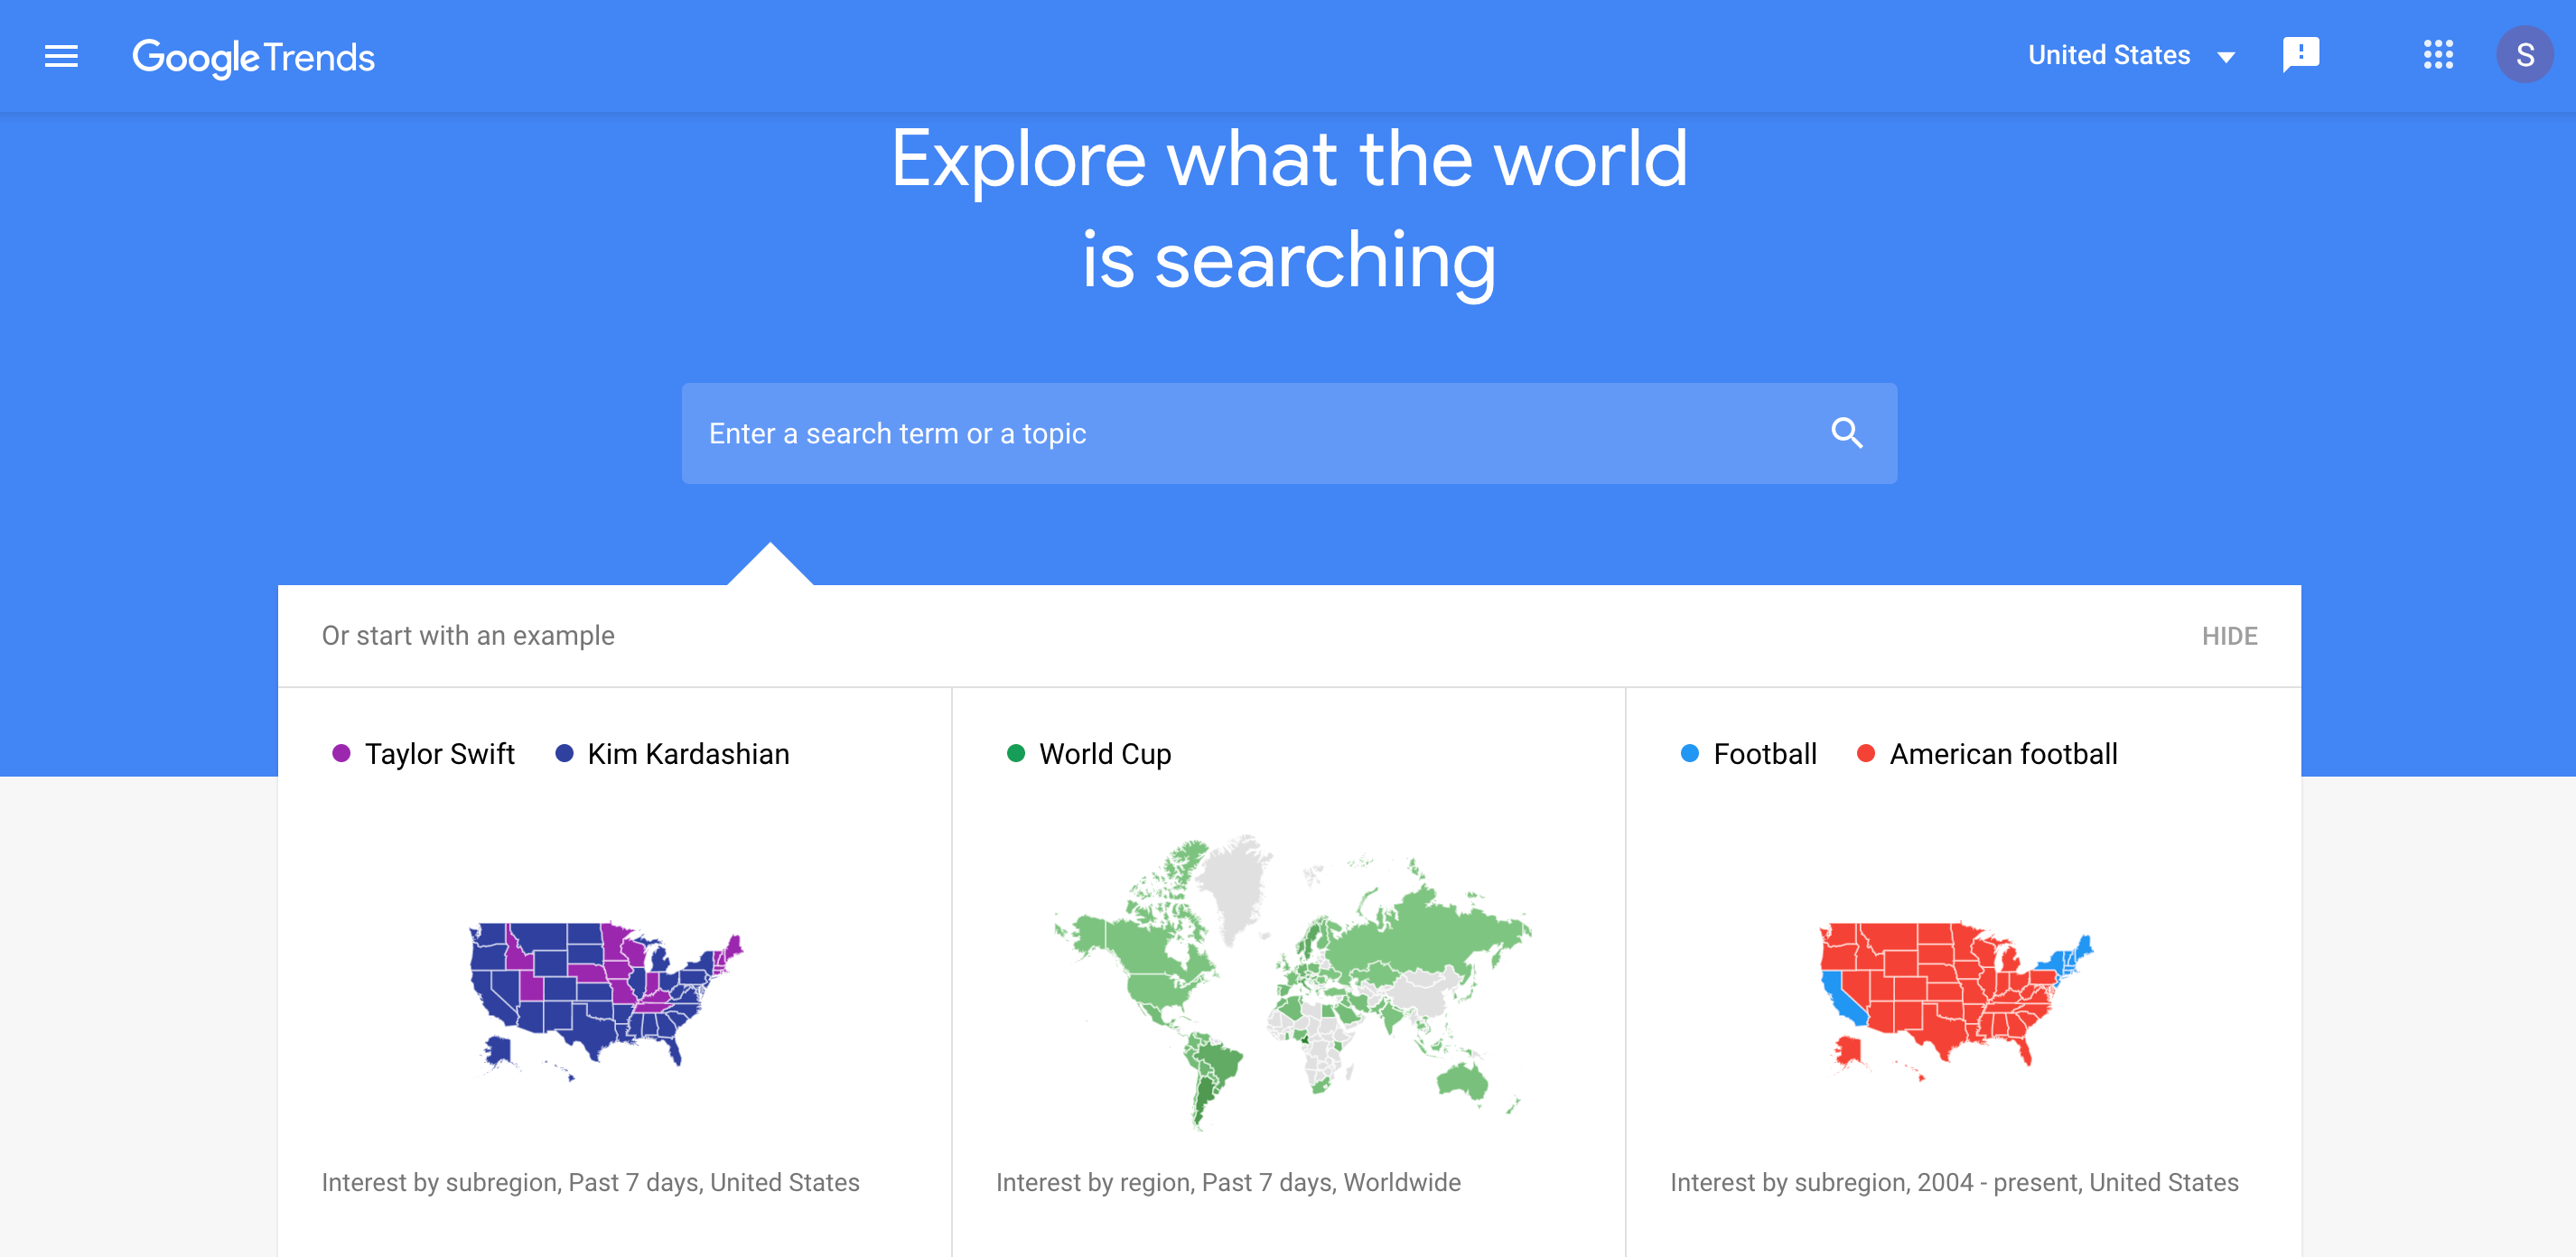
2. Google Shopping – Leverage Visibility on A Global Scale

Google Shopping - Global online Marketplace

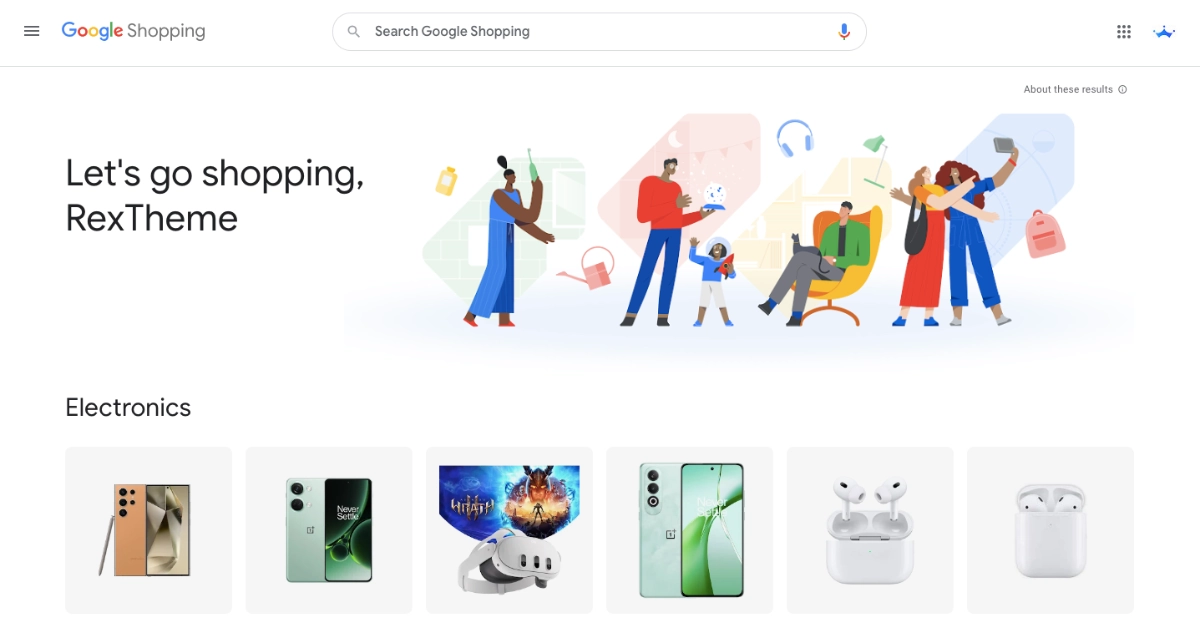
Google Shopping is the most commonly used global online marketplace by medium to large e-commerce stores.

Its specialty is you can directly get customers who search for products on Google as the products you list on Google Shopping are promoted on Google’s search page and various other display Ads.

Plus, you can pay extra to run Google Paid Ads all over the internet for these products.

Benefits of Google Shopping:

Here are some advantages of this marketplace-

  • Visual Appearance: Through this international online marketplace, your products appear visually on the search results page, increasing click-through rates and potential sales.
  • Global Reach: You can reach a wider audience and improve search engine rankings by promoting your products on Google Shopping.
  • Targeted Advertising: You can target specific audiences based on geographic location, language, device type, and more with this marketplace.
  • Detailed Analytics: You can track ad performance, including impressions, clicks, and conversions, to measure your return on investment from Google shopping.

When should you promote products on Google Shopping?

Google Shopping is ideal for any type of product (as long as they do not fall under restricted product categories). As long as you submit the right product data, you can get good results.

Even if you are running an online store, you can easily auto-sync your Woocommerce products to Google to promote them anytime.

Tips on getting started with Google Shopping:

  • Create a Google Merchant Center account to upload and manage your product data and listings.
  • Create your Google shopping feed with accurate and detailed information, including titles, descriptions, prices, and images.
  • Use high-quality product images that make your products stand out in search results.
  • If you face any Google feed errors by chance, you can easily avoid them by taking some steps.
  • If you want to showcase your products to your targeted audience, you can go for Google’s paid advertising. For that, you need to choose a bidding strategy carefully in the pay-per-click (PPC) model, considering your budget and performance goals. But, if you’re not sure about it and have less budget you can skip it and focus on listing your products on Google Shopping only.
  • You always need to monitor your performance metrics and optimize your product feed as needed.

However, when expanding your reach you may face a gap between search intent and social discovery. Utilizing specialized e-commerce software development services can significantly enhance the effectiveness of your presence on Google Shopping.

You can extend your reach further by leveraging Facebook’s vast user base and sophisticated ad-targeting capabilities that discussed in the next section.

3. Facebook – Targeted Marketplace for Potential Customers

Facebook - Global online Marketplace

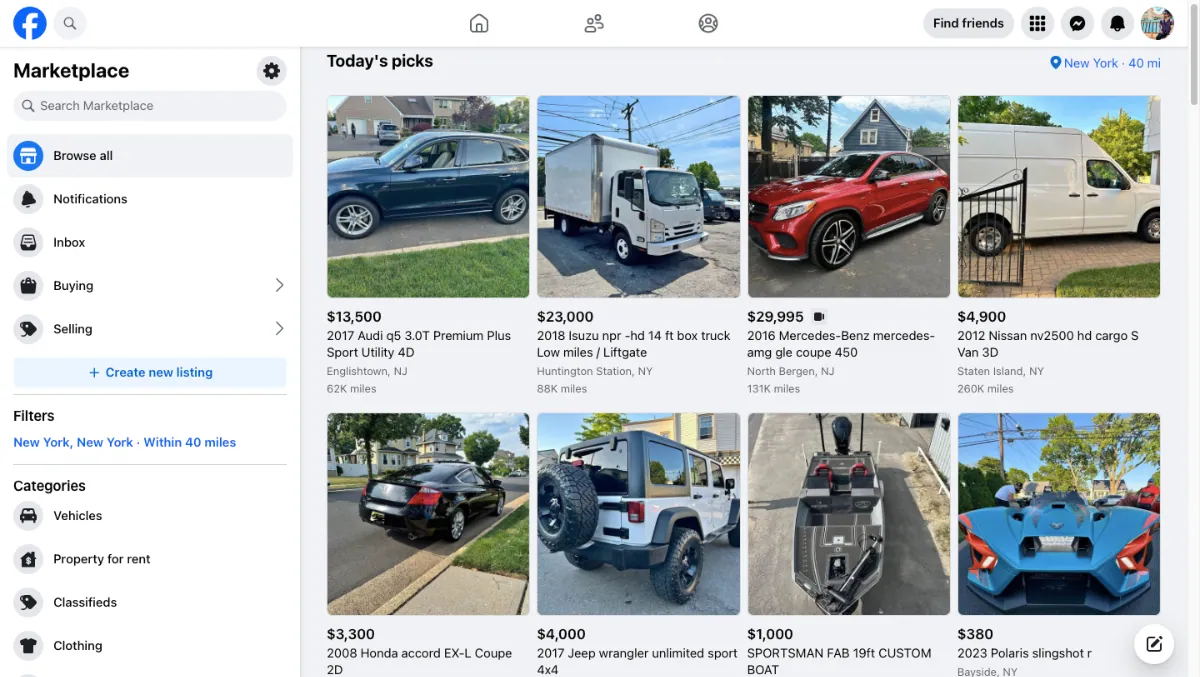
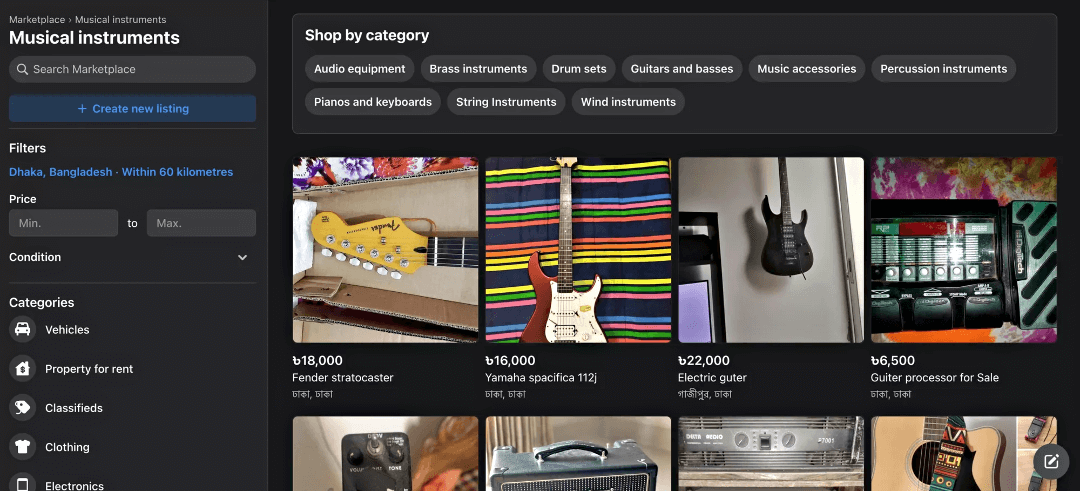
Facebook is one of the best social marketplaces worldwide, offering an excellent opportunity to promote your products and reach a wider audience.

By listing products on Facebook, you can display your products in the ‘Products Tab’ and attract potential buyers you come to Facebook to purchase.

Advantages of Facebook:

  • Large User Base: You can get benefits from Facebook’s massive user base of billions of active users worldwide.
  • Build stronger relationships: Facebook is such a platform, where you have a unique opportunity to build relationships with buyers in real time. make different kinds of posts to educate, have fun, or sell.
  • Analytics and Insights: You can also access detailed analytics to measure the performance of your ads and make data-driven decisions.

When should you promote on Facebook?

If your target audience consists of individuals who are active on social media and likely to engage with visual content, Facebook can be an effective platform for you.

For example, if you sell fashion accessories, promoting on Facebook can help you reach fashion-conscious individuals who are active on the platform.

Tips on getting started with Facebook:

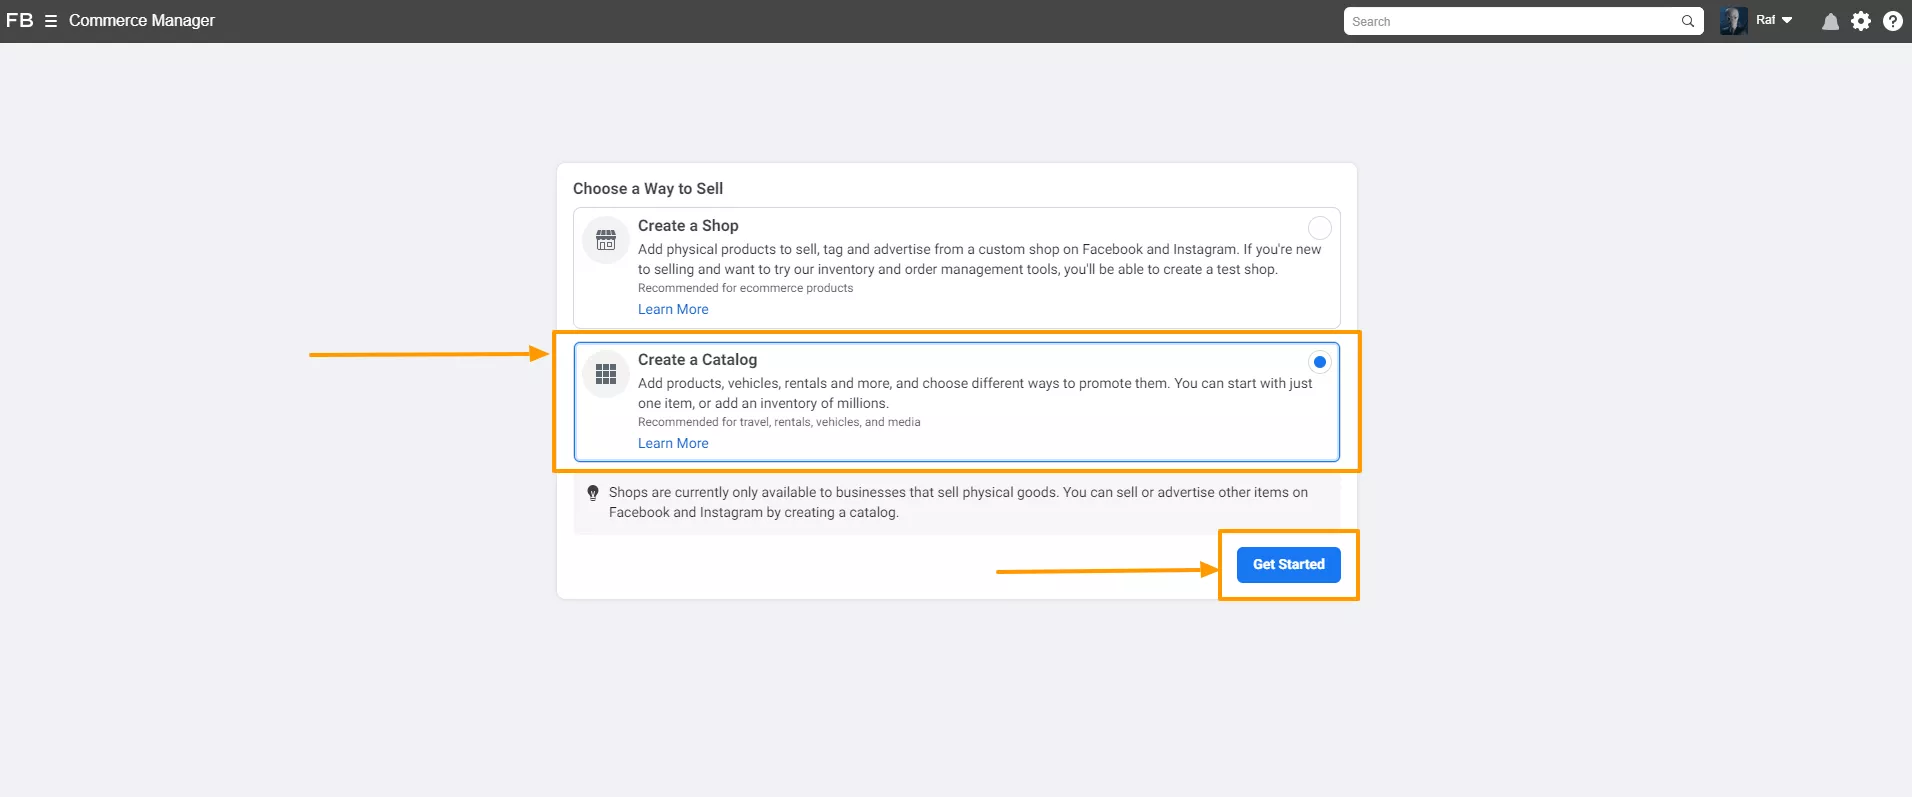
  • Set up a Facebook Page: Create a dedicated Facebook page for your store if you haven’t already. Make sure to include relevant information about your business, such as your website, contact details, and a clear description of your products.
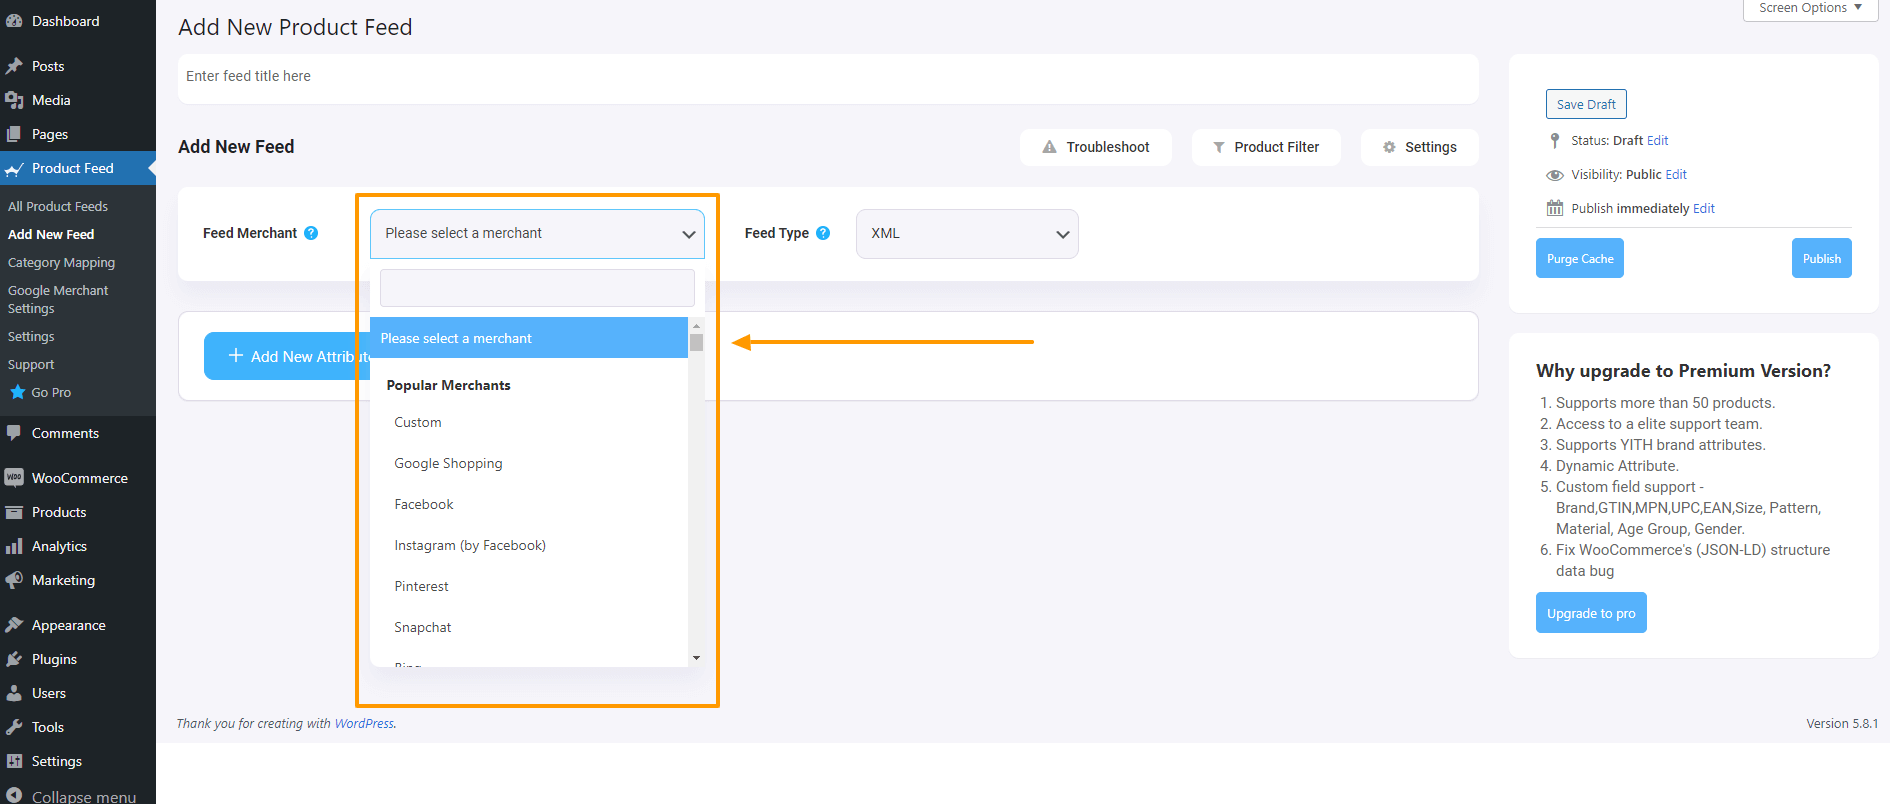
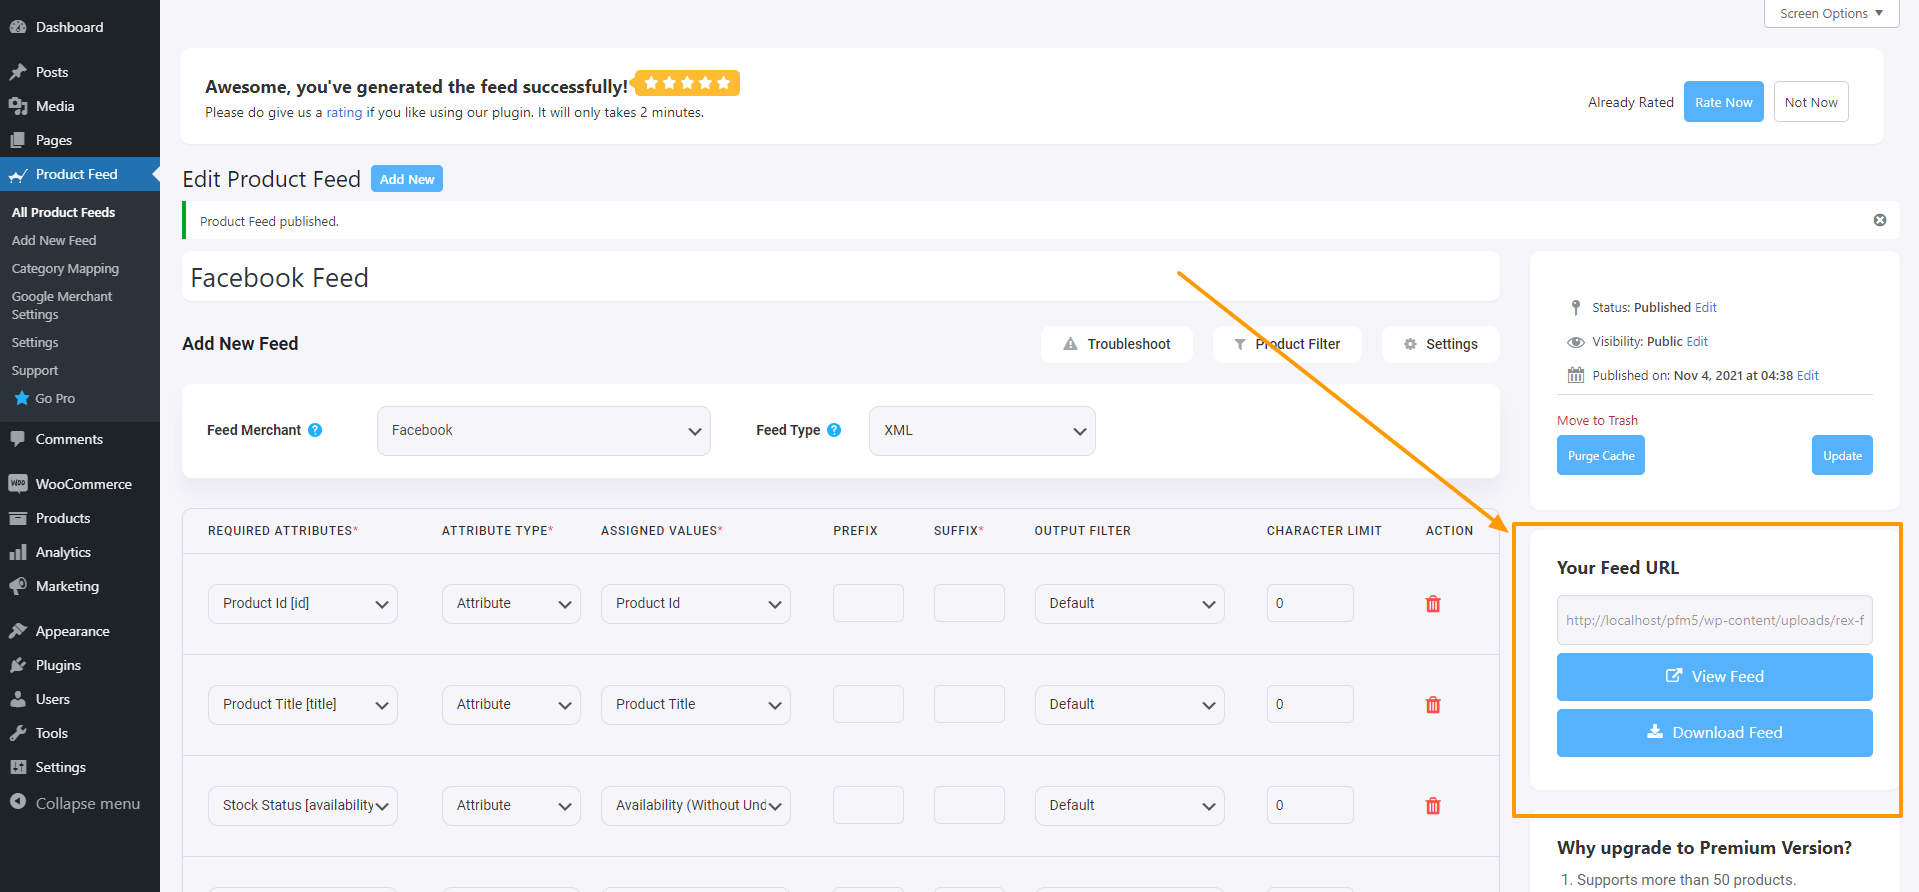
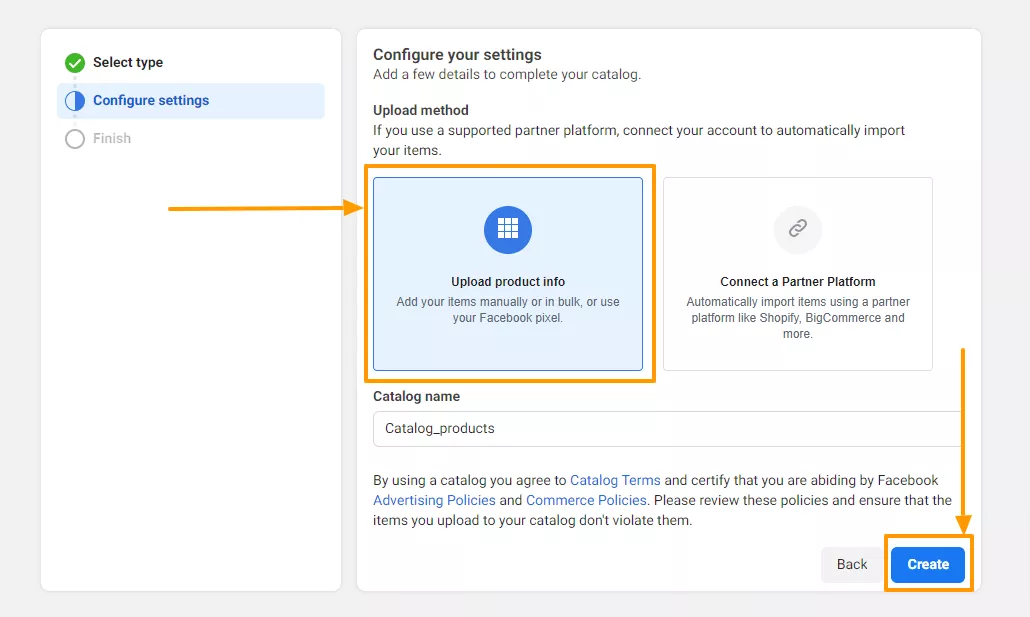
  • Install a Product Feed Plugin: To simplify the process of syncing, install a product feed plugin to list your products on Facebook for the WooCommerce store.
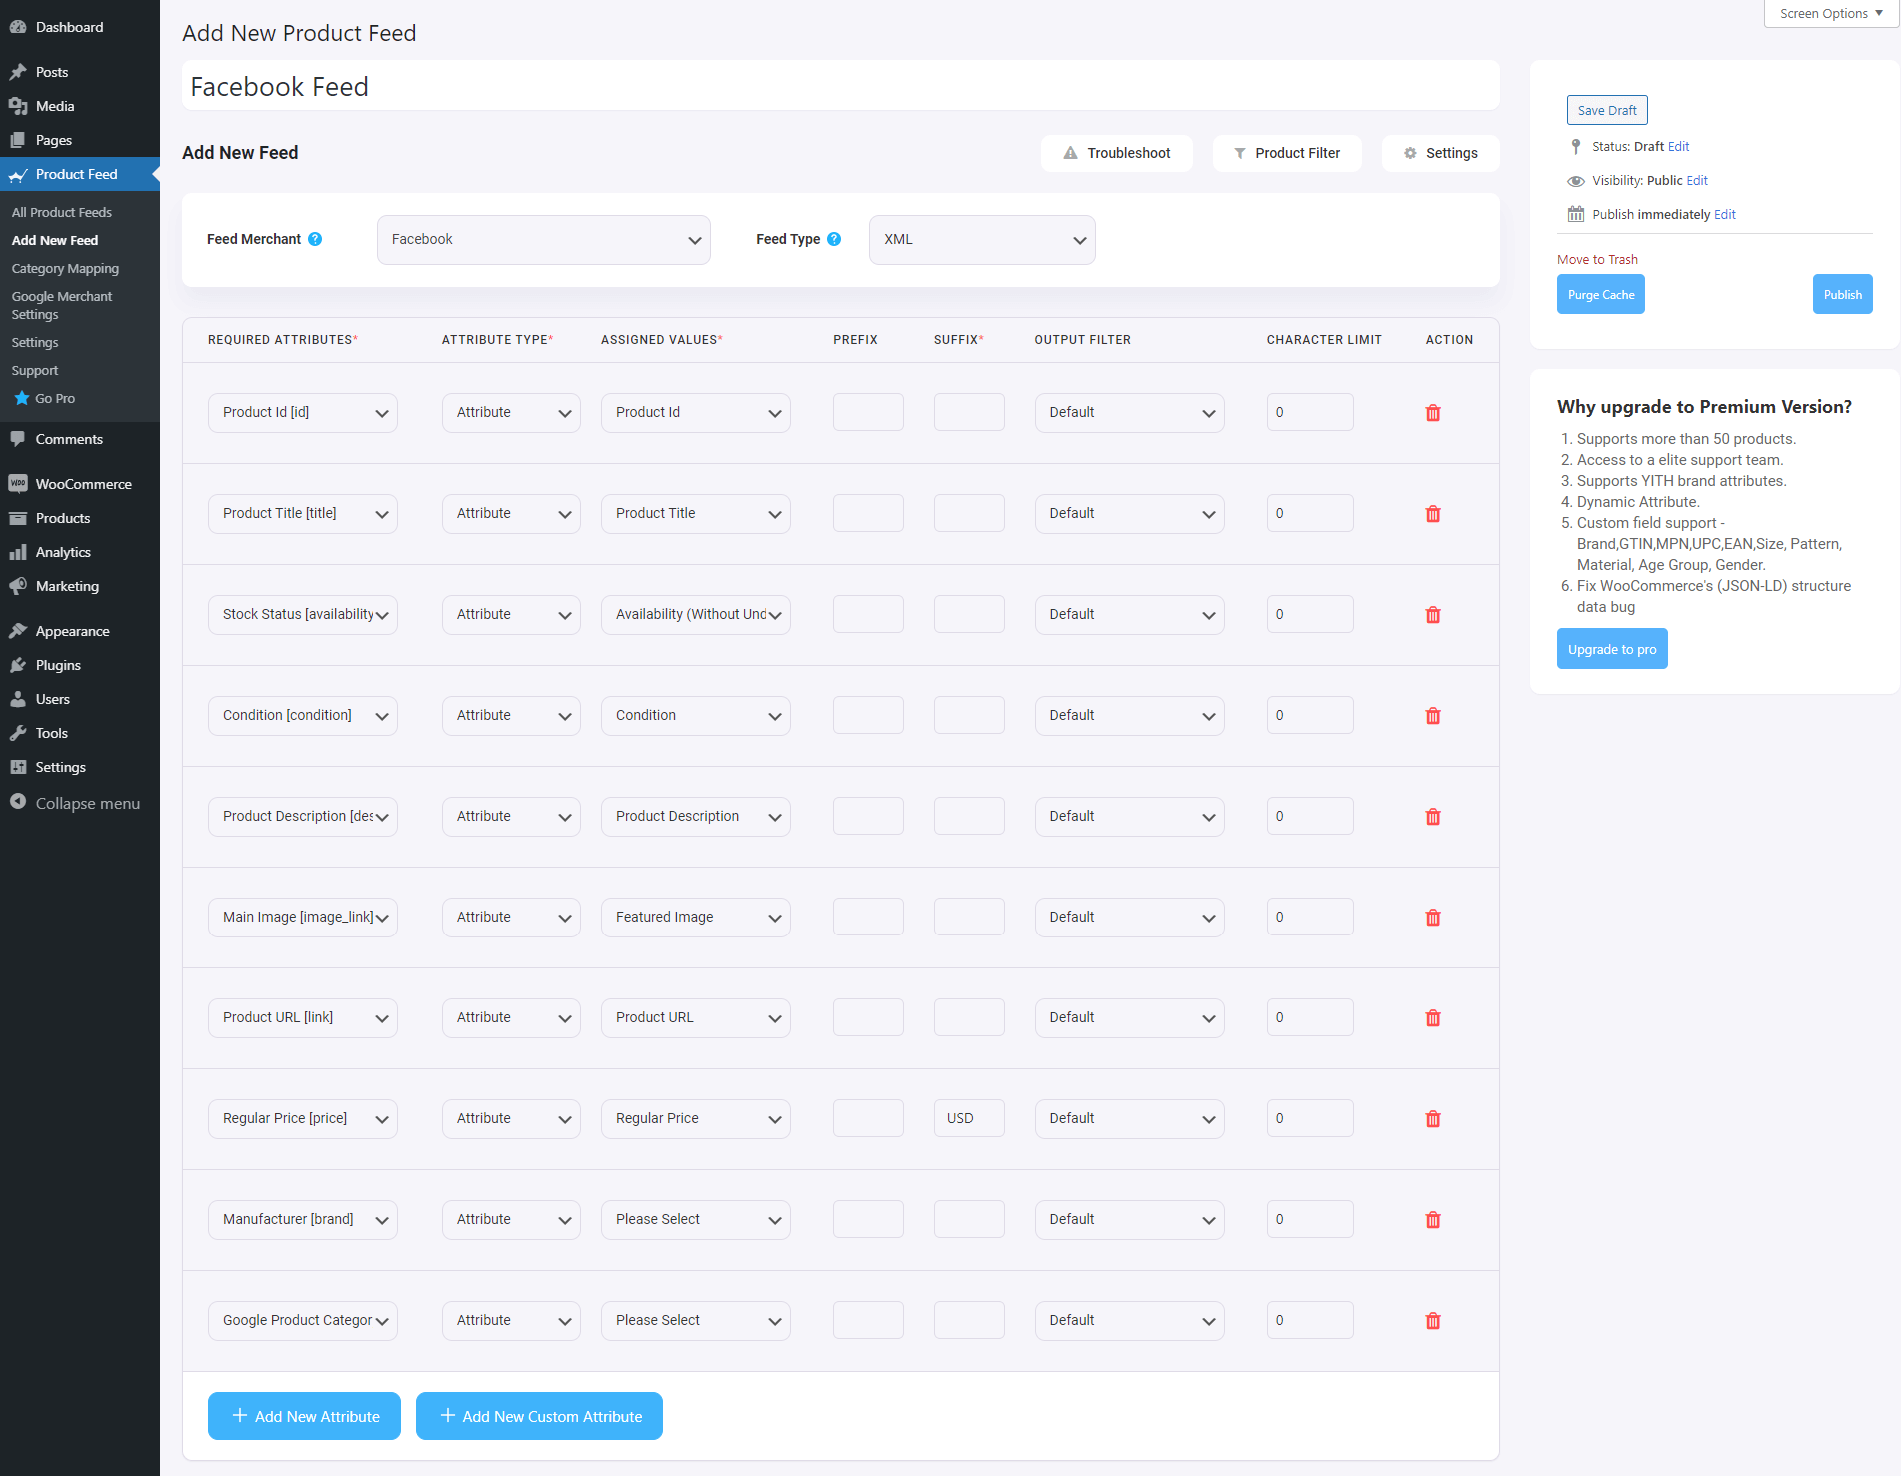
  • Optimize your Listing: Ensure that your product information, including titles, descriptions, prices, and images, is accurate and compelling.
  • Categorize and Tag Products: Organize your products into relevant categories or collections to make it easier for customers to navigate and find what they are looking for. Additionally, use relevant tags or keywords for each product to improve searchability.

Amplify your brand’s impact by utilizing Facebook’s robust ad targeting to drive traffic to your WooCommerce store, while also tapping into the immense customer base of Amazon, the world’s largest online marketplace.

4. Amazon: Promote Your WooCommerce Products Globally

Amazon - Global Online Marketplaces

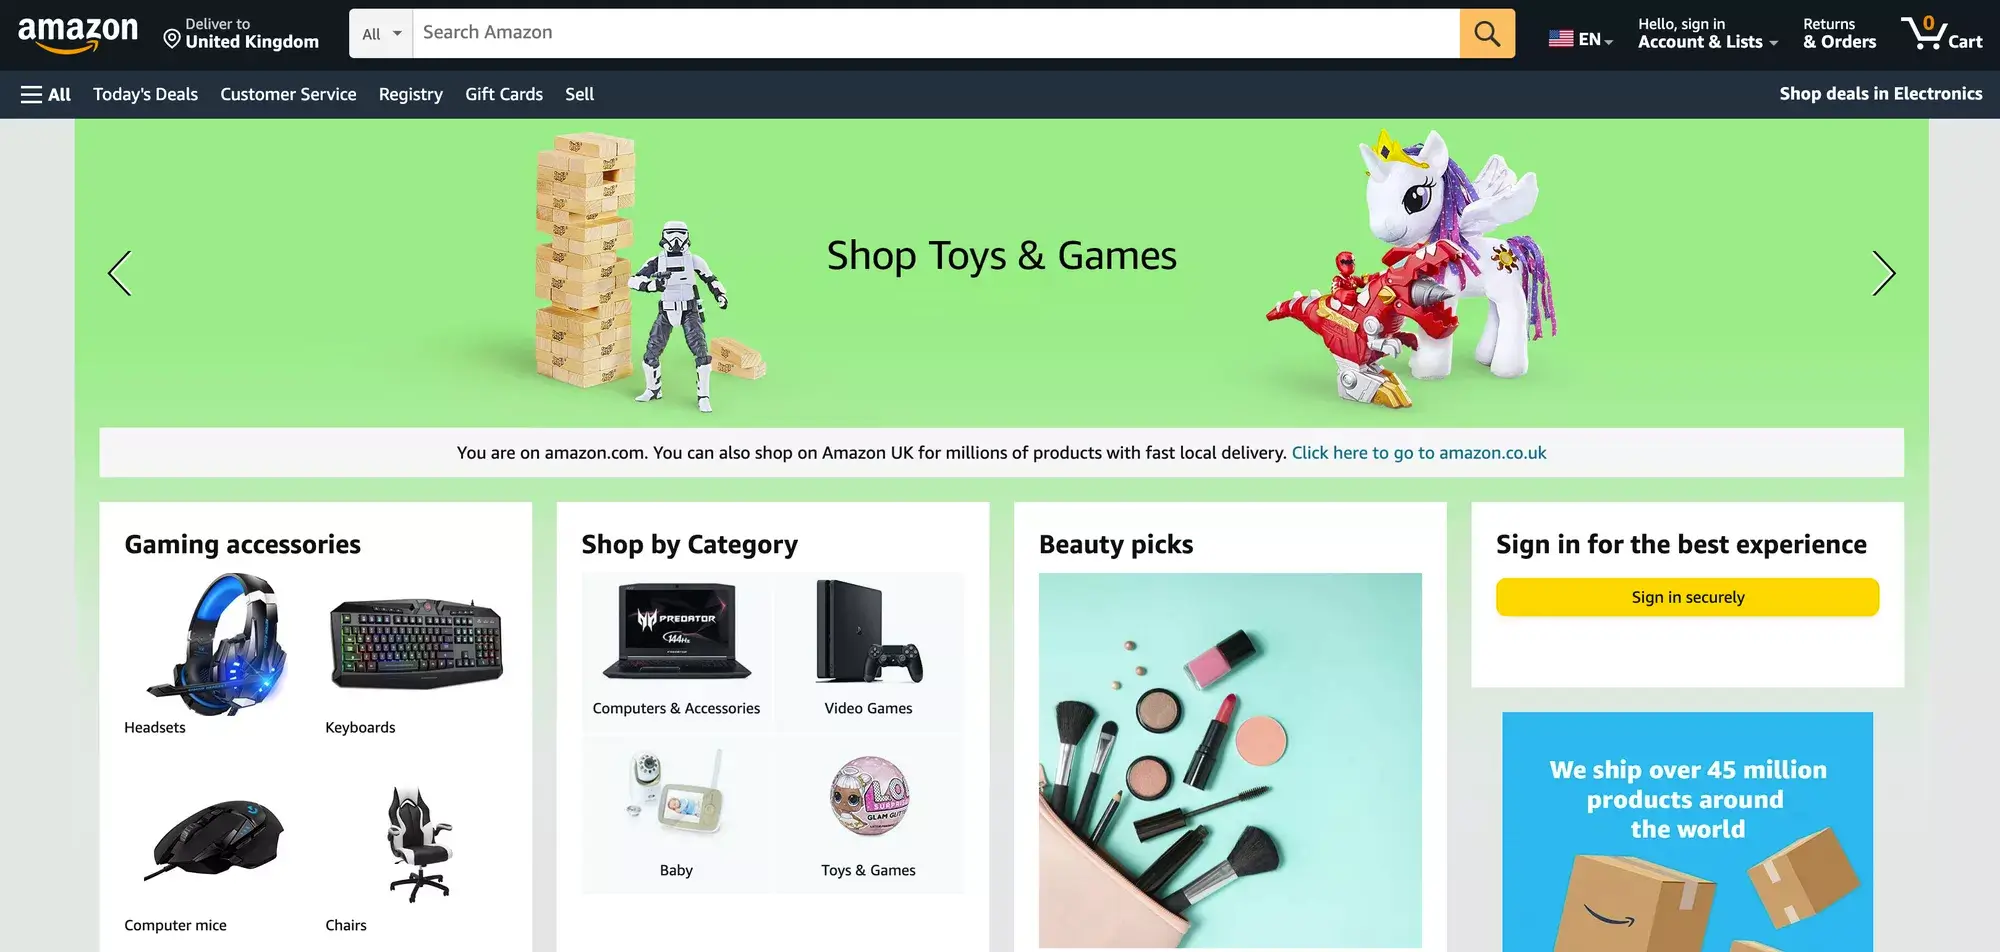
Amazon is a global online marketplace that attracts millions of customers daily, offering you a massive opportunity to sell your products worldwide.

By selling your WooCommerce products on Amazon, you can tap into its immense reach and leverage its fulfillment services, such as Fulfillment by Amazon (FBA).

Here are some advantages of this digital marketplace-

Benefits of Amazon:

  • Vast Customer Base: You can gain exposure to millions of active Amazon shoppers worldwide.
  • Fulfillment by Amazon (FBA): Utilize Amazon’s fulfillment services to store, pack, and ship your products, offering fast and reliable delivery.
  • Advertising Options: If offers different advertising options to promote products such as Sponsored Products, Sponsored Brands, and Sponsored Displays.
  • Trust and Credibility: Leverage Amazon’s trusted reputation to build credibility for your brand and products.

When should you promote on Amazon?

If you want to reach a massive customer base and benefit from Amazon’s fulfillment services, selling on Amazon is a wise choice.

However, it’s essential to conduct market research and ensure your products can compete effectively within Amazon’s highly competitive marketplace.

Let’s have some tips for getting started-

Tips on getting started with Amazon:

  • Create an Amazon seller account and choose the appropriate selling plan based on your business needs.
  • Optimize your product listings with detailed and accurate information, including titles, bullet points, descriptions, and images.
  • Use high-quality product images that meet Amazon’s guidelines.
  • Set competitive prices while considering fees and other costs associated with selling on Amazon.
  • Take advantage of Amazon advertising options to increase visibility and drive more sales.
  • Choosing a good Amazon PPC management service can help optimize your advertising strategy and maximize ROI.
  • Monitor your product performance and customer feedback to maintain a positive seller rating.

Home improvement products are also can be promoted on Amazon, However, if you want to showcase your WooCommerce products to millions of active Pinners, who are seeking inspiration and ideas, you can consider Pinterest.

5. Pinterest: Inspiring Shoppers with Visual Promotion

Pinterest - Global online Marketplace

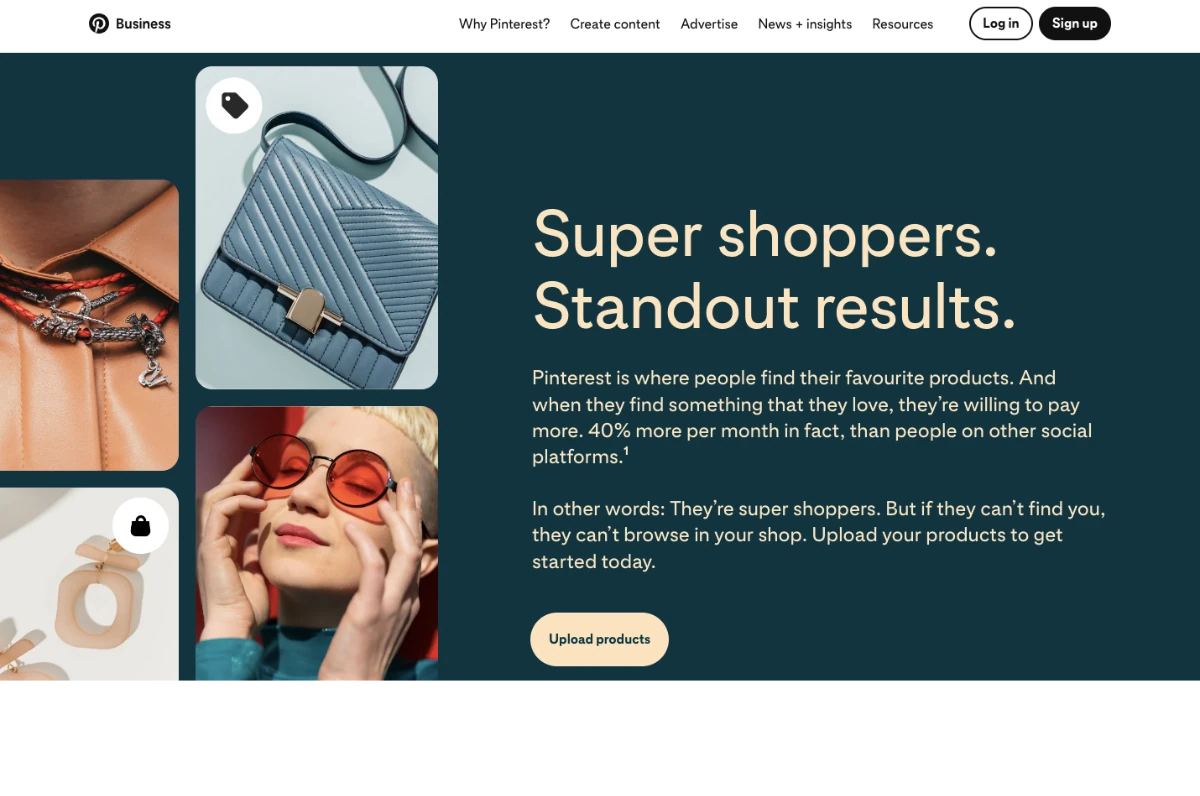
Pinterest serves as a visual search engine and a global online marketplace where businesses can showcase their products and connect with buyers creatively.

With millions of active users, Pinterest can help increase brand exposure and generate leads for your online store.

Advantages of Pinterest:

  • Visual Focus: Leverage Pinterest’s visual nature to showcase your products effectively.
  • Traffic Generation: Drive traffic from Pinterest directly to your online store.
  • User Engagement: Engage with users through boards, pins, comments, and collaborations.
  • Promoted Pins: Amplify the reach of your pins by using Promoted Pins, Pinterest’s advertising feature.

When should you promote on Pinterest?

If your products are visually appealing and can evoke inspiration or aspiration, Pinterest can be a valuable platform for you.

For example, if you sell home decor items, fashion accessories, or DIY products, Pinterest’s user base actively seeking such ideas and products can be an ideal target audience.

Here are some tips for getting started with this marketplace –

Tips on getting started with Pinterest:

  • Create a business account on Pinterest to access marketing features and analytics.
  • Optimize your profile with relevant information and appealing visuals that align with your brand.
  • Create visually compelling boards and pins that showcase your products in various contexts.
  • Use relevant keywords, descriptions, and hashtags to improve the discoverability of your pins.
  • Optimize your Pinterest product feed to sell effectively on the platform.

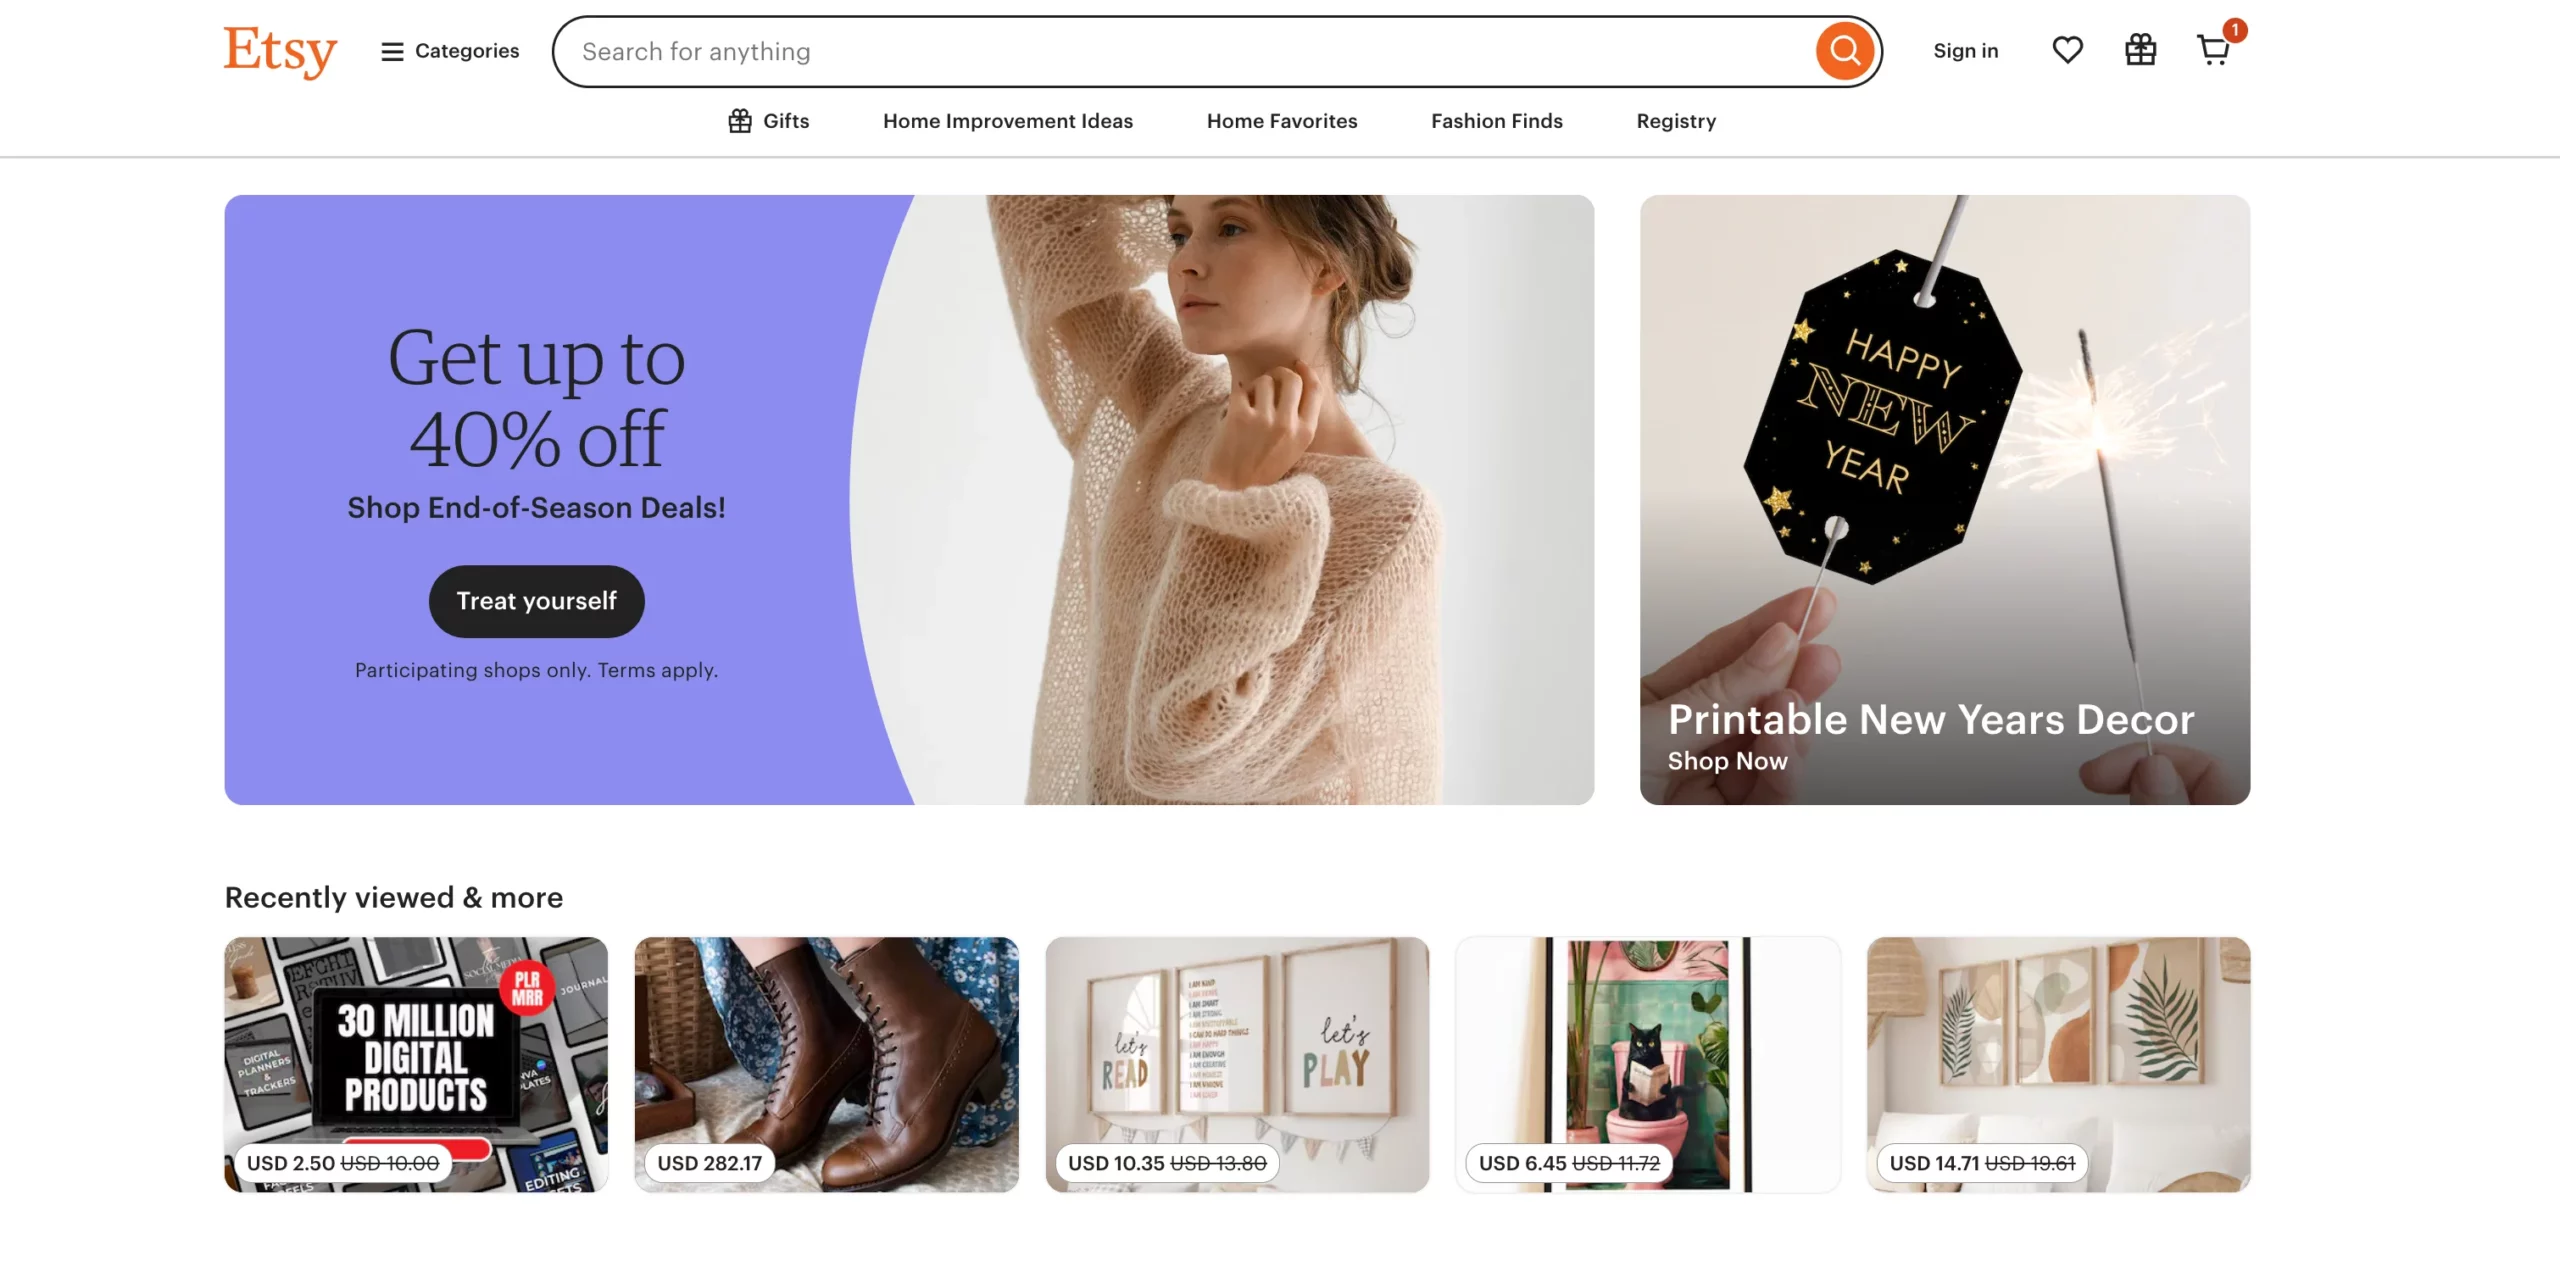
6. Etsy – Showcase Your Creativity on a Global Stage

Etsy is the go-to marketplace if you sell handmade, vintage, or creative goods. It’s a place where buyers appreciate unique items and sellers like you can connect with a niche, global audience.

Etsy Marketplace

Benefits of Selling on Etsy:

  • Reach Buyers Looking for Unique Items: Etsy is built for people searching for one-of-a-kind goods, so your products already have a head start in getting noticed.
  • Create a Store That Reflects Your Brand: With customizable storefronts, you can share your story and let your creativity shine.
  • Start Selling Without a Huge Budget: Etsy’s low listing fees make it easy to get started, even if you’re on a tight budget.
  • Tap Into Built-In Marketing Tools: Tools like Etsy Ads and insights help you promote your products to the right people.
  • Sell Globally Without the Hassle: Etsy simplifies international shipping, so you can sell anywhere in the world.

Why Etsy Is a Great Fit for You:

If your products are handmade, vintage, or uniquely creative, Etsy gives you the perfect audience. Whether you’re a jewelry maker or a crafts enthusiast, Etsy connects you with buyers who value originality.

Tips on getting started with ETSY:

  • Share your story through a compelling shop profile.
  • Use eye-catching photos to showcase your products.
  • Add keywords your buyers are searching for in your titles and descriptions.
  • Stay active in Etsy’s forums to get tips from experienced sellers.
  • Offer international shipping to grow your reach.

7. TikTok Marketplace – Transform Content Into Commerce

TikTok Marketplace is where the power of social media meets eCommerce. It enables you to connect with TikTok’s massive audience and turn your viral content into real sales.

Tiktok Marketplace

Benefits of Selling on TikTok Marketplace:

  1. Leverage TikTok’s Massive Reach: TikTok has over a billion active users, and its algorithm ensures your content reaches your ideal customers.
  2. Engage Through Authentic Content: Instead of traditional ads, TikTok lets you showcase your products in creative, relatable ways that build trust.
  3. Collaborate With Influencers: TikTok Creator Marketplace helps you team up with influencers to promote your products to highly engaged audiences.
  4. Boost Visibility With Ads: TikTok Ads Manager provides tools to create targeted campaigns that amplify your brand’s reach.
  5. Seamless Shopping Experience: TikTok integrates with platforms like Shopify to make purchasing easy directly from the app.

Why TikTok Marketplace Works for You:

If your audience spends time on social media and your products appeal to younger, trend-savvy buyers, TikTok Marketplace can skyrocket your visibility. Think fashion, beauty, or lifestyle items that look great in action.

Tips on getting started with TikTok Marketplace:

  • Set up your TikTok Business Account and link it to TikTok Marketplace.
  • Create entertaining content that highlights your products—think tutorials, challenges, or quick demos.
  • Use hashtags and trending sounds to boost discoverability.
  • Partner with influencers for sponsored posts or reviews.
  • Keep an eye on analytics to refine your content strategy.

Remember, it’s essential to tailor your marketing strategies and product selections based on the unique characteristics of each marketplace and the preferences of your target audience.

Moreover, If you want to get more exposure from your target audiences, you need to have a guide to digital marketing funnels that can boost your business as well.

But, when you are focusing on different WooCommerce marketplaces you may feel overwhelmed when you have to list different products of your store in different marketplaces.

Let’s learn how you can do that easily.

List Your Products Easily On Reliable Online Marketplaces

After identifying the best online marketplace where you want to promote your WooCommerce products, the next question that arises is how to list them effectively.

Manually listing the products can be time-consuming and challenging. Gladly, WooCommerce offers a range of useful plugins that can simplify this process.

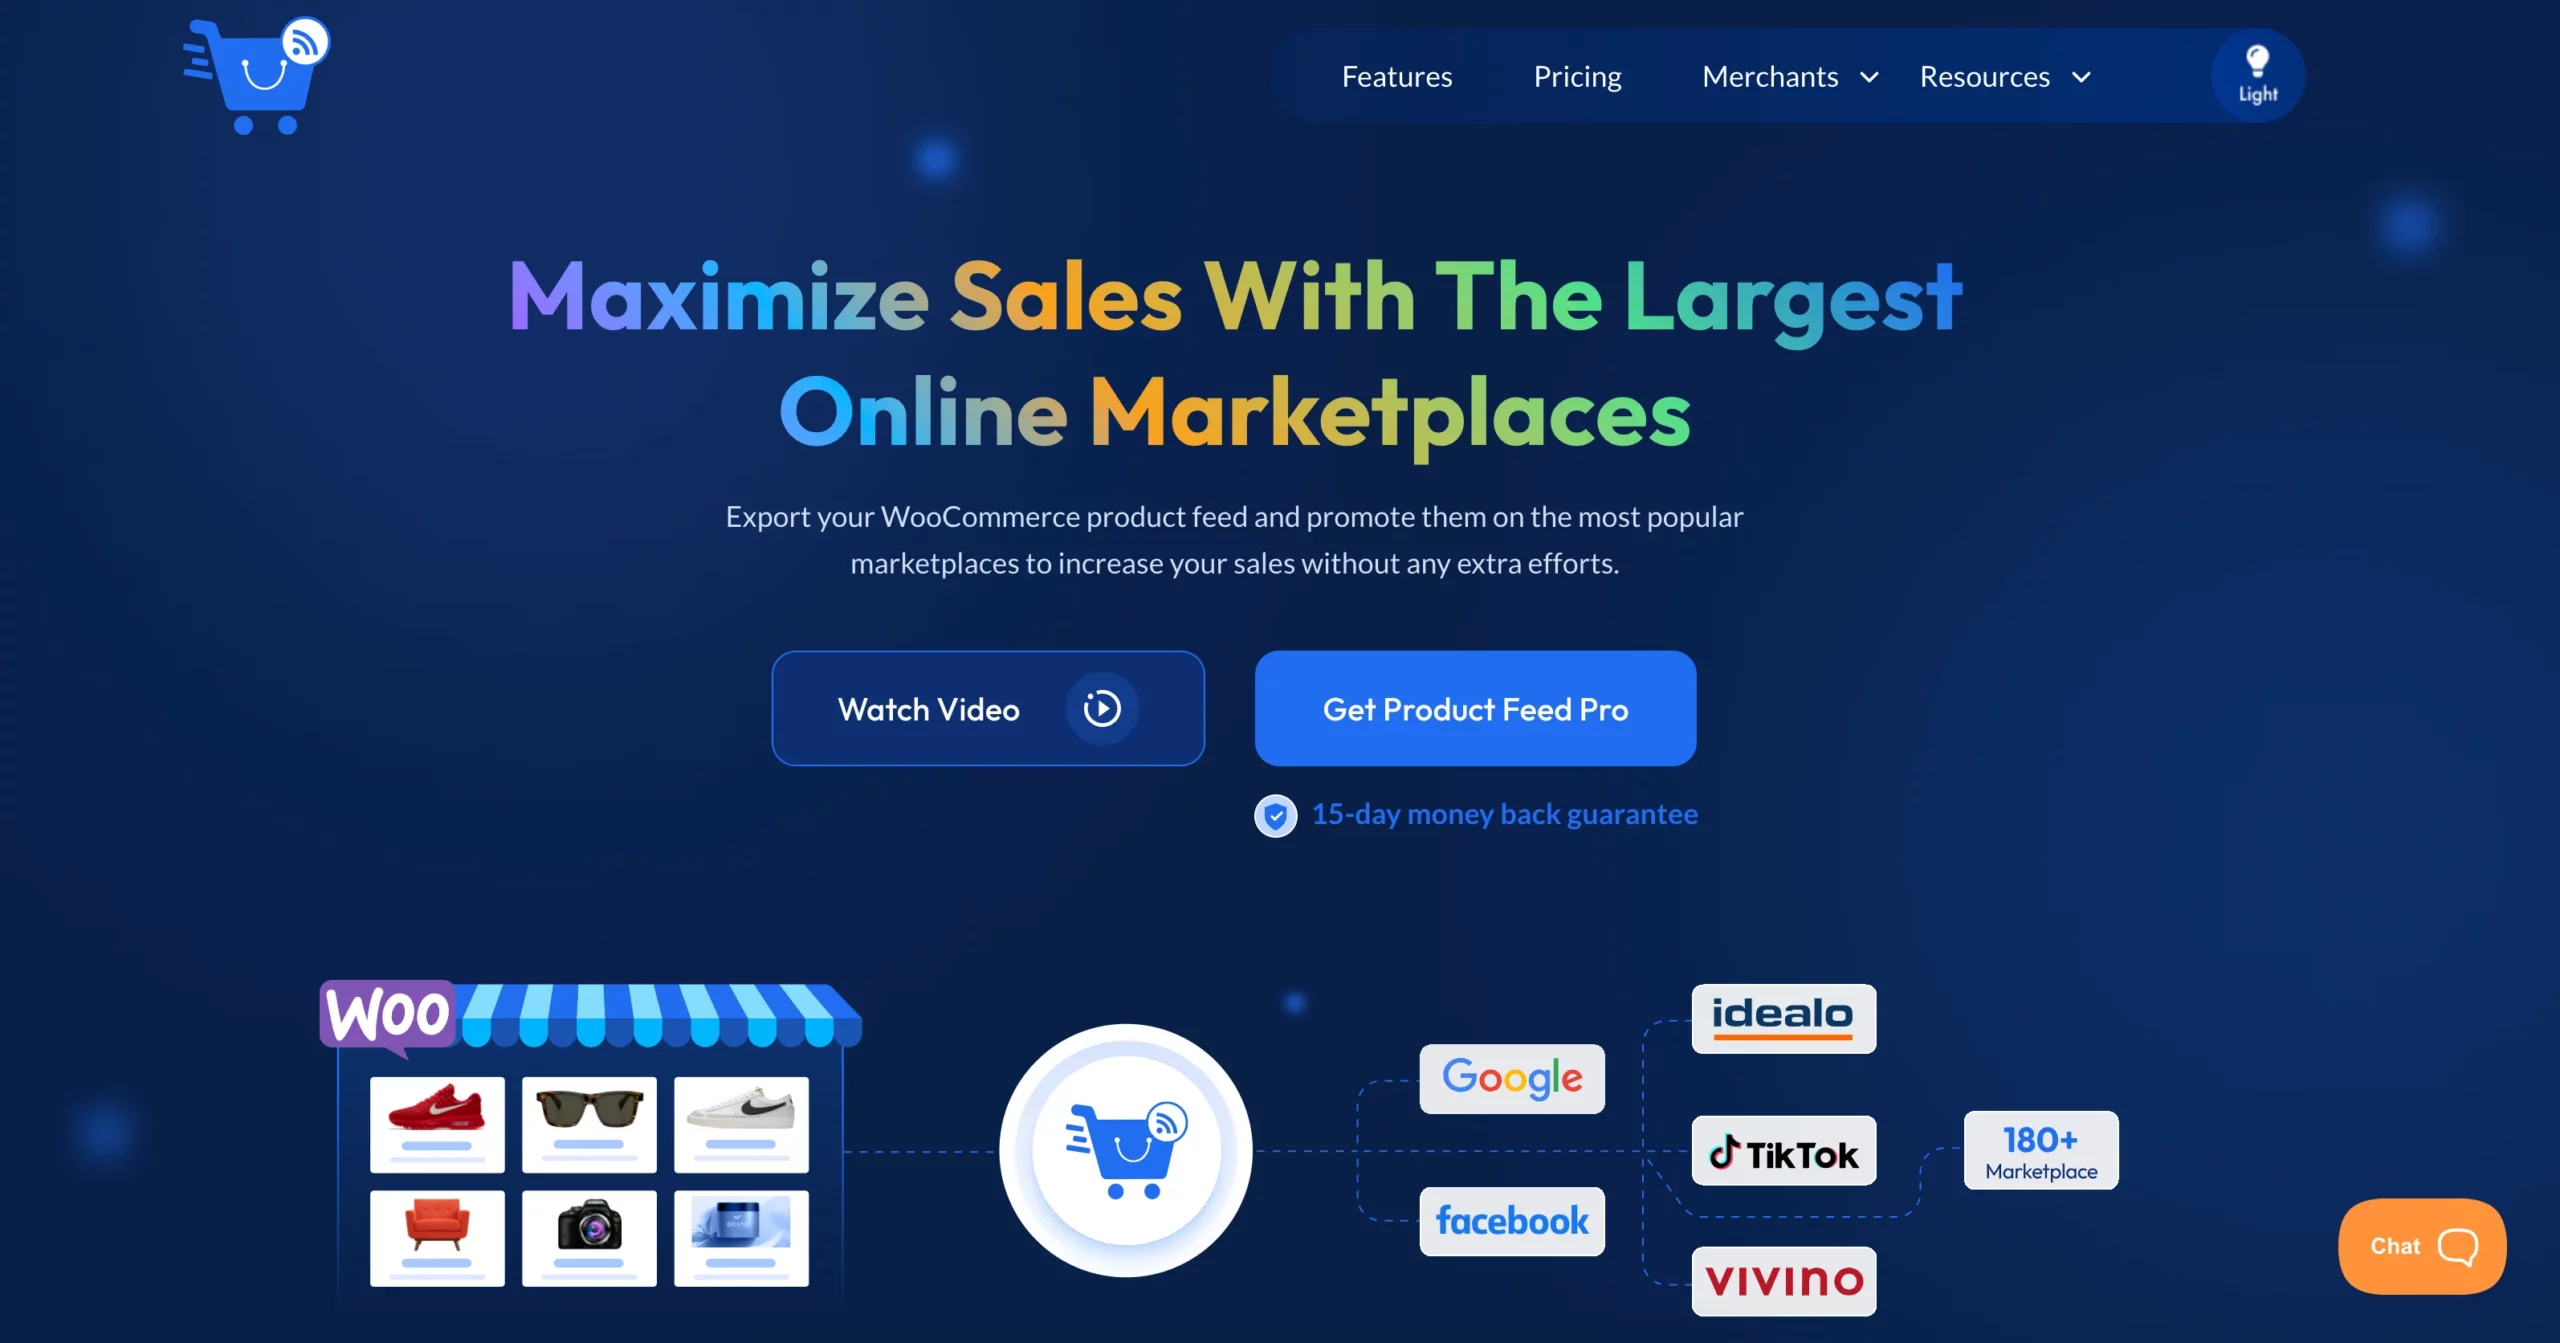
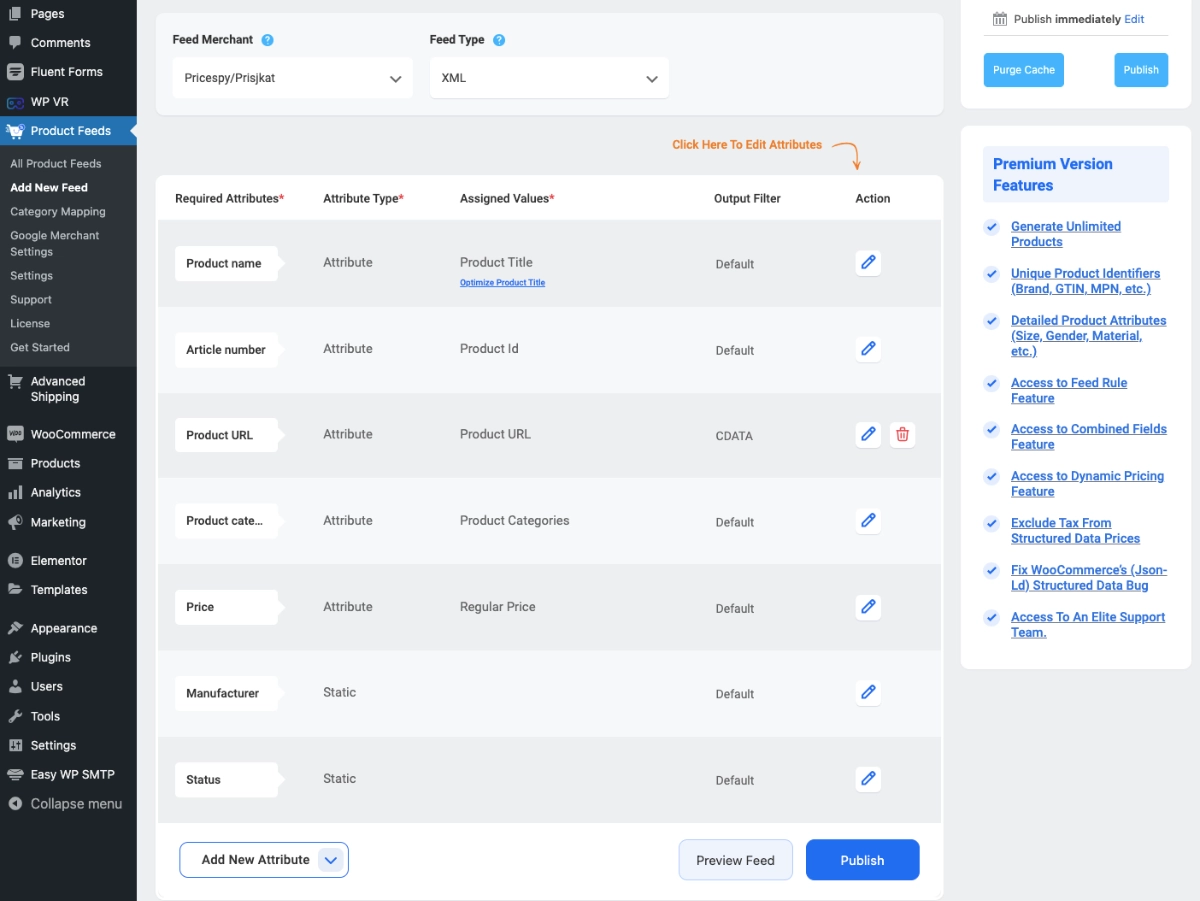
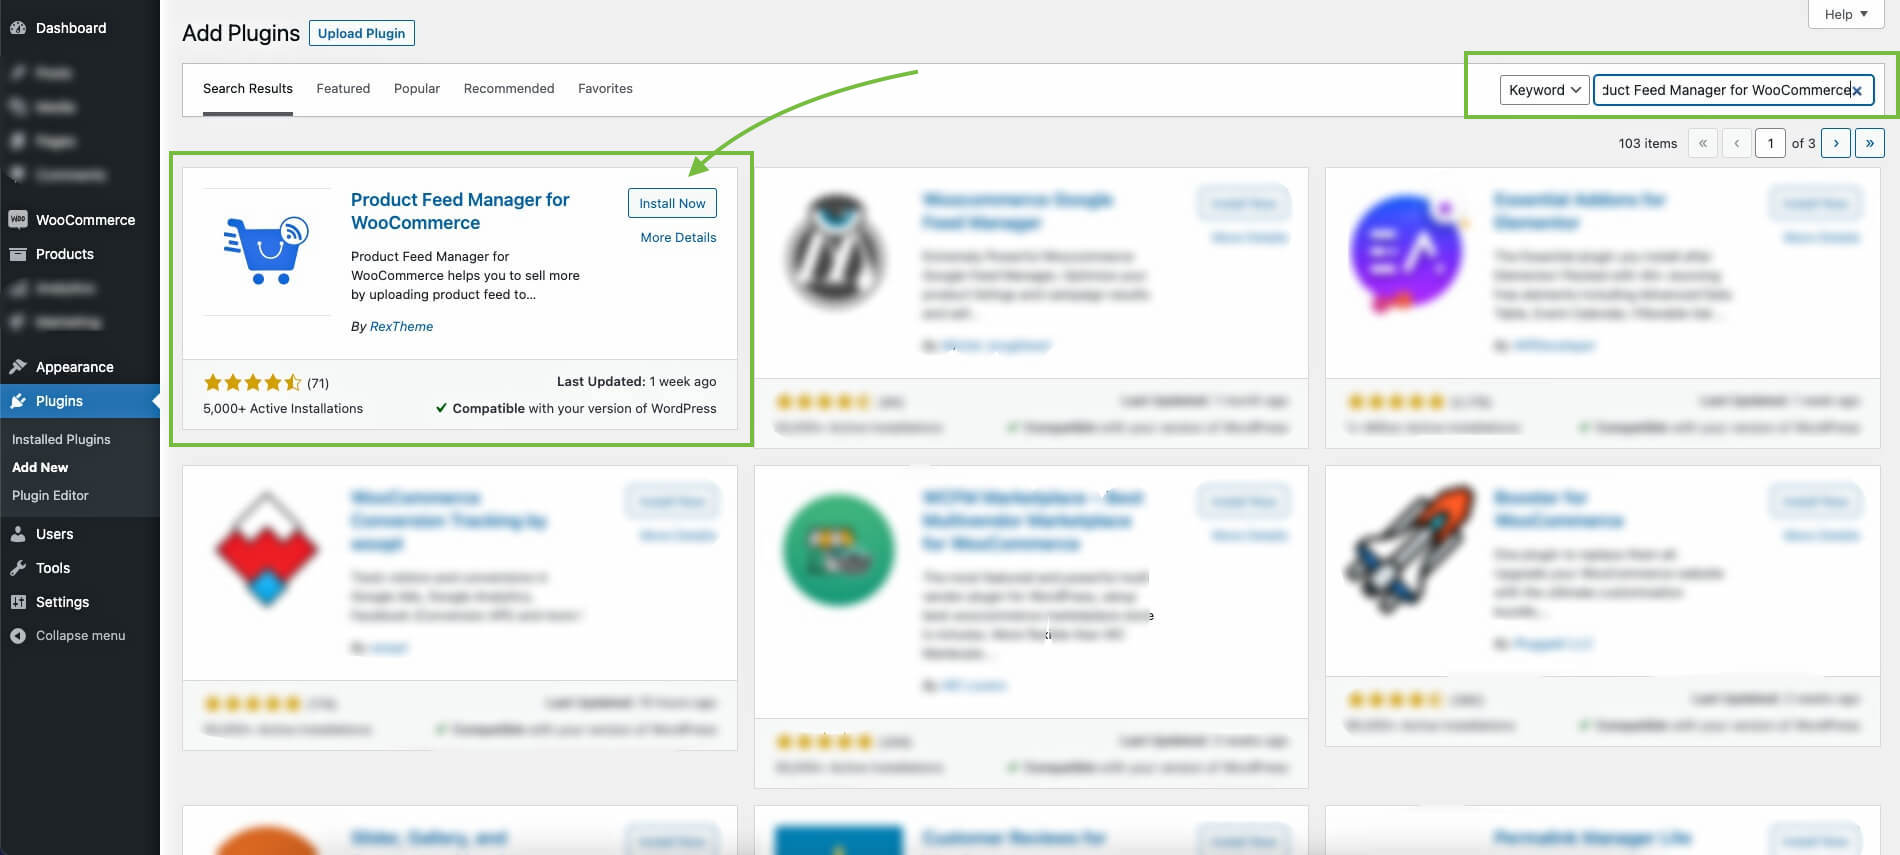
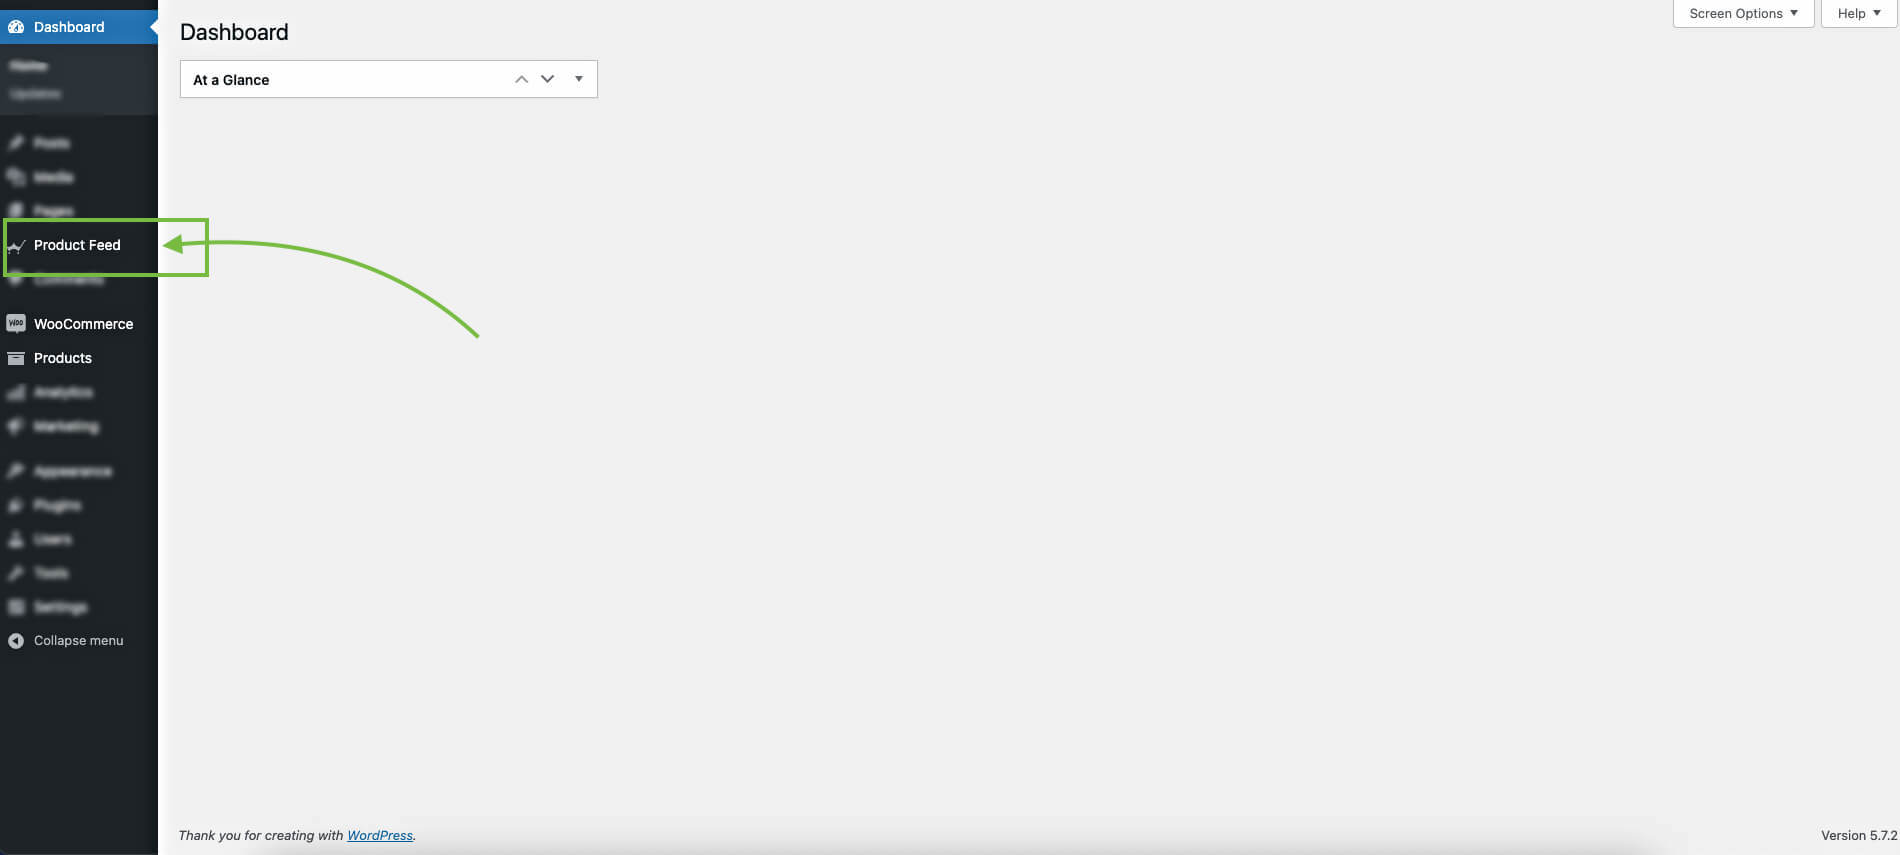
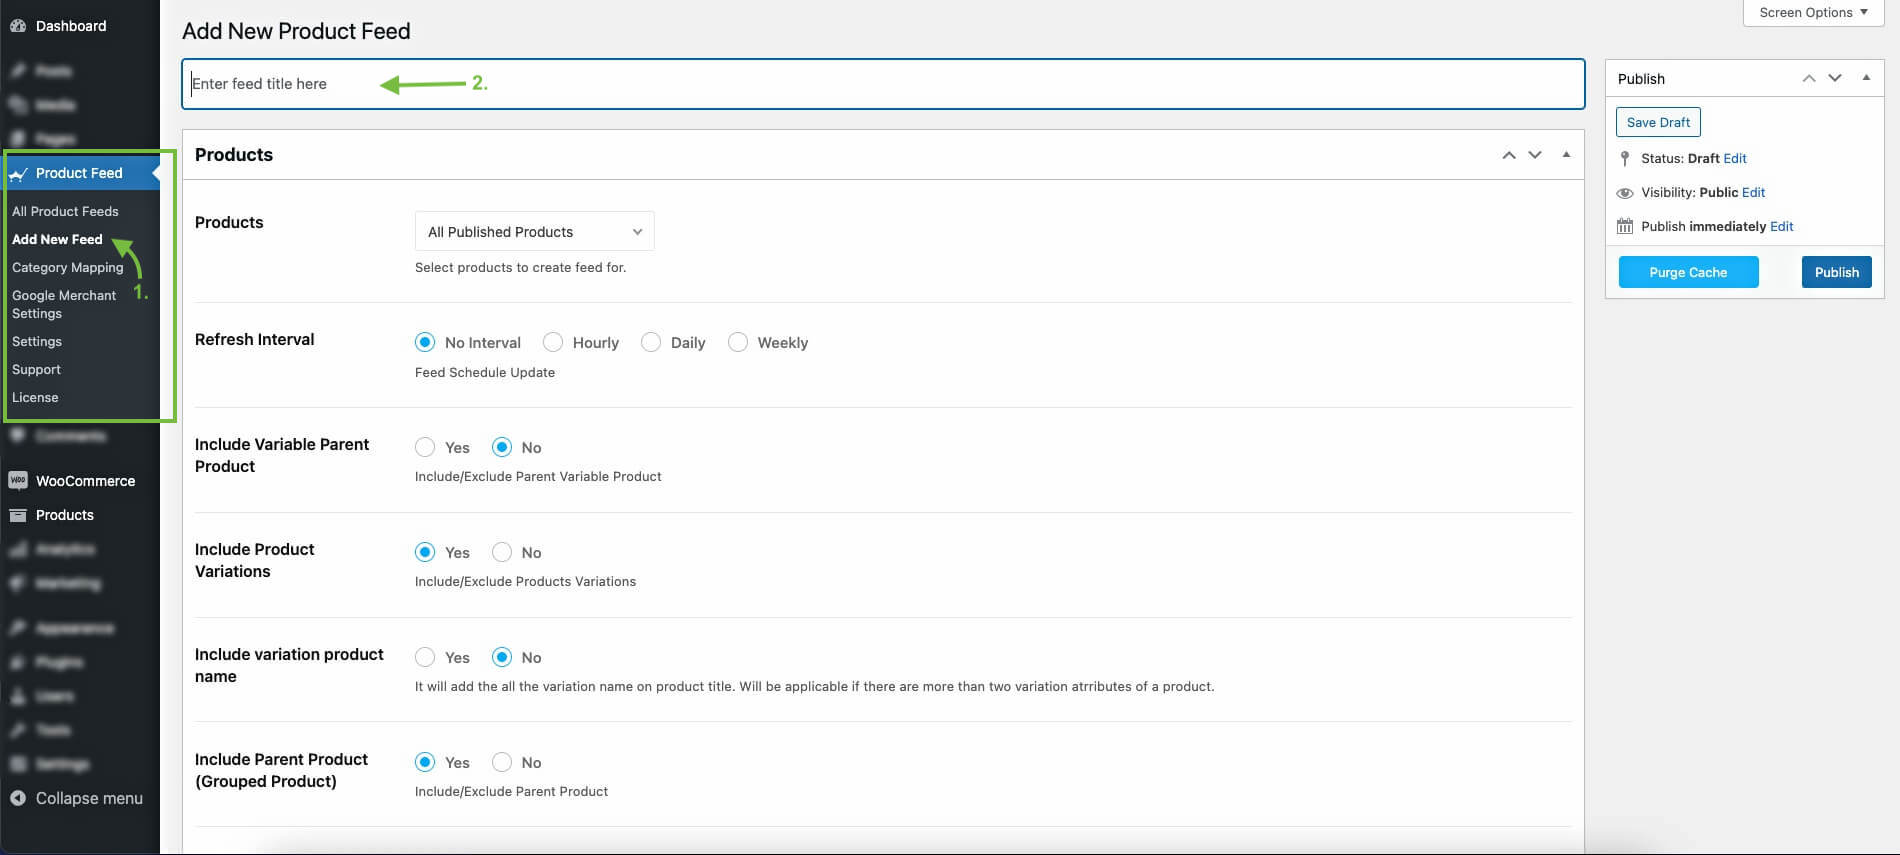
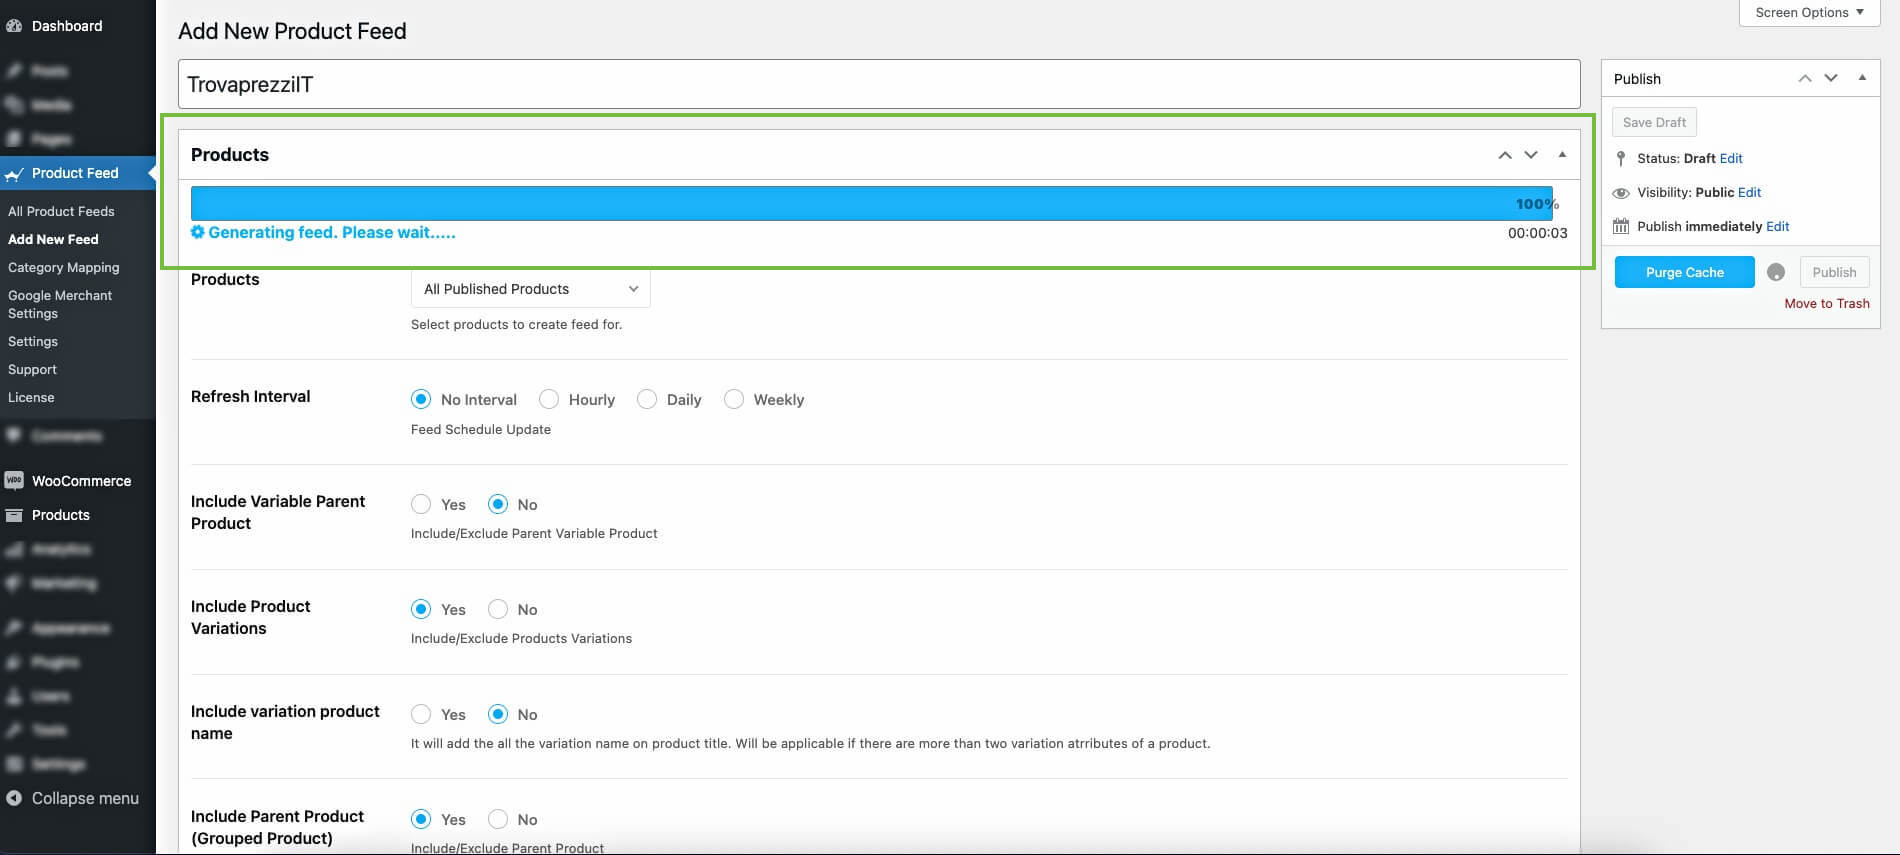
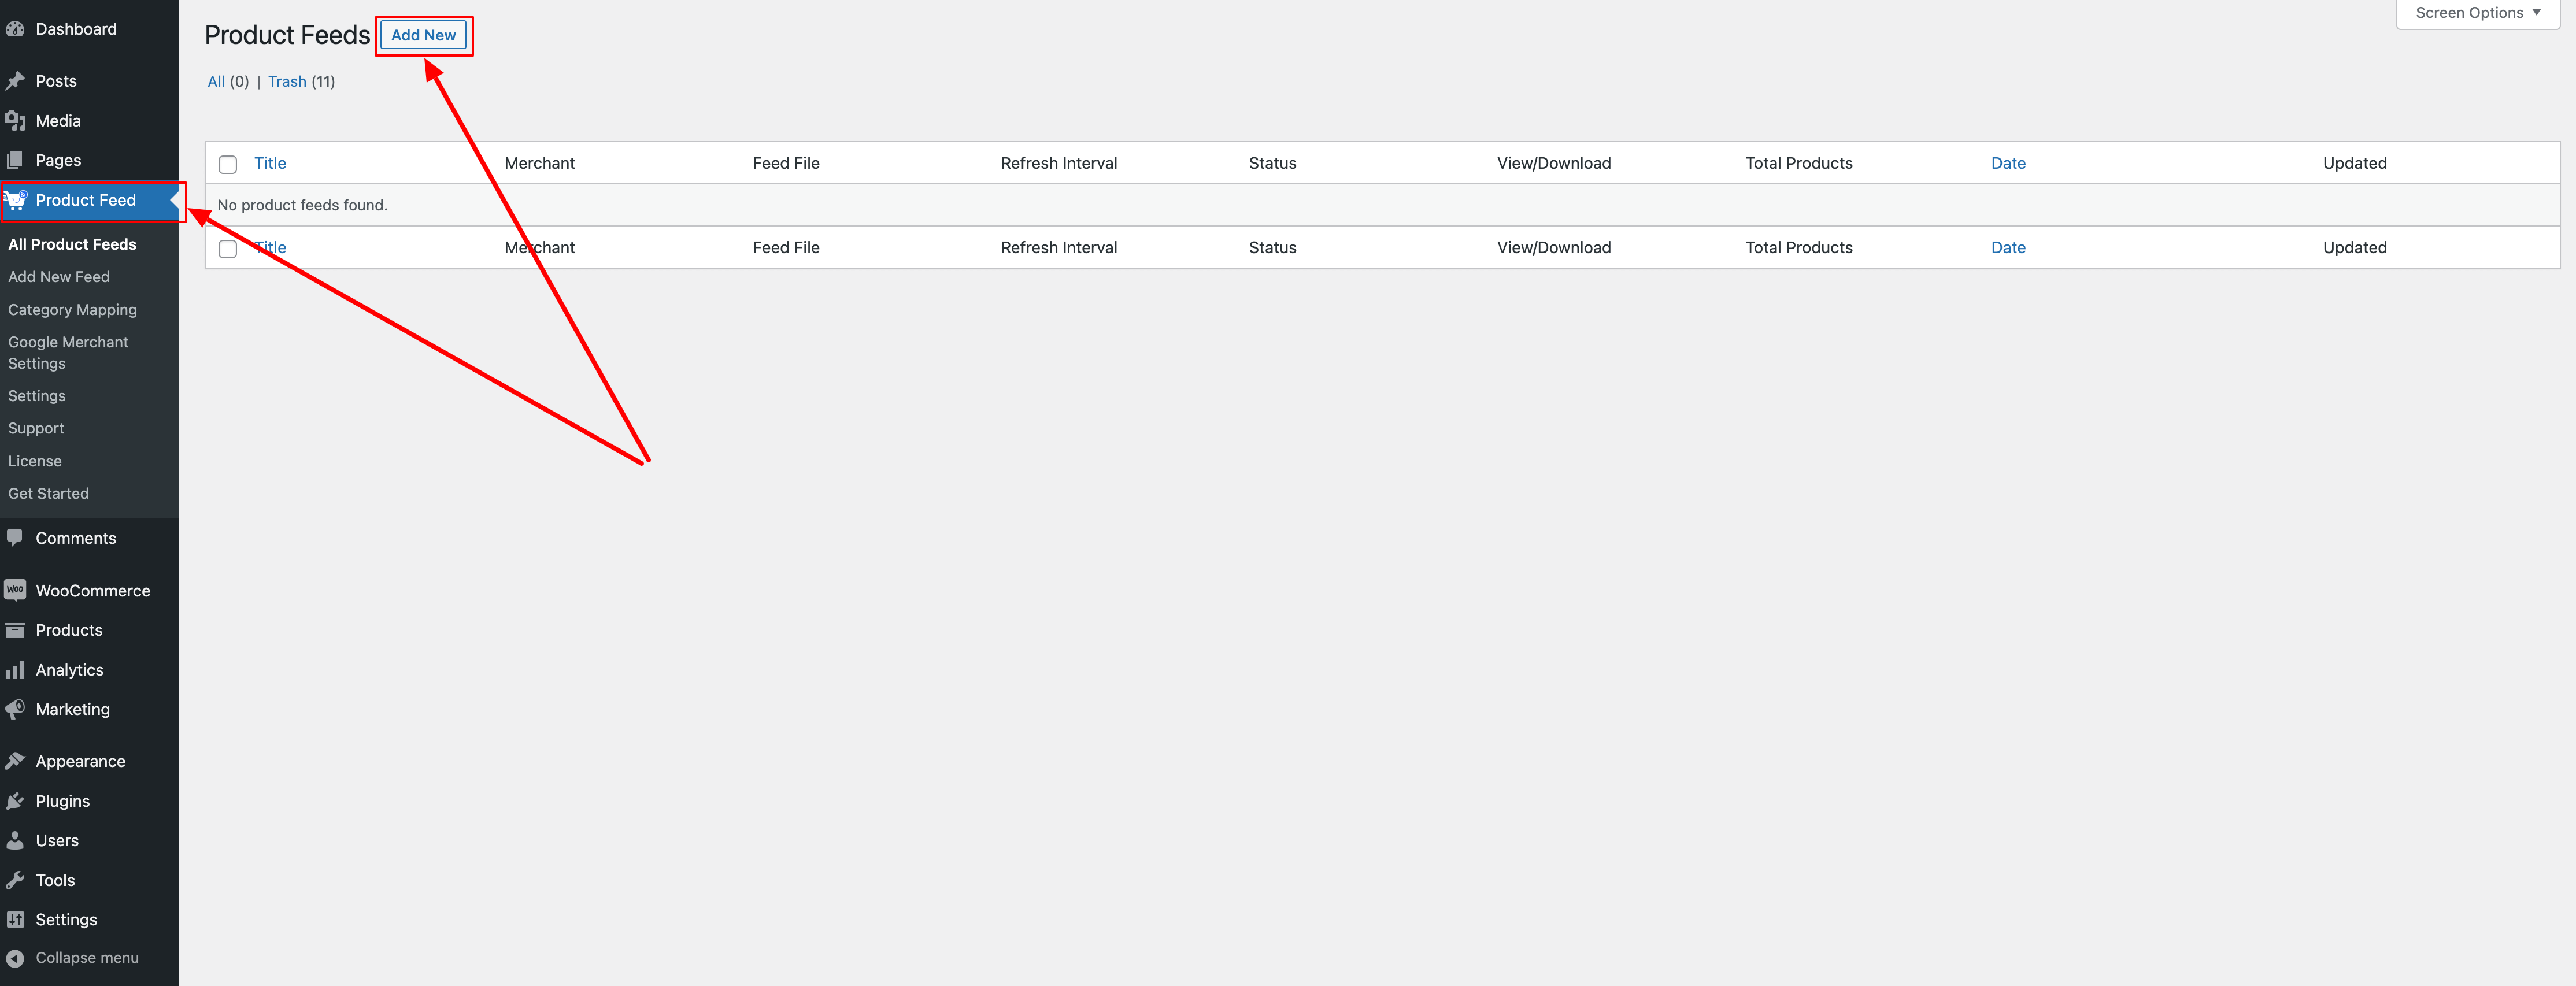
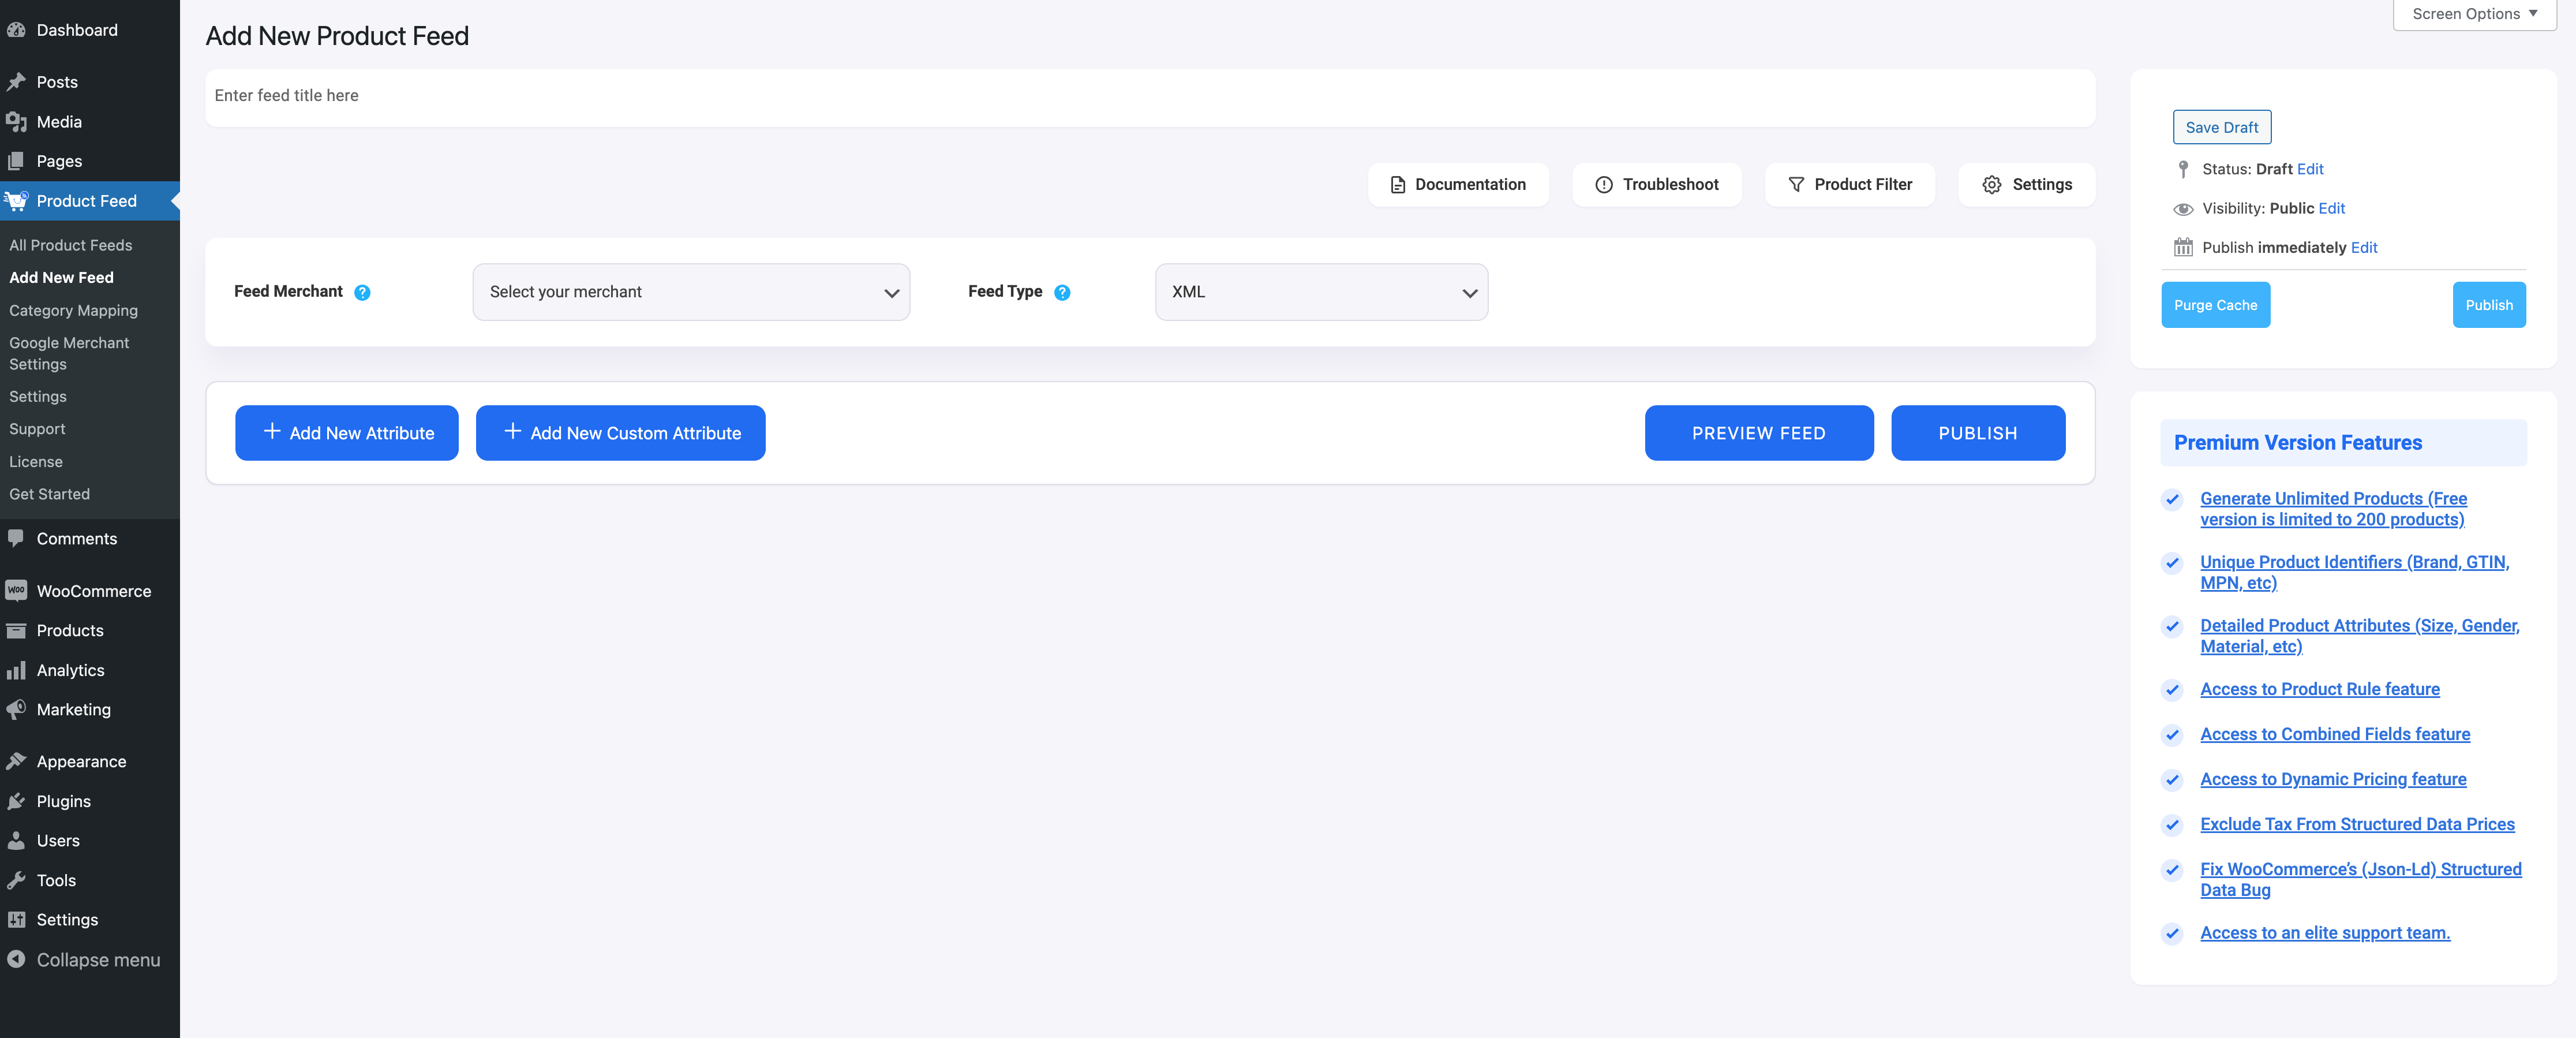
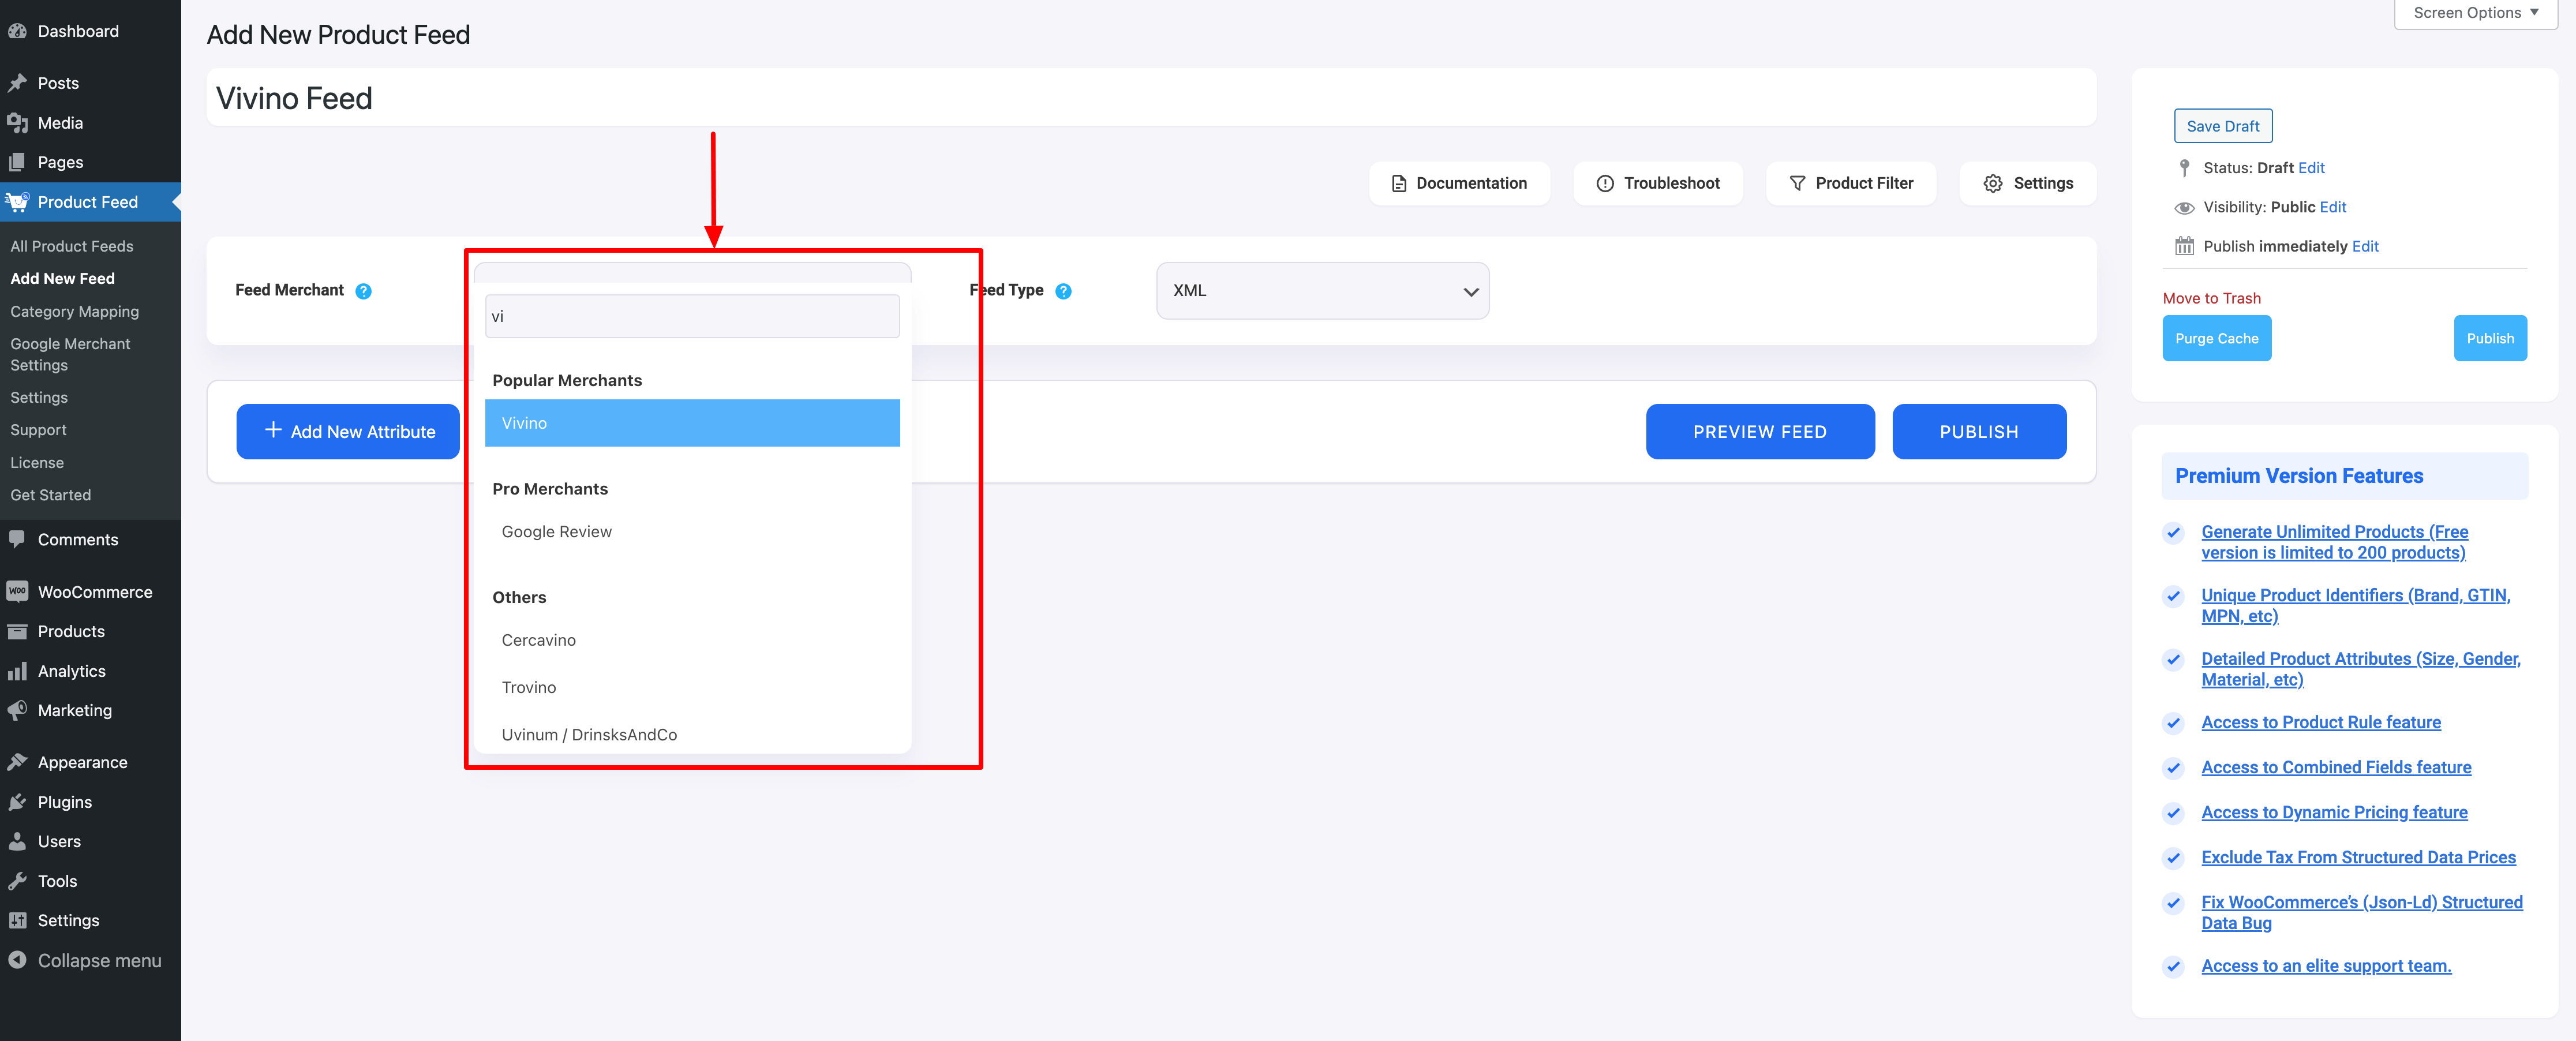
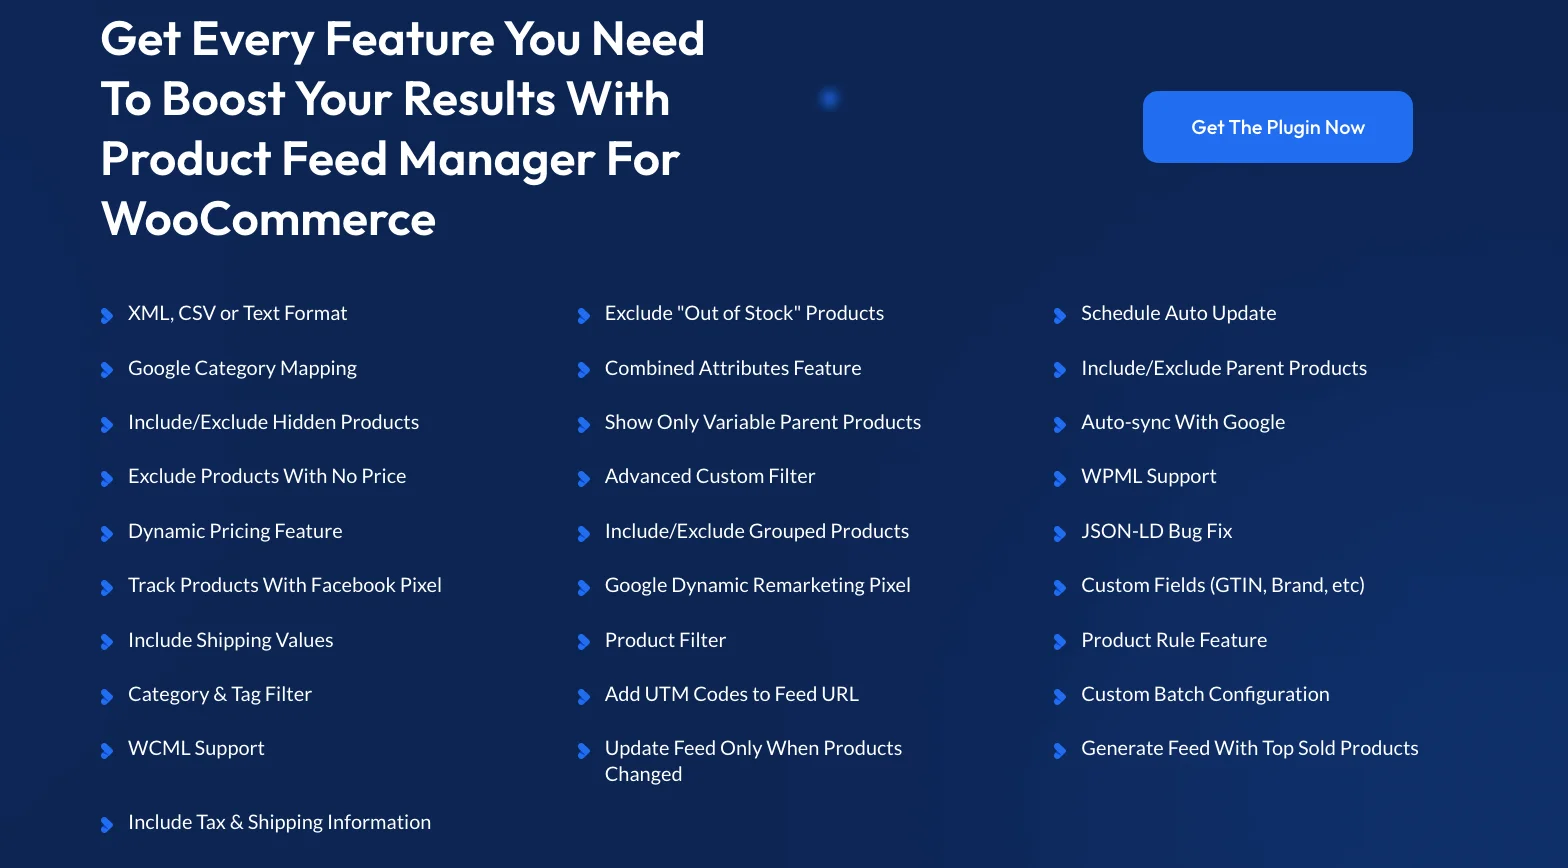
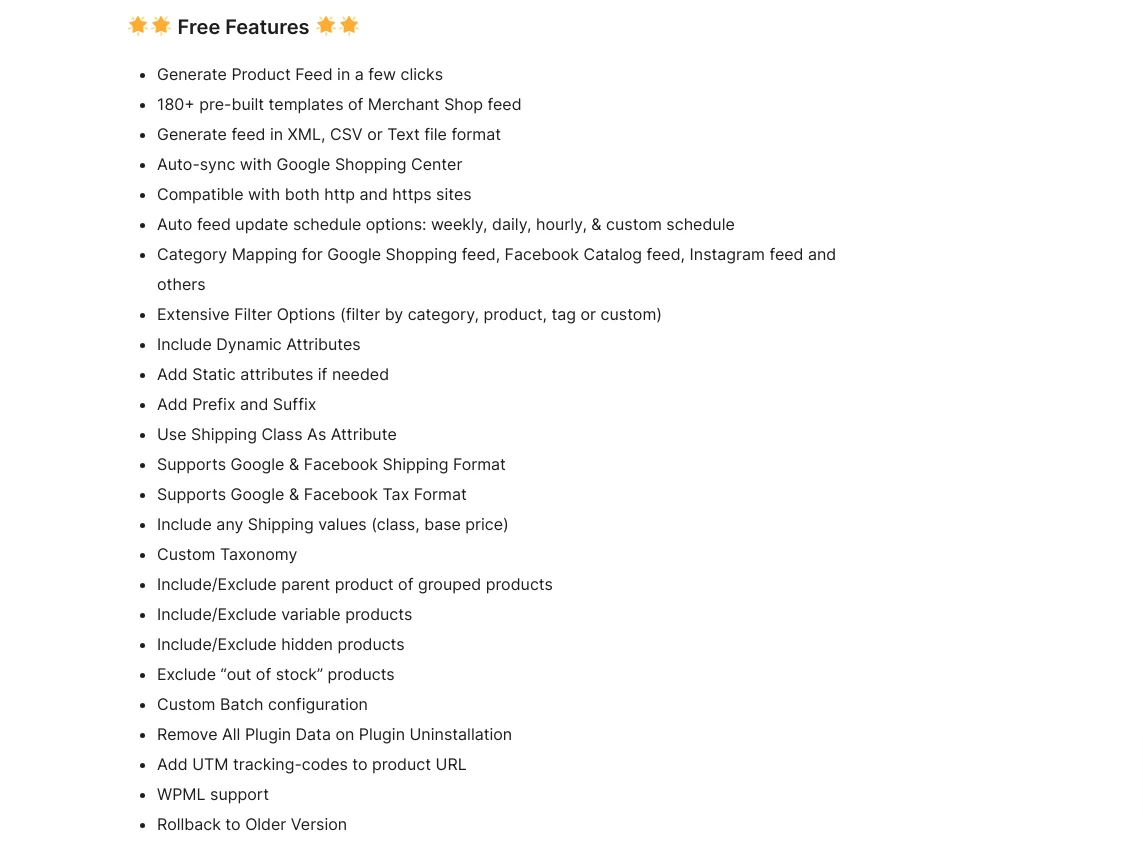
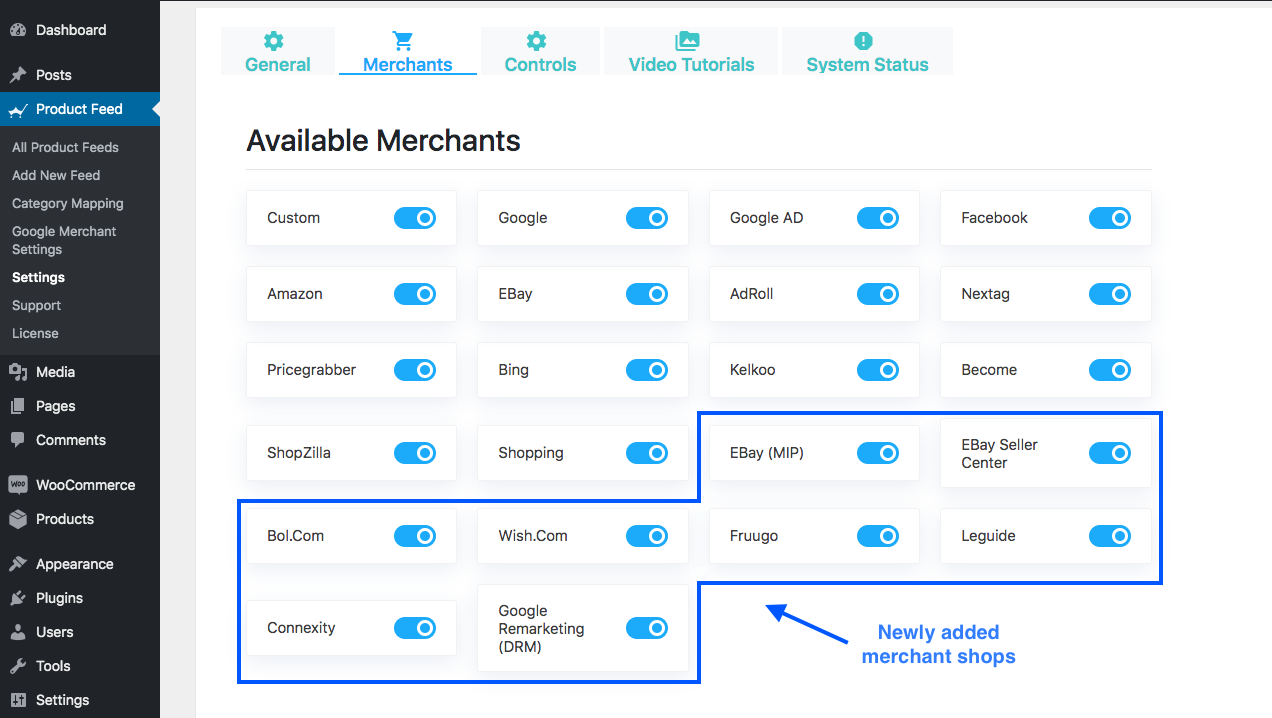
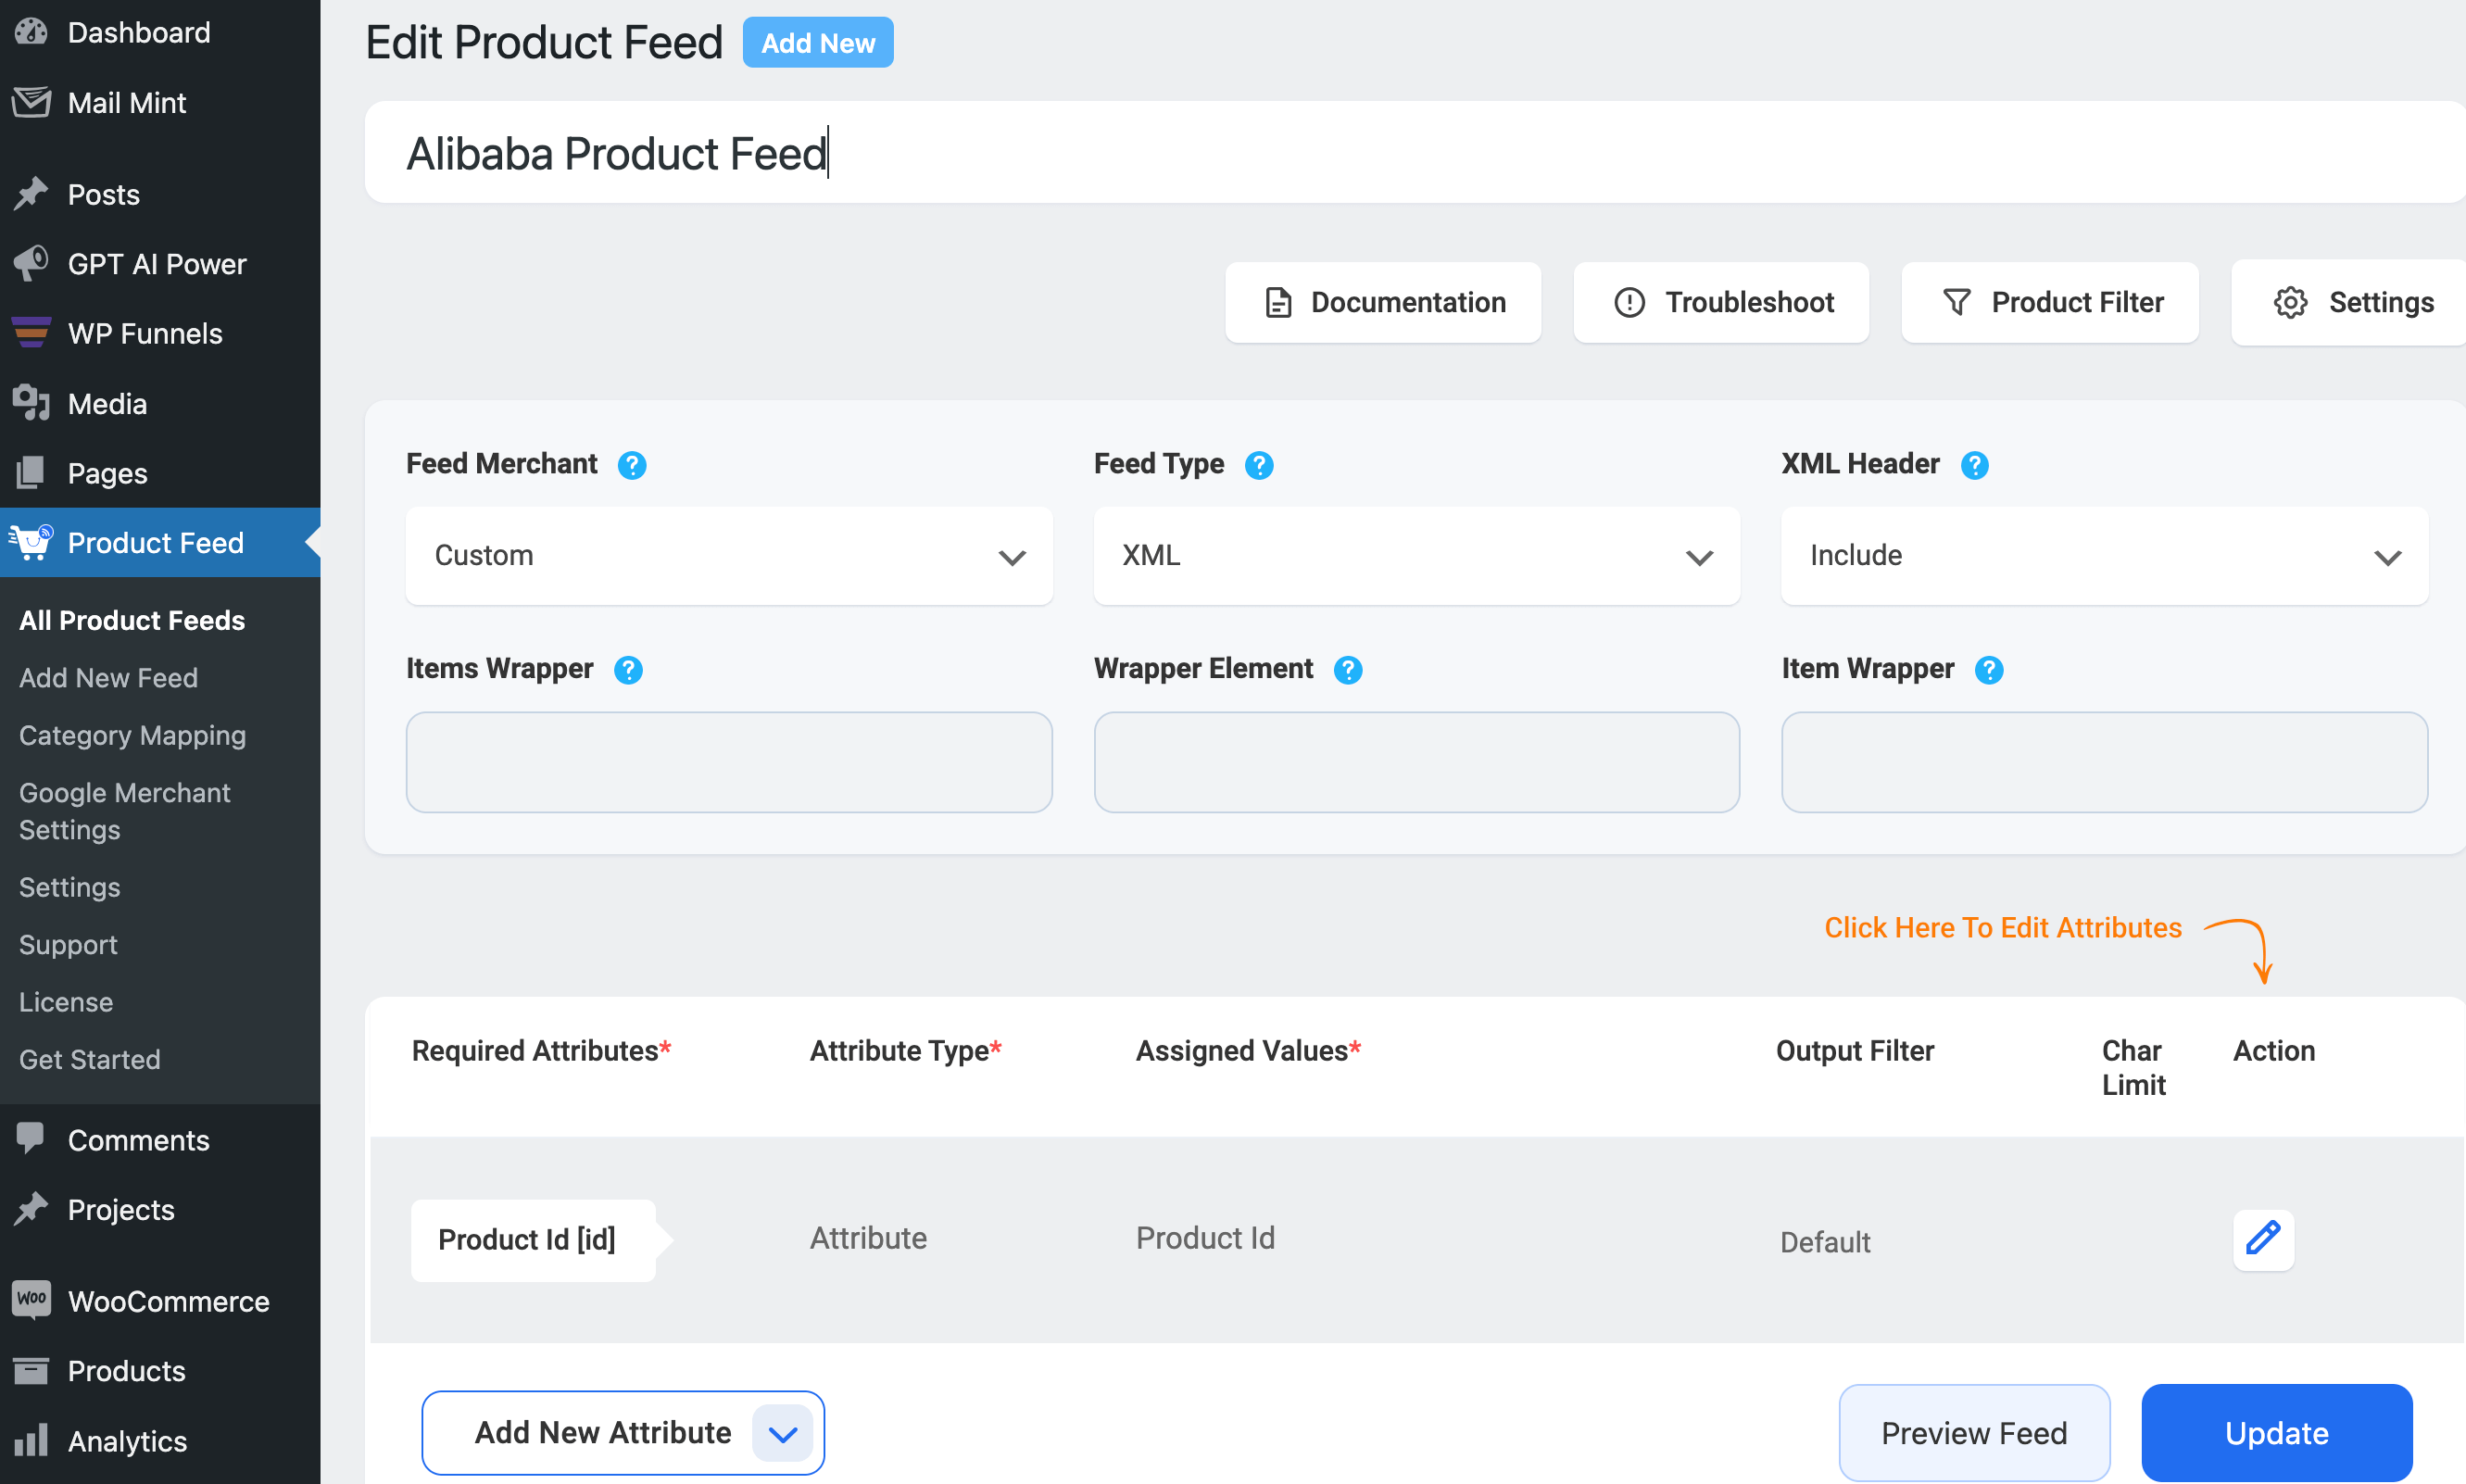
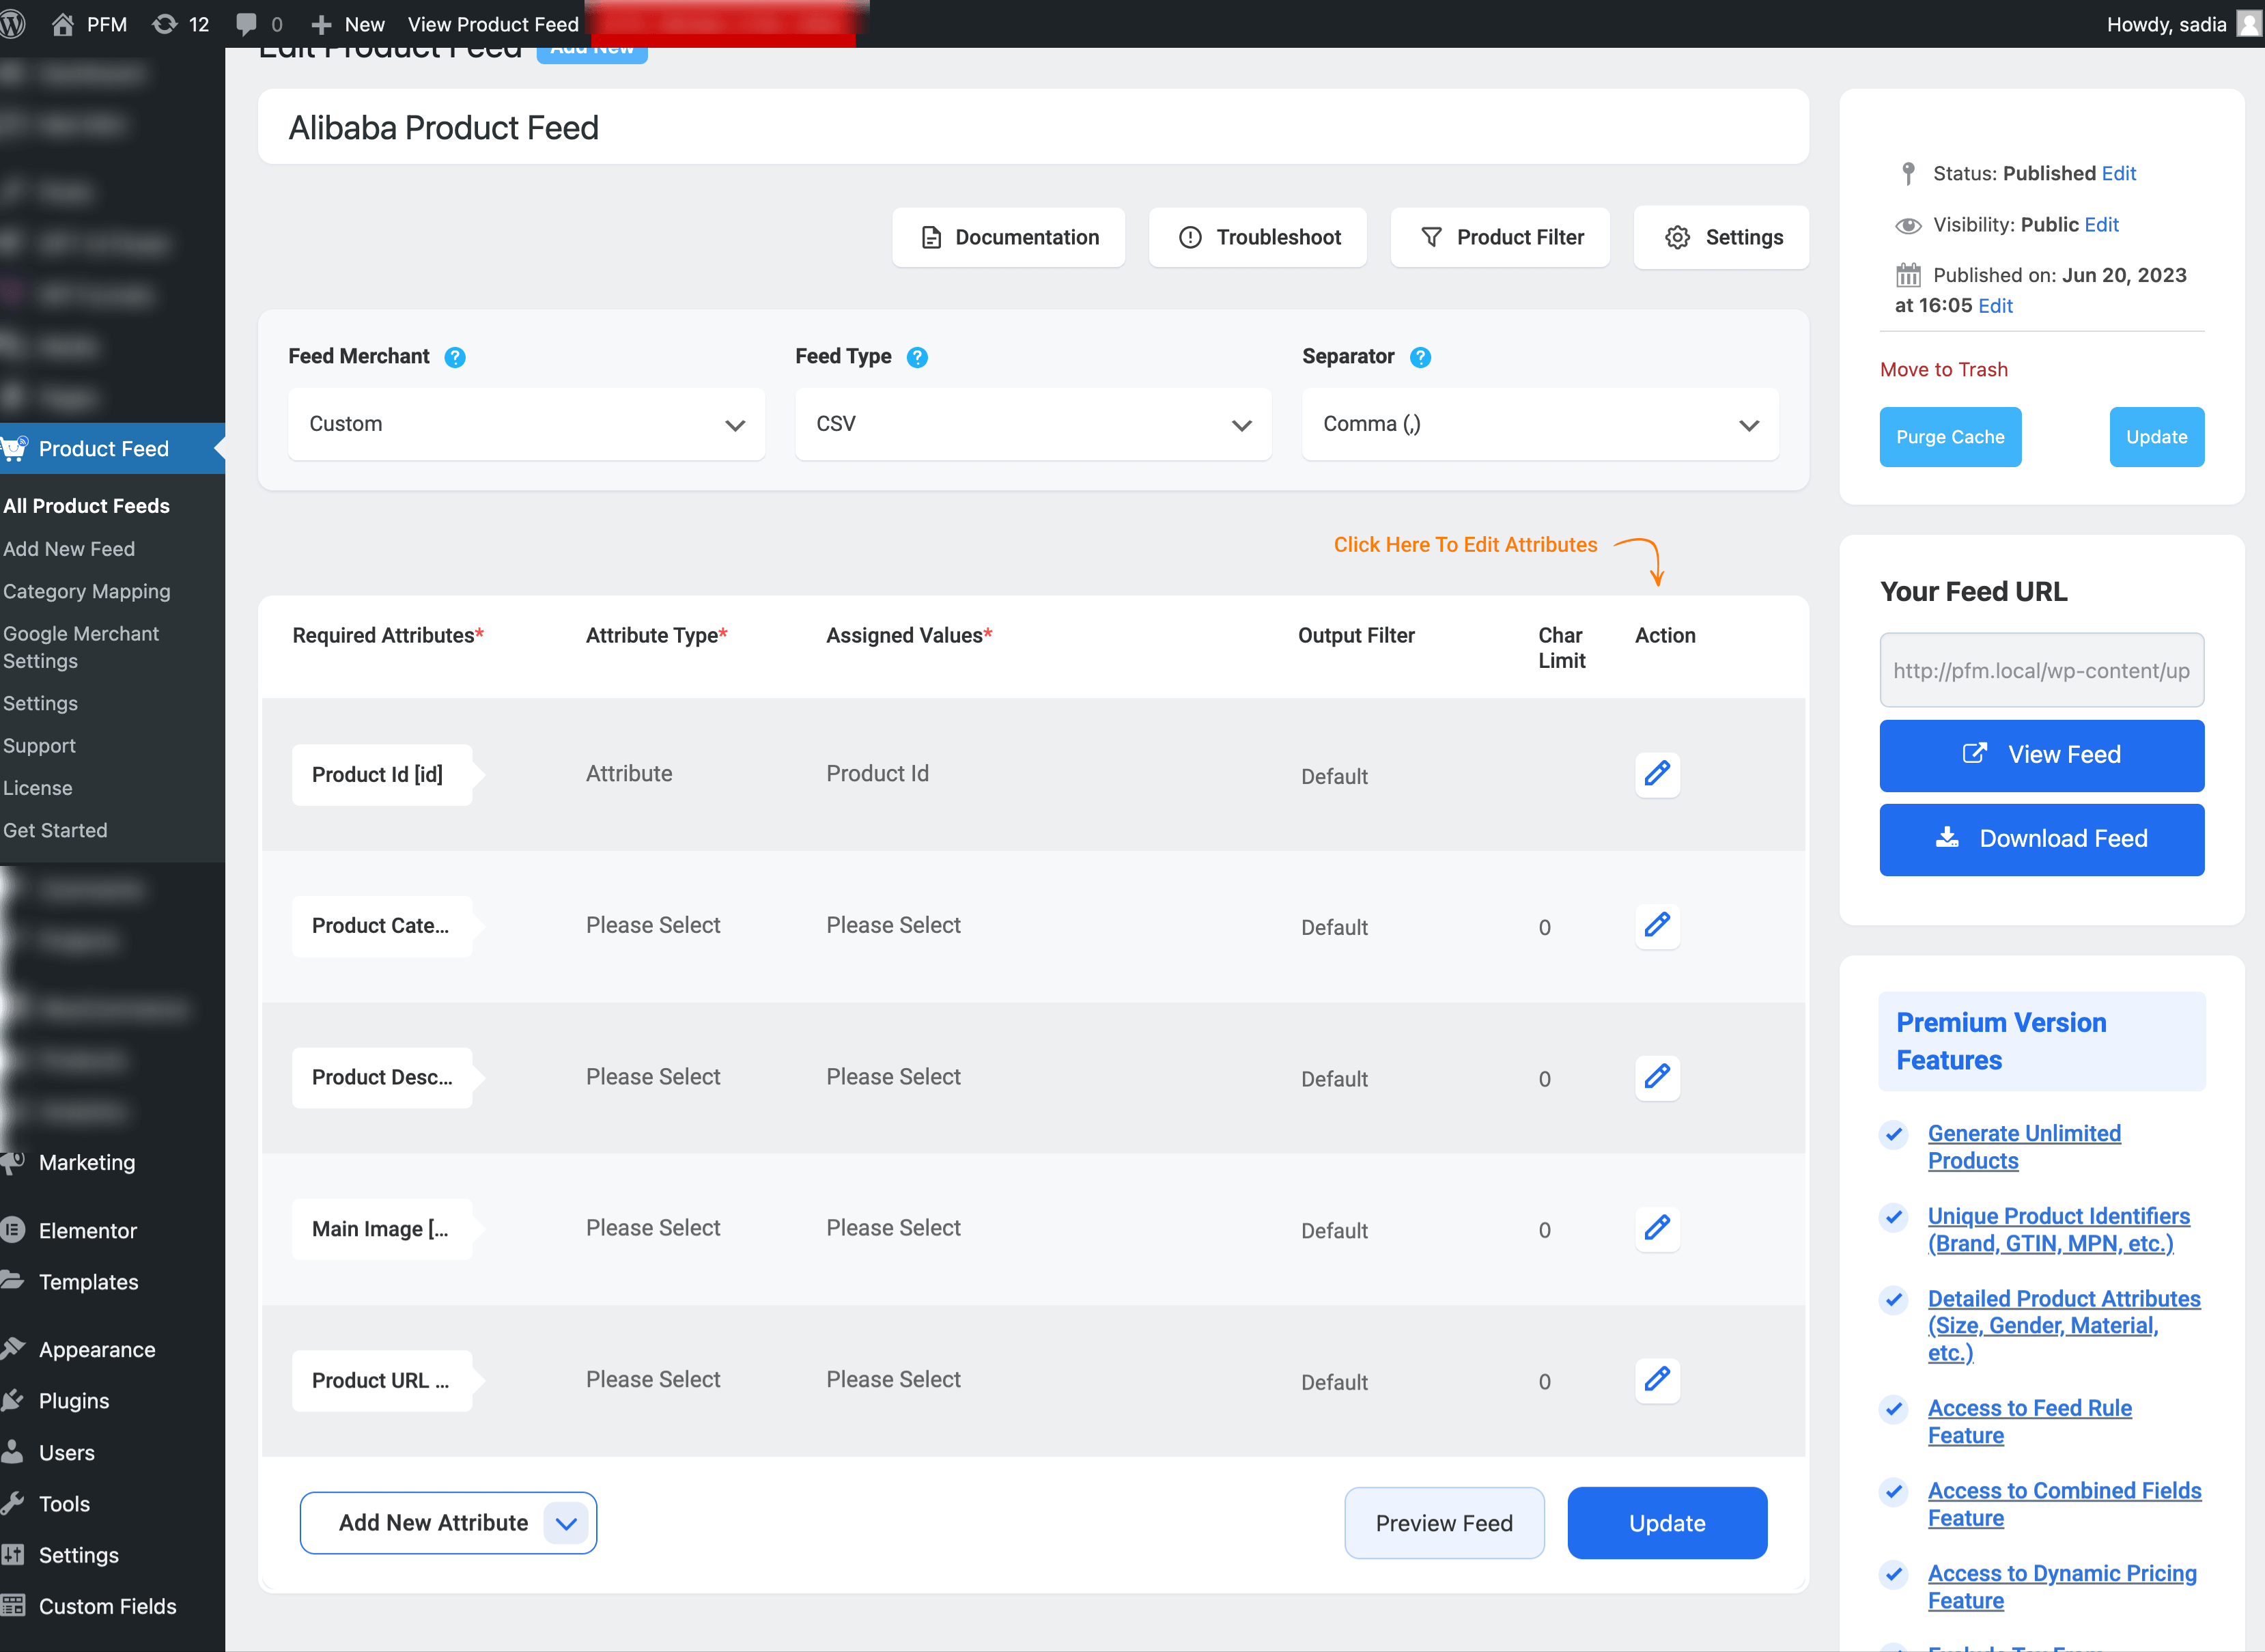
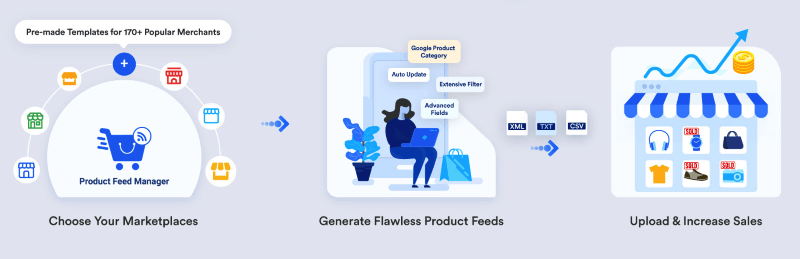
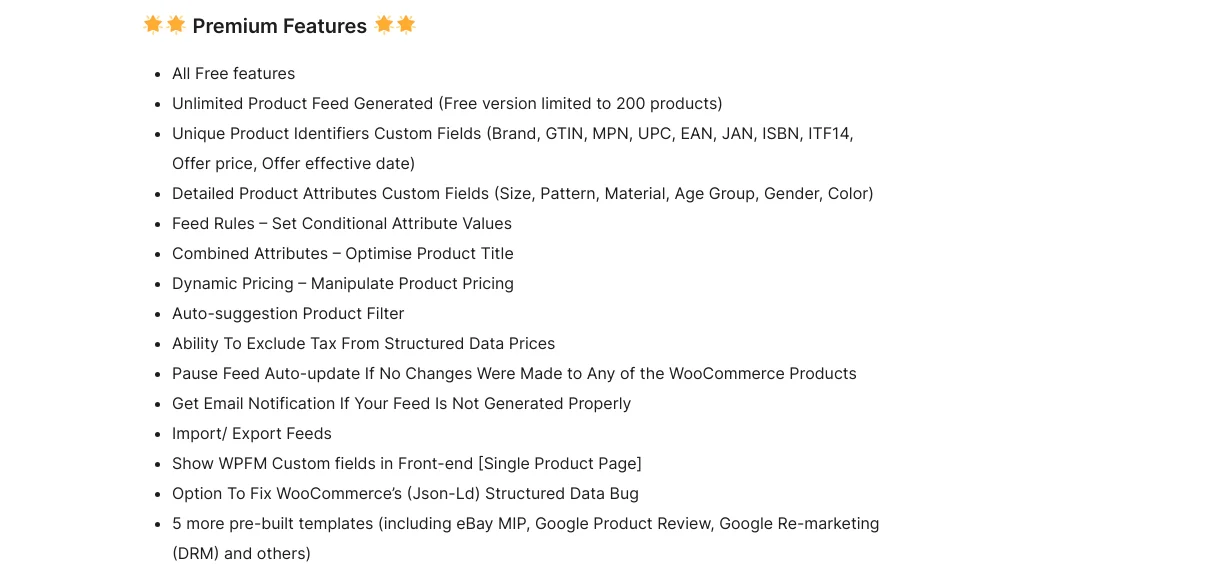
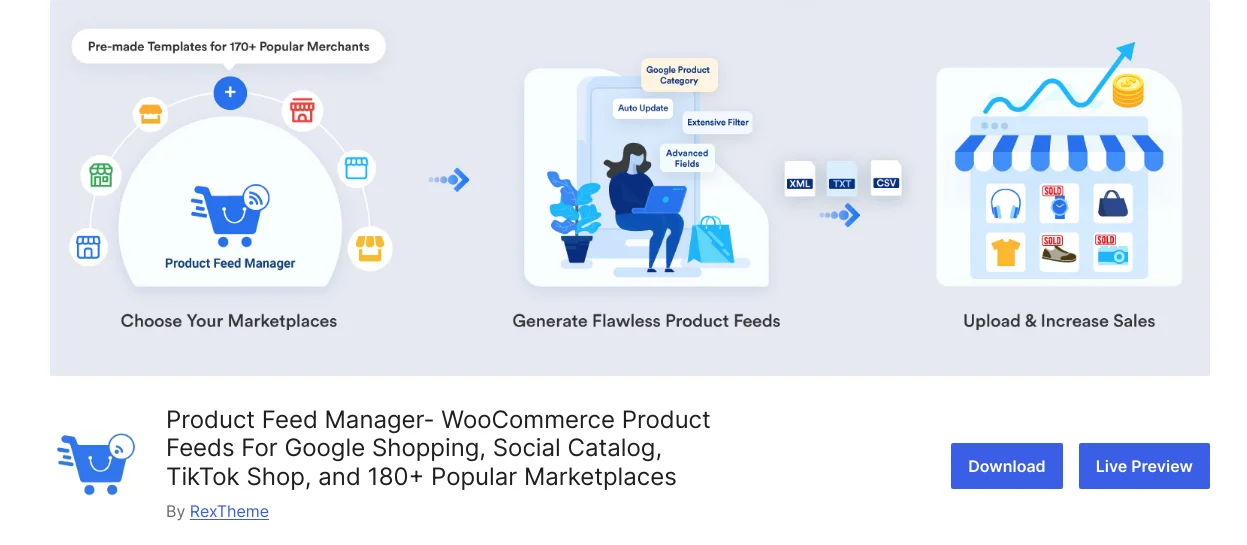
One such plugin is the Product Feed Manager for WooCommerce, which enables you to generate an accurate product feed for most international online marketplaces.

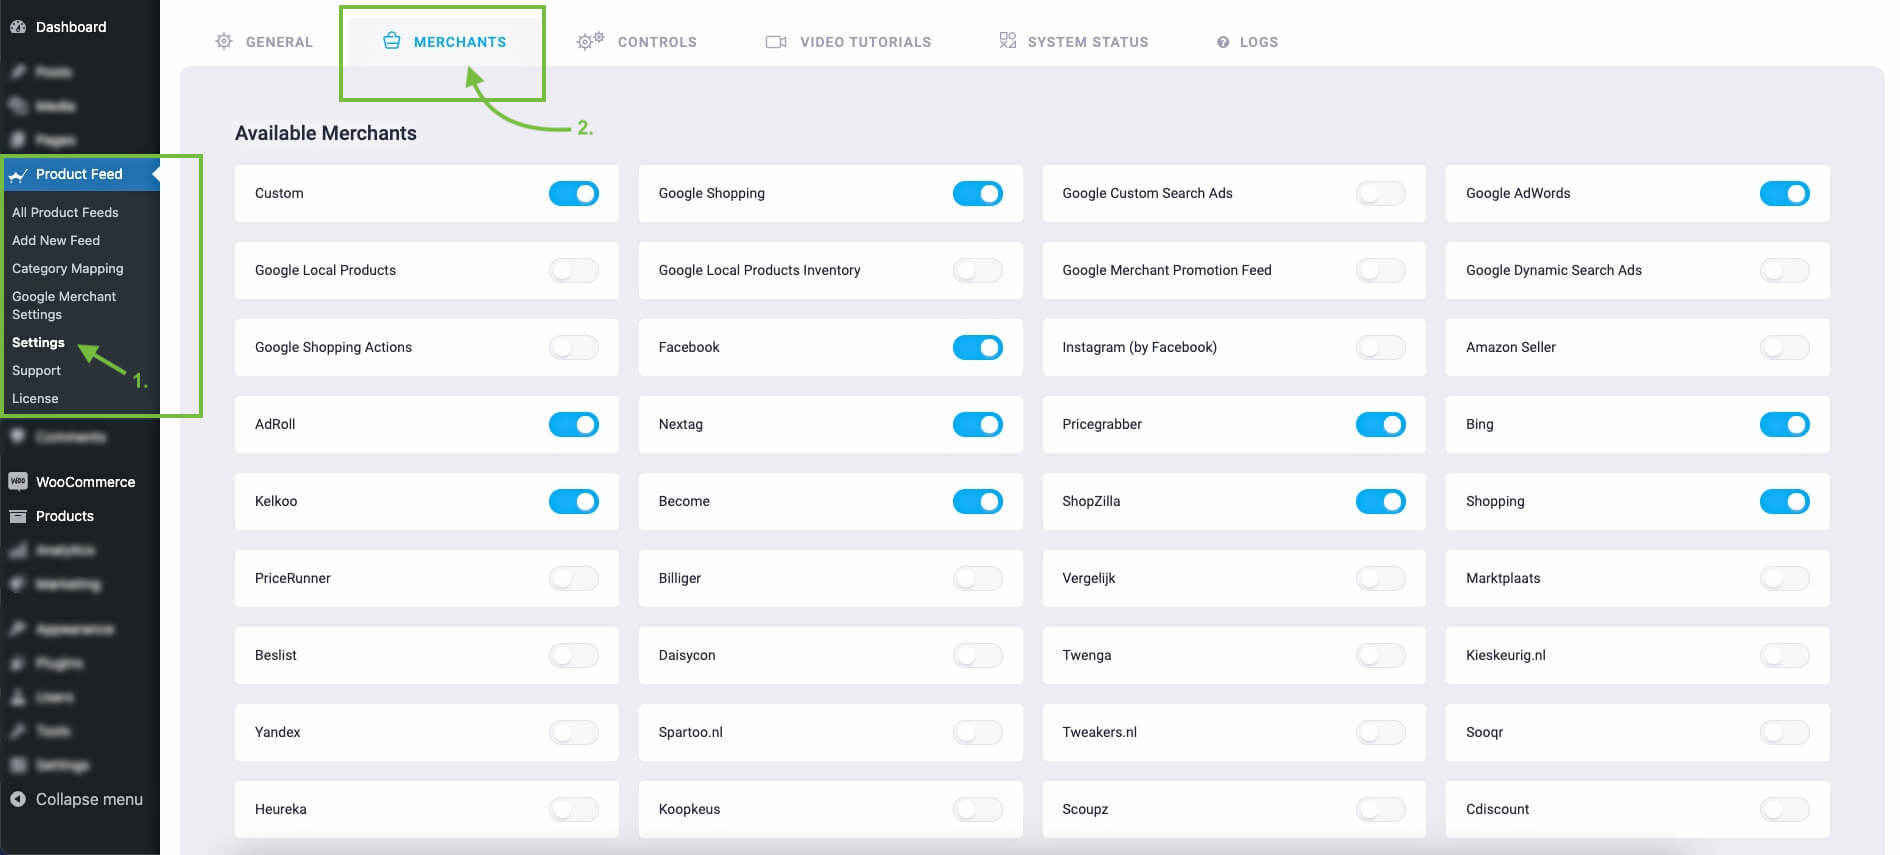
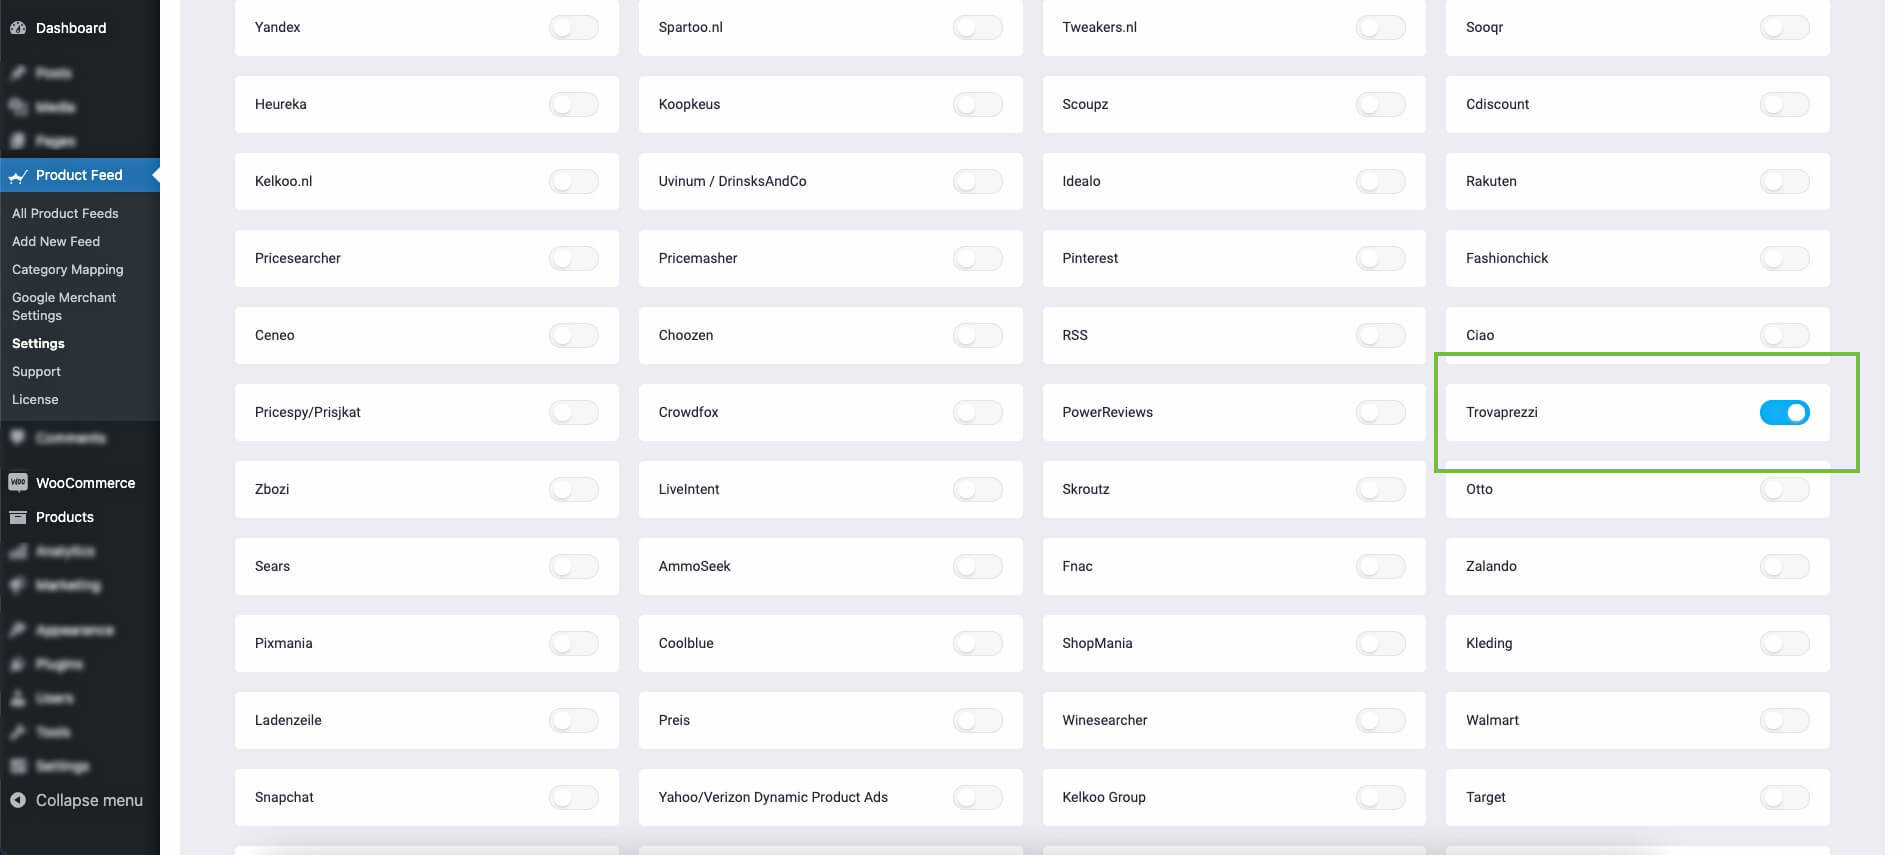
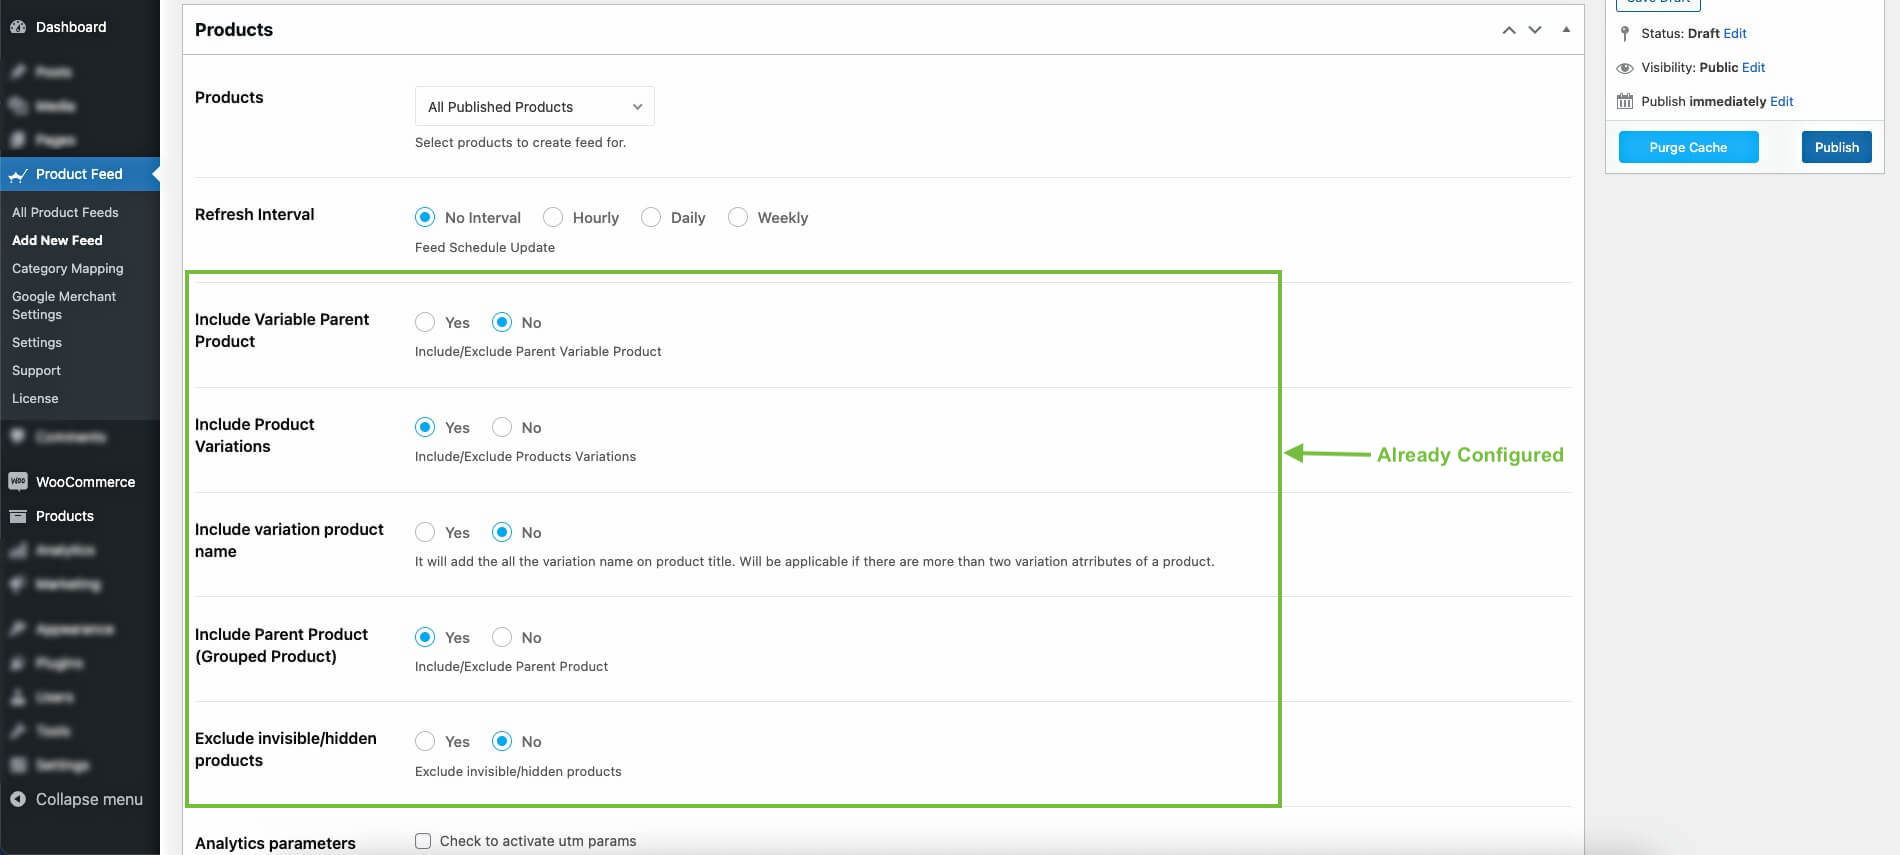
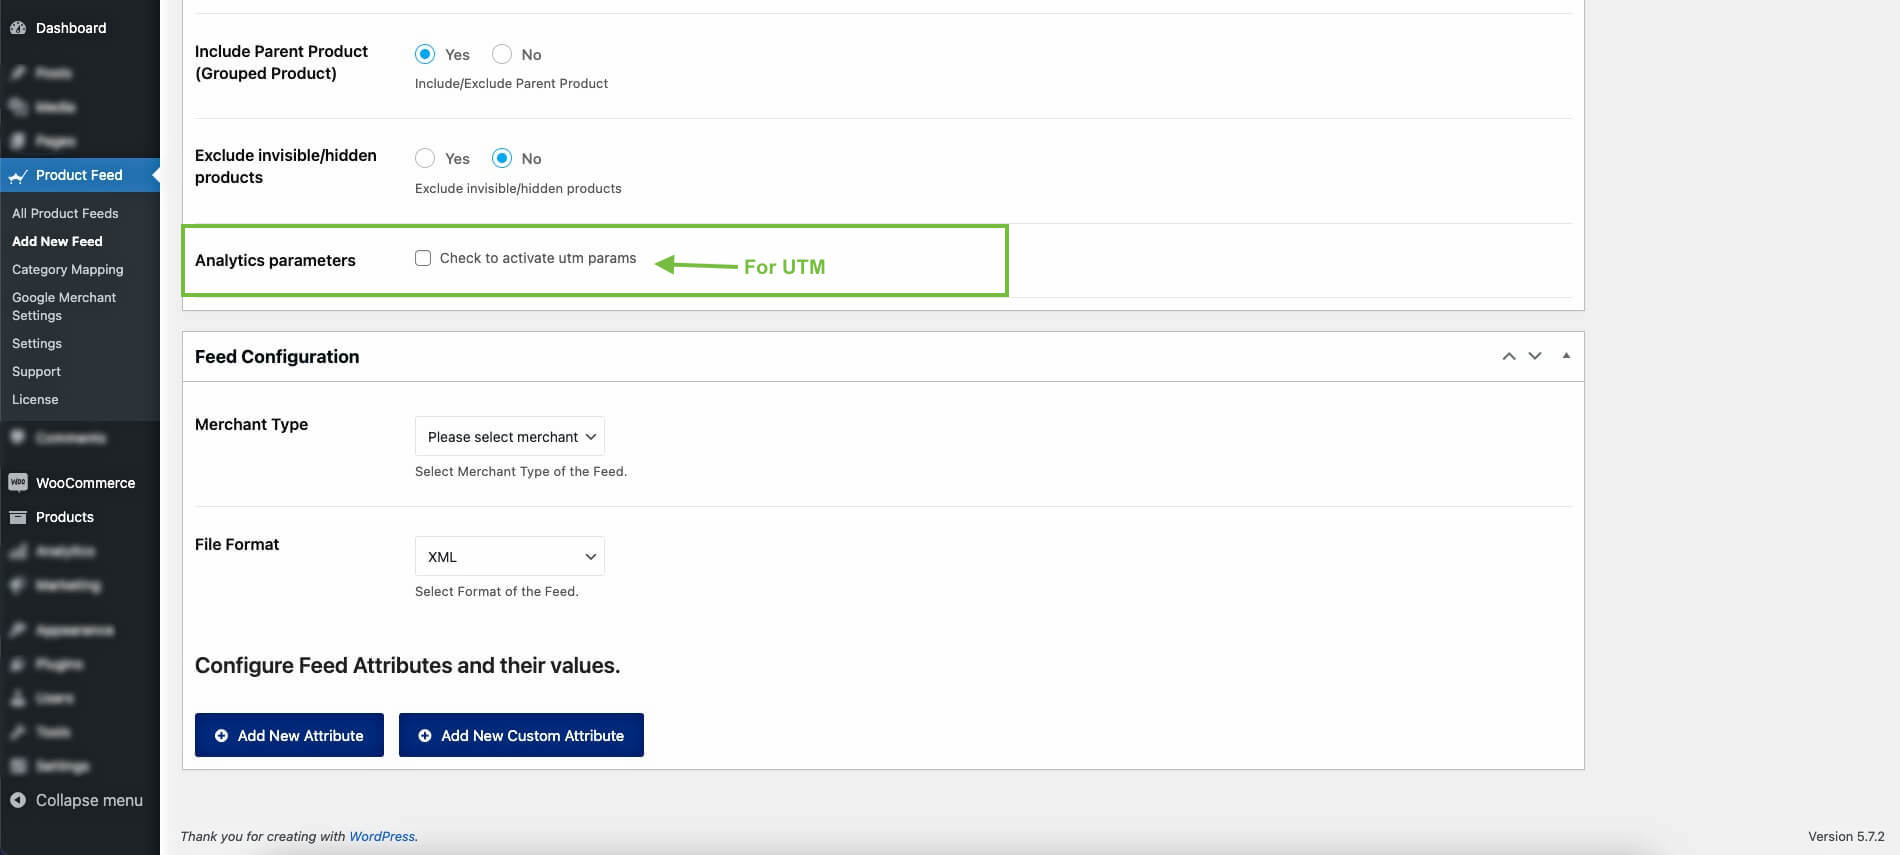
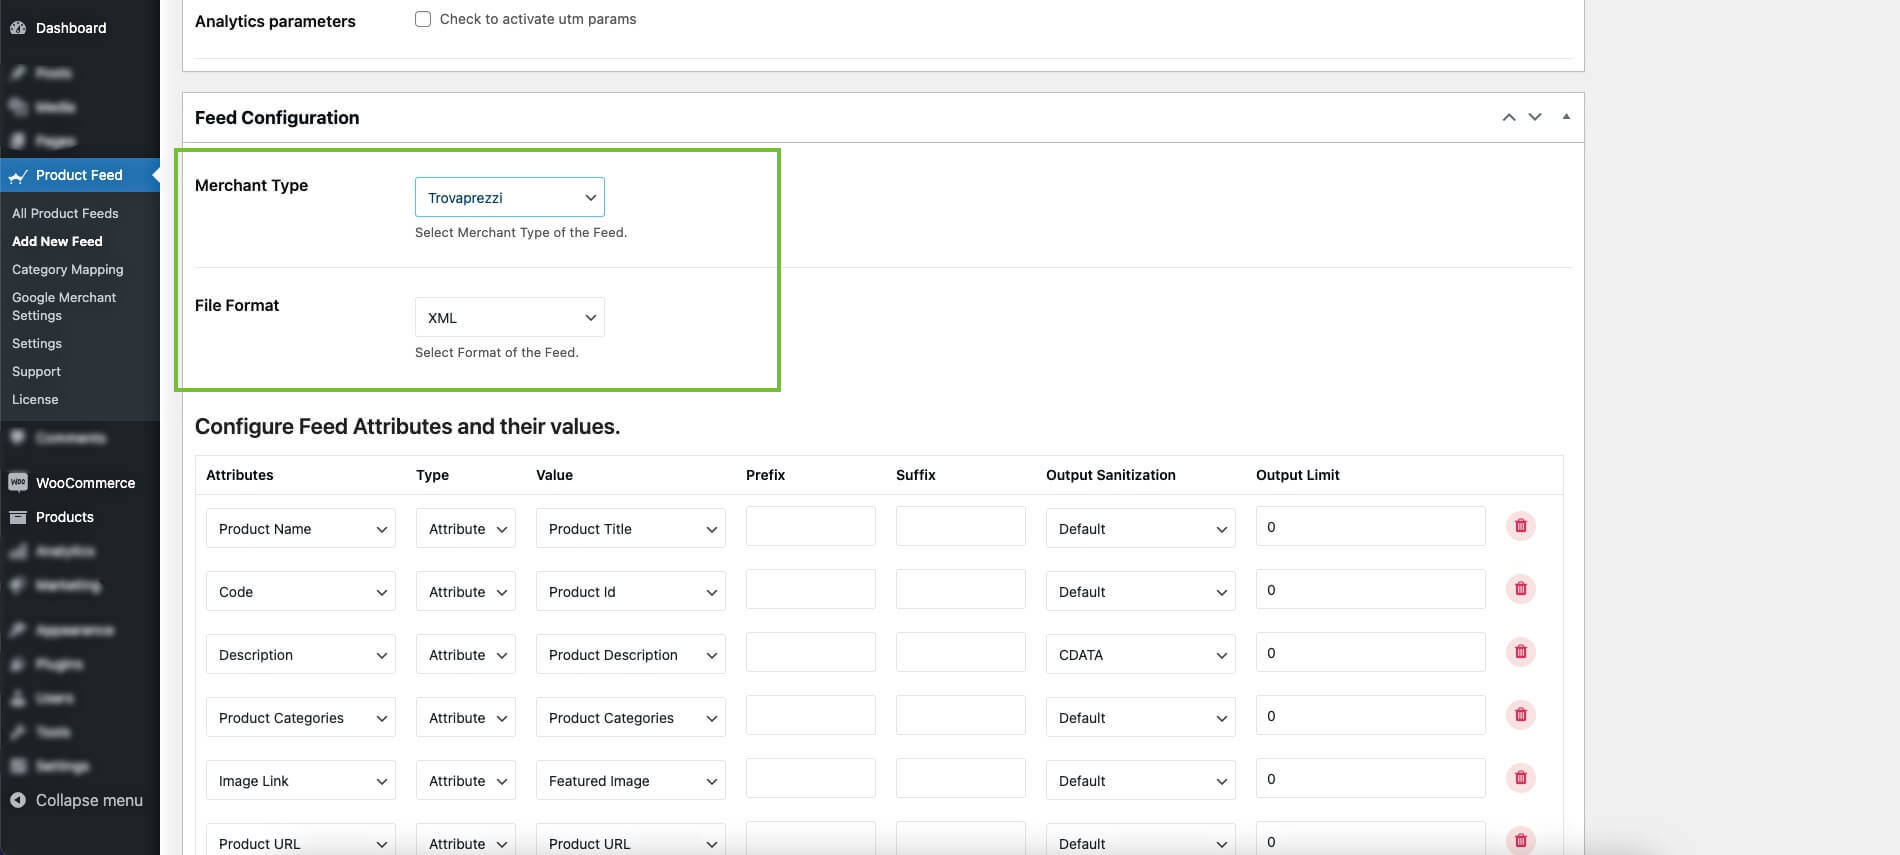
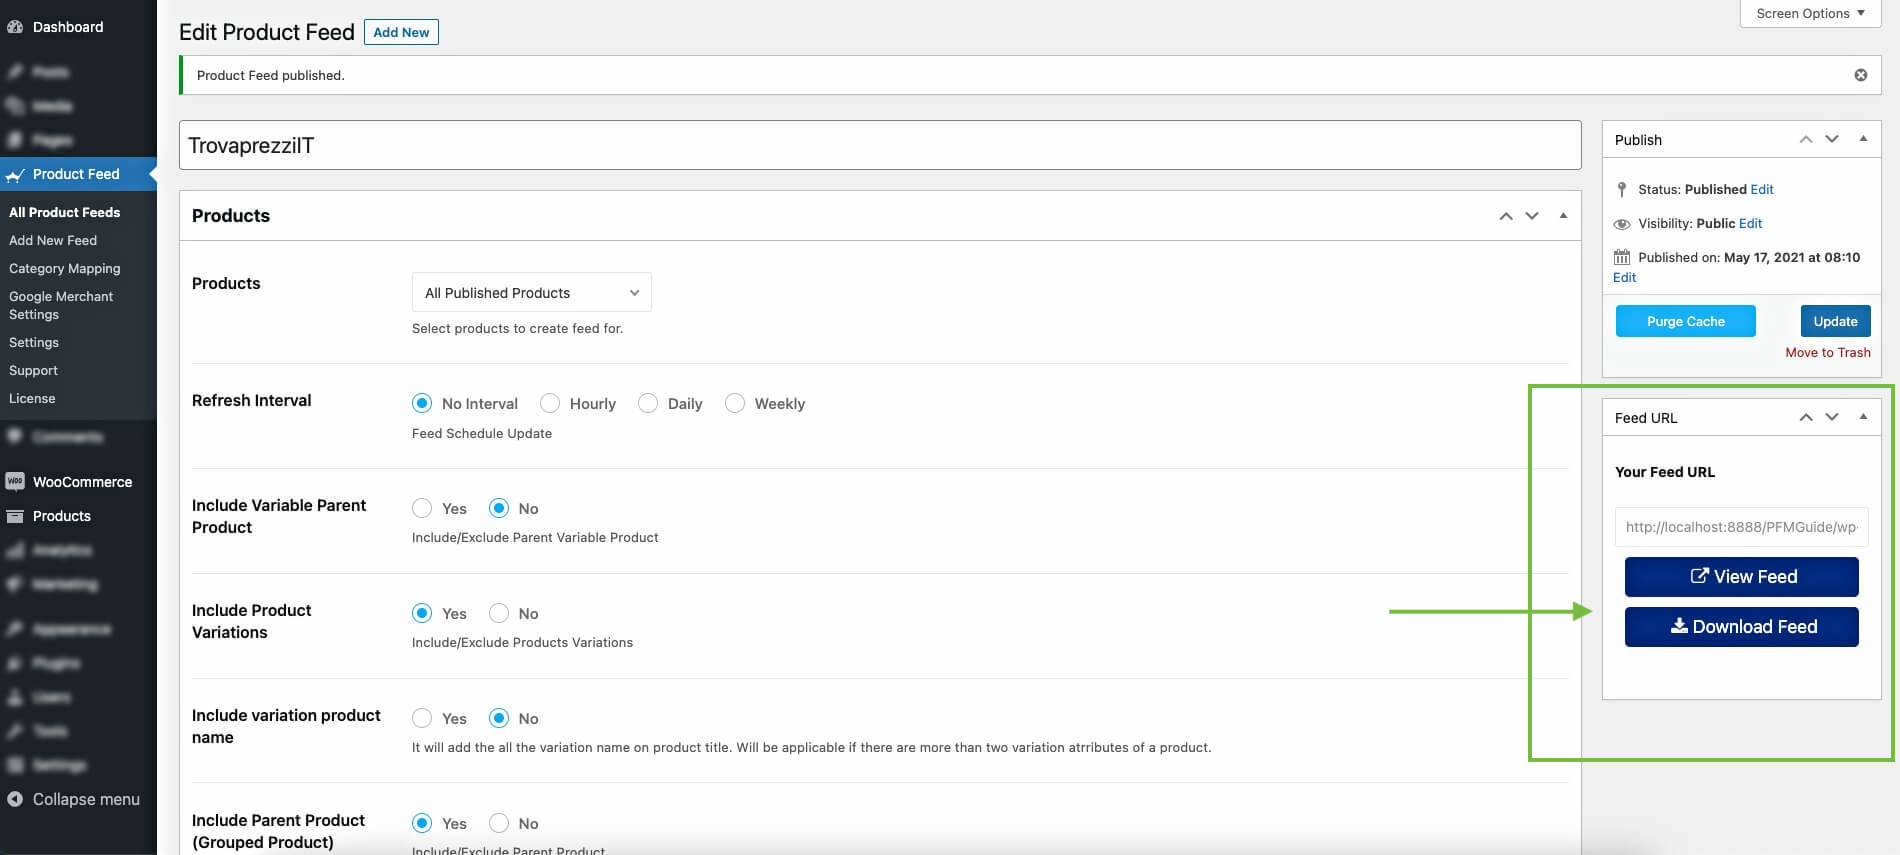
This plugin comes with pre-built templates allowing you to generate a product feed in just a few clicks and list your products on your desired marketplaces without hassle.

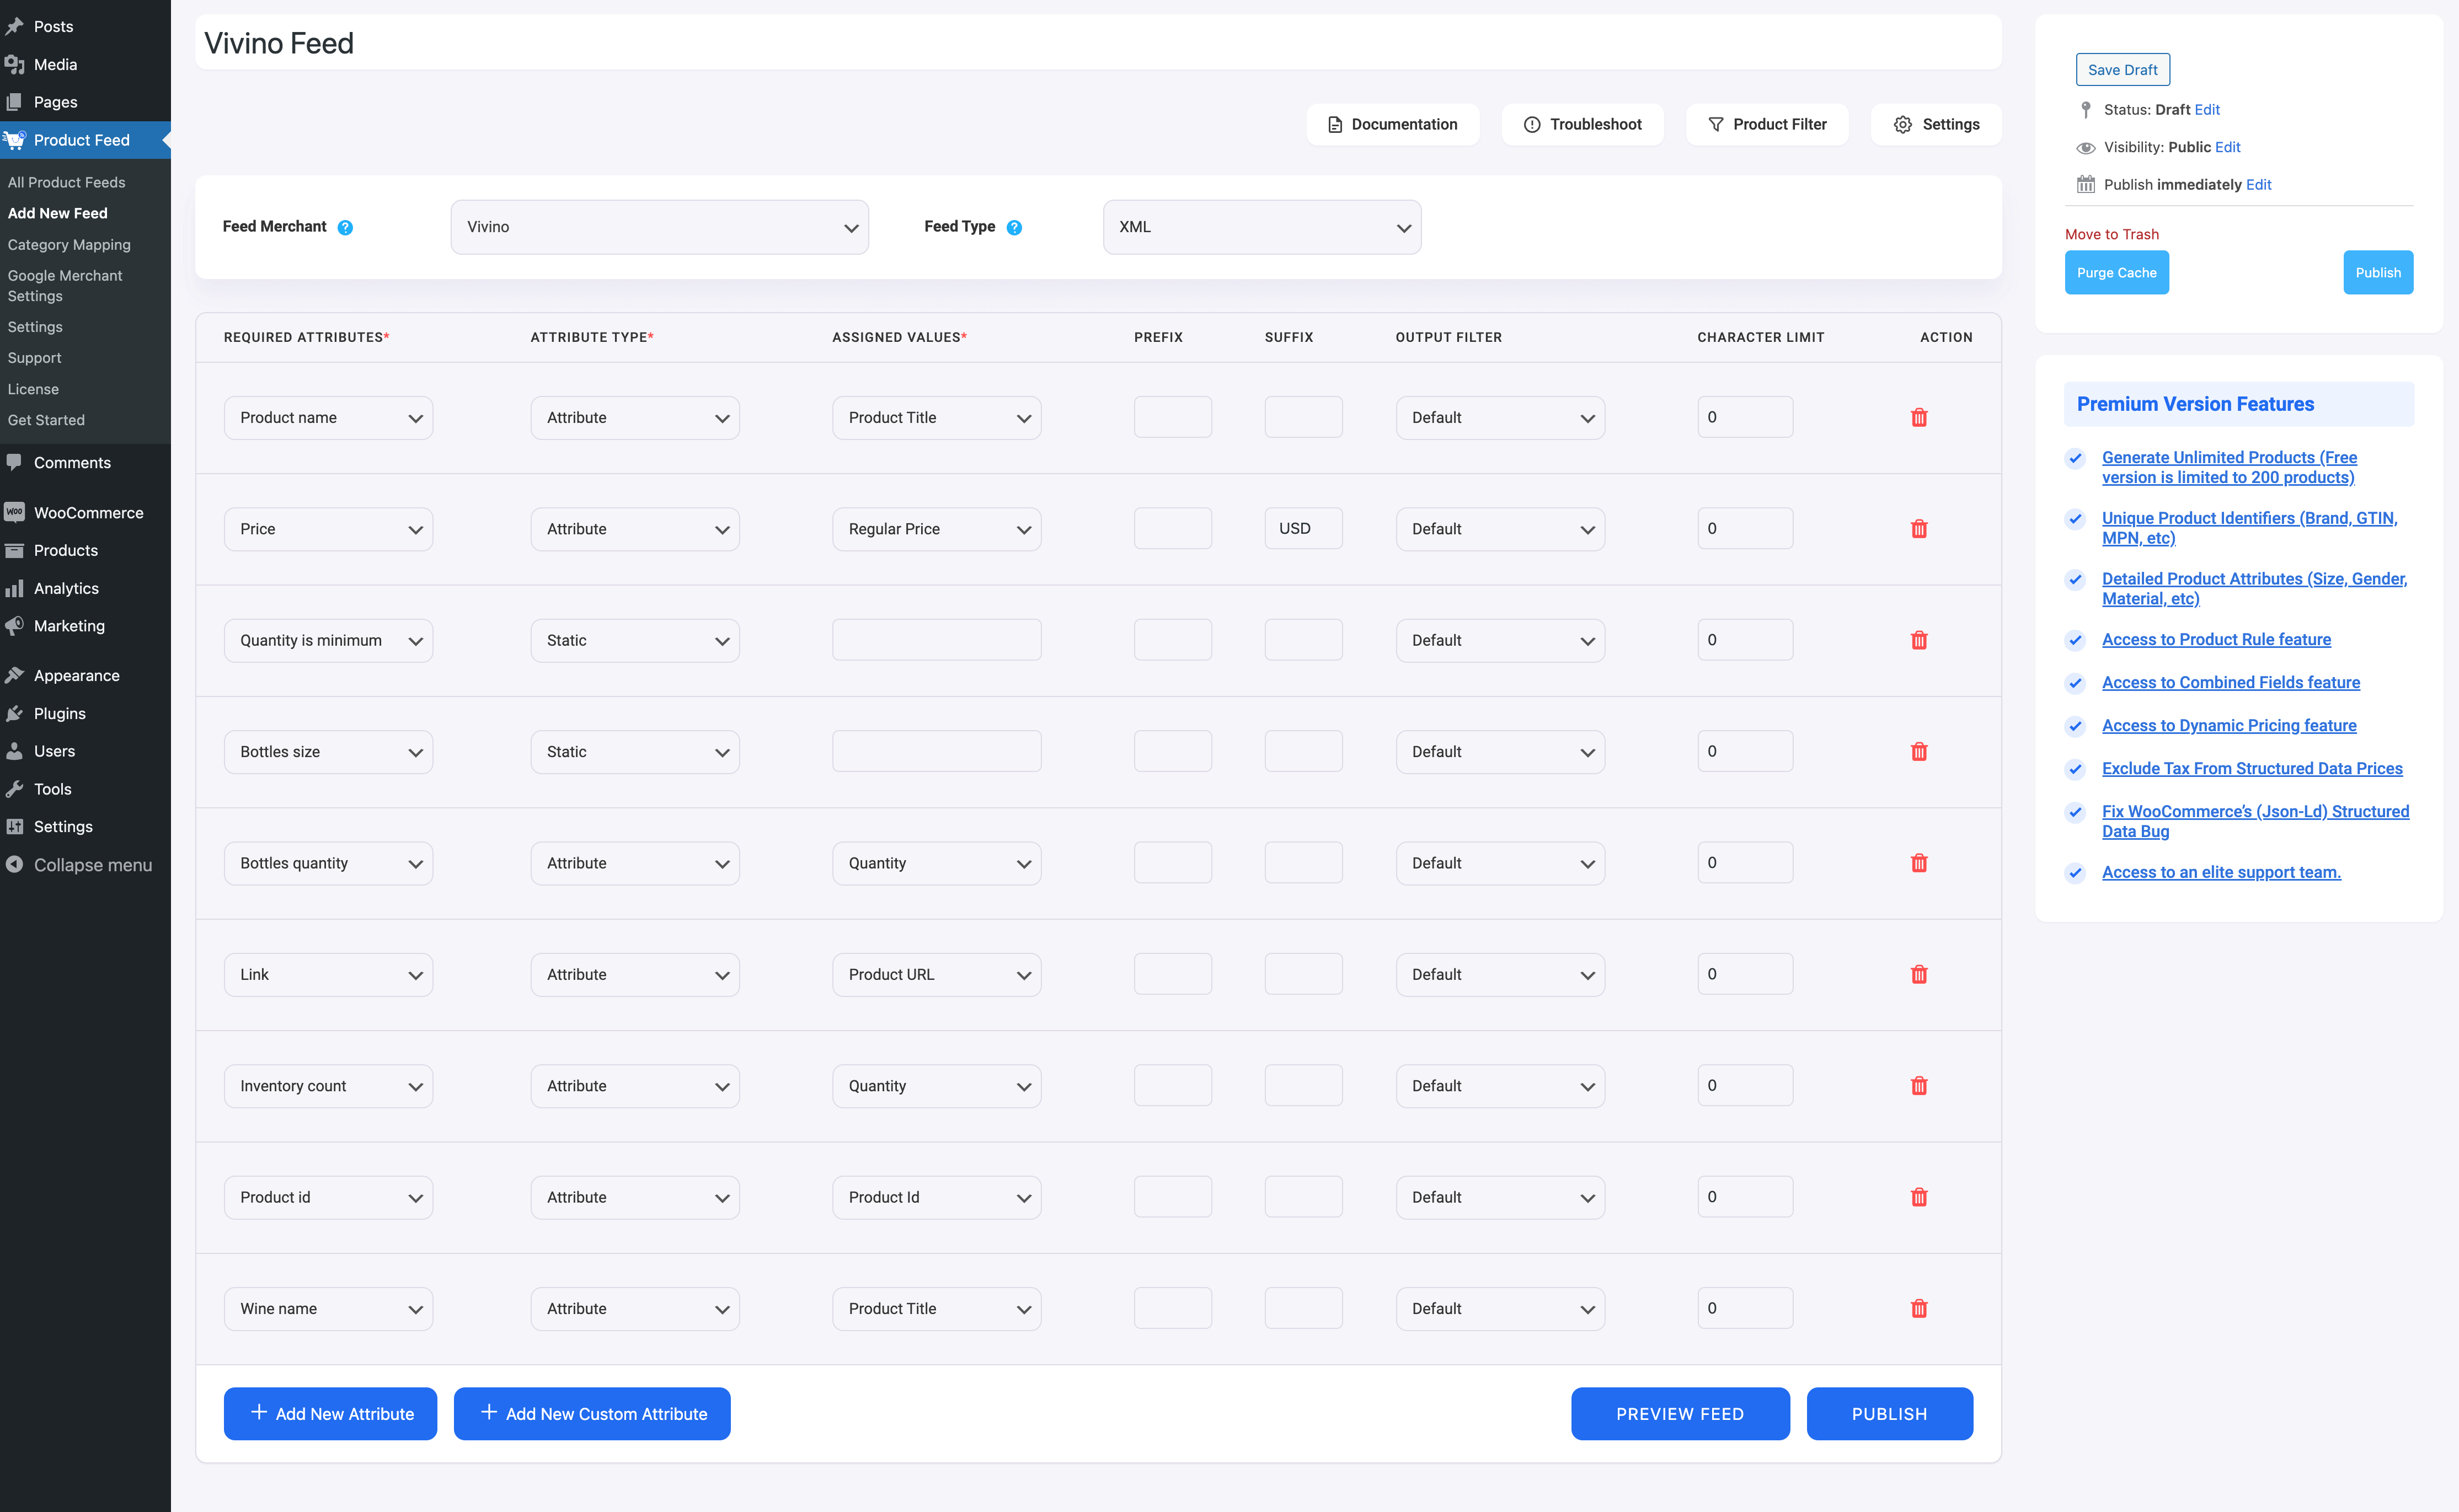
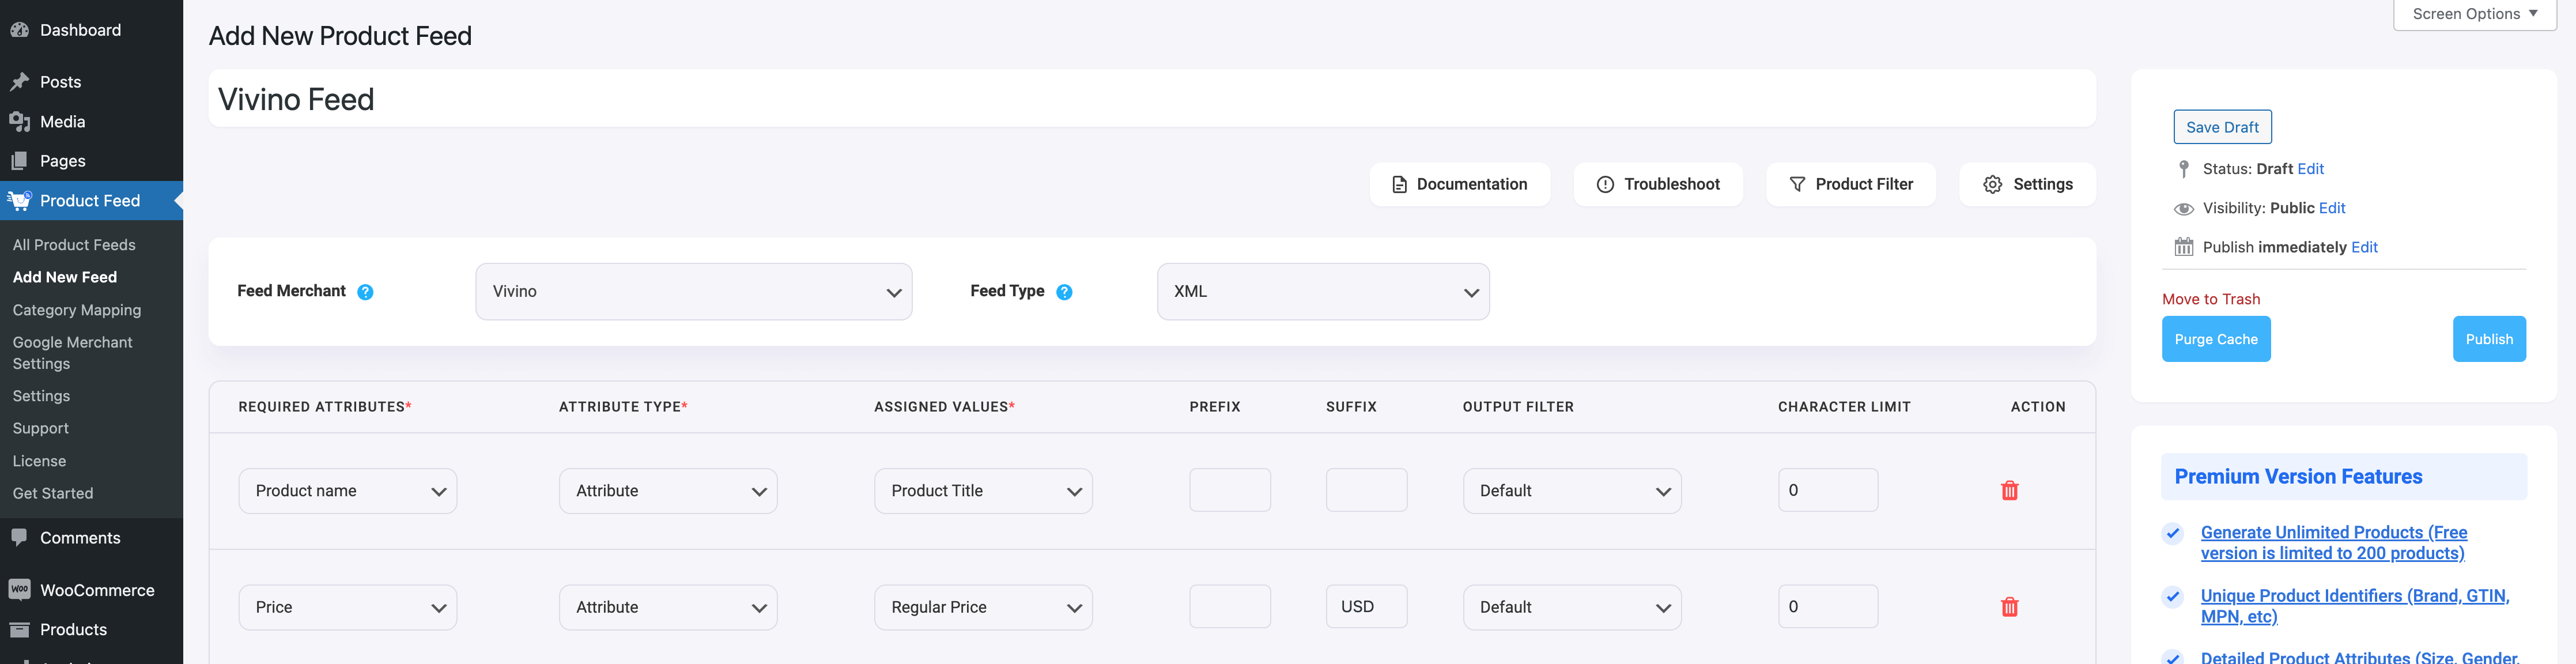
Additionally, It offers a range of customization options that allow you to customize your product feeds to meet the specific requirements of each marketplace.

Conclusion

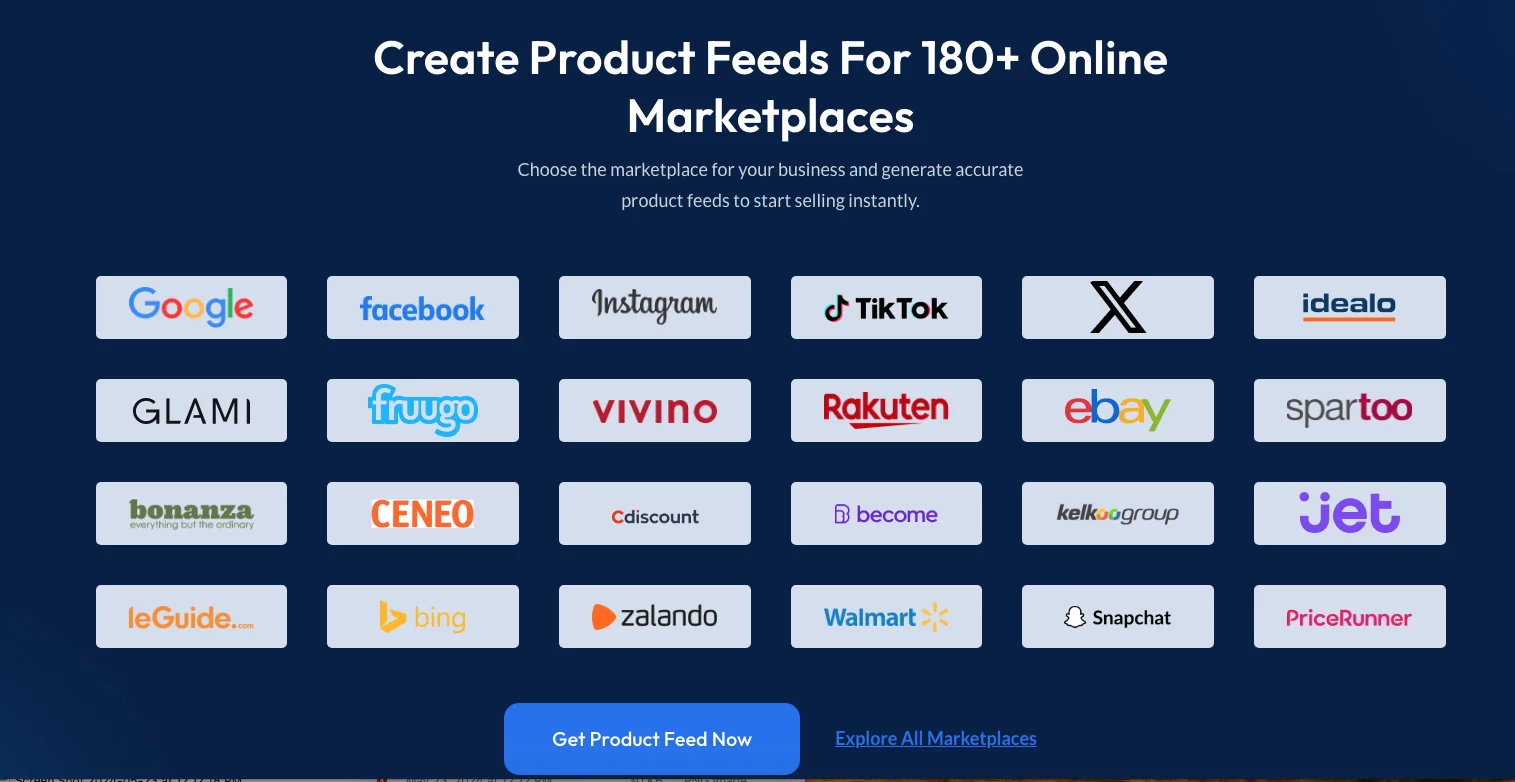
Promoting your products internationally on global online marketplaces like eBay, Amazon, Google Shopping, Facebook, and Pinterest can significantly increase your reach and sales.

These platforms are some of the best places to sell online. Utilizing these digital marketplaces simplifies the process of buying and selling on an international scale.

They serve as robust international e-commerce platforms. It offers tools and features to manage your listings, payments, and shipping efficiently.

You can easily post your WooCommerce products to these online markets using the PFM plugin, simplifying the process and helping you tap into new customer bases across the globe.

PFM tool

FAQs

How do you handle shipping and logistics when selling internationally?

When selling internationally, you can use the marketplace’s built-in shipping and logistics solutions to simplify the process. These services often include international shipping rates and tracking, making it easier for you to manage deliveries.

How do you ensure your product listings are effective?

To create effective product listings, use high-quality images and detailed descriptions. Highlight key features and benefits to attract buyers. Regularly update your listings based on customer feedback and marketplace trends to stay competitive.

How do you manage customer service for international sales?

Managing customer service for international sales involves timely responses to inquiries and resolving issues quickly. Use the marketplace’s messaging tools to communicate with customers and provide clear information about shipping times and return policies.

How do you optimize pricing for international markets?

Optimizing pricing for international markets requires understanding local market conditions and currency differences. Research competitor pricing and adjust your prices accordingly. Use dynamic pricing tools if available on the marketplace to stay competitive and attract more buyers.

How do you handle returns and refunds for international orders?

Handling returns and refunds for international orders involves setting clear return policies and procedures. Communicate these policies to your customers upfront to avoid confusion. Use the marketplace’s return and refund tools to manage the process smoothly. It also ensures customer satisfaction while minimizing your costs.

Categories
Guide Product Feed Manager For WooCommerce WooCommerce

Complete Guide to Increase eCommerce Sales with Pricespy [2024]

Running an eCommerce business may seem hectic, but today, eCommerce is the most booming industry out there.

According to a global report, the e-commerce industry has seen over $5.8 trillion worth of sales in 2023 globally and is expected to grow to over $8 trillion by the end of 2027.

Now, despite generating so much revenue and sales, most consumers go online to compare the prices of products. And 87% of these consumers end up making online purchases sooner or later.

Thousands of people still go to compare prices through several price comparison sites such as Pricespy, Pricerunner, Pricechecker, etc.

Thus it is ideal for any online store to list its products on popular price comparison sites. Pricespy is currently the most popular price comparison site in Europe.

This means, that if you run an online store and deliver products in major countries in Europe, then you must list your products on Pricespy to increase sales.

What is Pricespy?

Pricespy product feed

Pricespy is a popular price comparison website that helps you find the best deals on a wide range of products. It allows you to compare prices from various retailers across different categories such as electronics, appliances, and more.

As a shopper, Pricespy enables you to make informed purchasing decisions by presenting comprehensive price information and product reviews in one place.

For sellers, listing products on Pricespy increases visibility and attracts price-sensitive customers looking for competitive deals.

It is a valuable tool for both consumers seeking the best prices and businesses aiming to reach a broader audience, especially in the competitive UK online marketplaces.

How does Pricespy work?

Pricespy works by aggregating product information and prices from various online retailers into a centralized platform. Here’s how it operates:

  1. Data Collection: Pricespy gathers product details, prices, and availability from participating retailers like you.
  2. Comparison: It compiles this information into a searchable database. It allows you to compare prices and features across different products and brands.
  3. User Interface: Customers can easily navigate through categories, view product reviews, and filter results based on their preferences.
  4. Seller Participation: You can list its products on Pricespy to increase visibility and attract customers looking for competitive deals.
  5. Decision-Making: Customers benefit from comprehensive price transparency and unbiased product reviews. It enables them to make informed purchasing decisions.

Pricespy’s platform facilitates a convenient and efficient way for consumers to find the best deals online while providing you with a valuable tool to enhance your market reach and sales potential.

Why You Should List Your Products on Pricespy?

Pricespy is currently the most trusted price comparison site around Europe with over 14 million regular users.

Let’s look at the reasons why Pricespy is ideal for you to list your products.

1. Genuine Intent to Increase Sales

If you are an online store owner, Pricespy helps you to increase your eCommerce sales.

  • When you list your products, they will be sorted into various categories.
  • When a consumer will search for a product, they will get a list of the best deals for that particular product.
  • If you are offering a good price and an overall good deal compared to others, your product will appear among the suggestions that the visitors will see.
  • Let’s say the consumer chooses your product. Click on it will redirect the consumer to the product page on your site, where he/she can complete the purchase.

Now, this sounds similar to most other such sites, however, Pricespy has a few perks that outweigh others.

i. Displays Honest Deals

Display Deals - Pricespy product feed

Other listing sites such as Google Shopping or Facebook Ads have packages where paying higher can increase views. Pricespy has no such policy.

When a consumer searches for a product, he/she will get a genuine list of the best deals for that product from the lowest price to the highest.

So if you are offering a good deal, you will surely make money.

ii. Offers Price Prediction Graphs

Pricespy offers a unique service to consumers with a Price Prediction Graph. They have an artificial intelligence tool of their own called USP, which compares price changes in the past and the current market, and predicts what a product price might change into.

This can be used by consumers to decide when to purchase a product, and at the same time, it can be used by sellers to decide when to release good discount deals.

For example, if you see that the price of a product will fall next month, you can decide to give a discount offer beforehand to increase your sales as much as possible, before the fall in the market price.

In this way, even if a consumer sees that the price will fall later, your discount might tempt them to make an immediate purchase.

If the market price falls later, your current production cost will make it difficult to get a good profit at that time. So selling more of your products earlier will be more beneficial for your shop.

iii. Affordable Collaboration

Along with the above advantages you get, the cost of posting in Pricespy is absolutely nothing. They have a fair Cost Per Click (CPC) payment policy depending on the click volume. So if you are not getting results here, you will not have to pay.

They do have a paid feature, ‘Featured Shop’, however, it’s not what it sounds like. You might think a featured shop will probably be highlighted uniquely or will be displayed at the top of the list. But that’s not the case here.

In Pricespy, it will allow you to display your logo in the listing results rather than the name only, it will allow you to add a biography, and it will also add a ‘Cheapest on PriceSpy’ tag if your deal is cheapest for a certain product.

Apart from that, it gives you an analytics board to keep track of your product performance and changes the fees into a fixed Cost Per Click amount regardless of the click volume. These are the two features why most people sign up for the featured shop.

Your advantage here is that others cannot get too many special preferences just by paying extra. If you are offering good deals, you will get the value you deserve on the listing.

2. Huge Reach

Pricespy currently operates in 7 different European regions with their respective local domains (in local languages).

CountryWebsite
UK & Irelandhttps://pricespy.co.uk/
New Zealandhttps://pricespy.co.nz/
Swedenhttps://www.prisjakt.nu/
Norwayhttps://www.prisjakt.no/
Finlandhttps://hintaopas.fi/
Denmarkhttps://prisjagt.dk/
Francehttps://ledenicheur.fr/

It originated in Sweden as Prisjakt and has expanded to the above regions, while already gaining people’s favor locally and globally.

Most English-speaking people in any of these regions prefer using Pricespy UK rather than using the local sites. However, that’s not where it ends. Pricespy UK is also used by people overseas who wish to order products from the UK.

The site has regular users from the USA, Australia, India, Canada, Germany, Italy, Netherlands, and many other countries. So, if you sell products globally, this site is a sure way to reach ideal prospects.

3. High Regular Traffic

High Regular Traffic - Pricespy product feed

There is a reason why Pricespy decided to have local sites for the above-mentioned regions. It’s due to the huge traffic the site gets regularly.

Being the #1 price comparison site, Pricespy gets tons of regular visitors every day and results in tons of sales.

Here’s a chart (compiled using Ahref and Alexa) that will give you an idea of the number of visitors Pricespy gets in each of their regions:

CountryAhref Traffic AnalysisAlexa Rank & Stats
UK & IrelandGlobal: 131,914 /month
Local: 839982 /month
Rank: #54,920
1:22 Daily Time on Site
New ZealandGlobal: 251,216 /month
Local: 251,216 /month
Rank: #82,216
2:04 Daily Time on Site
SwedenGlobal: 2,807,643 /month
Local: 2,807,643 /month
Rank: #14,723
1:48 Daily Time on Site
NorwayGlobal: 835,560 /month
Local: 830,664 /month
Rank: #31,802
1:25 Daily Time on Site
FinlandGlobal: 80,406 /month
Local: 279,935 /month
Rank: #243,912
0:51 Daily Time on Site
DenmarkGlobal: 14,191 /month
Local: 14,069 /month
Rank: #601,266
1:42 Daily Time on Site
FranceGlobal: 636,256 /month
Local: 627,249 /month
Rank: #98,963
2:04 Daily Time on Site

**Daily time on site means the average time spent by every visitor per day.

As you can see, each of these sites has a high number of monthly visitors. This is a plus sign for you if you list your products on these sites.

Also, notice that visitors to all of these sites spend more than 1 minute (on average) daily. This is considered highly engaging. Any site with a daily time above 45 seconds is considered a quality and well-preferred site.

All these are proof that people regularly buy products through the help of this website which is earning revenue for many online stores.

4. Trusted Overseas

Here’s another great advantage of listing your products on Pricespy. Other than huge local visitors, Pricespy is also used by people overseas, who wish to order products from the UK.

Here are stats of the number of visitors Pricespy gets from a few overseas countries.

CountryTraffic Volume
USA63,828 /month
Australia2,019 /month
India1,036 /month
Canada886 /month
Germany854 /month
Italy588 /month
Netherlands502 /month

This is promising for any online store that delivers globally. Hence you have an opportunity to expand.

5. Engaging Mobile App

Pricespy Mobile App

Pricespy launched its mobile app which helped increase its usage even further.

The app comes in 7 different languages:

  • English
  • Danish
  • Finnish
  • French
  • Norwegian
  • Bokmål
  • Swedish

This is a great advantage because more than half the online consumers prefer using mobile apps to make purchases. Hence, this will increase the possibility of you getting more sales.

Currently, the app is regularly used by over 5 million Android users and tons of Apple users as well.

Now that you know all the advantages you can get just by listing your products in Pricespy, let us look at how you can start listing your products here.

How to List Your Products on Pricespy Accurately

First of all, keep in mind, that Pricespy will not list any non-branded products. So, for any products you submit here, you must submit a brand name.

For in-house products, they too need to have a brand name, possibly under your company name. Now, in order to list your products on Pricespy, you will need the following.

Signing Up As A Retailer On Pricespy

Signing up is completely free. The idea is to make sure that even very small shops can benefit from the site along with large stores.

However, there is a certain set of requirements that needs to be met. In this guide, I will elaborate on how you can get registered on Pricespy UK.

It’s a simple process. To get registered on their UK platform you will need to meet the following requirements:

  • You must sell at least one product within the categories of PriceSpy.
  • The website must be in English (language).
  • Products prices on your site must be in GBP (currency).
  • You must be able to take online orders via your website (or email).
  • The company policy should comply with all laws and regulations; nothing illegal is allowed.
  • You must submit your Company number or VAT number to Pricespy
  • You need to comply with UK Government policy on online selling and state the VAT number on your site.

After you register, if your shop is a British legal entity, then it will be listed with a UK flag next to its name.

And, if you own a non-EU company, then you must either be VAT registered in the EU countries where you wish to sell your products or be registered via the EU-service “VAT Mini One Stop Shop” (VAT MOSS). See details on Non-Union VAT MOSS here.

Here’s a copy of the Registration form:

Pricespy registration form

Simply fill out the form with all the required details.

The field ‘URL to product feed is where you can put the link to the price list you create for your products. If you don’t have that ready yet, you can leave it blank for now.

The shop category is important. Pricespy lets you choose from the following shop categories:

  • Various
  • Audio & Video
  • Beauty & Health
  • Camera & Photo
  • Computers & Accessories
  • Fashion & Accessories
  • Gamer Zone
  • Games & Consoles
  • Home & Garden
  • Phones & GPS
  • Sports & Outdoors
  • White Goods & Household Appliances

If you sell products from different niches in one shop, then you can choose ‘Various’. However, if you sell products within a single niche, then it’s best to choose one of the other categories.

This is because consumers have the option to get notifications and updates on Shopping categories. Choosing ‘Various’ reduces your shop’s visibility in any individual category.

Once you register, your application will be reviewed and you will get a confirmation e-mail with instructions for using Pricespy.

After that, the next step is to submit the Price List of your products.

How to Generate And Upload an Accurate Product Price List on Pricespy?

Accurate Price List - Pricespy product feed

When you create your product price list, you will need to include a few specific data.

Let us look into what data you must include on your price list and I will give you examples for each data so that you know the most optimized way to generate it.

Pricespy accepts either a Text format with tab delimiters or an XML format, although they prefer you to submit the Text format.

*I will provide you with a sample feed template to understand how the data should be submitted for your products

Now, Pricespy requires the following attribute values for each of your products to be included in the price list:

Mandatory Attributes

  • Product ID / Article Number
  • Product Name
  • Product Category
  • Product URL
  • Product Price
  • Condition / Product Format
  • Availability
  • Brand / Manufacturer

Recommended (but optional) Attributes

  • Product Image links
  • MPN / Manufacturer SKU
  • EAN-13 / GTIN-13
  • Shipping Fees
  • Total Price
  • Product Description
  • Stock Status
  • Colour or pattern
  • Gender and audience
  • Product Size
  • Multi-pack or bundle

Now, you must include all the data listed under the Mandatory Attributes. The recommended attributes are strongly advised to be used for better results in the listings.

Below is a more detailed explanation with examples of how each of these attributes should be assigned on your Pricespy price list for the maximum output.

After learning about the attributes in detail, you will get a sample of a Pricespy price list to get a clear idea. Now, let’s get into the details to understand what values you should assign to each attribute.

Product Attributes Explained

For each of the attributes, Pricespy has its own set of instructions that you need to follow.

Here I will give you examples and tips on how to make sure the data is not rejected and are optimized for better results.

Product ID

AttributeProduct ID or Article Number
**Here you can either submit Product ID or Article Number
Example241

This is a unique value for each product, to identify it in your store. It is limited to 36 characters.

For this, you can either use the value of the Product ID or the SKU of the product in your store.

**SKU is also unique for each product and can be used for the same purpose.

Product Name

AttributeProduct name
ExampleRFL White Electronic Blender

It is the name of the product to be displayed. When you set the product title, make sure it includes the product title, along with the model name/number.

Also, specify any special feature such as its color, material, model year, etc on the title if possible, especially for variations of the certain product.

If there is a separate brand name that people may recognize your product by, that is different from the manufacturer name you submitted, then you must include the brand name in the Product name.

For example, if you submit the Manufacturer as Today Electronics, but the brand name of the product is RFL, then include RFL in the product name (as shown in the example in the table).

Certain products may have different pack sizes (such as perfume, shampoo, and food). In this case, you need to specify the volume or weight in the product name.

If it is bundled or multiple packs of products, this should also be stated in the product name.

These tips are important to follow to get better chances of being relevant to a user’s search term, thus more chance of being listed when searched for.

Product Category

AttributeCategory
ExampleKitchen Appliances > Electronics For Kitchen

This is the category of the product. You must include the full category including sub-categories, in a tree structure.

The categories you submit should be based on the product type and not brand or any other aspects such as sales category, color, trademark, etc.

Pricespy will only accept the submission of one category, so you cannot submit multiple categories for the same product.

In this case, I suggest you use certain category mapping tools to ensure the right category tree is assigned.

If you own a WooCommerce store, you can use the plugin Product Feed Manager For WooCommerce which has a great category mapping feature to help you set the categories accurately.

**Browse through Pricespy and find out how other products, similar to yours, are categorized, and try to assign similar categories to your products when mapping.

Product URL

AttributeURL
Examplehttps://www.yourwebsite.com/rlf-white-electronic-blender/

This is the link to your product page. If the product page doesn’t have a URL of its own, you can use the URL for the category page.

If there are parameters in the product URL to differentiate between variants of a product such as color or size, the parameter must be included in the link; do not just give the URL of the basic product page.

**Do not include any UTM tracking code in the URL. For UTM tracking, submit a separate attribute called UTM, with the value of the UTM code.

Product Price

AttributePrice or Price (without VAT)
**Here you can either submit Price or Price (without VAT)
ExampleExample: 85.09 GBP

This is the price of the product to be displayed when listed, excluding shipping fees. I suggest you submit the price with VAT.

If you submit the price without VAT included, then rather use the attribute name Price (without VAT) to specify this to Pricespy.

The price you submit should match the price shown on your product page, and the currency should be GBP for the UK market.

Condition / Product Format

AttributeCondition or Product Format
**Here you can either submit Condition or Product Format
ExampleDemo

Use this attribute to indicate the current condition of the product or the format of the product.

These are the accepted values for the condition:

  • New – to indicate that is a brand new product and intact
  • Demo – to indicate that this is a preview of the product.
  • Used – to indicate that the product was refurbished or unpacked
  • Download – to indicate that this is a digital product to be downloaded

If all the products in your price list it in new condition and are physical products, then you can avoid submitting this attribute at all.

Availability

AttributeAvailability
ExampleCan not be ordered

Use this attribute to indicate if a product is currently available for shipping, if a certain product in the price list cannot be ordered immediately, or if it doesn’t accept home delivery.

These are the accepted conditional values for availability:

  • Available – to indicate that the product is in stock and can be ordered
  • Can not be ordered – to indicate that it is not available for ordering at the time being
  • Pickup – to indicate that this product has to be physically collected; no home delivery

Brand / Manufacturer

AttributeManufacturer
ExampleRexSupplies

It is mandatory to provide the brand/manufacturer to add products on Pricespy. Ideally, you should also mention the brand name on the product title.

In case you are a renounced manufacturer but are selling products with another brand, then you probably want to represent your company name as the Manufacturer’s name.

In that case, you must include the product brand name in the Product name. Certain products may be accepted without submitting this attribute.

These include

  • Movies
  • Books
  • Music Records

Other than these 3 types of products, any other products with missing brands or incorrectly defined brands will not be indexed or listed.

Product Image links

AttributeImage links
Examplehttps://www.yourwebsite.com/productimage.png

You may submit 1 or more image links for the product. The first link will be considered the primary image in case you submit multiple links.

Make sure the image has no watermarks brand seals, or any such marks on it. It’s advised to use high-resolution images of the product with a white background.

Also, the image should match various details that you include on the Product Name such as the color or the size.

For example, if the name of a product is White Blender, then the image should also include a Blender that is White color.

Pricespy will list your products even if you do not submit image links, however, we strongly advise you to provide at least 1 image link for better results in the listing.

MPN / Manufacturer SKU

AttributeMPN or manufacturer SKU
**Here you can either submit MPND or manufacturer SKU
ExamplePH0011

Here you need to provide the product MPN code of your products.

In case you do not have an MPN, you may use the SKU as the value (provided that you did not use the SKU as the Product ID.

It is not mandatory to include this attribute, but it is highly recommended to help with faster, more accurate indexing.

**MPN for each product is unique.

EAN-13 / GTIN-13

AttributeEAN-13 or GTIN-13
**Here you can either submit EAN-13 or GTIN-13
Example4129179234125

A product that is manufactured in Europe usually has an EAN. Similarly, a product manufactured in the US or Canada comes with a GTIN.

If you have the EAN-13 or GTIN-13 barcodes for your products, then you may submit them through this attribute.

This is optional data to provide, but submitting it helps with an accurate listing.

Shipping Fees

AttributeShipping
Example5 GBP

You can submit the shipping fees for your products.

The shipping fee may vary depending on the product, so it is not necessary that you have to assign a fixed shipping fee.

Total Price

AttributeTotal Price (with VAT) or Total Price (without VAT)
**Here you can either submit the Total Price (with VAT) or the Total Price (without VAT)
ExampleExample: 90.09 GBP

Rather than submitting a separate shipping fee, you can choose to submit a total price which is basically, the shipping fees added to the product price.

If you wish to submit the Total Price including VAT then use the attribute Total Price (with VAT).

If you wish to submit the Total Price excluding the VAT, then use the attribute Total Price (without VAT).

**You can either submit a shipping fee or the total price. If you submit both, Pricespy will keep the Shipping and exclude the Total Price attribute.

Product Description

AttributeProduct description
ExampleThis blender is super efficient and takes up less electricity than others.

You can add a short description of the product you are selling. Try to highlight all the major features it may have included in any features that you did not include in the Product Name.

This is optional data you may submit; we advise you to submit it to attract more prospects.

Stock Status

AttributeStock status
ExampleIn stock

This attribute indicates the stock status of the products in the shop. It is not mandatory to submit this attribute, but it helps to enhance the search results on the listing.

The stock status value you submit is conditional. It must be relative to the value you submitted under Availability. The following are the accepted values for the stock status:

  • In stock: To indicate that the product is available and can be delivered to the customer within six business days.
  • Out of stock: To indicate that the product is out of stock in the shop.
  • Incoming [date]: To indicate that the product is not in stock at the moment, but is expected to be available on the given date
  • Pre-order [date]: To indicate that the product is not released yet, but it will be released on the given date and can be pre-ordered from your website

You can use ‘In stock’ only when you submit Availability as ‘Available’.

Use ‘Out of stock’, ‘Incoming [date]’ or Pre-order [date] when you submit Availability as ‘Can not be ordered’

Do not submit a Stock Status if you submit Availability as ‘Pickup’.

**If you do choose to submit the stock status, then make sure it matches the instructions above. Incorrect submission of the Stock Status for any product will result in Pricespy hiding that product from the listing.

Color or Pattern

AttributeColor or pattern
ExampleStripped Marble Green/White

For certain types of products such as Apparel & Accessories, it is more logical to specify the color or pattern since buyers look into these aspects when buying such products.

Submit the actual color or pattern assigned by the manufacturer if possible.

As you can see, the example in the table, Stripped Marble Green/White is not a generic color or pattern; it was assigned by the manufacturer.

Gender and Audience

AttributeGender and audience
ExampleUnisex

Certain products are made for people of a specific gender or age group. For example, a skirt for women or a toy for children.

In such cases, you may submit the target gender or audience for the product. You may use the following values:

  • Women – if the product is for an adult lady
  • Men – if the product is for an adult man
  • Unisex – to indicate the product is usable by any gender
  • Girl – if it is for a teenage girl
  • Boy – if it is for a teenage boy
  • Child – to indicate that the product is for children

This attribute is optional. You only need to submit it if you did not include the value of the Product name.

Product Size

AttributeSize
ExampleUK12

For certain products such as shoes or T-shirts, a buyer will always look into the size. So you can submit the size of the product using this attribute.

Make sure to indicate the size type such as EU45 or US11 or UK12, to understand which size type the buyers are dealing with.

For example, you can submit the size as UK12, and if the buyer is from the US, then he/she can convert it from the UK to the US size and decide if this is the right size to buy.

If you have a product with multiple sizes available, you may submit all of them with a ‘/’ in between for example EU45 /E42 / EU40.

Multi-pack or bundle

AttributeMulti-pack or bundle
ExampleBundle

If you wish to submit a bundle or multi-pack offer from within your shop, and not the actual product manufacturer, you can use this attribute.

For example, let’s say you have the products Shampoo, Hair Conditioner, and Hair Serum. In your shop, you created a bundle with these items. You can submit that bundle as a product in Pricespy. In that case, you need to include this attribute and set the value as ‘Bundle’.

You can use the following values:

  • No: Indicate that the product is not a multi-pack or bundle created by your shop (or you may keep it blank).
  • Multi-pack: If you submit a multi-pack offer created by your shop.
  • Bundle: If you submit a bundle offer created within your shop.

Although this seems beneficial, I advise you not to submit your own created bundles or multi-packs to Pricespy as it may confuse buyers. You can avoid using this attribute by adding “bundle by (your shop name)” to the product names of the bundles you submit. For example, “Shampoo Combo bundle by RexSupplies”.

That’s it. By following the instructions above when including data in the price list, you can expect successful approval by Pricespy and optimization for better results in the listing.

Sample Price List of A Product for Pricespy

Here’s a sample of a price list for a single product in text format (with the mandatory attributes included),

One advantage you have with Pricespy is that, unlike most other listing sites, if you submit extra attributes, that are not among the ones mentioned above, they are not entirely ignored.

After pre-scanning, if any such values are traced that are not part of the expected attributes, Pricespy initiates review by a live agent, i.e., manual review.

How to Generate The Price List for Pricespy Easily?

Now comes the question, how will you generate the price list?

Manually creating it will take hours of your time, in case you have over 50 products. In that case, you can look for product feed generation tools to help you out.

If you are using WooCommerce, then it’s even easier for you. Simply use the plugin Product Feed Manager For WooCommerce.

Pricespy product feed

The plugin has the template of Pricespy already created. All you need to do is assign the target values and the plugin will generate the price list in minutes.

I mentioned earlier that to create categories, you will need category mapping. This plugin already has this feature.

Before generating the price list, simply set the category mapping. Then when you generate the price list, assign the category mapper you created as the value for the Category.

You can first test out the free version of the plugin. Once you generate the price list, log in to your Pricespy account.

On the Merchant Dashboard, you will find the Products tab. Here, choose Add Products and then click on the option called Feed file. There you will be able to upload the price list.

Conclusion

Using more options to promote your online products is wise if you want maximum sales. Pricespy is one of the few price comparison sites that consistently brings good results for online shops.

To excel in sales, it’s high time you start listing your products on Pricespy, provided you offer competitive deals and don’t overcharge.

It’s essential to create accurate and optimized product feeds to upload your products without any hassle. And for listing your eCommerce products on Pricespy, you need a plugin to simplify the process.

A product feed manager for WooCommerce can help you upload and optimize all your products effortlessly. So go ahead with it to save your valuable time on listing

** FAQs **

How do I start selling on Pricespy?

  • To start selling on Pricespy, create a seller account on their platform. Then, use a product feed manager plugin to upload your WooCommerce product feed. Make sure your products are competitively priced for better visibility.

What are the benefits of using Pricespy?

  • Pricespy helps you attract more customers by allowing them to compare prices across different retailers. This increased visibility can lead to higher sales, especially if you offer competitive pricing.

How can I optimize my product listings on Pricespy?

  • Use a product feed manager to ensure your product data is accurate and up-to-date. Regularly update your prices and product information to stay competitive and improve your chances of appearing in search results.

Is it necessary to use a product feed manager?

  • Yes, using a product feed manager simplifies the process of uploading and managing your products on Pricespy. It ensures your listings are optimized and helps maintain accurate, current product data.

Can I list bundle offers on Pricespy?

  • Yes, you can list bundle offers on Pricespy. Label them clearly by adding “bundle by (your shop name)” to the product names. This helps avoid confusion and ensures buyers know they are purchasing a bundle created by your shop.
Categories
Guide Product Feed Manager For WooCommerce WooCommerce

How to Generate Trovaprezzi Product Feed for WooCommerce [2024]

Trovaprezzi is one of the largest marketplaces in Italy to sell electronics online.

To promote your products on this marketplace, you simply need to submit your product feed in the right format, along with the necessary attributes for listing.

Currently, this marketplace gets an average of over 15.4 million visits per month, and it’s high time you too start selling on Trovaprezzi to boost your revenue.

In this guide, you will learn about the mandatory attributes, i.e., the product data you need to submit to list your products on Trovaprezzi

Plus, you will get a step-by-step guide to generate a Trovaprezzi product feed from your WooCommerce store in just a few clicks, using a simple and easy-to-use plugin.

So let’s get started.

What is The Trovaprezzi Marketplace?

How to Generate Trovaprezzi Product Feed for WooCommerce [2024] 1

Trovaprezzi is a top Italian price comparison marketplace that can help you find the best deals on products ranging from electronics to fashion and home goods.

If you’re a retailer, listing your products on Trovaprezzi can boost your visibility and sales by reaching a broader, price-conscious audience.

This platform enables a competitive shopping environment, benefiting you as a consumer looking for great prices or as a seller aiming to expand your market presence.

Therefore, Utilizing Trovaprezzi can be a strategic move to enhance your shopping or selling experience in the Italian market.

Benefits of Selling on Trovaprezzi Marketplace

Now let me explain the effective benefits of selling on Trovaprezzi Marketplace:

  • Increased Visibility: Listing on the Trovaprezzi marketplace boosts your product’s visibility among price-conscious Italian shoppers.
  • WooCommerce Integration: By integrating your WooCommerce product feed with Trovaprezzi using product feed management software, you can simplify the process.
  • Optimized Listings: Product feed optimization ensures your listings are accurate, appealing, and competitive.
  • Higher Conversion Rates: Effective product data feed management can lead to higher conversion rates and increased sales.
  • Market Expansion: Selling on Trovaprezzi helps you reach a broader audience and expand your presence in the Italian market.

Mandatory Product Data for Feed Prodotto Trovaprezzi

Trovaprezzi.it

Following are the mandatory attributes you need to submit for each of your products to list them on the Trovaprezzi marketplace.

  • Name: It is the name of the product, along with the model name. Do not include any promotional tag lines or phrases.

  • Code: You need to submit a unique product ID as the code. You can use the product IDs or the product SKU in your WooCommerce store for this attribute.

  • Description: In the description, you have to discuss the use and features of the product. You can also mention the compatibility, specifications, and variation details along with the product description.
    • You can use HTML tags to structure the description properly.
    • I advise you not to be too promotional as they tend to bring fewer results in this marketplace.

  • Categories: Include the entire category tree, from the parent category to the last child category, that a product can fall under.
    • You can use a comma (“,”) or semicolon (“;”) as the separator between the categories.

  • Image: Include a link to the main image of the product.
    • Make sure the image over-edited.
    • Avoid including watermarks, slogans, or promotional phrases in the image.
    • You must submit at least one image for each of your products to be listed on Trovaprezzi.

  • Link: This is the link to the product on your site.

  • Original Price: This is the base price of the product.
    • Do not include the currency along with the price. Normally people run discount campaigns when promoting Trovarprezzi. The original price still needs to be submitted so that Trovaprezzi can show the users the original price on which they are getting the discount.

  • Price: If you are running discounts on your products, then submit the discounted price using this attribute. However, if you are not running a discount, then submit this attribute with the same value as the Original Price.
    • Do not include the currency along with the price.

  • Shipping Cost: Trovaprezzi is very strict about accuracy and needs you to submit an accurate shipping cost for the products that you are availing on your site. For example, let’s say you have an Air Cooler, that you are selling at a free shipping cost. So the Shipping Cost for this will be 0. Now, let’s say you are delivering an Air Conditioner at a shipping cost of 10 GBP, then you need to submit this attribute for the Air Conditioner with the value of 10.
    • Do not include the currency along with the cost.

  • Brand: If you are the main manufacturer, then use your company name as the brand name. However, if you sell various products from different providers, then include the actual brand name using this attribute.

  • EAN Code: EAN is a unique identifier that exists for all original manufactured products. You have to submit an accurate EAN code for all products you include in the product feed.

  • Part Number: The Part Number also referred to as MPN, is provided by the manufacturer of most electronic goods. If you have the original MPN of your products, then include them here, or you can use your product SKU instead.

  • Weight: You have to submit the weight of the products you are listing on Trovaprezzi. The weight is measured in kg. So do not submit any unit; just input the numerical value in terms of kg.

  • Stock: This is the number of a certain product you have available in stock.

Example Feed Prodotto Trovaprezzi

Here is an example of how a general product feed for Trovaprezzi looks like with two product offers:

<Products>
	<Offer>
		<Name>DataTraveler G3 16 GB</Name>
 		<Brand>Kingstone</Brand>
 		<Description>Pen Drive Professional 16GB USB 2.0</Description>
 		<OriginalPrice>10.60</OriginalPrice>
 		<Price>8.60</Price>
 		<Code>219</Code>
 		<Link>http://www.NOMESITO.it/product.asp?Id=219</Link>
 		<Stock>35</Stock>
 		<Categories>informatica, chiavette usb/pen drives</Categories>
 		<Image>http://www.NOMESITO.it/images/219.jpg</Image>
 		<ShippingCost>0</ShippingCost>
 		<PartNumber>TS2GJFV20</PartNumber>
 		<EanCode>0075678164125</EanCode>
		<Weight>0.100</Weight>
 		<Image2>http://www.NOMESITO.it/images/219bis.jpg</Image2>
 		<Image3>http://www.NOMESITO.it/images/219tris.jpg</Image3>
	</Offer>
	<Offer>
 		<Name>Pendrive 4GB Verbatim Store'n'go</Name>
 		<Brand>Verbatim</Brand>
 		<Description>Pen Drive Professional 4GB USB 2.0</Description>
		<OriginalPrice>6.50</OriginalPrice>
 		<Price>3.50</Price>
 		<Code>220</Code>
 		<Link>http://www.NOMESITO.it/product.asp?Id=220</Link>
 		<Stock>5</Stock>
 		<Categories>informatica, chiavette usb/pen drives</Categories>
 		<Image>http://www.NOMESITO.it/images/220.jpg</Image>
 		<ShippingCost>0</ShippingCost>
 		<PartNumber>49061</PartNumber>
 		<EanCode>0075678164134</EanCode>
		<Weight>0.100</Weight>
 		<Image2>http://www.NOMESITO.it/images/220bis.jpg</Image2>
 		<Image3>http://www.NOMESITO.it/images/220tris.jpg</Image3>
	</Offer>
</Products>

So far, you have learned about all the product attributes that you need to submit on Trovaprezzi. Now, let us learn how you can generate a WooCommerce product feed for Trovaprezzi.

7 Steps to Generate Feed Prodotto Trovaprezzi Using PFM

The best way to create a feed on Trovaprezzi is to use a reliable plugin called Product Feed Manager for WooCommerce (PFM).

PFM is right now the most stable and easy-to-use plugin that you can use to generate a product feed for Trovaprezzi real quickly.

Additionally, the plugin comes with a pre-build template which you can use to generate an optimized product feed in just a few clicks.

You can also add UTM parameters to track your feed’s performance effectively. Now, let me show you how easily you can generate a Trovaprezzi product feed in minutes by following these 7 simple steps.

Step 1 – Install And Activate Product Feed Manager for WooCommerce

1. Go to Dashboard > Plugins > Add New

Add New Feed

2. Then search for Product Feed Manager for WooCommerce on the search bar and you will see the plugin logo.

Install Product Feed Manager for WooCommerce

3. Install and Activate it. Once activated, you will find the menu Product feed on your dashboard.

Product feed manager installed

Step 2 – Enable Trovaprezzi As A Merchant Type For Feed Generation

1. Go to Dashboard > Product Feed> Settings and go to the Merchants tab.

Product feed - Settings - Merchants

2. Here, look for Trovaprezzi and enable it.

Enable Trovaprezzi

3. Then go to the Controls tab and click on Purge cache.

Purge Cache

Now Trovaprezzi is enabled. It’s time to generate feed prodotto Trovaprezzi.

Step 3 – Create A New Feed

1. Hover on Dashboard > Product Feed and click on Add New Feed.

Add new feed

It will take you to a feed creation page.

2. Give a Title to the feed.

Step 4 – Configure Basic Settings For The Feed

1. First, decide if you want to include all the products in your store or use a filter to exclude certain products.

All published products or product filter

2. Use a refresh interval if you frequently make changes to your product data in your store.

3. The rest of the basic configurations are already configured.

Basic Settings Configured

You may scroll down to the Feed Configurations Section.

4. If you need to use UTM parameters for product links, you can enable the option and input the UTM values.

UTM Parameter

Step 5 – Use The Trovaprezzi Feed Template

1. Choose the Merchant Type as Trovaprezzi and keep the format as XML.

Merchant Type Trovaprezzi in XML Format

You will see, that all required attributes will appear below.

Trovaprezzi All Required Attributes

2. Configure the missing attribute values

As you see, most of these attributes are already configured. You simply need to configure the values for the following attributes:

  • Shipping Cost
  • Brand
  • EAN Code
  • Part Number
  • Weight
  • Stock

3. Assign A Shipping Cost

If you offer free shipping, then use a Static value of 0.

Free Shipping in Trovaprezzi

Or, if you have a fixed shipping cost, you may use a Static value here.

Fixed Shipping

However, if you have dynamic shipping, you need to store this value in a field within each product and then use that field value as shipping cost.

Dynamic Shipping Cost

4. Include the product brand name

If you are the sole manufacturer, then you may use a Static value with your company’s name for the Brand attribute.

Manufacturer as Brand Name

But, if you have products with many different brands, then you can either save them as attributes or save them in a custom field for each product.

Or you may consider using the plugin, Perfect Brands for WooCommerce to assign the brands to your products.

Whichever way you save it, you can use that value for the Brand attribute.

Use Product Brand Name

5. Submit the Product Ean Code and Part Number

For the EAN Code, since it has to be unique for each product, you must save it in a custom field within your product. You can use the custom fields provided by our plugin (which is a Pro feature), or you can add a custom field of your own to store the value.

Product Ean Code And Product SKU for MPN

For the Part Number, you can use the SKU, or if you have actual MPNs stored for your products, you can use them through custom fields.

6. Assign A Product Weight

Product Weight

In WooCommerce, you will be able to assign a weight to every product. Then use it in the feed by choosing Weight as the value for the attribute.

7. Decide on available stock

Product Quantity in Stock

Since you need to submit the available product quantity in stock for each product, you have to manage stock in your WooCommerce store, which will be included in the feed.

Step 6 – Publish & View Your XML Feed

1. Scroll up and click on Update.

Publish and Generate feed prodotto Trovaprezzi

A progress bar will appear to show that the feed is being generated.

Generating Feed

2. Once updated, you will get a notification “Product Feed Updated” and also you will get the option to view or download the feed.

View or Download Trovaprezzi product feed

Step 7 – Submit Your Feed on Trovaprezzi And Start Getting More Sales

Now that you have the feed ready, you can log in to your Trovaprezzi merchant account and submit your product feed. Once listed, you will start getting more traction soon.

Conclusion 

In conclusion, utilizing a product feed manager simplifies the process of generating and optimizing your Trovaprezzi product feed.

These tools automate feed creation, update product information dynamically, and simplify the synchronization of inventory.

By using a product feed manager, you can ensure that your listings on Trovaprezzi are accurate, up-to-date, and attractive to potential buyers, thereby enhancing your visibility and sales opportunities on this popular Italian price comparison platform.

If you are looking to maximize your presence on Trovaprezzi, utilizing a product feed manager is a highly recommended solution.

** FAQs **

How do I start selling on Trovaprezzi?

  • To start selling on Trovaprezzi, you need to create a seller account on their platform. Once registered, you can integrate your products from WooCommerce using tools. Ensure your product feed meets Trovaprezzi’s requirements for easy integration.

What are the benefits of using a product feed manager?

  • Using a product feed manager simplifies the process of managing your Trovaprezzi listings. It automates feed generation, updates product information in real time, and helps optimize your listings for better visibility and sales.

Can I customize my product listings on Trovaprezzi?

  • Yes, you can customize your product listings on Trovaprezzi through your WooCommerce store. Use features to adjust product details, pricing, and availability directly from your WooCommerce dashboard.

How often should I update my Trovaprezzi product feed?

  • It’s recommended to update your Trovaprezzi product feed regularly, especially when there are changes in product information or inventory. Use PFM to automate these updates to ensure your listings are always accurate and up-to-date.

Is selling on Trovaprezzi safe and reliable?

  • Yes, Trovaprezzi is a reputable platform known for its secure transactions and reliable service. They provide a trusted marketplace environment for both sellers and buyers, ensuring a safe experience for all parties involved.
Categories
Guide Product Feed Manager For WooCommerce WooCommerce

Quick Guide To Generate Vivino Product Feed – WooCommerce [2024]

Wine sales worldwide are expected to grow by $41.3 billion (12.22%) from 2024 to 2029.

If your target customers are new wine buyers and you are promoting in a marketplace that targets years-old wine buyers, chances are you will get low sales.

To attract new wine buyers you should promote your wines in a popular online wine marketplace called Vivino.

With over 5 million visits per month(mostly new buyers) in 2024 – Vivino is definitely a marketplace that will help you generate a huge amount of profit by selling wine.

If you run a WooCommerce store to sell wine online, then you can easily generate a Vivino product feed in just a few clicks, using the right tool.

I’ve explained how you can generate a Vivino XML feed in just a few clicks with details so that you can understand and implement better.

So let’s get started.

Guide To Generate Vivino Product Feed

Let us look at all the required data and the process to generate the Vivino product feed, real quick, using the right tool.

Instructions Feed Specification For Vivino Product Data

When creating a new feed for Vivino, you will need to include a few specific data in the right format.

Normally, the feed structure is as follows:

<vivino-product-list> 
	<product> 
		---PRODUCT ATTRIBUTES AND DATA HERE--- 
	</product> 
</vivino-product-list>

Now, let us look at a list of the required product attributes that you should include on your product feed, and I will provide an example for each attribute so you understand how to include the product data.

Later, I will show you an example of the complete structure of the XML feed and guide you on how you can generate the feed fast.

Required Product Attributes To Submit to Vivino

The following are mandatory attributes that you must submit for every wine you want to list on Vivino.

AttributeInstructionsExample
Product Name

Format:
<product-name>…</product-name>
This field is required.

Use the product name in the format:
[Producer] + [Wine name and appellation] + [Vintage] + [Wine Color]

**If it’s not White or Rosé wines, then you can avoid including the wine color.
**If it’s a non-vintage wine, then use NV in place of Vintage.
<product-name>Famille Perrin Côtes du Rhône 2014 Rosé</product-name>
Price

Format:
<price>…</price>
This field is required.

This should be the final price of the wine after all discounts.

**For non-US/Candian sellers, you must include taxes in the price.
**Do not include the currency.
<price>12.50</price>
Quantity is Minimum

Format:
<quantity-is-minimum>…</quantity-is-minimum>
This field is required.

Accepted values for this attribute are ‘True’ and ‘False’.

**True indicates that the discount will be applicable only if a certain quantity is purchased.
**False indicates that the discount is applicable for all bottles.
<quantity-is-minimum>False</quantity-is-minimum>
Bottle Size

Format:
<bottle_size>…</bottle_size>
This field is required.

The bottle size indicates the size or volume of the wine bottles you are selling.

**Vivino only accepts the following bottle volumes:
– 375ml   
– 500ml (for fortified and dessert wines)
– 750ml
– 1000ml
– 1500ml
<bottle_size>750ml</bottle_size>
Bottle Quantity

Format:
<bottle_quantity>…</bottle_quantity>
This field is required.

This is the number of bottles you are offering at the given price.
<bottle_quantity>1</bottle_quantity>
Link

Format:
<link>…</link>
This field is required.

This is the URL of the product on your website.
<link>http://www.yourwebsite.com/category/wine-12345/</link>
Inventory Count

Format:
<inventory-count>…</inventory-count>
This field is required.

This is the number of bottles you have available in stock.
<inventory-count>35</inventory-count>
Product ID

Format:
<product-id>…</product-id>
This field is required.

This is a unique identifier for each wine.

You can either use the Product ID from your WooCommerce store or use the product SKU as the value for this attribute.
<product-id>2714</product-id>

Extra Attributes You Might Want To Submit To Vivino

Apart from the required attributes above, there are several other attributes that you might want to submit to optimize the feed for maximum outcome.

The most notable extra attributes you can include are as follows:

AttributeInstructionsExample
Producer

Format:
<producer>…</producer>
You can submit the name of the producer using this attribute.
<producer>Arimia</producer>
Wine Name

Format:
<wine-name>…</wine-name>
The name of the wine can be submitted besides including it in the Product name.<wine-name>Verdelho</wine-name>
Appellation

Format:
<appellation>…</appellation>
This attribute refers to the region where this wine was produced.<appellation>Margaret River</appellation>
Vintage

Format:
<vintage>…</vintage>
This refers to the vintage year for this wine.

**For non-vintage wines, submit the value as NV.
<vintage>2014</vintage>
Country

Format:
<country>…</country>
You may submit the country of origin for a wine using this attribute.<country>Australia</country>
Color

Format:
<color>…</color>
This is to indicate the color of the wine.<color>White Wine</color>
GTIN

Format could be one of the following depending on your location:
<ean>…</ean>
<upc>..</upc>
<jan>…</jan>
This is a unique identification number that all products have. Submitting a GTIN value will indicate the authority of selling a genuine product.<ean>9334612000037</ean>
Varietal

Format:
<varietal>…</varietal>
You can use this attribute to define the percentages of different grape varieties.<varietal>100% Verdelho</varietal>
Alcohol

Format:
<alcohol>…</alcohol>
Use this attribute to indicate the alcohol percentage of the wine.<alcohol>13.4%</alcohol>
Description

Format:
<description>…</description>
You may describe the taste and quality of the wine to attract wine tasters or buyers.<description>The soothing taste of this wine will make you feel the vintage Australian tradition</description>
Ageing

Format:
<ageing>…</ageing>
Describe the ageing process of the wine using this attribute.<ageing>12 months in oak and 12 months in bottle</ageing>
Image

Format:
<image>…</image>
You may include an image of the wine.<image>http://www.yourwebsite.com/wp-content/uploads/img/wine-image.jpg</image>

Apart from these, there are several other extra attributes that you may include to optimize the feed.

To submit the extra attributes, you normally need to submit them by cascading them within the Extra tags.

Take a look at the example feed structure below to see what a Vivino XML feed looks like with all the mandatory attributes and a few recommended extra attributes.

Example Feed Structure For Vivino

Here’s a sample Vivino feed structure that you can follow to create a Vivino feed:

<vivino-product-list>
	<product>
		<product-name>Apothic Winemaker's Blend Red California 2013</product-name>
		<price>7.45</price>
		<quantity-is-minimum>false</quantity-is-minimum>
		<bottle_size>750 ml</bottle_size>
		<bottle_quantity>1</bottle_quantity>
		<link>http://www.wayback-wines.com/california/wine-12345.html</link>
		<inventory-count>20</inventory-count>
		<product-id>1125</product-id>
		<extras>
			<producer>Apothic</producer>
			<wine-name>Winemaker's Blend Red</wine-name>
			<appellation>California</appellation>
			<vintage>2013</vintage>
			<country>United States</country>
			<color>Red</color>
			<upc>0123456789001</upc>
			<varietal>70% Merlot, 25% Cabernet Sauvignon, 5% Malbec</varietal>
			<alcohol>13.4%</alcohol>
			<description>This is a great wine from Apothic with good value.</description>
			<ageing>12 months in oak and 12 months in bottle</ageing>
			<image>http://www.wayback-wines.com/wp-content/uploads/img/2535550.jpg</image>
		</extras>
	</product>
</vivino-product-list>

Now that you know the attributes to include in the feed, let us look at how you can generate Vivino XML feed easily using a WordPress plugin.

7 Steps To Generate Vivino Product Feed In Your WooCommerce Wineshop

Creating an XML feed manually for all of your products is no longer required as there are several tools out there that you can use to easily generate a product feed for Vivino.

In this guide, I will show you how you can generate a product feed for Vivino wine selling using Product Feed Manager for WooCommerce which is one of the easiest plugins to use and has a pre-built template to help you generate Vivino XML feed in just a few clicks. 

Follow these 7 quick steps below to use the plugin easily and generate Vivino product feed real accurately.

Step 1 – Install And Activate Product Feed Manager For WooCommerce

1. Go to Dashboard > Plugins > Add New

Add New Feed

2. On the Search bar, search for Product Feed Manager for WooCommerce, and you will see the plugin logo.

Install Product Feed Manager for WooCommerce

3. Install and Activate it. Once activated, you will find the menu Product feed on your dashboard.

Product feed manager installed

Step 2 – Import Vivno Template For Feed Generation

1. On your dashboard, click on Product Feed and then click on Add New Feed option.

Product Feed Manager - Add New Feed Option

It will take you to the feed creation page.

Product Feed Manager - Add New Feed Page

Here, on the top you will get an option to give a name to your feed, you can skip giving your feed a name if you want.

Click on the Feed Merchant Dropdown and you will get the list of all the supported merchants.

2. You can scroll down this merchant dropdown list or you can type Vivino in the search box, and you will get the Vivino option in the list.

Product Feed Manager - Vivino Merchant Option

Select Vivino, and all the required attributes of Vivino will be loaded below.

Vivino Required Attributes

Step 3 – Feed Configuration Options

Now, you can see four buttons under the Feed Title text box, Documentation, Troubleshoot, Product Filter, and Settings.

Product Feed Manager Configuration Buttons

1. Clicking on the Documentation button will take you to the Product Feed Manager documentation section. Here you will get all the necessary docs that you can use to create a feed successfully.

2. If you are having any issues generating feed, click on this Troubleshoot button, it will take you to the Troubleshoot page, it could be helpful for you.

3. If you want to use any filter or condition, you can click on the Product Filter option, and a drawer will slide in from the right side of the window, and there you will get the following filters:

  • All Featured Items
  • Custom Filter
  • Category Filter
  • Tag Filter
  • Product Filter (Pro)
  • Product Rule Feature (Pro)

You can select any filter option and use them as per your need and click on the Close button when done.

4. Now, to schedule your feed or to choose which type of products will be included in your feed, click on the Settings button, and you will get a list of options to exclude or include products.

Step 4 –  Use The Vivino XML Feed Template

1. If you look at the Feed Merchant dropdown button, there you will get another dropdown Feed Type, you can click here to set the type of this feed. You can set different types of feeds depending on what types of feeds this merchant supports or what types of feeds this Product Feed Manager has the support for.

For Vivino, keep the Feed Type as XML.

2. Now, in the attributes section, you will see that all the attributes are under the Required Attributes column, and their values are set according to the attributes under the Assigned Values column.

You can change any values to any attributes, simply click on the value dropdown, and select your preferred value.

All the required attributes will appear below. Now, most of the attributes will already be configured but notice that some of these attributes are unassigned.

Step 5 – Assign The Right Values To Unassigned Attributes

You will need to assign values for the following:

  • Quantity is minimum
  • Bottles size
  • Bottles quantity

1. Quantity is minimum

  • Assign the value as True if the price you submitted is a discounted price and will be applicable only if a certain quantity is purchased.
  • Assign the value as False if the price you submitted is applicable for any number of bottles purchased.
Quantity is minimum

2. Bottles size

Input an accepted bootle size for each product.

Bottle size

3. Bottles quantity

The bottles quantity mainly indicates the number of bottles you are offering at the given price. So assign a value to it.

Bottles Quantity

Step 6 – Publish & View Your Vivino XML Feed

1. Once you are done with the attribute, click on the Publish button on the bottom or Scroll to the top and click on Publish button.

Quick Guide To Generate Vivino Product Feed - WooCommerce [2024] 2

A progress bar will appear to show that the feed is being generated.

2. Once updated, you will get a notification saying Product Feed Updated, and you will get the option to view or download the feed.

Step 6 – Submit Your Feed On Vivino And Boost Your Wine Sales

Now that you have the feed ready, you can log in to your Vivino merchant account and submit your product feed. Once listed, you will start getting more traction soon.

Conclusion 

As you saw above, this is how easily you can generate a product feed for Vivino using Product Feed Manager for WooCommerce.

PFM - Exclusive features

Initially, test out the free version of the plugin or take a live preview.

Once you are sure the plugin does what is claimed, you can go ahead and think about upgrading to Pro.

Promoting via Vivino is the best decision most wine shops have ever taken. It’s about time you should also sell wine online through this trusted marketplace, and boost your revenue.

Categories
Guide Product Feed Manager For WooCommerce WooCommerce

How To Promote WooCommerce Products On Bonanza Marketplace [2024]

Right now Bonanza Marketplace gets over 120,000 visitors every day.

Unlike other marketplaces, you don’t need to update again and again.

This marketplace updates itself, so you can get sales without much effort also without investing in advertising.

If you want to promote your products on the Bonanza marketplace, you need to make sure you submit your Bonanza feed in the right format.

Bonanza has its own set of required product data that you need to include in the product feed, which you need to prepare in a CSV format.

In this guide, you will get a good understanding of

  • why you should sell on Bonanza,
  • what product data you need for your products to be accepted on Bonanza, and
  • how you can generate an accurate product feed quickly.

So let’s begin.

1. Why Sell On Bonanza?

Bonanza traffic analysis

Bonanza has already built up a reputation for helping WooCommerce stores increase their revenue.

This is possible mainly due to a high buyer-to-seller ratio, seemingly 1300: 1.

This means there are a lot more active users than the number of sellers in the marketplace, that’s why the Bonanza selling platform can be a good choice for you.

There are more reasons. Such as :

Bonanza provides sellers like you with a “Seller Stats Dashboard”.

This stats dashboard offers sellers comprehensive data on item views and revenue.

Bonanza seller dashbord

The dashboard also highlights TurboTraffic activity.

So, you can visualize its impact on your store’s performance at a glance.

Bonanza selling fees

You can choose from advertising rates of 9%, 13%, 19%, or 30%, with higher rates resulting in increased buyer traffic from platforms like Google Shopping and other sources.

And the best part is, there are no upfront or monthly fees to register on Bonanza!

Don’t make these mistakes

Bonanza makes sure all its sellers are selling genuine products.

They run several checks for example :

  1. products with images that are not real, edited, enhanced, or vague are rejected immediately.

2. If a Seller has a bad reputation, then there is no chance of registration.

3. If your online store is spammy with too many Ads, your products won’t be accepted unless you fix it.

Make sure you don’t make these mistakes.

Now that you know why it’s beneficial to sell on Bonanza, let us look at how you can prepare a product feed in the right format to list your products on this marketplace.

2. The Right Product Data To Upload WooCommerce Products On Bonanza

Since Bonanza wants to maintain quality, you are required to submit the following product data for each of your products.

**The ones marked in Green color are required attributes and the ones marked in Grey are optional attributes.

Product ID (id)

You can use the WooCommerce Product ID or the SKU for this attribute.

Product Name (title)

Use the product Title in your WooCommerce store and if possible, include extra traits such as color, size, gender, Brand name, etc to the title.

For variable products, it’s recommended to include the variation term to the tile for each variant.

Product Price (price)

Use the current price of the product on your site, i.e., if you have a sale running, then submit the sale price, else submit the regular price.

Do not include the currency for the price.

Category (category)

You need to submit the exact category path or category Id your product falls under as per Bonanza’s category list.

You can easily do that by using a category mapping feature when generating product feed. I will show you how later on in this article.

Product Description (description)

Use a benefit-rich description. You may choose to use the WooCommerce product description or the short description, whichever suits you better.

You may also add style to your description with certain accepted HTML and CSS elements.

Product Quantity (quantity)

This is the quantity of the products you have available in your store.

Main Image (image1)

Submit at least 1 image for every product in the feed.

You may use the product’s main or featured image link in your WooCommerce store.

Additional Images (image2, image3, image4) – optional

You may submit 3 additional images for every product.

Shipping Type (shipping type) – optional

Indicate the shipping cost type for your products using this attribute.

Accepted values are:

  • flat-rate
  • calculated
  • free
Shipping Price (shipping_price) – optional

If you include a shipping type as “flat-rate”, then indicate the shipping price here.

Shipping Service (shipping_service) – optional

Indicate the shipping service you use to deliver your products.

shipping_lbs – optional

If your shipping type is “calculated,” then you may specify the weight of your package in pounds using this attribute.

Do not include the unit of measurement in the value.

shipping_oz – optional

If the shipping type is “calculated,” specify the weight of your package in ounces using whole numbers only.

shipping_carrier – optional

If the shipping type is “calculated,” specify the carrier such as “ups”, “usps”, or “fedex”.

shipping_package – optional

If the shipping type is “calculated,” use this field to specify the packaging type such as “envelope”, “normal”, “large”, or “very large”. 

worldwide_shipping_type – optional

If you ship outside the USA, then indicate the shipping cost type for your products using this attribute.

Accepted values:

  • flat-rate
  • calculated
  • free
worldwide_shipping_price – optional

If you include a worldwide shipping type as “flat-rate”, then indicate the international shipping price here.

worldwide_shipping_carrier – optional

For sellers located in the US that wish to offer “calculated” shipping to worldwide addresses, use this attribute to specify the shipping carrier.

Accepted values are:

  • usps
  • ups
  • fedex

Now that you know about the required product attributes and optional attributes you can submit to upload your products on Bonanza, let us learn how you can generate a CSV feed for Bonanza easily.

3. How To Generate WooCommerce Product Feed For Bonanza Marketplace

In WooCommerce, you will find a reliable plugin called Product Feed Manager For WooCommerce with which you can generate a CSV feed for all of your products in just a few clicks.

PFM- Homepage

Watch the video below to generate a Bonanza CSV feed in just a few minutes.

As you just saw, it’s really easy to create a product feed.

The next thing to do is set up your Bonanza Booth and upload your clothing products to the Bonanza marketplace to start getting more sales.

Conclusion

As you saw above, this is how easily you can generate Bonanza product feed using Product Feed Manager for WooCommerce.

Initially, check out the plugin easily with the live preview option.

PFM repo

Once you are sure the plugin does what is required, you can go ahead and think about upgrading to Pro.

It’s high time you take advantage of the Bonanza marketplace and start getting more sales.

Categories
Product Feed Manager For WooCommerce Update

Generate WooCommerce Product Feed Optimized For Effective Promotion [2024]

Your WooCommerce store conversion can significantly increase by promoting on renounced 180+ merchant platforms such as Google Shopping, Facebook Dynamics, eBay, Amazon, etc with our product feed manager for the Woocommerce plugin.

Product Feed Manager (PFM) for WooCommerce is here to help you generate a product feed for all the products on your WooCommerce store with just a few clicks and without any hassle.

WPFM allows you to generate flawless WooCommerce product data feed in the correct format for your desired merchant shop. All you need to do is select the merchant type, assign the correct attribute values, and generate the product feed.

Then simply download the feed file and upload it on your desired merchant platform.

New And Improved Product Feed Manager For WooCommerce 

Product Feed Manager For WooCommerce already has set templates for major merchant shops for free.

PFM Repo

It also has many useful features including Auto-sync with google shopping center, Extensive Filter options (category, tag, custom), and more, in the free version. Have a look below :

PFM free features

Upgrading to pro allows you to generate unlimited product feeds and many more. Have a look below :

PFM premium features

So as you can see, we have introduced a few more impressive features that will help you generate product feeds more efficiently and without any hassle.

Let us look at the new features of Product Feed Manager For WooCommerce.

1. Generate Large Volume of Product Feed Without Issues

It is always a great concern about efficiency when you are generating product feed for a large number of products.

There are many tools that often get overloaded and fail to generate feed properly. They either stop after generating a few thousand product feeds or simply crash. Also, some tools will claim that the product feed is generated in full, but if you check the feed, you will find that several data are missing. 

Unlike most other such plugins, Product Feed Manager For WooCommerce generates feed using batch processing.

Which means, there is no chance of getting overloaded. Whether you have 50 products or 50,000 products or more, it does not matter; the plugin will successfully generate a product feed without any flaws.

2. Custom Fields for identifiers (Pro) 

Some products have assigned GTIN, MPN, UPC, or other forms of such product identifiers.

In order to promote products on Google Shopping, you need to provide at least one of these identifiers, if you wish to disclose the brand name of your product.

As you know, WooCommerce doesn’t provide such fields by default. So your options would be to use custom fields, add attributes manually to the feed, or use some other plugin to add these fields.

But now, you will not need to do any extra work. Product Feed Manager For WooCommerce now helps you to get these fields.

Add custom fields

You simply need to input the correct data and generate the product feed. 

For a single product, these fields could be added manually using WooCommerce custom fields, but what about variable products?

Just to let you know, identifiers are unique for every variation of a product under the same brand. WooCommerce only allows custom fields to be added for the parent product, not the variations.

Product Feed Manager For WooCommerce gives you the solution to this. The custom fields you get with our plugin will add the identifier fields within each variation for variable products.

Custom fields for variable products

This saves you from any complications.

You don’t need to use any extra plugins or get expert assistance to add the custom fields. Product Feed Manager For WooCommerce will help you add these fields without any extra effort.

Enabling custom identifier fields:
If you have activated the license for Product Feed Manager For WooCommerce Pro, then you should be able to enable or disable custom identifier fields from the dashboard.

Go to Dashboard > Product Feed> Settings. On the top, go to the tab called Controls.

Controls

Once you go there, you will get the option to enable or disable custom identifier fields.

Enable identifiers

It’s as simple as that.

3. Custom Fields for extra attributes (Pro)

Some attributes are very important for prospects to make decisions but WooCommerce doesn’t have fields for that. For example, age group, size, material, etc.

Also, if you have apparel products, to promote them on Google Shopping, it is mandatory to provide extra data which includes size, pattern, material, age group, and gender, for which each product is suitable.

You can add the custom fields for these attributes through Product Feed Manager For WooCommerce.

For Single Product:

Single product Custom Attribute added

For Variable Products:

Variable product Custom Attribute added

Due to this, you can easily assign these attributes and use them for generating product feeds.

Enabling custom attribute fields:
If you have activated the license for Product Feed Manager For WooCommerce Pro, then you should be able to enable or disable custom attribute fields from the dashboard.

Go to Dashboard > product feed > Settings. On the top, go to the tab called Controls.

Controls

Once you go there, you will get the option to enable or disable custom attribute fields.

Enable custom attribute fields

So, once you have these fields, there will be no more chance of missing information when uploading products to other merchant shops.

4. eBay MIP Feed Generation 

Feed formats are crucial when uploading on other platforms. However, some platforms have different feed formats. eBay MIP is one of them.

You can generate a product feed for eBay MIP in the correct format using Product Feed Manager For WooCommerce.

Most merchant shops accept a feed format similar to what Google accepts. But eBay MIP requires a completely unique feed format.

Here’s a glance at the differences:

Compare Google and eBay feed format

Well, using WooCommerce Product Feed Manager, you will get the feed format required by eBay MIP without any errors.

So maybe it’s time you promote on eBay MIP as well.

5. More amazing merchant shop feed templates 

The improved WooCommerce Product Feed Manager also supports major merchant shops.

As you know, different merchant shops have different feed formats, it is difficult to read and apply their instructions and create product feed manually.

You don’t need to. We have done that for you. Now, you will be able to generate product feeds for over 20 merchant shops.

Apart from these merchant shops in the free plugin,

Once you upgrade to Pro, you will also be able to generate a product feed for the following:

All these merchant platforms are very popular and if you operate internationally, you can benefit from promoting on whichever ones you want.

Additionally, there are tons of new merchants added in the free version. You can check them out here: All supported marketplaces.

Enabling more merchant feed formats:
To activate extra merchant product feed formats, go to
Dashboard > product feed > Settings. On the top, go to the tab called Merchants.

Merchants Tab

Once you go there, you will get the option to enable or disable feed generation for any supported merchant shop.

All Supported Merchants

Here, enable the ones you wish to promote, and then go ahead and generate a product feed to upload on those platforms.

Upcoming features 

We are working on adding more and more features so that you can generate feed more easily and have a tool that is value for the money.

>>Amazon Auto-Sync – Amazon is a large platform. We are trying to connect with Amazon and set up an auto-sync feature for Amazon. This will surely save a lot of time and effort.

>>E-mail product feed – You will be able to send the generated feed via e-mail to anyone you want. If you have someone else handling a certain merchant account for you, you can simply generate a product feed, and e-mail it to him. This feature is in the process of creation.

There are so many more upcoming features waiting down the line to be developed.

Product Feed Manager For WooCommerce is a stable and powerful tool that you can benefit from.

WPFM click

Save your time and effort and promote your products globally without hassle.

Take advantage of the Product Feed Manager For Woocommerce plugin and generate product feeds with ease.


Categories
Product Feed Manager For WooCommerce WooCommerce

How to Sell on Alibaba to Maximize WooCommerce Sales & Profit [2024]

Running a WooCommerce store for wholesale can be challenging, especially in attracting bulk-buying clients without relying on costly paid ads.

A great alternative is to list your products on Alibaba wholesale marketplaces. For businesses in Europe or Japan, selling on Alibaba is a top choice.

Alibaba is one of the world’s largest online marketplaces. It allows you to list your WooCommerce wholesale products and achieve regular sales with less effort.

With over 903 billion active users, Alibaba marketplace is a valuable platform for wholesale businesses looking to expand their reach.

Today, you’ll get a guide on how to sell on Alibaba. You’ll also learn how to list your WooCommerce products and start boosting your sales.

So let’s begin.

What is Alibaba Marketplace?

Alibaba Marketplace is a B2B online platform where you can connect with manufacturers and wholesalers globally, primarily from China.

On Alibaba, you can browse detailed product listings, complete with descriptions, images, and pricing, making it easy to find what you need.

To ensure secure transactions, Alibaba provides a Trade Assurance program, protecting you regarding product quality and shipping times.

Plus, this global online marketplace supports various payment methods and offers financing options, simplifying your transaction management.

What Types of Products Can You Sell on Alibaba?

Types of Products - Sell on Alibaba

You can sell a wide range of products across numerous categories. Here are some of the main types of products commonly sold on Alibaba:

  1. Electronics: Mobile phones, computers, cameras, audio equipment, and accessories.
  2. Apparel and Textiles: Clothing, footwear, fabrics, and fashion accessories.
  3. Home and Garden: Furniture, home decor, kitchenware, gardening tools, and outdoor furniture.
  4. Beauty and Personal Care: Cosmetics, skincare products, hair care, and grooming tools.
  5. Machinery and Industrial Equipment: Manufacturing machines, construction equipment, agricultural machinery, and tools.
  6. Automobiles and Motorcycles: Vehicles, auto parts, motorcycle parts, and accessories.
  7. Health and Medical: Medical equipment, health care products, fitness equipment, and supplements.
  8. Toys and Hobbies: Children’s toys, games, hobby supplies, and educational materials.
  9. Sports and Entertainment: Sporting goods, musical instruments, and outdoor recreation equipment.
  10. Packaging and Printing: Packaging materials, printing supplies, and promotional products.
  11. Office Supplies: Office furniture, stationery, and school supplies.
  12. Consumer Electronics: Home appliances, smart devices, and wearable technology.
  13. Food and Beverage: Packaged foods, beverages, agricultural products, and food ingredients.
  14. Jewelry and Watches: Fashion jewelry, fine jewelry, watches, and accessories.

These categories contain a broad range of products, making Alibaba shopping a good platform for various business needs.

Why Sell on Alibaba?

As mentioned earlier, the Alibaba shopping website currently has over 903 billion active buyers. This means if you list your products there from Europe, Japan, or any other country, you have 10 times more chance to get potential buyers there than you normally would via Paid Ads.

Alibaba provides robust marketing tools and services that can attract new customers and increase your brand visibility.

Sell on Alibaba marketplace
Type caption (optional)

For example, depending on your membership, Alibaba allows you to define your target audience based on Interests, buying behaviors, and customer demographics so that your products are displayed to the right audience.

This gives you a chance to narrow down who you want to reach and increase your chances of conversions.

How to Start Selling on Alibaba?

First of all, the Alibaba marketplace is not free. You have to pay over $166 per month to actively use their platform. However, considering you are an Alibaba wholesaler, the ROI is huge (unless you are a startup business).

Normally, you can go for the two usual plans, Basic or Plus. or you can also speak with a consultant for customized plans for a higher focus on the Ads budget for your Alibaba store.

Once you become a member, you can then design your store for the Alibaba platform and upload your products there using a CSV.

What Product Data is Needed to Sell on Alibaba?

To list your products on the Alibaba shopping website, it’s important to ensure that you provide all the necessary product data with keyword-optimized content so that you can get maximum exposure.

The information in your product feed depends on your product category. For every Alibaba product feed, there are 8 important pieces of information that you need to consider:

1. Basic information

In the basic information, you’ll add product type, product name, and the product keyword.

2. Product Details

The product photo and videos will go to the product details. So, If you want, you can add a custom description here.

3. General Product Details

General product details depend on the category you are selling. The details are material, variety, size, color, pattern, etc category-specific attributes.

4. Product Features

This section will include all product features you have.

5. Customize Features

Here you’ll add more details of your product features.

6. Variable Pricing

You’ll add the product unit and quantity-based pricing in this attribute.

7. Trade Information

This is simply the trade information of your products. You can also receive the options trade alerts for your product.

8. Acceptable Payment

Here, you’ll add the payment option for your products

When your product data is ready, you need to focus on uploading the products on the Alibaba platform.

But, it’s really tough and time-consuming if you try to upload them all manually. But, there is a solution to upload your WooCommerce product feed easily. Keep reading to explore that.

How to Bulk Upload Your Products on Alibaba

Bulk Upload - Sell on Alibaba

Uploading your products on Alibaba can be a time-consuming process, especially if you have a large number of products to list. Now, you may have a question about how to sell on Alibaba in terms of bulk uploading.

Don’t worry. Fortunately, Alibaba provides a bulk upload feature that allows you to upload multiple products at once.

Here’s how to use it:

  1. Prepare your product data: Before you can upload your products in bulk, you need to prepare your product data in a CSV (comma-separated values) file format. You can use a spreadsheet program like Microsoft Excel or Google Sheets to create your CSV file.
  2. Navigate to the “Product” tab: Once you have your CSV file ready, log in to your Alibaba account and navigate to the “Product” tab.
  3. Select “Bulk Upload”: Click on the “Bulk Upload” button and select “CSV File Upload” from the dropdown menu.
  4. Upload your CSV file: Select your CSV file from your computer and upload it to Alibaba. Make sure to review your file to ensure that all of the product data is accurate and complete.
  5. Map your product data: After uploading your CSV file, map your product data to the corresponding fields on Alibaba. It ensures that your product data is correctly aligned with Alibaba’s product data requirements.
  6. Submit your products: Once you’ve mapped your product data, you can submit your products to Alibaba. Alibaba will review your products and let you know if there are any issues. So, you can fix them before you publish your products.

This bulk upload feature can save you time. And, you can efficiently upload multiple products to the marketplace.

Now, let’s find out how you can make this process easier with a reliable plugin.

How to Easily Promote Your WooCommerce Products on Alibaba

If you are a WooCommerce store owner and looking to promote on the Alibaba shopping website, then we have a solution!

You can use the plugin Product Feed Manager for WooCommerce.

With the plugin, you can easily promote your WooCommerce products on 170+ online marketplaces. This plugin provides you pre-built merchant template so you don’t need to worry about merchant specifications and get your products accepted.

It also has a custom feed option, so you can customize your feed to get your expected exposure.

Here’s how you can easily promote your WooCommerce products on Alibaba using a Product Feed Manager for WooCommerce:

Step 1: Create a product feed

Once you have installed and activated the plugin, create a product feed for your WooCommerce products.

Follow the simple steps:

  • Go to Add New Feed
  • Set a feed title
  • Select the Custom option from the merchant drop-down
  • Set feed file type

Below this, you will see an attribute already listed which is the Product ID.

product feed - Sell on Alibaba

Now, you will add your preferred attributes which you need to sell on Alibaba.

Once you do that, your product feed will be ready.

Step 2: Export your product feed

Once your product feed is ready, you can export it in the required format for Alibaba. The product feed manager supports CSV, TXT, and XML formats, which are all compatible with Alibaba wholesale advertising.

Click on the Publish button and your feed will be automatically downloaded.

edit Alibaba product data - Sell on Alibaba
Type caption (optional)

Step 3: Upload your product feed to Alibaba

Now, it’s time to upload your product feed to the Alibaba shopping website.

Follow the steps to upload your product feed to Alibaba:

  1. Login to your Alibaba account: Firstly, log in to your Alibaba account. You need to create one if you haven’t already.
  2. Go to “My Alibaba”: Once you log in, click on “My Alibaba”. It is located in the upper-right corner of the homepage.
  3. Navigate to “Product Posting Management”: From the dropdown menu, select “Product Posting Management.”
  4. Choose your product category: Choose the product category that best suits your product.
  5. Click “Bulk Upload”: Under the “Product Management” section, click on “Bulk Upload”. After that, select “CSV” as the file format.
  6. Upload your CSV file: Upload your CSV file by clicking on the “Upload File” button. You can either drag and drop your file or select it from your computer.
  7. Map your product attributes: Alibaba provides a product attribute mapping feature. It allows you to match the product attributes in your CSV file to the attributes required by Alibaba. This step ensures that your product data is correctly formatted for Alibaba.
  8. Preview and submit: Preview your product information to ensure that it is accurate and complete. If everything looks good, click “Submit” to publish your products on Alibaba.

Now, After listing your products successfully on Alibaba, the next step for you is to promote your product.

Step-4: Promote Your Products on Alibaba

To successfully promote your products on Alibaba and enhance sales for your WooCommerce store you can do the following:-

  1. Utilize Alibaba Advertising: Consider using Alibaba’s advertising options to increase product visibility.
  2. Offer Competitive Pricing: Set competitive prices and run promotions to attract buyers.
  3. Highlight Unique Selling Points: Emphasize what sets your products apart from competitors.
  4. Provide Excellent Customer Service: Respond promptly to inquiries and address customer concerns professionally.
  5. Use Alibaba’s Social Media Channels: Engage with customers and share product updates on Alibaba’s social platforms.
  6. Participate in Promotional Events: Join Alibaba’s sales campaigns for increased exposure.
  7. Use Data Analytics: Analyze customer behavior and product performance to optimize your strategies.
  8. Encourage Reviews and Ratings: Positive feedback builds credibility and trust.
  9. Monitor and Adjust: Regularly assess your performance and adapt your approach accordingly.

By following these steps, you can effectively promote your products on Alibaba and drive sales for your WooCommerce store. So, cheers!

Conclusion

Selling on Alibaba can expand your WooCommerce wholesale business globally. If you’re ready for more orders and have the budget, promoting on Alibaba Marketplace is crucial.

Understanding how to sell on Alibaba effectively helps you tap into its wide reach for wholesale trade. It also connects you with potential buyers around the globe and expands your market presence.

Generating product data files from your WooCommerce store for Alibaba’s shopping site is straightforward with a product feed manager (PFM), making listing easy.

This can boost visibility and attract Alibaba wholesale buyers. Take this opportunity to grow your revenue and establish your presence as an Alibaba seller.

** FAQs **

How can I increase traffic to my WooCommerce store without using paid ads?

  • You can increase traffic by listing your products on popular online marketplaces like Alibaba. This platform provides exposure to millions of potential buyers and includes robust marketing tools to attract new customers.

What are the benefits of selling on Alibaba?

  • Selling on Alibaba gives you access to over 800 million active buyers. The platform also offers marketing tools to target specific audiences, which can help increase your brand visibility and sales.

How do I upload my WooCommerce products to Alibaba?

  • To upload products, prepare a CSV file with your product data. Then, log in to your Alibaba account, navigate to “Product Posting Management,” and use the bulk upload feature to upload your CSV file. Map your product attributes and submit.

What product data is required to list on Alibaba?

  • You need to provide basic information (product type, name, and keyword), detailed photos and videos, category-specific attributes, product features, variable pricing, trade information, and acceptable payment options.

How can I promote my products on Alibaba?

  • To promote your products, use Alibaba’s advertising options, set competitive prices, highlight unique selling points, provide excellent customer service, engage on social media, participate in promotional events, and encourage customer reviews and ratings.
Categories
Guide Product Feed Manager For WooCommerce Social Media

Facebook For WooCommerce – Transfer Your Products to The Best Social Marketplace [2024]

As a WooCommerce store owner, establishing a market presence is one of the most challenging aspects that you may face. If you own a newly rising online store, then it can take quite some time to become popular.

At this point, selling products only in the WooCommerce store is surely not enough. So you can try other Strategies & Facebook marketplace is one of the effective methods to sell your products easily.

Accodrding to current data, Facebook Marketplace has over 1.2 billion monthly active buyers.

In this article, I will discuss why you must promote your WooCommerce products in the Facebook Marketplace. You can also know how to easily generate and upload your store products to the marketplace in just a few clicks.

So let’s begin.

Why Should You Rely on Facebook for WooCommerce Product Promotion?

Facebook Marketplace has grown to assist digital stores in promoting their products to a greater audience and it is one of the best social marketplaces in the world. Its super-friendly business features can highlight your brand efficiently.

The Facebook business suit allows you to manage your business profile and Facebook page & shop around the Facebook community easily. So, you can leverage the marketplace to drive traffic and potential buyers into your WooCommerce store quite smoothly.

This social marketplace allows buyers to search for products, and if your product matches their intent, it will be available for the buyer to choose from.

Suppose a buyer is looking to purchase a musical instrument. He can simply go to Facebook Marketplace and search for the desired instrument.

Search in Marketplace - Facebook for WooCommerce

If the buyer clicks on the product, you can set it up to take the buyer to your Facebook shop page or your website.

The main difference between selling products only on a Facebook page and selling products from your WooCommerce to the Facebook marketplace is that you will get more trust from the people.

A buyer tends to order more from a business with its Brand value than buying from a private seller on Facebook. So having an up-and-running website is crucial if you want to stay in the eCommerce business for a long time.

In the next section, I will explain what you should have before creating a Facebook catalog as it is an important part of the process.

Necessary Things Before Creating a Facebook Catalog

Facebook for Woocommerce

Now I am going to explain necessary things that you need to prepare before creating a perfect Facebook catalog.

1. Website:

  • Ensure you have a functional and professional website where your products are listed. This is essential as your product catalog will link directly to your website.
  • How to Do It: Set up a website with a user-friendly design and clear product listings. Make sure the site is secure and optimized for mobile devices.

2. Accurate Product Information:

  • Gather detailed and precise information about each product, including titles, descriptions, images, prices, and stock levels.
  • How to Do It: Use a spreadsheet or a product information management system to organize and maintain accurate product data. Regularly update this information to reflect any changes.

3. Facebook Commerce Manager:

  • This is the tool where you will create and manage your catalog. It integrates with your Business Manager to provide a centralized location for your product data.
  • How to Do It: Log into your Facebook Business Manager, navigate to Commerce Manager, and follow the steps to set up your catalog.

4. Product Feed:

  • A product feed is a file that contains all the information about your products in a format that Facebook can read. This feed is uploaded to your catalog.
  • How to Do It: Create a WooCommerce product feed in CSV, TSV, or XML format. Include all necessary fields such as product ID, title, description, image URL, price, and availability. Validate the feed to ensure it meets Facebook’s requirements.

5. Facebook Tracking Pixel:

  • The Facebook Pixel is a piece of code that tracks actions on your website, such as views, adds to cart, and purchases. This data is crucial for dynamic ads and audience targeting.
  • How to Do It: Install the Facebook Pixel on your website by copying the pixel code from Facebook and adding it to your website’s header. Verify that it’s working correctly using Facebook’s Pixel Helper tool.

6. Facebook Page:

  • A Facebook Page is necessary to represent your business on Facebook and connect your catalog to your audience.
  • How to Do It: Create a Facebook Page if you don’t already have one. Fill out all relevant information, including business details, profile picture, cover photo, and contact information.

7. E-commerce Platform Integration:

  • If you use an e-commerce platform. you can easily connect WooCommerce to the Facebook marketplace. This Facebook WooCommerce integration simplifies the catalog creation process.
  • How to Do It: Follow the integration guides provided by Facebook and your e-commerce platform to sync your product data automatically.

8. Compliance with Policies:

  • Ensure your products and business practices comply with Facebook’s commerce policies to avoid disapproval or restrictions.
  • How to Do It: Review Facebook’s commerce policies and advertising guidelines, and make sure all your product listings meet these standards.

9. High-Quality Product Images:

  • Use clear, high-resolution images to showcase your products effectively. Good images can significantly enhance the appeal of your ads.
  • How to Do It: Ensure images are at least 500×500 pixels, well-lit, and showcase the product. Avoid cluttered backgrounds.

10. Accurate and Functional Product URLs:

  • Make sure each product URL in your feed correctly links to the specific product page on your website.
  • How to Do It: Test all URLs to ensure they lead to the right product pages. Correct any broken or incorrect links.

11. Inventory Management System:

  • Keep your inventory data up-to-date to avoid advertising out-of-stock products, which can frustrate customers. How to Do It: Use an inventory to sync stock levels with your product feed management system. Update the feed regularly to reflect the current stock.

12. Consistent Pricing:

  • Ensure all prices in your catalog match the currency and pricing strategy for your target market.
  • How to Do It: Verify that prices in your product feed are accurate and consistent with those displayed on your website.

13. Permissions and Roles:

  • Assign the right roles and permissions to team members to manage the catalog efficiently without compromising security.
  • How to Do It: In Business Manager, assign roles such as admin, editor, or analyst to relevant team members. Control access based on their responsibilities.

14. Customer Support Readiness:

  • Be prepared to handle customer inquiries and support requests that may arise from your product listings.
  • How to Do It: Set up a system for managing customer messages and comments on your Facebook Page. Train your team to respond promptly and effectively.

15. Analytics Setup:

  • Set up analytics tools to track the performance of your catalog and ads, helping you make data-driven decisions.
  • How to Do It: Use Facebook Analytics and other tools like Google Analytics to monitor key metrics such as click-through rates, conversions, and sales.

By following these steps, you’ll be well-prepared to create a Facebook Catalog that enhances your advertising efforts and helps you connect with potential customers more effectively.

Having said all that, you still have to upload your product data to the Facebook marketplace.

Now, manually adding products from WooCommerce to your Facebook marketplace can be quite frustrating. But there is an easy way to upload all of your products into Facebook for WooCommerce in just a few clicks.

Product Feed Manager for WooCommerce – Facebook Product Feed Generator

Product Feed Manager for WooCommerce (PFM) is an extension specialized for WooCommerce store owners who want to promote their products in other online marketplaces, including the Facebook Marketplace.

This tool will let you generate a product feed file in the right Facebook Catalog format with just a few clicks. Then, you can simply upload it to your Facebook for WooCommerce in the commerce center to list all of your products in the Facebook Marketplace in just a few minutes.

Now, yes, you will get some Facebook for WooCommerce plugins in WordPress that do a similar function, and some may even have more active installations.

But, what makes PFM unique is its super simple UI. You can start using the plugin and generate a Facebook Catalog feed with as low as 4 clicks. And if you have certain customized data in your store, you will still need as little as 3 minutes to configure and generate a perfect Facebook product feed.

Since you are running an eCommerce shop, you do not have a lot of time on your hands. The faster you can start promoting your products, the sooner you make money. That is why this tool is designed to save you time by uploading products on Facebook for the WooCommerce store.

You do not need to learn about the Facebook Catalog feed structure or format, and you do not need to spend hours configuring the feed generation. The plugin will lead you to achieve it real quickly.

Now, let’s take a look at how you can generate a product feed with all your WooCommerce products to upload to the Facebook Marketplace.

How to Quickly Generate Your Facebook Product Feed with WooCommerce Products

First, make sure you have the Product Feed Manager for WooCommerce installed and activated in your WooCommerce store.

Then, follow the two steps below to generate a Facebook product feed with your WooCommerce products.

Step 1 – Create A Product Feed

Once the plugin is activated, on your dashboard menus, you will find the option Product feed.

Hover on it and click on ‘Add New Feed’, and it will take you to the following page:

Add New Feed - Facebook for WooCommerce

Here, first set a feed title.

Then choose the Feed Merchant as Facebook.

Select Feed Merchant -  Facebook for WooCommerce

It will then load all the fields that will be included in your product feed for each of your products.

product feed generator - Facebook for WooCommerce

Step 2 – Configure Your Facebook Product Feed

You will notice that almost everything is already configured. All you have to do is assign the right values for the Manufacturer/Brand, and the Google Product Category

Configure required attributes -  Facebook for WooCommerce

– Assigning The Manufacturer/Brand:

This should be the Brand name of the product you are selling. If you are the manufacturer, you can set the type as Static and input your company name here.

If you have different brand names for different products, you will have to save the value in a custom field or product attribute and then use that value here.

**You can also use a brand plugin, which will make it easier to assign and use brand names.

– Configuring the Google Product Category:

Facebook Marketplace has its own set of categories (that match Google) that, most often, don’t match the categories in your store. But you do not have to change it in your store. You can simply use the category mapping feature to set up the mapping and use it as the value here.

You can further customize the feed if you need to use Product filters, a few basic feed settings, auto-update intervals, and feed rules. Normally, they are already configured in an optimized way for the Facebook Marketplace.

Once you have configured the feed, simply click on the Publish button on the right, and the feed will be generated in seconds.

And that’s it. You have successfully generated a product feed for the Facebook Marketplace. You will be able to collect the feed link or download the feed file from the right side.

product feed generated -  Facebook for WooCommerce

How to Upload Your Product Feed to Facebook Commerce Manager

Once you have generated the product feed, it’s time to get your WooCommerce products on the Facebook marketplace.

Before you do, it’s always best to create a Facebook business page if you want to leverage more exposure from Facebook for WooCommerce. You may read this guide to create a Facebook business page if you do not have one already.

Simply follow the steps below.

Step 1 – Create A Catalog

  1. Login to your Facebook account and access the Facebook Commerce Manager.
  2. Select your preferred way to sell your products on Facebook. Here, select the ‘Create a Catalog’ option. Then click on ‘Get Started.’
Commerce manager catalog -  Facebook for WooCommerce
  1. Now, choose your catalog type.
Select your catalog type -  Facebook for WooCommerce
  1. Next, Select Upload Product Info and click on the ‘Create’ button.
Create Catalog -  Facebook for WooCommerce
  1. Then click on finish, and it will redirect you to your Facebook Commerce Manager Dashboard.

Step 2 – Upload Your Product Feed to The Facebook Marketplace

Now that you have the Catalog prepared, you are ready to upload your products on the Facebook marketplace for your WooCommerce store.

  1. On your Commerce Manager menus, you will see a new menu called Catalog. Click on it, and then click on Data Sources.
  2. Then select Data Feed.
  3. Here, you will get three options – File Upload, Scheduled Feed, and Google Sheets. Choose Scheduled Feed.
  4. Then you will get the option to provide the link to the feed file. Earlier, when you generated the feed in your WooCommerce store, it gave you a feed link. Copy that link and paste it here.
  5. Now, choose a suitable time for the schedule fetch and click on Next.
  6. And finally, give a name to your catalog feed, choose the currency for your store, and click on Upload.

And that’s it. Your feed will be uploaded in a few minutes to the Facebook Marketplace, which you will be able to view in the Items menu under Catalog.

Key Benefits of Setting up Facebook Catalogs for WooCommerce

Now I will tell you some key benefits of setting up your Facebook catalog for WooCommerce so that you can be inspired more.

  1. Easy Integration: You can easily integrate WooCommerce with Facebook. It allows for automatic syncing of product information. It also saves you time and reduces manual data entry errors by automatically updating your Facebook Catalog whenever changes are made in WooCommerce.
  2. Enhanced Product Visibility: Products in your catalog can be featured across various Facebook and Instagram placements. It helps you to increase exposure and potential reach to millions of customers on these platforms.
  3. Dynamic Ads: Dynamic ads use your catalog to show personalized products to customers based on their behavior and interactions. It boosts your conversion rates by targeting buyers with products they’ve shown interest in, leading to higher ROI.
  4. Improved Shopping Experience: Customers can find and browse products directly from your Facebook and Instagram. It provides an easy shopping experience, reducing friction and making it easier for them to purchase.
  5. Automated Inventory Management: Syncing your WooCommerce store with Facebook ensures real-time inventory updates. It prevents advertising out-of-stock products, reducing customer frustration and potential lost sales.
  6. Advanced Analytics: Track performance metrics of your products and ads through Facebook’s detailed analytics tools. It enables data-driven decisions to make optimized product listings and advertising strategies.
  7. Multi-Channel Sales: Extend your sales channels by listing products on both your WooCommerce site and Facebook/Instagram. It helps to diversify revenue streams and reaches a broader audience.
  8. Easy Product Management: You can easily manage product listings, descriptions, prices, and inventory from a single platform. It simplifies catalog management, saving time and effort.
  9. Retargeting Opportunities: Using data from the Facebook Pixel helps to recapture your potential lost sales and increases conversion rates.
  10. Cost-Effective Advertising: Dynamic ads and personalized targeting are often more cost-effective than traditional advertising. It maximizes your budget efficiency by focusing on high-intent users.
  11. Enhanced Customer Insights: Gaining valuable insights can help you tailor marketing strategies and product offerings to better meet your customer needs.
  12. Increased Engagement: Engaging product posts and ads can attract likes, comments, and shares. It boosts your brand visibility and engagement on social media platforms.

By setting up Facebook Catalogs for WooCommerce, you can significantly enhance your e-commerce operations, improve customer experiences, and drive more sales through advanced targeting and easy integration.

Conclusion

In conclusion, Facebook Marketplace for your WooCommerce store can significantly enhance your product visibility and boost sales.

Following the steps outlined, you can easily transfer your products to Facebook. It allows you to reach a broader audience and simplify your sales process.

The integration offers numerous benefits, including dynamic ads, automated inventory management, and advanced analytics, all of which contribute to more efficiency & effectiveness.

For an effortless transfer process, use the Product Feed Manager to simply generate and upload your WooCommerce products to Facebook Marketplace with ease.

** FAQs **

How can I increase the visibility of my WooCommerce products on Facebook Marketplace?

  • To increase visibility, ensure your product titles and descriptions are clear and keyword-rich. Engage with your audience through your Facebook business page and use targeted ads to reach potential buyers. Additionally, leveraging Facebook’s algorithm by frequently updating your product listings can keep your store relevant and visible.

What should I do if my product feed fails to upload correctly?

  • If your product feed fails to upload, double-check the feed link and ensure it is formatted correctly. Also, verify that all mandatory fields, such as product titles and categories, are filled out. If issues persist, consider reaching out to support both WooCommerce and Facebook Commerce Manager for assistance.

How often should I update my product feed on Facebook?

  • It’s beneficial to update your product feed regularly, ideally daily, to reflect any changes in inventory, pricing, or new product additions. This keeps your listings accurate and up-to-date, improving customer trust and satisfaction.

Can I customize my product feed to match Facebook’s requirements?

  • Yes, you can customize your product feed using the Product Feed Manager for WooCommerce. Map your WooCommerce categories to Facebook’s, assign brand names, and adjust other attributes to ensure compatibility. This customization helps in displaying your products correctly on Facebook Marketplace.

How can I measure the success of my product listings on Facebook Marketplace?

  • You can measure success by tracking key metrics such as click-through rates, conversion rates, and sales figures through Facebook Commerce Manager. Additionally, utilize Facebook Insights to monitor engagement and adjust your strategy based on performance data to continually improve your listings.
Categories
Guide Product Feed Manager For WooCommerce WooCommerce

An Effective Guide to Selling Electronics Online For Google Shopping [2025]

Let’s face it: when people want to buy electronics, their first stop isn’t your website—it’s Google.

And guess what? If your products show up as suggestions on Google Shopping, they’re just a click away from landing in someone’s cart.

Listing your products on Google Shopping isn’t just a nice-to-have; it is one of the best techniques you can apply while selling electronics online.

In fact, with consumer electronics projected to hit $977 billion in sales by 2025, the stakes are higher than ever.

But here’s the burning question:

  • How do you ensure your products actually show up in search results?
  • When buyers do find you, how can you nudge them into buy now mode?
  • And most importantly—how do you get set up on Google Shopping without losing your mind?

You’ll get all those answers here. Let’s break it down step-by-step and show you how to sell electronics online with confidence and ease.

Why Sell Electronics Online?

Before we jump into the guide, let’s take a minute to talk about why selling electronic products online is such a big deal. Once you see the advantages, you’ll get how online selling can really level up your business.

1. Buyers Are Already Searching for Electronics Online

Think about your own buying habits. When you need a new phone or a set of earbuds, where do you start? Most likely, it’s online. Customers are constantly comparing prices, reading reviews, and hunting for deals. By listing your electronics online, you’re placing your products exactly where people are looking.

2. Expand Your Customer Base Beyond Local Shoppers

A physical store limits you to whoever walks through the door. But selling online? You’re not tied to one location. You can reach buyers across the country—or even the world. Whether someone is browsing from their living room or another time zone, your products are just a click away.

3. Your Store Is Open 24/7

In a physical shop, you rely on foot traffic and business hours. But when you sell online, there are no closing times. Customers can browse, compare, and buy whenever it’s convenient for them—whether it’s at 2 p.m. or 2 a.m. This “always open” approach means more sales opportunities, no matter the time of day.

4. Easier to Stand Out with Personalization

Online selling lets you tailor the experience in ways a physical store can’t. You can showcase product recommendations, run flash sales, or even offer personalized deals based on a customer’s browsing history. These small touches can create a more engaging shopping experience that turns visitors into loyal buyers.

5. Faster Adaptation to Trends and Customer Preferences

Tech trends move fast. Today it’s noise-canceling headphones, tomorrow it’s VR headsets. Selling online allows you to adjust your offerings quickly—no need to rearrange shelves or print new signage. Just update your listings and promotions, and you’re ready to go.

6. Lower Overhead, Higher Profit Potential

No rent, utilities, or in-store staff means you can reinvest that money into marketing, product improvements, or offering more competitive pricing. With fewer expenses, your profit margin can grow faster than it would with a traditional brick-and-mortar setup.

7. Build Trust with Reviews and Transparency

Online stores thrive on social proof. Customer reviews and testimonials can help build credibility and give potential buyers confidence. Plus, you can share detailed product descriptions, FAQs, and even video demos to answer any lingering questions before customers hit “buy.”

By selling electronics online, you’re giving yourself more reach, flexibility, and the ability to stay competitive in a fast-moving market. You’re not just offering products—you’re creating convenience and confidence for your customers.

How To Create An Effective Product Listing via Google Shopping

The first step to getting your products into the product suggestions is to upload your products on Google Shopping.

Following are some of the ways you can optimize your product listings for maximum results :

1. Include Core Keywords In The Title

The first factor in ranking product suggestions is the product title.

When it comes to electronics, people usually call them by multiple specific terms.

But you have to find the terms that are used by the majority.

For example, a trimmer is also often called an electronic shaver.

But the majority calls it a trimmer. So the term “trimmer” must be in the product title.

Second, buyers are often attracted to the brand. Third, in some products the model is important.

So, you need to have the product brand, the model, and the common term of the product name should be included in the product title.

This will increase impressions and allow the right buyers to recognize the product they are looking for.

2. Curated Product Images That Catch The Eye

Product images play a big part in attracting buyers. If you use a typical image similar to everyone else, it may not work.

You may try the following:

  • Use alternate colors. Search for your product on Google and find out how the typical results are. Then design your image to have a unique color that may make it stand out. One way is to have the product on a white background, but add a colored border so that is stands out.
  • For the image you choose to submit, update its tile and alternate text to be the same as the product title.
  • Do not add any promotional text to the image as Google Shopping reject it.

Overall, these are changes we recommend for you to make on the image that you submit in your product data.

3. Indicate Specific Google Product Categories In Your Product Data

Google Shopping allows you to submit the appropriate category for selling electronics online of which you want your products to be part.

You can easily do that by including an attribute “Google Product Category” and indicating which category your product is best suited in.

This will help to display your products as related or similar product suggestions when a buyer is not sure of the product name.

4. Include all the right attributes for Google Shopping

attributes for Google Shopping - Selling Electronics Online

When you submit your product data feed on Google Merchant Center to sell electronics online, make sure you have the following data included:

  • Product ID
  • Product Title
  • Product Description
  • Product Link/URL
  • Product Category
  • Google Product Category
  • Product Image URL
  • Stock Availability
  • Regular Price
  • Manufacturer/Brand Name
  • GTIN or MPN
  • Identifier Exists

Other than these, you may add additional attributes that are related to electronic products.

  • Product Condition – To indicate if these are new or refurbished.
  • Product Dimensions – The product length, width, and height.
  • Product Weight- The weight of the product.
  • Product Detail – Include additional specifications of the product.
  • Product Highlight – Link to a video of the product showcase.
  • Custom Labels – To mention non-attribute values as attributes such as model, technology, etc.
  • Shipping Information

You will be able to easily generate the product feed from your WooCommerce store in just a few clicks using a simple plugin – Product Feed Manager for WooCommerce.

5. Increase Local Visibility (if applicable)

If you are shipping a product to local areas only, then you have to be clear about it in your product listings and Google Shopping.

  • Use the country name (or city name) in the product description. For example “Get it anywhere in CA in just 3 days!”
  • Include the country name as a custom label.
  • If feasible, offer a special discount on shipping on local deliveries. Many tend to offer free shipping.
  • Allow an option of local pick-up.

Other than these, an important thing to do is to submit your products for selling electronics online as local product inventory other than the basic Google shopping listing.

This will ensure you get extra preference when local buyers search for your products. You can generate a local product inventory easily.

6. Use Google Merchant Promotions For Better Conversions

In your Google Merchant Center, you will find an option to apply for Google Promotions which allows you to run momentary discounts for the products you already listed in the Shopping feed.

The specialty of this is you can highlight that you have a special offer for your products rather than waiting for people to click on the product display Ads and visit your site to see the offer.

For this, you have to submit a separate Google promotion feed with details on the offers you have.

You can do a single promotion for all the products or submit unique promotion details for specific products.

This will give you an edge when people view the Shopping Ads.

There will be a special highlighted text such as “Special offer: 15% off” below the product Ad to grab the attention of the buyers.

7. Optimize Structured Data & Product Page To Get Approved

After you submit your feed, a Google bot will crawl your website and try to match the product data to your JSON-LD structured data and the product data on the page to confirm authenticity.

You need to ensure you have a proper JSON-LD format set for your structured data.

You can do it manually or via using a plugin. Product Feed Manager for WooCommerce allows you to do it with just a click.

Plus, you need to ensure there aren’t any mismatches on the main required product data. For example, the prices must match.

8. Customer Reviews and Ratings Can Create A Huge Difference

Positive reviews build trust, making potential buyers more confident in purchasing from you.

You can encourage satisfied customers to leave reviews by sending follow-up emails or offering small incentives like discounts. Highlight top reviews and ratings on your product pages to draw attention and establish credibility.

Your authentic testimonials can be showcased not only on Google Shopping but also in your marketing materials and social media, adding a personal touch.

A Quick Look At Product Feed Manager For WooCommerce

Product Feed Manager for WooCommerce is a unique plugin that allows you to generate WooCommerce product feed for Google Shopping, and other Google Merchant product promotion surfaces in just a few clicks.

PFM for selling electronics online via Google Shopping

The plugin ensures the product feed is generated in the right format with all the required attributes.

Plus, you will have full control over what product data you want to include and what products you do not want to list on Google Shopping.

Additionally, you will get pre-built feed templates for Google Shipping, Google Product Promotions, Local Inventory Feed, and Google Dynamic Remarketing Ads so that you can prepare them all in one place without wasting hours.

If you are selling electronics online using a WooCommerce store, then check out Product Feed Manager. It will save you hours in creating the product data file.

These are some of the ways your product listings will be optimized to sell electronics online and get more views with click-throughs on Google product suggestions.

Next, it’s time to ensure, that whoever clicks the Shopping Ads and lands on your website, you are able to convert. as many of them as possible.

How To Implement Conversion Tactics In Your WooCommerce Store For More Sales

So, you optimized your Google feed and started getting a lot of traffic on your website.

Now, losing these prospects would mean wasting your acquisition cost.

To avoid this, you may try a few techniques to ensure a high conversion rate for selling electronics online.

  1. Offer a Discount for First-Time Buyers: When customers visit your store for the first time, they’ll receive a special 10-20% discount to encourage an immediate purchase. This welcome discount helps them get the best deal right away.
  2. Use Target-Based Discounts to Trigger Higher AOV: As they shop for electronics online, take advantage of attractive discounts for orders over $500. This encourages them to add more items to their cart.
  3. Highlight the CTA Button & Special Offers on the Product Page: While browsing products, they’ll notice the “Buy Now” button highlighted with eye-catching colors. Special offers like “20% off today” are prominently displayed to ensure they don’t miss out on great deals.
  4. Use a Distraction-Free Checkout Page: When Your customers are ready to check out, the page is kept simple and straightforward. Options like multi-step, express, or one-page checkout are available to help them stay focused on completing their purchase without distractions.
  5. Initiate Abandoned Cart Recovery Campaigns: If they add items to their cart but leave without completing the purchase, friendly reminder emails will be sent. These reminders encourage them to return and finish their shopping.
  6. Make Post-Purchase Offers for Higher Sales: After completing a purchase, relevant upsell offers are presented. For example, if they buy a $150 monitor, a $300 monitor at 10% off might be offered to enhance their setup.
  7. Special Coupon for Second-Time Purchase: Once they complete their first order, a special coupon for your next purchase will be sent via email. This encourages them to return and shop for electronics online again.

Learn more about the electronics marketing strategies in detail from this blog.

Conclusion

In conclusion, to effectively sell electronics online, especially on Google Shopping, it’s important to focus on both your website and your product data feed.

With the product feed manager plugin, you can simplify this process.

When done right, you’ll see a significant rise in sales and conversions.

Complementing your Google Shopping efforts with paid ads on Facebook can further enhance profitability.

Building a popular online electronics store takes time. Even with these strategies, you’ll need to test and refine your product data continuously to identify what works best.

It can take anywhere from three months to over a year to achieve steady results, so patience and persistence are key.

Once you start seeing growth, you can then concentrate on well-planned promotional campaigns to boost sales further.

FAQs

What’s the best way to boost visibility when selling electronics online?

Listing your products on platforms like Google Shopping helps increase exposure and attracts more buyers.

Are electronic sales growing in 2025?

Yes, electronic sales continue to climb as more consumers prefer shopping online for convenience and variety.

What should I focus on to learn how to sell electronics online successfully?

Focus on clear product descriptions, competitive pricing, and optimized listings for search engines.

What are common mistakes to avoid when learning how to sell electronics?

Avoid vague listings and slow shipping—clear information and fast fulfillment build trust and boost sales.

Why is it crucial to sell electronics online now?

With consumer behavior shifting, selling online offers a larger audience and the flexibility to adapt to trends.

Categories
Guide Product Feed Manager For WooCommerce WooCommerce

How To Start Selling T-Shirts Online – 7 Actionable Tips [2025]

The apparel industry is one of the promising sectors right now.

The estimated worldwide apparel market revenue for 2023 was over 1.73 trillion US dollars, expected to rise to almost 2 trillion by 2026.

So, if you’re selling t-shirts online, you will be glad to know that according to Business Insider, the t-shirt industry will be valued at more than $10 billion by 2025.

But, as much as it is a booming business niche, it is also quite competitive.

To stay ahead of the competition, you should know how to start your t-shirt selling journey and you need to apply some unique techniques.

I have shared a step-by-step guide & gathered 7 unique tactics that can help you boost your t-shirt sales in your WooCommerce store.

After reading this article, you will be able to plan your sales strategy more effectively and work towards reaching your target sales.

So, let’s get started.

How to Sell T-Shirts Online – Step by Step

Starting an online t-shirt business isn’t complicated, but you need a clear plan to make it work. Follow these steps to set up your store and start selling successfully.

i. Find a Niche

First, decide on the type of T-shirts you want to sell. Instead of trying to sell to everyone, focus on a specific audience. For example, you could sell:

  • Gym and fitness t-shirts
  • Anime-themed designs
  • Funny quotes for office workers
  • Custom pet-themed shirts

A focused niche helps you attract the right customers and stand out from competitors.

ii. Create Designs

Once you have a niche, the next step is creating eye-catching designs.

tshirt design

If you’re not a designer, you have two options:

  • Hire an in-house artist – If you plan to release new designs regularly, having a dedicated designer makes sense.
  • Work with freelancers – You can hire designers on Fiverr or Upwork to create custom designs for you.
  • Accept custom designs from customers – Many brands let customers submit their own designs for printing. This is a budget-friendly way to start when hiring isn’t an option. Once your business grows, you can keep both options open to maximize t-shirt sales.

Keep an eye on trending topics, memes, or viral themes to create designs people will want to buy.

iii. Set Up an Online Store

Now that you have your designs, it’s time to set up your online store. You can:

  • Build your own website using WooCommerce or Shopify
  • Sell on marketplaces like Etsy, Amazon, or eBay using tools like product feed manager.

Having your own store gives you full control over branding and pricing, while marketplaces help you reach a built-in audience faster.

iv. Source Materials

Next, you need to find a reliable printing company to produce your t-shirts. Some options include:

  • Print-on-demand services like Printful or Printify, where the company prints and ships orders for you.
  • Bulk ordering from a local supplier, if you want to manage stock yourself.

Choosing high-quality materials ensures customers are happy with their purchase and more likely to buy again.

v. Set Up Payment

Before you can start selling, you need a way to accept payments. If you’re using WooCommerce, you can set up:

  • PayPal
  • Stripe
  • Credit/debit card payments

Make sure your payment system is easy to use and secure so customers can buy without hassle.

vi. Market Your Store

Once your store is live, the next step is getting people to visit and buy from it. Here are some effective ways to promote your business:

  • Work with influencers – Find small influencers in your niche and send them free t-shirts to promote your brand.
  • Use Facebook Communities – Join relevant groups and share your designs naturally. Avoid spammy promotions.
  • Offer pre-sale discounts – Run special offers before launch to attract early buyers.
  • Run retargeting ads – Use Facebook ads to target people who visited your store but didn’t buy.

Marketing is an ongoing process. The more effort you put into promoting your store, the more sales you’ll make.

vii. Ship Orders

Finally, once you start getting orders, make sure they are shipped quickly. If you’re using print-on-demand, they will handle shipping for you. If you manage inventory, work with reliable shipping services to deliver orders on time.

Now I’ll share some valuable tips that you can implement for your t-shirt business.

Unique Tips To Selling T-Shirts Online Like Never Before

Each of the tips you read here is a proven tactic that can help you grow your online t-shirt business significantly.

Let’s unfold the tips one by one :

Tip #1 – Actively Embrace Famous Trends to Boost T-Shirt Sales

You can browse through social media such as Facebook or Twitter to find a trend you want to follow.

But a more sensible approach is to use Google Trends.

finding trends for selling t-shirts online

Google Trends will help you find out the latest trends either locally or internationally.

You can find out the latest trends in your area and then re-stock t-shirts in that theme.

For example, when the famous movie ‘Avengers: End Game’ was released, it created quite the hype all over the world.

Image of avenger

People were busy getting tickets for the movie in the theaters, and it was the hottest topic on all social media.

At that time, many shops started selling t-shirts online with ‘The Avengers’ characters which sold crazily.

In the same way, you can look to embrace any trends.

It could be a famous movie, a famous incident, a trendy occasion, etc.

Using an online t-shirt maker, you can easily create custom designs that align with the latest trends, helping you attract potential customers while keeping your costs within budget.

Tip #2 – Create Irresistible Bundle Offers for Selling T-shirts Online

People love purchasing bundles.


The challenge with this approach is creating a bundle with the right combinations.

Most online stores fail to sell bundles because they fail to combine the right products together.

You cannot just bundle up two random t-shirts and expect them to sell. You need to have a plan behind it.

Let us look at a few ways you can devise great bundles for your t-shirts.

i. Out-of-the-box Themed Bundle

You can combine a T-shirt with a pair of shorts and probably a wristband of the same color to create a complete bundle. It’s even better if they are all of the same themes.

For example, you can offer a Batman-themed t-shirt, shorts, and wristband together at an attractive price.

People who love Batman will find this bundle appealing and may take the offer.

Now, this seems great if your online store sells more than just t-shirts. But what if you sell only T-shirts?

No worries. Chances are, this will bring in even better results.

Sometimes it’s best to surprise your audience. You can make such bundle offers in your store from time to time and amaze your audience with something different.

And if you have the right bundle and an attractive theme, then this may even trigger more sales than usual.

P.S. The bundle combination should not be limited to shorts or wristbands. You can even consider jeans, chinos, or other clothes if they fit well.

ii. Special Occasion Or Seasonal Bundle

Certain occasions or seasons call for specific clothes that people look to purchase.

For example, during the summer, women may look to purchase more cotton products, t-shirts with short sleeves, etc. You can create a bundle of several light-colored t-shirts specifically for women during the summer.

Again, if you consider winter, you can look to offer multiple sweatshirts in a bundle at a discount. P.S. During winter, most people will consider purchasing up to 3 of the same type of sweatshirts. So a bundle of 3 with different color variants might be a great idea.

Similarly, during Halloween, you can bundle up multiple t-shirts with the Halloween theme, such as t-shirts designed with Jack-O-Lantern.

The idea here is to honor the occasion or the season by offering a reasonable bundle.

iii. Couples Bundle

You probably already know this one, but couples usually love to wear similar t-shirts. So selling couple-themed t-shirt bundles will help to get more sales.

These are just some of the bundle tactics you can use to drive more t-shirt sales.

Remember, you need to be able to define the purpose that a bundle will serve its buyer. Only then will your bundle make more sense for them to purchase.

You can use a dynamic discount plugin to create irresistible bundle offers more easily.

Tip #3 – Run Category-Based Discounts to Increase Selling T-Shirts Online

You can offer discounts on ‘couple t-shirts’ prior to Valentine’s Day. Most make the mistake of running a site-wide discount at that time and terribly fail.

You can also consider offering discounts on cotton T-shirts during the Summer or maybe offer discounts on sports-themed T-shirts during any international sports events.

Now, this tactic will only work if you have different categories of t-shirts in your WooCommerce store, such as Couples T-shirts, Biker’s t-shirts, Cotton t-shirts, Sports t-shirts, etc.

If you have such categories, it will be easier for you to plan discounts during different periods throughout the year.

Tip #4 – Sell T-shirts on Large Marketplaces to Maximize Your Reach

Sell on Alibaba - Sell T-shirts on Large Marketplaces to Maximize Your Reach

Your WooCommerce site won’t rank in one day.

It will take time to start getting organic traffic. Until then, you have 3 ways to bring in traffic:

  1. Run Paid Ads on SERPs & social media
  2. Get referrals from friends & family via social media
  3. Promoting on Online marketplaces

The third point is what many are not aware of.

Sure, you can successfully run paid Ad campaigns and get good traffic. But more often than not, it ends up costing a fortune.

But did you know you could actually get more value for money by promoting on large online marketplaces?

An online marketplace is a popular website where several online businesses list their products. Usually, these marketplaces are popular and have regular buyers, so listing products there often results in more sales than other methods.

Promoting t-shirts on large marketplaces is a must to expand your reach.

Normally, you can look into promoting on the most popular marketplaces worldwide, including Google Shopping, Facebook Marketplace, Amazon, eBay, etc. Promoting in these marketplaces is great but is very competitive.

However, you can rather look to promote marketplaces that are more well-known locally. For example, in the USA, people prefer buying from Bonanza, Fruugo, or Etsy, and in most European countries, there is Kelkoo, PriceSpy, and many more.

So the best possible option here is to list your WooCommerce products in Google Shopping & Facebook Marketplace and then promote them on a couple of local marketplaces.

The advantage you get here is that most online marketplaces do not charge anything upfront. You only have to pay a small percentage on every sale you make. And since they have a huge audience, this amount usually pays for itself as you will get several buyers purchasing your products thanks to their loyal buyers.

Btw if you think it’s a lot of work to list products in those marketplaces, then don’t worry; you won’t have to do it all manually.

Since you own a WooCommerce store, you can simply add your products there and then automatically generate product feed in the right format of any online marketplace using a reliable plugin, Product Feed Manager for WooCommerce.

PFM -USA- Marchant

You can generate a custom feed for any merchant you choose.

The custom feed option of PFM will allow you to create a personalized feed for any marketplace you want.

With it, you can –

  • Select your preferred feed attributes
  • Choose a custom feed type
  • Include/Exclude XML header
  • Add Wrapper Element
  • Add Item Wrapper

See below how amazing offers this plugin is offering :

PFM- premium features

Before investing, check out the plugin with the live preview option.

PFM Repo

So there is no reason for you to be reluctant to use this strategy. Start expanding your reach ASAP.

Tip #5 – Promote Free Shipping on Selected T-shirts to Enhance Online Sales

Free shipping is often a great strategy to trigger more sales.

You can run ‘Free Shipping’ campaigns for a selected number of t-shirts so that people are more encouraged to order them.

Waiving off the shipping fee can be a great offer on premium quality t-shirts that usually cost more.

Another ingenious way to leverage free shipping could be running a ‘Weekly Free Shipping Day.’ On that day, any orders placed will be without any shipping fees.

However, in this case, it’s best to keep certain conditions to claim this offer. For example, all this offer on a certain quantity of t-shirts, or a certain amount spent. This will persuade buyers to order more and save you from losing money on low-cost t-shirts.

You may think of some other great ways to use Free Shipping to generate more sales. So, Let us know in the comments if you come up with any great ideas.

Tip #6 – Early Purchase Offer on New Collection

Often you may be excited to bring in a new collection of amazing t-shirts that you know people will love. But how do you get instant hype?

You can try using the Early Purchase Offer strategy. It is when you promote a special offer on your new collection for a limited time.

For example, you can put up a banner on the home page that a new collection is here and it’s on a discount for the first 3 days.

This will help to gain some instant attention.

You can share the same banner on social media, email, or via paid Ads which will drive more instant sales.

Now, you can get creative with the type of offer you want to make. You may

  • offer a discount on a certain quantity,
  • make a time based-offer,
  • offer a bundle with a discount,
  • promote free shipping,

and many more.

FYI, the discount doesn’t have to be a large amount for this tactic to work. You simply need to make sure to spread the word about this offer.

Since it’s a new collection, people will already be excited about these t-shirts, and a little discount is more than enough to trigger sales.

Tip #7 – Add a ‘Selling Fast’ Tag to Boost T-shirt Sales

Sell on Alibaba - Add a ‘Selling Fast’ Tag to Boost How to Sell T-shirts onlin

Now, this tactic sounds quite obvious, yet, many do not bother using it.

‘Fear Of Missing Out,’ or FOMO, has been one of the most powerful marketing tactics for ages.

A ‘Selling Fast’ tag not only grabs the attention of potential buyers it also gives them a sense of FOMO.

Normally, you should use this tactic on t-shirts that are genuinely popular and are frequently bought from your shop. Since it’s the most popular product in your store, you know people love it. And this simple tag can get it to sell even faster.

Now, this is just a tag to highlight a product and has no offers involved with it. So why does it work?

As simple as it sounds, this tactic is rather a psychological trigger that makes the buyers think of two things:

  1. This product seems very popular; hence, it must be very attractive or trendy.
  2. It may get sold out soon, so let’s check it out and see if I want it.

When these two thoughts are combined, most people cannot resist but visit the product page.

And many end up purchasing it, that too, with no special offer at all.

Final Thoughts

The 7 tactics above are just a few of the hundreds of other marketing tactics you may use. But these are unique and have proven to generate t-shirt sales for many WooCommerce stores over the years.

It’s fine if you cannot embrace all of them right away. But start using as many of them as possible as soon as possible because these ideas will surely help you grow your business and make selling t-shirts online easier.

If you have any great ideas that helped you sell more t-shirts in your WooCommerce store, then feel free to share them with us in the comments below.

If you are willing to promote on online marketplaces, then checkout our plugin Product Feed Manager for WooCommerce to generate product feed in minutes.

** FAQs **

How can I create unique t-shirt designs?

Focus on niche markets and trending topics. You can use design tools like Canva or hire freelance designers to create eye-catching, unique designs that resonate with your target audience.

What is the best place to sell t-shirts online?

The best place to sell t-shirts online isn’t one but many that include platforms like Shopify, Etsy, or a custom-built website to reach a larger audience.

What’s the most effective way to sell t-shirts online?

Focus on building a strong brand, use retargeting ads, and market your t-shirts through influencers to boost sales and learn how to sell t-shirts effectively.

What pricing strategy should I use for my t-shirts?

Research your competitors and consider your production costs. You can offer competitive prices and consider discounts or bundle deals to attract more customers.

How can I handle customer feedback and reviews?

Encourage satisfied customers to leave positive reviews and address negative feedback promptly. Use customer feedback to improve your products and services.

Categories
Guide Product Feed Manager For WooCommerce

How to Create eBay Seller Center Product Feed – Actionable Guide [2024]

eBay is currently one of the largest online marketplaces in the world with 1.7 billion live listings, being the third most popular in the USA.

Right now there are over 182 million active eBay users worldwide. Among all the people in the USA who make purchases online through mobile apps, over 33% of them made at least one purchase through the eBay app last year. That’s huge!!

However, uploading products to the eBay Seller Center manually can be very complicated. They have a fixed template which is difficult to fill out on your own, especially if you have a lot of products.

To solve this problem today, you will get a complete step-by-step guide on how to generate eBay product feed in the most optimized way and skyrocket your conversion rate.

So let’s get started

What is eBay Seller Center Product Feed?

eBay Seller Center Product Feed is a tool that allows you to upload and manage large quantities of product listings on eBay efficiently. Using this feed, you can provide detailed information about your products, including descriptions, prices, images, and inventory levels, in a structured format.

This system is especially useful for sellers with extensive catalogs, as it simplifies the process of keeping your listings up-to-date and consistent in the USA marketplaces.

The product feed helps streamline inventory management by allowing bulk updates and automating many aspects of listing products, such as categorization and compliance with eBay’s listing standards.

By utilizing eBay Seller Center Product Feed, you can enhance your productivity. It also ensures your listings are accurate and ultimately improves your sales performance on eBay.

Guide to Generate eBay Seller Center Product Feed

eBay Seller Center app

Once you upload your products on eBay, they will be available on the main eBay site depending on the location it is viewed from, and on its mobile app.

The best part of eBay is that you can put your products up on auction. This means you will name a minimum price, and others will bid on the product.

Whoever will bid the highest within the auction period, will be the buyer. So, there is a possibility that you will be able to get more than what you expected.

Make sure you have an eBay account. Once you create an account, you will have access to upload products on eBay.

The next thing to do is to prepare a product feed file using the right format.

How To Set Up eBay Seller Center Product Feed In The Most Optimized Way

In order to submit your products on eBay feed, you need to use one of their templates.

Ideally, if all of your products fall under a single category, then it’s best to use an item-specific template. However, for an online store with products in multiple categories, you should use the basic template.

**You can use the plugin Product Feed Manager For WooCommerce to generate the feed in the correct format. I will show you how later in this guide.

Now let us look at the mandatory attributes that you must submit for your products, and how you can optimize eBay data feed for each attribute you submit.

You will get examples and tips on using valid values in an optimized way for all the required attributes.

Necessary Product Attributes

The following are the mandatory and recommended product attributes that you need to submit when generating a feed using the basic template.

● Action
● Category
● Title
● Description
● ConditionID
● Picture URL

● Quantity
● Format
● StartPrice
● BuyItNowPrice
● Duration
● Location

● Shipping Attributes
● DispatchTimeMax
● CustomLabel
● Returns & Refund Attributes
● Payment Option Attributes
● Variation Details

For certain categories, you may need to submit a few item specifics such as Brand, Identifiers (UPC, MPN, or equivalent), Color, Style, etc. For such cases, you will need the

● Item Specific Attributes

To improve packaging and handling data, you may also need to submit certain weight or package dimension attributes which include

● WeightMajor
● WeightMinor
● WeightUnit

● PackageDepth
● PackageLength
● PackageWidth
● PackageType

Initially, when you decide to sell on eBay Seller Center, you need to look into a lot of details to understand how it works for your business. Each attribute will have different requirements based on the product you are selling.

But before going there, you should know that you don’t have to do it all manually. Since you own a WooCommerce store, you can easily generate an eBay Seller Center product feed for your products in minutes. Simply use the plugin Product Feed Manager For WooCommerce.

The plugin has a built-in eBay Seller Center Basic Template. All you need to do is assign them the correct values and fields. Here’s a video to show you how quickly you can generate an eBay feed without any hassle.

Generate Accurate eBay Seller Center Product Feed Using Product Feed Manager For WooCommerce

Now that you know how easy it is to generate the product feed, let’s learn about the accepted values for eBay when creating the feed.

The good news is, through this guide, you will learn about the acceptable values for each attribute and you will get tips to understand how to use them for your business.

So let’s get into details.

**Do note that eBay requires you to submit a lot of extra product data, some of which you have no way to input through default WooCommerce.

This is why it is more important for you to read the details for every attribute and understand which data you need to add to your store products via custom fields.

Any feed generation tool you use will only be able to pull data from your WooCommerce database, and if the data is not there, then your feed will not be accurate.

So go through the details and if you are serious about selling on eBay Seller Center, then you will find a way to add custom fields and include the extra required data to your products.

Details & Tips on Using Accepted Values for Mandatory eBay Attributes

Action

Attribute NameAction(SiteID=US| Country=US| Currency=USD| Version=941)
Example ValueAdd
Valid values● Add
● VerifyAdd
● Revise
● Relist
● AddToItemDescription
● End
● Status

The action attribute will signify your purpose for generating this feed.

Naturally, you will see that the Action field name will include some extra data to indicate the Country, Currency, and template version you are using.

For example:
Action(SiteID=US| Country=US| Currency=USD| Version=941)

  • The SiteID tells eBay, which eBay platform you are willing to list the products on.
  • The Country defines the location of your business.
  • The Currency states what currency will be an acceptable payment mode.
  • The Version signifies the template format.

The Version for the Basic template is 941.

The Version for an item specific template is 945

For the Action attribute, the following are the accepted values:

  • Add
    • The Add action is used to upload new products to eBay listings and eBay will generate an ItemID for each product listed.
  • VerifyAdd
    • If you want to check if your submitted feeds file is in the right format and contains the correct data before they are added to eBay listings, then you can use the VerifyAdd action.
    • Using this value will mean that eBay will generate a result file to state if there are any issues with the feed, or if it is acceptable. But the products will not be listed and no ItemID will be generated.
    • This is a convenient way to make sure you are uploading products with the correct data.
    • I advise you to use this and create a feed with a couple of products, let’s say a simple product and a variable product with two variants. Then upload on eBay to see if you have the right format or if any data is missing. Based on that, you can alter your feed and later submit it with the Add action value.
  • Revise
    • The Revise action means you want to modify the value of specific attributes for certain products.
    • When using this value, you need to submit the ItemIDs of the products for which you want to make changes in the data and the fields in which you want changes along with their dependent fields.
  • Relist
    • If an item was not sold when you initially listed it for auction, you can relist it using the Relist action.
    • All you need to submit are the ItemIDs of the products you want to relist.
  • AddToItemDescription
    • The AddToItemDescription field is used to make changes to only the description of the listed products
    • You are required to submit the ItemID and the description of any product for which you want to update the description.
  • End
    • Use the End action if you want to remove a product from the listing.
    • In this case, you need to submit the ItemID and the EndCode.
    • For EndCode, you can assign one of the values
      – LostOrBroken,
      – NotAvailable,
      – Incorrect, or
      – OtherListingError.
  • Status
    • The Status action is used to update the status of certain attributes for sold products such as Payment status and Shipping status or to leave feedback.
    • This attribute is rarely used. It’s best to handle these with your eBay Seller Center account. However, you can choose to use it if you need to update the status for too many products at once.

To upload new products, first, upload a feed with ‘VerifyAdd’ as the action. If everything goes well, then generate and upload the feed with the Action ‘Add‘.

◈ Category

Attribute NameCategory
Example Value1245
Valid valuesYou need to collect the appropriate category ID from the eBay category list.

Here are the category IDs based on the eBay category tree:
eBay Category ID List 1
eBay Category ID List 2

If you need the Category IDs of parent categories, you can collect them here.

eBay has its own set of category lists. So you need to submit a category ID for each product to signify which eBay category it will be listed under.

The best way to handle this is to map your store’s categories with eBay’s category IDs using a tool.

For WordPress, you can use the plugin Product Feed Manager for WooCommerce which includes the category mapping feature and the eBay template to generate product feed.

You can download the category lists given in the table above and configure category mapping with their help when generating product feeds.

◈ Title

Attribute NameTitle
Example ValueDenim Jacket With Zip Closure
Valid valuesUse a title with a maximum length of 80 characters.

This is the name of the product.

You can use a product title that includes a special feature that defines the product, for example, its model number.

**Avoid using special characters in the title.

◈ Description

Attribute NameDescription
Example ValueThis jacket is perfect for attending parties.
Valid values– Use texts with a maximum length of 32,765 characters.
– You can use the HTML tags, <br> to break lines, and <p> tags to separate lines into paragraphs.

Here provide a full description of the product to highlight all the features and attract buyers.

You can use HTML tags to present the data in an organized manner.

**But do not include any information about its condition here. If it’s not a brand-new product and you want to specify a description regarding its condition, you can use the ConditionDescription field.

◈ Condition ID

Attribute NameConditionID
Example Value2750
Valid valuesUse Condition IDs based on the category of the product. You can collect it from the list below:
Condition IDs based on Category

The condition ID is used to specify if the condition of the product is New or not.

Basically, there are set IDs for different conditions of a product. However, these IDs vary depending on the product category.

You can collect the condition IDs for your required products from the table above.

You will notice that some categories do not have Condition IDs assigned to them. This is because if your products fall under those categories, you are not allowed to sell them unless they are brand new.

**The Condition ID attribute is optional unless you have products that are not brand new. So, if you are uploading products that are brand new, you can skip using this attribute.

◈ Condition Description

Attribute NameConditionDescription
Example ValueThe jacket has a slight defect on the zip on the left pocket as it was used for a month. Other than that, it is in great condition.
Valid valuesYou can use text to describe the condition of the product if it’s not brand new.

The Condition Description field is used to give a further description of the product’s condition if it is not brand new.

Basically, if you submit a Condition ID, then you can wish to include a Condition Description as well, though this is optional.

**You can only submit a Condition Description if you include a Condition ID.

◈ Picture URL

Attribute NamePicURL
Example Valuehttps://www.example-image1.jpg| https://www.example-image2.jpg
Valid values– Submit the full image link along with “http / https”.
– You can submit multiple image links with a “|” separator between each link (with no spaces).

You can submit images of the product using this attribute.

Try to use images that highlight the main features of the product. Avoid using fake product images, or images that are edited into something not identical to the product. You can also try out AI for editing images in a manner that ensures they remain true to the product’s actual appearance.

Quantity

Attribute NameQuantity
Example Value25
Valid values– Use numerical values with a maximum length of 45 characters

The quantity refers to the number of available products in stock.

**If you sell in ‘Lots’ then you have to use the ‘LotSize’ attribute to indicate the number of products in a lot, and the quantity will signify the number of lots.

Format

Attribute NameFormat
Example ValueAuction
Valid valuesValid eBay formats include
– Auction
– FixedPrice
– ClassifiedAd

Here you need to specify the format in which you want to list your products on eBay.

Ideally, there are 3 types of listing formats.

Auction, FixedPrice and ClassifiedAd

  • Auction
    • When you list an item for sale in an eBay auction, you need to choose a starting price, and interested buyers will place bids. When the auction ends, the product will be sold to the highest bidder. In this case, you need to submit a ‘Starting Price’.

      You can also set a ‘Buy it Now price’ which is seemingly a high price that any buyer will be able to pay and purchase the product immediately, ignoring the auction.
  • FixedPrice
    • When you list your products under FixedPrice, it means that there will be no bidding; the price you submit will be the only cost to pay to buy a product. In this case, the StartPrice you submit will be considered the default price of the product.

      **To list products as FixedPrice, the product must be worth more than $0.99.
  • ClassifiedAd
    • When you list an item through an eBay Classified Ad, you will set a price for a product, and an interested buyer will contact you. Then you both will come into private contact and complete the transaction in person, outside the eBay platform.

      **The Classified Ad format is only available in a handful of selected categories.

◈ Start Price

Attribute NameStartPrice
Example Value5.99
Valid values– Use a numeric value with a maximum length of 16 characters including the decimal.

This is the price at which bidding will start when you list your products on Auction.

If you list your product in a fixed price format, this will be the default price of the product.

**If you remember, the currency is specified in the field name of the Action field. So you do not need to provide a currency here.

◈ Buy It Now Price

Attribute NameBuyItNowPrice
Example Value400
Valid values– Use a numeric value with a maximum length of 16 characters including the decimal.

When you list a product under auction, you can assign a Buy It Now Price so that a person can directly pay this amount and purchase the product, without waiting for the bidding.

Naturally, this price should be quite higher than the Start Price.

◈ Duration

Attribute NameDuration
Example Value5
Valid valuesThe following are the accepted values for Duration:
-1
-3
-5
-7
-10
-14
-30
-60
-120
-GTC

When you list products on the eBay seller center, you are required to specify a time limit until when the products will be available for purchase on eBay.

Here’s how you can decide what value to use for your products:

  • 1
    – To List products for a single day only.
    *This is only available to sellers with a feedback score above 10.
  • 3
    – To List products for three days since uploading.
  • 5
    – To List products for five days since uploading.
  • 7
    – To List products for seven days since uploading.
  • 10
    – To List products for ten days since uploading.
  • 14
    – To List products for fourteen days since uploading.
  • 30
    – To List products for thirty days since uploading.
    *Normally, this option is available for Motor Local listings only. But if you get high feedback scores on a regular basis, then you might be able to use it for other listings as well.
  • 60
    – To List products for sixty days since uploading.
    *This option is only applicable for Classified Ads in a few specific categories.
  • 120
    – To List products for around four months since uploading.
    *This option is only applicable for Classified Ads in a few specific categories.
  • GTC
    – GTC stands for Good ‘Til Cancelled. It means, every 30 days, if a product is not sold out, it will be relisted automatically.
    *If you submit a product in the FixedPrice format, then you have to submit the duration as GTC.

So use the duration value that applies to your products.

◈ Location

Attribute NameLocation
Example ValueLos Angeles, CA
Valid values– You can use alphanumeric text with a maximum length of 45 characters
– Do not include the zip code / postal code.

The location field specifies the location where the product is stored currently.

Here, simply provide the country name where you will be shipping out the products from.

**Do not include a zip code / postal code here. You can rather submit the ‘PostalCode’ and not submit the Location attribute. In that case, eBay will determine your location from the postal code.

◈ Shipping Attributes

There are several attributes which you need to use to indicate the available shipping options and shipping costs to the buyers.

You can use the following

  • Shipping Type
  • Shipping Service Option
  • Shipping Service Cost
  • Shipping Service Priority

Or, rather than submitting these 4 options, if you have opted in the eBay business policies, you can then just submit the attribute

  • ShippingPolicyName

In this case, eBay will collect the data related to shipping from your business policies created in your eBay account.

So you can choose to use either of the ways mentioned above to submit shipping information. So let us look at how you can use each of them properly.

Shipping Type
Attribute NameShippingType
Example ValueCalculated
Valid valuesAccepted Values are:
• Flat
• FreightFlat
• Calculated
• FlatDomesticCalculatedInternational
• CalculatedDomesticFlatInternational

The shipping type attributes decide how the shipping charges will be handled.

There are five shipping types you can use:

  • Flat
    • If you use a Flat shipping type, then it means that you will charge a flat rate for domestic shipping. (This may also be applied to international shipping if international shipping services are specified.)

      When using the Flat shipping type, you must also submit values for ShippingService Option and ShippingService Cost.
  • FreightFlat
    • You can offer a freight service for shipping heavy and bulky items. Here, you will negotiate the actual shipping cost with your preferred local freight carrier. separately from the checkout process, so that the sale can be completed quickly. Hence, the cost may vary depending on the negotiation.

      In this case, you must also submit the ‘ShippingService Option’ attribute, and assign the value ‘Freight.
      You do not need to submit any shipping service costs.

      **The FreightFlat option can only be offered by eBay US sellers.
  • Calculated
    • For domestic orders, if you wish to implement a calculated shipping cost based on the distance, weight, or dimension of the package, then you can use the Calculated shipping type.

      In this case, you need to submit the ‘ShippingService Option’ attribute, and one of the following attribute(s):
      • OriginatingPostalCode
        – if the cost is measured based on the distance.
      • Weight Major and WeightMinor
        – if the cost is calculated based on the weight of the product.
      • PackageDepth, PackageLength, and PackageWidth
        – if the calculation is based on the package dimensions.
  • FlatDomesticCalculated International
    • Use this option to apply a combination of Flat and Calculated shipping options among domestic and internal shipping.

      In this case, you need to submit data for ShippingService Option, ShippingService Cost, IntlShippingService Option, and IntlShippingService Locations.

      Plus you need to submit the ‘PackageType’ attribute, and one of the following attributes:
      • Weight Major and WeightMinor
        – if the cost is calculated based on the weight of the product.
      • PackageDepth, PackageLength, and PackageWidth
        -if the calculation is based on the package dimensions.
  • CalculatedDomesticFlat International
    • Use this option to use Flat shipping for domestic shipping and Calculated shipping for international shipping only.

      In this case, you need to submit data for ShippingService Option, IntlShippingService Option, and IntlShippingService Locations.

      Plus you need to submit the ‘PackageType’ attribute, and one of the following attributes:
      • Weight Major and WeightMinor
        – if the cost is calculated based on the weight of the product.
      • PackageDepth, PackageLength, and PackageWidth
        -if the calculation is based on the package dimensions.
Shipping Service Option
Attribute NameShippingService-1:Option
Example ValueFedEx2Day
Valid valuesYou can submit up to 4 shipping service options attributes –
– ShippingService-1:Option
– ShippingService-2:Option
– ShippingService-3:Option
– ShippingService-4:Option

You can collect a valid shipping service option here:
USA Valid Shipping Services

Here, you need to specify the shipping service that you will be used to deliver the product to the buyer.

Make sure you use a valid shipping service and input the name without spaces. You will find the list in the table above.

**You can submit up to 4 shipping options along with their dependent fields, Shipping Cost, Priority, and Shipping Surcharge.

Shipping Service Cost
Attribute NameShippingService-1:Cost
Example Value2.99
Valid valuesYou can submit up to 4 shipping service options attributes –
– ShippingService-1:Cost
– ShippingService-2:Cost
– ShippingService-3:Cost
– ShippingService-4:Cost

You need to use this when you have submitted a Shipping Service Option and selected the Shipping Type as Flat.

It’s basically the cost of shipping through the shipping service.

**You need to submit a shipping service cost for every shipping service option you include.

Shipping Service Priority
Attribute NameShippingService-1:Priority
Example Value1
Valid valuesIts valid values are 1, 2, 3, and 4.

You need to assign a Shipping service priority, if you include more than one Shipping Service Option, to indicate the priority of shipping service.

**Do not use the same value for multiple shipping options or the feed will not be accepted.

Shipping Profile Name
Attribute NameShippingProfileName
Example ValueShippingPolicy1
Valid values– Must be the same as one of the policies created on your eBay account.

If you opt-in to Business Policies for your eBay account, then you can set up Policies to specify your preferred shipping options.

You can use it instead of using the Shipping options. Simply submit the policy name using the ShippingProfileName.

**Business policy names are case-sensitive. So make sure to use the correct policy name.

If you submit both the shipping options and a shipping profile name, then eBay will by default give priority to the Shipping Profile Name.

◈ Dispatch Time Max

Attribute NameDispatchTimeMax
Example Value10
Valid valuesThe valid values are:
• -1
• 0
• 1
• 2
• 3
• 4
• 5
• 10
• 15
• 20
• 30

When you assign the Shipping type as Flat or Calculated, you have to submit a value on the DispatchTimeMax field to indicate the maximum number of business days you will need to prepare an item for shipment after the payment has been made.

  • The positive number in the valid values mentioned in the table refers to the number of days for dispatch time.
  • 0 indicates same-day handling
  • -1 indicates that the item has to be picked up locally, and will not be shipped.

◈ Custom Label

Attribute NameCustomLabel
Example Value256-HK122
Valid values– Use an alphanumeric value with a maximum length of 50 characters.

You can use CustomLabel to submit a unique identifier for your product. Ideally, I advise you to use the Product SKU as the CustomLabel.

However, this is an optional attribute.

◈ Returns & Refund Attributes

For your products, you also need to submit your return and refund policies that apply to the buyers.

You can submit the following attributes

  • Returns Accepted Option
  • Refund Option
  • Returns Within Option
  • Return Shipping Cost Paid By Option
  • Additional Details For Returns/Refunds

Or, rather than submitting these 3 options, if you have opted in the eBay business policies, you can then just submit the attribute

  • ReturnProfileName

In this case, eBay will collect the data related to returns and refunds from your business policies created in your eBay account.

So you can choose to use either of the ways mentioned above to submit your return and refund policies. Let us look at how you can use each of them properly.

Returns Accepted Option
Attribute NameReturnsAcceptedOption
Example ValueReturnsAccepted
Valid valuesThe following are the accepted values for this attribute:
– ReturnsAccepted
– ReturnsNotAccepted

Use this to indicate if you accept returns in case the buyer is not satisfied.

You can use the following values as per your requirements:

  • ReturnsAccepted
    – Means you accept returns.
  • ReturnsNotAccepted
    – Means you do not accept returns
Refund Option
Attribute NameRefundOption
Example ValueMoneyBackOrExchange
Valid valuesThe following are the accepted values for this attribute:
– MoneyBackOrExchange
– MoneyBack
– MoneyBackOrReplacement

If you have marked the ReturnsAcceptedOption as ‘ReturnsAccepted’, then you must submit a value for RefundOption.

This field indicates how a refund/return claim from a buyer will be compensated.

There are three refund options you can offer:

  • MoneyBackOrExchange
    – This means that you can return the money or offer to exchange for another product when someone returns a product.
  • MoneyBack
    – This means, if someone returns a product, you will return the money. You can use this option when you do not have more products in stock.
  • MoneyBackOrReplacement
    – This means that you will be able to offer a replacement or return the money when someone returns a product.
Returns Within Option
Attribute NameReturnsWithinOption
Example ValueDays_14
Valid valuesThe following are the accepted values for this attribute:
– Days_14
– Days_30
– Days_60

This will indicate the number of days within which a buyer will be able to return a product.

You can use one of the three accepted values given in the table above.

If you have marked the ReturnsAcceptedOption as ReturnsAccepted, then you must submit a value for this attribute.

Return Shipping Cost Paid By Option
Attribute NameShippingCostPaidByOption
Example ValueSeller
Valid valuesAccepted values are:
– Seller
– Buyer

For returns, you have to submit this attribute to indicate who will bear the shipping cost of returning a product.

If you are to bear the shipping cost of returns, use the value Seller.

If the buyer has to bear the returns shipping cost, then submit the value Buyer.

Additional Details for Returns/Refunds
Attribute NameAdditionalDetails
Example ValueReturns will not be valid if the warranty seal is broken.
Valid valuesUse text to explain your return policy with a maximum length of 5000 characters.

If you accept returns, then you can provide additional information about your return policy using this attribute.

However, this is an optional attribute.

Return Profile Name
Attribute NameReturnProfileName
Example ValueExchange101.
Valid values– Must be the same as one of the policies created on your eBay account.

If you opt into Business Policies for your eBay account, then you can set up Policies to specify your preferred return and refund options.

You can use it instead of using the other return and refund attributes. Simply submit the policy name using the ReturnProfileName.

**Business policy names are case-sensitive. So make sure to use the correct policy name.

If you submit both the return and refund options and a return profile name, then eBay will by default give priority to the Return Profile Name.

◈ Payment Option Attributes

Though optional, it is highly recommended that you indicate how you accept the payments from buyers.

To do so, you can either opt into the eBay Business Policies and set up a profile for payment options or use the attributes for payment options to indicate the payment modes you accept.

To use the payment policy from your eBay business policies, you have to submit the attribute

  • PaymentProfileName

But if you rather want to use the payment option attributes, then you can choose to use one or more of the 12 payment option attributes.

You can also add instructions regarding your accepted payments using the attribute ‘PaymentInstructions.’

Here’s how you use them.

Payment Profile Name
Attribute NamePaymentProfileName
Example ValueCashOnly1
Valid values– Must be the same as one of the policies created on your eBay account.

If you opt-in to Business Policies for your eBay account, then you can set up Policies to specify your preferred payment options.

You can use it instead of using the other payment option attributes. Simply submit the policy name using the PaymentProfileName.

**Business policy names are case-sensitive. So make sure to use the correct policy name.

If you submit both the payment options and a return profile name, then eBay will by default give priority to the Payment Profile Name.

Payment Option Attributes

In case you did not create a business policy for payment options, I recommend you submit at least one payment method.

The following are the payment method attributes you can choose to submit, in case you accept them.

  • AmEx
    – Submit this if you accept payments through American Express cards
  • Discover
    – Submit this if you accept payments through Discover Cards
  • VisaMastercard
    – You can submit this attribute if you accept payments through Visa or Master Cards.
  • Paypal accepted
    – To indicate that you accept payments through PayPal. In this case, you must also submit the PayPalEmailAddress attribute.
  • PayPalEmailAddress
    – This will be your email address where you accept payments through PayPal.
  • ImmediatePayRequired
    – This indicates that a person has to pay immediately via PayPal and later receive the product. In this case, you must also submit the PayPalAccepted attribute.
  • PaymentSeeDescription
    – You can rather explain your payment policies in the product description. Then you can use this attribute to insist the buyer read the product description to find out about the payment options.
  • Payment Status
    – Once a buyer processes a payment, you can give a status of the purchase to indicate if the payment was received or not using this attribute.
  • IntegratedMerchantCreditCard
    – If you issue credit cards for purchases in your online store, then you can use this attribute to indicate that the buyers will be able to pay using that card.
  • MOCashiers
    – For certain products, accepting money orders or cashiers’ checks seems more convenient. If this applies to your business, then you can submit this attribute.
  • PayUponPickup
    – You can allow a buyer to pay, and then pick up the product from your location. In that case, you can use this attribute.
  • PersonalCheck
    – If you accept a personal check, you can use this attribute.

The following table applies to AmEx.

Attribute NameAmEx
Example Value1
Valid valuesAccepted values are 0 or 1.

All the payment option attributes work in the same way. The field names are as-is on the list above. And the accepted values are 0 or 1.

  • 0 indicates false, i.e., you do not accept that payment option
  • 1 indicates true, i.e., you accept that payment option

So for some products, you might accept MOCashiers, but for others, you can not. In that case, you can use the MOCashiers attribute and assign the values accordingly.

◈ Variation Details

So far you learned about the attributes that either provide product data or business policies.

If you have product variations, then you need to submit the parent product with common details, and variation products with only the dynamic data.

For example, you can submit the Title for the parent product and leave it blank for the variants as the title will be the same no matter the variance.

Again, you need to submit separate image links for each variant as they tend to have unique images in your store.

For variable products, i.e. products with multiple variants, you have to submit 2 extra attributes to handle their relationships.

Relationship
Attribute NameRelationship
Example ValueVariation
Valid values– Use the value ‘Variation’ for variants
– Leave it blank for parent products
Relationship Details
Attribute NameRelationshipDetails
Example ValueSize=S;M;L;XL|Color=Black;Pink;Red;Blue
Valid values– For the Parent product, indicate the variation factor and its variant terms in the format:
VariationFactor1=VariantTerm1;VariantTerm2
– Use a “|” separator in between multiple variation factors
– For product variant, indicate which variant term it represents in the format:
VariationFactor1=VariantTerm2

Use the Relationship Details attribute to indicate what factors a product varies with, and its variant terms.

For example, let’s say you have a t-shirt with the variation factor Color and its variant terms are Red and Blue. And it also has a variation factor Size with variant terms S, M, and L.

In this case, the RelationshipDetails value will be as follows:

For Parent Product:

Color=Red;Blue|Size=S;M;L

**You can see, each variant term is separated by a semi-colon. And each variation factor is separated by a “|”.

For Product Variant:

Color=Red|Size=S
Color=Red|Size=M
Color=Red|Size=L
Color=Blue|Size=S
Color=Blue|Size=M
Color=Blue|Size=L

**You can see only one variation term is selected for Color and Size. And each variation factor is separated by a “|”.

◈ Item-Specific Attributes

Now, products in certain categories require you to submit certain item specifics to optimize the data. For example, you might have to submit a Brand name.

In this case, you need to follow the format C:ItemSpecificName for the attribute name.

For example, when submitting a brand, you use the attribute C:Brand with the value of a brand name such as Sony.

Attribute NameC:Brand
Example ValueSony
Valid values– Any valid value for the item specific

For any other item specific, you need to submit the attribute names in the same way. So, for MPN, the attribute name will be C:MPN, and for Size Type, the item specific will be C:Size Type.

To know if you need to submit any of these specifics, you can collect your desired category IDs and generate an item specifics template to learn if you need to submit these attributes.

Or, you can simply upload the products using the Basic Template and later input item specifies within eBay, where required.

◈ Weight Attributes

For certain shipping options you have to submit the weight attributes to determine the shipping cost. As a result, you need to submit the following attributes

  • WeightMajor
  • WeightMinor
  • WeightUnit
Weight Major
Attribute NameWeightMajor
Example Value2
Valid values– The whole number part of the actual weight.

This attribute represents the whole number part of the actual weight of the product.

For example,
– if the product is 2.5 kg, then the WeightMajor will be 2.
– if the product is 3 lbs and 8 oz, then the WeightMajor will be 2.

Weight Minor
Attribute NameWeightMinor
Example Value5
Valid values– The decimal/fraction/sub-unit part of the actual weight.

This represents the remaining decimal/fraction/sub-unit part of the actual weight of the product.

For example,
– if the product is 2.5 kg, then the WeightMinor will be 5.
– if the product is 3 lbs and 8 oz, then the WeightMinor will be 8.

Weight Unit
Attribute NameWeightUnit
Example Valuekg
Valid values– kg or lb

The weight unit is used to decide on the unit of measurement for the weight.

  • For imperial measurement, use the value lb
  • For metric measurement, use the value kg

Package Dimension Attributes

The packaging and handling time of products can be justified by submitting Package dimension attributes. This includes

  • PackageDepth
  • PackageLength
  • PackageWidth
  • PackageType

Package Depth

Attribute NamePackageDepth
Example Value10
Valid values– Only whole numbers allowed

This indicates the height of the package (top to bottom). Submit the nearest whole number of the package height. For example, if the height of the package is 10.4 cm, submit the value 10.

Package Length

Attribute NamePackageLength
Example Value15
Valid values– Only whole numbers allowed

This indicates the length of the package (from side to side). Submit the nearest whole number of the package length. For example, if the length of the package is 15.3 cm, submit the value 15.

Package Width

Attribute NamePackageWidth
Example Value12
Valid values– Only whole numbers allowed

This indicates the width of the package (from front to back). Submit the nearest whole number of the package width. For example, if the width of the package is 12.1 cm, submit the value 12.

Package Type

Attribute NamePackageType
Example ValueLargeEnvelope
Valid valuesFollowing are the valid values you can use to indicate the product type:
– Letter
– LargeEnvelope
– PackageThickEnvelope
– USPSLargePack
– VeryLargePack
– ExtraLargePack
– None

The package type will help eBay understand what sort of package will be shipped.

As you can see in the valid values, if it falls under any of them, then you can submit this attribute with those values, else, you can use the value none.

However, this is an optional attribute. You may or may not use this attribute.

There are many more attributes within eBay, but the ones explained here are the most important ones.

Conclusion

Since eBay is a renowned marketplace, getting on board to sell your products can be challenging. However, the detailed explanation here should help you understand how to prepare your store to generate an accurate product feed.

For WooCommerce stores, generating an eBay Seller Center product feed is much easier with the Product Feed Manager For WooCommerce plugin, rather than manually preparing a feed file.

So, go ahead and start using the plugin to get your products on the eBay feed. Reach millions of eBay buyers and boost your sales effortlessly.

** FAQs **

How do I create a product feed for the eBay Seller Center?

  • To create a product feed for eBay Seller Center, you need to prepare a CSV or XML file with all your product details. This file should include attributes like title, description, price, and stock levels. Using a plugin like Product Feed Manager for WooCommerce simplifies this process.

Can I automate the product feed updates?

  • Yes, you can automate product data feed updates. By using a plugin, you can schedule regular updates to ensure your product listings on eBay are always current. This saves you time and keeps your inventory accurate.

What should I include in my product feed?

  • Make sure your product feed includes key details such as product titles, descriptions, prices, images, stock levels, and unique identifiers like SKUs. Including comprehensive and accurate information helps attract buyers and prevents listing errors.

How often should I update my product feed?

  • It’s best to update your product feed regularly, ideally daily, to reflect any changes in your inventory or pricing. Automating this process with a plugin ensures your eBay listings are always accurate and up-to-date.

How can I troubleshoot feed errors?

  • If you encounter feed errors, start by checking the error messages provided by the eBay Seller Center. These messages will guide you on what needs fixing. Common issues include missing required fields or incorrect formatting. Double-check your feed file and make the necessary corrections.
Categories
Product Feed Manager For WooCommerce WooCommerce

What Is Product Feed Management? 6 Proven Tactics To Drive Sales [2025]

Let me ask you something—how confident are you in your WooCommerce product feeds?

Because here’s the thing: Your product feed isn’t just a list of items. It’s the bridge between your store and potential buyers.

A messy or unoptimized feed means missed opportunities, wasted ad spend, and products buried in search results.

And let’s be honest—managing product feeds can feel like a never-ending battle. Errors pop up, updates pile on, and different platforms demand different formats. It’s exhausting.

But here’s the good news: You don’t have to struggle with it anymore.

In this guide, I’ll show you the Six Best Tactics to take control of your product feeds—so your listings stand out, your ads perform better, and your sales skyrocket.

So, ready to make your product feeds work for you instead of against you?

Let’s dive in.

What is Product Feed Management?

Think about how customers find your products online. They search, scroll, and compare before making a purchase. But if your product details aren’t accurate or visible, they’ll move on to someone else.

What Is Product Feed Management? 6 Proven Tactics To Drive Sales [2025] 3

That’s where product feed management comes in. It’s all about organizing and optimizing your product data—titles, descriptions, images, and prices—so they appear correctly across different sales channels.

Whether you’re selling on Google Shopping, Amazon, or social media, a well-structured product feed ensures your products reach the right people at the right time.

If your product feed is messy or incomplete, your listings might not even appear in searches. Worse, they could get rejected by platforms, costing you potential sales.

Why Product Feed Management Is Important for Visibility and Sales

You can have great products, but if no one sees them, they won’t sell. A properly managed product feed helps your listings get noticed, rank higher, and drive more clicks. Here’s why it matters:

  • More visibility = more sales – Platforms like Google Shopping and Amazon rank listings based on data quality. If your product details are well-optimized, they’re more likely to appear in front of the right customers.
  • Better ad performance – Running paid ads? Clean and structured product feeds help you target the right audience and improve conversion rates.
  • Fewer errors, less hassle – Platforms have strict listing requirements. If your feed isn’t formatted correctly, your products can be rejected or removed.
  • Saves time with automation – Manually updating product details across multiple platforms is exhausting. A well-managed feed lets you automate updates and avoid constant manual fixes.
  • Essential for multi-channel selling – Different platforms have different rules. With a properly optimized feed, your products meet the specific requirements of each marketplace, social platform, or ad channel.

Channels That Use Product Feeds

To increase sales, you need to list your products on multiple platforms. But each platform has its own requirements, so your product feed must be tailored accordingly. Here’s where your product feed plays a crucial role:

  • Online Marketplaces – Platforms like Amazon, eBay, and Walmart pull product details from your feed. If your feed is optimized, your listings will be more accurate and rank higher in searches.
  • Social Media – Facebook, Instagram, and Pinterest use product feeds for their shopping features. A structured feed ensures your products display correctly and appear in relevant searches.
  • Paid Advertising – Google Shopping, Microsoft Ads, and other PPC platforms rely on product feeds to show relevant ads. The more optimized your feed, the better your ads perform, leading to higher ROI.

Challenges of Product Feed Management

As mentioned before, Product feed management is one of the most essential tasks if you want to increase your sales and conversion rates in your WooCommerce store.

But, there are several challenges you might face in your product feed management.

Let’s have a look at them:

  • Inconsistent Data
    When managing your product feeds, inconsistent data can be a common issue that you may face. As a store owner, you may encounter missing or inaccurate product data, which can result in low-quality product listings. This can lead to pricing inconsistencies between your product feed and your actual store. And your items get rejected by merchant sites. This potentially causes you to face financial losses.
  • Unoptimized Product Titles and Descriptions
    You might fail to optimize your product titles and descriptions, resulting in low visibility on marketplaces.
    For example, you might have used generic product titles and descriptions that don’t highlight the unique features of the products.
    This will make it difficult for buyers to find your products.
  • Competing with Similar Products
    You may often face huge competition from similar products on marketplaces. It’s challenging to make your products stand out in a sea of similar products.

    For example, you might be selling t-shirts and may face competition from hundreds of other stores selling similar t-shirts.
    Which makes it difficult to attract buyers.
  • Adapting to Changing Marketplace Requirements
    Different marketplaces have different product feed requirements that change frequently. So, you must adapt to these changes to ensure that your product feeds remain optimized.
    For that, you have to update your product feed file to comply with Facebook’s new advertising policies. Which can be time-consuming and challenging.

No worries! let’s overcome these challenges with 6 proven Product Feed Management tactics.

Proven Product Feed Management Tips To Overcome The Challenges

I listed down 6 proven product feed management tactics that you can follow for proper feed management :

Tip 1 – Create Product Titles That Convert

Titles are one of the key attributes that search engines use to determine when to display your products.

Putting effort into optimizing titles is worth it. It not only helps you rank higher for a product but also increases your chances of conversion.

Now, the title is the very first thing your potential buyer notices. Your product titles should create interest among your potential buyers. This will encourage them to click on your product and you probably make a sale. Highlighting a product’s key features in the title is one of the best ways to optimize product titles. Let’s have a look at the key factors of product title optimization:

  • Use relevant keywords Including relevant keywords in your product title helps search engines understand what your product is about. For example, if you sell women’s shoes, include relevant keywords such as “comfortable women’s shoes” or “affordable women’s shoes” in your title.
  • Highlight unique features If your product has a unique feature, make sure to highlight it in the title. For example, if you sell a foldable laptop stand, use a title like “Compact and Foldable Laptop Stand for Easy Storage”.
  • Keep it simple and clear Your title should convey what your product is about without being too complicated. Avoid using jargon or overly technical terms that your potential buyers may not understand.
  • Test different variation It’s always a good idea to test different variations of your product title to see what works best. Use tools like Google Ads to run A/B tests and optimize your titles based on performance.

Tip 2 -Segment Your Product Catalog For A Better Profit

Segmenting your product catalog can help you maximize your profit by focusing on the products that perform well.

Not all products are equal, and some may not be worth promoting.

For example, if you have products that haven’t sold in a long time, it’s better to exclude them from your feed. This is particularly important since most merchants charge based on the number of items in your feed.

To make it easier to segment your products, you can use custom labels based on different criteria such as top-selling items, price range, profit margin, etc.

Adding a category filter will take your segmentation to the most perfect level.

This way, you can easily identify which products are generating the most profit and prioritize them in your campaign strategy. If you’re running Google Ads or Facebook Ads, you can focus on the products that are likely to bring in the most revenue.

For example, if you’re selling shoes, you can create custom labels based on the brand, style, or price range. This will help you to identify the products that are most popular among your customers and promote them more effectively.

If you notice that a particular brand or style is performing well, you can increase the bid for that product to increase its visibility and sales.

Tip 3 – Provide Consistent And Updated Data Everywhere

Consistent and accurate product data is crucial for a successful product feed management strategy.

Your product data must match across all platforms to avoid confusion among your potential customers.

For example, if you have listed a product on Google Shopping and your product data mismatches with your website, your product will be disapproved. This may lead to lost sales opportunities and eventually harm your business’s reputation.

Moreover, your product feed should always contain updated information about your product’s availability, price, and other attributes. If your product is out of stock or its price has changed, it’s crucial to update the product feed as soon as possible.

If you don’t update your product data, your potential customers may see different information on your website and marketplace, leading to confusion and mistrust.

To avoid such issues,

  • regularly update your product feed to reflect the latest changes. This will not only help you avoid disapproval but also improve your product’s visibility and sales potential.

So, always provide consistent and updated product data everywhere to ensure a seamless shopping experience for your potential customers.

Tip 4 – Appropriate Product Category For Proper Product Feed Management

When you assign a product to a specific category, it helps the search engines to understand the nature of that, which in turn helps your products to appear in relevant search results.

When choosing a category for your product, it’s important to choose the most specific category possible. Because the more specific the category, the easier it is for customers to find your product.

For example, if you are selling a laptop, simply assigning it to a category like “Electronics” may not be enough. You should rather choose a more specific category like “Computers & Tablets > Laptops” to make it easier for customers to find your product when searching for laptops.

Using relevant categories also helps improve the overall user experience of your online store. When your products are organized and categorized logically, it makes it easier for customers to find what they are looking for.

This helps reduce the bounce rate and increases the chances of customers staying on your website longer and potentially making a purchase.

Tip 5 – Prioritize The Optional Attributes With Product Feed

Normally, when you submit the product feed, you are mostly concerned about the mandatory fields of your merchant.

But, the optional attributes can have a big impact on your listing.

These fields can provide additional context and information about your products that can make them more appealing to potential customers.

For example, let’s say you’re selling clothing on your WooCommerce store. By including the optional field for “size” in your product feed, customers can easily filter and find the size that they need, which can improve their overall shopping experience and increase the likelihood of a purchase.

Another benefit of prioritizing optional fields is that it can improve your product’s visibility in search results. By providing more detailed information about your products, search engines like Google can better understand what your products are and display them in more relevant search results.

So, when creating your product feed, it’s important to prioritize these optional fields and include as much relevant information as possible.

This can help increase your product’s visibility, improve the customer shopping experience, and ultimately lead to more sales.

Tip 6 – Analyze Your Feed Performance

Regularly monitoring and analyzing your product feed performance is crucial in identifying areas for improvement and better-optimizing product feed.

Track your store’s key metrics such as clicks, impressions, conversions, and sales across various channels and platforms. It helps you to track your shortcomings.

Use Google Analytics to track your feed performance on Google Shopping. Identify which products or categories are performing well and which ones need improvement.

Use Facebook Ads Manager to monitor the performance of your product feed on Facebook and Instagram.

Alternatively, you can connect Facebook Ads to Looker Studio and create live dashboards that can be shared within the company.

Regularly monitor and analyze your feed performance, also you can use extensive analytics tools to gain valuable insights into your customers’ behavior and preferences.

This can help you make data-driven decisions and improve your overall business performance. You can do this easily with proper product feed management.

Why Product Feed Management Is Important For Visibility and Sales?

Product data feed management is crucial if you want to attract potential customers and drive sales. Optimized product feeds provide the most accurate and highly relevant data, which allows you to

  • Rank higher for your products
  • And eventually, drive more sales.

The question here is why you need to optimize product feed. Let’s discover the reasons behind the need for product data feed optimization.

Avoid Rejected Feeds Due to Incorrect Structure

Feed structure is one of the crucial factors when you’re selling WooCommerce products on different marketplaces.
The marketplaces you promote have different required feed structures and formats.

For example, Google accepts only XML feed. On the other hand, for listing products on Bing, you need to provide a TEXT feed format.

So, it depends on which merchant you’re using. But you need to make sure you are using the accurate feed structure and feed format. Otherwise, your feed will be rejected.


Overcome Merchant Approval Challenges

For feed structure, different merchants have different criteria for product approval.

For example, Google requires a brand name with GTIN or MPN, while Rakuten requires age and gender attributes in your feed.

If your product feed data doesn’t match your site or doesn’t meet the merchant’s requirements, your products may be disapproved.
Optimizing your product feeds ensures that you’re providing the most accurate and up-to-date information. Also, increasing your chances of getting approved.

Improve Feed Performance and Increase Sales


Sometimes, even if your feed is approved, it may not perform as expected.
But, following product feed management tactics, you can improve your feed’s quality. This will lead to more sales for your store.

Automate Your Product Feed With The Most Reliable Tool

So, by now you must understand how important it is to do product feed management correctly.

The tactics mentioned above can significantly increase your sales performance, but manually handling these tasks can be time-consuming and inefficient.

That’s where the Product Feed Manager for WooCommerce comes into play.

the easiest product feed management tool - Product feed manager : Homepage

Creating optimized product feeds for your WooCommerce store has never been easier with this product feed management tool. Even if you’re new to this, you can generate flawless feeds in just three simple steps:

  1. Choose Your Marketplace: Select the platform where you want to sell your products.
  2. Customize Your Product Details: Adjust your product information to match the requirements of your chosen marketplace.
  3. Generate the Feed: With a single click, your feed is ready to go.

That’s it!

In no time, you’ll have a perfectly optimized product feed, ready to showcase your offerings and drive sales on your desired marketplace among 180+ marketplaces. Also, you can customize your email signature with links to your store, social media profiles, or even landing pages and promotions to enhance your email marketing campaign.

180+ marketplaces of PFM

This powerful tool also offers advanced features like category mapping, product filters, custom fields, and automatic syncing with Google.

You can also fix Woocommerce (JSON-LD) structure data for approval in Google Shopping.

This plugin empowers you to fine-tune your feeds for maximum impact.

You can experience this plugin through a live preview before you invest in it.

Product feed manager- live preview feature

And if you get confused on any level, this plugin has 96 documentation to help you out at any level you feel puzzled.

What Is Product Feed Management? 6 Proven Tactics To Drive Sales [2025] 4

So, why wait? Get the plugin today and be one of the happy users among 10000+ users!

Review sector PFM page

Wrapping Up

These products feed management tactics mentioned above, can significantly improve the sales performance of your WooCommerce store.

Simplify your feed management tasks and automate them with the right tool, to save time and get better results. Optimizing your product feed is also crucial for success.

So, if you need a reliable product feed management solution, you can look no further than Product Feed Manager for WooCommerce.

Give it a try and take your WooCommerce store’s sales to the next level.

FAQs

How do you manage product feeds efficiently?

A feed management tool automates updates, optimizes product data, and syncs listings across multiple sales channels.

Why is structured data important for eCommerce sales?

Structured data is key to product feed management as it ensures accuracy, improves rankings, and enhances visibility on marketplaces.

How does product feed management software help businesses?

A product feed management software simplifies bulk updates, prevents errors, and maximizes exposure across advertising platforms.

Can a feed management tool improve conversions?

Yes, using a feed management tool ensures clean, optimized product data, which increases ad relevance and drives higher conversions.

What’s the best way to optimize product listings?

The right product feed management software helps refine titles, descriptions, and attributes to improve visibility and click-through rates.