Categories
WooCommerce

7 Unique Black Friday Campaigns From Top Brands

Black Friday is fast approaching, and for you, it’s a golden opportunity to get new customers and drive serious sales.

But with countless common discounts flooding the inboxes and feeds of your consumers, your businesses can struggle to connect and miss the chance to create an ever-lasting impression on your customer’s minds.

So, how could YOU make your Black Friday campaign THE ONE that stands out?

You should focus on creativity and customer connection, to build a campaign that not only catches the eye but also wins hearts and gets you sales long after the holiday is over.

In this blog, I’ll go through seven unique Black Friday campaigns from top brands so you can get unique Black Friday campaign ideas.

Also, I shared tips to get your online store ready for the 2X black Friday sale!

So, Let’s get started!

7 Unique Black Friday Campaign Ideas

Below, I’ve listed seven Black Friday campaigns from top brands that took a unique approach and grabbed customers’ attention.

These best Black Friday campaign examples demonstrate how thinking outside the box—or even breaking the usual Black Friday common discount trends—can significantly create a positive impact.

1. Patagonia’s Don’t Buy This Jacket Campaign

The first campaign I would like to start with is Patagonia’s bold “Don’t Buy This Jacket” campaign that urged consumers to think twice before purchasing anything.

Patagonia’s Don’t Buy This Jacket Campaign

Thinking then how they make it a successful best Black Friday campaign?

Here’s the details :

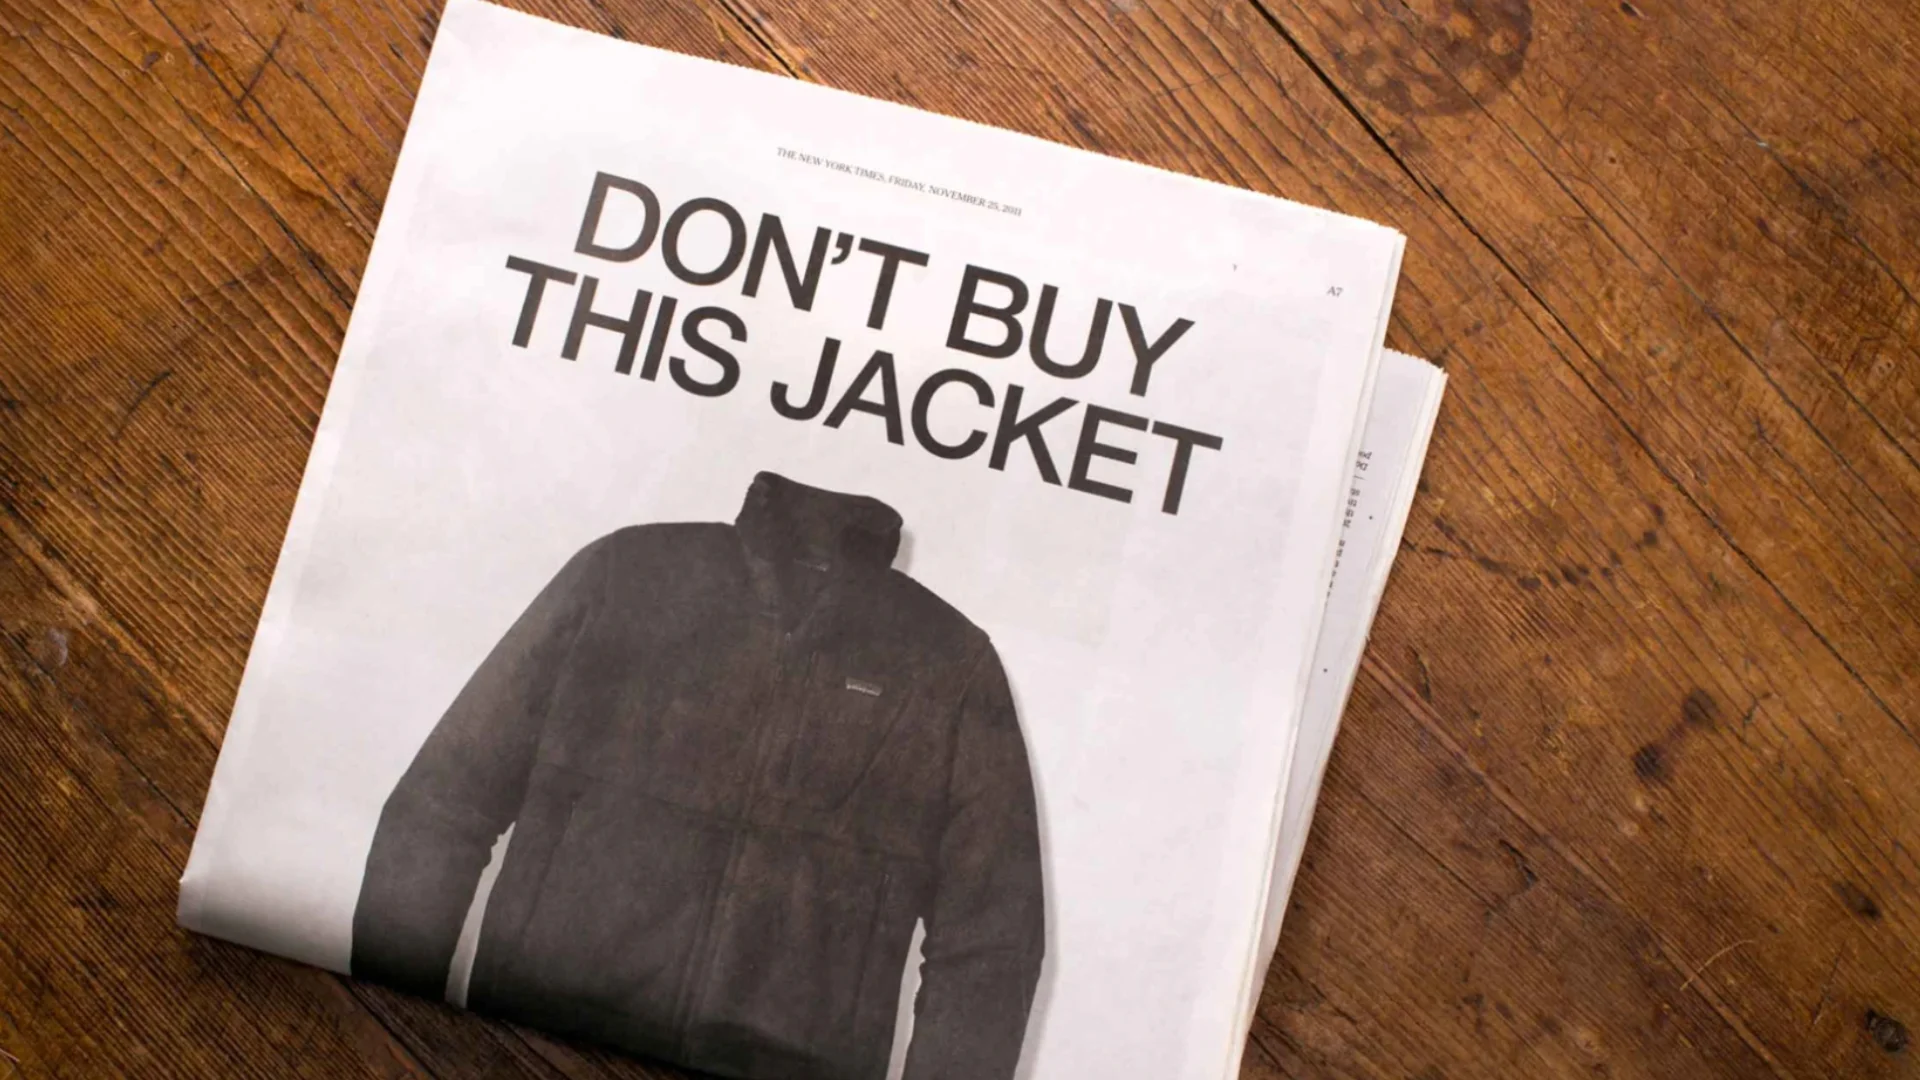
Patagonia took a bold stand against consumerism on Black Friday marketing, placing a full-page ad in “The New York Times”.

The ad showcased their best-selling jacket, accompanied by a message detailing the environmental costs of producing it:

  • 36 gallons of water (enough for one person’s daily needs for 45 days)
  • 20 pounds of carbon dioxide emissions (24 times the jacket’s weight), and significant waste.

And, you will shocked to know the result of this campaign.

Despite the opposite anti-sale message, their sales increased by 30% following the campaign.

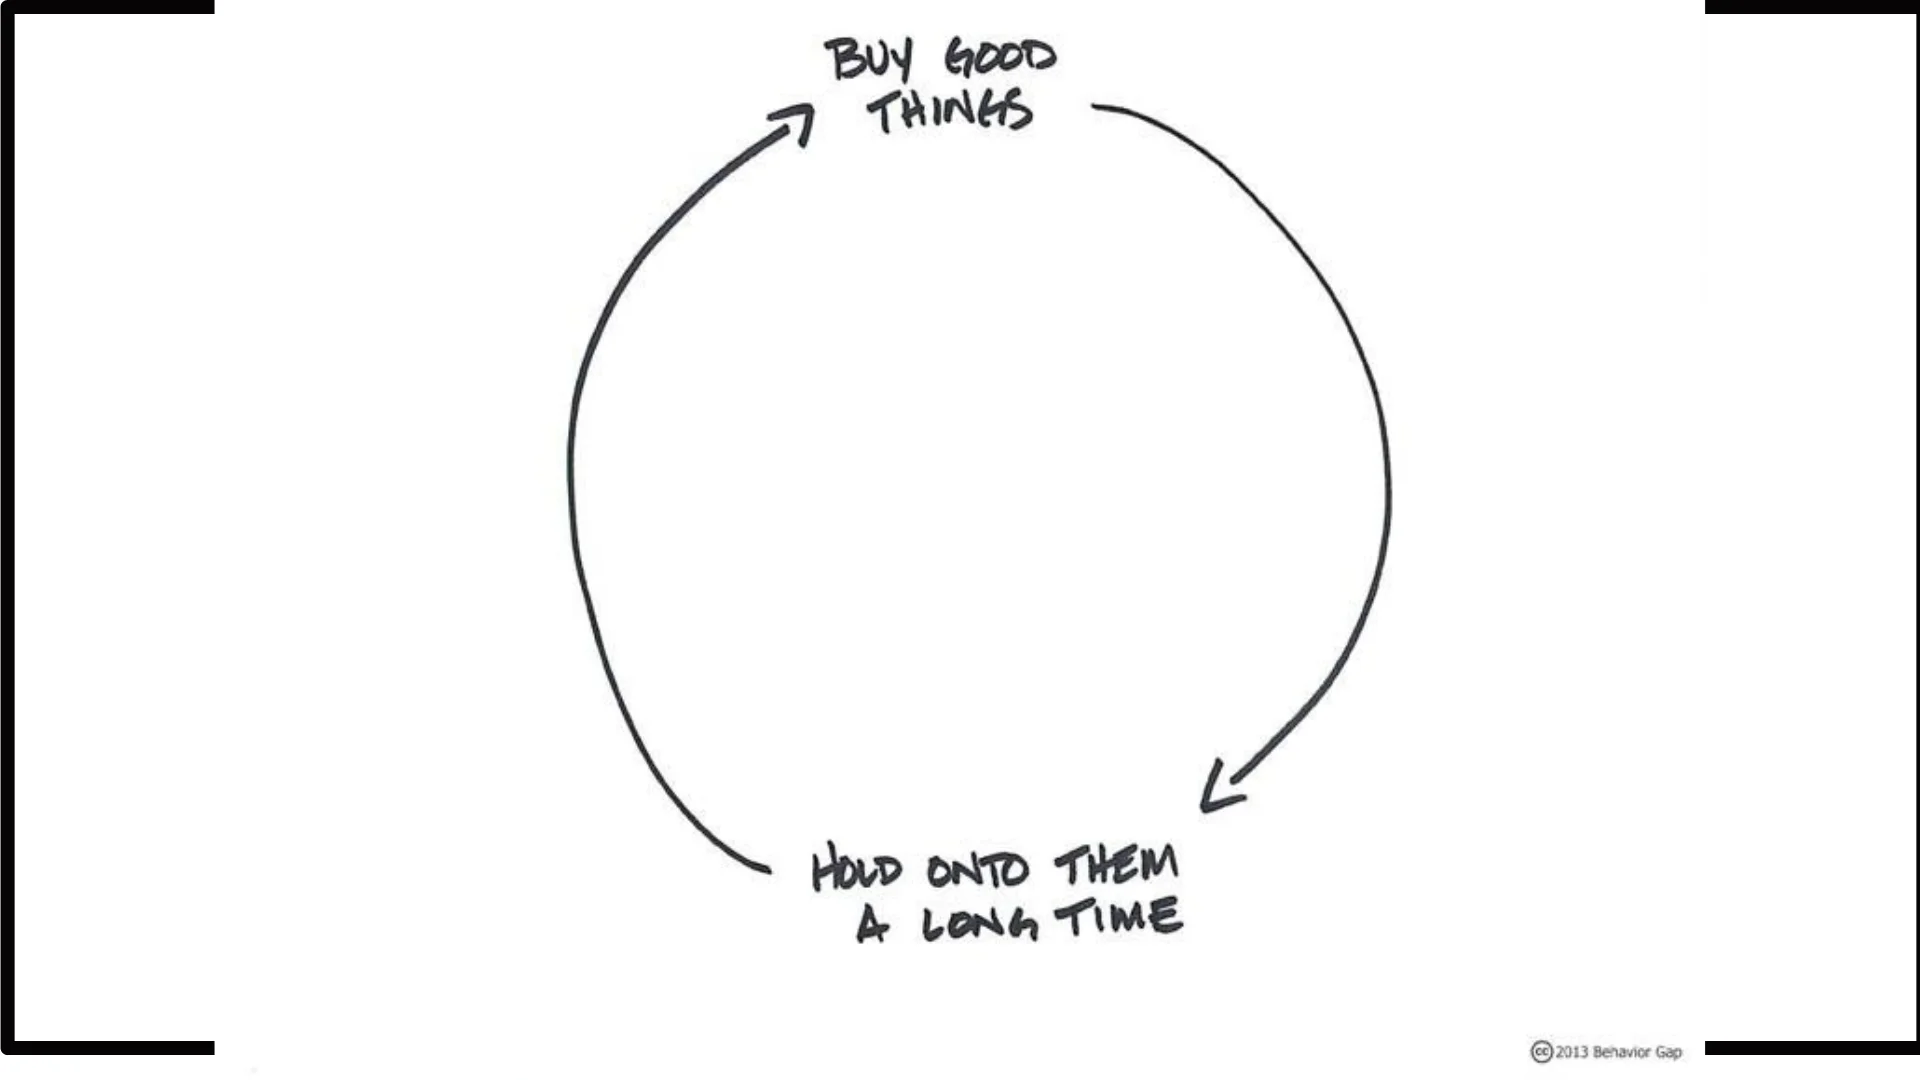
In partnership with eBay and as part of their Common Threads Initiative, Patagonia aimed to inspire consumers to ‘think before they buy’ and encouraged them to buy fewer, higher-quality items.

The campaign highlighted the mission Patagonia has upheld since 1973:

“Build the best product, cause no unnecessary harm, use business to inspire, and implement solutions to the environmental crisis.”

Patagoni's campaign theme

This is an example of how reverse psychology blended with the brand’s authenticity can work well.

It also brought attention to the staggering environmental impact of the fashion industry, which is responsible for 10% of global carbon emissions and 85% of textile waste annually.

The campaign’s success directly resulted from the company’s commitment to environmental advocacy and systemic authenticity.

2. BlackOwnedFriday by Google

The next one I want to mention is Google, the tech giant known primarily for its search engine, ventured into Black Friday with a powerful message.

Google black friday campaign- one of the successful black friday campaigns

In 2020, at the height of the pandemic, Google launched the #BlackOwnedFriday campaign to support Black-owned businesses.

Google partnered with well-known Black artists Wyclef Jean and Ari Lennox to compose jingles celebrating their favorite Black-owned local businesses.

The music became animated videos and Spotify tracks.

Google's Black owned friday campaign

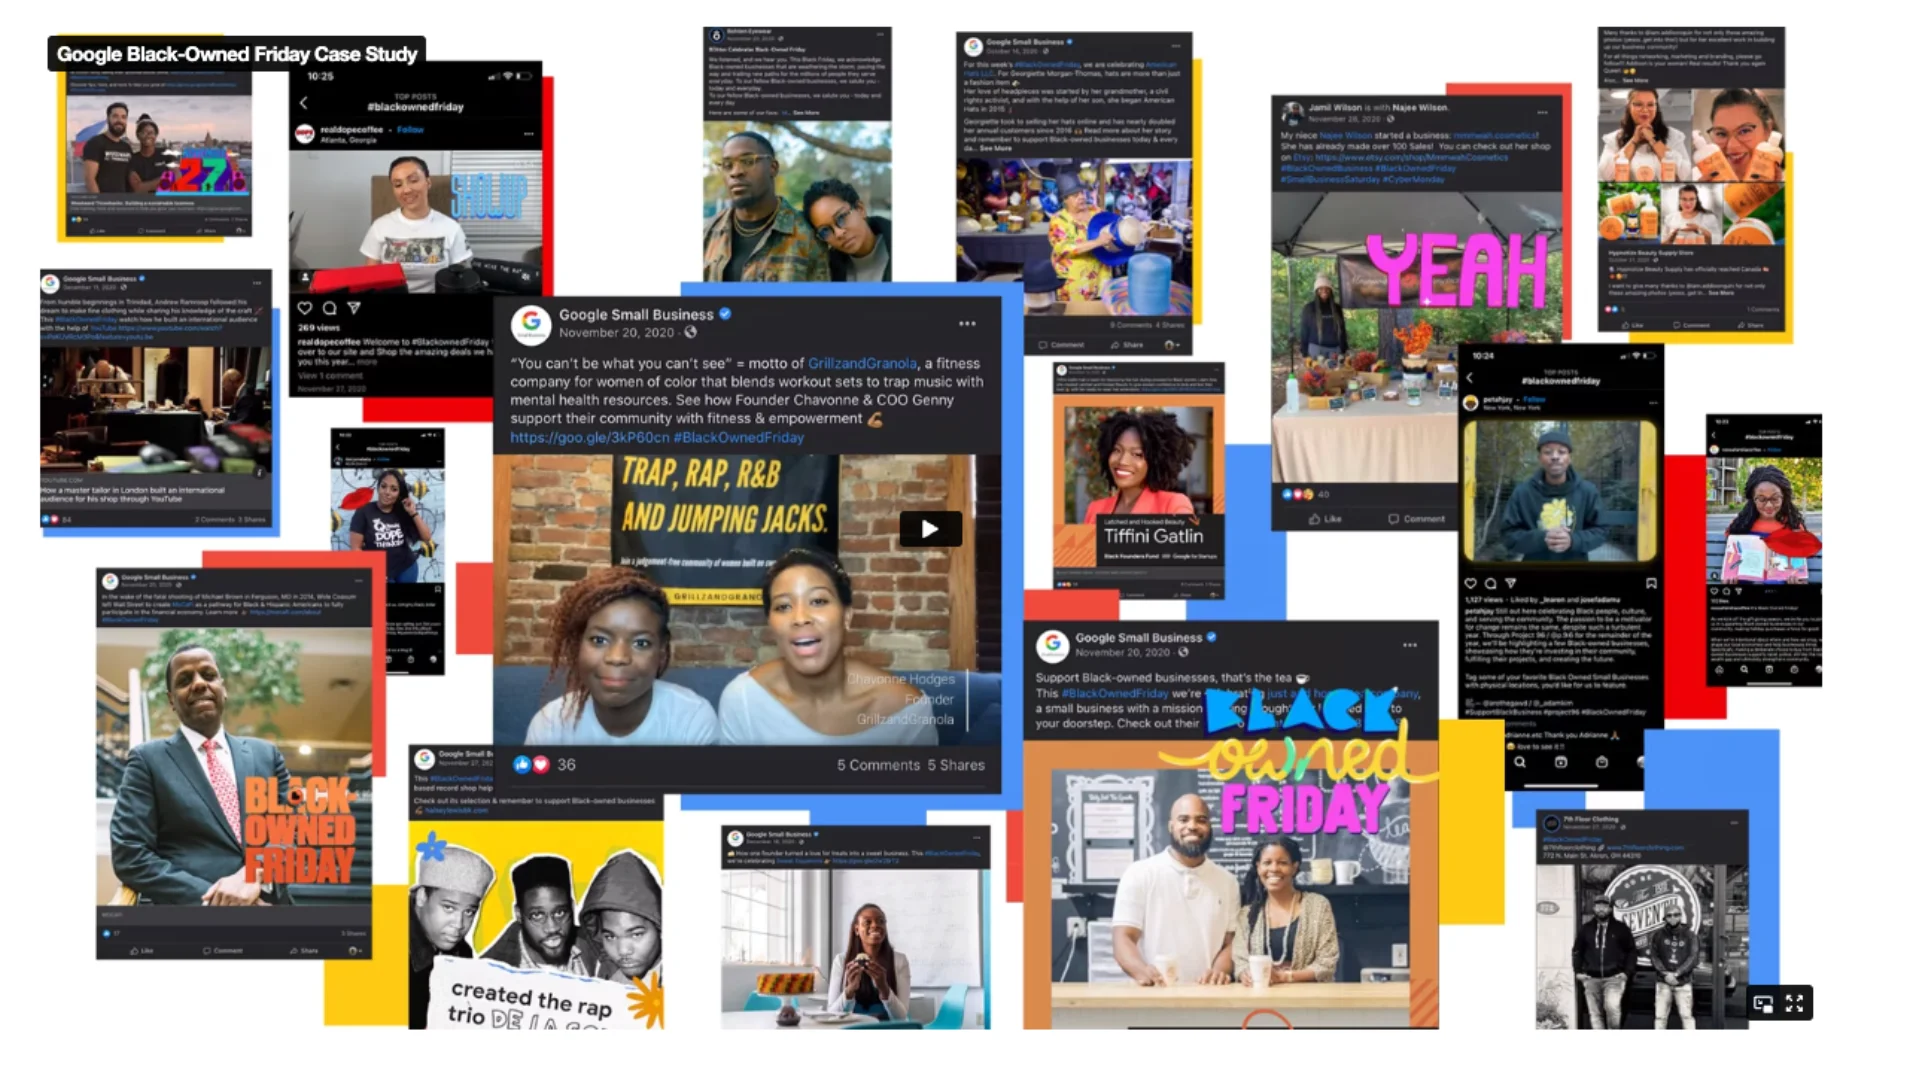
This campaign gained massive traction, reaching half a billion media impressions in just one season.

The success of the 2020 campaign inspired Google to relaunch it in 2021 and 2022.

These follow-up campaigns involved Black artists creating interactive music videos where viewers could shop for featured products directly on the screen.

This unique approach delivered a substantial impact:

  • A 300% increase in “Black-owned business” online conversations
  • Over half a billion impressions in media reach
  • A 3000% sales increase for Grounded, a featured Black-owned plant store

You can think of a campaign like the #BlackOwnedFriday campaign, that delivers the message Black Friday can be about more than just a discount.

In this way, your Black Friday campaign can be a platform to grow community support, create collaborative conversations, and generate positive change.

3. Polysleep’s Mock “Leaked Email” Campaign

Number 3 on my list of Black Friday campaigns is the Polysleep, which captured attention with a clever mock “leaked email” campaign.

The email revealed Black Friday discounts, giving the feel of an inside scoop.

In 2016, finding a solution for a double herniated disc injury, Jeremiah Curvers started a journey to develop a better mattress and founded Polysleep in Montreal.

For Black Friday campaigns, Jeremiah took a creative approach with a mock “leaked” email campaign, giving subscribers an exclusive preview of an upcoming sale.

The email increased participation and sparked interest as subscribers shared the deal with their friends and family.

According to Jeremiah, this campaign helped to create a more personal connection with their customers and thus it returned them to popularity, loyal customers, and great sales.

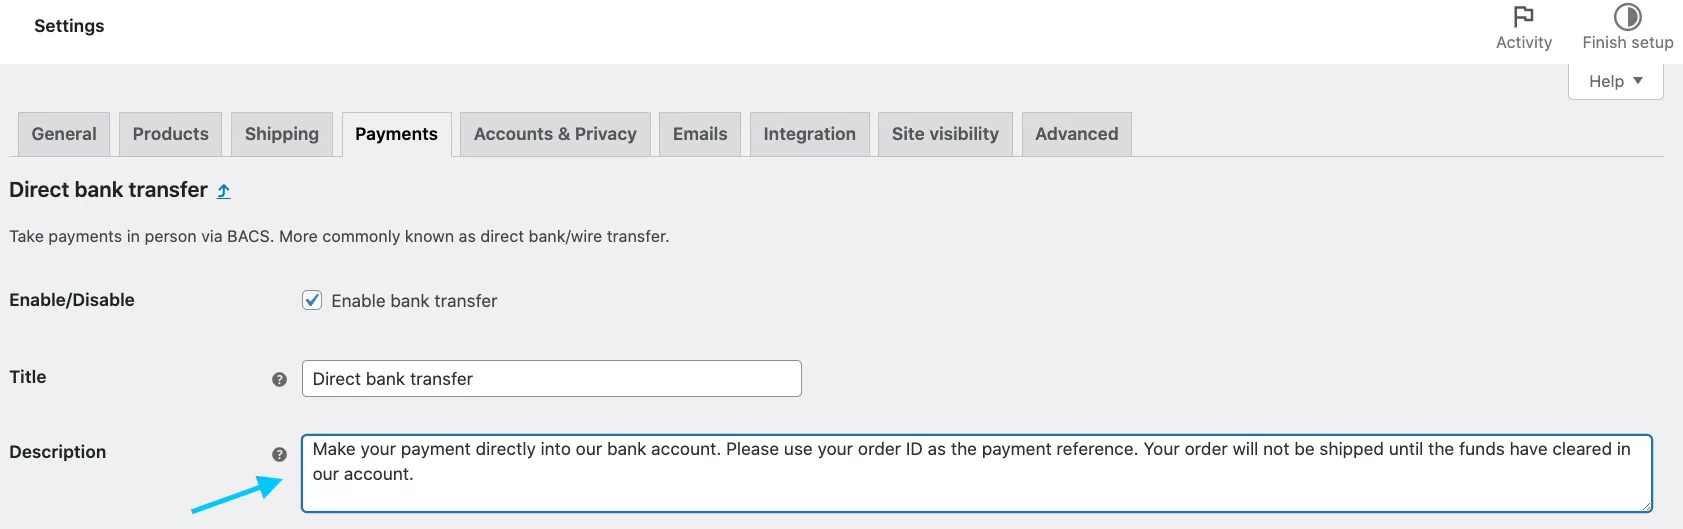
You can opt for this kind of strategy, too. First, create your desired discounts in your store (it’s better to use a discount plugin for ease), and then think about presenting your discount in a unique way.

4. IKEA’s #BuybackFriday

IKEA’s #BuybackFriday was a sustainability-centered best Black Friday campaign allowing customers to sell back used IKEA furniture.

Ikea buy back furniture campaign

Next on the list is the IKEA campaign, which launched its innovative #BuyBackFriday campaign, collaborating with Edelman to promote circular consumption by buying back old IKEA furniture.

IKEA offers their customers the ability to return unwanted non-upholstered items—like tables, chairs, and shelving—in exchange for vouchers worth up to 50% of the original price, based on the condition of the furniture.

This initiative was a part of IKEA’s broader commitment to becoming circular and climate-positive by 2030, addressing the 45% of global carbon emissions tied to everyday product consumption.

By repurchasing and reselling secondhand furniture, IKEA not only minimizes waste but also encourages sustainable consumer habits.

The campaign runs in 27 countries and highlights the brand’s dedication to creating a “better everyday life” while reinforcing the durability of its products, ultimately benefiting both the planet and the business.

So see, you can skip the regular common way of offering deals, instead you can go for a massage-spreading campaign like IKEA.

5. Glossier’s Only Sale of the Year Campaign

Glossier took exclusivity to another level by hosting its only annual sale on Black Friday and it is one of the most popular Black Friday campaigns.

Glossier black friday campaign

For Glossier customers, Black Friday holds particular significance as it represents the only opportunity of the year to purchase their favorite beauty products at a discount.

Known as the “Only Sale of the Year,” Glossier’s Black Friday campaign skillfully generates a sense of urgency and exclusivity, motivating shoppers to seize this unique chance.

With this limited-time strategy of its promotions, Glossier not only increased its sales but also strengthened its bond with its customers who look forward to this annual occasion.

Only running a campaign without creating urgency like common black Friday campaigns will not make you a great sale. You can opt for a strategy like this that will help you to create urgency and 2x your Black Friday campaign sales.

6. Kohl’s Super-Cash

The next example I want to draw your attention to is, Kohl’s, a popular department store chain, has always been known for its wide selection and competitive prices, but during Black Friday, the brand took an extra step to build customer loyalty.

Instead of offering standard discounts alone, Kohl’s introduced an enticing incentive called “Kohl’s Cash.”

For every purchase made during the Black Friday event, shoppers received a certain amount of Kohl’s Cash that they could use on future purchases.

This clever approach gave their customers not only an immediate benefit but also a reason to return to the store after the holiday.

Kohl’s Cash created a sense of excitement and motivation for customers, who saw the rewards as “free money” they could spend later.

This increased the likelihood of return visits and gave their targeted shoppers a feeling of extra value.

See how Kohl’s Cash campaign not only gained success on their Black Friday promotion but also laid the groundwork for long-term engagement with continued revenue.

Your Black Friday Campaign can also be a way of brand exposure and get you loyal customers if you can add a little different fact like Kohl’s.

7. Cards Against Humanity’s Annual Pranks Campaign

The last want I want to put lights on is Cards Against Humanity, which used Black Friday to launch playful, ironic campaigns.

Cards against humanity

Cards Against Humanity embraced its signature irreverent humor with an anti-consumerism campaign for Black Friday in 2023.

They raised prices instead of discounting, challenging the conventional Black Friday approach and proving that humor can build brand loyalty.

Continuing its tradition of quirky marketing, the brand introduced a new social media platform called Yowza, where users could only post the word “yowza.”

This playful concept not only engaged users in a lighthearted manner but also served as a critique of both social media culture and the frenzy surrounding consumerism during the holiday season.

The absurdity of Yowza’s content generated excitement on social media and significantly boosted the brand’s visibility. It also sparked discussions among thousands of participants who joined in on challenges and shared their experiences.

The campaign effectively highlighted the brand’s unique voice while promoting a message that encourages consumers to rethink the holiday shopping experience.

Well, as you can see these campaigns are amazing but did you notice there are some similar approaches or mindsets that these brands went for?

3 Approaches To Create A Black Friday Campaign That Grabs Attention

Here I have summed up these examples and taken out three approaches to help you apply a unique Black Friday marketing strategy so that your campaign stands out this year’s Black Friday:

1. Emphasize Exclusivity

Creating a sense of urgency can significantly drive your customer engagement.

You can see how Glossier exemplifies this strategy with its “Only Sale of the Year” campaign, where customers eagerly wait for the one day each year they can buy their favorite beauty products at a discount.

This kind of exclusivity can not only increase your sales but also strengthen your customer loyalty and increase your brand awareness.

2. Use Humor and Creativity

Humor can be a powerful tool for capturing attention. Cards Against Humanity embraced this approach in their black Friday campaign.

The campaign successfully generated buzz and discussions, proving that humor can effectively differentiate your brand during the bustling holiday season.

3. Add a Personal Touch

Making your campaign relatable can connect your business with your targeted customers instantly. Polysleep’s mock “leaked email” campaign serves as a prime example of this idea.

With Black Friday discounts through a humorous “leaked” email, the brand added a personal relationship with its subscribers.

If you apply this kind of personalization on your site, you can encourage participation such as sharing the deal with their friends and family.

With the leaked email, Polysleep sends their subscribers a preview list of black Friday sales.

You can show the upcoming arrivals on your site to tap the buying triggers for your potential customers.

Also, most of the time your customers get confused about picking a product from on sale list. You can show the popular items on sale and name them “Black Friday Bestsellers”.

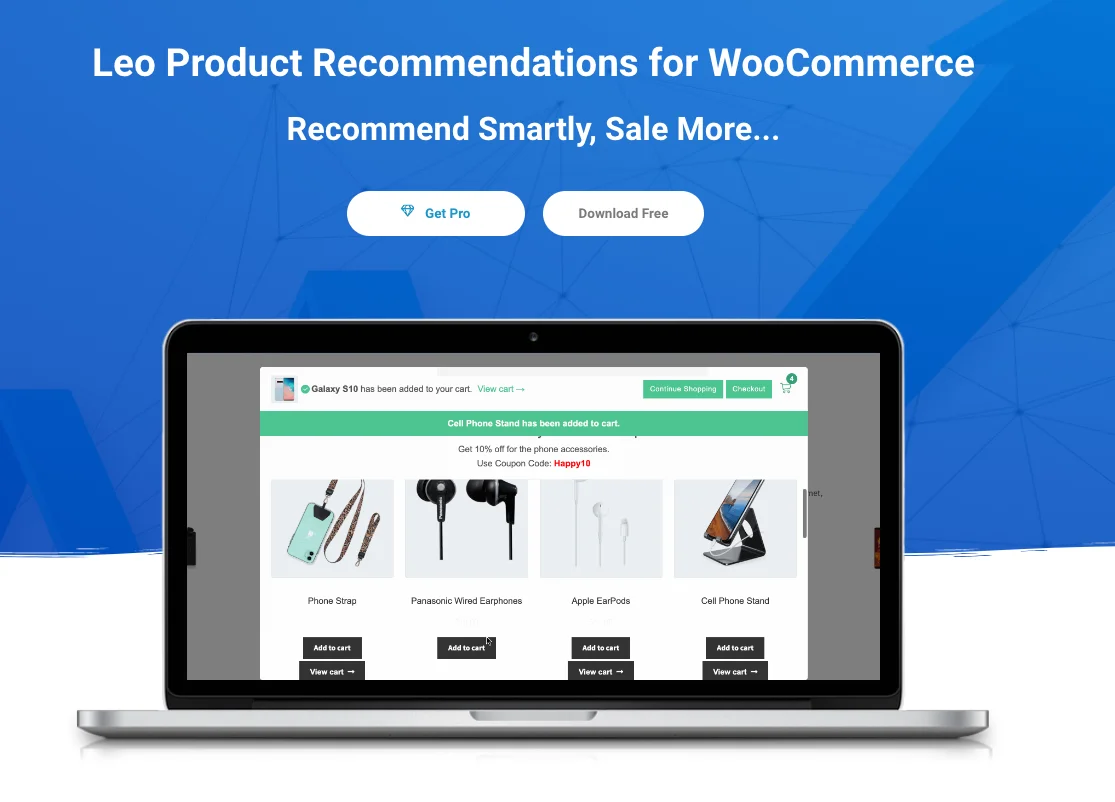
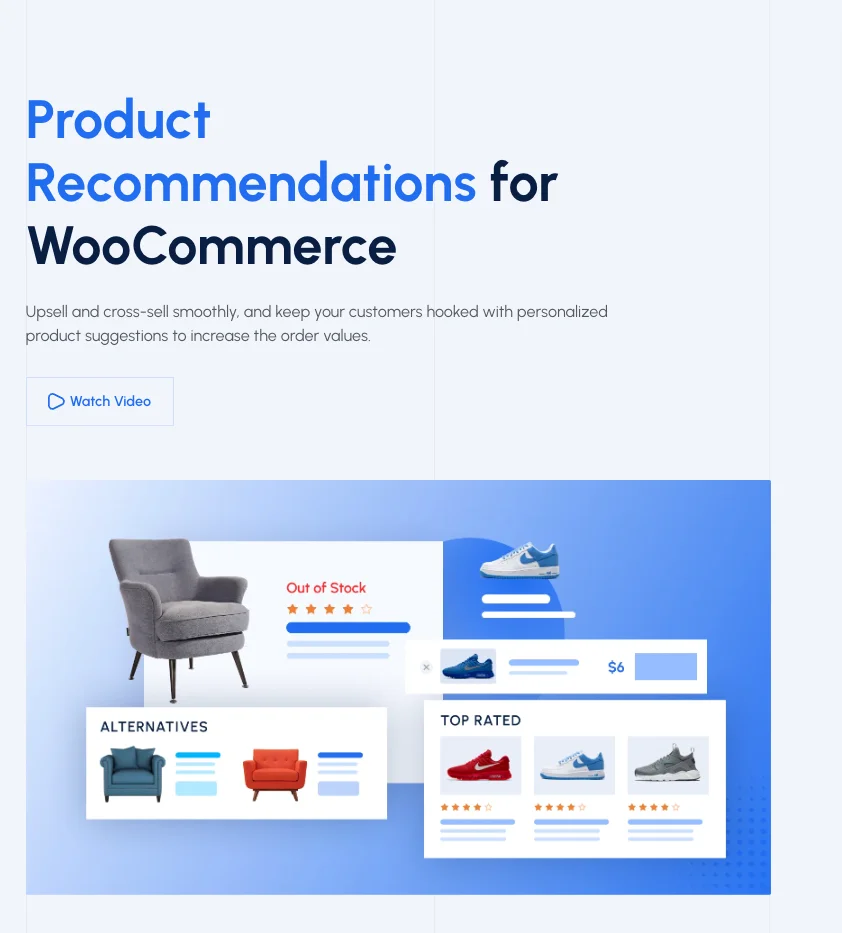
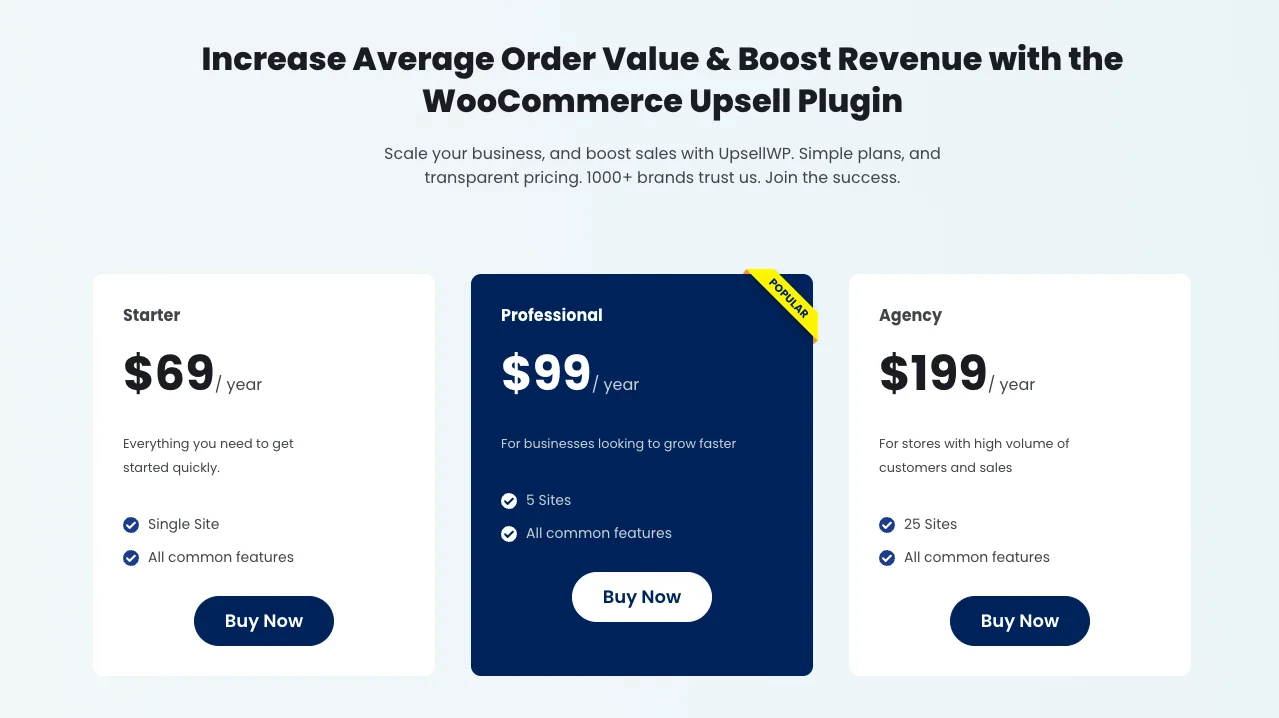
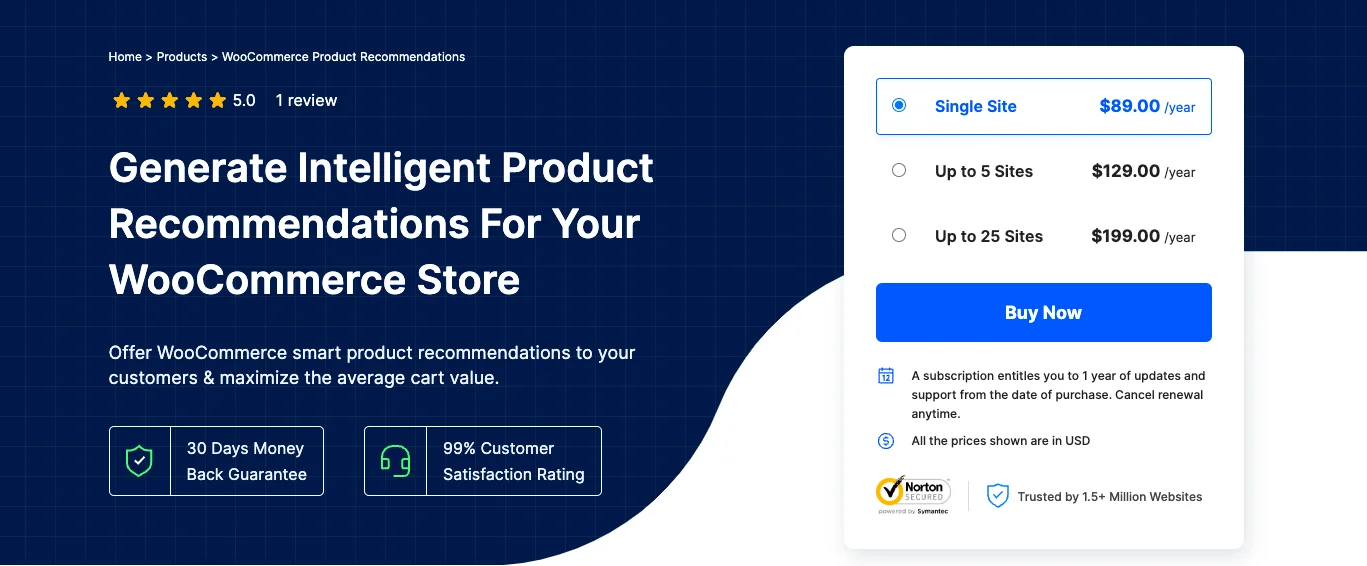
To set new arrivals or on-sale popular products, You can use tools like Product Recommendations for WooCommerce.

product recommendation for WooCommerce

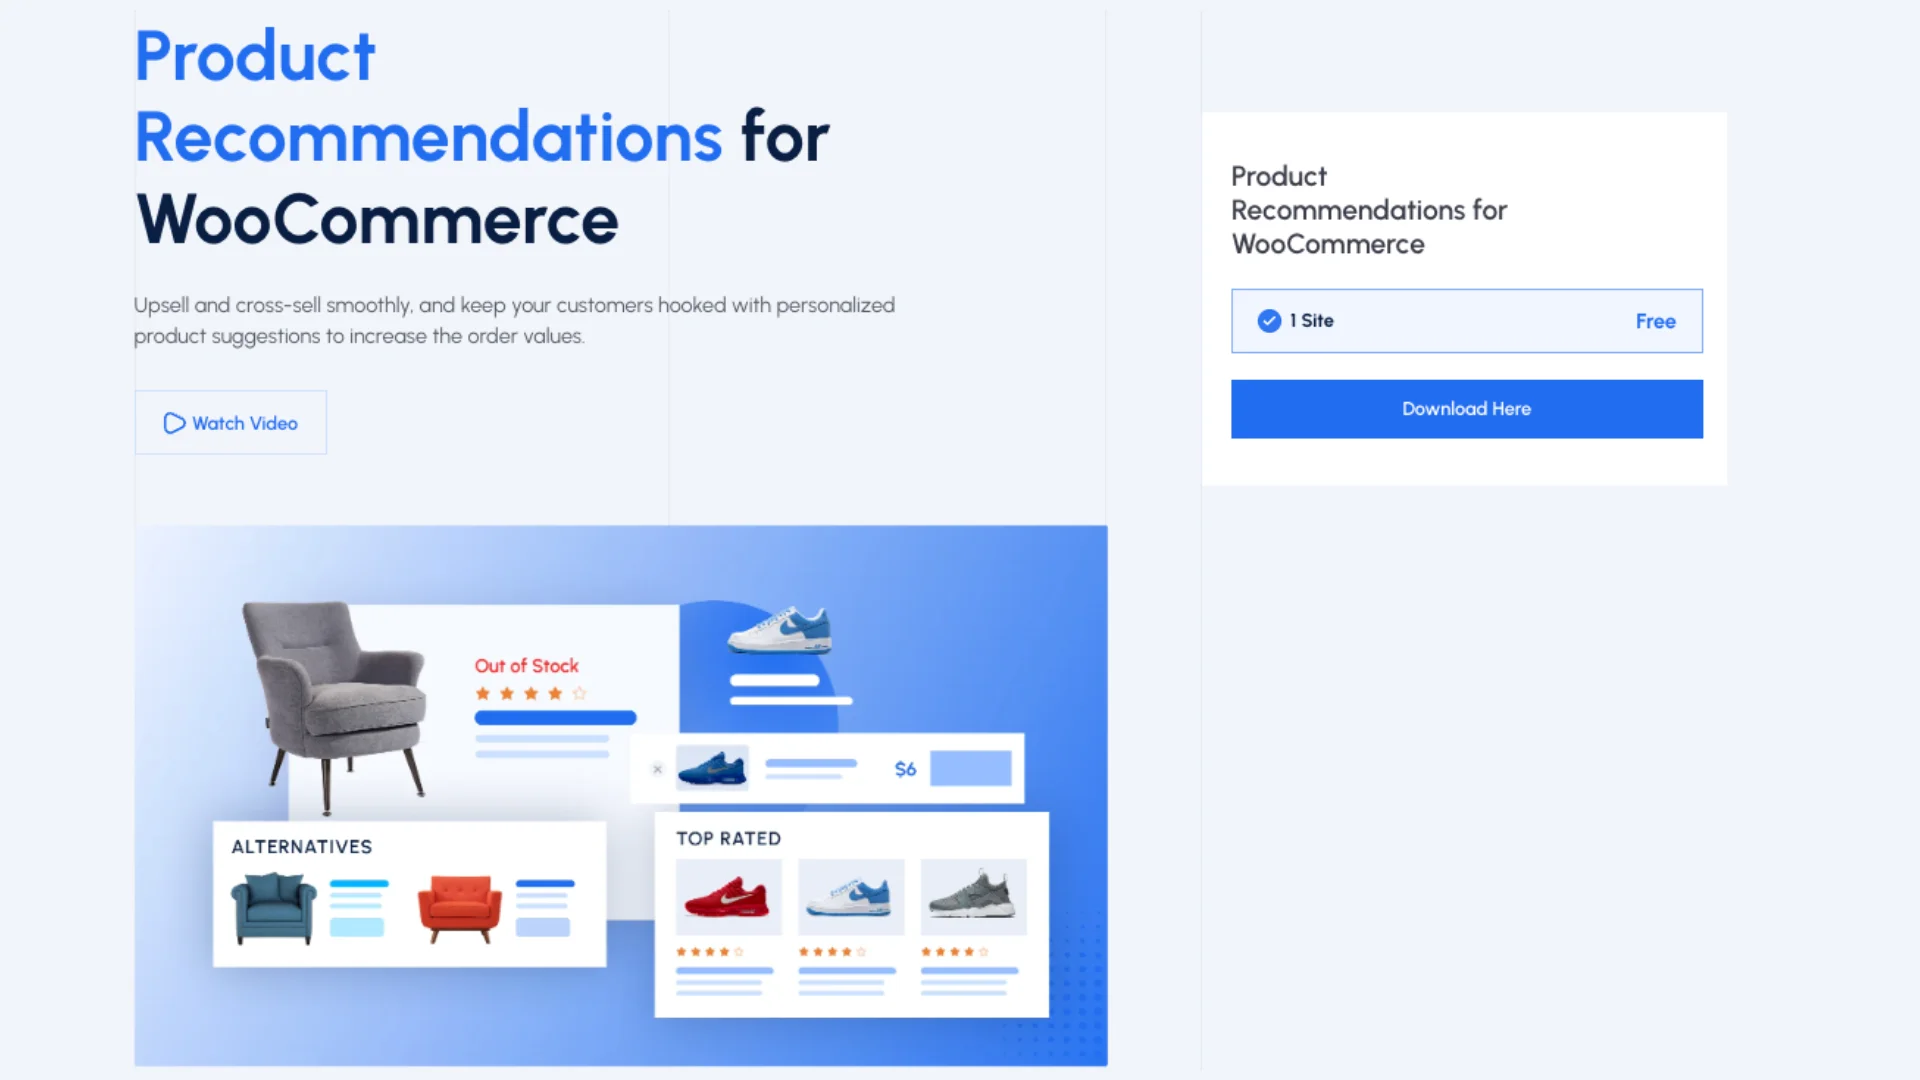
With the product recommendation tool, you can :

  • Drive Sales through Excitement: Presenting new arrivals keeps customers returning to see the latest products, increasing chances of conversion.
  • Capture Deal-Seekers’ Attention: Feature discounted items prominently to cater to shoppers actively looking for sales.
  • Strategic Placement for Impact: Position sale products in high-visibility areas to maximize exposure and make the most of black Friday marketing.

Final Thoughts

Standing out on Black Friday doesn’t always mean offering the biggest sale discount.

Sometimes, the best Black Friday campaigns are the ones that take a creative or unexpected approach.

As you read, the mentioned seven Black Friday campaigns took an out-of-the-box approach and made a lasting impression, and also increased sales.

From Patagonia’s environmental call to action and Google’s commitment to supporting Black-owned businesses to Glossier’s exclusivity and Cards Against Humanity’s playful satire, each brand found a way to connect with customers on a deeper level.

A Black Friday campaign doesn’t have to be a race to give away your products at the lowest prices.

You can tap into your unique brand values, address consumer concerns, or simply add a dose of humor, to create meaningful connections that extend beyond the holiday weekend and bring you sales and strong brand recognition.

Or you can show your discount offer uniquely like Polysleep’s Mock “Leaked Email” Campaign or Glossier’s Only Sale of the Year Campaign.

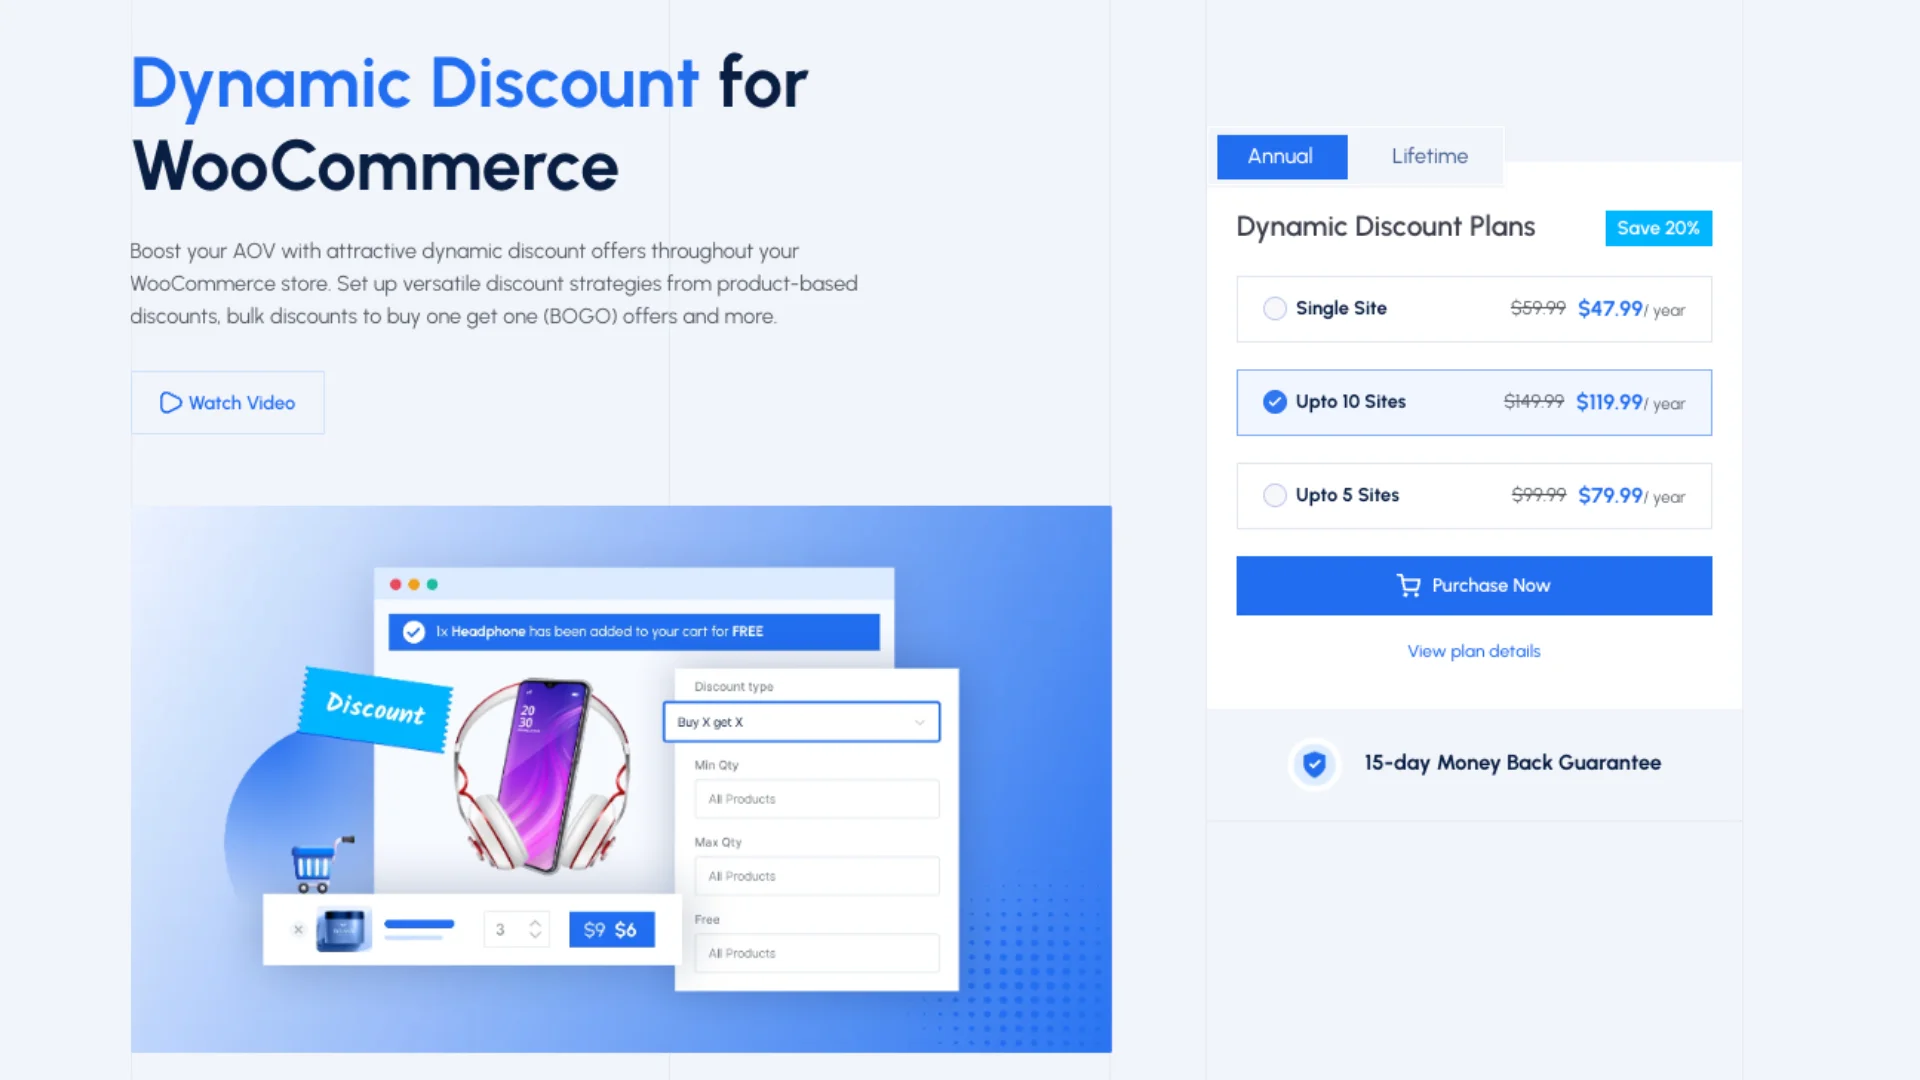
To create discounts as per your wish and set up discounts in most easiest way on your store, you can opt for easy-to-use tools like Dynamic Discounts For Woocommerce

This powerful plugin lets you create irresistible offers across your store, helping you boost your average order value (AOV) and maximize conversions.

Whether you’re looking to set up category-based discounts, offer exclusive BOGO deals, or create time-sensitive promotions, Dynamic Discount has you covered.

Dynamic discounts plugin


What makes a Black Friday campaign unique?

A unique Black Friday campaign offers something different, like humor, exclusivity, or a special experience. These approaches make brands memorable amid the usual sales-driven campaigns.

How can small brands compete with big retailers on Black Friday?

Small brands can compete by focusing on creativity, niche products, and building customer loyalty. You can craft a campaign that tells a story or highlights a cause that can create a lasting impact.

Are discounts necessary for Black Friday?

Discounts are common, but not required. Campaigns like Patagonia’s “Don’t Buy This Jacket” show that brands can stand out with unique messages or by promoting sustainability, even without traditional discounts.

Categories
WooCommerce

Best WooCommerce Shipping Strategies to Keep Customers Happy [While Maintaining Profits]

As an online store owner, you know that shipping can make or break your business.

It’s not just about getting products from point A to point B – it’s about keeping your customers happy while also protecting your profit margin.

And It’s QUITE CHALLENGING!

Because on the one hand, your customers don’t want expensive shipping fees.

On the other hand, you have to choose a good carrier [which is expensive] to deliver the package on time and in good condition.

Shipping was cited by over one-third of business owners as the greatest unexpected expense of a business.

WooCommerce shipping Strategies

You can strategically plan how you will ship your products and keep your customers super happy every time.

And guess what? You can do this without losing any money too.

All you need is to plan strategically and choose strategies wisely.

In this guide, I’ll discuss 5 WooCommerce shipping ideas that will help you achieve both customer happiness and a high-profit margin.

So let’s begin.

The Impact of Shipping on Your Business

shipping impact business

Before we dive into specific strategies, let’s talk about :

Why and how shipping is related to your business growth and conversion.

63% of online customers abandon their purchases because they don’t want to pay for shipping

That’s a significant chunk of potential sales you could be losing.

On the flip side,

93% of shoppers are more likely to buy more products if free shipping is available.

These statistics show just how much your shipping strategy can influence your customer’s buying decisions. And how shipping affects business greatly.

You might be thinking that free shipping is the solution then but it’s not :

Businesses in the US lose over $1 billion annually due to shipping damage.

So if you choose a low-quality carrier, to give your customer a free shipping offer chances are high that your product will get damaged.

Hence, your customer won’t receive a damaged product which will create delivery returning expenses.

Let’s understand factors that increase your shipping costs and how you need to consider these while picking a shipping strategy that will be the right fit for you.

Factors Affecting Your Shipping Costs

factors effecting free shipping

To choose an effective shipping strategy that perfectly aligns with your business, you need to understand the reasons behind your WooCommerce shipping cost.

Here are the factors that affect Woocommerce shipping costs:

  • Weight And Dimensions

The size and weight of your products play a significant role in determining shipping costs.

Heavier or larger items generally cost more to ship.

If you sell products of various sizes and weights, your shipping strategy will need to be more [FLEXIBLE] than if all your products were similar.

  • Packaging Materials

Some products require special packaging to ensure they arrive safely.

For example, if you sell fragile items like glassware or electronics, you’ll need to invest in protective materials.

  • Distance And Zones

The further your package has to travel, the more it will cost to ship.

Most carriers divide their service areas into shipping zones, with prices increasing as the package moves through more zones.

  • Handling And Processing Time

Don’t forget about the manpower of shipping.

You’ll need to account for the time and labor required to package and prepare orders for shipment. This includes creating labels, packing boxes, and coordinating with carriers. So, you have to keep this cost in your mind.

Now that you understand the factors affecting shipping costs, you might be worried about how you can offer an affordable shipping shipping fee without any profit loss.

The answer is applying effective shipping strategies to your WooCommerce store.

5 WooCommerce Shipping Strategies to Keep Customers Happy

Below, I’ve jotted down five WooCommerce shipping tips that you can apply in your WooCommerce store to keep your customers happy while maintaining your profits.

Let’s start with shipping options :

1. Offer Multiple Shipping Options

One size doesn’t fit all when it comes to shipping

So if you offer multiple options, you can give your customers the flexibility to choose what works best for them.

Also, you can handle WooCommerce shipping costs more wisely.

Here are some options to consider:

  • Live Shipping Rates

With live rates, also known as real-time shipping calculations, you can offer shipping rates at the carrier’s exact cost for various sizes, weights, and distances.

shipping Cost Calculation for physical and virtual products

In this example, you can see that you can charge your customers for only for physical products but not for virtual products.

This method syncs in real-time with your carrier’s rates, which ensures accuracy and transparency for your customers.

Also, this will show package options like a list.

Even if your customer chooses the lowest amount the shipping cost will not come down to your pocket.

  • Flat Rate Shipping

Flat rate shipping is simple – you charge the same amount regardless of order weight or size.

Among all other WooCommerce shipping ideas this one works well if your products are similar in size and weight, or if most customers order similar quantities.

This will create an impression that you are offering low shipping as you don’t change when the product size, or weight changes.

Customers find this kind of shipping easy since it eliminates the need for them to calculate the cost of shipping each time they make a purchase.

On the other hand, if your products are close in size and weight the carrier will cost you less.

So, It’s a Win-Win.

flat rate shipping
  • Table Rate Shipping

Table rate shipping uses a set of rules to calculate shipping rates based on factors like weight, size, shipping class, order total, destination, and number of items purchased.

This option provides the most customization and is especially helpful if you sell products that vary in weight, size, or volume.

weight based shipping
Weight Based Shipping

For example,

If a product in an order weighs up to 10 pounds then an additional $10 will be added with a basic shipping charge.

You can set the conditions as per your need like :

If products weigh between 1 and 3,999 pounds, they will incur an additional $1 in shipping costs.

If an order contains items weighing between 4 and 6,999 pounds, the shipping fee will be increased by $2.

In this way, you will not be charged for the extra size or location.

Here’s an example of Setting Up Size-Based Shipping :

size based shipping
Size Based Shipping

For stores with diverse product ranges, consider factoring in weight, size, and quantity when calculating shipping costs. Display buttons for weight, size, and quantity at your checkout page.

And set up the checkout in a way, so that the shipping cost change accordingly.

This way, your customers will know the exact reason for the increased shipping cost, making them more likely to pay.

  • Free Shipping (Conditional)
Free shipping

Your customer loves free shipping!

If you offer it conditionally, such as you add the condition “Orders Over A 2000 Amount And Get Free Shipping

This can encourage customers to add more items to their cart to qualify for free shipping.

In this way, even if free shipping costs your pocket, you can replace it with the high-profit margin you will get as your AOV increases.

  • Add Price-Based Shipping Costs
price based shipping

For stores with a wide range of products and varying price points, this solution allows flexible shipping costs.

You can set lower shipping fees for higher-priced items and adjust shipping costs for lower-priced products accordingly.

The benefit of this flexibility is that it helps store owners offer more competitive shipping rates that improve customer satisfaction.

By reducing shipping costs for high-value items and adjusting rates for lower-cost products, stores keep the option to balance profitability while offering different shipping costs to different customer segments.

This also encourages purchases of higher-priced items due to the lower shipping costs.

  • Offer Shipping Costs Based On Specific Products/Categories/Tags
product basede shipping cost

You can offer your shipping rates to specific products, categories, or tags.

This will deliver precise shipping calculations, especially if you have products with vastly different shipping requirements.

2. Apply Smart Pricing Techniques

Clever pricing strategies can help you offset shipping costs while keeping your customers happy.

Here are some techniques to consider:

  • Incorporating Shipping Costs Into Product Prices

Instead of charging shipping separately, you could increase your product prices slightly to cover shipping costs.

In this way, you can offer “free shipping” without losing any money.

  • Setting Minimum Order Values For Free Shipping

You can get larger orders by offering free shipping when customers reach a certain order total. This can increase your average order value while providing value to your customers.

free shipping
  • Using Psychological Pricing

Small tweaks in pricing can make a big difference.

For example, pricing an item at $9.99 instead of $10 can make it seem more affordable, even though the difference is minimal. This technique is called Charm Pricing.

This triggers a special psychological phenomenon in people that’s called “left digit bias,” in which consumers focus attention on a number’s leftmost digit (in this example, the price of a product).

Charm pricing

3. Optimize the Checkout Process

A smooth checkout process can reduce cart abandonment and improve customer satisfaction.

Here’s how you can optimize it:

  • Add A Location Picker At Checkout

This strategy is to allow your customers to select their location early in the checkout process.

Then provide accurate shipping estimates upfront. And after that, you will reduce the shipping price at the final step.

Your customers will feel like they are getting a surprise and as a result, you will not charged for the shipping.

  • Simplify The Shipping Information Form

You should make it as easy as possible for your customers to enter their shipping information.

Use autofill where possible and only ask for essential information.

In this way, the checkout process will be done quickly and your customer will be happy.

You can easily create a checkout page with fewer fields using the Checkoutify plugin :

Checkoutify

This tool helps to create a more efficient and user-friendly experience by:

  1. Eliminating unnecessary form fields
  2. Minimizing distractions during the purchase flow
  3. Reducing the amount of effort customers need to expend

As a result, you will get a more focused checkout that can potentially increase your conversion rates.

Also, you should provide clear shipping cost estimates early in the process

Don’t wait until the last step to reveal shipping costs. Provide estimates as early as possible to avoid surprises that might lead to cart abandonment.

4. Offer Time-Based Shipping Options [Special]

Time-based shipping options can create urgency and encourage purchases among your potential buyers.

Time based shipping

Here are some ideas:

  • Daily Limited-Time Shipping Offer [Hour Based]

You can create a sense of urgency by offering special shipping rates during certain hours of the day.

For example, you can offer “Free shipping on all orders placed between 2 PM and 4 PM!

  • Special Shipping Offers On Fixed Days

You can boost your sales on slower days by offering special shipping rates.

Suppose, you can offer “Free shipping on all orders placed on Tuesdays!”

Free shipping on fixed days

Use Advanced Shipping for WooCommerce

Applying these strategies manually is quite time-consuming as the shipping options WooCommerce by default are cluttered.

To apply these shipping strategies or more easily, consider using the Advanced Shipping for WooCommerce plugin.

Advanced shipping

It will allow you to set up complex shipping rules based on various conditions, including time and day.

5. Deliver Better Customer Experience

Shipping isn’t just about rates – it’s about the entire experience.

Here’s how you can improve it:

  • User Role-Based Shipping Discounts

You can reward your loyal customers by offering shipping discounts based on user roles.

For example, you can offer your regular members or frequent buyers preferential shipping rates.

User Role Based Shipping Cost in WooCommerce
Different shipping costs for different WordPress User Roles
  • Offer Delivery Date And Time Schedule

You can give your customers more control over their deliveries by allowing them to choose a preferred delivery date and time.

This is especially valuable if you are selling perishable goods or items that require the customer to be present for delivery.

  • Provide Order Tracking Information

You can keep your customers informed about their package’s journey.

Try to provide tracking numbers and consider integrating with your shipping carriers to offer real-time tracking updates directly on your site.

  • Send Automated Shipping Notifications

Keep customers in the loop with automated emails or SMS messages at key points in the shipping process.

For example, you can integrate with your shipping carrier and send your customer messages on when the order is packed, when it’s shipped, and when it’s out for delivery.

Why Customer Feedback Is Important

Getting Customer feedback and giving value to their opinion is important.

PwC reports that 17% of customers will leave a company by 1 unfavorable experience, and 59% of customers leave their even favorite company after a series unfavorable experiences.

Having a listening ear for consumers leads to better customer service and experience.

Also, it saves you from losing your customers.

When you value your customer feedback and improve your shipping process accordingly, you show that you appreciate your current clientele and prioritize them!

86% of customers are willing to spend extra for an improved customer experience, according to CX statistics.

Not just these, ever heard the proverb?

Happy consumers refer three friends, whereas dissatisfied ones refer ten.

If your current customers are happy with your business, they will recommend your products or services to others. So, that’s a free branding you will get by prioritizing your customer’s feelings.

Final Thoughts

Creating an effective shipping strategy for your WooCommerce store is all about balance – keeping your customers happy while not losing your profits.

If you apply strategies like the ones mentioned in this article while focusing on customer experience, you can maintain both.

Your ideal shipping strategy will depend on your specific products, customer base, and business goals.

Keep adjusting your strategy as you learn more about what works best for your store.

Apply these WooCommerce shipping strategies, these are well thought out and highly effective.

So, why wait? Start applying these strategies and you’ll be well on your way to happier customers and a good profit margin.

To utilize these strategies, try out the best plugins in WordPress from the following guide,

Categories
WooCommerce WooCommerce Sellkit

What Is WooCommerce Catalog Mode [Beginner’s Guide]

As an online store owner, your focus must be on increasing sales and conversions.

However, you need to increase your store visibility to attract more potential buyers.

Let me tell you the truth: Traditional direct ordering methods might not always be the best fit for this.

You need to present your store differently so the limelight of your targeted customers comes on your store.

Your website can be a site with a catalog of products or services instead of a website with just Buy nowor Add to cart products.

You can provide quoted messages, or you can select whether you want to show products to local customers or wholesalers or display your product in any way without being salty with a direct sale approach.

Today I’ll discuss what catalog mode is, the benefits of using WooCommerce in catalog mode, and when and how you should use WooCommerce catalog mode.

let’s get started.

What is WooCommerce Catalog Mode?

WooCommerce catalog mode is a feature that transforms your ordinary online store into a digital product showcase store.

Think of it as a fashion show, where designers present their different types of design in front of people with ramp-walking models.

fashion show

Couldn’t they just lay their design on a rack and show them off with a price tag?

Women fashion clothing store

In a fashion show, you can see how a particular cloth will look good after wearing it. Also, you can sense the fabric, and design more clearly as in a ramp walk models come one after one.

On the other hand, in a clothing store where a single line holds 10 to 20 clothes, you really can’t get the design detail that precisely.

That’s exactly the difference between an ordinary WooCommerce store page with just a product name, price, and no other details.

On the other hand, when you enable WooCommerce in catalog mode you can present your products like this :

online catalog

This is a catalog of a microfiber wholesaler.

Notice the description here, they have added the size, and how many towels are there also they include a review.

So, In a nutshell, WooCommerce in catalog mode allows you to display your items just like a regular e-commerce site but without the ability for visitors to make direct purchases.

When catalog mode is enabled, your WooCommerce store undergoes several changes, such as:

  1. The “Add to Cart” buttons are typically removed or replaced with custom messages.
  2. Prices may be hidden or displayed based on your preferences.
  3. You can disable cart and checkout functionalities.
  4. You can showcase product pages focusing on detailed information and high-quality visuals rather than purchasing options.

This mode creates a browsing experience similar to flipping through a physical product catalog, which allows your customers to explore your offerings without the pressure of immediate purchase decisions.

Let’s go through some reasons why you need to use WooCommerce catalog mode.

Why should you use WooCommerce Catalog mode?

Using WooCommerce catalog mode means removing direct selling options.

It might seem stressful to remove direct purchasing options from your WooCommerce site.

But, indirect approaches often work much better than direct approaches!

Think of yourself,

Suppose you went to a shop, and you saw someone saying you buy this product and this is the price.

On the other hand, you get another salesman describing how the product is, what materials are used, what the size of the product is, and what other sizes of products are available.

Which will be more tempting for you to try out?

Of course second one.

Here are some compelling reasons for you to consider using Your WooCommerce store in catalog mode:

  • Flexibility in Sales Processes:

Catalog mode allows for more complex or personalized sales processes, which can be crucial for certain business models.

  • Lead Generation:

By replacing the “Add to Cart” buttons with “Request a Quote” or “Contact Us” options, you can generate leads for follow-up sales efforts.

  • Showcase Products Without Commitment:

You can display your entire product range without worrying about inventory management or immediate order fulfillment.

  • Protect Pricing Information:

For businesses with variable or negotiable pricing, catalog mode helps keep price details private until customer engagement occurs.

  • Improve Site Performance:

With fewer dynamic elements like cart updates and checkout processes, your site may load faster and provide a smoother browsing experience.

  • Focus on Product Information:

Without the distraction of purchasing options, customers can concentrate on learning about your product’s features and benefits.

When Should You Use WooCommerce Catalog Mode Most?

As you now know the reasons, let’s know the right timing or situations for using WooCommerce catalog mode:

Showcasing Products Without Selling

Catalog mode is ideal when your primary goal is to showcase products rather than immediate online purchases.

Suppose,

You have a physical store of travel bags. You primarily sell products at brick-and-mortar locations but want an online presence to showcase your products.

Now, you can use your WooCommerce store in catalog mode to showcase what type of travel bag you sell, what are the sizes, reviews, which ones are sold out, etc.

Selling Custom Products With Customizable Pricing

If you are selling items that require customization or personalization, catalog mode will let your customers explore options before initiating a consultation.

Suppose, you sell cakes. The flavors, colors, and cake design vary from customer to customer.

cake shop catalog example

Source

So if you use a catalog like this cakeshop, you can show them different designs, mention the weight, mention whether you used fondant or regular cream, occasions, etc before an in-person call.

In this way, you get knowledge about what that client wants and brief better in your in-person meeting.

Running B2B Operations Smoothly

If you are someone related to Business-to-business (B2B) operations, you can benefit from catalog mode in following ways:

  • Wholesale Catalogs

You can display your product range to potential businesses (B2B) without revealing pricing to the general public.

Diva’s Bag, a wholesale bag company added catalog mode to their site. They sell bags wholesale to other small businesses at a customized pricing.

On the first page, they have created different catalog pages:

divas bag

As you click on the “Discover” button, you will be on this page :

divas travel bag

Just like this wholesale company, you can also represent your products in this way. Notice that they have added a description too, in this way, you can do branding while displaying your product.

  • Complex Pricing Structures

For industries with variable pricing based on order volume or client relationships, catalog mode allows for private quote requests.

Think about event food suppliers. Their orders depend on what type of event it is, how many people are coming, and what type of food the client wants.

online food delivery company together

They really can’t put an exact amount on their site. Instead, they can show the pictures of their items, names, what ingredients they use, and the reviews they got up until now with a “Get Quotes” request button.

  • Approval-Based Purchasing

Some B2B transactions require approval processes before orders can be placed, making a catalog-style site more appropriate.

contact contact us

Handling Out-Of-Stock Situations

You might face difficulties handling “out of stock” products in your store. A catalog mode makes it easy for you to control how the out-of-stock product will appear to your customer.

Think of the seasonal products of your stores. For items only available at certain times of the year, catalog mode can keep them visible while indicating their temporary unavailability.

In terms of supply chain issues, you may face unexpected stock shortages.

In that case, you can switch to catalog mode which will help you to maintain product visibility without disappointing your customers with out-of-stock messages.

During High-Demand Periods

High traffic and demand can sometimes overwhelm your store systems. Catalog mode offers a solution to it.

Suppose in the time of Flash Sales or a Major Sale event, you can use catalog mode to build anticipation and allow customers to plan their purchases.

There are often when you want to release a limited edition for a few of your products.

For products with restricted quantities, catalog mode can help you manage demand and create a fair purchasing process.

Giving Teasers Of New Arrivals In Your Store

Catalog mode is an excellent way for you to build excitement around your new product release time.

You can publish a teaser series catalog in your store for your new arrival products.

Here are some pre-launch and post-launch ideas:

  • Pre-launch

Suppose, you are an owner of a shoe store. And you are bringing new types of sneakers to your store. You can create a coming soon catalog page and showcase upcoming products to generate pre-launch interest.

You can also create sneak peek catalog pages with exclusive previews to your loyal customers or newsletter subscribers, to increase engagement of your store.

Did you notice I mentioned “loyal customers” mean repeating customers not all your customers?

I did it because you can restrict and select your desired customer base to show your catalogs.

  • Post-launch

Not only pre-launch, catalog mode will help you in the post-launch process as well.

You can provide a catalog of Gradual Release.

You can introduce new products in catalog mode before opening purchases to gain interest and manage products effectively.

Mac cosmetics catalog

Source

You can also offer a Waitlist.

You can use catalog mode with a notification sign-up to build a waitlist for your high-demand items.

WooCommerce Catalog Mode Advanced Use Cases

There are more type of options for displaying your products using WooCommerce catalog mode.

Here are a few:

Role-based pricing and access

You can enable catalog mode and customize it to offer different experiences based on your user roles.

For example,

  • You can offer tiered pricing means you can display different prices or product availability to wholesale customers instead of retail buyers.
  • With a catalog, you can also showcase premium or limited edition items only to registered VIP customers.
  • You can also provide additional product information, case studies, or training materials to authorized resellers or distributors.

Region-based catalog and pricing

You can tailor your catalog to different geographical markets.

For example,

  • You can show or hide products based on shipping restrictions or regional regulations.
  • You can display prices in local currencies for international customers when applicable.
  • You can adjust product descriptions or imagery to align with regional preferences and norms.

How To Use WooCommerce Catalog Mode

Now, that you know what, why, and when you should use WooCommerce catalog mode, let’s see a brief process of how you can enable WooCommerce catalog mode.

To enable it easily, you can either do it manually or use plugins available in WordPress. However, the manual process is really lengthy.

Using a WooCommerce catalog plugin you can:

  • Remove, Redirect, or Restrict All “Add to Cart” Buttons
  • Choose to hide “Add to Cart” buttons across your site or on specific pages.
  • Optionally, replace these buttons with custom text or contact forms.

The process may vary on the plugin you choose to use.

Final Thoughts

If you use WooCommerce in catalog mode, you can transform your online store into a versatile showcase for your products or services.

Just be careful when and how to implement catalog mode, follow the tips that I gave in this article, and you won’t be wrong!

Make sure your catalog mode settings align perfectly with your business model and customer needs.

You need to understand how to communicate with your customers while turning your WooCommerce store into catalog mode.

Ensure that your customers understand how to proceed with purchases or inquiries, whether that’s through contact forms, customized buttons, phone numbers, or directions to physical store locations.

Make sure you are engaging product descriptions, high-quality images, and even videos to make your catalog an invaluable resource for customers, even when they’re not making immediate purchases.

To enable catalog mode in WooCommerce, you can check out this guide,

Frequently Asked Questions (FAQs)

FAQ 1: Can I switch between catalog mode and regular e-commerce mode?

Yes, most catalog mode plugins allow you to easily toggle between modes. This can be useful for temporary promotions or seasonal changes in your business model.

FAQ2: Will catalog mode affect my site’s SEO?

When implemented correctly, catalog mode shouldn’t negatively impact your SEO. Focusing on detailed product information and reducing clutter, might even improve your content quality and user engagement metrics.

FAQ3: Can I use catalog mode for just a portion of my products?

Absolutely! Many businesses use a hybrid approach, keeping some products in catalog mode while allowing direct purchases for others. This flexibility can be especially useful for businesses with diverse product lines.

FAQ4: How can I measure the success of my catalog mode implementation?

Track metrics such as time spent on product pages, inquiry form submissions, and follow-up sales. You may also want to survey customers about their browsing experience to gather qualitative feedback.

FAQ5: Are there any downsides to using catalog mode?

The main potential downside is the loss of impulse purchases. However, for businesses where catalog mode makes sense, the benefits of lead generation and more personalized sales processes often outweigh this concern.

Categories
Virtual Reality WP VR

Using 360 VR Panoramas In 2024 [Beginner’s Guide]

360 VR panoramas are very popular nowadays, you will find many websites using virtual tours, and many YouTube channels using 360 video tours.

All sectors of the business are now using 360 VR panoramas to give their customers real-life experiences virtually, from marketing and entertainment to real estate.

You can’t provide a realistic experience with flat photography or regular video.

With a flat image or traditional video, you can do nothing else but have a look, but with 360 VR panoramas you can literally explore a place however you want.

So, you can already understand how great it is!

To help you guide how to use it, this article will give you all the necessary knowledge you need to use VR Panoramas with examples.

I’ve also mentioned which resources you need (with suggestions) for using 360 VR panorama to use this knowledge and ideas from the use case to attract more audience or customers.

Let’s begin.

What is a 360 panorama?

what is a 360 panorama

First, let’s start with what 360 panoramas are.

360 panoramas are images that capture a full 360-degree view of a scene.

A “360-degree” or spherical panoramic image captures the entire view surrounding the camera.

This comprehensive visual representation allows viewers to explore the complete environment as if they were standing at the center of a sphere.

Alright, let’s give it a more casual spin:

Picture this: you’re taking a photo that grabs literally everything around you. We’re talking about the whole space – the sky up top, the ground under your feet, and every bit in between.

That’s what’s a 360-degree or spherical panorama called.

Here’s a guide for you to start learning to capture 360 Panorama photos.

Why Use 360 Panoramas for VR?

When used in virtual reality (VR), these panoramas can transport you to different places, making you feel like you’re in that place.

Using 360 panoramas in VR has many benefits that you can’t get with regular flat images.

  • They create realistic experiences.
  • They’re great for virtual tours of real places.
  • They help preserve memories more engagingly.
  • They’re useful for education, training, entertainment, and business.

Not just that if you compare a flat image with a VR panorama, you will find a huge difference.

To use 360 panoramas in VR, you need to gather some materials,

Resources You Need To Use 360 Panoramas for VR

To get started with 360 panoramas for VR, you’ll need:

  1. A camera to capture 360-degree images
  2. VR software to edit and view your panoramas
  3. A VR headset (optional, but it enhances the experience)

Let’s start with material 1:

1. Choose A Camera To Capture panoramic Images

There are three camera options for capturing 360 panoramic images:

Option 1: Digital 360 Degree Cameras

360-cameras for 360 panorama photos

Digital 360-degree cameras are specially designed to capture 360-degree images in one shot.

They’re easy to use and give consistent results.

Popular models include:

  • The Insta360
  • Ricoh Theta
  • GoPro Max

A 360-degree camera can capture in motion (one shot). For the same reasons, it may require a little space.

You can go with this option to shoot, press a single button as it is incredibly simple to manage.

Option 2: DSLR

DSLR Cameras For 360 VR Panorama photos

You can use a DSLR camera to take multiple overlapping photos and stitch them together later.

With DSLR, you can get high-quality results but it requires more skill and time.

Here’s a guide for you to shoot 360 panoramas with a DSLR.

To capture a 360-degree image with a DSLR camera, you’ll need to follow these steps:

  • You will need a sturdy tripod.
  • Take multiple photos, making sure they overlap, to cover the entire surrounding area.

Keep in mind that you’ll need to combine these photos yourself using separate software after you’ve finished shooting.

Option 3: Smartphone

Using smartphones to create 360 photos

Many modern smartphones have a panorama mode that can capture 360-degree images.

While not as high-quality as dedicated 360 cameras, they are not bad quality either.

They’re convenient and always with you.

You do not have to buy a special gadget or tripod if you are using a smartphone.

Here’s a guide for you to start creating Panorama photos using a smartphone.

Also, you can easily stitch your panoramic images using panoramic apps.

Depending on your smartphone’s quality, sometimes it can even generate photographs of higher quality than a dedicated 360-degree camera.

You can opt for a VR tool that is mobile-friendly. With mobile-friendly VR software, you can easily load panoramic images, videos, or tours that you have taken from your smartphone or iPhone.

As you have an idea about camera choices, here are some mistakes you shouldn’t make while capturing your panoramic image for VR.

Mistakes To Avoid While Taking A 360 Panorama Photo

In this part, I’ll go through at frequent issues that pop up when taking and processing panoramic images. I’ll offer advice on how to solve these problems and improve your results.

Dealing with Glare

Glare can be a real headache when shooting in very bright places. It can make parts of your image too bright, losing important details and making the picture less appealing.

Tip: Try taking photos during the “golden hours” – early morning or just before sunset when the light is softer. Also, using a polarizing filter can help cut down on reflections and glare from shiny objects.

Fixing Stitching Problems

When the individual images don’t line up correctly, it can lead to weird-looking perspectives and uneven joins in your 360 image. This can really hurt the overall quality.

Tip: Use a solid tripod and turn the camera around its center point (called the nodal point). This helps keep everything lined up properly and avoids errors caused by changing viewpoints.

Balancing Different Exposures

If the brightness levels of the different frames used to make your 360 images don’t match, you’ll end up with obvious differences in light and dark areas. This can make the final image look uneven and less professional.

Tip: Shoot in manual mode. This means setting things like shutter speed, aperture, and ISO yourself for all the frames. By keeping these settings the same, you’ll get consistent brightness across all your shots and avoid noticeable differences in exposure.

2. Choose A VR Software with an Easy Interface

Apart from capturing your panorama images, you need to have tools to view and edit your panoramas and to create virtual tours video tours, or any type of virtual reality you want.

to do that, you’ll need VR software.

Look for options with user-friendly interfaces, and features that you can use engaging information while creating your VR.

One of the popular choices is:

WPVR – This virtual tour software creates captivating tours in just five minutes. Because it has a simple and easy interface with powerful features. As a result, you can generate high-quality virtual tours with simple steps.

3. A VR Headset (Optional)

You can enter virtual environments and become part of what is happening by putting on a VR headset.

The headset blocks out the real world and replaces it with the virtual reality world. Everything you can see in VR moves with you to make you feel like part of the action/ place.

There are different types of VR headsets, ranging from simpler, cheaper models to more expensive, high-tech versions.

These headsets all work in slightly different ways, but most come with controllers to help you guide virtually.

VR Headset support

Use cases for 360 Panoramas In VR

Virtual Reality (VR) is changing how people work and learn in various sectors.

In education, students can take virtual field trips to ancient Rome. Shoppers can try on clothes without leaving home. Even car designers use VR to test new models without making expensive prototypes.

The results of using VR can be amazing. It can make learning more fun and effective. It can save companies money on training, marketing, and design. VR can help people understand complex ideas or deals more easily.

It can make shopping more convenient and reduce returns. In therapy, VR can help people face different situations in a safe environment.

As VR technology continues to improve, we’ll likely see even more creative uses across different fields.

I’ve discussed different types of fields where VR is already a leading factor for the business.

Keep reading, you may find the industry you are related to!

1. Real Estate

The real estate industry has embraced 360 panoramas in VR for good reason. Realtors can sell more properties with higher closing rates with engaging video tours or virtual home tours.

  • Virtual Property Tours: With virtual property tours, potential buyers can explore properties from the comfort of their homes, saving time and resources for both clients and agents.
  • Virtual Walkthrough Tour: Virtual walkthroughs of rooms allow for better planning and client approval.

Example:

Operating in South Korea, UN Reality is a provider of real estate services.

Using WPVR, they have produced several virtual tours of their properties, which they are utilizing on their website to showcase them to prospective purchasers.

The virtual tours they produced are shown here :

User review of WP VR

Now, here’s another real estate virtual tour showcase that you can create using WPVR,

2. Tourism and Travel

From your house in Singapore or California, picture yourself being able to take a guided tour of Barcelona or Budapest.

It is possible to achieve it with VR. Using VR technology the tourism industry has found VR to be a game-changer in attracting and engaging potential travelers.

Here’s why :

  • Virtual Destination Previews: Travel agencies can offer immersive previews of destinations, hotels, and attractions.
  • Interactive Travel Guides: Tourists can explore 360 panoramas of landmarks and cities, complete with informational hotspots and audio guides.
  • Preservation of Historical Sites: Fragile or restricted areas can be digitally preserved and made accessible through VR.

Example:

Atlantis Dubai has shown all of the distinctive features that are available for clients to view and investigate before they arrive using 360 video tours.

3. Hotel & Resort

The hotel and resort industry has embraced 360 panoramas in Virtual Reality (VR) as a powerful tool for marketing, customer experience, and operational efficiency.

Let’s explore some benefits of this technology in the hospitality sector :

  • Accurate Room Previews: Guests can explore room types in detail before booking, reducing the likelihood of disappointment upon arrival.
  • Showcase Amenities: Hotels can highlight their pools, gyms, spas, and restaurants in an immersive way.
  • Accessibility Information: 360 panoramas can help guests with mobility issues assess the suitability of rooms and facilities.

Example :

In Purulia, West Bengal, there is a 4-star boutique hotel called Pearl Tree. They have prepared a few fantastic virtual tours for most of their hotel rooms using the plugin WPVR.

Here’s it is :

Pearl Tree Hotel VR Tour Created With WPVR.

To facilitate easier booking decisions, Many hotel and resort owners are providing 3D walkthroughs.

Here’s an example of how what a complete 3D hotel virtual tour would look like,

In addition to the guestrooms, prospective visitors can peruse the hotel’s restaurant, patio, and lobby to get a sense of the layout and amenities available.

4. Art Exhibitions and Museum

The Art Exhibitions and Museum industry is using 360 VR Panoramas to attract more visitors.

  • Art Exhibitions: The art gallery virtual tour lets viewers take a closer look at paintings or art without a live visit to an Art exhibition.
  • Museum: A virtual museum will help attract customers because they can explore the museum sitting comfortably in their homes.

Example :

This well-known museum Musée d’Orsay, Paris, which has dozens of well-known French paintings from the 19th and early 20th centuries offers a virtual walkthrough of the museum on their site.

Now, explore a real art gallery virtual tour that was showcased in Minsk, Belarus,

5. Education

in the education section, students or parents looking for a campus visit online and that’s why many education institutions are using virtual tours on their websites.

On the other hand, teachers are using 360 video tours or virtual field trips to create excitement and provide more knowledge about a historical place to their students.

  • Virtual Field Trips: Students can visit far-off locations, historical sites, or even other planets without leaving the classroom.
  • Campus tour: Through virtual campus tours, students will have a chance to show off all the best areas of campus, including hallways, faculty areas, dormitories, classrooms, labs, etc.

Example:

Virtual tours of Sherborne International School’s classrooms, residence halls, and other facilities have been produced.

The image of the virtual tour of their school’s grounds is below:

example of virtual tour

6. Retail and E-commerce

360 panoramas are changing how people are shopping online now. Retail and e-commerce sectors are using virtual tours or showcases or creating virtual stores to attract more clients.

  • Try Before You Buy: Users can visualize how furniture or decor items would look in their own spaces.
  • Interactive Catalogs: Brands can create immersive product catalogs that users can explore in VR.

Example:

Fashion houses that participated in the second annual Metaverse Fashion Week in March 2023 like DKNY and Tommy Hilfiger, used virtual stores to show their collection.

7. Automotive Industry

Car showrooms can use 360 tours to showcase their latest arrivals and users can look around from the comfort of their homes.

Here’s are some important factors of using virtual reality in the automotive industry.

  • Realistic Experience: Create A Meaningful Experience For Potential Buyers
  • Drive More Sales: Add Relevant Car Details [Both interior & Exterior] Than Can Drive Decisions

Here’s a complete virtual car showroom tour for you to explore

How to Share Your 360 VR Panoramas Across Different Platforms

Sharing your 360 panoramas is easy, you can :

  • Upload them to social platforms like Facebook, Reddit, LinkedIn, etc.
  • Create a virtual tour and share the link with iFrame code on specialized 360 photo sites.
  • Use QR codes to let people easily access your panoramas on their devices.

Either you can use a VR tool that has the feature to share your virtual tour on any platform you want. One such tool is WP VR.

Go through this video to know how easily you can share your virtual tour with WPVR.

Closing Thoughts on VR Panoramas

As VR technology continues to advance, VR panorama will play an increasingly important role in how we capture and experience the world around us.

Start with simple scenes, experiment with different techniques, and soon you’ll be creating stunning virtual experiences. You can go through this complete guide,

For any kind of queries comment below!

Categories
WooCommerce

Enable Catalog Mode with 5 Most Used Plugins

Showing irrelevant items can reduce the number of potential buyers in your online store.

If you provide a catalog with relevant products on your site, the chances of converting your website visitors into paying clients increase.

How?

When you display things that they are genuinely interested in instead of showcasing the prices, they get a strong feeling of getting their desired products in your store!

It highly triggers their buying sense, and they end up buying your products or at least asking the price of the products.

To create a catalog of relevant products based on your user perspective, you need to enable catalog mode.

However, the process of manually enabling catalog mode is a lot of hassle.

With catalog mode plugins, you can easily enable that.

There are several plugins and WooCommerce extensions available.

After researching a lot of plugins, I’ve selected 6 best catalog mode plugins and provided detailed information on these below.

But first, let’s see why you should enable catalog mode in your online store.

Why You Need Plugins To Enable Catalog Mode

You need to enable catalog mode to convert your usual website to a catalog website.

So, what’s the difference?

To put it simply, a catalog website is one that seems like an ordinary online store but lacks the “Add to Cart” button, cart, and payment process.

On the other hand, a list of products with photographs, technical details, and descriptions that are relevant to that particular category of goods or services can be found there.

With a catalog website, your customers can obtain all the information they need about your goods or services with online catalog, but in order to make a purchase, they need to take an additional step: either choose a local merchant from the list to place their order, or fill out a form to find out the price.

Not just these, Catalog mode also benefits you in selling complicated or expensive goods.

For example, Bare Metal Laser, an online retailer of high-end industrial equipment, offers detailed product details and prices, but instead of standard “Buy Now” buttons, their website displays “Make an Enquiry.”

Here’s another one: ROL Workplace, This company offers high-end electrical desks for workspaces and some additional accessories. They also used catalog mode to show all of their available desks.

Sample of catalog mode

WooCommerce does not, by default, include a “magic button” that can be used to switch an eCommerce website with pricing and cart capabilities into catalog mode.

That’s why you need additional plugins that will help you to enable catalog mode in your online store.

Top 5 WooCommerce Catalog Mode Plugins

I’ve selected 6 catalog mode plugins to review in this article.

Here every plugin has special features. I’ll go over what makes these tools special down below, and what you can do with these plugins with the pricing structure.

You can select a plugin from here based on your needs and preferences.

So, let’s go through them one by one :

1. YITH WooCommerce Catalog Mode

YITH catalog mode plugin

The YITH WooCommerce catalog mode plugin offers a great degree of customization.

Using the options this plugin offers, you can also design a special call to action button and labels.

In addition to the personalized CTA buttons, this plugin allows you to make an inquiry form.

You don’t need any coding skills to create forms with this plugin. Additionally, you can modify the form to fit your needs in terms of styles.

The ability to enable or disable catalog mode is another noteworthy feature of this YITH product catalog plugin. You can choose which products in the store to enable catalog mode. You can apply this to a particular location as well with this plugin.

Key Features of YITH WooCommerce Catalog Mode

In the below, I’ve listed some notable features of this plugin that are praised by their users.

  • Selective catalog mode application.
  • User-specific catalog mode settings.
  • Add to quote” button integration and display this on every product page.
  • Activate the ‘Return to shop‘ and ‘Update list‘ buttons.
  • Conceal the prices on all product pages.
  • Automatically display the ‘Add to quote‘ button for out-of-stock products.
  • Customize the style and the colors of the ‘Add to quote‘ button according to your own brand color &style.

Pricing

This plugin offers a free plan but to get access to all of its features you need to take their pro plans which start from $69.99/ yearly.

Get the Tool: YITH WooCommerce Catalog Mode

2. Advanced Catalog Mode for WooCommerce

Elex Advanced catalog mode

Now for the second plugin to review, I’ve chosen advanced catalog mode.

With this plugin, you can enable catalog mode, wholesale pricing, and WooCommerce role-based pricing in just a few clicks.

Additionally, you can restrict the use of catalog mode to clients or guests who meet certain user role requirements.

Every sort of WooCommerce product is supported by the plugin. It also allows you to conceal payment methods according to user roles.

Additionally, you can personalize the “Add to basket” button to entice clients to get in touch with you or seek a quote.

Key Features of Advanced Catalog Mode for WooCommerce

Apart from what I mentioned about this plugin now, here are some highlighted features of this plugin :

  • Add to Cart” button customization.
  • Configure general and role-based catalog mode settings for each product.
  • Set a priority to hide payment options.
  • This plugin offers support for WPML.

Pricing

The pricing plan of this plugin starts from $6.59 monthly (billed annually at $79)

Get the Tool: Advanced Catalog Mode for WooCommerce

3. CatalogX – Product Catalog Mode For WooCommerce

CatalogX

With the CatalogX plugin, you can turn your online store powered by WooCommerce into an interactive catalog.

You can use specific inquiry forms to easily gather consumer questions via email for each product.

You can also customize the form fields to your requirements, and you can also select between an eye-catching pop-up display or a slick inline format.

Additionally, there is an option to add the inquiry button to the theme of your website by using custom CSS variables.

Key Features of CatalogX

Here are some highlighted features of this plugin :

  • Request a product option.
  • Customizable “Add to Cart” option.
  • Price visibility management option.
  • Customization of the inquiry form feature.
  • Variable product support option.
  • Management based on roles.
  • Query management by Role.
  • Quick search to easily locate customer quotes.
  • Activate catalog mode options for single or all product.

Pricing

This plugin offers a free plan. The pricing structure of this plugin comes with 3 plans: Growth, Agency, and starter. The growth plans will cost you $109/per year and it will provide 3 site support.

The starter one will cost you $79 and will provide you with 1 site. The agency plan costs you $159/ yearly and this is for 10 sites.

Get the Tool: CatalogX – Product Catalog Mode For WooCommerce

4. ELEX WooCommerce Catalog Mode

ELEX catalog mode

Check out ELEX WooCommerce Catalogue Mode if you are looking for a simple-to-use plugin to enable catalog mode on your WooCommerce store.

The WPML WordPress plugin and the plugin are 100% compatible.

Therefore, ELEX WooCommerce Catalogue Mode will not cause any problems if you manage a multilingual business using WPML.

The plugin also has a great feature called user role-based pricing. You can establish a special fee for particular user roles.

You should use this functionality if you have a membership model. In this manner, regular users must pay the full amount while premium members receive discounted goods and services.

Key Features of ELEX WooCommerce Catalog Mode

Here are some best features of this plugin :

  • Role-based pricing.
  • Wholesale pricing and discounts.
  • Customizable “Add to Cart” button.
  • Request a quote.
  • Hide the cost of the products.
  • Compatible with variable products.
  • Additional personalization choices on product pages.
  • Support for WordPress Multilingual (WPML).

Pricing

The WordPress plugin ELEX WooCommerce Catalogue Mode is available for free. The plugin’s free version is available for download from the repository.

However, the premium edition of the plugin is available for $79 annually for 1 site. If you need this plugin for more sites then the price will be increased.

Get the Tool: ELEX WooCommerce Catalog Mode

5. Catalog Visibility for WooCommerce

Catalog visibilities for WooCommerce

If you want to eliminate eCommerce capabilities from your online store and convert it to a catalog one, then you should simply go for Catalog Visibility For WooCommerce.

With this well-liked plugin, you can incorporate catalog mode into your WooCommerce store. You may conceal the prices, cart feature, checkout option, etc. with just one button click.

You also have the option to show prices to users who are logged in only.

You can also hide the price of your goods or services from visitors who are not registered on the internet with this plugin.

Key Feature of Catalog Visibility for WooCommerce

Using this plugin, you can :

  • Has a “Hide price” and “Hide product” feature.
  • Disable the functionality of the cart option.
  • Removes the checkout function.
  • Customizable roles of users option.
  • Option to add “Set priority”.

Pricing

The WooCommerce plugin Catalogue Visibility Options is a premium one. The plugin costs $6.59 per month or $79 annually and can be downloaded from the official WooCommerce website.

Get the Tool: Catalog Visibility for WooCommerce

Final Thoughts

The experience your consumers enjoy in your store has a big impact on how successful your WooCommerce Store is. So, you should definitely convert to catalog mode to provide a professional experience to your potential buyers.

All five of these plugins, in my opinion, can transform your store into catalog mode quickly and easily.

I hope that this post helped clarify the differences between the different plugins.

These plugins require very little technical expertise and setup to access all of the fundamental features found in the Free version.

That is my opinion, and please feel free to leave a comment below if you have any queries!

Frequently Asked Questions (FAQs)

FAQ 1: Which Catalog Mode plugin is best for customizing which users can see prices and purchases?

– The YITH WooCommerce Catalog Mode plugin is often recommended for its granular control over user roles.

It allows you to hide prices and disable purchasing for guests while keeping those functions active for registered users or specific user roles.

FAQ 2: How to enable catalog mode in WooCommerce?

-While WooCommerce doesn’t have a built-in catalog mode, you can use a plugin to add this functionality.

Categories
WooCommerce

Effective Ideas To Customize WooCommerce Checkout fields- 2024

Have you ever wished that your cart abandonment rate dropped very low or that no customer ever abandoned their cart on your site?

If yes then the answer is to simplify your checkout page to save customers’ time and reduce frustration.

In a nutshell, you have to provide a Simple, Clear, Attractive Checkout.

For that, you’ll need to gather some actionable ideas to customize WooCommerce checkout fields as the default checkout pages in WooCommerce are very cluttered.

Well, here’s the best thing.

This list is filled up with 7 PROVEN (and little-known) ways to customize WooCommerce checkout fields that are easy to apply and 95% possibility of reducing your abandoned cart rate.

Also, I’ve provided some ideas of how you can apply these strategies easily at the end.

Let’s get started.

7 Actionable Tips To Customize WooCommerce Checkout Fields

I’ve picked 7 checkout field customization ideas that you can apply and reduce your cart abandonment rate:

1. Remove Unnecessary Checkout Fields

Many of your customers might leave your site due to unnecessary fields on the checkout page.

The best idea that you can do is to delete the unnecessary fields from your checkout page.

Suppose you visited a store online for a gift, you choose it then you proceed to the checkout page.

Now in the checkout field, you become irritated while filling up the unnecessary fields and end up abandoning your cart.

The same happens with your customers too. To avoid this you need to remove the fields that are not necessary for your customers to checkout items.

Now, this is WooCommerce’s default checkout form.

Effective Ideas To Customize WooCommerce Checkout fields- 2024 1

As you can see, all kinds of options are given in this form for many types of businesses. You need to adjust it according only to your requirements.

Not all the options given in this form are needed for your business. Keep only the one that you need and cut out the rest.

Here’s a guide on how you can cut out unnecessary fields that you don’t need.

2. Edit WooCommerce Checkout Fields Labels- Add Label, Insert Placeholder Text

WooCommerce customers are very used to seeing the same checkout field again and again.

To make a difference and make the fields actionable, you can modify WooCommerce checkout fields.

Add or Change Label

You can change the label name or add a more relatable label that goes with your business brand value.

Suppose you want to give your customer options for :

  • Contactless Delivery
  • Extra bags
  • More specific details and directions to the delivery man

Then you have to add a label.

As the default WooCommerce setup doesn’t offer these options, you need to use a plugin to apply this idea.

Add or Change Placeholder Text

Apart from adding a label, you can also change the placeholder text.

See below, if you want to write a note on the placeholder in any options you can do it and this will add more clear direction to your customer.

add or change placeholder text- customize WooCommerce checkout fields

In case you want to know how to change the placeholder text step by step,

3. Use A Multi-Step Custom Checkout Form In One Field

No matter how attractive the level you use or placeholder text you write, if your checkout page seems unorganized your buyers will leave.

Suppose, you are shopping from an online store and filling up an unorganized checkout page. You might avoid completing your checkout process. So do your customers.

That’s why you should simply go for a multi-step approach. This means dividing the form into different sections such as:

  • The first section is for personal information.
  • The second section is for billing details.
  • And the third for order summary etc.

A multi-step checkout will allow your consumer to finish their transaction without feeling overwhelmed by breaking up the checkout page into multiple steps.

In a multi-step approach,  every field is separated so there is less confusion for your buyers.

Here is an example below :

Multi Step Checkout
Source: Kylie Cosmetics

In this approach, your checkout field page will look more neat and clean. And your users won’t get distracted while completing the entire process.

4. Add Product Images to the Checkout Page

Whether you go for a single-step or multistep approach, you can add some creativity to your checkout page.

The default settings of the order details of the checkout page are like this :

checkout page - products displayed without any images

As you can see, there is no product image besides the product details.

Now see below :

Add image beside products in the checkout page
Type caption (optional)

Didn’t it become more eye-catching?

You can also add product images like this to your checkout page and make your checkout page different that other WooCommerce store’s checkout pages.

5. Add An Option For Increased Quantity Field To Double Your Sale

Adding product images is a great customization idea, but what if your customers want to increase their number of purchased products at the checkout page?

With the default WooCommerce settings, you can’t offer your customer to increase the number of products at the checkout page.

Think it for yourself, aren’t there oftentimes you realize the deal is really good and you should buy 2 instead of one?

But you don’t want to repeat the whole process of selecting and checkout, and end up buying just one!

That’s something that can happen to your customer too!

So, you can edit WooCommerce checkout fields by adding the option to increase the number of products right there.

6. Add Automatic Registration At the Checkout Page

Your potential customers love a quick checkout process because no one has time to kill on a checkout page.

You don’t want to create a checkout page that is very time-consuming for your potential buyers.

That’s why you need to add automatic registration at your checkout page. In another way, enabling the guest checkout process.

Though it does give your potential customer a smooth checkout experience, this idea comes up with a drawback.

Drawback : if you add automatic registration process instead of manual, you won’t be able to see important info about customers, like what they’ve bought before and what they like. This makes it hard to send them specific offers or figure out what they want to buy.

7. Add Branding Color & Logo

One more unique idea you can apply while doing your checkout field customization is, that you add your branding color and logo on the field label or placeholder text. This will add branding at the checkout process.

This way the checkout process will match your branding, and it will greatly help you to create brand awareness.

Look below at how RexTheme placed its logo and brand color on the checkout page:

Add branding in your checkout

As you can see, they focused on their branding in every single element of the checkout page. They kept their logo, highlighted the button and linkable texts with their brand color.

And as I mentioned in one of the previous tips, they cut out all the unnecessary steps in their checkout to make it distraction-free.

Best Plugin That You Can Use To Customize WooCommerce Checkout Fields

These 7 ideas that I described in this article are great for customizing your checkout field and providing your customers with a smooth and hassle-free checkout experience.

By adding these ideas, you can reduce your abandoned cart rate and increase your sales. You can apply these strategies in two ways, by custom coding or using a plugin.

If you are a not tech person, custom coding would be really hard for you.

You can simply go for a plugin such as Checkoutify :

Checkoutify- checkout field customization plugin

This mini but powerpack plugin comes up with a drag-and-drop editor for the Checkout, where you can easily create a customized checkout page!

Also, it offers a Multi-Step Checkout option, with it you can easily apply the idea of a multi-step approach that I mentioned above.

Here are more features of this plugin :

  • Well-Organized Checkout Fields
  • Rearrange Steps, Move Sections
  • Custom Checkout Fields (Adding or Removing field)
  • Guest Checkout Friendly
  • Adding Branding & Logo

With this no-code plugin, you can easily apply these ideas without any headache and reduce your abandoned cart rate!

Final Thoughts

To match with the fast-paced business world, you need to step up and add unique WooCommerce checkout field customization ideas to give your customers a better checkout experience.

Traditional styles are gold, but customers nowadays have tons of options as business, and e-commerce startups are growing at a high growth rate.

It’s become really hard to catch their attention if it takes their much time, is cluttered, or not attractive.

So, go ahead and apply these ideas to provide a different checkout experience which will reduce your abandoned cart rate.

If you stay away from custom coding, go for the Checkoutify plugin.

If you have any queries, comment below!

Categories
WooCommerce

Best Panorama Plugins In WordPress [2024]

Panorama plugins help you transform your panorama images into virtual tours.

And not only that, they also let you to host and publish the tours as well.

These no-code plugins are designed to be the best way to make the most of all your panoramic photos and images.

You just have to be cautious enough to choose a panorama plugin that aligns with your needs and is easy for you to use.

To assist, I’ve reviewed 3 best panorama plugins to help you create a virtual tour and set it up on your WordPress site EASILY.

Make sure you pick a plugin that has the features and functions that you are looking for.

In case you don’t know what features you should look for in panorama plugins, I’ve explained below.

So, let’s get started.

What to Look for in Panorama Plugins

Panorama tools can have a lot of different features.

Here are the major functions you should consider while choosing a panorama plugin:

Easy Virtual Tour Creation Process

You need to pick a plugin that can help you complete the whole virtual tour creation process with less confusing buttons, inputs, and fewer Steps.

So that you can face less hassle and save your time.

Hotspots Support

Make sure the plugin you are choosing has hotspot support. You can share any information about the specific scene or object within the VR tour using hotspot.

VR Headset Support

If you choose a plugin that has VR headset support, you can activate it easily.

When people come to your website, they can wear their Google Cardboard or VR Headset and experience your virtual tour using their phones.

Customizable Navigation Options

Maintaining your brand identity is highly important when you are creating a virtual tour.

So, choose a plugin where you can customize the colors of the navigation keys.

Shortcode Support

You must be sure that the plugin you are choosing has global shortcode support for publishing virtual tours.

This way, you will be able to publish virtual tours on any page builders without any hassle.

What Are the Best Panorama Plugins In WordPress

When it comes to picking a panorama plugin, it’s all about what you need.

Here are 3 panorama plugins that I think cover a lot of different areas:

1. WP VR: 360 Panorama and Virtual Tour Builder For WordPress

WPVR Landing Page

With WPVR, you don’t need any help from anyone and create your virtual tour all on your own with just 3 simple steps.

Not just that, you can increase interaction using zooming choices, easy navigation functions, a scene gallery to preview all scenes, etc.

You can add interactive and clickable hotspots to your tour to provide visitors with information, pictures, videos, GIFs, and even set the option to purchase things straight from the tour.

Many plugins provide specific builders like Gutenberg or Elementor. But with WPVR, you can publish on page builder or any theme such as Gutenberg, Elementor, Divi, etc!

Not just these, WPVR lets you add 360 videos in the easiest way in WordPress.

Best Features

Here are some features of WPVR that stand out :

  • Easy UI and Creation Process

With WPVR’s easy-to-use interface, you can easily create virtual tours without any technical knowledge.

In less than five minutes and 3 steps, you can make a virtual tour on your own.

This plugin offers video tutorials, documentation, and virtual tour creation guides to help you out if you are stuck at any stage.

  • Interactive Hotspots Support

You can add engaging hotspots or pointers, such as texts, images, GIFs, URLs, videos, and buttons, which are all included.

Additionally, these hotspots come with over 900+ customizable icons that you may further alter with any color and a ripple animation option.

You get additional add-ons like “Fluent Forms Addon” that you can add as a hotspot and wherever you want in your virtual tour.

  • Mobile Friendly Virtual Tours

WPVR is made with mobile devices in mind, any tour you create will have a completely mobile responsive, 360-degree viewer.

Also, you can get quicker loading interactive VR tours on a phone.

WPVR offers height customization for virtual tours on mobile. You can set the mobile-only virtual tour height for every 360-degree virtual tour to display interactive VR tours on a mobile device.

You can also set alerts for smartphone users. The custom front-end messages can be displayed to assist smartphone users in viewing virtual tours with WPVR.

  • 360 Panorama Scene Features

You can add up to 5 scenes [Free Version] and unlimited scenes [Pro Version] in WPVR. On top of that, you may add the scene title and author’s name, set up horizontal angles, or verticle angles, and also create partial panorama tours.

On top of that, you get a scene gallery feature with which your clients can navigate from one scene to another. You can also customize the transition from one scene to the next by using more than 15+ scene transition effects.

  • Easy Navigation & Customization

Maintaining your brand identity is highly important when you are creating a virtual tour. So, with WPVR, you get a modern and trendy navigation layout with which you can customize the colors and branding of the navigation keys.

You can also use mouse controls and keyboard controls to move around the virtual tour.

  • VR headset and Cardboard Support

With just one click, you can enable your virtual tours to work with VR cardboard with WPVR.

Additional Features

You have gone through some core features that WPVR provides.

Here are some special features that you can add to take your virtual tour to the next level:

  • Floor plan

A comprehensive floor plan for your house, business, showroom, or any other location you own may be made with ease. Realtors and real estate agencies love using real estate floor plans, and you can use them to add some flair to your real estate tours.

  • Explainer Video

Get viewers involved with a guided Explainer Video. Guide people through the complete virtual tour experience with an entertaining and pre-recorded video that lets you connect with visitors directly.

  • Embed Addon Feature

You can share the VR tours that you create on your WordPress website outside of the WordPress environment as well.

With WPVR’s embed addon, you may share your VR tours via QR Codes, Social Media [LinkedIn, Facebook, Reddit, Email & X], and iFrame codes for embedding in any Website.

  • Password-Protected Virtual Tours for Publication

You can create password-protected virtual tours for your premium clients and also offer special services like private art gallery tours or private museum virtual tours for your clients.

  • VR Headset & Cardboard Support For a Complete Immersive Experience

With just one click, you can now enable your virtual tours to work with VR headsets.

Visitors to your website can use their phones to take realistic virtual tours by putting on a VR headset or Google Cardboard.

Reviews

WP VR plugin got a 4.7 out of 5 rating in the WordPress plugin directory with more than 80+ 5-star reviews.

WP VR Rating

Pricing

WPVR offers a free version. The pricing plans start from $79.99/year.

If you want the advanced features you can get the Pro version. Or if you need this plugin for 10 or more sites and would like to have the embed addon, you can go for the Agency plan.

2. iPanorama 360 – WordPress Virtual Tour Builder

panorama plugins

iPanorama 360 lets you make awesome virtual tours for your clients right from your WordPress dashboard.

You can add markers to show info about different parts of the tour or to move to other rooms.

Plus, there’s a neat tooltip system that lets you add text, images, videos, and more to make your tour even more interactive.

All you have to do is upload your 360 panoramic images, and this plugin will do the rest to turn them into a super realistic virtual tour.

You can use iPanorama 360 with the classic shortcode, and it works great with the Gutenberg Block Editor.

Plus, you can easily share your tour on other websites using the iFrame embed feature.

Best Features

Here are some features of iPanorama that stand out :

  • Simple And Quick Creation Process

With a modern web interface, Panorama 360 makes it simple and quick to create an interactive virtual tour.

With the plugin’s support for preview mode, you can see all of your changes before publishing.

  • Link Multiple Scenes Together

Using 360-degree photos, you can link multiple scenes together with markers with this plugin.

A marker can be clicked by the user to move to the previous or next scene.

You can customize the transition from one scene to the next by using transition effects such as fade, zoom, twist, and so on.

Additionally, you may configure popovers and tooltips for each scene’s markers to provide viewers with more details.

  • 5 Types Of Scenes

iPanorama provides the option to add 5 types of scenes to your virtual tours. And, those are Sphere, Cube, Little Planet, Flat Image, and Google Street View.

  • Hotspot Support

With iPanorama, you can add a hotspot or a popover window with text, images, video, and other online media.

  • iFrame Embed Feature Support

With this plugin, you can use the HTML iframe and share your journey on other websites.

You should go to the tour builder, choose “shortcode,” and then copy and paste the embed iframe code to accomplish this.

Additional Features :

  • Duplicate Tour on One Click

With this plugin, you can duplicate tours with one click easily.

  • Control Permissions

iPanorama offers a mouse wheel scrolling, also you can use arrows to navigate through scenes.

  • Audio Background

You can set background music scenes using iPanorama, so your clients don’t experience a boring virtual tour.

Reviews

The average rating of this iPanoram plugin currently is 4.4 out of 5 in the WordPress plugin directory with more than 20+ 5-star reviews.

iPanorama rating

Pricing

The plugin is free to use. For advanced features, you need to take their pro plan which starts at $39.

3. Panorama Viewer By bPlugins

Panorama viewer plugin

This plugin makes it super easy to add awesome panoramic photos and videos to your website, even if you’re not a tech expert.

You can put your panoramic pictures and videos in your blog posts, pages, sidebars, and even on your online store product pages.

This plugin for WordPress lets you show off images, 360° images, and videos on your site without any issues.

You can change the size of your panorama images to fit your website’s style. You can also control how fast your images rotate, and choose whether or not to have default controls on the screen.

If you upgrade to the pro version, you can do even more advanced stuff like display galleries, 360° tours, and Google Street View.

You can also pick the starting view angle and decide if you want custom controls for your visitors. You can make your images load automatically without needing the user to click on them.

You can also let users drag the images with their mouse or fingers, and show or hide a compass for directions.

You can even add titles and author names to give more info about the images.

Best Features

Here are some features of Panorama Viewer that stand out :

  • Display the Gallery, Tour 360°, and Google Street View

With the Panorama Viewer plugin, you can easily embed your 360 photos and videos on your WordPress site. You can even add Google Street locations to give your audience a virtual tour.

  • 360 Image Gallery

You can create a 360-degree picture gallery with this plugin.

  • User-Friendly Interface

You will have an amazing experience with this plugin because of its clear and simple interface.

  • Shortcode Support

You can embed the model anywhere on the website with the ShortCode API of this plugin.

Additional features

  • Display the Title and Author Name

You can give a nice title to your virtual tour & also mention your name, this plugin will display the title and your name on your virtual tour.

  • Google Panoramic Street View

Panorama viewer has this significant feature that lets you add google 360 street view on your website.

Reviews

The average rating of this iPanoram plugin currently is 4.1 out of 5 in the WordPress plugin directory with 4+ 5-star reviews.

panorama viewer rating

Pricing

Panorama Viewer has a free version. For advanced features, you need to take their pro plan which starts at $59.88.

Comparison Between These Plugins


Features


WP VRiPanoramaPanorama Viewer
Hotspots Support
Yes
YesNo
Scenes Type2 types5 types1 type
Mobile FriendlyYesYesYes
Page Builder SupportGutenberg, Elementor, Divi,
Oxygen, Visual Composer
Gutenberg SupportElementor Support
Floor PlanYesNoNo
Gyroscope supportYesYesNo
Shortcode SupportYes. Works with all builders.Yes. Works with all builders.Yes. Works with all builders.
VR Headset SupportYesYesNo
Easy Creation ProcessYesYesYes
Navigation LayoutHighly CustomizableLimited CustomizationNot customizable
Sharing Outside
Of WordPress Website
YesNoNo
PriceStarts at
$79.99/Yearly
Starts at
$39 /Yearly
Starts at
$59.88 /Yearly

Final Thoughts

So, as I said in the beginning,

panorama plugin helps you to increase your brand visibility and your customer will have a good impression of your site by taking a virtual tour as it gives a realistic feeling.

Among the panorama plugins that are available in the market, these 3 plugins are very simple and easy to use.

If you judge based on the core feature that should be there in the VR plugin, active installation, and downloads, WPVR beats the rest of the two plugins.

Here is the current status of these plugins:

  • Active installation of WP VR is currently 10,000+ and total downloads are 528,151.
  • Active installation of iPanorama is currently 7,000+ and total downloads are 210,683.
  • Active installation of Panorama viewers is currently 2000+ and total downloads are 25,369.

No matter which plugin you choose, try to choose a plugin that is updating regularly and tested on the updated version of WordPress.

Also, the plugins that are regularly updated solve their bugs and issues, so you will face much less hassle.

You will find the update status of any plugin in the WordPress plugin directory.

if you have any more queries, comment below!

Categories
Product Feed Manager For WooCommerce WooCommerce

How To Create Instagram Product Feed For WooCommerce – A Complete Guide [2025]

Instagram isn’t just for food pics and cute puppy videos any more—it’s practically a digital mall.

And guess what?

Over 54% of users end up buying something they see there.

You know what that means: your products should be front and center.

And all it takes is setting up an Instagram product feed for your WooCommerce store. It’s easier than convincing yourself you don’t need another pair of shoes after scrolling through Instagram.

In this guide, I’ll walk you through the exact process that smart WooCommerce owners use to drive traffic and boost sales.

Let’s jump in.

What is Instagram Product Feed?

A WooCommerce Instagram Product feed is a spreadsheet containing all your product information, including titles, prices, categories, tags, descriptions, and more.

For example, an Instagram product feed for WooCommerce could be a simple Excel spreadsheet, and you can enter your product data with titles like ID, title, description, link, condition, price, etc.

Attributes Of Instagram Product Feed

Knowing Instagram Product Feed’s terms will help you understand the process better.

Instagram Feed Attributes For Woocommerce

Here’s a list of things you should know:

  • Product ID: A special number every item has to make it easy to find and keep track of.
  • Title: A heading to describe the product clearly so everyone knows exactly what it is.
  • Description: A brief paragraph containing all the important info so buyers can make a decision.
  • Product URL: This is the link that takes you right to the product on any website.
  • Image URL: This is the web address for the picture of a product on a website.
  • Availability: To let your customers know if it’s in stock or not so they know what to expect.
  • Condition: To tell buyers if the product you are selling is brand new, gently used, or refurbished.
  • Manufacturer This is the name of the company that makes the product you are selling. If you are the one making the product, just put your company name here. If you have different brand names for different products, you’ll need to save that info somewhere else and then use it here.
  • GTIN(Global Trade Item Number)– This is a special number that helps identify your product. It helps Google show your products to more people. The GTIN number is given to you by the company that makes the product. If you don’t have this number, just leave the field blank. Don’t put in a random number!
  • MPN (Manufacturer Part Number)– This is a unique number for each product as a product identification number given by the manufacturer.
  • Google Product Category – This is about matching up your product categories with Google’s categories.

Each platform on Meta, like Instagram Shop, has different requirements for attributes than other platforms.

Make sure you check the specific guidelines for the Instagram platform before creating your product feed.

Create an Instagram Product Feed for Your WooCommerce Store

Let’s now create an Instagram Product Feed for the WooCommerce Store.

I am using the free version of the plugin product feed manager for Woocommerce to demonstrate the process step-by-step.

Make sure you have installed Woocommerce on your WordPress site.

Go to your Dashboard> Plugins> Add new plugin.

add new plugin

Type ‘Product Feed Manager For WooCommerce‘ in the search bar and hit enter.

Install Product feed manager For WooCommerce

The plugin will pop up in the search results for you to install. Click on the button install.

That’s all. The product feed manager for WooCommerce is installed on your site.

Step 1: Create New Feed & Feed Mapping

Head over to your product feeds dashboard.

Find the button that says Add New Feed and give it a click.

add new feed

This will bring you to the page where you can create your feed.

At the top, you can choose a title for your feed. Think of a name that aligns with your brand identity to give your feed!

asdd feed name

Choose the merchant you want to use.

select merchant in PFM

I am going to pick Instagram.

select instagram merchant

All the important details are shown below.

You’ll see that many details are already set up for you, but you might need to adjust a few things. Feel free to change anything you need to.

Feed page

For Instagram, there are a couple of details that need to be fixed.

  • Manufacturer – This is the name of the company that makes the product you are selling.
  • GTIN – The GTIN number is given to you by the company that makes the product
  • MPN– The MPN number is a special code of a product given by the company that made it.
  • Google Product Category– This is about matching up your product categories with Google’s categories.

Now, let’s map the Google product category.

You can do category mapping in two ways. You can use a category mapper that’s already set up for Google Shopping, which you can also use for Instagram. Or you can create your category mapper.

For the first one,

Scroll down on the attribute list, you will find the Google product category attribute at the end.

choose google product category attribute

Click on the assigned value option beside the Google product category attribute. Click on the edit button on the right. Then click on the assign value button shown in the image :

 select assign value option in google category in PFM

As you can see, a scroll-down list will come up, from here select the Google product category[default] option.

google category mapping

As you select it, you see a blue write-up “configure category mapping” below the selected assigned value.

google category mapping set up

Click on the Configure Category Mapping button which you will find under the Category Mapping value, and a new tab will be opened with the default category mapper – Google Product Category.

google category mapping set up

Map your categories here and click on the Update and Close button to go back to the attribute section.

However, you can create a new Category Mapper too. You need to click on the Category Mapping button from the WordPress dashboard and there you will get the option to create a new Category Mapper and to configure the mapper.

You can follow this doc to learn how to create a new Category Mapper for your feed.

Now, you need to choose the feed type. Click on the Feed Type labeled box and all the available types will come.

feed type

Just so you know, Instagram can handle XML, CSV, and TSV feeds. You can pick which type of feed you want from the dropdown menu. CSV is usually the best choice.

Step 2: Feed Configuration

Go back to the top of the page and you’ll see four choices.

feed configuration in pfm
  • Documentation
  • Troubleshoot
  • Product Filter
  • Settings

Let’s start by setting up the Product Settings.

Click on the Product Settings button, and a menu will pop out from the right side of the screen.

feed configuration setting option

The first thing you’ll see is Auto-Generate Your Feed.

auto generate feed

This lets you schedule when your feed updates automatically.

Choose a time interval or select “No interval” if you don’t want it to update on its own.

Now,

Close the menu and click on Product Filter. Another menu will pop out from the right side.

select product filter option in pfm

You can choose which products to include in your feed.

product filter option

You can include all your products, or use filters Category Filter, and Tag Filter to select specific products.

If you want to add a custom filter, on the right side you can click on the add custom filter.

Here’s an example,

custom product filtering

All of it you can do in the free version. For a simple feed, that’s enough.

If you want to add any Feed Rule, you can take the pro version.

Here’s how you can set up Feed Rules,

Feed Rule Feature in Product Feed

Learn more about Feed Rules from this doc. ->

Step 3: Publish The Instagram Product Feed for WooCommerce

Alright, now that you’ve set up your feed just the way you want it, it’s time to publish it!

Just go back up to the top of the page and look for the big button that says “Publish” on the right side.

publish feed option in product feed manager

Click that button and your feed will be published.

Once you publish your feed you’ll get the URL or the download link of the Feed.

Publish Instagram Product feed

On the right panel, you will find the button “Update”. If you want to make any changes you can simply click on these options and update.

How To Create Instagram Product Feed For WooCommerce – A Complete Guide [2025] 2
Type caption (optional)

That’s all! Your Instagram product feed is ready!

Integrate WooCommerce Store With Instagram Shop

Just creating an Instagram product feed is half done work, You need to connect your Woocommerce store with the Instagram shop.

Headache is:

How would you connect it?

First, Go to your Facebook business page.

create business account in commerce manmager
Type caption (optional)

If you already have a Facebook account, log in and head over to your Facebook Business page. If you don’t have an account yet, create one.

Once you’re on your Facebook Business page, you’ll be redirected to the dashboard.

home page of business account
Type caption (optional)

Next, is to set up your Instagram Business account.

Go to the Instagram account and click on the three bars in the top right corner.

Select “Settings” and then “Business“.

Click on “Connect to Facebook” and follow the prompts to link your accounts.

Now, it’s time to create a Catalog where you can showcase all your products.

To do this, go to Facebook Commerce Manager and click on the Add Catalog button.

Add catalogue
Type caption (optional)

Choose the type of Catalog you want to create, and once it’s confirmed, you can start adding products.

Select type of catalogue
Type caption (optional)

Give a name to your catalog select the upload method and click on the Create button.

configure settings
Type caption (optional)

Click on View Catalog to begin adding items.

catalogue create
Type caption (optional)

When you click on View Catalog, you’ll see the Category Overview section.

Click on Add Item to start adding products to your Catalog.

overview section of facebook commerce manager
Type caption (optional)

To add products from your Facebook feed, click on Data Sources and then Add Items.

This will take you to the Add Items window where you can start uploading your products.

set uo commerce manager
Type caption (optional)

Select Data Feed and click on the Next button.

set up commerce manager
Type caption (optional)

Here you will some new options to set the data feed source. Select Yes and click on the Next button.

Set up commerce manager
Type caption (optional)

Now, you have to submit your feed here.

You can upload a feed from your Computer, from an external URL, or by using Google Sheets.

set up facebook commerce manager
Type caption (optional)

that’s how you upload your data feed to Facebook Commerce Manager.

As you upload it on Facebook Commerce Manager, It will automatically upload to your Instagram feed.

Now that you’ve met the prerequisites, you’re ready to connect your Woocommerce store:

Now,

  • Log in to your Woocommerce store’s WordPress dashboard.
  • Go to “Plugins” and click on “Add New“.
  • Search for “Instagram Shopping” and select the plugin from the search results.
  • Install and activate the plugin.

After you’ve added the plugin and turned it on, you’ll need to set it up.

Here’s how:

  • Go to your Woocommerce store’s WordPress dashboard and pick Instagram Shopping from the menu.
  • Click on Connect to Instagram and follow the instructions to link your Instagram Business Account to the plugin.
  • On the plugin settings page, make sure to turn on Enable Instagram Shopping.
  • Customize the other settings however you want, like syncing products and tagging options.

Alright, so now it’s time to link your Woocommerce store to Instagram:

  • Go to your Woocommerce store’s WordPress dashboard and find the Instagram Shopping option in the menu.
  • Click on Connect to Instagram and then just follow the instructions to give your store permission to connect to your Instagram Business Account.
  • Once everything is connected, your products will automatically show up on both your Woocommerce store and Instagram

Reasons To Avoid Manual WooCommerce Instagram Feed Creation

To create a WooCommerce Instagram Product Feed Manually, You need to organize the data of all of your products in a spreadsheet.

You can use Google Sheets or Excel for this.

You have to make sure to put each detail in a separate column at the top of the spreadsheet.

It’s kind of like filling out a long form! Which is very TIME CONSUMING!

If you have a big online store with lots of products, it’s not a good idea to manually create a data feed.

Another important thing for online stores is running sales and offering discounts. This means you’ll need to change your product prices often.

For example, if you’re having a Black Friday sale, you’ll need to update your prices for that specific time.

If you’re selling your products on different platforms, like Instagram, it’s crucial to keep everything in sync.

This means you need to update prices and sale details everysheet your products listed.

Managing all this manually can be a real headache.

Every time you make a change to your store, you’ll have to update all your product feeds with the latest info and upload them to every platform.

That’s why my suggestion is to use a Product Feed plugin.

You can SURELY choose the Product Feed Manager For Woocommerce that I have demonstrated here.

In the free version, you can generate product feed for up to 200 products per feed.

With this plugin, you can generate the feed in 3 simple and easy steps. It also takes much less time than manual setup.

If you are satisfied with the result, you can upgrade to the pro version and use this plugin to the full extent.

Benefits of Integrating Your Woocommerce Store With Instagram

81% of consumers trust a brand that has a strong brand identity.

By linking WooCommerce & Instagram together, you can create a strong brand identity that will help you attract more customers.

There are some more insightful data regarding Instagram marketing

  • Instagram has 2 billion active monthly users, which means if you integrate your Woocommerce store you get massive traffic and increase your brand visibility.
  • Instagram has been gaining a ton of new users every year, around 70 million to be exact. This has been happening since 2020 and it’s been staying pretty steady.

When you connect your WooCommerce store to Instagram, you open the door to a more interactive shopping experience for your customers. Here’s what you gain:

  • Increased Product Visibility: Showcase your products to millions of potential buyers on Instagram’s visually-driven platform.
  • Seamless Shopping Experience: Customers can browse and purchase directly from Instagram without leaving the app.
  • Real-Time Product Updates: Automatically sync inventory, prices, and descriptions for accurate product listings.
  • Boosted Engagement: Tagging products in posts and stories encourages more interaction and click-throughs.
  • Improved Sales Insights: Access Instagram’s analytics to track performance and refine your marketing strategy.

That means you can have a high growth rate if you integrate and market on Instagram properly.

Getting Started With WooCommerce Products on Instagram

To get these benefits, get started promoting your products on Instagram.

Just do it the right way so that you can save your time.

The manual process of creating an Instagram product feed is highly challenging.

As you can see, you have more work left to promote on Instagram like

  • Connecting it with your WooCommerce store
  • Researching trending hashtags
  • Work on graphics or product images and more.

It’s better just to use a plugin to create an Instagram product feed.

You can simply generate it the way I’ve shown you with the Product Feed Manager For Woocommerce.

Here’s a video you can go through for more clarity-

If you have any questions about this article, just comment below!

FAQs

1. How do I show my WooCommerce products on Instagram?

You’ll need to complete the Instagram shopping feed setup so your store products sync directly to Instagram.

2. What’s the best way to sync product updates with Instagram?

Using an Instagram product feed plugin ensures your product descriptions, prices, and stock updates stay accurate.

3. Can I automate product listings on Instagram?

Yes, the right Instagram product feed plugin automatically syncs new products and updates in real-time.

4. What’s required to get my WooCommerce store approved for Instagram Shopping?

Your Instagram shopping feed setup should include accurate product info and a Facebook catalog linked to WooCommerce.

5. How do I tag products in Instagram posts and stories?

After setting up your Instagram product feed, you’ll be able to tag products in posts for easy shopping.

Categories
WooCommerce

8 Best WooCommerce Shipping Plugins for Your Store

As a WooCommerce owner, you can go with a manual WooCommerce shipping setup.

But the problem is –

WooCommerce default shipping setup doesn’t have all the features or options that you need, also setting up manually is very time-consuming!

And there’s a huge chance of losing a lot of your potential customers if you fail to provide them if you fail to set up properly.

But don’t worry, there are tons of WooCommerce shipping plugins out there that can help you execute your shipping process like a pro.

In terms of WooCommerce shipping plugins :

  • Some plugins allow you to create shipping rules and methods for cash-on-delivery (COD)
  • Some tools offer you real-time UPS shipping rates, automate the printing of UPS labels, and more.

In this article, I’ve rounded up 8 reliable Woocommerce shipping plugins for your store that can reduce your shipping-related costs.

So, let’s begin.

Why Do You Need Woocommerce Shipping Plugins For Your Store?

Plugins for shipping are essential for improving your customer experience as a whole.

Real-time shipping rates which you can add with a shipping plugin, will allow your customers to select the most convenient solutions for them at the point of checkout.

Suppose, for any reason your shipping carrier increases their rate, the shipping cost of your site will automatically update. Your customer will choose the most low-cost one amount the list and you will not need to offer free shipping.

Because of this transparency and the knowledge that they are not being overcharged, customers will have greater faith in your company.

Apart from this automated calculation benefit, there are other benefits like customizing shipping rules, setting shipping restrictions, better shipping process that you will get using a shipping plugin.

Think of yourself as a customer who wants to make an online transaction,

If you find out that the shipping costs are too high or that the delivery time has to be shortened after putting the item in your cart and checking out., you will probably give up on your cart and look for alternatives.

That’s why using a shipping plugin is a wise idea to make your shipping process effective.

Now let’s go through some key points you should check before choosing a plugin,

Factors to Consider When Choosing the Best WooCommerce Shipping Plugin

Four primary elements are generally what you should be searching for in a WooCommerce shipping plugin. I’ve listed the factors below,

  • Ease Of Use

Make sure you choose a plugin with a simple setup process and user interface. You ought to pick a plugin that has an easy-to-use interface that makes it simple for you to set up and manage shipping options. A plugin’s simple setup procedure and convenience of use will save you time and lower the possibility of installation and configuration mistakes.

  • Regulations For Customs Shipping

To customize shipping alternatives to your business needs, you must create custom shipping rules based on order value, product weight, or destination. You should select a plugin that will assist you in establishing the rules for your online business from the many alternatives available.

Make sure you verify whether a plugin has conditional logic enabled to show or conceal shipping options according to particular parameters, like cart contents or client location.

  • Support For Logistics

Your customers will receive a well-earned shipping benefit when you choose a quality WooCommerce plugin that offers both domestic and international shipping options.

  • Shipping Tracking System

One of the most important features that you need is shipment tracking for WooCommerce. The ability to follow your package as it makes its way through the logistics chain gives your customers more confidence and creates trust.

So, you should search for shipment tracking information in a WooCommerce plugin.

You need these factors to guarantee quick and flexible delivery to the intended location. Having a flexible shipping solution that enables you different delivery options, pricing, and methods is highly important for this.

Top 10 WooCommerce Shipping Plugins for Woocommerce Shipping

Here are the top 10 Woocommerce shipping plugins to make your online store shipping operation easy.

1. Table Rate Shipping for WooCommerce by Flexible Shipping

table rate shipping

The Table Rate for WooCommerce is a shipping plugin that lets you calculate shipping charges based on the weight of the items or the total cost of the cart.

It provides you with the capability to assign names and descriptions to your shipping methods. It also allows you to create shipping rules, and methods for cash-on-delivery (COD), and implement handling fees or insurance costs once the order value crosses a specific threshold.

Key Features of Table Rate Shipping for WooCommerce:

Here are some best features of this plugin :

  • Create multiple shipping methods: You can create an unlimited number of shipping methods for your store. Each shipping method can have its own unique set of rules, rates, and conditions. You can offer different shipping options to your customers, such as Standard Shipping, Express Shipping, or even separate methods for different product categories or regions.
  • Set shipping rates based on various conditions: The Table Rate Shipping extension allows you to set shipping rates based on a wide range of conditions like Cart weight, Cart subtotal, Shipping destination, product quantity and more.
  • Offer custom shipping options: This extension provides you with the ability to offer custom shipping options to your customers. You can create shipping options based on various factors, such as Delivery date or time slot, Special handling requirements (e.g., fragile items, refrigerated items), Pickup options (e.g., in-store pickup, curbside pickup) Delivery instructions or preferences.

Pricing

This plugin has a free version. The pro pricing of Table Rate Shipping for WooCommerce by Flexible Shipping plugin starts from $99/ year. This plan is for 1 site. This plugin has two more plans :

  • Flexible Shipping Bundle: $139.00/ year
  • All Plugins Bundle: $219.00/ year

2. Advanced Shipment Tracking By Zorem

advanced shipment tracking

The Advanced Shipment tracking for the WooCommerce plugin provides smooth shipment tracking capabilities. And you can keep your buyers in the loop every step of the way.

With support from over 850+ providers and shipping carriers, you can effortlessly include detailed tracking information.

Also, you can include the carrier, tracking number, and date in your WooCommerce order completion emails.

Key Features of Advanced Shipment Tracking:

Here are some best features of this plugin :

  • Multiple Carrier Support: This plugin supports integration with a wide range of shipping carriers (850+), including USPS, FedEx, UPS, DHL, Canada Post, and many more.
  • Shipment Tracking: One of the standout features of this plugin is its ability to provide detailed shipment tracking information to customers.
  • Shipment Status Emails: The plugin can automatically send shipment status emails to customers, keeping them informed about the progress of their orders.
  • Order Status Updates: The plugin automatically updates the order status in WooCommerce based on the shipment status received from the carrier.

Pricing

The plugin is available in both free & pro versions. You can download the free version from their official WordPress repository.

The pricing of the pro version is structured as follows:

  • Single site license: $129/year
  • Up to 5 sites license: $399/year
  • Up to 10 sites license: $699/year

3. Advanced Shipping For WooCommerce

Advanced Shipping offers you the simplest shipping process to improve your customer experience and increase your sales. It offers highly customizable shipping options to fit any business model so that you can offer fair and logical shipping costs.

Advanced shipping for WooCommerce

Not just this, you can have the flexibility to adapt to changing shipping requirements or carrier options as it offers custom shipping methods within zones.

This plugin can adapt to different business models and tax situations, so you can easily provide transparent pricing to your customers without any error.

It offers pre-configured shipping scenarios so that you can set your shipping conditions more quickly.

Key Features Advanced Shipping For WooCommerce:

  • Quantity-Based Shipping: You may set up WooCommerce shipping rules based on item quantities or cart line items to handle bulk orders and maximum quantity items.
  • Time-based Shipping: A special feature that this plugin offers is time based shipping with which you can set up shipping based on time of the day and day of the week and run promotional campaigns for that.
  • Flexible Cost Calculation: You can use multiple rule calculations (Sum, Highest, or Lowest) and cart calculations based on your physical or virtual products.
  • Advanced Conditional Rules: You can set shipping rules based on various conditions including fixed amounts, price ranges, specific product, product categories, user roles, and product weight.

Pricing

The pricing of this plugin is structured as follows:

  • Single site license: $49.99/ year
  • Up to 5 sites license: $99.99/ year
  • Up to 10 sites license: $149.99/year

4. Track Orders for WooCommerce By WP Swings

Track order plugin

The Track Orders for WooCommerce Pro plugin is a comprehensive order-tracking solution designed for WooCommerce stores. It allows merchants to deliver accurate information to customers about their order fulfillment, from the moment they place an order to the final doorstep delivery.

This plugin offers a range of innovative features to simplify the delivery process and enhance customer satisfaction. 

Key Features of Track Orders for WooCommerce:

Here are some best features of this plugin :

  • Shortcodes for Tracking Pages & Forms: Customizable order tracking pages and forms using shortcodes. 
  • Track Your Order Popup: Convenient order monitoring within the My Account section. 
  • Reliable Shipment Integrations: Integration with third-party shipment tracking services like USPS and Canada Post. 
  • Custom Order Status: Ability to create custom order statuses tailored to specific order fulfillment workflows. 

Pricing 

  • Pro Plan: $49.00 per year
  • Free Version on WordPress

5. Advanced FedEx Shipping Plugin By One Team Software

FedEx shipping plugin

The Advanced FedEx Shipping plugin takes your WooCommerce shipping to new heights.

With a wide range of account options like FedEx Express, SmartPost, and Freight,

you gain complete control over your shipping processes.

Even for international shipments, you can effortlessly request essential export documents such as the Certificate of Origin, Commercial Invoice, Pro Forma Invoice, and Export Declaration.

Key Features of Advanced FedEx Shipping:

Here are some best features of this plugin :

  • Automatic Rate Retrieval: This feature allows you to automatically retrieve real-time shipping rates from FedEx based on various factors such as package weight, dimensions, destination, and service type.
  • Address Validation: The plugin includes an address validation feature that verifies the accuracy of shipping addresses entered by customers.
  • Shipment Tracking: With this feature, you can provide your customers with detailed tracking information for their shipments.
  • Shipping Label Generation: The Advanced FedEx Shipping plugin enables you to generate shipping labels directly from your website or online store.
  • Customs Documentation: For international shipments, the plugin can automatically generate the necessary customs documentation, such as commercial invoices and certificates of origin.

Pricing

Advanced FedEx Shipping offers a free version. However, the premium version costs $15 monthly on the official website.

6. ELEX WooCommerce USPS Shipping Plugin

Elex WooCommerce Shipping Plugin

You can add a professional touch to your online store’s shipping experience with the ELEX WooCommerce USPS Shipping Plugin with Print Label. This plugin is designed to give you a product delivery process while offering flexible and powerful features.

By providing live shipping rates based on the shipping destination, weight, and dimensions of your products, it brings transparency and clarity to your customers.

Key Features of ELEX WooCommerce USPS Shipping:

Here are some best features of this plugin :

  • Automatic Rate Calculation: This feature allows you to retrieve real-time shipping rates from USPS based on factors such as package weight, dimensions, destination address, and shipping service.
  • USPS Shipping Service Selection: The plugin provides options to offer various USPS shipping services to your customers, including Priority Mail, Priority Mail Express, First-Class Mail, Media Mail, and more.
  • Address Validation: The ELEX WooCommerce USPS Shipping Plugin includes an address validation feature that verifies the accuracy of shipping addresses entered by customers.
  • Shipment Tracking: With this option, you can track your shipments through the USPS tracking system integrated into the plugin.
  • Shipping Label Generation: The plugin allows you to generate USPS shipping labels directly from your WooCommerce store.

Pricing

this plugin has a free version. The pricing for this plugin is structured as follows:

  • Single site license: $89
  • Up to 5 sites license: $199
  • Up to 25 sites license: $499

7. ReachShip Shipping Carrier

Reachship WooCommerce plugin

The ReachShip WooCommerce Multi-Carrier Shipping Plugin allows you to display real-time shipping rates from leading carriers. This versatile plugin aims to be a one-stop shop for all your shipping needs, eliminating the hassle of managing multiple carriers and provide you a smooth delivery experience for your customers.

Key Features of ReachShip Shipping Carrier:

Here are some best features of this plugin :

  • Shipment Creation and Tracking: The plugin allows for the creation and automation of shipments, as well as bulk printing of shipping labels, all from the WordPress admin dashboard.
  • Real-Time Rates and Label Printing: The plugin enables you to save time and cost on shipping by displaying real-time shipping rates to your customers and printing labels efficiently from the admin panel.
  • Intelligent Packaging: The plugin employs a sophisticated packaging algorithm that ensures items added to the cart are efficiently packed into appropriately sized boxes, taking into account their dimensions.
  • Conditional Shipping: The Conditional Shipping feature allows for the customization of flat-rate and carrier-based shipping options. These conditions can be based on multiple factors such as items, shipping classes, cart values, product types, and shipping addresses.

Pricing

The ReachShip Multi-Carrier Shipping Plugin for WooCommerce is available for free download.

It offers integration with several leading shipping carriers like FedEx, USPS, UPS, DHL, Australia Post, and more.

With additional carriers planned for future integration.

8. WooCommerce UPS Shipping Plugin with Print Label

WooCommerce UPS Shipping Plugin with Print Label

The WooCommerce UPS Shipping Plugin with Print Label seamlessly integrates UPS shipping services into your WooCommerce store. This plugin automatically calculates real-time UPS shipping rates based on weight, dimensions, and destination, providing customers with accurate shipping costs at checkout. It also supports the automatic generation of shipping labels and order tracking, streamlining the fulfillment process and reducing manual errors.

Key Features of WooCommerce UPS Shipping Plugin:

  • Real-Time UPS Shipping Rates: Get live shipping rates directly from UPS for accurate cost calculations at checkout based on weight, dimensions, and destination.
  • Automated Label Printing: Generate UPS shipping labels automatically when an order is placed, saving you time and reducing errors.
  • Tracking Information & Customer Notifications: Automatically send customers UPS tracking numbers and shipping status updates via email for a smoother post-purchase experience.
  • Support for Multiple UPS Services: Offer a range of UPS shipping options, including UPS Ground, UPS 2nd Day Air, UPS Worldwide Express, and more, for both domestic and international shipments.

Pricing

  • Single Site License: $99.00 (1-Year Subscription with Support & Updates)
  • 30-Day Money-Back Guarantee

Final Thoughts

We hope that our selection of the top WooCommerce shipping plugins was useful to you.

To facilitate your decision-making, we have attempted to highlight the most important features of each plugin.

You can choose the option that best meets your needs,

whether you’re searching for a solution with a lot of features or just a few key features.

With the ideal plugin, you can completely integrate your business goals with the delivery efficiency and customer pleasure of your online store.

Let me know if you have any inquiries!

Categories
Product Feed Manager For WooCommerce WooCommerce

Generate Facebook Product Feed For Woocommerce – A Complete Guide [2024]

Facebook is the third most visited site in the whole world right now!

More than one-third of the people who use Facebook shop there too.

Why? Here’s the answer-

Ads and posts in Facebook feeds come automatically when people randomly scroll to spend time.

And, if anyone clicks on a certain product suppose I clicked on a bag.

Facebook will automatically suggest all the online bag stores near me in my Facebook feed.

So, If you have an online store using WooCommerce, you must pay attention to Facebook.

With much less effort you can get sales instantly.

You can set up a whole store on Facebook, run ads that change based on who’s looking at them, and even list your products on Facebook Marketplace.

Facebook has many cool features that can help you sell your products without you doing ALMOST NOTHING.

All you need to do is create a Facebook product feed for WooCommerce. [We have shown below the easiest steps]

Before going into the process, let’s gather some knowledge about the WooCommerce Facebook feed :

What is WooCommerce Facebook Product Feed?

WooCommerce Facebook Product Feed is like a file that has all the important info about the stuff you’re selling on your online store in the Facebook marketplace or shop.

You can use this file to show your products on Facebook in real-time.

Facebook Marketplace

Facebook Marketplace makes it easy for businesses that sell directly to customers to promote their products.

Here are some important things about Facebook Marketplace:

  • You can make catalogs of your products.
  • Reach more people who might want to buy your stuff.
  • Connect your online store data with Facebook.
  • Show ads that change based on what people like.
  • Let people buy your products right on Facebook.

One great thing about Facebook Marketplace is that you don’t need to be a tech expert to set up your store.

With the RIGHT TOOL to make WooCommerce Facebook Product Feeds, you can easily connect your online store with Facebook Marketplace.

You need to create a catalog on Meta Commerce Manager and use one single Facebook catalog feed to list your products on both platforms.

Before going deep into these, let’s know some requirements you need to create your Woocommerce Facebook product feed.

Facebook Product Feed Requirements

Different channels have their own rules for what information you need to include about your products.

These rules are called product feed guidelines. Attributes are the specific details about your products that you need to include in your product feed.

For example, when you’re creating a product feed for Facebook, you’ll need to include things like the title, availability, price, and category of each product. These details are called attributes.

Here are some examples of the attributes you’ll need to include in your Facebook product feed:

  • ID
  • Title
  • Description
  • Availability
  • Condition
  • Price
  • Link
  • Image link
  • Brand, MPN, or GTIN (include at least one)

Each platform on Meta, like Instagram Shop or Facebook Marketplace, may have slightly different requirements for attributes.

Make sure you check the specific guidelines for each platform before creating your product feed.

Now that you know what attributes are, let’s dive into how to create a product feed for Facebook.

Creating a Facebook Product Feed Using The Product Feed Manager

Remember when we talked about how to make a list of all your products for Facebook?

Well, you can do it by copying and pasting some important details into an Excel file. Then, you just add in all your product info underneath.

But what if you change your products a lot, like adding new ones or changing prices?

You’ll need to update your list every time you make a change. To remove this hassle you must use a product feed plugin.

I am going to use Product Feed Manager For Woocommerce to create a Facebook product feed.

This awesome WooCommerce plugin helps you connect your products to Facebook easily and quickly, so you can spend less time worrying about it and more time making sales. You can create Facebook product feed with 3 SIMPLE STEPS.

Create WooCommerce Facebook Product Feed in 3 steps

So, now I will go through step by step and create a Facebook product feed.

Generate WooCommerce Facebook product feeds

First, you need to generate a Woocommerce Facebook product feed.

Go to your WordPress dashboard and install the Product Feed Manager For Woocommerce. Then activate the plugin and set the license key.

Step 1: Create a new feed for Facebook

Now, go to the left panel, and click on the plugin. Next, look for the Add New Feed button and give it a click.

Woocommerce facebook product feed

This will bring you to the feed creation page :

Now, here’s what you need to do:

i. At the top, you’ll see a spot to give your feed a title. Go ahead and name your feed.

Add New Feed in PFM Woocommerce Facebook product feed

I’ve named my feed “ Facebook feed for Rextheme”

ii. Just below the title, you’ll find a dropdown menu to choose your preferred merchant. Click on Select Your merchant option.

Woocommerce Facebook Product Feed

Click on the Feed Merchant dropdown button and pick your favorite merchant from the list or search for them in the box.

As you scroll, you will find the Facebook catalog option. Click on it and then it’s time to choose your feed types.

You will get 2 feed types :

 Woocommerce Facebook product feed feed type
  • XML: A text file format that uses extensible markup language.
  • CSV: A text file format that uses commas to separate values, and newlines to separate records.

Once you’ve selected your merchant, all the necessary attributes will pop up below.

Step 2: Mapping Facebook Attributes

Now you gotta connect your WooCommerce Product Fields with Facebook attributes. The plugin will do most of the work for you by matching up the right fields.

But if you want to get fancy and customize things even more, you can use the drop-down menu to manually connect the fields yourself.

Step 3: Mapping WooCommerce Categories with Facebook categories

So once you’re selected you will see all the record attributes will be listed below :

Woocommerce facebook product feed

You’ll also find the attributes are already configured.

what you have to do is assign any unmapped attribute with the right product data now for Facebook.

You will see two unmapped attributes the first one is manufacturer or brand

Now Facebook requires you to submit either a brand name or GTL or MPM so if you have any brand value saved in your Woocommerce store.

you can simply select this option from this drop-down menu but if you’re the sole manufacturer you don’t need to change it as it is already set as static.

Now select the edit button on the left.

Then you can provide your company name from here :

Woocommerce facebook product feed

Then click the correct mark and you will be saved.

Alright, now you have to set the Google product category.

If you scroll down you will find you will get the Google Product Category field :

google product category

Now, fill out all the other sections and be ready to share your feed with the world.

Then go back up to the top of the page and hit the Publish button to make your feed live.

But wait, it’s not quite finished yet!

Next up, it’s time to configure the Google Product Category.

Applying Category Mapping :

Once you’ve set up a category mapping rule, you can make it work when you’re creating a new feed by picking the category mapper you made under “Value for an attribute.”

category mapping for Google

First, make sure you remember the name of the Mapper you saved.

In this case, we have saved it as Feed Category Mapping.

Click on the “Assigned Values” option for the Google Product Category attribute. Scroll down and you’ll find the Mapper you created.

choose-mapper

Choose the mapper you need. For Google Shopping, you have to use it as the value for the Google Product Category attribute.

Next, it’s time to publish the feed. Go back to the top, see on the right panel, and click on the “Publish” button.

Pubish WooCommerce Facebook Product Feed

Now, when you update the feed, you’ll see the value of the attribute that will use the mapped value based on the category you assigned to the product.

That’s it! Now you can go ahead and use it to create a perfect product feed for Facebook.

Final Thoughts

When you start promoting your WooCommerce store’s products on Facebook Marketplace, it makes it easier for people to find and buy your stuff.

Since most people already use Facebook, they’ll feel right at home browsing your products on Facebook Marketplace.

Plus, you can chat with customers in real-time using Messenger and the comment section. That means you can increase customer engagement with your store.

All you need to pick the right plugin and start generating your Woocommerce Facebook product feed. If you don’t want to research plugins, you can simply go for the most reliable plugin Product Feed Manager for WooCommerce.

I hope this article helped you learn more about WooCommerce Facebook Product Feeds.

If you found it useful, drop a comment and let us know!

Frequently Asked Questions (FAQs)

FAQ 1: How can I use Facebook for WooCommerce Integration?

-Integrating Facebook with WooCommerce can greatly enhance your e-commerce capabilities. Start by installing and activating the “Facebook for WooCommerce” plugin on your WordPress site.

Once activated, connect your Facebook account and either create a new Facebook page or select an existing one for your business. Next, set up your product catalog in Facebook Business Manager. Configure the product sync settings in the plugin to ensure your WooCommerce products are accurately represented on Facebook

FAQ2: How do I integrate a website with a Facebook page?

Begin by adding Facebook social plugins to your website, such as Like and Share buttons, and the Comments feature. Install the Facebook Pixel on your site for comprehensive tracking and analytics. Implement Facebook Login to offer users an easy authentication method. Add the Facebook Page Plugin to showcase your Facebook page’s feed directly on your website. Create Facebook Open Graph tags for your web pages to control how your content appears when shared on Facebook.

Categories
WooCommerce WooCommerce Sellkit

5 Best WooCommerce Product Recommendations Plugins In 2024

“Out of sight is out of mind”- You must have heard this proverb.

And it’s the exact thing that happens with your customers when they scroll on online marketplaces or on your site.

If you can’t properly show them what products you have, chances are you might LOSE YOUR BUYING CUSTOMERS!

So, increasing your product visibility as a Woocommerce store owner is highly important.

You can achieve this through an effective product recommendation strategy and a top-quality product recommendation plugin that can implement the strategies successfully.

You need the best WooCommerce product recommendation plugins that have features such as up-selling, cross-selling, “frequently bought together” suggestions, related product displays, best-seller carousels, and more.

This article with assist you with details information and side-by-side comparison so that you can find the right solution.

So, Let’s begin.

Why Use Product Recommendation Plugins In WooCommerce?

why use product recommendation plugin

Product recommendations in WooCommerce can transform your store’s performance and drive significant growth.

Personalized recommendations make shopping more relevant and efficient.

Salesforce reports that 73% of customers expect businesses to understand their unique needs, and targeted product suggestions fulfill this demand.

In eCommerce, the impact of personalized recommendations is striking.

McKinsey highlights that such recommendations contribute up to 35% of Amazon’s revenue.

Smaller online stores also benefit, with effective recommendation systems often leading to a 10-30% increase in sales.

In the below, I’ve listed down how integrating product recommendations into your WooCommerce store can benefit you:

  • Increase Sales: Tailored recommendations can increase conversion rates. So, you may show items that shoppers are more likely to buy.
  • More Customer Engagement: Personalized suggestions create a more enjoyable shopping experience and your customers can engage more.
  • Increase Average Order Value (AOV): Techniques like cross-selling and up-selling increase the value of each purchase.
  • Customer Retention: Customized shopping experiences create repeat buyers.
  • Optimize Inventory: You can easily make your inventory clutter-free by clearing out less popular or overstocked items.

Adding product recommendations to your WooCommerce store improves the overall customer experience and drives substantial business growth. You can turn browsing into buying and maximize your sales potential by recommending relevant products.

4+ Best WooCommerce Product Recommendations Plugins

Here are 5 best WooCommerce product recommendation plugins highly recommended options that have received favorable feedback from WooCommerce store owners:

1. Leo Product Recommendations For WooCommerce

Leo Product Recommendations is an effective WooCommerce plugin that helps you to show recommendations in a visually appealing popup.

This popup appears after a customer adds a product to their cart.

Leo product recommendations

The plugin features a user-friendly and fully customizable settings panel, allowing you to manually and dynamically tailor product recommendations according to your marketing strategy.

Major Features of Leo Product Recommendations

Here are some major features of Leo product recommendation plugins :

  • Flexible Recommendation Popup Heading (Heading & Description)
  • Recommended Products Grid Settings
  • Slider Layouts (Pro)
  • Dynamic Selection(Pro)
  • Modal Color Settings (Pro)

The Benefit You Will Get Using Leo Product Recommendations

With its fully customizable and easy-to-use settings panel, you can tailor both manual and dynamic recommendations to suit your marketing needs.

For example, after a customer buys a smartphone, the plugin can instantly suggest relevant accessories like cases or headphones, driving additional sales.

Pricing

This plugin has its free version but with limited features.

If you want to grab their advanced features you need to take their pro plans that start at $79 in a yearly payment system.

Leo Product Recommendations for WooCommerce pricing

2. Product Recommendations for WooCommerce

With this plugin, you can upsell and cross-sell smoothly, and keep your customers hooked with personalized product suggestions to increase your order values.

Product recommendation by rextheme- best woocommerce product recommendation

With this plugin, you can suggest products commonly purchased together and make it easy for your shoppers to find complementary items using the “Frequently Bought Together” Option.

You can help your customers to find perfect product pairings based on real customer behavior. Increase order value and convenience for customers using this cross-selling strategy.

It has Out-of-Stock Backup Options, and with it, you can explain how to find similar products when an item is unavailable. This way you can retain a customer without any hassle.

Major Features of Product Recommendations for WooCommerce

Here are some major features of product recommendations for WooCommerce:

  • Frequently bought together option
  • Exclude or hide out-of-stock options
  • Top-Rated Product Showcase
  • Best Sellers Display
  • New Arrival Alerts

The Benefit You Will Get Using Product Recommendations for WooCommerce

With strategic product placement and various recommendation styles, you can expect higher conversion rates across your store.

The plugin’s intelligent handling of out-of-stock situations ensures you never lose a sale. It offers suitable alternatives to keep customers engaged.

with this plugin, you can showcase new arrivals and top-rated items that might otherwise go unnoticed.

Finally, by strategically highlighting discounted products, you can maximize the impact of your promotional campaigns, attracting deal-seekers and driving sales during high sale periods.

Pricing

This plugin has a free version and offers you the most flexible plans for pro plans. As you can see below, its price starts at only $47.99/year.

Product recommendations for woocommerce pricing

3. UpsellWP

upsellwp

Top-rated All-in-One WooCommerce Upsell Plugin allows you to create one-click upsell offers, making it easy to increase your Average Order Value and increase sales.

The plugin enables you to present exclusive offers right on the checkout page.

Your customers can add these special offers to their existing orders with just a single click.

It presents exclusive deals at checkout to capture your customers’ attention and drive additional purchases.

Major Features of UpsellWP

Here are some major features of Upsell :

  • Conditional upsell offers
  • Simple setup
  • Advanced conditions for campaigns
  • Product & Cart add-ons

The Benefit You Will Get Using UpsellWP

This plugin is highly targeted and you can create personalized product recommendations for every shopper category in your store.

Its advanced algorithm handles the heavy lifting of generating smart recommendations, eliminating the need for manual upsells and cross-sells.

You can make each customer feel like your store was designed just for them.

Pricing

UpsellWP has a free version but you can’t get their pro features in it. To get the pro plans it will cost you $69 to $199 in a yearly payment system according to your site’s needs.

UpsellWP pricing

4. WooCommerce Product Recommendations

The related products for the WooCommerce plugin allow you to display customized related products in your WooCommerce store.

product recommendation by webtoffee

You can showcase related items based on categories, and tags, or manually select products to feature on the product details page of individual items.

By recommending related products, you capture customers’ interest in other items within your store, encouraging them to explore and purchase more. This approach helps increase the average order value.

Utilize this plugin’s related product functionality to suggest additional items to your customers, boosting your sales and enhancing their shopping experience.

Major Features of WooCommerce Product Recommendations

Here are some WooCommerce product recommendations:

  • Multiple pre-built recommendation templates
  • Advanced filters for recommendations
  • Display product recommendations on multiple store pages
  • Create custom recommendations with custom rules
  • Customize the recommendation widgets
  • Hide out-of-stock products
  • Advanced sorting options

The Benefit You Will Get Using WooCommerce Product Recommendations

To make your store even more appealing, you can transform the related products section into an eye-catching slider.

This not only enhances the visual appeal of your product pages but also lets you showcase more items without cluttering the layout.

You’re in charge of how many products appear, ensuring the perfect balance for your store’s design.

One of the most valuable features for you as a store owner is the automatic removal of out-of-stock items from recommendations.

This saves you time and prevents customer frustration, keeping your product suggestions current and purchasable.

Pricing

WooCommerce Product Recommendations By WebToffee prices start at $89.

5. Alternate Product Recommendations for WooCommerce

Customers often leave empty-handed When they can’t find what they’re looking for due to out-of-stock or discontinued items.

The Alternate Product Recommendations for WooCommerce plugin addresses this issue by suggesting similar products when the desired item is unavailable.

Alternate Product Recommendations for WooCommerce

Additionally, for in-stock items, the plugin recommends complementary products to increase sales potentially.

This approach aims to improve customer satisfaction and boost revenue by providing alternatives and upsell opportunities.

Major Features of Alternate Product Recommendations

Here are the major features of alternate product recommendations :

  • Disable default WooCommerce product functionality
  • Choose custom-related products
  • Option to set up associated products for the entire store (by category, tags)
  • Set up related products for individual products (by category, attributes, tags, or products)
  • Exclude selected categories from showing as related products

The Benefit You Will Get Using Alternate Product Recommendations

When customers encounter out-of-stock items, instead of leaving disappointed, they’re presented with relevant alternatives that may meet their needs. This thoughtful approach of this plugin keeps shoppers engaged on your site, increasing the likelihood of a purchase.

Moreover, for customers who already have items in their cart, you can offer alternatives to out-of-stock products with a plugin which can significantly reduce cart abandonment rates.

Pricing

The pro plans of this plugin start at $49 and it’s billed annually.

Comparison Between 5 Best Product Recommendations Plugins

FeaturesLeo Product RecommendationsProduct Recommendations for WooCommerceUpsellWPWooCommerce Product RecommendationsAlternate Product Recommendations
Product suggestion methodsResponsive Popup, Manual & Global Selection, Slider Layouts, Dynamic Selection.Frequently Bought Together, Top Rated Products, Best Selling Products, Sale products.Checkout upsell, frequently bought together, double order, upsell pop-up.custom-related products, Upsells, Cross-sell.Before/After the Product Price, Carousel/Slider type
Advanced Customization OptionsYesYesNoCustomize the recommendation widgetsLimited customization
Out-of-Stock optionNoOut Of Stock Product AlternativesNoExclude or hide
out-of-stock products
No
New Arrival AlertsNoYesNoNoNo
Placement ControlYesYesOffer display controlNo Track the products viewed & purchases
PriceStarts at $79Starts at $47.99Starts at $69Starts at $89Starts at $49

Final Thoughts

When selecting a recommendation plugin, it’s crucial to consider your specific store needs and target audience.

As I’ve discussed earlier, product recommendations put a highlight on your store and your customers easily get clear about the offers you are providing.

Using a top-rated plugin with features that you need, can reduce your time and cost. Amidst all the plugins I’ve made a small list of only five plugins that most WooCommerce store owners choose.

For any queries, comment below!

Categories
WooCommerce

4 Best Product Feed Plugins for WooCommerce in 2024

There are many online marketing strategies to improve your Woocommerce business to drive constant sales.

Among them the most effective and quick marketing strategy is, promoting your products through an online marketplace, social media platforms, or Google shopping.

However, promoting manually on any platform is a ton of work as you need to buckle up almost all the details of all of your products in one single tab.

No worries!

If you take time and choose the right Woocommerce product feed plugin you can generate your product feed in minutes and manage it easily without any headache.

That’s why I’ve well-researched all the plugins available on Woocommerce right now and picked out 4 best product feed plugins that have higher reviews & installation than the rest.

So, let’s begin.

Why Use Product Feed Plugins?

best product feed plugins

Google shopping, Facebook, and online marketplaces are full of shoppers who are roaming on the site to buy products online.

As a Woocommerce store owner, you need to create a proper product feed file (XML, TXT, CSV, XLS, or TSV file format) to promote on these platforms.

Creating a proper product feed file is a hassle of work, as the product feed file contains all the product information of your online store.

That’s where product feed plugins came to the rescue.

With product feed plugins, you can automate the whole product feed file format process and half cut your hassle and time.

Also with the right product feed that aligns with your needs, you can :

  • Increase your product visibility
  • Upload complete product information
  • Reach to a larger audience

To help you to pick the right plugin, I’ve found out 4+ best product feed plugins [WELL RESEARCHED]

4 Best Product Feed Plugins for WooCommerce

Here I’ve listed down 4 best product feed plugins with details you need to know. These plugins have a high rating and high installation rates.

I will start with the Product feed manager for Woocommerce by Rextheme.

Product Feed Manager For Woocommerce [180+ Marketplaces]

Product Feed Manager For Woocommerce has the maximum online marketplace coverage with a 5-star rating and 10,000+ installations.

This plugin provides a super easy UI & pre-configure templates so that you can generate the most accurate product feed file in minutes.

product feed manager for woocommerce

With PFM, You can also automate the feed generation process whenever you make changes to your store such as,

  • Adding a new product, or
  • Changing product details, etc

Not only these, it also provides certain fields Brands, GTIN, UPC, age group, Gender, etc that WooCommerce doesn’t provide.

It supports right-to-left languages like Arabic and Hebrew. The user interface will automatically adjust for RTL languages.

Major Features of Product Feed Manager For Woocommerce [All in One]

Here are some major features of the product feed manager for Woocommerce that you will get :

  • Supports maximum types of file formats (XML, CSV, TEXT, TSV, RSS)
  • Custom Fields for Unique Identifiers
  • Advanced Category Mapping
  • Variable Product Support
  • Accurate Structured Data Format
  • Auto-sync With Google Merchant Center
  • A Custom Feed For Any Merchant
  • Ability To Exclude Tax From Structured Data Prices
  • Multi-vendor compatibility

Now let’s talk about the benefits you will get from this plugin.

The Benefit You Will Get Using Product Feed Manager For Woocommerce

The most amazing feature that I already wrote about is pre-made templates.

Think about it, that manual effort goes for feed design, and organizing it is huge.

You can customize the premade data and you can :

  • Add advanced filter options to generate feed with selected products,
  • Create a custom feed for merchants that we do have a template for.
  • Combine Multiple Attributes In The Feed
  • Fix WooCommerce’s (Json-Ld) Structured Data Bug
  • Exclude Tax From Structured Data Prices

You can also use the smooth filter options to include or exclude the required products of your store from the product feed. You can filter by categories, or tags, or apply custom filters using other attributes.

You also get custom filter options and with this, you can generate feed more precisely.

In business, any changes can come up. With PFM, you can set a schedule for your product feed to be updated automatically.

If you are planning to promote on Google Shopping, then PFM is the most ideal plugin for you.

Google shopping feature page : Product feed manager

You will get everything you need from the Google merchant feed. You can :

  • Add additional product data
  • Do category mapping with Google’s category
  • Add and configure Google Analytics UTM tracking codes to your product URLs.
  • Get Google Dynamic Remarketing Pixel support.

In terms of Facebook product feed, you can track Products With Facebook Pixel. You can also add custom fields for Unique Identifiers.

You can not only generate feeds but also fetch custom images using ACF to your product feed easily without any hassle.

It often happens that your product is listed on the feed but there is no stock left.

With PFM, you can easily exclude “out of stock” products from your product feed file.

As you are starting new, you might get confused about getting an email notification if your feed is not generated properly.

Pricing Structure

Product Feed For Woocommerce offers 25 features in its free version. You can also take a live preview and get a preview now.

PFM- best product feed plugins

In the pro version, you will get almost 15 advanced-level features for just $79.99 in a yearly payment system for 1 site.

Product Feed Pricing- best product feed plugins

The price plan increases with the number of sites you buy for.

Product Feed Pro By Adtribes

You can generate product feeds in various formats (XML, CSV, TXT, YML) for multiple e-commerce platforms and marketing channels with the Product Feed Pro By Adtribes plugin.

Product feed by adtribes

This plugin includes Google Shopping, Meta/Facebook, Bing Shopping, and numerous comparison sites like Billiger.de, Pricerunner, and Skroutz.

It provides 100 pre-configured templates for popular marketplaces, comparison engines, and search platforms. You can also create custom feeds tailored to your specific requirements.

This tool is ideal for businesses seeking high-quality product feeds for Google Shopping, Meta/Facebook Catalog, and other major e-commerce marketing channels.

Major Features of Product Feed By Adtribes

  • Unlimited number of products & product feeds
  • This plugin supports the usage of Custom Attributes, Dynamic Attributes, and Product Attributes.
  • Google Analytics support
  • Google Dynamic Remarketing Pixel supports.
  • Fix for WooCommerce structured data bug (Elite version)
  • Add critical Google Shopping Feed fields to your store (Elite version)
  • Polylang support (Elite version)

The Benefit You Will Get Using Product Feed By Adtribes

Using this plugin offers numerous advantages for e-commerce businesses. It streamlines product feed management across multiple platforms, saving time and effort.

The plugin’s support for unlimited products and feeds, coupled with advanced features like category mapping and rule-based filtering, ensures precise control over product data.

Its integration of pixels and Conversion API enhances tracking capabilities, and can potentially improve your marketing effectiveness.

Pricing Structure

The price plan of this plugin starts from the growth plan of $99/year.

Product Feed by attributes

Its elite version comes in the Business plan and that will cost you $199/year.

CTX Feed By WebAppick

This powerful WooCommerce plugin provides product feed management support for over 100 marketing channels, including major platforms like Google Shopping, Facebook Catalog, and TikTok.

It simplifies the creation of optimized, error-free feeds for various marketplaces, search engines, and comparison sites.

CTX Feed

With features like automated updates and flexible scheduling, it ensures your product information stays current across all channels.

The plugin’s user-friendly interface and wide compatibility make it an essential tool if you are looking to expand your reach.

Major Features of CTX Feed By WebAppick

Here are some major features of CTX Feed By WebAppick :

  • Unlimited products & feeds
  • 100+ pre-configured templates
  • Output types to avoid errors
  • Category mapping

The Benefit You Will Get Using CTX Feed By WebAppick

The plugin can provide you with flexible options for updating product information, supports multiple file formats, and includes advanced features like attribute formatting and identifier add-ons.

With its user-friendly interface and tailored solutions based on user feedback, CTX Feed simplifies product feed management, enhances marketing efforts, and improves your product visibility across various e-commerce platforms and marketplaces.

Pricing Structure

CTX feed pro offers 3 different price plans, for one single site it will cost you $119/year. Their most popular one offers features for five sites for $199 and another one will cost you $229/year.

Product feed by WebToffee

Product feed by WebToffee generates optimized product feeds in various formats, including XML, CSV, XLSX, and TXT.

It enables smooth integration with major sales channels such as Google Merchant Center, Facebook, Instagram, TikTok Ads, Pinterest, Snapchat, and Bing.

4 Best Product Feed Plugins for WooCommerce in 2024 4
Type caption (optional)

The plugin’s functionality extends to transforming your social media presence into effective sales channels, offering opportunities for free listings and ads on several platforms.

Additionally, it provides automated synchronization with Facebook catalogs and simplifies the process of connecting your WooCommerce store to Google Merchant Center. In this way, this plugin enhances your product visibility and marketing reach across multiple digital marketplaces.

Major Features of Product Feed By WebTofee

Here are some major features of product feed by WebTofee :

  • Dynamic Price & Feed Update
  • Advanced product filtering options for generating product feed
  • Supports WooCommerce Multilingual & Multicurrency for WPML
  • Exclude out-of-stock products
  • Server cron for managed hosting
  • Auto-catalog sync for Facebook catalog
  • Multi-vendor compatibility

The Benefit You Will Get Using Product Feed By WebTofee

This plugin is made to eliminate any complexities you face in generating WooCommerce product feeds.

Here are some benefits you will get by using this plugin :

  • Smart filtering – It lets you filter product categories to specifically include or exclude from the product feeds generated.
  • Batch sync – You can sync thousands of WooCommerce products with Facebook, Google, or Instagram shops by enabling batch sync. This will reduce the server load and ensure successful product synchronization.
  • Category mapping – You can quickly map the categories in your store with the Facebook and Google Shops categories and save the mapping for future use.
  • Edit mapping – This allows you to edit the existing Facebook category mapping.
  • Product sync log – You can view failed product syncs for easy debugging.

Pricing Structure

Product Feed By Web Tofee offers 3 pricing plans based on how many sites you need. For single sites, this plugin cost you $89.00/year.

Now I compared these 4 best product feed plugins for Woocommerce below based on the features you must need :

Comparison Between 4 Best Product Feed Manager Plugins

FeaturesPFM By RexthemeProduct Feed Pro By AdtribesCTX Feed By WebAppickProduct Feed By WebTofee
Automatic Feed GenerationYesYesYesYes
CustomizationYesYes YesYes
Number of Marketplaces180+100+100+20+
Automatic UpdatesYesNoYesYes
Number of Supported Plugins2723yesyes
Category / Taxonomy mappingYesYesYesYes
Pre-Configured Templates180+100+100+20+
PriceStarting from $79.99Starting from
$ 99.50
Starting from
$199
Starting from
$89
Rating4.8/5.00
(191 reviews)
4.7/5.00
(908 reviews)
4.6/5.00
(696 reviews)
4.8/5.00
(19 reviews)

Final Thoughts

Implementing a product feed for your WooCommerce store is a crucial step toward enhancing your brand’s visibility and popularity.

By generating product feeds with Woocommerce product feed plugins, you open up new ways to gain traction in the e-commerce market.

Various plugins are available that simplify the process of creating and optimizing product feeds for major platforms such as Google Shopping, Bing, Amazon, eBay, and other popular websites.

I have listed down the best product feed plugins for Woocommerce in this article, you can make a proper decision from here.

These tools make it easier for store owners to expand their reach and showcase their products across multiple channels.

Frequently Asked Questions (FAQs)

FAQ1: Why are product feed plugins important for WooCommerce stores?

Product feed plugins are crucial for WooCommerce stores because they:

  • Allow for easy customization of product data for different platforms
  • Save time by automating feed creation and updates
  • Ensure accurate product information across multiple channels
  • Improve product visibility on shopping platforms and search engines
  • Increase sales potential by reaching a wider audience
FAQ 2: What features should I look for in a top-rated product feed plugin?

When choosing a highly-rated best product feed plugin for WooCommerce, look for the following features:

  • Support for multiple platforms and feed formats
  • Automatic feed updates, Custom field mapping, and attribute creation
  • Category mapping and product filtering options
  • Performance optimization for large product catalogs
  • Integration with popular WooCommerce extensions
  • User-friendly interface