Categories
Guide WooCommerce

6 Major Strategies to Avoid Abandoned Cart for Your WooCommerce Store [2025]

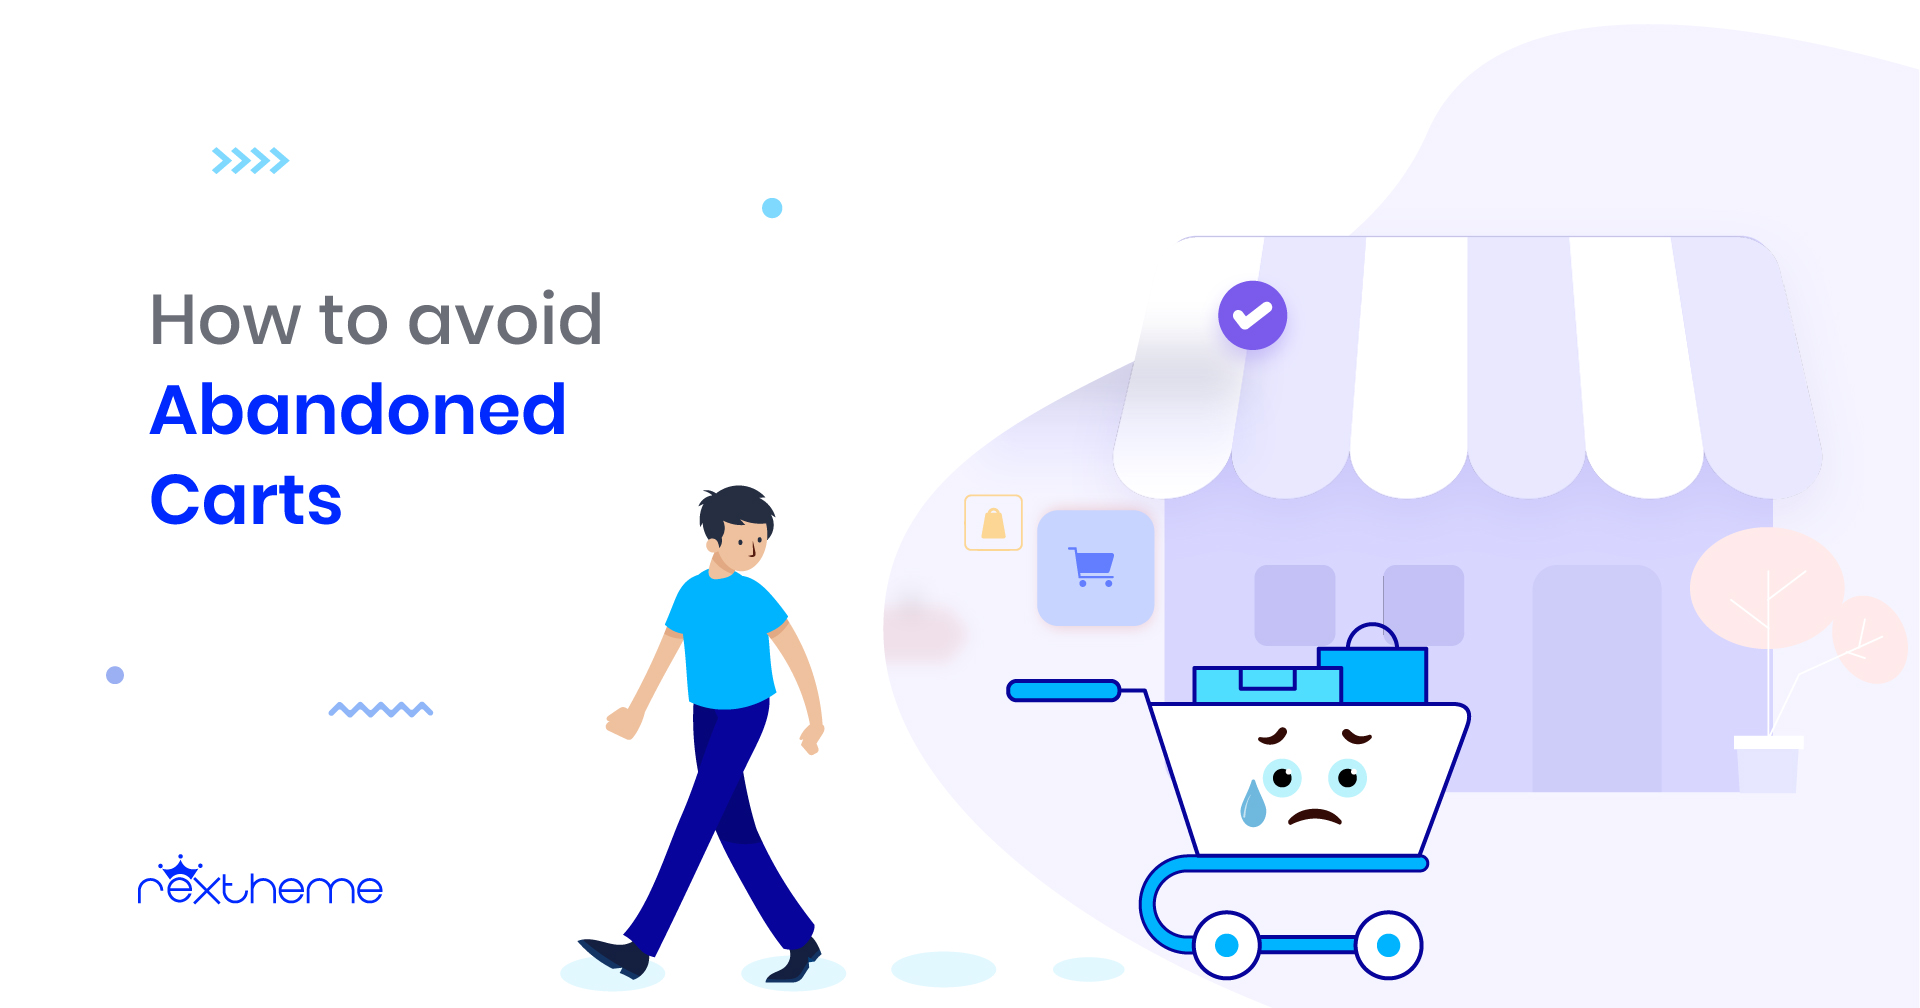
Shopping cart abandonment is a major reason, why most e-commerce sites lose tons of prospects.

According to Baymard, the average abandoned cart rate is 70.19% throughout all industries.

As you can see, this is a serious issue and it’s best to take steps to cut down the chances of any abandoned cart situation.

So here’s the good news.

Today, I have analyzed the major reasons why shopping cart abandonment happens. There are some reasons you often ignore, such as some facts in the refund policy.

I have also discussed how to avoid these unwanted scenarios.

After you read this article, you will learn

  • Unexpected reasons why you face shopping cart abandonment
  • How to avoid abandoned cart issues?
  • Why you should give serious effort to this matter

So let’s get down with it.

What is Shopping Cart Abandonment?

Shopping cart abandonment happens when someone visits your WooCommerce store and adds products to their cart but doesn’t complete the purchase. It’s a missed sale that leaves money on the table.

Think about this: You’ve found a great deal on a product. You add it to your cart, maybe even browse a bit more. But then something distracts you. Maybe you get confused about shipping fees or decide to compare prices on another site. Before you know it, you’ve closed the tab and completely forgotten about the cart.

That’s exactly what shopping cart abandonment looks like for your store. And it’s not rare—most online stores experience this regularly.

However, the first step to fixing it is understanding why it happens.

Key Reasons Behind Shopping Cart Abandonment

After a lot of research, I have found out that the major reasons why you may face abandoned carts are rather very simple. They are:

  1. Lack of Payment Options
  2. No Or Poor Return/Refund Policies
  3. Additional Hidden Costs
  4. Complicated Or Poor Checkout Process
  5. Slower Page Load Speed
  6. No Security Symbol

Yes, these may sound like small possibilities and are often ignored, but it is the reality; these simple issues lead to the largest number of abandoned carts.

Let’s look at why shopping cart abandonment happens so that you can effectively work on to reduce cart abandonment.

1. Lack of Payment Options

Lack of Payment Options - Abandoned Cart

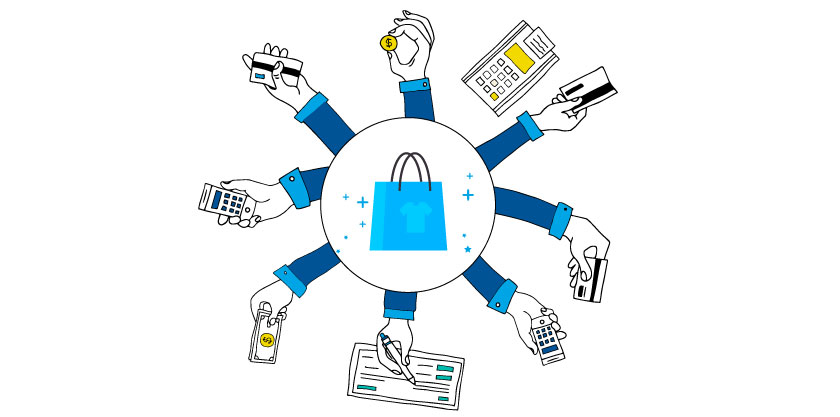
Once a prospect has gone through all the steps of conversion and has proceeded to checkout, it’s time for payment.

This means that the prospect is genuinely interested and is ready to buy.

However, there is still a chance of an abandoned cart when choosing payment options.

A lot of prospects tend to change their interest based on the available payment options or payment methods.

Yes, this sounds far-fetched but actually, this is a real deal!!

59% of customers abandon their carts because their preferred payment option was not offered on the site.

With all the different payment options and payment methods available today, there is always a chance that you are not offering a particular option that a few prospects may expect.

Most sites offer options such as Cash On Delivery, Credit Card Payment (Visa/Masters), and payment via Paypal.

What if a person is looking to pay via Gift Card? A lot of sites do not accept it. In fact, I have seen sites that do not accept payments even via Debit Card; only CC payments are accepted.

This can often cause prospects to have an instant denial of interest and just abandon the cart without a second thought.

There is nothing more frustrating than losing a prospect right at the last moment, and that too is for a reason not related to the product.

2. No Or Poor Return/Refund Policies 

Refund Policies - Abandoned Cart

One thing that is almost as frustrating as the woocommerce abandoned cart itself is a refund.

Let’s say a person purchased a phone online. However, after receiving it and using it for a day, he noticed that the phone had a battery issue and would run out of charge very quickly.

This is a serious issue and is very possible with electronic devices. The next expected action is a return or refund.

This is why most buyers always look into the return & refund policy of a website when purchasing products for the first time.

If you don’t have a return & refund policy, that’s a big red flag, and if you have one but is not a feasible one for prospects, that will push the prospect away as well.

Most people wish to read the refund policy after they have found some products they like and probably added to the cart. But if they can’t find the refund policy or are not happy with the terms in the policy, they will simply leave your WordPress website.

So the bottom line is that the return & refund policy is a must for any online store.

Why Your Store Needs A Proper Return & Refund Policy

Let’s look at the following statistics:

  • 63% of online buyers won’t consider buying from an online shop if there is no return policy.
  • Almost 30% of all the orders on online shopping get returned, but they get returned for a good reason.
  • 96% of the buyers will consider buying from an online shop again if they have supported an easy return once.

3. Additional Hidden Costs 

Hidden Costs - Abandoned Cart

Additional hidden costs appear mostly because of 2 things:

  • Taxes
  • Shipping/Delivery Costs

Almost every online buyer has a fixed budget in mind when shopping online, and a lot depends on this budget when deciding what products to buy.

Imagine a prospect trying to buy some make-up accessories. Even though she might have brand preferences, she also has a budget she would not want to exceed.

So, let’s say she has found some products she liked, added them to the cart, and is ready for checkout.

Once she goes to the checkout page, all of a sudden, she sees this huge extra cost for taxes and shipping/delivery fees that add up to surpass her budget.

At this point she only has 3 choices:

  • increase the budget
  • cross out some products
  • or abandon the cart

In most cases, the third option is chosen. Reasons:

  • It feels easier than taking the pressure of making a decision.
  • Prospect might think he/she will purchase later when more money is at hand, and eventually ends up forgetting about it.
  • Prospects might feel it’s unfair and may move to other online stores to look for better pricing.

4. Complicated Or Poor Checkout Process

Checkout Process - Abandoned Cart

According to a survey run by Bayard, 22% of online buyers said that they abandoned a cart because the checkout process was confusing or complicated.

Now, 9% sounds small, but these are the prospects who are most likely to convert. They passed every step of the conversion and stopped only when they felt uncomfortable with the final process.

These are the reasons why the checkout process gets complicated for the users:

  • The long and confusing checkout process
  • Creating distractions with ads and banners.
  • No place to enter discount coupons.
  • Creating a detailed account during checkout
  • Not allowing to edit cart
  • No contact info on the checkout
  • Absence of your policy links

Here’s an example. Let’s say a person is willing to purchase a custom hoodie from your store. Once he goes to the checkout, if he sees that there are about 4 to 5 steps to purchasing just 1 hoodie, he will probably decide to do it later and end up forgetting about it.

Similarly, let’s say a person is on the checkout page. Now, if you initiate a lot of Ads or product suggestions, and by any chance, he finds one interesting, he will rather like to click on that.

Now you might think this is good that he might buy another product. But here’s the fact. Many people who will go into those Ads, will eventually get busy and decide to purchase later. And some will never come back.

You can give product suggestions on the Cart Page. However, make sure there are no product suggestions or Ads when a customer is in the checkout process. A little distraction can increase the chance of abandoned cart.

5. Slower Page Load Speed

If your store’s pages take too long to load, prospects might lose patience and leave before they even get a chance to check out. Fast load speeds are critical to keeping your customers engaged, especially during checkout.

Imagine this: a customer has added a few items to their cart and is ready to make the purchase. But when they click on the checkout page, it takes several seconds—or even longer—for the page to load. They start wondering if the site is legit, or if there’s an issue with the checkout system. Frustration sets in, and instead of sticking around to wait, they simply leave.

In fact, studies show that 40% of users will abandon a website if it takes more than 3 seconds to load.

A slow website is not only annoying, but it’s also a major reason for shopping cart abandonment. Make sure your pages load quickly to avoid losing potential customers during these critical moments.

6. No Security Symbol

Nowadays, security is top of mind for online shoppers. If your WooCommerce store doesn’t show any signs that it’s secure—like SSL certificates or a security symbol—shoppers might hesitate to enter their personal and payment information.

Let’s say a customer has reached the checkout page, ready to buy. But when they look for that reassuring “padlock” symbol or see the HTTPS prefix in the URL, it’s nowhere to be found. They might start questioning whether it’s safe to enter sensitive information.

Without a clear security symbol, you risk turning away customers who aren’t willing to take the risk. Displaying an SSL certificate and other security markers can build trust and encourage customers to go through with their purchase.

6 Actionable Strategies To Avoid Shopping Cart Abandonment

Taking steps to prevent shopping cart abandonment means you’re staying ahead of the game.

You’ve seen how easily things like slow pages, hidden costs, or tricky checkouts can make someone leave. But by focusing on the right strategies, you’re showing your customers that their experience matters just as much as the products they’re buying.

Let’s look at how you can avoid those abandoned carts and create a smoother path to checkout.

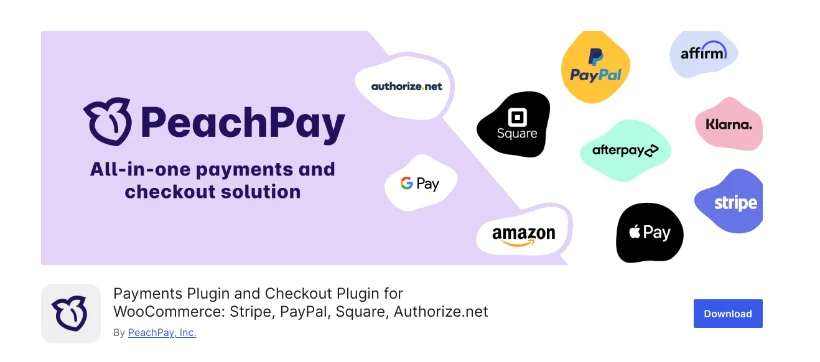
1. Offer Multiple Payment Options

First of all, you must accept the common forms of payment methods:

  • Cash On Delivery (For local sales)
  • Credit Card Payments (Visa/Masters)
  • Paypal

Now, to satisfy more prospects you have to incorporate more payment options. Let us look at some of them.

i. Debit Card Payments

Whether it’s a Visa, Masters, or any card processing network assigned, as long as the debit card is allowing payments via your required currency, it should be accepted, even if the person is from abroad.

ii. Gift Card Payments

A gift card, also known as a gift voucher or a gift token, is a prepaid stored-value card and is usually issued by a bank or a retailer.

Gift Card Payments - Abandoned Cart

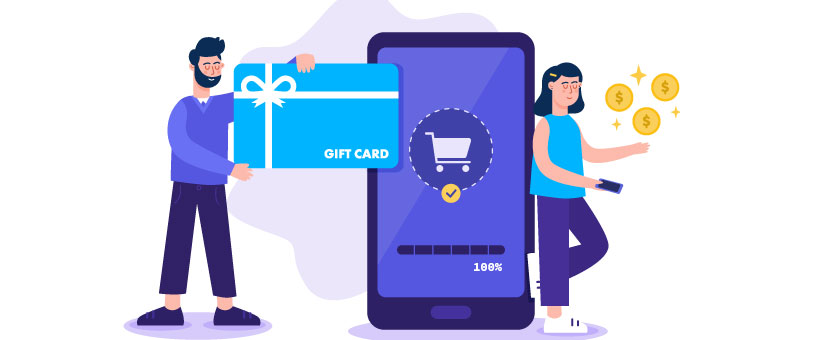
Allowing gift card payments will attract new prospects to your store.

Let’s say a person got a gift card as a present and is looking for a place to spend it. If you accept gift cards, then your shop might be the place to spend it.

It will also give you an advantage over your competitors since most of them do not accept gift cards as a payment method.

iii. Allow Partial Payments

‘Partial payments’ means when you allow a customer to place an order by paying a portion of the bill, and the rest to be paid during delivery.

In this way, there will be less chance of cancellation and will attract prospects who have few trust issues.

iv. Payment via installment

If you have expensive products, then you can allow customers to pay via installments.

Installment Payment - Abandoned Cart

You can have the prospect sign some sort of agreement during delivery for security and allow the prospect to pay off the total amount over a certain period.

IMEI is one of the forms of payment via installment that most electronic sellers allow nowadays, where a person purchases a product using a credit card, and an ACH is set up for the customer to be charged every month for an agreed number of months.

You can also allow prospects to do similar agreements through their debit cards to attract the ones who don’t have or refrain from using Credit Cards.

v. Allow Split Payment

During the holiday season, many banks and companies reward their users and employees with gift cards. This is also the time when people look forward to purchasing expensive gift items.

For example, if a prospect has a gift card worth $50 and he comes across a toaster in your store worth $80, he is unable to pay it with the gift card alone.

But if you allow him to split the payment and pay the rest of the $30 with his debit card, he will be happy to pay for the toaster.

vi. Accept Payments via Other Payment Gateways

If you’re running an online store, you should keep all the popular and standard payment gateways for your prospects. It is one of the great strategies of abandoned cart recovery that you can implement as the solution for woocommerce shopping cart abandonment.

Other than PayPal, two other payment gateways to consider for WooCommerce are Braintree and Stripe

On WooCommerce, you can use some really great plugins for setting up a payment gateway.

Remember, ‘finance & payments’ are a sensitive matter. People are more comfortable paying in their preferred payment methods or options.

2. Create Clear and Customer-Friendly Return Policies

Let’s start with statistics on why there should be a clear and buyer friendly return policy in your store.

So, first of all, you must have a Return & Refund Policy if you wish to run a successful WoocComme store.

On the policy, you must include proper instructions on what actions to take when a prospect wishes to request a return or refund.

Tips on writing a proper Return & Refund Policy

  • You must clearly state the terms that make a prospect eligible for a refund. And mention the time it will take to process the refund policy. Look at the example below.

These are part of RexTheme’s refund policy.

Refund request validity - Abandoned Cart
Refund request period - Abandoned Cart

It is clearly stated when a person is eligible to apply for a refund and within what time they have to request a refund.

  • You need to include an action plan, i.e. what will be done by you when – A delivered product has defects – A wrong product is delivered – No product (s) delivered at all – Correct product delivered but does not match product details
  • You should also state the different action plans you may have for different product types. For example, underwear cannot be returned, but if it is defective, you have to offer a refund. Again, a phone can be returned and the prospect may be offered an exchange, repair (via warranty), or a refund. (More about this a bit later.)
  • Give your customers enough time to ask for a refund. It is ideal to give customers at least a week to report a return or refund request. Most large companies rather allow a 14-day return & refund policy. This is because it is not always possible to notice an issue with any product quickly. For example, an issue with lipstick can be spotted immediately but issues with a phone require a few days to notice.

Write a policy that reflects your business. Don’t be lazy and just copy and paste it from any other eCommerce site. The policy should be solely based on your products and target prospects.

Here are a couple of strategies you can apply to make the return & refund policy more feasible for you.

Smart Alternatives to Refund

Refund Alternatives - Abandoned Cart

You do have a chance of avoiding refunds in some cases. You may try the following alternatives:

  • Offer a store credit of the same amount if a prospect has a genuine refund request. This way, the prospect will have to spend the amount on your store. However, this idea is more applicable to customers who purchase regularly, or if you have a popular online store with membership facilities.
  • You can keep an exchange/replacement option. An exchange/replacement option is more applicable if the reason for the refund request is a ‘damaged product’. This is a better solution for electronics, which usually cost more than clothes and apparel, and people will be more than happy to accept a replacement.

Return & Refund policy based on product types

Here are some ideas you can implement when writing your Return and refund policy based on product types.

i. Refund Policy On Food Products

If you’re selling food products, then you know that food is perishable or has a decaying nature. Hence, you need to have a different policy for food products.

Here is what Unique Pretzels says on their return policy:

‘Perishable food products cannot be returned. All items from our online store are sold on a non-returnable basis unless defective.

Where the product is defective, damaged, or contaminated, you may contact us to request a return of your purchase within 14 days of receiving your shipment for a refund or exchange.

This policy is precise. A customer cannot return it unless the product has a defect. And the customer has a good two weeks to request a refund or an exchange.

Let us take an example. Let’s say a customer ordered a packet of chocolates. When he got the delivery, the chocolates were broken or molten inside. So as per the above policy, he is eligible for a refund as long as he requests a refund within 14 days.

Usually, the process is, that the customer has to send images proving the defection, and if proven correct, the request for a refund will be granted.

ii. Refund Policy on Electronics

Electronic products are a common subject of return or exchange.

If you are selling electronics online and a customer buys a cellphone from your store & discovers that the battery is not providing sufficient backup, then the customer should be offered a solution via repair. replacement, or refund.

Walmart gives customers a long period of 15-30 days to demand a return. According to their refund policy:

‘Electronics including but not limited to computers, camcorders, digital music players, and GPS units must be returned within 15 days with receipt.’

As long as the receipt is there and a notable issue is reported, after inspection (i.e. checking that the actual sold product was returned, which can be checked through product GTIN or MPN, and no extra damage was inflicted by the customer), return and refund may be accepted.

You can allow your prospects a similar return policy. You may also offer options such as repair, replacement, or store credit.

iii. Refund Policy On Clothes & Apparel

Clothes and apparel usually receive the highest amount of refund/return requests. According to SmallBizTreds, 75% of all the returned products online are products under the category ‘clothing and apparel’.

You can allow a tactical exchange policy on clothes to avoid refunds.

Let’s say a person purchased a dress for his wife. However, after receiving the dress, he realized that it was not in the correct size. In this case, you can allow him to get an exchange for an appropriate size.

Note that in this example, there was no defect in the dress, and the customer knew what size he was buying at the time of purchase. So why still allow him an exchange?

This is just a strategy to avoid refunds when there is a defect. If your policy states an exchange, then you can simply allow the customer to return the defective product and send a copy of the same product that is not defective. Thus avoiding refund.

But you do need to mention that ‘preference-related exchanges’ should be allowed only once. Only defective goods can be returned multiple times.

For apparel, however, you should allow a return & refund only when there is a defect or wrong product delivered.

Make Additional Policy For the Holiday Season

You’re going to receive more orders and more sales during the holiday season. It comes with some drawbacks as well.

The delivery system will be packed up during this time. With more sales, there will also be more refund requests. Plus, missed delivery time will be a major headache. So the question is how you can avoid abandoned carts during the holiday season.

Imagine a man purchasing gifts for everyone in his family and two of the gifts were wrong deliveries. He will be furious and will surely want a refund.

So you have to prepare for the holiday rush. Here are some tips:

  • Increase The Return Request Time: From mid-December to early January, make your return/exchange request time longer. If It was 14 days, make it 22 days for orders accruing within this time.
  • Send Complimentary Products: If a prospect gets a wrong delivery, offer them extra store credit and send a small complimentary gift after the rush hour.
  • Mention delay possibility: Mention in your policy that due to rush, delivery might be delayed by a couple of days.

Being transparent will let you be more credible to prospects.

Use all these ideas and make a compelling refund policy. Make sure to keep the link in the cart and checkout page as well.

On product pages, you may mention that you offer a money-back guarantee in case the product is not up to the mark. This will gain more trust and reduce the chance of an abandoned cart. 

3. Be Transparent About Costs Upfront

Since hidden costs can be one of the prominent reasons for shopping cart abandonment, let’s directly go through how you can be transparent about the costs to your customers.

Here is how you can take steps to remove the hidden cost confusion.

Suggested Steps:

i. Show the delivery fee on the product page

On the product page, mention the delivery fee below the product cost.

If it’s an international prospect, use a plugin that uses Geolocation tracing to show shipping costs based on the customer’s location.

You may include a calculator for international shipping where customers can choose their preferred delivery country to find out the shipping cost.

Or, you can simply set a product price with increased value and offer free shipping.

If a shopper is ordering a product for any festival or important use, the delivery date is the prior concern.

The date can be delayed in real life for many circumstances, but you can estimate the possible delivery date of the product.

ii. Show the Delivery Date On The Cart

If a shopper is ordering a product for any festival or important use, the delivery date is the prior concern.

The date can be delayed in real life for many circumstances, but you can estimate the possible delivery date of the product.

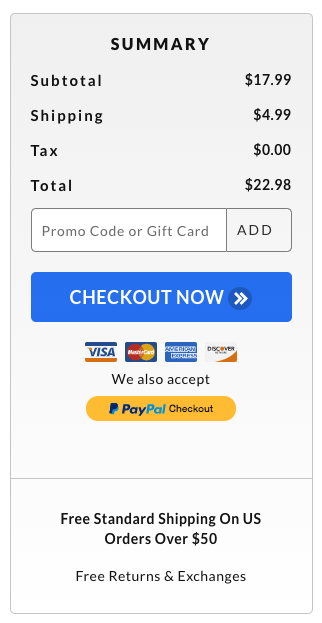
iii. Show Price Including Tax

As of now, you can often trace the location of a prospect and calculate the amount of tax that will add to the product. Show that amount whenever a shopper is viewing a product.

If a buyer sees a price including the tax on the product page, he or she will be able to make accurate budget decisions and are less likely to abandon the cart.

This is how NordStorm does it:

Nordstorm Product Price - Abandoned Cart

Here, you can see the actual price of the product, the shipping fee (Free shipping in this case), the tax amount, and the total bill to be paid, thus making it easier for the prospect to manage his budget.

iv. Show Shipping costs on Product Pages

If a prospect likes a product and the actual price is within his budget, the next thing he’ll be looking for is the shipping charge.

Based on the location of the prospect, the shipping charge can differ from very low to higher than the product’s price itself, especially on international shipping.

So it’s best to display the shipping cost on the product page.

v. Show Cost BreakDown On the Cart

It’s always a good idea to keep a cost breakdown for the products on your cart.

As you saw in the example of NordStorm earlier, you can break down every cost for purchasing products and produce a total price.

Here is another such example, LookHuman’s cart page:

Here is another such example, LookHuman’s cart page:

LookHuman Cart Page - Abandoned Cart

You can use some tools to calculate the accurate shipping cost of a product.

Here are some tips you can use to improvise on shipping costs.

Tips Regarding Shipping

i. Offer Free Shipping

One of the most effective ways to convince your buyer is to offer them free shipping.

This is a lucrative deal that works like a charm locally.

See how AliExpress is doing it.

See how AliExpress is doing it.

AliExpress Shipping - Abandoned Cart

You can also offer free shipping to a few specific countries when delivering globally. Based on the Geolocation, assign the ‘free shipping’ message to appear only for customers buying from your preferred countries.

You can also offer surprise-free shipping in the cart or on the checkout page. This means you will show the shipping cost on the product page, but when the customer goes to the cart or checkout page, he will get a surprise with free shipping.

This will make him feel like it’s a special offer and will reduce the chance of shopping cart abandonment.

ii. Offer Express Delivery

When someone is ordering a product on the internet, they want to receive it as fast as they can. That’s why you can see the term ‘Same Day Delivery’ getting more and more popular.

If a prospect is comparing your product with similar products from your competitors, sometimes the only difference that will make them choose your one is the express delivery feature.

**Express delivery costs more so you should mention it, calculate the price, and show the cost of express delivery.

If the customer is in a real hurry, they’ll pay for the extra cost.

iii. Keep A Shipping Policy Page

You should not confuse a shipping policy page with a privacy policy page.

The shipping policy page should contain every detail related to shipping only.

These are things your shipping policy page should contain:

  • Different methods of shipping you offer (Normal, Express Delivery) and their prices.
  • Shipping medium (such as FedEx, USMail, etc)
  • Accepted delivery locations
  • International Shipping Information
  • Local shipping information
  • Bulk/wholesale shipping information
  • How shipping fees will be paid
  • Charges for product return/refund cases
  • Shipping condition for lost/missing products
  • Shipping condition for delayed delivery
  • Shipping policy for canceled orders
  • Product and Location restrictions (If any)

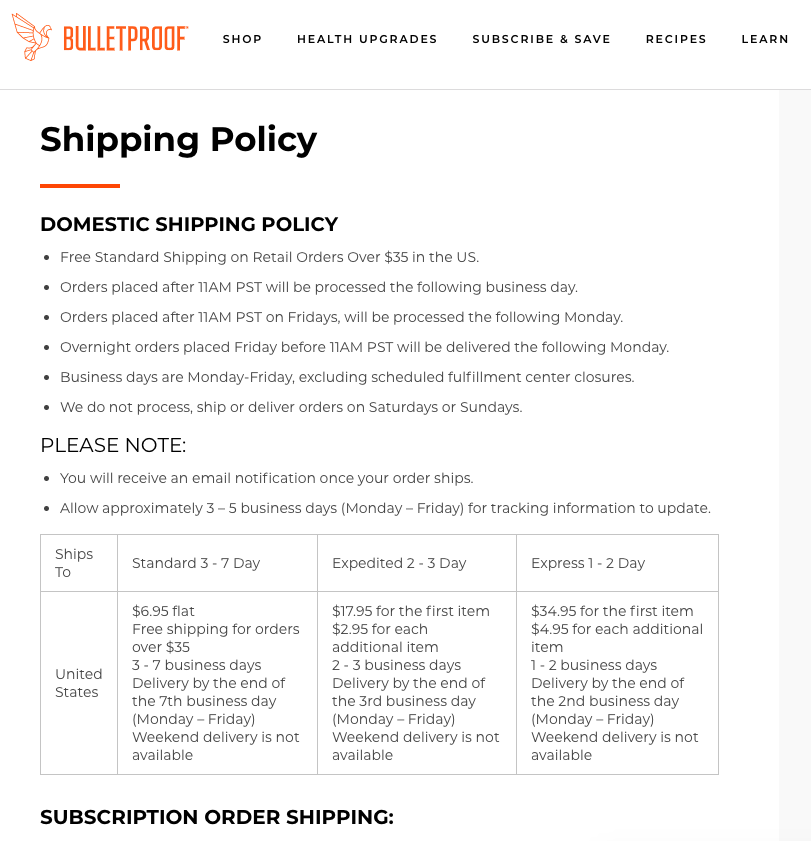
Here is an example of an excellent shipping policy from BulletProof.

Bulletproof shipping policy - 
abandoned cart

iv. Create a Tax Policy

Now, this is probably a new term for you. You won’t usually see the tax policy page on most eCommerce sites.

The amount of tax on a product depends on:

  • The nature of the product.
  • If the buyer is shipping it locally or internationally.

In the US, few states have applied a recycling tax on plastic products that are different in each state. And if you’re shipping internationally, different countries charge a range of taxes on most imported products.

So you may create a separate page for tax policy or create a single page for shipping and tax policy.

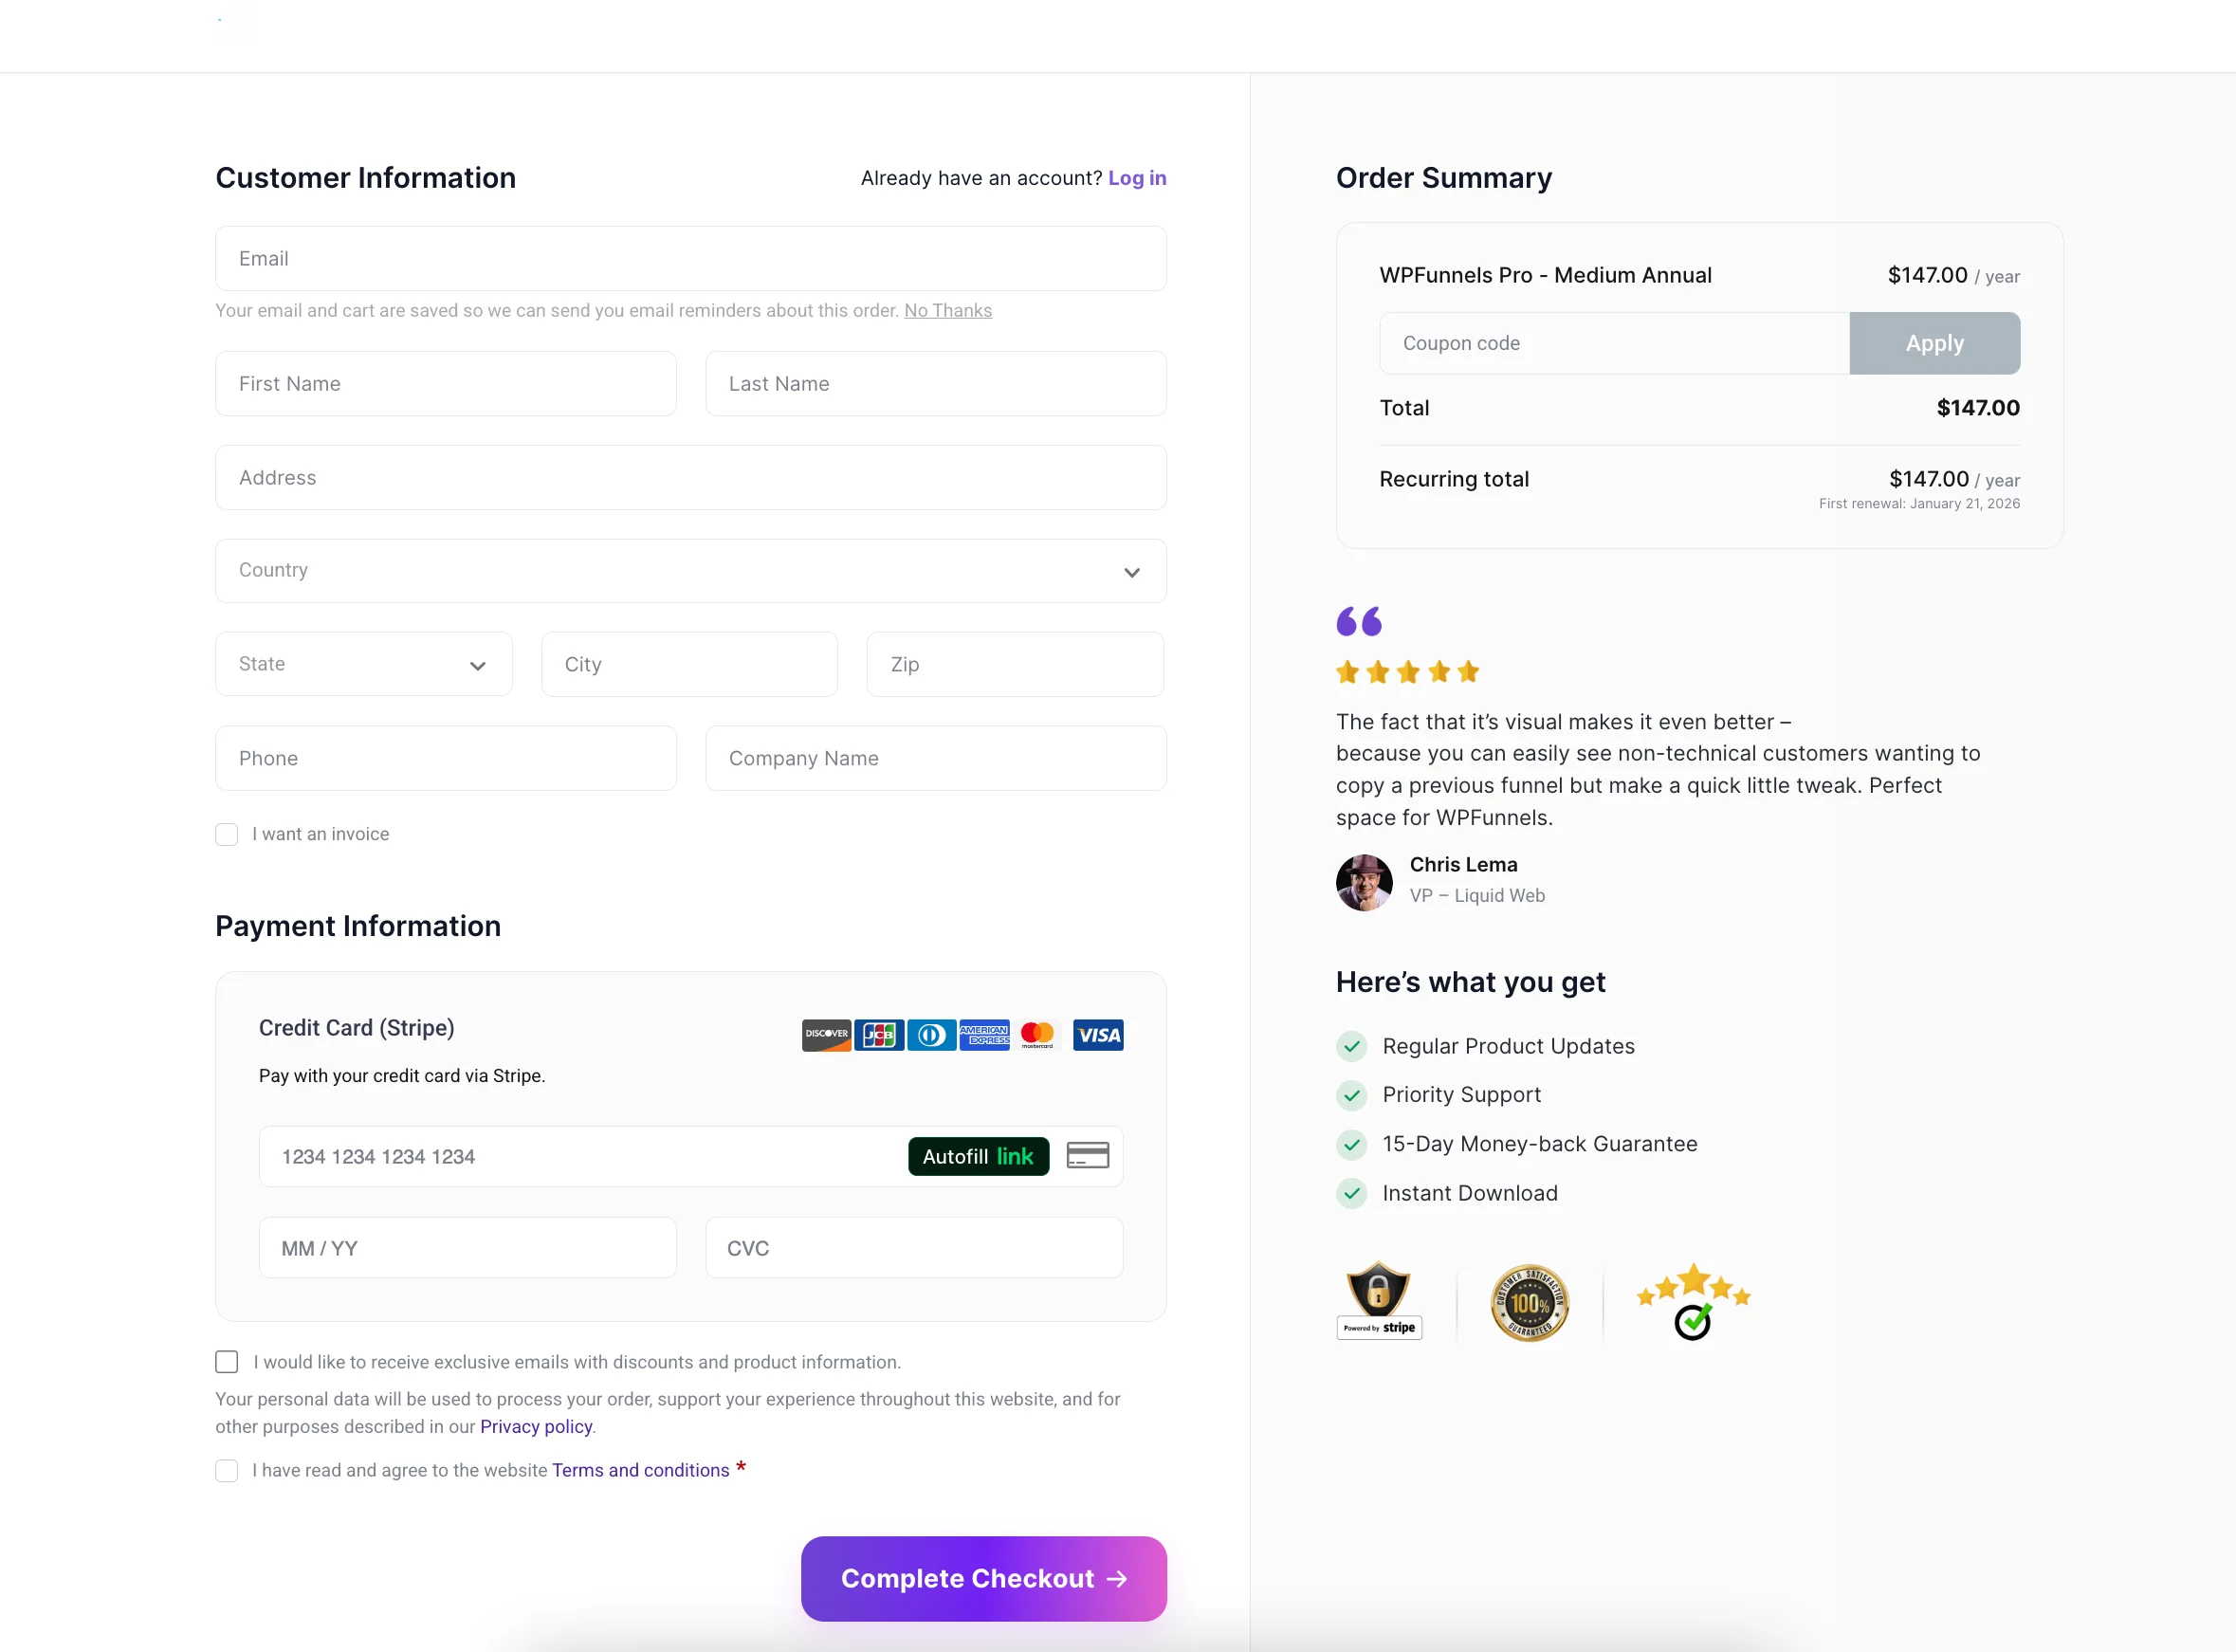
4. Simplify Your Checkout Process

A short simple checkout process genuinely helps in reducing the chance of shopping cart abandonment.

Here are a number of things you can do to improve the checkout process.

i. Keep The Process Short & Simple

Try to make sure there are as few steps as possible to complete the checkout process.

Some websites insist that a customer should open an account, verify it, and then place an order. This is often very annoying as it takes a lot more time to complete than what a customer would expect.

So here’s what you can do.

  • Only take the information you really need for a complete order. So, keep 4 fields: Name, Email, Address, and Phone number.
  • Next, complete the payment process.
  • Once complete, auto-create an account and give a note on the page that an account was created and an e-mail was sent to set the password.

You can keep a checkbox that says “Send Me Exciting Offers For The Similar Products In The Future” so that, even if a person doesn’t reset his password anytime soon.

This will give you permission to get in touch with them in the future and sooner or later they will set up their account properly.

ii. Allow Guest Checkout

A buyer might not want to open an account and may just want to purchase that one time either because he is busy or security conscious.

You can allow a “Guest Checkout” where the prospect will just provide the phone number, name, and address. Then proceed with the payment process.

You can display a promotional message after the payment process offering a ‘New Sign Up” discount voucher to encourage the person to open an account in the future.

Remember, you should encourage your prospect to open an account, but never force it.

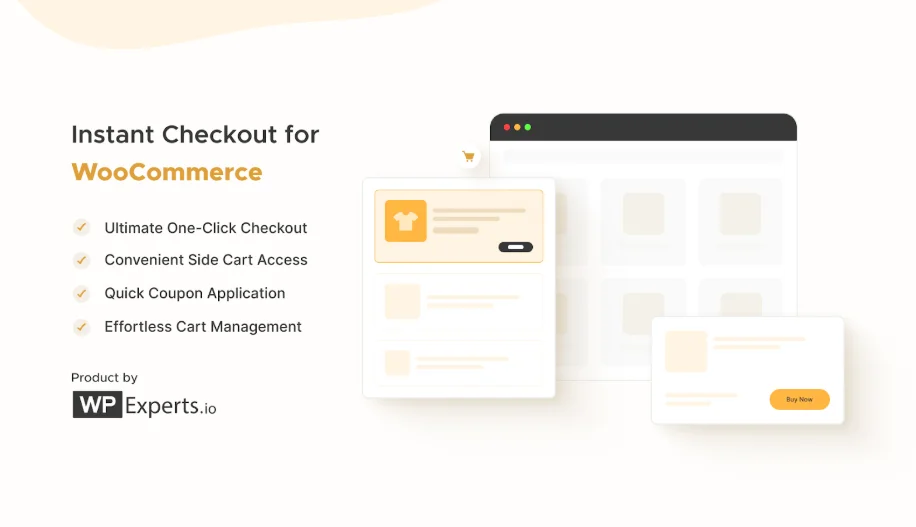
iii. Apply One Page-Checkout

Onepage Checkout - Abandoned Cart

You can also be strategic and use a one-page cart and checkout page so that a prospect can see his selected product details and complete the checkout process in one go.

If he already has an account created, you can auto-fill all the fields for customer details and allow him to edit them where required. If he doesn’t, then simply let him fill them out and auto-create an account later on.

Here are some of the fields you should include in a one-page checkout:

  • Customer name
  • Email
  • Phone number
  • Cart details (Which he can edit)
  • Payment options
  • Shipping address and method
  • “Save Cart” button (opt for e-mail and name if clicked)
  • “Shop More” button
  • Links to your policy pages

Nowadays, most large companies use One-Page Checkout to minimize WooCommerce cart abandonment.

5. Optimize Page Load Speed for Faster Navigation

Slow-loading websites are one of the primary reasons users abandon their carts. If your website takes too long to load, customers lose patience and leave without completing their purchase. Optimizing your page load speed ensures a seamless shopping experience, making it more likely that customers will follow through with their orders.

Here’s how you can optimize your page load speed with actionable strategies:

i. Minimize Image Sizes

High-resolution images can take a significant amount of time to load, especially on mobile devices. Compress your images to smaller sizes without compromising quality.

Use tools like:

  • TinyPNG or ImageOptim for manual compression.
  • WordPress plugins like Smush or ShortPixel for automated compression.

Also, consider using modern formats like WebP instead of older formats like PNG or JPEG.

ii. Enable Browser Caching

Browser caching stores static resources, like images and stylesheets, on the user’s device. This reduces the need to reload these resources each time the user visits your site.

  • Set up caching using plugins like WP Super Cache or W3 Total Cache if you’re using WordPress.
  • For non-WordPress sites, configure caching through server settings or CDN providers like Cloudflare.

iii. Use a Content Delivery Network (CDN)

A CDN improves page speed by distributing your website’s resources across multiple servers worldwide. When a user accesses your site, they download resources from the server closest to their location. Popular CDNs include:

  • Cloudflare
  • Akamai
  • Amazon CloudFront

iv. Optimize Code (CSS, JavaScript, and HTML)

Bloated code can slow down your website. Minify your CSS, JavaScript, and HTML files to reduce file sizes and improve load times.

  • Use online tools like Minify Code for quick fixes.
  • Install plugins like Autoptimize to automate this process for WordPress sites.

Additionally, remove unused code and reduce the number of scripts running on your site.

v. Optimize Your Hosting Environment

Your web hosting provider plays a crucial role in page load speed. Ensure that your hosting plan can handle the traffic your website receives.

  • For WooCommerce sites, use hosting providers optimized for eCommerce, like SiteGround or Kinsta.
  • Upgrade to a VPS or dedicated server if your current shared hosting plan is causing slowdowns.

vi. Reduce HTTP Requests

Every time a user loads your site, their browser sends HTTP requests for various resources. Too many requests can slow things down. Reduce these requests by:

  • Combining CSS and JavaScript files.
  • Limiting the number of plugins you use.
  • Using CSS sprites for icons and small images.

By focusing on page load speed, you ensure your customers enjoy a smooth and frustration-free shopping experience, reducing the likelihood of shopping cart abandonment. The faster your site, the happier your customers.

6. Build Trust with Security Badges and SSL Certificates

If visitors don’t feel secure while browsing your site or entering their personal information, they’ll leave without making a purchase.

By showcasing security measures like SSL certificates and trust badges, you can reassure potential customers that their data is safe, building credibility and boosting conversions.

security badge
Type caption (optional)

Here’s how you can effectively build trust with security badges and SSL certificates:

i. Install and Display an SSL Certificate

An SSL (Secure Socket Layer) certificate encrypts the data exchanged between your website and users, ensuring that sensitive information like credit card details and passwords remain secure.

  • Activate HTTPS: Transition your site from HTTP to HTTPS. Most browsers mark HTTP sites as “Not Secure,” which deters users.
  • Obtain SSL certificates from trusted providers like Let’s Encrypt (free) or premium services like DigiCert.
  • Check for SSL configuration errors using tools like SSL Labs’ SSL Test.

ii. Highlight Trust Badges on Your Website

Trust badges are visual indicators that signal your site is secure and trustworthy. Place them prominently on:

  • Checkout pages: Reassure users that their payment information is safe.
  • Homepage or footer: Reinforce trust throughout their browsing experience.

Popular trust badges include:

  • SSL badges (e.g., “Secured by SSL”).
  • Payment gateway logos (e.g., PayPal, Visa, Mastercard).
  • Verified seller certifications (e.g., TrustedSite or Better Business Bureau).

iii. Enable Two-Factor Authentication (2FA)

Adding an extra layer of security like two-factor authentication reassures users that their accounts are protected from unauthorized access.

  • Use WordPress plugins like Wordfence or Google Authenticator to implement 2FA.
  • Encourage users to activate this feature for their accounts.

iv. Display Privacy Policies Clearly

Transparency builds trust. Create a privacy policy that explains how you collect, use, and store customer data.

  • Write in clear, simple language, avoiding legal jargon.
  • Place a link to the privacy policy in the footer, checkout page, and account creation page.

Tools like Termly or PrivacyPolicies.com can help you generate a professional policy.

v. Add a Security Seal to Your Site

Displaying a security seal from a trusted provider increases buyer confidence. Services like Norton Secure, McAfee Secure, or Trustwave offer seals after verifying your site’s security.

By combining these strategies, you create a safe and secure shopping environment that builds trust with your customers.

Bolus Strategies to Prevent Shopping Cart Abandonment

Now that you’ve implemented core strategies, it’s time to take things further. Adding a few extra tactics can address specific scenarios where visitors might leave without completing their purchase.

These strategies complement what you’ve already done, giving you more ways to connect with potential customers.

i. Use Retargeting for Cart Abandoners

Even with the best optimizations, some visitors will leave their carts behind. Retargeting gives you a chance to bring them back. Use tools like Google Ads or Facebook Ads to create retargeting campaigns that remind these users about their incomplete purchases.

  • Show ads with images of the products they left behind.
  • Offer time-limited discounts to encourage them to act quickly.
  • Use dynamic ads to personalize the experience and make it feel relevant.

This strategy doesn’t just recover lost sales—it keeps your brand top of mind.

ii. Employ Social Proof

When people see others trust your business, they’re more likely to trust it too. Social proof builds confidence and makes your brand look credible.

social proof in Checkout
Type caption (optional)
  • Display customer reviews on product pages.
  • Add user-generated content, like photos or testimonials, on your homepage.
  • Highlight statistics, such as “10,000+ happy customers” or “Rated 4.8/5.”

Plugins like TrustPulse or Judge.me can help automate this process. By showing real-world validation, you create a sense of reliability that influences buying decisions.

iii. Utilize Exit-Intent Pop-Ups

Visitors leaving your site don’t have to be a lost cause. Exit-intent pop-ups are a simple way to grab their attention before they go.

  • Offer a discount or free shipping to make them reconsider.
  • Share lead magnets like an eBook, checklist, or free trial to capture their email address.
  • Keep the pop-up design clean and the message short for maximum impact.

You can use tools like OptinMonster or Popup Maker to create effective exit-intent campaigns. These pop-ups are particularly useful for turning hesitant visitors into leads or customers.

By adding these extra strategies, you give your site an edge. Combined with the core methods, they create a more comprehensive approach to improving engagement and conversions.

Conclusion

Reducing the number of shopping cart abandonment in your store doesn’t require a lot of effort. But you do need to focus on the little things that you often ignore.

The idea is to work smart and adopt the right methods for optimizing your store. I have offered the solutions that I found more actionable and result-oriented. You can be more creative and look for a better solution.

Eventually, if you can tackle the problems mentioned in this article properly, then you will end up reducing shopping cart abandonment by over 20% which will be more feasible.

Cart Lift can solve your problem by automating cart recovery with personalized email campaigns and discount incentives. This easy integration with WooCommerce ensures a smooth and effective recovery process, boosting your conversions and revenue.

** FAQs **

What can I do if a customer abandons their cart?

Send personalized follow-up emails with a reminder of their abandoned items. You can offer a small discount or free shipping in these emails can entice customers to return and complete their purchase.

How does mobile optimization help to reduce cart abandonment?

Make sure your WooCommerce store is mobile-friendly, as many shoppers use mobile devices. A smooth mobile experience can significantly lower the chances of shopping cart abandonment.

How can I improve my website’s loading speed?

To improve your website’s loading speed, optimize images, use a reliable hosting provider, and implement a content delivery network (CDN). Faster loading times enhance user experience and reduce cart abandonment.

Should I offer discounts to first-time buyers?

Yes, you should. You can offer discounts to first-time buyers who can incentivize them to complete their purchase. This not only helps reduce cart abandonment but also encourages new customers to try your products.

How can live chat support help reduce abandoned carts?

Implementing live chat support allows customers to get immediate help if they encounter issues during checkout. This instant assistance can resolve concerns quickly, reducing the likelihood of shopping cart abandonment.

Categories
Guide Virtual Reality

Top 3 Panoramic Camera Apps for Your iPhone

Panoramic pictures are super popular right now in the area of photography & VR.

Panoramic photography is way easier with an iPhone.

And the best part is, you don’t need any other fancy equipment to try it out with your iPhone.

Even though your iPhone is equipped with a built-in panoramic camera, it can be quite challenging to use on its own to capture high-quality panoramic images, which is why using an iPhone panorama app can make a big difference.

With panoramic apps, you can take panoramic photos right on your iPhone without even having to move it around.

You don’t have to buy a tripod or expensive pieces of equipment either!

You can also use a panoramic camera app for Android if you are an Android user.

But in this article, we’ll look at 3 of the best panoramic camera apps for iPhone

Also at the end of the blog, I provide you guidelines on how you can create virtual tours easily with your panoramic photos and revisit virtually.

So let’s get started.

Why Use A Panoramic Camera App Instead Of iPhone’s Built-in Panoramic Camera?

The built-in panoramic camera that the iPhone comes with has a lot of limitations and it becomes way more challenging if you want to take panoramic photos.

Here are side-by-side comparisons:

Panoramic Apps VS Built-in-Panorama

If you want to take panoramic pictures, there are a bunch of apps that can help you do that.

If you look at the iTunes store, you’ll see a whole bunch of different app icons to choose from. Some are free, some you pay for once, and some you pay for extra features while using the app—so you can even find a free 360 camera app for iPhone if you’re looking to save on costs.

I have well researched most of the apps and chose 3 apps that can easily solve the issues that you will face using the in-built panorama of your iPhone.

Advantages of Using a Panoramic Camera App

Let’s have a look at some advantages you’ll have by using a panoramic camera app:

  • You’ll capture more of the scene in a single shot.
  • Panoramic camera apps will give you high-resolution images with impressive detail.
  • They’ll provide you with an experience with no visible stitching marks in the final panoramic image.
  • These panoramic camera apps are easy to use and require no professional photography skills.

Overall, a good panoramic camera app will save you from manual flaws and help you capture high-resolution panoramic photos with your iPhone quite easily.

Then, you can use them to show off a location or your property on Facebook or even via virtual tours on your website.

Top 3 Panoramic Camera Apps for iPhone

Here are three apps that I’ve chosen to provide in-depth information on quality & features to help you get 360 panoramic photos using an iPhone with the help of a 360 camera app for iPhone:

1. DMD Panorama

DMD Panorama is a pretty neat app and better than the iPhone’s panorama feature in many ways.

You can take full 360-degree panoramas with this app (both horizontal and vertical angles), which is awesome.

It uses the gyro and compass in your iPhone to help make sure your panorama turns out great.

So, if you want to take some great quality panoramic photos, this app is worth checking out!

Key Features of DMD Panorama:

  • Works with the front camera of the iPhone for panoramic selfies
  • Take panoramas with 3 different Exposure settings
  • Up to 100MP panoramas
  • The ultra-wide lens on the newest phones captures panoramas with floors and ceilings

Notes : In DMD panaroma app, selfie panorama mode unlocks after you capture and save 10 regular panoramas.

Feedback From DMD Panorama User’s:

I have read all the reviews of DMD panorama users that I got and summed up their feedback here below:

Panoramic Camera App for iPhone - DMD Panorama

Average User Rating: 4.4 stars out of 5.

App Link: DMD Panorama.

2. Panorama 360

Panorama 360 is a powerful panoramic app that will allow you to capture 360-degree panoramic photos with your iPhone easily.

The app offers a range of editing tools and filters to enhance your photos.

Key Features of Panorama 360:

  • Capture panoramas blazing fast
  • View your iPhone camera app panoramas in the 360-degree viewer
  • Embed panoramas in your website or blog
  • HD+ capture

Feedback from Panorama 360 App Users:

Well, there are much fewer 1st hand reviews I got on this app than the DMD panorama app.

I have jotted down the positives and also the negatives below:

Panoramic Camera App for iPhone - Panorama 360

Average User Rating: 4.2 stars out of 5.

App Link: Panorama 360 for iPhone.

3. Bimostitch

With Bimostitch, You can combine different photos to make one big panoramic image that looks perfect.

Now to mention that this is not a 360 panorama capturing app but a panorama stitching app. But I had to keep this on the list because this stitching is a very important aspect of 360 panorama images and in iPhone, this is one of the best apps you can find for that.

It won’t take up much space on your device and the panoramas will be super clear. You can make panoramas on the go, like when you’re on a trip, and you don’t need to be connected to the internet.

Bimostitch Panorama Stitcher has been downloaded 570 thousand times.

You don’t even need any fancy equipment or sensors to use this app. Whether you’re a pro or just starting, this app is perfect for making great panoramic photos.

Key Features of Bimostitch:

  • Stitch High-resolution, single-row, multi-row, vertical, horizontal, 360° panoramas.
  • Stitch many (2 to 200+) overlapping photos into impressive wide-view panoramas.
  • Compress large panoramas to save space on your device.
  • Video-to-panorama for converting videos of panning motion into panoramas
  • View source images in panorama while in preview mode

Feedback From Bimostitch User’s:

Though it’s not an image-capturing app but rather a stitching app, I got the highest positive reviews on this app. I summed up the positive reviews in 4 points.

In regards to negative reviews, I only got 1. Take a look:

Panoramic Camera App for iPhone - Bimostitch

Average User Rating: 4.6 out of 5.

App Link: Bimostitch

If you want a seamless way to capture high-quality 360 panoramic photos on your iPhone, a 360 camera app is a great choice. If you need more advanced features, explore custom iOS app development services to create a tailored solution for your specific needs.

Creative Ways To Use Panorama Images

Panorama images aren’t just stunning—they’re incredibly versatile. Here are some creative, actionable ways to use them:

1. Create Virtual Tours for Websites

Transform your panorama images into immersive virtual tours. If you’re a realtor, use them to showcase properties. As a resort owner, highlight your rooms, amenities, or scenic views. Tools like WP VR or Kuula can help you upload your panoramic shots and turn them into interactive experiences that visitors can explore from any device.

2. Design Eye-Catching Social Media Posts

Panoramic images stand out on platforms like Facebook and Instagram. You can upload them as scrollable photos or use third-party tools to convert them into engaging videos or carousels. Think of it as a way to grab your audience’s attention while telling a story.

3. Use Panoramas in Presentations

If you’re preparing a pitch or a creative presentation, panoramic images can serve as impactful visuals. For example, a tourism business could embed panoramic views of destinations into their slides to wow the audience.

4. Personalize Travel Albums

Want your travel photos to feel more immersive? Use panorama shots to capture breathtaking landscapes or cityscapes. Instead of flipping through flat photos, you’ll feel like you’re revisiting the entire scene. Print them as fold-out albums or large wall posters for an extra wow factor.

5. Create 3D-Printed Keepsakes

Panoramas can be converted into unique 3D models or keepsakes. Some services let you use panoramic shots to create printed snow globes, crystal engravings, or even 3D postcards.

6. Plan and Share Home Renovations

If you’re remodeling, take panoramic photos of each room before and after. Share these with your contractor to ensure they understand your vision or use them to inspire others when you post your home transformation online.

7. Capture Before-and-After Shots

If you’re in a creative field like landscaping, architecture, or event planning, panoramic photos are perfect for showing transformations. A side-by-side comparison of panoramic shots can be a compelling way to market your services.

By thinking outside the box, you can turn your panoramic photos into more than just pretty pictures—they become tools for storytelling, marketing, and memory-making.

Get a complete guide on how you can create a virtual tour using the iPhone Panorama picture that you took using one of the suggested plugins,

Wrapping Up

Each of these panoramic camera apps has its unique features and benefits.

Whether you’re looking for a user-friendly interface or powerful stitching tools, there is an app on this list that will meet your needs and could be considered the best 360 camera app for iPhone for capturing stunning panoramic shots.

So why wait?

Download one of these apps today and start capturing stunning panoramic photos with your iPhone.

Keep in mind that while these apps are great for capturing panoramic photos, the quality of the photos will also depend on the camera quality of your iPhone.

It’s recommended to use the latest iPhone models for best results.

Categories
Virtual Reality WP VR

Amazing WPVR Virtual Tours Created By Users [2024]

If you’re thinking of a new and innovative marketing strategy to convert more website visitors to real customers, a virtual tour is the most suitable solution for you.

Especially, if your business has a physical location of any kind, a virtual tour is a great way to show your service, products, and facilities to your prospects online.

For a WordPress site, WPVR is right now the easiest plugin to create quality virtual tours.

Since its release, the plugin has gone a long way, with great interface improvements, and now it is considered a reliable plugin to create virtual tours.

And within that time, many WPVR users have created a few amazing virtual tours. You will be amazed at their creativity in using the plugin to create stunning virtual tours.

So, we’ve decided to share some of these WPVR virtual tours with you so you can take ideas and inspiration from them and hopefully, make a few great ones yourself.

In this article, I will highlight some of the virtual tours that WPVR users created for their businesses.

And I have classified them within different industries so that you can find the ideal ones to learn from for your business.

So let’s get started.

Stunning WPVR Virtual Tours Created By Users

I am really excited to show all these virtual tours as I am sure you will find something to learn and you will be able to understand how people in your industry are using virtual tours.

1. Virtual Tours of Real Estate Properties and Housing

If you’re in the real estate industry, you can create a virtual tour of your properties and add them to your online listings.

It will allow your prospects to have a realistic experience of your place and thus a better idea about the property.

This, in turn, will increase the conversion rate as people calling with inquiries will probably already be interested in how the property looks.

Here is a virtual tour of a real estate property created by a WPVR user.

You can navigate this tour, move around between the scenes, and check out all the features on this tour.

Here are some virtual real estate tours created by WPVR users:

i. Marfuse Studio

Marfuse Studio is specialized in creating content to help with Virtual Reality, Augmented Reality, and 3D Animation for their clients. Among many tools, they are also using WPVR to showcase some of the properties.

Below are two virtual tours created by this WPVR user.

Marfuse WPVR Virtual Tours for Real Estate
Marfuse Real Estate Virtual Tour

Click on the images to visit the tours.

ii. UN Reality

UN Reality is a Real Estate Service Provider operating in South Korea.

They’ve created multiple virtual tours for their properties using WPVR and are using them to highlight their properties to potential buyers through their website.

Here are the virtual tours they created.

UN Property Virtual Tour
Virtual Tour UN Property

Click on the images to visit the tours.

2. Virtual Tours of Hotels, Motels, Resorts, and Guest Houses

If you’re involved in the hotel or resort business, then you can largely benefit from using virtual tours on your site.

Most people who want to visit a resort or book hotel rooms, browse through the websites of several places. And if you provide an engaging virtual tour, it will surely create a great experience online.

This will increase the possibility to get more bookings and create a good first impression of your hotel/resort.

Using a quality virtual tour that is informative and realistic, will get you a higher rate of conversion over using only stale images.

Here is an informative virtual tour of a hotel room created using WPVR:

You can navigate this tour and check out all the features on this tour.

Here are a few virtual hotel tours created by WPVR users:

i. Pearl Tree

Pearl Tree is a 4-star boutique hotel located in Purulia, West Bengal. They have created a few wonderful virtual tours for most of their hotel rooms.

Click on the images below to take a tour of their hotel.

Pearl Tree Hotel Room Tour
Pearl Tree Hotel Tour

ii. Shar Barr Casa

Shar Barr Casa is a beautiful vacation home in the Caribbeans. They’ve created virtual tours of both the interior and exterior of the home.

You can take a tour and experience their enjoyable resort by clicking on the images below.

Shar Barr Casa Virtual Tour
Shar Barr Casa Interior Tour

3. Virtual Tours of Pubs and Bars

We all love to take a break every now and then and spend some time in a pub or bar.

And you will be surprised to know that many do search online for good pubs to hang out in. If you provide a virtual tour of your pub and can present a great environment, people will be hooked immediately and will probably visit soon.

A virtual tour that represents your service quality and interior well, will make them more likely to choose you as their regular pub.

Here is an example of a Pub virtual tour that represents the interior really well.

Try clicking on the hotspots in the virtual tour and see how more information is provided.

Here are a few more virtual tours of pubs and bars that WPVR users created.

i. KluBar Gastropub

Located in Kranj, Slovenia, KluBar Gastropub is a concert space, a day bar, a nightclub, a cafe, and an exhibition space altogether.

Klubar Gastropub created a virtual tour using WPVR. Take a tour and experience their place.

KluBar Virtual Tour
Klubar Gastropub Virtual Tour

You can see the tour on the website of the KluBar Gastropub.

ii. Whiskey Licker Up

Whiskey Licker Up is a bar and cafe in Las Vegas. They have created a simple virtual tour that looks amazing.

Here’s their tour. Click on it to take a visit.

Whiskey Licker Up Virtual Tour
Whishkey Licker Virtual Tour

4. Virtual Tours of Restaurants and Cafes

Locally, people tend to search online for good restaurants and cafes on a regular basis.

Besides good food and ratings, a person also values the environment. If you manage a restaurant, you can consider using virtual tours to attract more customers and increase sales under your management.

If you can show how great your restaurant is using a virtual tour, it will surely attract people to try your restaurant out.

Here are a couple of restaurants that used virtual tours to highlight their lovely interior. Click on the images below to experience their virtual tours.

The Renaissance
The Renaissance
Avalon Cafe Virtual Tour
Avalon Cafe

5. Virtual Tour of Beauty Parlors and Salons

When a person looks for a beauty parlor or salon, they usually prefer the ones that feel peaceful to visit with a lovely interior.

One way to highlight your sweet beauty parlor is to use a virtual tour on your site.

Here is an example of a virtual tour for a beauty salon.

You can see how you can use hotspots to provide information about each of your services and showcase your parlor easily.

A couple of WPVR users happened to be owners of Beauty salons. Take a look at the tours they created.

Studio L Salon
Studio L Salon
Creative Hair Salon
Creative Hair Salon

You can have a look around their entire salon and learn about all of their services easily.

6. Virtual Tours of Schools and Colleges

When choosing schools, parents do value the campus and the interior of the school. It creates an impression of where their kids will study and if they feel safe about it.

A virtual tour is a great way to showcase your school’s environment online so that the parents know beforehand how amazing your school is. And whether the students enroll or not, they will definitely take a live visit if they enjoy the virtual tour, which increases your chances of taking a new student onboard.

i. Sherborne International School:

Sherborne International School created virtual tours of their classrooms, dorms, and other facilities.

Here is the virtual tour of their school premises:

Sherborne Chemistry Lab Virtual Tour
You can see their chemistry in this scene. On another tour, you can see the common room of their dormitory.

You can see their chemistry lab in this scene. On another tour, you can see the common room of their dormitory.

This tour clearly speaks with the parents about the reliability of the school.

7. Virtual Tours of Museums, Art Galleries, and Exhibitions

If you own a museum or art gallery, creating a virtual tour of them is a great way to attract more visitors to your site.

This way, you’ll not only get popularity online but people will be tempted to visit your gallery or museum in person.

In fact, if you regularly host art exhibitions, you can create virtual tours of your past events and use them to promote your upcoming exhibitions.

Here are some virtual tours created by WPVR users for museums and art exhibitions.

i. Melissa Morgan Fine Art

Melissa Morgan Fine Art created a stunning virtual tour of their entire exhibition and it’s so amazing.

These are the scenes from the entrance and the inside of the exhibition. Click on the images to visit the tour.

Melissa Morgan Entrance Tour
Melissa Morgan Exhibition Virtual Tour

ii. Rolling Hills Studio

Rolling Hills Studio has created a clean and simple virtual tour of its fabric art studio. They used a high-quality 360 panoramic image and the virtual tour elegantly showcased the whole place.

Click on it to take a look.

Rolling Hills Virtual Tour
Rolling Hills Art Virtual Tour

iii. Mao Jianhua’s Personal Website

Mao Jianhua is a renowned artist and entrepreneur from China whose paintings are often a symbol of ‘Zhuo Weng’, which translates as a wise man dedicated to a simple and austere life.

His paintings have been exhibited in the famous galleries of Italy and the United Kingdom.

Here is a virtual tour of one of his exhibitions. I request you to take a tour of his exhibition:

Mao Jianhua Art Gallery Virtual Tour
Mao Jianhua Gallery Virtual Tour

iv. Virtual Museum of the National Institute of Health (Peru)

In commemoration of its 126 years of its creation, visitors will find a gallery of the Chiefs who led a firm response to various diseases and epidemics that devastated Peru.

Additionally, They have access to the Book of Royal Orders and Acts relating to the philanthropic vaccine expedition which details the events from 1806 to 1820 that served to avoid the smallpox disease.

Here’s how they used WPVR to create Virtual Tours,

Museum of the National Institute of Health Virtual Tour
Museum of the National Institute of Health

More Brilliant Virtual Tours Created By WPVR Users

Apart from these virtual tours, there are also a lot of amazing virtual tours created by WPVR users of other industries and businesses.

Let’s take a look at more virtual tours created by WPVR users.

i. Far Out Ride – Van Tour

This is a unique virtual tour of a mobile home created by Far Out Ride.

They’re specialists in building custom automobile homes for all your living accommodations.

Here is a virtual tour of one of their mobile homes:

Far Out Ride - Van Virtual Tour
Van Virtual Tour - FarOutRide

ii. Virtual Fair and Virtual Stalls by EEST

ESST created some really professional virtual tours with custom-made high-quality 360-degree images.

This is mind-blowing as they created the image from scratch and used WPVR to turn it into a masterpiece.

I insist you take this tour. You won’t be disappointed.

ESST Virtual Venue Tour
ESST Virtual Stall Tour

iii. 360 Degree Drawing and A 3D Self Portrait By Karen Nijst

Karen Nijst is a Web Developer from Hapert, the Netherlands who made some wonderful 360-degree drawings of herself and her surroundings.

In her own words:

“As you can see, I like to draw a lot.

Because I also enjoy making animations, you will find a fully drawn digital tour through our living room and garden (where I prefer to draw) and through our village Hapert (Noord-Brabant NL) below.”

Karen Nijst Self
Karen Nijst Garden

Click on the images to visit her virtual tour and experience these beautiful images.

iv. Patrick Gerola’s Atelier

Patrick Gerola is an artist painter from Belgium.

Here are the virtual tours of his excellent studio:

Patrick Gerola Studio 1
Patrick Gerola Studio 2

Click on the images to visit these tours.

v. Zirzow Gallery by Amanda Zirzow

Zirzow Gallery was formed in 2020 with the desire to showcase the beautiful, unique art of Amanda Zirzow.

Zirzow Gallery sells original art, fine art prints, and gift items. It is also the hub of her artistic community.

Click on the images to visit her gallery.

Zirzow WPVR Gallery Virtual Tour

Inspiration for Amanda’s paintings comes from her experiences in nature, adventures, and stories.

Through her art, she captures impressions from her imagination and infuses her subjects with color to bring them to life.

WPVR Virtual Gallery Tour - Zirzow

Amanda’s mission is to share her artwork to inspire and help others. She is an active member of her community, a teacher, and an artist based in Fort Myers, Florida.

vi. Studio immobiliare Valsesia

Studio Immobiliare Valsesia gives you access to Valesesian real estate, and they’ll handle everything needed for selling or renting a property for you.

They have a huge number of properties listed on their website, so you can easily find your desired property here.

They have created virtual tours for almost every one of their properties using WPVR.

Studio immobiliare Valsesia 2

Click on the images to view the actual virtual tours on their website.

Studio immobiliare Valsesia

They’re right now in collaboration with Fiaip, the largest association of Italian professional real estate agents.

vii. CBS Spol – Virtual Tours with Areal Photography

Areal Photography Virtual Tour

CBS Spol, s.r.o. is a Slovak airline company and also the publisher of the largest edition of books on aerial photography in the world.

CBS’s mission is to provide a unique view of the landscape, and aerial view is one of the most unusual for humans.

Shooting is performed by a small fleet of Slovak-made aircraft.

You can check out one of their 360-degree videos here.

viii. Fischhalle – Cultural Center

If you own a restaurant that also hosts musical events, Fishchhalle’s virtual tour of its cultural center is a perfect inspiration for you. Take a look.

Fischhalle Center Virtual Tour
Fischhalle Cultural Center Tour

ix. Web Multimedia Solutions By Matt Jones

Matt works as a multimedia professional in Tampa, Florida. He produces websites, brand films, and 3D animations that let companies communicate their passion with the world and come to life. 

Here is one of the Virtual Tours he created,

Amazing WPVR Virtual Tours Created By Users [2024] 1

Conclusion

As you saw earlier, just like them over 10000 WPVR users are actively using WPVR to create brilliant virtual tours.

I’m sure you’ve learned a lot from these virtual tours that you can apply.

I’d love to see your creation with WPVR.

So, let us know once you’ve created a virtual tour yourself.

Categories
Guide Virtual Reality

What Are The Best 360 Panoramic Cameras You Can Buy [2024]

In 2024, visually consumed information will be highly accepted as people want to know it all without investing a much longer time.

Whether you are a traveler, resort owner, or realtor,

your consumer list won’t be satisfied if your site provides images or videos with a conventional 2D camera.

For a proper virtual tour of a home, place, or resort with a photo-first model, you need to use a high-quality 360 camera.

With that kept in mind, here’s my top-picked suggestion list of 360 cameras for 2024.

Let’s get started.

Consideration Points Before Purchasing A 360 Panoramic Camera

Key Factors of 360 Panoramic Cameras you can buy

Before going to the list, go through these key factors you need to focus on while buying a 360 camera.

1. Dynamic Range Ability:

Capturing the full 360 angle of the scene is highly important in 360 photography.

Without a high dynamic range in the camera you are using, you will fail terribly in terms of the sharpness of your product.

2. Lens Quality:

In terms of lens, You should go for a single-lens mode camera.

A 4k single-lens mode camera would be the best as you will need very little editing time to give finishing to your images.

3. Easy & fast workflow :

You need to pick up a camera that speeds up the entire action cam workflow, from stabilizing, reframing, and editing to transferring files with an easy user interface.

4. Battery Life:

You must not want any overheating and crash issues with your camera.

Since panoramic cameras are power-hungry, choose one with a long battery life.

You should consider cameras with removable batteries or the ability to charge via USB, so you can keep the camera charged on the go.

5. Durability:

If you plan to take your panoramic camera on outdoor adventures or use it in harsh environments, look for models that are built to withstand the elements.

Weather sealing, rugged construction, and shock resistance are the features that you should consider.

6. Aligned with your need :

There are many amazing 360 cameras but every camera has its own unique value.

Some are really good at night mode, while others can tolerate the hot weather of sunny days.

Now considering all these, let’s have a look at the best 5 Panoramic cameras for you.

Best 360 Cameras For Capturing 360 Panoramic Images in 2024

As panoramic photography gains in popularity, more and more manufacturers are producing panoramic cameras that cater to this niche market.

So I’ve gathered the top five 360 panoramic cameras in the market right now, along with their standout features, pros, cons, and best use cases.

1. INSTA 360 X3

Insta 360 X3

The Insta360 X3 is an updated version of the Insta 360 X2 with improved HDR for better quality in difficult lighting.

It has 50% faster wifi transfer compared to X2.

You can easily mount the camera, and record any bouncy action with proper stabilization.

With this virtual tour camera, you can quickly share to social media in a few clicks without losing video quality.

Specs :

  • Sensor Size 1/2″
  • Battery Capacity 1800mAh
  • 360° Video 5.7K
  • 360° Active HDR Yes
  • 360° Photo 72MP
  • Single-Lens Mode 4K30fps
  • Screen Size 2.29″
  • Waterproof 10m (33ft)
  • FlowState Stabilization + 360° Horizon Lock Yes

Buy It If :

  • You want to edit on your mobile as it has photo format INSP, that can be exported via mobile app or desktop Studio.
  • You want to charge your battery in 90min(5V/3A)
  • You want a high dynamic range.

Don’t Buy It If :

  • Your operating temperature isn’t between -4°F to 104°F (-20℃ to 40℃).

Pricing

Insta360X3 pricing

2. INSTA360 ONE RS 1-Inch

Insta360 One 1-inch


The advantage of buying the Insta360 One RS 1-inch edition is that it has more impressive features than smaller sensor cameras.

With Leica co-engineered lenses, dual one-inch sensors, and 6K 360-degree recording capabilities, it delivers superior image quality and can provide you with low-light performance.

Specs :

  • Aperture F2.2
  • Focal Length 6.52mm
  • Photo Resolution 6528×3264 (2:1)
  • Dimensions (W x H x D) 53.2×129.3×49.5mm
  • Max Video Bitrate 120Mbps
  • ISO Range Photo: 100-3200, Video: 100-3200
  • Audio Modes Wind Reduction & Stereo
  • White Balance 2000K-10000K

Buy It If :

  • You have limited filming experience as Insta360 ONE RS 1-Inch easy to use right out of the box. The camera setup process is quick and intuitive.
  • You want to connect the camera to the smartphone app.
  • You want the app-to-camera connection to be stable and uninterrupted.
  • If you want to connect it with multiple devices (watch, AirPods). As the connection remains strong.

Don’t Buy It If You :

  • You want to format in mobile as RAW files of this device require software on PC/Mac to export.

Pricing

Insta360 one RS 1 inch

3. RICOH THETA Z1

Ricoh Theta Z1 Review Panoramic Camera

The Ricoh Theta Z1 is your premium choice for immersive 360-degree photography.

With its high-end features, it delivers detailed and captivating images, perfect for capturing your surroundings in stunning clarity.

Specs :

  • Image Sensor Size 1 inch (x2)
  • Image Sensor Effective Pixels Approx. 20M (x2)
  • File Size (still images) RAW: 7296 x 3648, JPEG: 6720 x 3360
  • Lens F2.1, 3.5, 5.6
  • OLED Panel 0.93 inch Organic light emitting display Panel, 128 x 36 dots
  • Usage temperature range 0°C – 40°C
  • Dimensions 48mm (W) x 132.5mm (H) x 29.7mm (24mm *7) (D)
  • Shutter speed Still image: (AUTO) 1/25000 sec. to 1/8 sec.

Buy It If :

  • You want to capture incredibly detailed images with excellent color accuracy and dynamic range as it has dual 1-inch CMOS sensors.
  • You want advanced image processing capabilities.
  • You want a large storage capacity.

Don’t Buy It If :

  • You require a huge amount of video recording as it has limited video recording capabilities.
  • You want longer battery life.

Pricing

Ricoh Theta Z1

4. QOOCAM 3

Qoocam 3

QooCam 3, is a 360-degree camera with two ultra-wide fisheye lenses that capture 5.7K photos and videos in all directions simultaneously.

With the “invisible” selfie stick, you can remove the footage by the camera’s algorithm.

Specs

Qoocam 3 specs
  • Aperture F1.6
  • Exposure Compensation ±2EV
  • White Balance Auto, 2500K-8000K
  • Maximum Resolution of Photos 62MP (11136×5568)
  • Video Bitrate 120Mbps
  • Water and Dust Resistant IP68 Waterproof
  • Audio output AAC (16 bit/Quadraphonic/48 KHz)

Buy It If :

  • You want an easy-to-use camera
  • You want a compact and travel-friendly camera.
  • You want a well-built and weather-resistant camera.

Don’t Buy :

  • Down on resolution and some features from its predecessor.
  • Built-in JPEG processing is only so-so, with the need to use DNG to get the best out of the camera

Pricing

Qoocam 3

5. PANOX V2

panox V2

PanoX V2 stands out for its exceptional performance, especially in capturing high-resolution still photos.

Its intuitive interface makes it a pleasure to carry and operate in the field.

And will allow you to focus on capturing stunning images without worrying about the fragility of the equipment.

Specs

  • 360°Video 5.7K@30FPS
  • 360° Photo 72MP
  • Sensors 1/2” CMOS
  • HDR Photo   12K
  • Photo  Format JPG+DNG
  • Live Streaming  4K 360° YouTube &Facebook
  • Timelapse. 5.7K 360°

Buy It If :

  • You want higher density and higher resolution as it has 8K 5 FPS mode
  • You want a built-in GPS.
  • You want to just drag the files right into the desktop uploader without other processing as it has on device stitching of 360s.
  • You don’t want to buy an adapter as it has a standard tripod camera mount.

Don’t Buy It :

  • If you want high sharpness, the UI on the camera feels a bit less polished
  • If you want fast GPS tracking, acquiring GPS satellites can take a bit of time.

Pricing

Panox V2

Comparison of The Best 360 Degree Cameras

Now that you know all the details about each of the best 360 cameras, let us look at a few comparison tables to understand which one is ideal for you to choose and which 360 cameras are affordable.

Video & Image Resolution

360 Cameras360 Video Resolution360 Image Resolution
Insta360 X3⬩ 5.7K: 5760×2880@30/25/24fps
⬩ 4K: 3840×1920@60/50/30/25/24fps
⬩ 3K: 3008×1504@100fps
72MP (11968×5984)
18MP (5952×2976)
Insta360 One 1-inch⬩ 5888×2944@30fps
⬩ 6144×3072@25/24fps
⬩ 3840×1920@30/25/24fps
⬩ 3040×1520@50fps
6528×3264 (2:1)
Ricoh Theta Z1 ⬩3840×1920 (30fps 4K)14 Megapixels
Kandao QooCam 3⬩ 8K Video (30fps)
⬩ 4K Video (120fps)
29.4 Megapixels
PANOX V2⬩ 5760 x 2880  (30fps).
⬩ 360 Degree 4K (60fps).
⬩ VR180 Degree 3D
18 Megapixels

Audio, Mounting & Durability

360 CamerasAudioMountingWaterproof
Insta360 X3⬩ 48 kHz, 16bits, AAC
⬩ Directional audio for vlogging.
⬩ Wind noise reduction & stereo quality sound.
Invisible Selfie StickYes, 10m (33ft)
Insta360 One 1-inch⬩ 4 Mic 360 Degree Audio.
⬩Wind Reduction
⬩ Stereo
Flip-out Mounting FeetYes, 10m (33ft)
Ricoh Theta V⬩ 4 microphones to record 360 degrees of spatial audio.
⬩ Option to use an additional external microphone.
Stands, Sticks, &
Smartphone holders (Optional extra)
No
Kandao QooCam 3⬩ 4 MEMS 48KHz Microphones.
⬩ 3.5mm Mic Port for external professional Mic.
Third-party stands
and sticks
No
Panox V2⬩ 4 MEMS 48KHz Microphones.Tripod SocketWith Case (Up To 30m)

Control Options & Pricing

360 CamerasMobile AppTouchscreenVoice CommandPrice
Insta360 X3YesYes14 Voice Commands$399
Insta360 One 1-inchYesYes4 Voice Commands$429.99
Ricoh Theta Z1YesYesOnly for Image Capture$376.95
Kandao QooCam 3YesYesNo$559.99
Panox V2YesNoNo$399

You can now compare different features and aspects of these 5 cameras and decide which one matches your requirements best.

How You Can Make Money with 360 Panoramic Cameras – Industry Use Cases

Let’s have a look at how panoramic cameras are being used and can be used in different industries to make you money.

1. Real Estate

If you’re a real estate agent, you can use 360 panoramic cameras to create virtual tours of your properties, providing a 360-degree view of the property to potential buyers.

This will help to increase engagement with your clients and provide them with a more immersive viewing experience.

Pair your camera with WPVR to easily create immersive virtual tours and integrate them directly into your website.

Here’s an example of how it will look,

2. Travel and Tourism

If you work in a travel company, you can use these 360 panoramic cameras to capture immersive footage of destinations where you operate and create virtual tours.

It allows your potential customers to explore a location before booking a trip.

They can explore rooms just like the one below,

3. Education and Training

You can use 360 panoramic cameras for education or to train employees or students by creating immersive training videos.

For example, medical students can get familiar with real-life challenges & learn how to act using 360-degree footage of surgeries.

4. Museums and Exhibitions

You can create interactive exhibits and virtual museum tours using 360 panoramic cameras and make your exhibitions open to your online viewers.

5. Automotive Industry

If you own a car dealership, you can use 360 panoramic cameras to create a virtual car showroom to showcase the interior and exterior of your vehicles.

They may check car details like this,

6. Architecture and Design

If you’re an architect or designer, 360 panoramic cameras will help you create immersive visualizations of your projects.

It allows your clients to have a better idea of the space before it’s built or designed.

7. Photography & Videography

360 panoramic cameras will let you capture unique perspectives and create stunning visuals.

Their compact size and portability make them a great option for your on-the-go shoots.

8. Event Planning

In the event planning business, you can use 360 panoramic cameras to capture your events from multiple angles, providing a more comprehensive view of the event and a dynamic showcase.

Also, utilizing 360 panoramic cameras to capture your events from multiple angles not only provides a more comprehensive view but also enhances the invitation-making process by offering dynamic visual content for the invitation maker app.

For those looking to elevate their event documentation further, hiring professional event photographers can add a layer of professionalism and creativity to your visuals.

It’ll make your job easier to impress your potential clients with your previous work.

9. Construction and Real Estate Development

If you have a construction business, you can utilize 360 panoramic cameras to create virtual site visits and track construction progress.

It’ll let your stakeholders monitor the progress of the project remotely.

10. Sports and Action

You can use 360 panoramic cameras to capture your extreme sports and outdoor activities in high-quality footage.

This will be useful for athletes like you looking to document their experiences.

11. Film and Entertainment

If you’re in the entertainment industry, you can use these panoramic cameras to capture live events, such as concerts and festivals, to capture 360-degree footage for your online audiences.

12. Security and Surveillance

In the case of monitoring large crowds or events, 360-degree footage can provide a comprehensive view of the area being monitored.

Wrapping Up

In summary, the Insta360 One X3 offers the best image stabilization and editing capabilities, making it a great choice for those who want to capture smooth, professional-looking footage.

The Kandao QooCam 8K is the best choice for those prioritizing image quality, as it offers the highest resolution and dynamic range.

The Ricoh Theta Z1 is a great option for those who want advanced features like live streaming and remote control.

The Insta 360 ONE RS 1-Inch offers amazing photo quality even in low light so it’s great for using in all weathers.

Lastly, PanoX V2 is great for its exceptional performance, especially in capturing high-resolution photos.

No matter which camera you choose, a 360 panoramic camera can open up creative possibilities for photographers and videographers.

Whether you’re looking to capture immersive footage of your travels or create virtual tours of real estate properties, these cameras can help you easily achieve your vision.


If you want to use a reliable virtual tour creator that is reliable, cost-effective, and has a high-quality interactive floor plan feature, then WPVR would be a great choice.

Try using WPVR today and start making virtual tours that are more optimized for converting clients.

FAQs

Are 360 panoramic cameras difficult to use for beginners?

  • Not necessarily. While they may have a learning curve, many models offer user-friendly interfaces and intuitive controls to simplify the shooting process.

Can I use a 360 panoramic camera for everyday photography?

  • Yes, 360 panoramic cameras are universal tools that can capture a wide range of scenes, from everyday moments to epic landscapes. It enhances your photography experience.

Are 360 panoramic cameras only suitable for professional photographers?

  • No, they’re for everyone. Whether you’re a professional photographer, an enthusiast, or just someone who loves capturing memories. A 360 panoramic camera can elevate your photography game.

Do 360 panoramic cameras require special editing software?

  • While some advanced editing software can enhance your images, many panoramic cameras come with built-in editing features. It helps to make it easy to edit and share your photos directly from the camera.

Can I use a 360 panoramic camera for live streaming?

  • Yes, some models, like the GoPro MAX and Ricoh Theta Z1, offer live-streaming capabilities. It allows you to share immersive experiences in real-time with your audience.
Categories
Guide Real Estate Virtual Reality

How to Take A Panoramic Photo with Drones – Guide To Aerial Panorama [2024]

360 panoramic images have changed how people see photography in several businesses. You can easily present properties or various locations in the form of 360 virtual tours thanks to panoramic images.

However, it’s 2024, and now you can take 360 photography to a whole new level. And it’s all thanks to the invention of drones!

That’s right! Drones have grown in popularity over the past few years, and now, you will find several drones that come with high-quality cameras that are perfect for capturing 360 panoramic photos from the air.

If you are part of businesses such as real estate, hotels, resorts, education institutes, etc., then you can get a huge advantage when using aerial photography.

For instance, homes with aerial panorama photos sell 68% faster.

Today, you’ll learn how to take a panoramic photo using a drone, easily capturing stunning wide-angle views.

So let’s begin.

How To Take A Panoramic Photo Using Drones

Drones give you an extra edge in 360 aerial photography because you will be able to capture a panoramic photo that’s more versatile and unique than ever, unlike a regular camera.

For instance, you will be able to take aerial shots and shots from a distance you could never take on your own using a regular 360 camera.

There are three main steps to capturing a 360 panoramic image during a drone shoot:

  1. Choosing a reliable drone with the right 360 camera and lens.
  2. Preparing to capture a 360 panoramic photo using your drone.
  3. Capturing an amazing 360 panorama using your drone.

Let us look at each of them one by one.

1. Choosing A Reliable Drone with The Right 360 Camera & Lens

Since this is about taking panoramic photos, the first thing you need to invest in is a drone suitable to take high-quality 360 panoramic images.

This means you will need to ensure the drone you choose has a proper fish-eye lens along with a stable, high-resolution camera.

Let us look at a couple of drones that you may consider buying for this.

i. DJI Phantom 4 Pro V2.0

DJI Phantom 4 Pro V2 Review - Panoramic Photo with Drone

The DJI Phantom 4 Pro V2.0 is one of the best drones for capturing 360-degree panoramic photos.

It has a 20-megapixel camera with a 1-inch CMOS sensor and a mechanical shutter that can shoot 4K video at 60 frames per second.

It comes with a 3-axis gimbal that provides stability during flight and ensures smooth footage.

Specifications of DJI Phantom 4 Pro V2.0:

  • Camera: 20-megapixel camera with a 1-inch CMOS sensor.
  • Video resolution: 4K at 60 frames per second.
  • Gimbal: 3-axis gimbal.
  • Flight time: Up to 30 minutes.
  • Max speed: 45 mph.
  • Max range: 4.3 miles.
  • Weight: 3.04 pounds.

Pros & Cons of DJI Phantom 4 Pro V2.0:

Pros:

  • High-quality camera with a large sensor and mechanical shutter.
  • The 3-axis gimbal provides stability during flight.
  • Long flight time and range.
  • Obstacle avoidance sensors for added safety.
  • Advanced flight modes for easier panoramic photography.

Cons:

  • It is expensive compared to other drones.
  • The heavy and bulky design may not be as portable as other options.
  • Limited battery life.

Industry Use Cases of DJI Phantom 4 Pro V2.0:

If you are a professional photographer or videographer and require high-quality panoramic images for commercial use, then The DJI Phantom 4 Pro V2.0 is an excellent choice.

For example, if you are a real estate agent, this will be a great drone for you to capture an aerial panoramic photo of your properties which you can include in your virtual tour to create a unique perspective.

ii. DJI Mavic Air 2

DJI Mavic Air 2 Review - Panoramic Photo with Drone

The DJI Mavic Air 2 is another great option for capturing 360-degree panoramic images.

It has a 48-megapixel camera with a 1/2-inch CMOS sensor and can shoot 4K video at 60 frames per second.

It also has a 3-axis gimbal for stability during flight and can fly for up to 34 minutes on a single charge.

Specifications of DJI Mavic Air 2:

  • Camera: 48-megapixel camera with a 1/2-inch CMOS sensor.
  • Video resolution: 4K at 60 frames per second.
  • Gimbal: 3-axis gimbal.
  • Flight time: Up to 34 minutes.
  • Max speed: 42.5 mph.
  • Max range: 6.2 miles.
  • Weight: 1.25 pounds.

Pros & Cons of DJI Mavic Air 2:

Pros:

  • High-quality camera with a large sensor.
  • Lightweight and portable design.
  • Long flight time and range.
  • Advanced obstacle avoidance sensors for added safety.
  • Intelligent flight modes for easier panoramic photography.

Cons:

  • Gimbal may not be as stable as other options.
  • Limited camera control compared to more advanced drones.
  • No mechanical shutter.

Industry Use Cases of DJI Mavic Air 2:

If aerial photography is your hobby and you like to capture stunning 360 panoramic images for your personal collection, then The DJI Mavic Air 2 is an excellent option.

It’s easier to operate and has just the right features required for aerial photography.

It’s also a great option for travel bloggers and social media influencers who want to capture aerial panorama photos and videos on the go.

2. Preparing to Capture A 360 Panoramic Image Using Your Drone

Preparing to Capture A 360 Panoramic Image - Panoramic Photo with Drone

Before you are able to capture a proper 360 panorama, you have to consider a few preparations.

i. Configure Your Drone for Panoramic Photography

The first thing to do is to ensure your drone is well-prepared for panoramic photography.

Make sure that the drone’s batteries are fully charged and the propellers are in good condition.

Additionally, you should ensure that the camera is correctly mounted on the drone and is set up for panoramic photography.

Set it up to capture images in RAW format, which will allow you to make adjustments to the exposure and color later during post-processing. Also, enable the manual mode for the camera for consistent exposure.

ii. Observe The Lighting Conditions & Weather Conditions

Lighting is a crucial aspect when capturing any photos. Hence, you need to keep an eye on the weather conditions and observe if the lighting is correct to be able to capture colorful, attractive panoramic images.

Most photographers prefer to conduct their photography session during the golden hour, which is the first hour after sunrise and the last hour before sunset when the light is soft and warm.

You should avoid your aerial photography session during windy conditions to avoid disruptions or at times when the sunlight is too bright to avoid unwanted flares.

iii. Identify A Spot with Fewer Obstructions to Fly Your Drone

You need to keep in mind that your drone will have a few automatic functions that will not allow you to move it to a place with obstructions.

Hence, you need to find a spot where you are sure you can fly and land your drone.

This is where you will navigate your drone to for landing once the photography session is done.

So this spot should be a place with no trees or wires within a 3-meter radius.

If you don’t want to be captured within the photo, then this spot should be a bit away from your main focus location.

iv. Use Flight Planning Software for Efficiency

You can use one of the two apps which is suitable for you:

1. Pix4Dcapture

Pix4Dcapture allows you to design precise flight paths, ensuring consistent and high-quality panoramic photos. It provides valuable data on altitude, speed, and direction, giving you greater control over your drone’s movements.

With Pix4Dcapture, you can automate your drone’s flight, making it easier to capture detailed and accurate panorama images for your virtual tours.

2. AirMap

AirMap provides real-time airspace information and tools to design precise flight paths, ensuring safe and effective panoramic photography. It offers insights into altitude, speed, and no-fly zones, giving you greater control over your drone’s movements.

With AirMap, you can plan your drone’s flight to capture stunning panorama images, making your virtual tours more engaging and professional.

These are flight planning software designed for drones and help you with valuable data such as altitude, drone spend, and direction so that you can have more control over your drone while capturing a photo.

3. Capturing An Amazing 360 Panorama with Your Drone

Capturing Amazing 360 Panorama - Panoramic Photo with Drone

Now that you are ready to start your photo session let’s learn how you can proceed to capture the panoramic image.

i. Identifying the Sweet Spot for Capturing Your Panoramas

Next, it’s time to decide on a location where you want to fly your drone and capture the image.

To find the sweet spot, fly the drone above and around your desired location and find an angle where you find the scene that meets your photogenic requirements.

It’s best you can find a view where your main element gets the highest focus while still capturing a few surrounding elements to add some extra attraction.

Plus, the opposite direction should have something very interesting.

For example, if you are taking a 360 photo of your resort, then your resort should be the center of attention, while you can still have the mountains behind the resorts within the capture on a small scale.

And on the other side, there could be a view of the nearby beach.

Once you find such an angle, mark the spot.

ii. Capture your 360 photo

While the drone is on the spot, let it remain still for a few seconds for the camera focus to fully stabilize.

Once you are happy with the output, capture the image three times.

Check the images after capture and see if this is the view you were looking for.

The drone controller screen should let you get a 360 view of your panorama to understand if it meets your requirements.

If you are satisfied, then there you go. You have just captured 360 panoramas using the best drone for pictures.

iii. Take More Images From Other Angles

As satisfying as it may be, you shouldn’t stop. You should be determined to find the best possible view rather than settling for just one.

Move your drone around again to find more suitable angles and positions and capture a few more aerial panoramic images.

We recommend you capture at least 3 such panoramas before choosing to stop.

iv. Landing Your Drone

If you have flown the drone from a location with no obstacles, then most drones have a single-click option to return to the initial position and land.

But if you move around your drone in too many angles from there, there could be obstacles in the path of the drone from the initial flight position, and then you have to navigate it back to the landing place or to another suitable landing spot manually.

  • Avoid trying to land the drone on your palm. Many find it daring, but it could be risky.
  • If you notice it is windy at the moment around the landing area, then you should move away from that place before attempting to land the drone. You do not want the wind to cause an accident.
  • Make sure there are no birds or other animals around the area you are landing the drone.

v. Post-processing Your Images

Since you captured your images in RAW, you may edit them using Adobe Photoshop and adjust the color balance, brightness, and exposure before exporting them in a suitable image format.

You may then upload it on a VR tool to observe and decide if any more changes are required.

In case you captured this image to create a virtual tour that you want to embed on your WordPress site, then you may use the plugin WPVR. It is right now the no. 1 virtual tour software in WordPress.

You can simply upload your 360 panoramic images in just a few clicks and get a ready virtual tour in less than 5 minutes.

Advantages of Using Drones for Aerial Panorama Photography

Advantages Of Using Drones -  Panoramic Photo with Drone

You have just learned how you can capture a 360-panoramic photo using a drone.

But if you are still having doubts about why this is the best option, let us look at some of the core benefits you will get when using drones.

1. Access to Difficult Locations

You can use drones to capture images from high altitudes, over water bodies, or in areas that are difficult to reach.

With a drone, you can easily capture panoramic images of landscapes, cityscapes, or even inaccessible natural wonders like waterfalls or canyons.

2. High-Quality Images

Drones are equipped with high-quality cameras that can capture high-resolution images.

On top of that, drones with advanced features like 3-axis gimbals and mechanical shutters can ensure that images are stable and free from blur.

3. Time-Saving

Capturing panoramic images manually is a time-consuming process, involving multiple shots taken at different angles and then stitched together in post-processing.

With the best drone for pictures, you can capture panoramic images quickly and efficiently, saving time and effort.

Drones can capture multiple images at different angles in a single flight, making the process of capturing panoramic images faster and more convenient.

4. Unique Perspective

Drones can provide a unique perspective that is not possible with traditional photography techniques.

You can capture panoramic images from high altitudes, providing a bird’s eye view of the environment.

This perspective can provide viewers with a unique and breathtaking view of landscapes and cityscapes.

5. Cost-Effective

Drones are a cost-effective option compared to traditional photography methods.

They can capture high-quality images at a fraction of the cost of traditional aerial photography methods like helicopters or planes.

Top 3 Tools to Create a Virtual Tour with Drone Panoramic Photos

Creating a stunning virtual tour with drone panorama photos requires the right tools. Here are the top three tools that will help you maximize the potential of your panoramic shots:

1. WPVR

WPVR - Panoramic Photo with Drone

WPVR is one of the best tools to create a virtual tour with drone panoramic photos. This WordPress plugin allows you to effortlessly transform your drone panorama shots into immersive virtual tours.

You can also upload high-resolution panoramic images, customize navigation hotspots, and add interactive elements to enhance the viewer experience.

Its user-friendly interface ensures that even beginners can create professional-quality virtual tours quickly. Ideal for real estate, tourism, and other industries, WPVR helps you engagingly showcase properties and locations.

By leveraging the ability of drone panoramic photography, WPVR makes it easy to captivate your audience with stunning virtual tours.

Pricing:

  • Free Plan: free in WordPress Repository.
  • Starter Annual Plan: $79.99 per annual for 1 site.
  • Pro Annual Plan: $169.99 per annual for 10 sites.
  • Agency Annual Plan: $269.99 per annual for unlimited sites.
WPVR Pricing - Panoramic Photo with Drone

2. Koala

Koala - Panoramic Photo with Drone

Koala is a cutting-edge virtual tour software that allows you to create stunning VR experiences using drone-captured footage. You can easily transform aerial photos and videos into immersive virtual tours, providing viewers with a unique and engaging perspective.

This software supports high-resolution imagery and offers intuitive tools for stitching, editing, and customizing your tours. Ideal for real estate, tourism, and event planning, It enhances the presentation of properties and locations, making them more appealing to potential clients.

Its user-friendly interface ensures that even beginners can create professional-quality VR tours, maximizing the impact of your drone photography effortlessly.

Pricing:

  • Basic Annual Plan: free with limited functionality.
  • Pro Annual Plan: $65 per annual for 3 tours.
  • Unlimited Annual Plan: $450 per annual for unlimited tours.
Koala Pricing - Panoramic Photo with Drone

3. My360tours

My 360 Tours - Panoramic Photo with Drone

My360tours is a top tool for creating virtual tours with drone panoramic photos. This platform allows you to turn your high-resolution panoramic images into immersive virtual experiences with ease.

It offers intuitive features for uploading, editing, and customizing your drone panorama shots, making the process straightforward even for beginners.

You can add interactive elements such as hotspots, info points, and navigation tools to enhance viewer engagement. Perfect for real estate, hospitality, and tourism industries, My360tours helps you showcase properties and locations in a captivating way.

By utilizing the capability of drone panoramic photography, My360tours enables you to create professional and engaging virtual tours that leave a lasting impression.

Pricing:

  • Real Estate Annual Plan: $37 per month (billed annually)
  • Dealership Annual Plan: $37 per month (billed annually)
  • Architect Annual Plan: $37 per month (billed annually)
  • Photographer Annual Plan: $49 per month (billed annually)
My 360 Tours - Panoramic Photo with Drone

Conclusion

To summarize, capturing 360 panoramic photos using drones is a revolutionary approach that can significantly enhance your photography capabilities.

Drones offer unique perspectives, high-quality images, and access to challenging locations, making them an ideal choice for real estate, hospitality, and education businesses.

They save you time and effort, provide breathtaking views, and are a cost-effective alternative to traditional methods. By following the steps outlined in this guide, you can master aerial panoramic photography and elevate your visual content.

Once you’ve captured these stunning images, you can easily create a virtual tour using the WPVR plugin. WPVR simplifies the process, allowing you to upload and integrate your 360 panoramic images into a virtual tour on your WordPress site in just a few clicks.

** FAQs **

1. What kind of weather conditions should you avoid when flying your drone?

  • When flying your drone, avoid strong winds, heavy rain, and extreme temperatures. These conditions can interfere with the drone’s stability and performance, potentially causing crashes or damage. Instead, opt for calm, clear days with moderate temperatures to ensure the best flying and photography experience.

2. How can you ensure your drone’s battery lasts longer during a photo session?

  • To ensure your drone’s battery lasts longer, fully charge it before your session and bring spare batteries. Avoid aggressive tricks and high-speed flights, as these can drain the battery quickly. Additionally, monitor your battery level regularly and plan your flight path to make efficient use of power. It ensures you have enough battery to safely return and land.

3. What should you do if your drone loses signal while capturing photos?

  • If your drone loses signal, stay calm. Most modern drones have a “Return to Home” feature that automatically brings the drone back to its takeoff point. Ensure this feature is enabled before flying. If the drone doesn’t return automatically, try moving to a higher or clearer location to re-establish the connection.

4. How can you enhance the quality of your drone photos in post-processing?

  • Enhance your drone photos by using editing software like Adobe Photoshop or Lightroom. Adjust the exposure, contrast, and saturation to make the images pop. Also, fix any distortions or stitching errors in panoramic shots. Shooting in RAW format gives you more flexibility in post-processing. It allows for better adjustments and higher-quality final images.

5. What precautions should you take when flying your drone in populated areas?

  • When flying in populated areas, always follow local regulations and avoid restricted zones. Maintain a safe distance from people, buildings, and vehicles to prevent accidents. Fly at a lower altitude to minimize risks, and always keep your drone within your line of sight. Additionally, inform any nearby individuals of your drone activity to ensure their awareness and cooperation.
Categories
Guide Real Estate Virtual Reality WP VR

How to Create Apartment Virtual Tour In WordPress To Rent & Sell Faster [2024]

Even though regular promotions using apartment photos and videos are still there, the way virtual tours can represent an interactive model of your apartments, traditional still images can’t.

And it’s obvious!

Virtual tours show off your apartment features without having an in-person visit.

It saves you wasted hours, cost, and hassle that you go through while showing your low potential home buyers an in-person visit.

So, whether you’re a real estate agent, realtor, property investor, or marketing manager, this guide is for you!

In this guide, I will give you a good insight into increasing conversion and a proper step-by-step guide to creating an apartment virtual tour (and no, it is not just a video tour).

So let’s dive into it.

Do You Really Need to Use Virtual Apartment Tours for Your Real Estate Business?

The answer is Yes. You need to use a virtual apartment tour.

92% of the interested buyers prefer to research on the internet first, then decide to reach out to an agent.

There are just too many competitors out there and buyers won’t think twice to move to another site if they don’t find your website appealing.

Besides, basic images and videos of properties have already become so common nowadays that people no longer find them amusing.

What Is a Virtual Apartment Tour?

Just imagine,

after all the hard work and investment you have put into building and developing your website,

your prospects are leaving your site without giving you a real chance.

Pretty frustrating, right?

So what can you do differently?

The best option now is to make an instant impression. And the most unique way to do so now is to use a virtual tour.

Instead of going to a place, a virtual tour can bring that place to you.

And people love this experience.

The longer you can keep your prospects hooked, the higher the chance they will consider reaching out to you for a deal.

So, having virtual tours is definitely the go-to solution for you.

You will find several such tools which include WPVR, Matterport, Kuula, Klapty, and many more.

The easiest of them are WPVR (for WordPress), and Klapty (though a bit expensive)

Before we look into how you can create one, let us learn what exactly a virtual apartment tour is and observe a few examples to understand why you need VR apartments on your website.

An Ideal Apartment Virtual Tour

Here is an example of a typical 360-degree apartment virtual tour:

As you can see, you have full control to view in all directions, move from one room to another easily, check out the information given inside hotspots, & use the control buttons for easier navigation.

This is an ingenious way to make your prospects get hooked right on the spot. In this guide, I will show you how you can create a virtual apartment tour on a WordPress site using WPVR.

Create an Apartment Virtual Tour in Minutes(Not Hours)

How to Do A Virtual Apartment Tour

By creating a complete virtual tour your visitors can get an overall idea of how your offered apartment looks in real life.

Simply upload a 360 panorama image, and the plugin will help you transform it into a realistic virtual tour. ( And you don’t have to wait too long for it)

So, Get rid of describing your apartment features again and again over the phone and in messages.

Simply for the steps below and you can create an apartment virtual tour in minutes.

Step 1 – Install and Activate The Virtual Tour Builder Plugin

  • Go to your WordPress dashboard and click on the Plugins tab.
  • Click on Add New
  • On the search bar, insert WPVR and choose to Install and then Activate WPVR.

Install and activate it on your site, and Activate the License Key.

Now you’ll have all the premium features to create a robust virtual tour of your apartments.

If you need any help, follow this short guide to set up WPVR on your website.

Step 2 – Create A Basic Virtual Apartment Tour Really Quick

Now, we’ll create a simple virtual apartment tour in under 5 minutes.

From your WordPress Dashboard,

  • Hover on WP VR, and click on the Add New Tour option.
Create New Virtual Apartment Tour

Now, you’re in the tour settings tab.

  • Set a Title for your virtual tour.
  • Make sure that the Tour Autoload option is enabled.
    • This will automatically load your virtual apartment tour.
  • Ensure that the Basic Controls option is enabled.
    • This will enable the Zoom in, Zoom Out, and Fullscreen control buttons in your apartment virtual tour.
Create New Apartment Virtual Tour
  • Click on the Scenes section.
  • Set a unique Scene ID (Without any special characters and spaces).
  • Click on the Upload button under the Scene Upload field, and choose the first panorama image of your apartment that want to use.
Upload Scene - VR Apartment Tour
  • Scroll down and click on the Preview button.
Preview 3D Virtual Apartment Tour
  • You’ll see a live preview of the tour in the Tour Preview section. Here, you can move around to see the basic tour and use basic controls.
Preview of Modern Apartment Virtual Tour

That’s it.

As you can see, it was really easy to create a basic virtual tour.

Let’s move on to the next step.

Step 3 – Apply Useful Options To Your Scene

Now, we’ll use the advanced options of WPVR in the scene you’ve just created, to give your viewers better control of the apartment virtual tour.

Let’s keep editing the tour:

  • On the Title field, set a suitable name for this panorama.
    • For example, if the image is of the kitchen, set it as ‘Kitchen’ or ‘Kitchen – 90 SQF’.

Tip: Use this field to give your viewers a heads up on where they are in the apartment.

  • The Author field can take your viewer to any link. You can use this field as you desire.
    • You can use terms like ‘Learn more about this Kitchen’ or ‘Made By Rex Properties’.
  • In the Author URL, you can set any URL of your company website or page.
Set Title and Details to Luxury Apartment Virtual Tour
  • Remember, this URL will be activated when a viewer clicks on the Author title. So, make it relevant to that field’s text.
  • Scroll down and click on the Preview button again.

You’ll see the Title, Author, and Author URL fields working now.

3D Virtual Tour Title and Info in Preview
  • Now, scroll down and turn on the Customize Scene Zoom option.

You’ll get 3 new options that will allow you to set any zoom settings you want.

Zoom Settings - 360 Degree Apartments Tour

The Zoom values range from 50 to 120.50 is the most zoomed in, and 120 is the most zoomed out.

Default Zoom will be applied every time your viewers load this scene.

The Max Zoom and Min values will define how much your viewer can zoom in or zoom out in the tour.

Apply any zoom setting that you prefer. It’s up to you.

Now, if you preview and look at the live preview, you’ll see that all your advanced scene settings have been applied.

You can apply some other options as well:

1. Default Scene Face

Set a point in the panorama image, which you want it to load from.

2. Vertical and Horizontal Angle of View

When you’re using partial panoramas or panoramas taken with your mobile phone, the images are not full 360 degrees. You can use it to adjust those images.

3. Limit Vertical and Horizontal Scene Grab

For partial or mobile panoramas, you can set a custom value within which you want your viewers to explore.

Now, keep adding more panorama images by adding more scenes in this tour. You can use an unlimited number of images until you’ve covered every corner of your apartment.

Apply different settings to each individual Scene or the same settings for all the Scenes. Whichever you prefer.

Now, let’s enable the advanced features and make turn it into a professional virtual apartment tour.

Follow the next step.

Step 4 – Use Advanced Features – To Turn It Into A Professional Virtual Tour

First, click on the Publish button to save your progress.

Now, under the General section, click on the Advanced Controls tab.

  • Turn on these 3 options:
    • Keyboard Zoom Control, Mouse Drag Control, Mouse Zoom Control.

1. Keyboard Zoom Control: It allows your viewer to zoom in and out on the virtual tour using the plus(+) and minus(-) buttons of the keyboard.

2. Mouse Drag Control: It allows your viewer to drag and move the view of the panorama image.

3. Mouse Zoom Control: It lets your viewers zoom in and out on the panorama image using the mouse wheel.

In short, these 3 options enable smooth control on your virtual tour.

Smooth Control on Virtual Apartment Tour
  • Turn on the Gyroscope Control option.
    • When viewing from a mobile device, the Gyroscope will respond to the movement of the device. It gives great realistic control of the virtual tour to your viewers.
  • To make it even better, enable Auto Gyroscope Support.

It will turn on the Gyroscope support on smartphones by default.

Gyroscope Support - Virtual Tour Mobile Device
  • Turn on the Compass feature. It will display a live compass inside the virtual tour and help the viewers understand which directions they’re looking at.
Compass on Virtual Apartment Tour
  • Turn on the Scene Gallery option.
    • When you have multiple panorama images, it will show a slider gallery where your clients can see a preview of every panorama image in your apartment. They can also choose to visit a specific scene directly from the gallery.
  • Turn on the Scene Title on Scene Gallery option – to make your clients understand which part of the apartment the scene will take them.
360 Degree Panorama Gallery

Now, how about adding some interesting features to your apartment virtual tour?

Let’s add them right away.

  • Set Background music to your virtual tour using the Tour Background Music option.
    • Let your clients experience soothing audio the entire time they’re on your tour.

  • Set an explainer video using the Enable Explainer Video option.
    • Definitely, you want to give your clients more information about the apartment you’re showing them.
    • You can record a video explaining details of the apartment and set it here.
      Whenever your clients want to explore more, they can click it and learn about the apartment directly from you.

Background Audio on 3D Apartment Virtual Tour

Now, it’s time for your own branding.

Tell them who created this virtual tour by showing your logo and description.

Set your company logo and a description using the Add Company Information option.

 Your Logo and Information - Virtual Tour

Step 5 – Set Control Buttons – Easy Navigation for Your Client

To make the tour easier to navigate, you can turn on the control buttons.

These are the controls you can turn on:

  • Move Up.
  • Move Down.
  • Move Left.
  • Move Right.
  • Zoom In.
  • Zoom Out.
  • Full Screen.
  • Gyroscope.
  • Home Button.
Control Buttons on Apartment Virtual Tour

On top of that, you can set a different icon and color for each of these buttons.

Step 6 – Use Hotspots – Connect Panorama Images & Show Additional Info

Once you’ve set up one panorama image, you can now upload more and connect them.

Remember to keep the sequence between your images.

For example, if your tour starts from the entrance of your apartment, the next one should lead to the living room or the bedroom that is right beside the living room.

And if your viewer is leaving that bedroom, it should take them back to the living room.

The sequence of the images must reassablence the apartment in real life.

You have to use the Scene-type hotspots to connect the scenes.

Here is a small guide to connecting panorama images in your virtual apartment tour.

On top of that, you can use the Info-type hotspots to show in-depth details about the apartment.

The content you can set in the hotspots:

  • Images.
  • Texts.
  • Videos (YouTube, Vimeo, & Self-hosted).
  • GIFs.
  • URLs (Open on a new tab or the same tab).
  • Buttons.
  • Combination of everything above.
Hotspot To Show Information - Virtual Tour

You can set these to both on-hover and on-click actions of the hotspots.

To add more content and customize the hotspots, follow this guide.

Bonus Tips To Make A Luxury Apartment Virtual Tour Stand Out From Your Competitors

If you’ve made it this far in this guide, then great job!

In this section, I have something for you that’ll pay off your patience.

Suppose you’ve followed all the steps in this guide to make the perfect apartment virtual tour.

Now, all you need to do is make the viewer contact you and start the process of conversion.

Here’s how,

Inside every panorama scene of your tour set a hotspot that will contain a contact form or email submission form.

You can go one step further by adding a different contact form in every scene.

Example:

  • In the Kitchen scene, invite them to drop their email – to learn more about the water supply & gas stove setup options.
  • In the Entrance or outdoor scenes, ask them to give you their contact – to learn about the lawn diameters and neighboring community rules.

The easiest way to generate more leads would be to keep the form as minimal as possible. Just asking them to type in their name, email address, and the best time to call back would be great.

But, you can also add a couple of questions to qualify them for your case such as their budget, expected time to rent, etc.

And this, you can easily set up using WPVR.

The Benefits of Using this Latest Trend: Convert Prospects Into Potential Buyers

Today there are several creative ways to handle prospects that help to boost conversion.

And one of the proven ways now is to use virtual tours on your website.

Webpages with virtual tours receive 5-10 times longer views.

Here’s how it works.

  1. Get prospects to visit your website.
  2. Hook them with engaging apartment virtual tours they can’t ignore.
  3. Give them a glimpse of exactly what they will get in real life.
  4. Get them interested and pre-qualified while on the tour.
  5. Make the prospects book a time for you to call back.

Advantages of Using Virtual Tour:

  • The user will not have to worry about traveling to get a live view of the apartment.
  • An apartment virtual tour with navigation control means prospects are not bound to a fixed view. They can view and move around however they want. This will gain more trust.
  • People will already get to make a temporary decision on the apartment of their choice.
  • You can include more details on the apartment within the tour, which you would normally explain via phone.
  • And most importantly, you can have the buyers fill out a form to get a call back right on the virtual apartment tour.

You can create an engaging apartment virtual tour without any complications using the right tool. And we mentioned and demonstrated WPVR here. You can easily go with it.

Conclusion 

As you can see, a virtual tour is the next best thing to a live visit. And it is also a key option to stand out among your competitors.

Plus, as you saw, creating apartment virtual tours is relatively easy and quite affordable. So it’s high time you, too should, start using virtual tours to sell or rent more apartments easily.

Keep your prospects hooked and convert them into buyers with the latest trend that works.

If you own a WordPress site, then go ahead and start using WPVR and start closing more deals.

Categories
Plugins WooCommerce

Top 15 WooCommerce Checkout Plugins: Get Smoother Transaction Experience

If you’re a WooCommerce store owner, you know that the most important step of your website is the checkout process.

An optimized checkout process makes it easier for your prospects to complete the purchase and helps to create a positive user experience.

You should optimize your WooCommerce checkout process at any cost to ensure that your prospect completes the purchase once they enter the WooCommerce checkout page.

There are many ways to optimize your WooCommerce checkout process:

  • Implement one-click WooCommerce checkout;
  • Use smart custom fields wherever you need them;
  • Break down your WooCommerce checkout process into multiple small steps;
  • Ensure a fast and responsive payment gateway process.

These methods will help you bring down the abandoned cart rate on your WooCommerce store and increase the number of loyal customers.

Today, I have gathered a list of 15 amazing plugins that can help you optimize your WooCommerce checkout process and increase your ROI.

So, let’s get into the details.

Key Features of a Great Checkout Plugin for WooCommerce

If you’re running a WooCommerce store, you already know how critical the checkout process is. It’s the last stop before someone commits to their purchase. That means every detail needs to work in your favor.

Here’s what you need to look for in a checkout plugin to make that happen:

i. Easy Customization Options

You probably don’t want your checkout to look like every other WooCommerce store out there. A solid plugin lets you tweak layouts, fields, and labels effortlessly. Whether you’re simplifying the process or adding personalized fields, customization ensures the checkout feels tailored to your brand.

ii. Multiple Payment Gateway Integrations

Once you’ve made the checkout look great, it’s all about payment. Everyone has their go-to option, whether it’s credit cards, PayPal, or local payment gateways. A plugin that covers a wide range of payment methods ensures your customers aren’t abandoning their cart because their favorite option isn’t available.

iii. Mobile-Friendly Design

And don’t forget mobile shoppers. Chances are, a big chunk of your audience browses and buys on their phones. If your checkout isn’t fast and responsive, you’re frustrating those customers before they can hit the “place order” button.

iv. Guest Checkout Options

Here’s another area where friction pops up—forcing people to register. Some shoppers just want to make a quick purchase and move on. Offering guest checkout keeps things simple and makes you more approachable.

v. Built-in Address Validation

But simplicity doesn’t mean skipping accuracy. Built-in address validation can catch typos or incomplete entries, saving you from dealing with failed deliveries or annoyed customers later.

vi. One-Page Checkout

Speaking of keeping it simple, nobody enjoys clicking through multiple screens. A one-page checkout keeps everything in one place. When customers see their cart, payment options, and order summary on a single page, they’re less likely to lose patience and leave.

vii. Upsell and Cross-Sell Features

Now that they’re almost ready to check out, why not gently introduce them to products they might love? A good plugin lets you suggest add-ons or related items without feeling pushy. It’s a great way to increase sales without disrupting the buying flow.

viii. Automated Tax Calculations

Of course, there’s the practical side too. Tax calculations can get complicated, especially if you’re selling in multiple locations. A plugin that handles this automatically keeps things accurate and compliant while saving you a ton of effort.

ix. Multi-Language and Multi-Currency Support

And if you’re serving international customers, a checkout that adapts to their language and currency makes a world of difference. It builds trust and creates a smoother shopping experience for everyone.

x. Built-in Analytics and Reporting

Once your checkout is running smoothly, it’s time to track its performance. Features like abandoned cart tracking or conversion rate insights help you see where you’re winning—and where there’s room to improve.

xi. Compatibility with Other Plugins

Finally, you need a plugin that plays well with the rest of your WooCommerce setup. Whether it’s syncing with your email marketing tools or your shipping provider, compatibility prevents hiccups and keeps everything running seamlessly.

Every feature here works together to create a better experience for your customers. If you notice any gaps in your current checkout process, addressing them could make a big difference in your store’s performance.

Now, let’s get into the plugin list you might consider for your business.

15 Best Woocommerce Checkout Plugins for Optimize WooCommerce Checkout Process

Here is the list of 15 amazing Woocommerce checkout plugins to give your customer a smooth checkout experience :

1. Checkoutify – The Ultimate WooCommerce Checkout Customizer

Checkoutify - The Ultimate WooCommerce Checkout Customizer

Checkout is a revolutionary WooCommerce checkout customizer that empowers you to create and replace your default checkout process with a well-organized, drag-and-drop editor.

With its intuitive drag-and-drop editor, you can design the perfect checkout journey, customizing every aspect from layout and flow to visual elements and branding.

Features That Make Checkoutify The Best Checkout Plugin For Woocommerce

These are some of the best features of this plugin :

  • Drag and Drop editor for the checkout editor
  • Multi-step checkout
  • Remove unnecessary checkout fields
  • Guest checkout friendly
  • Multiple payment gateway support
  • Rearrange steps & move sections

So, As you can see this plugin offers a range of powerful features to enhance your checkout process and boost conversions.

Why wait? Buy Checkoutify now and create a checkout process your customer will fall in love with.

Remember that because WooCommerce connects with a wide range of low, medium, and high-risk payment processors, you can practically connect with any payment gateway you like.

2. WPFunnels – Drag & Drop Sales Funnel Builder for WordPress

Wpfunnels

WPFunnels allows you to create complete sales funnels in a visual canvas & edit the funnel steps.

Among the Funnel steps, you completely edit & re-design the checkout step.

Features That Make WPFunnels The Best Choice For Woocommerce Checkout

The plugin gives you multiple ready-to-use Checkout page templates you can import with one click and edit them.

You can edit the checkout templates with Elementor, Divi Builder, and Gutenberg and include any elements or apply any customizations.

Moreover, you’ll be creating the checkout steps in a drag-and-drop visual canvas where you can plan your checkout process.

Learn more about WPFunnels – Sales Funnel Builder here.

3. ShopEngine

shopengine

ShopEngine allows you to create and customize WooCommerce checkout pages in minutes with its conversion-friendly templates. You can also design a checkout page from scratch with 20+ modules and 70+ widgets.

Again, you can add custom checkout fields to your checkout pages using this WooCommerce page builder. Moreover, you can remove unwanted checkout fields and create a short checkout page with ShopEngine.

Features That Make ShopEngine The Best Choice for WooCommerce Checkout

  • Friendly drag-and-drop interface.
  • Multi-step checkout.
  • Quick checkout system.
  • Additional custom checkout fields.
  • Professional checkout templates.
  • Discount coupons.

This WooCommerce checkout plugin has freemium and premium versions. The premium packages start at $59 per year, and they come in lifetime and bundle packs. 

To learn more about this plugin, visit ShopEngine’s official page.

4. WooCommerce Buy Now — StoreApps

woocommerce plugin

WooCommerce Buy Now is a premium plugin that allows your repeat customers to complete the full checkout + payment process in a single click!

If a customer with a previous purchasing history tries to purchase again from your store, this plugin will auto-fill their information and take them directly to the checkout or payment page with a customizable Buy Now button.

Features That Make myPOS The Best Choice For Woocommerce Checkout

Some of its premium features are:

  • Auto-fill billing and shipping information;
  • Custom Buy Now buttons on the entire store or just selected product pages;
  • One-click checkout with PayPal, Braintree, Stripe, Authorize.net, etc;
  • Quick checkout for the new and guest users;
  • Set up discount coupons.

This plugin is modeled after Amazon’s patented and popular “1-Click ordering” that lets your customer skip the shopping cart and proceed to checkout.

So, if you’re looking for a plugin to let your customers complete the WooCommerce checkout process in the easiest and fastest way possible, then this is the ideal plugin for you.

Learn more about the website of WooCommerce Buy Now.

5. WooCommerce Checkout Manager

checkout manager

If you’re looking for an all-in-one checkout plugin, WooCommerce Checkout Manager is the one for you. This freemium tool developed by QuadLayers allows you to take full control and customize your checkout process.

With more than 90,000 active installations, WooCommerce Checkout Manager is one of the best eCommerce plugins out there.

Features That Make WooCommerce Checkout Manager The Best Woocommerce Checkout Plugin

The most popular features of Checkout Manager are:

  • Add, Remove, and Edit Checkout Fields
  • Add New Fees To the Checkout (fixed or percentage)
  • Add Conditional Fields
  • Allow Users To Upload Files To Their Orders
  • Show Custom Fields In Order
  • Email Notifications

Checkout Manager is a freemium tool. The free version comes with basic functionalities, while the premium plans include more features and start at just $19 (one-time payment).

To learn more about this plugin, visit the official website.

6. Checkout Field Manager by ShopLentor

ShopLentor - Landing Page

ShopLentor’s Checkout Field Manager is a powerful WooCommerce module by ShopLentor that streamlines your store’s checkout process.

Customize fields through an intuitive interface without coding, remove unnecessary fields, and add custom options instantly.

With multiple templates and real-time previews, create an optimized checkout flow that reduces cart abandonment and drives conversions.

Design a seamless purchase journey tailored to your business needs.

Features That Make ShopLentor Checkout Field Manager a Great Choice

With ShopLentor Checkout Field Manager, you’ll get benefits such as:

  • Drag-and-drop field management eliminates complex coding requirements;
  • Custom field creation adapts checkout to your specific needs;
  • One-click field removal streamlines the entire checkout process;
  • Smart field rearrangement optimizes the customer purchase journey;
  • Seamless integration with Elementor enhances design flexibility;
  • Multiple checkout template options for diverse business needs;
  • Real-time field preview ensures perfect checkout flow setup.

Ready to revolutionize your checkout experience? Transform your WooCommerce store’s conversion rate with ShopLentor’s Checkout Field Manager today.

For more information, you can check out the premium plan of ShopLentor.

7. WooCommerce Direct Checkout

Checkout manager

WooCommerce Direct Checkout is a freemium plugin that helps you simplify your checkout process and increase conversion rates. 

It is designed to reduce cart abandonment and speed up the checkout to help you boost your sales.

Features That Make WooCommerce Direct Checkout The Best Choice For Woocommerce Checkout

With WooCommerce Direct Checkout, you can get features such as:

  • One-Page Checkout
  • Quick Purchase Button
  • Ajax Add To Cart
  • Checkout Field Customization
  • Checkout Redirects
  • Quick View Option

The lite version is free and comes with basic features.

On the other hand, if you want more advanced functionalities, you can go for one of the premium plans of WooCommerce Direct Checkout starting at just $19 (one-time payment).

For more information, you can check out the premium plan of WooCommerce Direct Checkout.

8. myPOS Checkout For WooCommerce — myPOS Europe Ltd

mypos checkout for woocommerce

myPOS Checkout is an extension of myPOS Online Payments that provides European merchants with a modern and secure WooCommerce checkout solution.

This plugin allows you to accept payments from debit and credit cards in a few simple steps and integrate financial transactions with VISA, MasterCard, JCB, and Bancontact cards.

Features That Make Checkoutify The Best Choice For Woocommerce Checkout

With myPOS, you’ll get benefits such as:

  • Easy and simple installation and set-up;
  • Ideal compatibility for clients from The Netherlands;
  • Free e-money account with individual IBAN;
  • Fully PCI compliant;
  • Integration Support.

myPOS Online Payments has more exclusive features which include:

  • Secured page and channel communication with the merchants;
  • 3D secure processing for direct payments from any card;
  • Accepting payments in many currencies in a single account.

The plugin can store merchant data such as shopping cart, amount, payment method, transaction details, etc.

If you’re a merchant in the EU, who wants a secure and advanced, but easy-to-use online payment solution, you should consider using myPOS Online Payments.

Visit the website of myPOS.

9.  Flexible Checkout Fields For WooCommerce —  WPDESK

Flexible checkout field for woocommerce

Flexible Checkout Fields For WooCommerce is a great plugin for customizing your checkout fields using an easy-to-use interface.

This plugin is beautifully integrated with the WordPress dashboard, so you will feel comfortable using it.

Features That Make Flexible Checkout Fields —  WPDESK The Best Choice

The free version has useful features such as:

  • Fields ordering;
  • Edit Labels and Placeholders;
  • Ability to show or hide fields;
  • Validation and make validation required or optional;
  • Custom field styling using the CSS classes.

The pro version has many features which include:

  • Conditional logic based on
    • fields
    • products
    • product variation
    • categories
    • shipping method

Plus it allows Custom checkout sections.

The premium plugin allows you to add 12 types of fields:

  • single-line text
  • text area
  • checkbox
  • radio button
  • select (dropdown)
  • multi-select
  • date
  • time
  • color picker
  • headline
  • HTML
  • file upload

If you want to customize the WooCommerce checkout fields fully, then you can rely on this plugin.

Check out the premium version of Flexible Checkout Fields For WooCommerce.

10. WooCommerce Checkout Field Editor and Manager – Acowebs

Woocommerce checkout field

WooCommerce Checkout Field Editor is a leading WooCommerce plugin that is used by more than 6000 users across the globe.

It helps to manage (add, edit, and hide) the default fields of WooCommerce checkout according to your business purpose.

One of the major highlights of this plugin, apart from its various functionalities, is its groundbreaking UX design which is highly acclaimed by many of its users.

The plugin comes with a clean user-friendly UI and a drag-and-drop form builder which makes it super simple for admins to edit the checkout fields.

The front-end UI is built using React JS which makes it a stable one even when multiple checkout fields are added.

Features That Make Acowebs The Best Choice For Woocommerce Checkout

Major features in the free version:

  • Edit Default Checkout Fields
  • Add New Checkout Fields
  • Hide existing Checkout Fields
  • Option to enable and disable WooCommerce Checkout Fields
  • Display inside order details
  • Display in Order Emails
  • Adjust the checkout column to half or full width
  • Option to set custom CSS
  • Compatible with WPML and Polylang

Some of the additional features in the pro version are:

  • More than 19 Field Types
  • Option to add Checkout Fields on Conditional logic
  • Option to add Checkout Sections on Conditional logic
  • Apart from Checkout, add fields to My Account registration forms
  • Conditional rules based on various parameters
  • Option to add extra fee based on the selected field
  • Add extra tax to the extra fee charged

The pro version of WooCommerce Checkout Manager can be purchased from the Acowebs website at a nominal yearly subscription.

There are also lifetime membership plans where you can pay just once and use the plugin for a lifetime.

To learn more, visit the website of Acowebs.

11. PeachPay for WooCommerce

peachpay plugin

PeachPay is democratizing one-click checkout. If you’re interested in increasing conversions, delighting customers, and reducing cart abandonment, then PeachPay checkout is exactly what you need.

Install PeachPay checkout in minutes so your customers can check out in seconds.

Features That Make PeachPay The Best Choice For Woocommerce Checkout

Major Features list (the plugin is entirely free):

  • Adds a new payment option to your site that integrates seamlessly with any existing options, managed through the Stripe dashboard without any additional hassle.
  • Generates a streamlined checkout form for first-time users
  • Gives repeat users access to passwordless one-click checkout no matter what site they are on
  • A supplementary mobile app gives customers access to order history aggregation, item tracking, and more, so they are more likely to return to your store

Visit the website of PeachPay.

12. Instant Checkout for WooCommerce

Instant Checkout for WooCommerce

Bring your WooCommerce store into the future with an innovative plugin that makes instant checkout really effective in online shopping. The Instant Checkout for WooCommerce plugin has a customizable side cart, allowing customers to add products to it and perform checkout actions with a single click. It simplifies the entire checkout process, reducing cart abandonment and increasing conversion.

Instant Checkout: Features That Set It Apart

  • Customizable Side Cart: Choose from pop-up or sliding designs. Personalize the cart with color and icon choices to suit your brand.
  • Buy Now Button: Direct checkout from the shop page with faster transactions.
  • One Page Checkout: Remove steps and allow customers to checkout from product pages only.
  • Cross-Selling Opportunities: Present related items to make more sales.
  • Quick View for Variations: Add product variations without visiting the page.

Pricing

  • Basic Plan: $49/year for 1 site.
  • Premium Plan: $99/year for 3 sites.
  • Business Plan: $149/year for 100 sites.

Make the move from traditional to modern checkout systems today!

13. Conditional WooCommerce Checkout Field  — Amplify Plugins

Woocommerce checkout plugin

Conditional WooCommerce Checkout Field will help you to set fields for additional information that are required to complete the purchase.

Suppose you are selling customized products on your WooCommerce site, or have a service of event registration like summer camps, integrating event check-in software can streamline the process by gathering essential details upfront, ensuring smooth transactions and accurate pricing calculations based on individual requirements.

In these cases, you need additional information like product customization details and requirements for the event from your prospect before they can complete the purchase.

This is important because the price of a customized product will depend on the customizations applied.

For example, the cost of an event will depend on the number of people joining and the extra services and facilities required.

This plugin is perfect to help with these situations by adding fields that are necessary to complete a proper purchase based on the products that require custom pricing.

Features That Make Conditional WooCommerce Checkout Field The Best Choice

Here are some of the pro features you’ll get with this plugin:

  • Unlimited number of custom conditional fields;
  • Conditional fields for an unlimited number of products, product variations, or product categories;
  • Conditional field based on the number of purchased products;
  • Integration with WooCommerce Bookings and WooCommerce Product Bundles;
  • Conditional fields for all products in a single category or multiple categories;
  • Adjust the order of the fields.

This plugin also allows you to edit all the default WooCommerce checkout fields.

You can set input fields such as:

  • Text boxes
  • Multiline text areas
  • Dropdown
  • Password
  • Radio buttons

And more useful fields such as Country, State, Checkbox, Password, and Date.

This plugin has been improved and maintained for more than 5 years, so the developers have made it light and efficient; the plugin loads quickly and is fully compatible with any WooCommerce compatible theme.

Check out the Conditional WooCommerce Checkout Field.

14. Custom Checkout Fields For WooCommerce — WPFactory

Custom checkout field by WP Factory

Custom Checkout Fields For WooCommerce is a light and easy-to-use checkout plugin for setting up any type of custom field on the checkout page for your WooCommerce store.

You can set up various field types such as:

  • Text
  • Textarea
  • Number
  • Datepicker
  • Timepicker
  • Checkbox
  • Email
  • Radio
  • URL

You can also include more customs fields for Password, Country, State, Phone, and the Search field.

Features That Make Custom Checkout Field The Best Choice For Woocommerce Checkout

The plugin allows you to add fees to the cart total depending on the value of the custom fields.

For each type of field you use, you can set various options like:

  • Default value
  • Placeholder
  • Required
  • Description
  • Label
  • Customer meta fields

You can also arrange the position options with:

  • Set by Priority
  • Set by billing section
  • Set by shipping section
  • Set by account section
  • Set by order section

If you want to add additional and customized fields anywhere in your WooCommerce checkout process, this is the perfect plugin for you.

Check out the premium version of Custom Checkout Fields For WooCommerce.

15. WooCommerce Multi-Step Checkout —  SilkyPress

Silkypress plugin

WooCommerce Multi-Step Checkout allows you to break down your checkout process into multiple, small steps.

This is often useful to make it easier for your users to understand the whole checkout process and input accurate data.

Features That Make SilkyPress The Best Choice For Woocommerce Checkout

You will find the following benefits in the free version:

  • Mobile-friendly interface;
  • Smart and sleek design;
  • Keyboard navigation;
  • Responsive layout;
  • Inherit your button and form designs from the theme;
  • Adjust with the colour of your theme.

The premium version of the plugin has exclusive features such as:

  • Clickable steps: Your user can click on the immediate next step or the already completed checkout steps to navigate.
  • Validation With Steps: The step-by-step process allows you to inform your prospects of any errors before going to the next step.
  • Registration on The Login Step: When a new prospect goes to your checkout process, they can register directly on the login page.
  • Product Image on the Order Review Step: You can make your customers confident about the purchase and ensure their order with images of the products.

This plugin is WPML-ready and is compatible with most WordPress themes.

Check out the premium version of WooCommerce Multi-Step Checkout here.

16. Checkout Field Editor and Checkout Manager for WooCommerce

themeparrot plugin

WooCommerce Checkout Field Editor and Manager plugin allow you to add personalized fields to your checkout pages.

This gives the checkout section a user-friendly interface and you’ll find it easy to manage the details of customers. 

It works seamlessly with most WooCommerce-compatible themes, so you’ll have countless options to choose from when jazzing up your store and marketing your products.

Features That Make WPML The Best Choice For Woocommerce Checkout

The popular WordPress Multilingual (WPML) compatible plugin lets you translate website content into different languages.

You can change field orders with the drag & drop option.

This makes the plugin easier to use. No need to code & debug and don’t suck your time in this process.

  Key Features:

  • Rearrange, add, and edit Checkout fields.
  • Automatic field validation.
  • File upload feature.
  • Modify the default fields.
  • Section positioning.
  • 17+ Field types.
  • Create and place the custom section on the Checkout page.
  • UI is user-friendly.
  • Date, Time, and Color Picker features.
  • Checkbox and Radio groups help to capture more info.
  • Also can add additional CSS classes.
  • Lightweight and easy to use.

Checkout Field Editor and Manager is a Freemium plugin. 

You can enjoy the basic features on the free version and if like to move on to the pro, then you’ll get access to all of the premium features.

Download the plugin.

Conclusion

You can see that each of these plugins has unique features that allow you to optimize your WooCommerce checkout process for the best possible outcome.

The right plugin for you really depends on your products and the checkout process you wish to achieve.

Also, if you’re looking for some great and free WooCommerce plugins for your store, you can check out these best free WooCommerce plugins.

Try to make your checkout process as simple as possible and ensure not to confuse the users with too many fields scattered around. Yes, you have the power to customize, but use customizations only when necessary.

If you know of any better plugins for WooCommerce checkout, then please share them with us in the comments.

If you have used any of these plugins, then you can let us know of your experience.

FAQs

1. What is a WooCommerce checkout plugin?

A WooCommerce checkout plugin helps customize and enhance the default checkout process on your WooCommerce store, making it more user-friendly and optimized for conversions.

2. Why should I use a checkout plugin instead of the default WooCommerce checkout?

The default checkout is basic. A plugin adds features like better design, multiple payment options, or one-page checkout to improve user experience and reduce cart abandonment.

3. Are WooCommerce checkout plugins beginner-friendly?

Yes, most plugins are designed with simple interfaces, allowing you to customize your checkout without needing advanced technical skills.

4. Can a checkout plugin improve my store’s conversion rate?

Absolutely. Features like guest checkout, one-page layouts, and multiple payment gateways can reduce friction, making it easier for customers to complete their purchase.

5. How do I choose the right WooCommerce checkout plugin?

Look for features that match your store’s needs, like mobile responsiveness, payment gateway support, and compatibility with other tools you use.

Categories
Guide Virtual Reality

Guide to Panoramic Photography – How To Shoot Panorama Photos Efficiently [2024]

“Content is King,” as stated by Bill Gates, is quite true today. Most businesses nowadays rely on online presence and digital marketing.

You will find so many unique ways businesses are trying to use content to stay ahead of the competition. And one such unique content is “Panorama.”

A panoramic image is a processed form of photography that gives you a wide and expansive view of a location. You can then convert it into a 360 virtual tour quite easily.

Virtual tours are right now one of the most interactive forms of content in the real estate, hotel, and travel industry to increase sales.

However, panoramic photography can be quite challenging. You have to consider the lighting, the right equipment, and the proper angle of view to capture a high-quality panorama.

In this guide, you will learn how to shoot panorama photos in the right way, with the best possible captures.

After reading this article, you will learn:

  • The equipment needed for panoramic photography.
  • Proper shooting techniques to capture panoramas.
  • Ways to optimize capturing 360 panoramic images.

And eventually, you will be able to capture high-quality panoramas that you can use to create the best virtual tours.

So let’s begin.

Step By Step Guide To Panoramic Photography

Taking panoramic images will need you to follow three main steps:

  1. Collect the required equipment for efficient panoramic photography.
  2. Use the right shooting techniques to capture images for the panorama.
  3. Stich the captured images into a 360 panoramic image.

Let us look at each of them one by one.

Step 1 – Collecting The Required Equipment For Efficient Panoramic Photography

The first step to capturing panoramic images is to choose the right equipment.

Following are the tools you need to collect before you can proceed to capture your panoramic images.

1. High-Resolution Camera With A Wide-angle Lens

If you want to capture a high-quality panoramic image, you will need to choose a high-resolution camera and a wide-angle/fish-eye lens for the 360 effects.

Ideally, a camera with at least 24 megapixels and a wide-angle lens with a focal length of 35mm or less will serve your purpose.

The idea is to combine the camera and the lens to help you capture the full grandeur of a scene (which is not possible with a traditional lens).

  • The camera’s high resolution will ensure all the details are captured to the last detail.
  • The fish-eye lens will create a concave effect to help capture a 360 view.

Tips On Using Your Camera & Lens Properly

  • Set your camera to manual mode.
  • Use a decent shutter speed – 1/10th or 1/20th is ideal during the day.
  • Set the aperture to about F11 and ISO to around 640 or more during the day.
  • Set manual white balance to 4000 Kelvin

**Remember, these settings are suggested based on ideal photogenic lighting conditions. You may have to toggle the white balance and ISO a bit to get the best output.

Best Cameras To Consider For Panoramic Photo Shooting
Best Wide-angle Lenses For Panoramic Photography

2. A Tripod For Stable Photography

You’ll need a stable tripod for panoramic photography to avoid noise and jitters caused by camera shakes.

Plus, you will be able to raise or tone down the height of the camera easily, to capture at just the right angle for the best panoramic view.

Tips On Using A Tripod Properly

  • Try to keep the tripod on an even surface.
  • Adjust the height and angle of the tripod for your desired composition.
  • Notice the bubble of the tripod. If it’s in the center, it means the tripod is standing straight.
Best Tripods for Panoramic Photography

3. Remote Shutter Release

The remote shutter release will allow you to trigger the camera without physically touching it. This will remove the possibility of camera shakes.

Best Remote Shutter Releases

3. Automated Pano Head/Nodal Head For Controlled Photoshoot

Since you need to cover every angle of a view, you must maintain a fixed rotation angle. An automated pano head will help you maintain that angle.

You may set the amount of angle you want the camera to rotate after every shot (and set a timer to define how soon the camera will rotate next).

This will help you capture all angles of a 360 view without any manual effort.

Best Automated Pano Heads for Panoramic Photography

5. Leveling Tools

In case your tripod doesn’t; have a leveling tool attached, you may buy one. They are useful to ensure your tripod is on level, i.e., standing straight against gravity.

There are mainly 2 types of leveling tools

  • Bubble levels
  • Electronic levels.

Bubble levels are the most common ones used.

Best Leveling Tools for Panoramic Photography

Step 2 – Use The Right Shooting Techniques For The Best Panoramic Photography

Once you have all your equipment ready, it’s time to capture panoramas.

1. Choosing the Right Spot

The first step in capturing a great panorama is finding the right spot.

You may want to take a panoramic image of your office interior. Or you may want to take an exclusive panorama just outside your resort to capture your resort and the environment around it.

The spot to place your camera and other equipment will vary. The spot you choose will determine the quality of your image, and using an AI image enhancer can further improve sharpness and clarity in every detail of the captured scene.

  • Interior photoshoot
    In the case of interior photography, the best location is always the center. However, you have to work on maintaining a constant light balance throughout. For example, if there are windows on one side, find a way to block the sunlight from coming through. You do not want half of your image to be bright and half of your image to be dark.
  • Exterior photography
    When taking external panoramas, you should find a wide-open view where the elements around are not too close, and you get a soothing view of what you want to capture. You may stand in the spot and crouch a bit to judge if the angle is right before placing your equipment there.

2. Set Up The Tripod And The Panohead

Once you have decided on the spot, place the tripod in the middle and adjust the bubble level to the center. Also, adjust the height of the tripod to the height you found suitable when observing the view prior.

Next, set the pano head and adjust the pano head to rotate to an angle of 60 degrees after every shot. This will help to capture 6 photos horizontally.

Best Practice: Avoid using the center column of the tripod as it may cause instability. Instead, use the tripod’s legs to adjust the camera’s height.

Once these are set up, attach the camera to the pano head.

3. Configure Camera Settings

As mentioned above, if you capture the image during the day, set the following configurations:

  • Camera Mode: Manual
  • Shutter speed – 1/10th or 1/20th
  • Aperture: F11
  • ISO: 640
  • Manual white balance: 4000 Kelvin

If the weather is not too bright or too cloudy, these settings will help to get the best possible panoramic quality.

Before you start the shooting session, rotate the camera manually and check if you are satisfied with the lighting and angles. Make changes to the settings if required as per your observation.

Always use manual mode when capturing professional photos. It will give you more control over the image quality.

And finally, attach the remote shutter release to the camera.

4. Capturing Your Panoramic Photo

Once the setup is ready, go ahead and initiate the photoshoot.

Most automated pano heads come with a remote. So you may set it up and initiate the capture from afar.

You could either stand behind the photo view or go sit in your car to avoid getting caught up in the image.

First, initiate the shutter release once and then initiate the pano head rotation using their remotes respectively.

Every time the pano head rotates, clip the shutter release ones.

Once you have covered a 360 angle horizontally, stop the rotation. Since it’s a fish-eye lens, it already covers 180 degrees vertically. However, it will still keep the top and bottom ends missing around the center.

So, you need to manually move the camera view up to 90 degrees and down 90 degrees to capture 2 photos.

Now, you have a total of 8 images from all angles on the shooting spot.

Your photo session is complete for this spot. You may then follow the steps you followed in this section to capture images for more spots that you have in mind.

Once you are ready with your images, it’s time to stitch them into 360 panoramas.

Step 3 – Stitching Images Into Panorama Photos

Stitching images for panoramas is not a manual process. You simply need to use good stitching software, and it will be done in just a few clicks.

1. Good Photo Stitching Software To Choose From

There are several software options available for stitching your panoramic shots.

Some of the most popular ones include:

Each of these software has unique features, but they all follow a similar stitching process.

2. Step-by-Step Stitching Process

The stitching process involves aligning and merging multiple overlapping shots to create a single panoramic image.

Here’s a standard process to stitch your panoramas:

Step 1: Import your images into the stitching software.

Step 2: Identify the order of the images and which ones are the upper and downward views.

Step 3: The software will automatically align the images using control points or features in the images.

Step 3: The images will then be merged into a seamless panoramic image.

Step 4: Adjust the cropping and straighten the image if necessary.

Step 5: Generate the final stitched panorama.

Now, your panorama is ready. But there’s more work.

3. Optimizing The Stitched Panorama

You will notice that the stitched image will have a few issues, such as low brightness, dull color balance, or some blurry areas. You may edit the image to improve these issues.

Tip 1: Adjust the exposure and color to ensure the final image looks natural and has balanced colors.

Tip 2: Improve blurred areas with custom sharpening.

Tip 3: Adjust the image tilt if necessary.

Caution: Avoid over-editing the image as it can result in an unnatural and over-processed final image.

Once ready, export the image, and that’s it. You now have a complete 360 panoramic image that you captured and generated.

Tips for Advanced Panoramic Photography

1. Use A Polarizing Filter

A polarizing filter will help you capture more vibrant and natural-looking images.

It reduces glare and reflections on water and other reflective surfaces. Plus, it can improve color saturation and contrast.

Practical Use: Screw it onto the front of your lens and adjust it until you achieve the desired effect.

Best Practice: Use a circular polarizing filter, as it is more effective than linear polarizers with autofocus cameras.

Also, try to position yourself at an angle to the sun when using the filter to get the best results.

2. Be Mindful Of Exposure Changes

While you’re capturing panoramic photos, the exposure can change from one shot to the next, especially if you are shooting during the golden hour or other times of changing lights.

After the 6 photos are captured, if you notice unsatisfactory exposure at a certain angle, capture from that angle again after adjusting the white balance and ISO to get a better shot.

Best Practice: Shoot during times of consistent light, such as midday or overcast days.

Use exposure bracketing, which takes multiple shots at different exposures, to ensure you capture the perfect exposure.

3. Avoid Moving Objects

Any moving object will ruin a panoramic photo by creating a ghosting or blurring effect.

So, before you start capturing, make sure there are no moving objects, at least around the scenery that you want, with the utmost quality in your panorama.

If there are trees around, avoid holding the photo session during windy weather.

Best Practice: In the case of external photography, shoot during times of low activity, such as early morning or late evening.

Tip: Use a fast shutter speed to freeze motion.

4. Experiment with Different Perspectives

Don’t be afraid to experiment with different perspectives when shooting panoramas.

Try shooting from high vantage points or low angles to add interest to your images.

Tips: Use a drone, if possible, to shoot from a high vantage point.

Alternatively, try shooting from a low angle by placing your camera on the ground or using a tripod with adjustable legs.

Best practice: Use leading lines, such as a road or path, to create depth and interest in your images.

Turning Your Panoramic Images Into A 360 Virtual Tour

Once you have your panoramic images, you may use them by creating a virtual tour for your business.

And it’s actually quite easy. In WordPress, you will find a plugin called WPVR, which lets you create stunning virtual tours in just a few clicks.

All you have to do is upload your 360 images, and the plugin will turn it into a realistic, interactive virtual tour. And then, you will be able to customize it and make it more engaging using tooltips, images, and videos, and even connect multiple views through a click-to-move button.

On top of these, you may use a lead form to collect leads, include your company information, add an explainer video, include a floor map, and even set it to be viewed using a VR Box.

This means your hard work in capturing panoramic images will pay off, as you will then have amazing virtual tours to stay ahead of your competition online.

Final Thoughts

If you have the right tools, you can capture 360 panoramic images without many complications.

The quality of the outcome may be a bit shaky at the beginning, but as you gain experience, it will all become super easy.

And once you are good at panoramic photography, you may go ahead and create your own virtual tours. or offer panoramic photography services to other businesses that may want to use virtual tours.

So go ahead and get your camera equipment ready. start capturing high-quality panoramas now.

P.S. If you own a drone, then you can avoid these steps and do aerial photography instead to capture high-quality 360 panoramic images. Here’s a complete guide.

Categories
Guide Virtual Reality

Best 5 Panoramic Camera App for Android to Capture 360-Degree Images [2024]

Since you’re interested in Panorama images, you know how the popularity of panoramic photography increased among smartphone users in recent years.

However, you also know that traditional Android smartphone cameras have limitations in capturing high-quality panoramic images.

But don’t worry! There are some perfect panoramic camera app for Android in the market that offer a range of features to capture immersive 360-degree photos.

This article will discuss the top 5 panoramic camera apps available for your Android smartphone.

Once you go through this, you can choose the most suitable panoramic camera app for Android for you.

Let’s dive in.

Not an android user? Do you use iPhone? Here’s are some of the best panoramic camera apps for iPhones

Features to Look for in a Panoramic Camera App for Android

First, let’s have a look at the features or options a good panoramic camera app for Android should have.

You need to consider these features that contribute to the quality of 360-degree images.

Here are some of the features to look for:

i. Image Resolution:

Higher-resolution images provide more details and clarity, resulting in better-quality panoramic photos.

ii. Stitching Accuracy:

A good panoramic camera app should be able to stitch together multiple images accurately, without any visible seams or distortions.

iii. Ease of Use:

A user-friendly interface and straightforward navigation can make it easier to capture panoramic images on your Android device.

Top 5 Panoramic Camera Apps for Android

You’ll find many panoramic camera app for Android on the Google Play Store.

Here are the top 5 apps, along with their unique features and capabilities:

1. Panorama 360:

Panorama 360 is a popular panoramic camera app that will allow you to capture 360-degree images with your Android devices.

Panoramic Camera App for Android - Panorama 360

It allows you to capture 360-degree photos in high resolution and even supports VR viewing.

The app features a user-friendly interface, high-resolution image capture, and an auto-stitching feature for seamless panoramic images.

It also offers social sharing options, allowing users to share their panoramic photos directly from the app or send them via email.

The app comes with a variety of editing tools and filters to enhance your photos.

You can easily share your panoramic photos on social media platforms.

Features of Panorama 360 Android App:

  • 360-degree photos.
  • High-resolution photos.
  • VR viewing support.
  • Editing tools and filters.
  • Social media sharing.

Pros & Cons of Panorama 360 Android App:

Pros:

  • Easy to use.
  • Good image quality.
  • Variety of editing tools.

Cons:

  • Limited free version.
  • Some features require in-app purchases.

Average User Rating: 3.7 out of 5

App Reviews: 108k

App Downloads: 10M+

App Link: Panorama 360.

2. Cardboard Camera

Cardboard Camera is a panoramic camera app developed by Google.

Panoramic Camera App for Android - Cardboard Camera

It allows you to capture 360-degree photos and view them in VR with a Google Cardboard device.

The app features high-quality image capture, an auto-stitching feature for seamless panoramic images, and a virtual reality mode for viewing photos in 3D.

It also allows you to add sound to your photos for a more immersive experience.

With Cardboard Camera, you can easily share your panoramic photos with friends and family.

Features of Cardboard Camera:

  • 360-degree photos.
  • VR viewing with Google Cardboard.
  • Sound capture.
  • Sharing options.

Pros & Cons of Cardboard Camera:

Pros:

  • Good image quality.
  • User-friendly interface.
  • VR viewing support.

Cons:

  • Limited editing options.
  • Requires Google Cardboard for VR viewing.

Average User Rating: 4.4 out of 5

App Reviews: 162k

App Downloads: 10M+

App Link: Cardboard Camera.

3. Insta360

Panoramic Camera App for Android - Insta360

The Insta 360 camera is a cutting-edge panoramic camera designed to capture immersive 360-degree photos and videos. With its advanced features and intuitive interface, it allows you to create stunning panoramic content with ease.

Whether for personal use or professional projects, the Insta360 camera offers unparalleled versatility and quality, making it a must-have app for capturing life’s moments from every angle.

Features of Insta360 Panorama Camera:

  • Easy 360-degree photo capture.
  • Real-time preview and editing capabilities.
  • Advanced stitching algorithms for high-quality panoramic images.
  • Integration with social media platforms for easy sharing.
  • Additional features such as filters, effects, and virtual reality (VR) support.

Pros & Cons of Insta360 Panorama Camera:

Pros:

  1. Easy 360-degree photo capture for immersive experiences.
  2. Real-time preview and editing features enhance user experience.
  3. Integration with social media platforms simplifies sharing.

Cons:

  • Require significant storage space for high-resolution images.
  • Some advanced features may be locked behind in-app purchases.
  • Compatibility with certain Android devices may vary.

Average User Rating: 4.2 out of 5

App Reviews: 20.8k

App Downloads: 1M+

App Link: Insta360

4. Wide Camera – Panorama 360 HD

The Wide Camera – Panorama 360 HD is a powerful panoramic camera app for your Android device.

Panoramic Camera App for Android -Wide Camera Panorama 360 HD

It allows users to take 360-degree photos and offers a variety of features for editing and sharing them.

The app uses advanced algorithms to stitch together multiple images into a seamless panoramic view, resulting in high-quality images that capture the entire scene.

Features of Wide Camera – Panorama 360 HD:

  • High-resolution panoramic images.
  • Real-time capture and preview.
  • Automatic image stitching.
  • Advanced photo editing tools.
  • VR viewing support.
  • Social media sharing.
  • Live wallpaper creation.

Pros & Cons of Wide Camera – Panorama 360 HD:

Pros:

  • High-quality panoramic images.
  • Real-time capture and preview.
  • Wide range of editing tools.
  • Supports VR viewing.
  • Live wallpaper creation.
  • No ads.

Cons:

  • Some features require in-app purchases.
  • Limited free version.
  • Large file sizes may take up significant device storage.

Average User Rating: 3.5 out of 5

App Reviews: 1.17k

App Downloads: 500k+

App Link: Wide Camera – Panorama 360 HD.

5. Photaf Panorama by Bengigi

Photaf Panorama is a pretty good 360 camera app for Android that comes with a gyro sensor to guide you when taking 360 panoramas.

Panoramic Camera App for Android- Photaf Panorama by Bengigi

This panoramic photography app is well suited to capture 360 photos on the go as its sensor will indicate which angle to take pictures from next. If you are able to stay stable while capturing the images, then the app will automatically stitch the captured images into a 360-degree panorama.

You can even transfer your photos to your phone or desktop and use them to create virtual tours.

Features of Photaf Panorama:

  • Guided 360 image capture
  • Gyro sensor for compass & direction
  • Automatic Image Stitching
  • 360 Panorama creation
  • HD Panoramas (in Pro)

Pros & Cons of Google Street View:

Pros:

  • Guided photography to avoid flaws
  • Fast panorama generation
  • Access to their own featured photo library
  • 360 image capture for free

Cons:

  • Limited editing options.
  • Complicated UI
  • Sometimes errors in stitching

Average User Rating: 3.6 out of 5

App Reviews: 68.8k

App Downloads: 5M+

App Link: Photaf Panorama

How to Take Better Panoramic Photos

Capturing high-quality panoramic photos can be a challenging task, even with the best panoramic camera app.

Here are some tips to help you take better panoramic photos:

Choose A Good Location:

Look for a location with a scenic view or an interesting subject.

The more interesting the location, the better the panoramic photo will be.

Keep Your Camera Steady:

Avoid moving your camera while capturing the images for the panoramic photo.

This can result in blurred images or visible seams in the final photo.

Overlap Your Shots:

Make sure to overlap your shots by around 30% to ensure accurate stitching of the images.

Use Tripod & Gimbal:

Using a tripod can help keep your camera steady and make it easier to capture accurate shots for your panoramic photo.

Using Gimbal will keep your 360 images and videos super steady if you’re taking the shot by hand.

Use the right settings:

Adjust the settings on your panoramic camera app to ensure you capture high-quality images.

This includes adjusting the exposure, focus, and white balance settings.

Wrapping Up:

These were the top five panoramic camera apps for your Android device.

Each of these apps comes with its own unique features, pros, and cons.

Whether you’re looking for high-resolution photos, VR viewing support, or 3D effects, there’s an app on this list that will suit your needs.

Download these apps, experiment with their features, and capture stunning panoramic photos on your Android device. You can go through our next guide If you don’t know how to take a panoramic photo with drones.

** FAQs **

How do I know if my Android phone supports panoramic photography?

  • Most modern Android smartphones come with built-in panoramic photography features. Check your camera app for panorama mode. If unavailable, download panoramic camera apps from the Google Play Store.

Can I use panoramic camera apps on older Android devices?

  • Yes, you can use them on older devices if they meet minimum requirements. However, older models may face slower processing speeds or feature limitations compared to newer ones.

Are there specific techniques for capturing better panoramic photos?

  • Yes, techniques like selecting stable locations, keeping the camera steady, overlapping shots, and using tripods or gimbals can enhance stability and quality in panoramic photography.

Do panoramic camera apps require a lot of storage space on my Android device?

  • Panoramic camera apps may consume storage space, especially with high-resolution images or video recordings. Regularly delete old files or consider cloud storage options for managing space.

Can I use panoramic photos taken with these apps for professional purposes?

  • Yes, you can utilize panoramic photos professionally in real estate, travel websites, or virtual tours. It ensures high-quality representation and accuracy in depicting subjects or locations

Not satisfied with the quality of 360 images via Androids or iPhones? Then why not explore some of the best digital 360 cameras? It may turn out to be less hard work and better results. Here’s a list of the best 360 cameras out there.

Categories
Real Estate Update Virtual Reality WP VR

Interactive Virtual Floor Plan For Your Virtual Tours! [2024]

Great news for all VR lovers!

We have just released one of the best features for WPVR so far!

  • The Virtual Floor Plan

You can now include an interactive floor plan in your virtual tour where your buyers can see where they are in your tour and navigate to different scenes from right within the map!

And the best part, it’s super easy to use and can be applied to your existing tours as well.

Let us get a closer look at this amazing new feature.

Make The Tour More Meaningful With An Engaging Floor Map

Until now, you could create a complete virtual tour with WPVR and make it super engaging with hotspots, audio, and company details.

However, while a prospect takes the tour, it is often confusing to understand how the whole property is architected. What rooms are connected to the living room? Which direction is the balcony? Where is the kitchen in the house?

So far, your audience had to look around and find the rooms themselves, which, though enjoyable, often left many in a dilemma when taking a buying decision.

The virtual floor plan will change this completely.

If you have a floor plan ready for your place, you can now view it inside your virtual tour and map it out with your scenes so that a prospect will know exactly where they are on the property, and where to look to find various rooms or locations in your property.

It will give a clear idea of how the rooms in the house are distributed, thus making it easier to navigate on the tour.

But that’s not all. You can also place pointers on the map to indicate the locations of the scenes you have created in the virtual tour. And you can connect these pointers to their respective scenes so that viewers can click on them to move into that scene.

This will make the experience more engaging and meaningful for your prospects.

How Does It Work?

When you place the map in your tour, your audience will get an icon on the bottom right corner to click and view it.

Here you can check out the video on how it works for your viewers:

Here’s how it’ll work on your published tours.

On the map, you can click on the points to go to the associated scenes:

Virtual Floor Plan - Thumbnail

Your position on the tour will be highlighted on the map so that you know where you are.

This will make your audience aware of their position and make the navigation much more exciting.

You can also double-click on it to enlarge the virtual floor plan and have a better idea of your property.

Virtual Floor Plan Zoom

How To Set Virtual Floor Plan using WPVR

This is a Pro feature and is included in all WPVR Pro Plans.

Once you have WPVR Pro Installed and Activated, go to one of your tours, and visit the Floor Plan tab.

Virtual Floor Plan - WPVR

And Activate the Floor Plan.

You’ll find options to:

  • Upload the Floor Plan Image.
  • Floor Plan Pointers List.
  • Color Option for Floor Plan Pointers.
Upload Floor Plan to Virtual Tour

Once you upload the floor plan image, you can preview it.

And on the Preview, you can click on any position of the virtual floor plan and a pointer will be automatically set for that position.

Panorama Pointer on Floor Plan

You can drag the pointer over the virtual floor plan and you can also choose to delete it.

But most importantly, you can connect any of your scenes to this hotspot.

House Plans with Virtual Tours

Your viewers can click on these pointers to load the scenes.

That makes the transition really interactive!

From now, not only they can visit different scenes of your tour using the hotspot directions or the scene gallery, and they can navigate through an aerial view using this virtual floor plan.

On top of that, you can choose your desired color for the pointers as well.

Set Color to Floor Plan Pointers

To learn the details on how you can utilize it, follow this guide to set virtual floor plans.

Start making your virtual tours more interactive from today.

What’s Next With WPVR?

We are now focusing on making WPVR more user-friendly for you.

The next update of WPVR will Include:

  • Translation Support

We’re working on making all the strings of WPVR translatable so you can start using the plugin in your own language.

This is planned for our next sprint, and at this moment, we’re researching to find ideas that can help you make more engaging and impressive virtual tours.

For now, if you have any great suggestions, do reach us with your ideas and we will love to look into them.

And if you haven’t already, get WPVR now to create your own virtual tours in WordPress, easily!

Categories
Update WP VR

Great News For Divi Users! The WPVR Panorama Module Is Here!

If you are a fan of Divi and want to use virtual tours on your site, then we have got great news for you.

Until now, you had to use shortcodes to embed a VR tour when using Divi. But not anymore.

You can now use a dedicated panorama module to place the virtual tour on your website easily!

  • Simply use the WPVR Panorama Module!

Let us look at how it works.

Embedding A Virtual On Divi Using WPVR Panorama Module

First, you have to create a virtual tour in WPVR. And once you have it ready, go to the page where you want to embed it.

Edit the page with Divi Visual builder and in the section where you want to embed the tour, search for the module called WPVR.

WPVR Panorama Module Divi

In the module settings, choose the virtual tour you have created earlier from a dropdown list and define its Width, Height, Radius, and Mobile Height.

Divi WPVR module

And then publish/save the page.

Now, if you exit the visual editor, the virtual will appear on the page and you can take the tour right away. It’s as simple as that.

No more using shortcodes!

Tip: Make sure to define a mobile height and test it afterward to ensure the tour size is right on your mobile device. Most people tend to view virtual tours via their cell phones.

This will make it so much easier to edit pages with virtual tours.

What’s Next With WPVR?

We are now focusing on more features that can help you make the virtual tour even more engaging and attractive.

Some of our upcoming features include:

Floor Plan:

You will be able to include a floor plan on the tour where people can get a birdseye view of the place and get an idea of where they are on the tour.

Translation Support:

We’re working on making all the strings of WPVR translatable so you can start using the plugin in your own language.

These are all 2 of our planned features for the upcoming sprints, and many more are being researched to find ideas that can help to devise the best virtual tours.

Final Thoughts

Now that it’s much easier to embed virtual tours in Divi, go ahead and start designing your web pages with more control. And if you were not sure if WPVR will work with Divi, well, now you can use it without any hesitation.

  • Get WPVR and start using virtual tours now.
Categories
Update Virtual Reality WP VR

Big News! Introducing VR Headset Mode – The Most Immersive Virtual Tour Experience

Team WPVR is back with a massive feature!

Since the release of the plugin, one of the most demanded features was support for VR Headsets.

And after months of development and testing, we are excited to announce that it’s finally here!

You can now allow your audience to experience virtual tours via VR headsets!

Offer A Realistic VR Experience Like Never Before

The VR Headset support will change the way your audience will take the tour from now on.

VR Headset support for WPVR

Anyone who has a VR Headset or VR Cardboard will be able to enjoy your virtual tour in a near-realistic experience as if he is physically visiting your place.

And it’s really simple. All you need to do is to allow the VR Headset mode in your virtual tours and your prospects will be able to get a fully immersive experience via their mobile and the VR headset.

How does it work?

Your audience will get an option to enable the VR Headset mode right on the tour. Upon enabling it, the tour will turn into a bi-angular view as shown below.

VR Headset Mode In WPVR

Next, all your prospect needs to do is to place his mobile device into his VR Headset and that’s it! He will be in a whole new virtual world, away from reality.

But it’s not just a tour to look around. You will notice that while on the VR Headset mode, there will be a small indicator in the center of your tour.

When you look around, place the indicator on any hotspot for about 3 seconds, and it will act as a click.

So if it’s an information hotspot, it will open up the details, and if it’s a scene-type hotspot, then you will be taken to the next scene!

So your visitors will not just take a look around, but they will also engage and interact within the tour, thus making the tour much more appealing.

How To Allow Support For VR Headset for Mobile

This is a Pro feature, so to use this, you have to get WPVR Pro.

Once you have WPVR Pro, go to WPVR > Get Started > Settings, and there you will find an option that says VR Glass Support.

Enable The VR Headset Support for Mobile Devices

Simply enable this feature and that’s it – now, all the virtual tours you created will have an option to enable VR Headset mode when viewed on a mobile device.

What’s Coming Next?

The VR Headset for mobile is one of the best features yet, but this is just a start.

As promised earlier, we have refactored our plugin so that we can come up with more amazing features to help you create even better virtual tours. Hence, more amazing features are in store.

Following are some of the planned features for next quarter:

Individual Colors For Every Hotspot Icon

Right now, you can only use one single color for all hotspot icons. But we are working on allowing you to set different colors for different hotspots.

This will help you make the hotspots more meaningful, and help you highlight certain hotspots for special purposes.

WPVR Divi Module To Embed Virtual Tours

Divi is one of the best themes and builders out there. But until now, to embed tours in a Divi site, you had to use our shortcodes.

But we are working on creating a dedicated Divi Module to embed virtual tours on your site more easily.

A Fully Translatable WPVR

‘Translation’ is crucial and has been a barrier for many when using WPVR for a while.

But that will change soon as we are working on making WPVR fully translatable and will release support for at least 10 more languages in the core WPVR plugin.

Interactive Floor Plan

We are conducting research to bring in another out-of-the-box feature, interactive floor plan support for virtual tours.

However, as amazing as it sounds, it’s still quite a difficult feature to achieve within WordPress.

But we are determined to find a way to make it happen. Fingers crossed!

Do You Have Any Brilliant Ideas Or Suggestions?

We are also looking for great ideas to work on and we would love to hear your ideas.

If you have any suggestions or ideas to improve the plugin, feel free to suggest them in the WPVR product roadmap.

Wrapping Up

The VR Glass Support is one of the many features WPVR has to help you create high-quality virtual tours in WordPress, easily.

If you want to grow your business with advanced technology, then using virtual tours is a no-brainer.

So go ahead and start using WPVR and create amazing virtual tours for your business.

Get WPVR Pro now!